Making My Bed(s); The “Best” Tomato

Buckwheat Beds

About a month ago the greenhouse was looking messy as oxalis, grasses, chickweed, and other weeds were starting to carpet the mostly bare ground.  An unacceptable situation, considering that a month hence — now — I would need the space for planting in preparation for fall and winter.

The first step back in August was, obviously, to clear away the weeds, pulling almost each and every one out, roots and all. As long as weeds aren’t too overgrown or too abundant, the job is pleasantly satisfying. Moist soil also helps.

Pulling out weeds differs from the usual approach of preparing the soil by tilling it to discombobulate and bury weeds. I avoid tillage because it exposes buried weed seeds to light, which is just what new weeds need to germinate and grow. Tillage also burns up valuable humus and discombobulates not only the soil, but also resident fungi, earthworms, and other beneficial organisms.

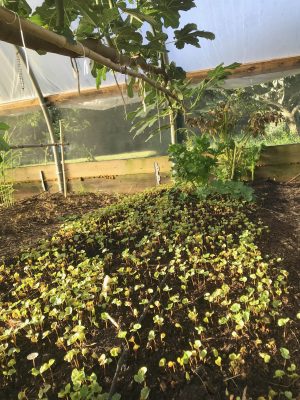
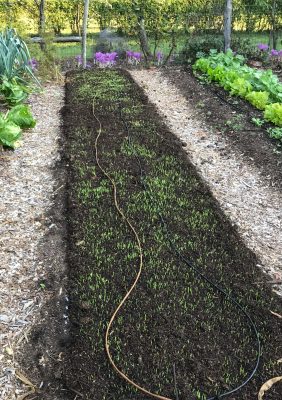
I wasn’t ready to plant anything in some of those greenhouse beds a month ago, yet I hate to look at bare soil. (Mother Nature is equally repulsed by bare soil; she clothes it with weeds.) So I planted buckwheat, sprinkling the seeds thickly over the beds.Buckwheat sprouting in greenhouse Buckwheat provides a quick and temporary cover of the bare ground. Sprinkling it with water assured its getting off to a quick start.
Finally, I covered the ground with an inch-thick layer of compost. That amount of compost will nourish whatever’s growing in the beds for a whole year. It also provides cover to hold moisture around the buckwheat.

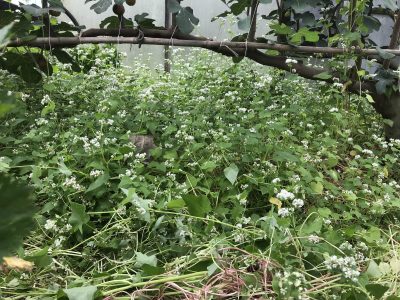
Only a few days later, buckwheat sprouts were already peeking up through the compost blanket. They went on to grow quickly in the heat of the season. Aboveground the dense foliage was, I hoped, doing its job of shading out any new weeds trying sprout, something for which buckwheat is famous. Buckwheat growing in greenhouseBelow ground, the roots were latching onto nutrients that might otherwise leach away, bringing them up into the roots, stems, and leaves.
By the first week in September, buckwheat stems were flopping down onto the ground. Anyway, it was time to remove them to make way for planting the greenhouse. I was anxious to see what kind of new weed growth, if any, presented itself beneath the buckwheat.

The goal was to remove the buckwheat without disrupting the soil. My fingers easily raked off the tops which detached themselves from the roots that were left intact in the soil.

Buckwheat lived up to its reputation: I could hardly find a weed anywhere!

Oat Beds

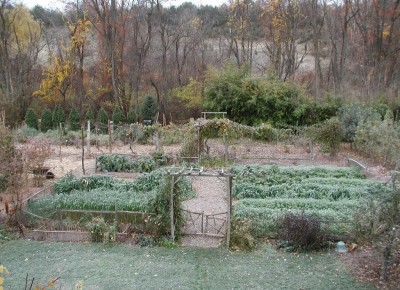
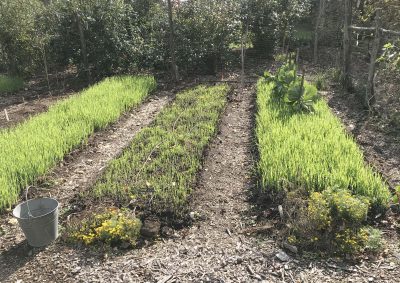
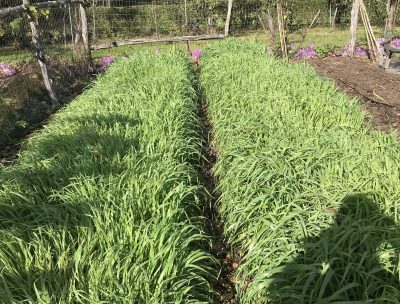
Outdoor beds in the vegetable garden have been receiving similar treatment, with some wrinkles. Those beds that are finished for the season, not needed for autumn harvest, get cover crops of oats rather than buckwheat. Buckwheat doesn’t like cool weather and is killed by the slightest frost.

The advantage of oats over buckwheat is that oats enjoy cool weather, growing lush and green, and even tolerate quite a bit of cold weather. Oat cover crop sproutingSo any bed no longer needed for autumn vegetables and cleared before about the end of September gets oats (and compost). After the end of September, short days don’t provide enough light for the oats to grow enough to warrant planting.
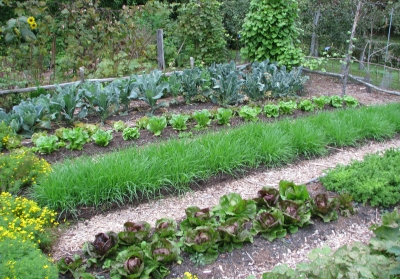
One benefit of oats, buckwheat, and any other cover crop is that they keep up appearances. Oat cover cropWhile I have great respect for soil, it’s not pretty to look at — and being bared isn’t good for the soil or the plants growing in it. I’d much rather look at a uniform, green carpet than bare, brown soil.
The Best(!!!!) Tomato

No need to rush summer vegetables out the door quite yet. I had the opportunity to try out a new tomato this season, Garden Gem, which has received a lot of fanfare.

Time travel back to 1995, when tomato breeder Harry Klee of the University of Florida, began to suss out what makes a great-tasting tomato using heirloom varieties, gas chromatography, and tasting panels. Then fast-forward to 2011, a field in Florida, where Harry tastes the result of his effort to breed a great-tasting tomato that is disease resistant and productive, and stands shipping. And so was born Garden Gem, the offspring of the luscious heirloom variety Maglia Rosa and the variety Fla. 8059, excellent in all characteristics except flavor.

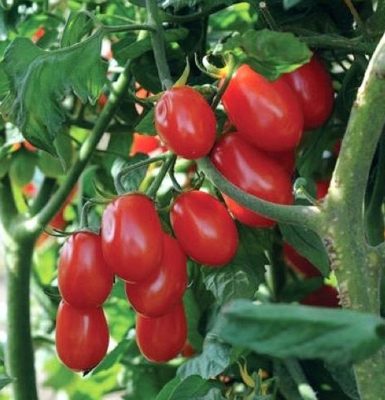
Garden Gem scored as high as the heirloom parent for flavor.Garden Gem tomatoAs it turns out, even taste is a matter of taste: To me, Garden Gem is not a great-tasting tomato; not even a good-tasting tomato. It lacked any sweetness or richness to smooth out the acidity, which is basically all I tasted.

(The “perfect supermarket tomato,” as it was billed, was also a commercial flop, for now at least. It’s reported that Garden Gem too large for a small tomato and too small for a large tomato and, anyway, that consumers don’t really care about flavor.)

Some You Win, Some You Lose. Why?

Mo’ Better Berries

Because I’ve grown a number of varieties of blueberries for a long time, I’m often asked what variety I would recommend planting. Or whether you need to plant two varieties for cross-pollination in order to get fruit.

The answers to both questions are intertwined. First of all, blueberries are partially self-fertile so one variety will bear fruit all by itself.
Large blueberries
But — and this is important — berries will be both more plentiful and larger if two different varieties cross-pollinate each other. (Apples, in contrast, are self-sterile so, with few exceptions, won’t bear any fruit at all without cross-pollination.)

Benefits of cross-pollination aside, why plant just one variety of blueberry? Different varieties ripen their fruits at different times during the blueberry harvest season. With a good selection of varieties, that season can be very long.

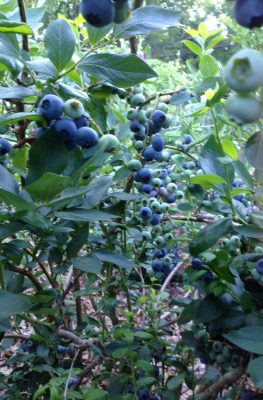
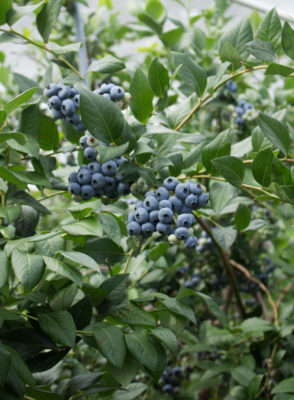
Here on the farmden, the season opens with Duke and Earliblue, both usually ready for picking (in Zone 5) at the end of June. The season moves on, with Blueray, Berkeley, and Bluecrop ripening in July, and Jersey, Toro, and Nelson in August.Blueberries galore As I write, in September, the variety Elliot is still bearing ripe berries.
So if you’re going to plant blueberries, which I highly recommend doing, plant more than one variety, and choose the varieties that let you enjoy berries with your morning cereal or your after dinner ice cream over a long season.

Soil Matters

I pay special attention to the soil when I plant blueberries, and it pays off. Blueberries have rather unique soil requirements among cultivated plants, demanding those that are very acidic, high in organic matter, low in nutrients, and consistently moist and well-aerated. (Most cultivated plants like soils that are only slightly acidic and have moderate to high fertility.) No matter if a soil is not naturally to blueberry’s liking; it can be made so.

The soil where I planted my blueberries drains well. If it did not, I would either choose a better location or else create mounds on which to plant.

Next in importance is soil acidity; I test it before planting. If it’s not at the required pH of 4 to 5.5, I spread pelletized sulfur, a naturally mined mineral, over the ground. (Pelletizing the sulfur makes it less dusty to work with.) Mulched blueberry planting
The amount of sulfur, per 100 square feet, needed to lower the pH by one unit would be a pound in a sandy soil and three pounds in a clay soil. My clay loam’s initial pH was about 6.5, so I needed 3 pounds of sulfur per hundred square feet to lower that pH to 5.5, that upper limit enjoyed by blueberries.

Now, for planting. I mix a bucketful of peat moss with the soil in each planting hole and then tuck the plants and soil into the hole, setting the plants slightly deeper than they stood in the nursery. Peat moss is a long-lasting source of organic matter, unique among organic matters in also being low in nutrients.

Right after planting, I spread a 2 to 3 inch depth of some weed-free, fluffy organic material, such as wood shavings, wood chips, straw, pine needles, or autumn leaves, as mulch. The mulch snuffs out weeds, which are more adept than blueberry at soaking up water and nutrients, and keeps the soil cool and moist, just as it is in blueberry’s natural habitats.

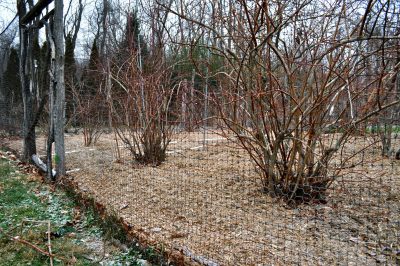
With regular watering, as needed, pruning, and annual mulching and attention to soil acidity, blueberry leaves should maintain a healthy, green color, and stems should grow a couple of feet or so each year. My planting of 16 plants yields almost 200 quarts per year of delicious, organic blueberries.

Celeriac Failure, Again

Blueberries have been a great success; now for a failure. Celeriac, a celery relative that puts that flavor  into its softball-sized, white root, isn’t well-known as a vegetable, but I’d like to grow it. I’ve tried, for the past couple of years, without success. The problem is some sort of celery blight that kills the top growth so there’s no greenery to feed the root.

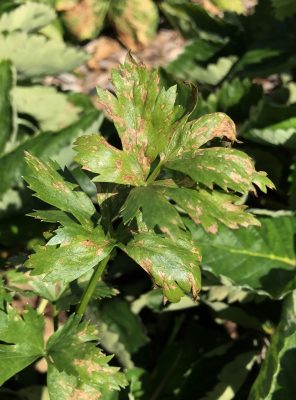
Both early blight and late blight, fungal diseases, could cause problems. They arrived in gardens on infected celery seed and/or infected celery debris from the previous cropping season. Celery bacterial blightLast fall I thoroughly cleaned up diseased plants, even planted some celeriac this year in the greenhouse. Failure occurred both outdoors and in the greenhouse, although lots of rain and heat could have helped (the fungi or bacteria, not me).
I’m not giving up. Perhaps the seed is the problem. Seed can harbor the disease, but can be “cleaned” up with a heat treatment: 30 minutes at 118°F. As a last resort, I could spray an organic fungicide such as one of the organically approved materials based on copper or hydrogen peroxide. Perhaps this time next year I’ll be eating celeriac.

Watering — in the Rain?

Why Are Pots Thirsty?

With recent rains of more than 3 inches over the last couple of days, you’d think that the last thing on my mind would be having to water anything. But you’d be wrong. Plants in pots — and I have plenty of them, some ornamental and some tropical and subtropical fruits — don’t get the full benefit of all that water.

Potting soils are, and should be, more porous than any garden soil to maintain good aeration within the confines of a pot. About a one inch depth of water is needed if you’re going to thoroughly wet a 12 inch high column of potting soil. If a flower pot is, for example, only 6 inches high, only 1/2 inch depth of water would be needed; and so on.

A lot of my potted plants didn’t drink in that 3 inches of rain that fell over the past couple of days. Some of the plants are shielded from the sky by overhanging house eaves. And the leaves of other plants — excepting amaryllis and calla lily which have strappy, upright leaves — deflect water that could have fallen into the pot.

If you don’t believe me, tip a potted plant out of its pot following a heavy rain, and check how dry the soil is down deep within the pot. Even easier, purchase an inexpensive moisture meter whose metal probe, when slid into the soil, reports moisture deep down.

(Sort of) High Tech Solution

When I first started gardening, I knew I would eventually move from the cottage I was renting. My mini-orchard was in pots and travel-ready. I kept that “orchard” watered by hand, which wasn’t so bad. The problem was that in the heat of summer, some plants needed their thirst quenched twice a day, which kept me from leaving my home for more than a few hours.

These days, technology has come to the rescue.

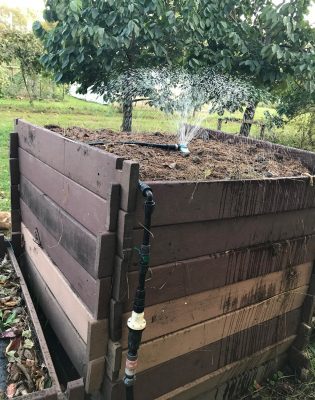
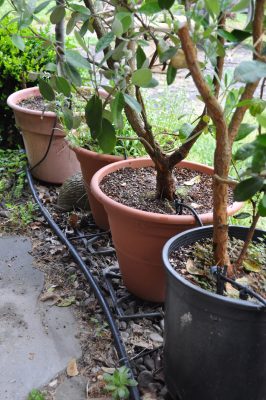
The first techno-solution has been drip irrigation. A simple, battery-operated timer at a spigot sends out water on a twice daily schedule to banks of potted plants. Also at the spigot, following the water line right after the timer, are a filter and a pressure reducer. automatic watering, potsThe fittings for wending water through tubes around corners and up into pots are low pressure fittings; the pressure lowers water pressure to a mere 20 psi.
Once the 1/2 inch main line makes its way to a group of potted plants, a 1/4 inch plastic line, plugged into the main line with, of course, a low pressure fitting, carries the water up to the ground surface of each pot.

If the water merely exited at this point, pots closer to the water source would be under higher pressure and so get more water than those more distant. And pots that were shorter or at lower elevation would likewise get more water. So I slid an emitter, that reliably puts out 1/2 gallon of water per hour, no matter what the incoming water pressure, on the end of each 1/4 inch line.

Capillarity to the Rescue

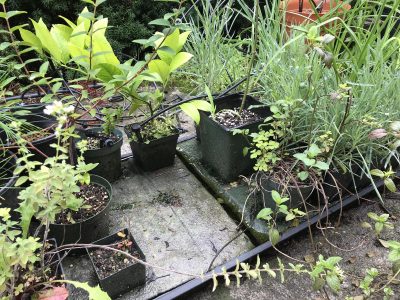
I have a number of lowbush blueberry, lingonberry, hollyhock, carnation, and blazing star plants growing in pots 4-inches and smaller. I’ll eventually plant them out in the garden. Until then, the plants need regular watering Snaking 1/4 inch tubes to all these pots would create a tangled nightmare.

Enter capillary mat watering. All these smaller pots sit on a mat of absorbent fabric spread over a tray held a couple of inches above a pan of water. Irrigation, capillary matPart of the capillary mat dips into the reservoir of water, which gets sucked up into the mat and then sucked up into the potting soil through the drainage holes in each flat-bottomed plant pot.
I periodically have to remember to add water to the reservoirs. Or, rather, “had to” because I ran a few of those drip tubes into the reservoirs, enough to keep them topped up with water to keep pace with plant use.

And a Presentation of Interest

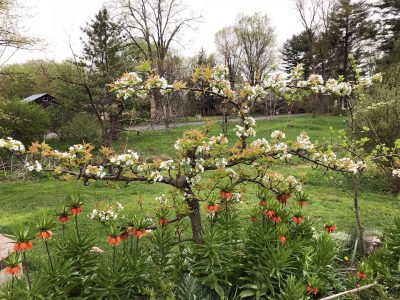
I’ll be doing a presentation on August 18th on THE SCIENCE, ART, FUN, AND TASTY FRUIT OF ESPALIER in Copake Falls, NY. The presentation will explore the theory and the practice behind the pruning and orienting of branches to create an espalier. This decorative, usually 2-dimensional form, offers high yields of high quality fruit on a plant or plants that can be free-standing, decorating a wall or fence, or even creating the fence itself! I’ll go over which fruit plants work best and the branch pruning and orienting techniques that create and maintain espaliers that look good and yield especially delectable fruit. For more information, go to https://awaytogarden.com/8-18-open-day-plant-sale-lee-reich-espalier-talk-drip-irrigation-workshop/Asian pear espalier flowering

Upcoming workshop


Drip workshop ad, 2018

Thirst

Too Much or Too Little?

The current deficit of rainfall reminds me of the importance of watering — whether by hand, with a sprinkler, or drip, drip, drip via drip irrigation — in greening up a thumb.

Not that watering is definitely called for here in the “humid northeast;” historically, cultivated plants have gotten by mostly on natural rainfall. Historically, vegetable gardens also weren’t planted as intensely as they are these days. In one of my three-foot wide beds, for example, brussels sprouts plants at eighteen inches apart are flanked on one side by a row of fully grown turnips and on the other side by radishes. Five rows of onions run up and down another bed.

The rule of thumb I use for watering is that plants need the equivalent of one inch depth of water once a week.

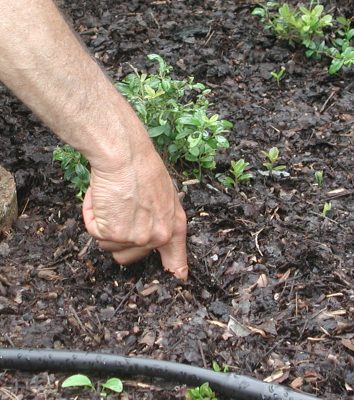
Finger in soil to test for moisture

Finger in soil to test for moisture

This approximation doesn’t take into account the fact that my bed of sweet corn is thirstier than is my bed of onions, that my plants drew less water up from the soil during a recent calm, cloudy day than they will with today’s bright sunlight and breezes, and that warmer temperatures speed water loss. Still, an inch a week is a good approximation, one very workable around here where periodic rain allow some wiggle room in watering. Not so in parts of California and similar climates that remain reliably bone dry all summer.

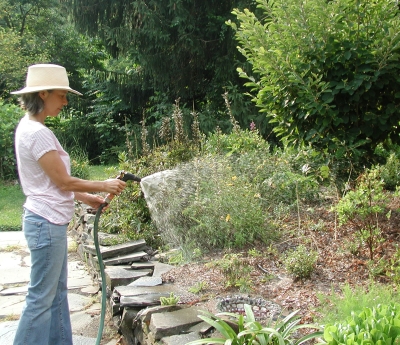
A sprinkler, or a hand-held hose with a spray rose for small areas, and some randomly placed straight-sided cans to catch water are an easy way to tell how long to leave the spigot on to get that inch depth of water. Hand wateringUsually, about an hour, once a week, is what it takes. (That’s a long time to stand still holding a hose.) Unless it rains. Then less might be needed.
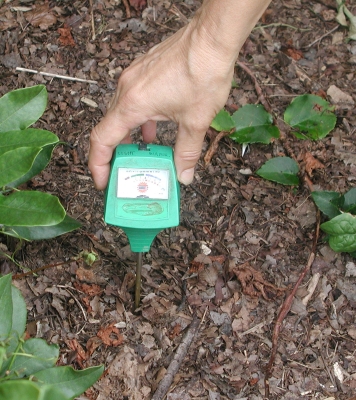
A rain gauge is an inexpensive way to know whether what seems like a soaking rain is really so. Or monitor soil moisture directly. Dig a hole, poke your finger into the soil, or, even better, purchase a “moisture meter” for less than $15; plunge the metal probe a few inches into the ground and read on the dial whether the ground down there is “dry,” “moist,” or “wet.” You want it moist.

Digital moisture probe.

Digital moisture probe.

Thirst Quenching a Drip at a Time

My vegetable plants get their thirst quenched with drip irrigation rather than a sprinkler. The idea of a drip system is to drip water into the soil at about the rate which plants are removing it. That doesn’t occur once a week, but every bright day, all day long.

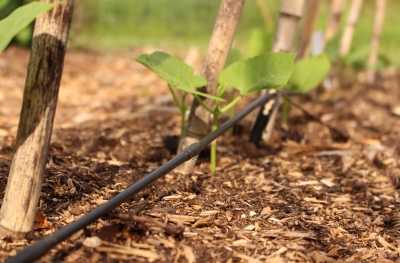
That one inch per week rate translates to about three-quarters of a gallon per square foot. Dripline with beansMy drip system is on a timer, and the time needed to apply this amount depends on the rate of flow from each emitter as well as the spacing of emitters.
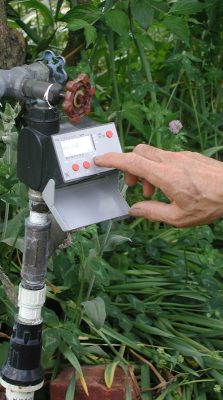
After a lot of calculations and approximations (many years ago), I determined that dripping for one-half hour per day would be about right. But, as I wrote, plants drink all day long, not just once a day. My drip timer can turn on and off at three specified times per day, so the plants get their thirst quenched three times spaced out during daylight hours at ten minutes per session. My old timer offered six sessions per day; then, plants got six waterings of 5 minutes each.Drip timer

Done. All I have to do is check every once in a while that all systems are go, which is one reason my drip lines run above ground. I can watch the dripping.

I do have to get out the watering can for the lettuce seedlings, the third planting of the season, that are soon to be set out, as well as for the recently planted row of carrot seeds and other recent seedings and transplants. Supplemental watering until roots of new plants stretch down into the region of the drip line’s wetting front, which spreads with the shape of an ice cream cone downward beneath each spot of dripping water.

(I’ll be leading a hands-on workshop on drip irrigation August 18th at the garden of Margaret Roach in Copake Falls. For more information, go to Margaret’s website, and type my name in the “search” box.)

Engineered Orifices

Note that I haven’t mentioned “soaker hoses.” Although the water oozes out from these porous hoses, they are not really “drip irrigation.” Sure, the water just oozes out slowly. But they’re inconsistent in output not only with water pressure and elevation, but also with time. And roots can grow inside buried soaker hoses, further muddying the water.

A real drip line has water emitters spaced six to twelve inches apart along their length, and those emitters aren’t mere holes punched in tubing. They are engineered orifices, designed to be relatively consistent in output with changes in incoming water pressure and changes in elevation along the line. They also are self-cleaning in case debris gets into the line.

And Now, A Word About Fireflies

Fun fact: Fireflies (which I knew as “lightning bugs” in my youth) are more than whimsy on a summer night; they’re also a gardener’s friend, feeding on, among other creatures, slugs.

My Dog and I Have Odd Tastes

In My Opinion . . .

Note: The following editorial comments represent the opinions of the writer and do not necessarily represent the opinions of the publisher.

I don’t understand the current — decades long, now — infatuation with the “stinking rose,” as garlic used to be called. Not to reveal my age, but I don’t remember ever seeing, smelling, or tasting garlic in my youth. Not that I didn’t; I just don’t remember it if I did. At any rate, in my family circle, at least, it would not have generated the undue enthusiasm it does these days. Whole festivals, for instance!

I don’t dislike garlic. Mostly, when I’ve used it, it’s flavor is lost when cooked. Except when roasting turns the texture satiny and the flavor bite-less; then it’s quite delicious spread on bread or baked potato, or mixed with vegetables. Mmmmm.

But still not worth planting. It’s my belief that many gardeners devote all too much space to growing garlic. Is home-grown garlic really that tasty, tastier than what you can pick off a supermarket shelf or from a bin at the farmers’ market?

I’ve seen very small vegetable gardens in which a third of the area was devoted to the stinking rose. For my money, I’d rather be picking fresh lettuce, asparagus, or peas — all of which taste significantly different and better within minutes of harvest than when bought from any market, farm or otherwise. Or peppers, tomatoes, sweet corn, or green beans, because I can choose the best tasting (to me) varieties to plant in my garden.

As you might guess, I don’t grow garlic — not in my vegetable garden, at least. Why devote even a square foot of space in that compost-rich, drip irrigated, sun-drenched ground to  such a thankless vegetable?

I do sometimes grow garlic in various patches of open ground in the large patch of gooseberries, grapes, and a miscellany of other plants behind my garden. The only improvement that soil experiences is annual mulching with autumn leaves, which has enriched the ground below with humus. But no irrigation, which the garlic, planted in early autumn and then harvested the following summer, hardly needs because it can run on rainfall that falls in autumn through spring.

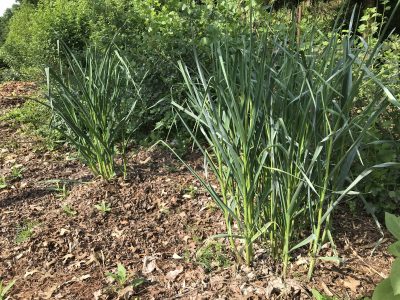
Garlic doesn’t seem to get the hint that I don’t particularly want to grow it. Enough bulbils that form at the tops of scapes touch down each year to make new garlic plants. Most are spindly, giving rise to Lilliputian cloves. Garlic volunteer plantsBut if I want some garlic flavor in spring, I can pull stalks out of the ground, peel off the outer covered of leaf sheath, and chop up the ivory white lower portion for use. Many I just pull out and toss into the compost pile; the garlic is getting weedy.
Okay, you garlic lovers, go ahead and pelt me with tomatoes. But hold the garlic.

Sammy Stalking

My dog Sammy has grown very fond of stalks. Asparagus stalks. Why can’t he channel that stalky affection to the garlic sprouting behind my garden? Perhaps some culinary magic with garlic poured over his dog food and guided walks over to some of the growing clumps could bring him around.

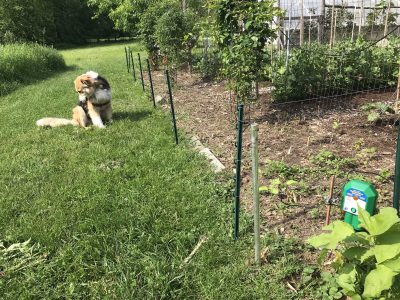
I planted asparagus outside the fenced vegetable garden with the knowledge (ha!) that no furry animals would dine on it. Sammy has plowed his way through or gracefully leapt over the temporary chickenwire enclosure meant to keep him asparagus-free. A recently purchased electric fence should keep him at bay — also from the persimmons, another of his favorites, later in summer. Sammy & electric fence

Of Mulch Importance

On a more serious note, now, with recent rains maintaining good soil moisture, is an ideal time to mulch. Earlier this season, mulch would also have been good, except that it would have delayed soil warming and, hence, seed germination, planting and growth of annual vegetables and flowers.

Mulch spread atop dry soil has to be wetted before letting water percolate down into the ground below. Mulching chestnutsIf spreading mulch is delayed until the soil turns dry, all the more water will be required to give the soil below a good drenching.
A large pile of wood chips sits on the far side of my wood pile, compliments of local arborists. Day by day, I’m spreading it for an attractive, soil enriching, moisture sealing blanket over my soil — even around my volunteer garlic plants.

Peppers & Potting Soil

Concerned

You’d think that there’d be no reason for me to be concerned. After all, year after year I raise my own seedlings for the garden. Nonetheless, every day I take a look at the small tray of soil in which I had sowed eggplant and pepper seeds, waiting for little green sprouts to poke through the brown surface of the potting mix.

These plants are on a schedule. They get a start indoors — in a greenhouse now; under lights or in sunny windows in years past — so that they have enough time to start ripening their fruits by midsummer.

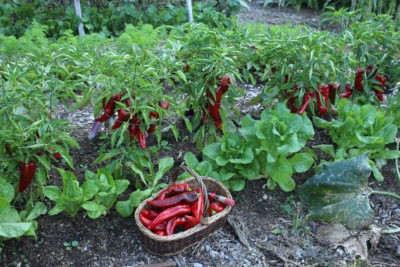
Italian Sweet peppers

Italian Sweet peppers

Even an early-ripening pepper wouldn’t ripen its first fruits before October if seeds were sown directly in the garden once the soil had warmed enough for germination, which isn’t until the end of May around here.

Ingredients for Good Transplants

Not that raising transplants for the garden is difficult. All that’s needed is attention to details, the first of which is using seed that is not too old. The dry tan pepper and eggplant seeds might not look alive, but they are. And they do age. Under good storage condition — cool and dry — pepper seeds retain good viability for only a couple of years, eggplant seeds for 4 years.

Next in importance is the container and potting mix. Old yogurt containers, egg cartons — people have come up with all sorts of containers for growing transplants. They’re all fine as long as they’re at least an inch and a half deep and have holes in their bottoms to let excess water drain out.

Garden soil, even good garden soil, is not suitable for containers. It stays too wet, suffocating roots. So all potting mixes contain aggregates, such as sand, perlite, vermiculite, or calcined clay (a.k.a. kitty litter), which are large mineral particles that make room for air in the mix. Mixes also contain some organic material, such as compost, peat moss, or coir (made from coconut waste), to help them retain moisture.

You can purchase potting mixes made with or without real soil in them, and either sterilized or not. Sterilization kills potential pests that might lurk in the raw ingredients. Not sterilizing keeps living things, including potential enemies of any potential pests, alive in the mix. I make my own mix, usually unsterilized, from equal parts compost, garden soil, peat moss, and perlite.

With seeds sown and then covered with about a half inch of potting mix, the container is gently watered, then covered to keep in moisture.

Warmth is the next ingredient for good germination. Seeds need more warmth to sprout than than a seedling needs for good growth. In the case of pepper and eggplant seeds, between 70 and 80° F. is ideal for sprouting. The top of a refrigerator might provide a warm home for the seeds to get started, as might a shelf above a radiator. I use a soil heating mat.

The last ingredient in raising seedlings is the most difficult one for me to provide, at least with pepper and eggplant seeds. Patience. Even under good conditions, these seeds might take a week or two to sprout. All I need, then, is to be rational. I sowed the seed on March 5th; I provided good conditions. As I write this, it is March 12th. One week, a not unreasonable time for the seeds not to yet show signs of life.

Not to Worry

Growing transplants is generally easy. Although I’m a little concerned until pepper and eggplant sprouts emerge, I’m more laid back with pretty much all other seedlings. Tomatoes, for example, are among the quickest and easiest to grow, and, because of the wide choice of varieties when growing your own transplants, very satisfying.

Once the peppers and eggplants sprout, they, like other sprouts, need to be moved to where they are bathed in light. Along with light, slightly cooler temperatures from then on make for sturdy, healthy growth. And then, towards the end of May, out to the garden they go.

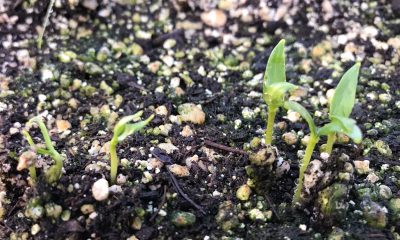
Update: March 17th. I was about to re-sow the pepper seeds. But first I checked the ones sowed March 5th. They sprouted!Pepper seeds sprouting

Some Fruits and a Ornamental Veggie

Happy Blueberries, Happy Me

My sixteen blueberry plants make me happy, so I make them happy. (They made me happy this year to the tune of 190 quarts of berries, half of which are in the freezer.) I don’t know how much work bearing all those berries was for them, but I just finished my annual fall ritual of lugging bag upon bag of leaves over to the berry patch to spread beneath the whole 750 square foot planted area.Blueberry fruit cluster

I don’t begin this ritual spreading until the blueberries’ leaves drop. Then, old leaves and dried up, old fruits are on the ground and get buried beneath the mulch, preventing any disease spores lurking in these fallen leaves or fruits from lofting back up into the plants next spring. Rainy, overcast summers or hot, dry summers or any weather in between — my bushes have never had any disease problems.

In past years, I did do two things before spreading that mulch. First, I spread some nitrogen fertilizer: my universal pabulum, soybean meal, at the rate of 2 pounds per hundred square feet. And second, I spread some sulfur, at about the same rate, to keep the soil acidic. After many years of mulching, the soil has built up an ample reserve of organic nitrogen — evidenced by the plants’ 2 to 4 feet of new stem growth each year. So I no longer add extra nitrogen.

With all those years of mulching, levels of decomposed and decomposing soil organic matter have greatly increased the soil’s buffering capacity for acidity. That means that I no longer have to pay such close attention to acidity, so I rarely add sulfur anymore.

Sammy also likes the mulch

Sammy also likes the mulch


Besides all these other benefit, the mulch has created a soft root run that retains moisture, just what blueberries’ thin roots really like. Fruit is borne on shoots that grew the previous season, so each year’s vigorous new growth translates into a good crop in the offing for the next year.

New York Bananas

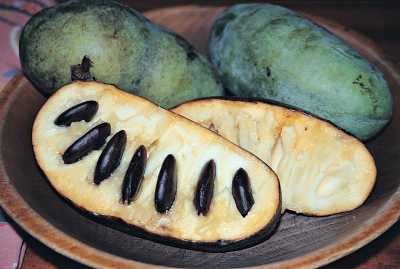
Although the crop seemed paltry at first this year, by the time autumn came around, pawpaws were in abundance. This uncommon fruit is the northernmost member of the tropical custard apple family, and the fruit does indeed taste very tropical — a flavor mix of banana, mango, avocado, and vanilla custard — even though it’s easy to grow and native throughout much of the eastern U.S..Pawpaw, like crème brûlée

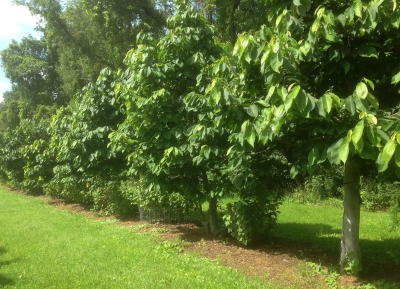
Two trees would be adequate for most households; I have about 20, just so I can learn more about them and their individual differences. That makes for a lot of pawpaws! (I test market most of them.)Row of pawpaw & black currant

Pawpaw fruits are very variable in both size and flavor even among the branches of a single tree. One year, I tried thinning the fruits to see if that would increase size of remaining fruits, as it does with apples and peaches. Pawpaw has a multiple ovary so each blossom can give rise to as many as 9 fruits. The small fruits are hard to see because they match so closely the green color of the leaves, so I didn’t thin as many as I had hoped. That said, at season’s end, fruits on thinned clusters seemed no larger than fruits on unthinned clusters.

Beginning around the middle of September, I began harvesting the first fruits. I picked some up from the ground and picked some softening ones from the trees, all of which continued through October. By putting them immediately in a cooler at 40°F, I still had good fruit into the middle of November.

Scarlet Runners

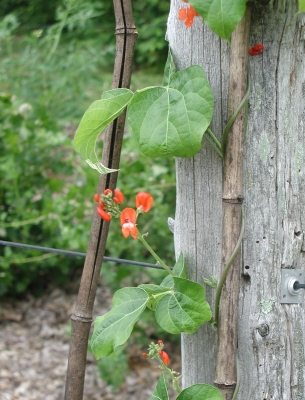
Every year I fear that at season’s end I’ll remember something I forgot to plant. This year it was scarlet runner beans.Scarlet runner bean flower

Despite the “bean” in the name, I’ve grown this vining bean, as do most people, primarily as an ornamental, for its scarlet blossoms. I occasionally eat the fat, hairy, yet delectable green beans.

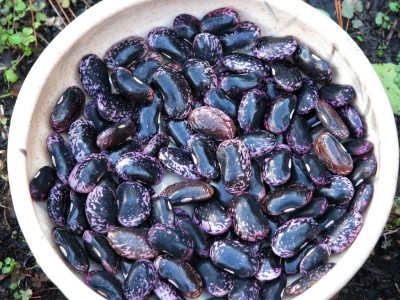
Every year I collect some of the matured black and pale purple, calico seeds for replanting the following year. One year, I decided to cook up some of these seeds and taste them. Scarlet runner bean seeds are quite tasty (and, I learned prior to eating, nonpoisonous). Scarlet runner beans
 
Next year I’ll remember the scarlet runners. My yard will be aflame in scarlet flowers and, because the plant is pest-free  —  even to Mexican bean beetles — I expect to reap a bumper crop of beans.

Giving Thanks

Share the Bounty

Thanksgiving is a holiday that really touches the gardener, this gardener, me, at least. If nothing more, it’s a harvest festival, a celebration of the bounty of the season’s efforts. And the season has been bountiful, as is every season if a variety of crops are grown.

Like most home gardeners, I grow a slew of different vegetables and fruits in my gardens. This year’s poor crops of okra, lima beans, and tomatoes was counterbalanced by especially bounteous crops of peppers, cabbages (Asian and European), and various kinds of corn (sweet corn, popcorn, polenta corn) and beans (green, cannelloni).

More than just give thanks, why not give back? One way would be to share the bounty with others who either don’t garden or can’t afford to purchase enough produce. Ample Harvest (www.ampleharvest.org), Angel Food Ministries (www.AngelFoodMinistries.org), and Feeding America (www.feedingamerica.org) are three organizations that can direct your vegetables and fruits to local pantries. Some gardeners take inspiration from the suggestion of Garden Writers Association to “Plant a Row for the Hungry.”

Thank You, Soil

This Thanksgiving, actually all through autumn (and every autumn), I’m thankful to the soil. Much of life is supported by the thin skin of earth that envelops the earth’s surface. (The skin of an apple is, relatively speaking, proportionally the same to the size of the fruit as the skin of soil is to the size of our planet.)Mulched apple trees

That earthy skin also plays an important role in recycling water and organic materials.  Soil stores and purifies water, and is host to 10,000-50,000 species of microorganisms in every teaspoon that break down and recycle waste leaves, tree trunks, dead animals and other organic materials.

I offer thanks to the soil by feeding soil organisms organic materials. I haul in materials that people elsewhere have too much of: bagged leaves; manure mixed with wood shavings and hay from a local horse farm; wood shavings from a sawmill. On site, I feed soil creatures kitchen trimmings, hay mowed from my meadow, old cotton, wool or leather clothing, shredded paper, and anything else derived from what is or was living. Some of the stuff gets spread on the ground as mulch. Some gets composted before being spread on the ground.Mulching chestnuts

When all is said and done, my ground each years is better, in terms of fertility, soil life, water holding and drainage, than it was the previous year. On the practical side, there’s no need for me to purchase fertilizer.

Good, crumbly soil structure

Good, crumbly soil structure

—————————————

That’s not all with this thankfulness. How about the environment generally, not just the soil? Nothing to do this time of year except to carry on as usual. That includes eliminating or minimizing the use of various -icides. Fungicides to kill fungi, insecticide to kill insects, herbicides to kill weeds, acaricides to kill mites, bactericides to kill bacteria . . .  did I leave any out?

True, gardening isn’t Nature, and even good gardens get occasional pest problems. But, as I wrote above, most gardens easily yield an abundance of vegetables, fruits, or flowers, so some could be sacrificed to (shared with?) pests.

And there’s something to be said for ignoring a certain amount of damage, especially if it is only cosmetic. After all, plants tolerate the damage. The remaining parts of a leaf that has been chewed away by and insect, for example, then step up to bat with beefed up  photosynthesis.

On the rare occasions when it’s necessary to reach for some -icide to do in a pest has gotten sufficiently out of control to seriously threatens a plant, I opt for environmentally-friendly alternatives. I’ll use the pest-specific bacterial fungicide Bacillus thurengiensis (sold under such trade names as Thuricide and Dipel) to kill the various cabbage worms (they’re actually not “worms” but “caterpillars”). And insecticidal soap or horticultural oil to kill scale insects and mealybugs, and certain fungi, and pans of beer to attract and kill slugs.

Mostly, though, I let Nature take care of itself, within reason. I decide what plants to put in my gardens and what plants to weed out (weeds). Severe pest outbreaks require a decision on whether action is necessary or whether the particular crop can be sacrificed. (That’s the advantage of home gardens: financial decisions don’t rule and diversity means there’s always plenty of other vegetables or fruits to harvest.) I regularly “feed” the little guys in the soil who, in turn, feed the plants to replenish nutrients they take from the soil, and then are moved further offsite into my kitchen.

Thanksgiving harvest

Thanksgiving harvest

Leafy Exercises

A New Exercise: Un-Rei-King

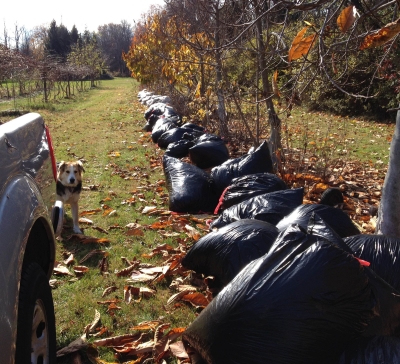
A few years ago I wrote that, among the many benefits of gardening is the opportunity it offers for varied, productive exercise. At that time I highlighted rei-king (ray-KING). Now, let’s add un-rei-king to join rei-king, zumba, cardiofunk, and other ways modern humans build and maintain sleek, fit bodies.Leaf bags with pawpaws

In fact, many people, including couch potatoes and nongardeners, practice rei-king this time of year. You can see them practicing this sweeping motion on their lawn amidst gathering piles of leaves.

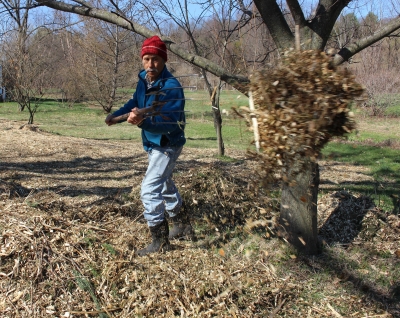
Un-rei-king is a more rare form of exercise, of which I am a practitioner. Rei-kingers gather those piles of leaves that are a byproduct of their exercise into large bags, then muscle them curbside. I gather said bags, muscle them gardenside, and launch into un-rei-king. That is, I employ a similar motion to rei-king, except more jagged and with a pitchfork, spreading the leaves once I have freed them from their baggy confines.

Feeding the Soil to Feed the Plants

Exercise aside, my goal is to blanket the ground beneath one row of pear trees, a large bed of gooseberry bushes and grapes, and another long row of pawpaw trees and blackcurrant bushes with 6 to 12 inches of autumn leaves. That fluffy blanket will hold autumn’s warmth in the soil long after bare soil has frozen solid to a few inches depth.

I have to practice un-rei-king every year in November because by this time next year, that leafy blanket will have pretty much evanesced into thin air, literally. Leaves are composed mostly of carbon, hydrogen, and oxygen which becomes, over the course of the year, carbon dioxide and water vapor.

All this may seem like wasted effort (except for the exercise), but it’s not. The transmutation of leaves to carbon dioxide and water happens as bacteria, fungi, worms, and other soil organisms gobble up the leaves. Mostly, these creatures are beneficial, helping plants to fight off pests.

Leaves are mostly, but not only carbon, hydrogen, and oxygen; also contained therein are a slew of minerals needed by plants. In addition to feeding soil life, as the leaves decompose they’re also fertilizing the ground. More than that, natural, organic compounds are being formed that help make minerals already in the soil more accessible to plants.

All this living activity also releases into the ground other natural, organic compounds that aggregate soil particles to create pores for good aeration as well as to act spongy to help the ground, at the same time, hold moisture.

All of which is to say that after years of un-rei-king, my soil is soft, fluffy, moist, and very much alive. The pear trees, gooseberry bushes, etc. love it.

Uh-Oh, Mice

Meadow mice also enjoy the fluffy blanket, beneath which they can nest — and feed on plant roots and bark! So as I lay down that blanket, I’m also putting an 18-inch high cylinder of hardware cloth or some commercial wrap around the bottom of the tree trunks to fend off the mice.

I’ll also keep the leaves a few inches back off the trunks to keep mice at bay and avoid rotting of the trunk. Such precautions are unnecessary for shrubs, whose fresh supplies of stems that grow each spring at ground level can replace any chewed ones. (That’s why they are shrubby.)Tree protected with plastic spiral

And Some Leaves — For Next Year

Not yet finished with leaves. Every autumn a local landscaper dumps a truckload of vacuumed-up leaves here. On that pile I grow watermelons all summer long. By now, the leaf pile has about half-decomposed into “leaf mold” which is pretty much the same thing as compost. Except rougher, because it’s not yet in the final stages of decomposition.Leaf pile

Being richer in nutrients than freshly fallen leaves, leaf mold is just the ticket for loading into a cart for mulching some special plants: a young chestnut tree, filbert bushes, and semi-dwarf apple trees. Plus, it brings along all the aforementioned benefits of raw leaf mulch.Mulch, leaf mold on pear
Spreading leaf mold

NOTE: I’m not sure if the comments section is working on this page, so, if you will, please some of you readers write a comment so I can see if a fix is needed. Thanks.