MORE AUTUMNAL NEATENING

An Upbeat Closing

I don’t know about you all, but I have a great urge to tidy up my garden this time of year. Partly it’s because doing so leaves one less thing to do in spring and partly because, as Charles Dudley Warner wrote in My Summer in the Garden in 1889, “the closing scenes need not be funereal.” All this tidying up is usually quite enjoyable.
Pulling creeping charlie
Moist soil – and not too, too many weeds – make weeding fun. Creeping Charlie (also know as gill-over-the-ground) has sneaked into some flower beds. Its creeping stems are not yet well-rooted so one tug with a gloved hand and a bunch of escaping stems slithers back from its travels forward from beneath and among flower plants and shrubs. What remains are occasional tufts of grassy plants, especially crabgrass, easily wrenched out of the ground or coaxed out with my Hori-Hori garden knife.

This tidying is intimate work: me, the soil, weeds, and garden plants at close range. While I’m down there on hands and knees, I’ll also cut back some old stalks of perennial flowers. When everything is cleaned up, I’m going to spread a blanket of chipped wood (free, a “waste” product from arborists) over all bare ground.

The one thing not to do this time of year, as far as tidying up, is pruning. Better to prune after the coldest part of winter is over and closer to when plants can heal wounds.

A Real Crocus, Now

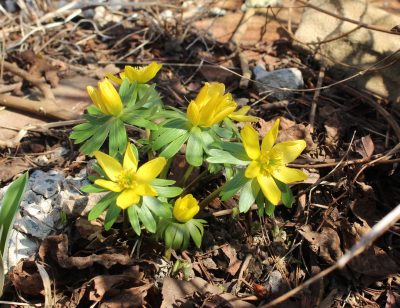
A few weeks ago, I, along with anyone visiting my garden, was wowed by autumn crocuses then in bloom. As I pointed out, they weren’t not true crocuses (they were Colchicum species), they just acted like crocuses – on steroids. Then, a couple of weeks later, I noticed that my true autumn crocuses (that is, the ones that are true Crocus species) were in bloom.
autumn crocus
And I did really have to stop and notice them after that most flamboyant show of fake autumn crocuses. These true crocuses (crocii?) are dainty plants, just like spring crocuses, and their colors are subdued: some are pale violet and some are white. In contrast to the fake autumn crocuses, which multiplied like gangbusters, the real autumn crocuses look about dense as when I planted them. Both kinds of crocuses wait until spring to show their leaves.

It’s fortunate that the part of my garden that’s home to autumn crocuses, real and fake — the mulched area beneath the dwarf apple trees — is free of weeds. Otherwise, the real autumn crocuses, being so dainty and lacking a supporting role of leaves, would be swallowed up, visually or for real.

Weed? Perhaps.

Back to weeds . . . I’m trying to see the positive side of all that creeping Charlie I’ve been pulling. Bits of it that have insinuated themselves in amongst the bases of stems of woody shrubs, especially thorny ones like the Frau Dagmar Hastrup rose, are not that much fun to weed out. So what’s good about creeping Charlie?
creeping charlie
For one thing, with shiny, round leaves of a deep, forest green color, it’s not a bad looking weed. The flowers are an attractive, purple color although neither big nor prominent enough to make a statement. The otherwise excellent reference book Weeds of the Northeast (Cornell University Press) erroneously states that “the foliage emits a strong mint-like odor when bruised.” That would be nice except that I’ve never noticed that odor and didn’t even when I just ran outside to crush some leaves check up on this statement.

Creeping Charlie grows well in sun or shade, so well that when I worked in agricultural research for Cornell University, I considered the plant as a possible groundcover to replace the relatively sterile herbicide strips in apple orchards. It grows as such beneath my dwarf pear trees.

Creeping Charlie beneath trees

Creeping Charlie beneath my pear trees

The plant could even be a somewhat ornamental groundcover, making up for any lack of great beauty with its capability to rapid fill in an area and grow only a couple of inches high. You couldn’t ask much more from a plant – except to keep out of some of my flower beds.

Colorful, Sometimes Tasty, Ground

Lurid Ground

Lurid, violet flowers have sprouted in the wood chip mulch beneath my row of dwarf pear trees. The flowers are autumn crocuses, the first part of the two-part flowery show that takes place each autumn in that piece of ground.
colchicum
The second part of that flowery show, soon to follow, will be autumn crocuses. “But,” you exclaim, “autumn crocuses were the first part of the show!” Let me explain.

This first show is from a flower called autumn crocus but which is botanically a Colchicum species. It’s not really a crocus, not even related. Colchicum flowers resemble true crocus flowers, on steroids. The second show will be from true crocuses (that is, Crocus species) that happen to bloom in autumn. The Crocus autumn crocuses are dainty and in colors like our spring crocuses.

What’s really unique about the colchicum flowers, and what makes them so striking, is that, first, they emerge from the soil this time of year, and second, that they do so without any leaves, making the contrast between the mulched ground and the flowers all the more dramatic. The color itself is dramatic, the row of bold-colored blossoms painting a wide swath along the ground.
Purple autumn crocuses, in a row
Cochicums, like every other plant, need to photosynthesize, and, like every other plant, need leaves to do so. Those leaves, which are wide, long, and fairly large, appear for awhile in spring and look nothing like true crocus leaves. Not only do the plants not need leaves in autumn, they also don’t need soil. Colchicum bulbs will sprout their lurid violet flowers even if just left sitting on a bench or table!

Green Tastes Good

Aside from spots of bright color, the dominant color in my garden is green. That verdure is especially evident in my vegetable garden, now in its autumn glory – lush and green – and becoming more so every day. I’ve been sowing and planting with almost the same fervor as in spring.

Bed of lettuce and chinese cabbage

Bed of lettuce and chinese cabbage

A few weeks ago I made my last planting of outdoor lettuce, using transplants that had been growing in seed flats for about a month. The varying textures and colors of the different varieties make a pretty tapestry on the ground, so pretty that it seems almost a shame to pick any of the tender, tasty heads and ruin the picture. I’m not sure how large they’ll grow before stopped or turned to mush by really cold weather. Protection beneath a tunnel of clear plastic with, later, an additional covering of some spun-bonded row cover material, should keep them and me happy into December.

Other beds display yet more shades of green with varying textures. There’s a bed of kale, which has been pumping out deep green leaves for good eating since spring. Another bed has endive – Broad-Leaved Batavian — planted close enough so neighboring plants push each other’s leaves over the loosely forming heads. Shaded from sunlight, those inner leaves become tender and sweet, livened up with just a hint of bitterness.

Green, Not for Eating

Lushest green of all beds in my garden are those that are sprouting oats. Yes, that’s the same oats that we (and horses) eat, except that I didn’t plant these oats for eating. I plant oats as so-called cover crops, which are plants grown to improve and protect the soil.

I can only eat just so much lettuce, endive, kale, and other greens. If I’ve filled this quota for planting and no longer have further use for every bed this season, I plant it with oats. September 30th is my deadline because after this date — here in the lower Hudson Valley, at least — days are too short and weather becomes too cold to expect much growth.
Oat cover crop
Oats, just one of a number of potential cover crops, thrive in the cool weather of autumn and early winter. Their roots, pushing through the soil, crumble it and latch onto nutrients that might otherwise wash down below the root zone. After the roots die, they enrich the soil with humus and leave behind channels through which air and water can move within the soil. Above ground, the stems and leaves protect the soil surface from being washed around by pounding raindrops.

Most of all, I like the look of that green carpet of grassy oat leaves. Both I and Mother Nature abhor bare ground, which becomes subject to wind and water erosion, and large swings in temperatures through the year.

GOOD LOOKS, GOOD TASTES

Kale’s Delights

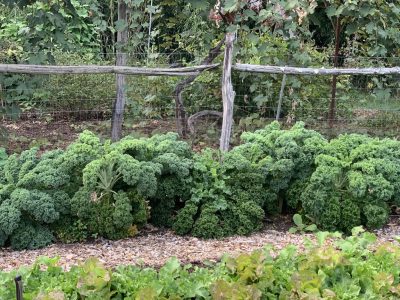
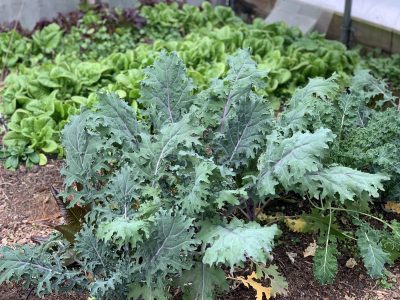
I’m lucky enough to have a French window of two big, inward swinging panels out of which I can look over my vegetable garden every morning. Oddly enough, the garden bed that is catching my eyes these mornings for its beauty is the bed of kale plants.
Kale plants
No, it’s not a bed of one of the so-called colorful, ornamental kales, not even a reddish kale such as Russian Red. I mostly grow just plain old Blue Curled Scotch kale, which is no more bluish than any other kale, or any other member of the whole cabbage family for that matter. What catches my eye each morning is the frilliness of the leaves and how neatly they line up along the stalk. It’s pretty.

My vision could be swayed by the fact that kale is such a healthful vegetable, being especially rich in calcium and vitamin A. Or the fact that it’s so easy to grow. I sowed the seeds in March, put out transplants in early May, have been harvesting it since the end of May, and will continue to do so probably well into December. (Another bed of kale, which I seeded right out in the ground at the end of May, is also looking good.)

Kale is unlike other members of the cabbage family. Broccoli is past its prime once buds open into flowers. Cauliflower is over the hill once the florets sidle apart from each other. Cabbage splits if left too long. Brussels sprouts needs sowing in early spring but aren’t ready for eating until touched by frost at the other end of the growing season.

Kale doesn’t have a small window of time for optimum harvest; actually, no window. It just keeps growing taller, with more leaves, still tasting good at all stages.

The only thing kale needs protection from is rabbits and woodchucks, like most vegetables, and from the various cabbage worms. One or two sprays of the biological pesticide Bacillus thurengiensis (sold under such trade names as Thuricide and Dipel) is all that’s needed for the worms, or nothing, especially in a year like this when worms were pretty much absent.

What more could I ask for from a plant: flavor, health, and beauty?

Free Kisses

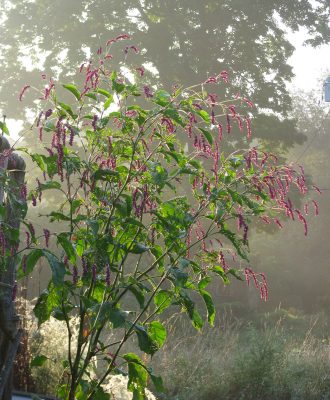
I take it upon myself to personally promote the revival of an old-fashioned flower: kiss-me-over-the-garden-gate (Polygonum orientale). It’s big, it’s beautiful, and it’s distinctly old-fashioned.

If you know the weed called smartweed, you have a hint of what kiss-me-over-the-garden-gate looks like. Smartweed is a trailing weed whose flowers look like small droplets of pink dew at the ends of its stems. Kiss-me-over-the-garden-gate looks like smartweed on steroids, with “droplets” the size of bb’s. Rather than trailing, the plant rises with robust arching stems to more than seven feet high. It’s just the height and form for growing next to a garden gate, which is where my plants grow.
Kiss me  over the garden gate
Kiss-me-over-the-garden-gate is a little hard to get started because the seeds germinate slowly and erratically. My plants thankfully lived up to their reputation of being self-seeding annuals, and those self-seeding plants come up more robustly than the few coddled seedlings I used to plant out each spring.

It’s self-seeding habit is sufficiently restrained for me. All I do each spring now is to weed out the few extra plants, as well as those that stray too far from the garden gate.

Ever Green Onions

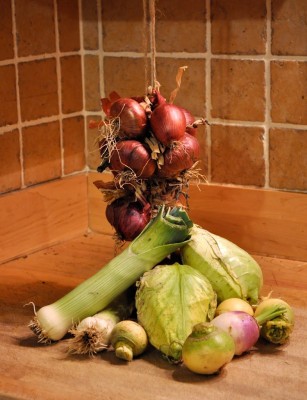
For many years, in addition to starting onions from seed (sown in February!), I also went the more conventional route and bought a few “sets” for planting. Sets are those small bulbs that grow first to become scallions, which are mostly leaf, then go on to fatten into bulbs that can be harvested and stored.
Vegetable face
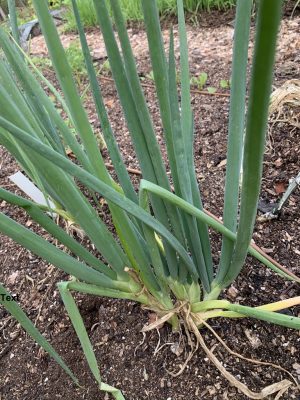
This year, instead of planting sets for scallions, I grew bunching onions, yet another type of onion, one that never ever makes fat bulbs. During the growing season, slender new scallions are produced around the bases of older ones. Left outdoors, they will perennialize and multiply by offsets year after year. 

I set out transplants back in early summer grown from seeds sown in spring. Even now, these scallions still look like scallions, some larger, some smaller, depending on how crowded they are to each other. No matter their size, they’ve all been flavorful right through summer and on into fall, maintaining all the time their scallion character.

SOW NOW?

Next Year’s ‘Chokes

Ahh, such a leisurely time of year to sow seeds. And for some of them, I don’t care if they don’t sprout for months. You might wonder: Why sow now; why so laid back?

I’ll start with artichoke, from whose seeds I did want to see sprouts soon. And I did. The seeds germinate readily. Right now, a few small seedlings are growing, each in its own “cell” of a seed flat, enjoying the cool, sunny weather.
Cynara, artichoke seedlings
Artichoke is a perennial whose natural life cycle is (usually) to grow leaves its first year, then edible buds its second year and for a few years hence. Especially in colder regions, artichokes can sometimes grown from seed like annuals, with a wrinkle.

To make that transition from growing only leaves to growing flower buds, the plants need to get vernalized, that is, to experience some winter cold. Except that winter cold here in the Hudson Valley (and everywhere else colder than Hardiness Zone 7) will do the plants in. So we cold-climate gardeners need to trick the plants into feeling like they experienced winter cold, just not our winters’ depth of cold.

When growing artichokes like annuals, from seed sown in spring, you make “winter” by exposing the young, growing seedlings to cool, but not frigid, temperatures (32-50°F) for a couple of weeks. The problem with this method is that the plants are fairly small when they get this signal that “winter” is over. In my experience, these small plants make commensurately small buds for harvest.

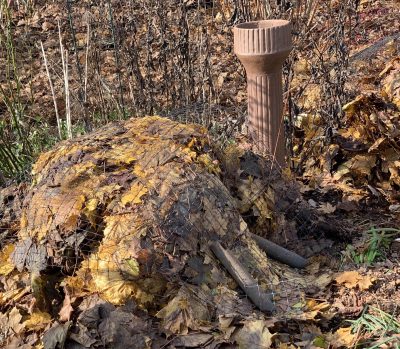
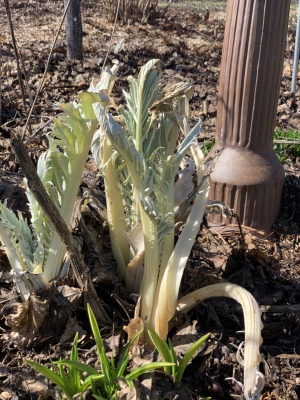
I’m lucky enough to have a greenhouse that gets very cool in winter, but not below freezing. My young artichoke plants will continue to grow very large though the very extended “autumn” weather in the greenhouse. In midwinter, they should get plenty of chilling. Come spring, after frost danger is past, I’ll plant out the large plants to, I hope, make large, fat buds.

I got this idea from growing cardoon, which is essentially the same as artichoke, except it’s grown for its large leaf stalks.
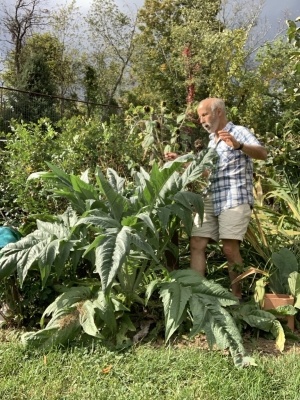
Large cardoon plant
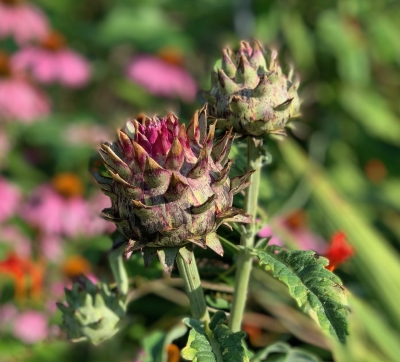
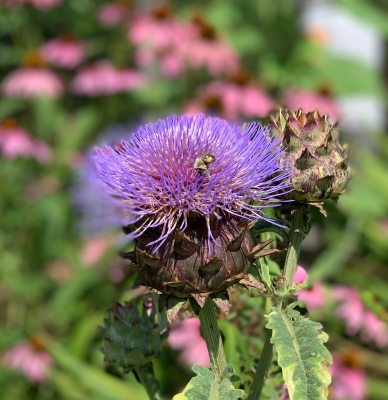
Or it’s grown as a flower, in which case it would require the same conditions as artichoke to make flowers. I don’t like cardoon as a vegetable but do like it as a flower, so last year, around now, I sowed cardoon seeds and grew the seedlings in the greenhouse just as I’ve described for artichoke. The result was big, fat, beautiful, blue flowers. I expect the same, except I’ll harvest the artichoke buds before they open.

Actually, I grew two cardoon plants, and for some reason one of them grew only leaves all summer, and is still growing them, the olive-green leaves each rising from ground level in a four-foot-high-whorl.

More Hucks’

A couple of months ago I collected huckleberry seeds from my huckleberry plant and sowed them. As expected, they still haven’t sprouted. They weren’t expected to sprout, at least not until they were “stratified.”

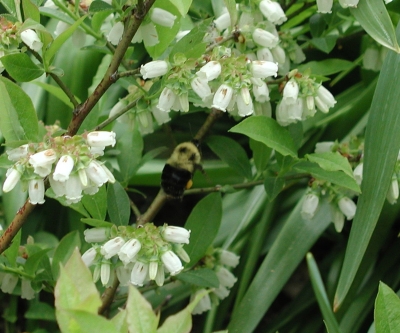
Like artichoke, huckleberry (Gaylussaccia baccata) needs to feel that winter is over, in this case before its seeds will sprout. Stratification, as this cold exposure is called, prevents small seedlings from being killed by winter cold after sprouting in late summer or autumn.

My huckleberry plant in fall

My huckleberry plant in fall

Again, it’s a certain duration of cool (32-50°F) temperatures that do the trick. Under natural conditions, these chilling requirements are fulfilled in late autumn and/or in spring. In this case, colder temperatures would do no harm, but would not put any hours into the “chilling bank.” Once the “chilling bank” has been filled, the seeds await warm enough temperatures to sprout.

(For more details and wrinkles about seed germination, see my latest book, The Ever Curious Gardener: Using a Little Natural Science for a Much Better Garden.)

The pot of huckleberry seeds has been sitting outdoors, covered, since they were sown. If I want earlier sprouting, I’ll bring the pot into the greenhouse in winter. 

Ramping Up

I collected seeds from my ramp plants about a month ago with an eye to increasing my holdings. You guessed it: Ramps also need cold. But given mere stratification, the seed will not germinate. The behavior of ramp seeds is a little different from huckleberry seeds in that ramp seeds have a double dormancy.
Ramps seed heads
Roots need to grow before the shoots will sprout. That first stage requires a couple of months or so of warmth. Only after then can the second stage, shoot growth, begin, except that won’t occur until after a stratification period, with cool temperatures, again between 32-50°F. 

Under natural conditions, ripe ramp seeds get their warm period before winter sets in and then are ready to sprout in spring. But further north, where seeds ripen later, that first stage, to get root growth underway, is delayed until the summer after the seeds drop. In that case, sprouts don’t poke above ground until their second spring.

I don’t want to wait that long so I sowed my ramp seeds in a seed flat which I’m keeping in a warm place for a couple of months. After that, I’ll move the flat to cooler temperatures. And then, come spring, sprouts — I hope.

My ramps planting

My ramps mother plants

TWENTY-TWENTY FORESIGHT

North Vegetable Garden

I’m stepping outside this sunny afternoon for a walk around the farmden, pad and pen in hand to evaluate some of this season’s goings on to make notes for next season. Not that the season is anywhere near over yet. I expect to be out and about with pitchfork, harvest basket, and garden cart at least into December. But no surprises are expected at this point.

Starting in the north vegetable garden: tomatoes. Over the years I’ve honed the number of varieties here from too many to our half-dozen or so favorites.

Valencia tomato

Valencia tomato

The goal is top-notch flavor and reasonable productivity. San Marzano, which is very productive, might taste like cotton fresh but it’s a must for the best-tasting cooked tomatoes. The San Marzanos get their dedicated canning jars, but also good canned is Blue Beech and, great for fresh eating also, are Amish Paste and Anna Russian.

Three more, mostly for fresh eating next year, are Paul Robeson, Belgian Giant, and Valencia. Valencia has year after year proven to be a very good, very beautiful, and productive tomato. Pretty also, round, smooth, and pale orange. Cherokee Purple hardly produced this year, and hasn’t in years past, so it’s scrapped from the list for next year.

I consider Sungold to be the best-tasting cherry tomato, and it’s still bearing a daily abundance of persimmon-orange fruits. I put in 8 plants; next year, I’ll plant a few more.

That makes a total of only seven tomato varieties — unless someone twists my arm into trying any other variety.

I’ll try for a repeat abundance of peppers next year by again growing Carmen and Sweet Italia.

Italian Sweet peppers

Sweet Italia peppers

Sweet Italia tastes better but Carmen bears a little better, especially now. The non-hot hot pepper Habenada, is billed as having hot pepper flavor minus the hotness. More like no hotness and no flavor, a no-go for next year.

South Vegetable Garden

Walking over to the “south garden,” the highlights this year were cauliflower, beans, and squash. Cauliflower is allegedly a challenge to grow. I don’t like it so grew it just for the challenge, and because Deb likes it. I was successful, and she can eat it all.

Blue Lake and Kentucky Wonder pole beans keep pumping tender new beans, as pole beans are wont to do. Or is it Blue Lake and Romano? Or Kentucky Wonder and Romano? The row label is buried deep in a wall of foliage so I won’t know until the end of the season. Pole beansI guess two plants per pole, with poles about a foot apart, is too crowded. Next year: one plant per pole.

Pole beans begin bearing late so I also grow bush beans (bush Blue Lake and bush Romano), which peter out after a couple of weeks but yield an early crop for the freezer. I usually put in a second planting also, which is — note for next year — not needed. We didn’t have to harvest any of them because the pole beans kicked in soon enough.

It’s been a banner year for winter squash. I usually plant squash out in the meadow in the cleared strip of land between the dwarf apple trees. And usually, deer or my poultry eat the vines or the fruit so the harvest is usually nil. This year I planted squash in the rich soil along and inside the back fence of the south garden, which backs up to the poultry run. The squash climbed up and over the fence and onto the fenced roof of the run; now there’s plenty to harvest, perhaps too many!Winter squash on poultry run

South Vegetable Garden

Two flowers were standouts this year: On a whim I purchased red buckwheat seed from Baker’s Creek (www.rareseeds.com). With no place special in mind about where to plant it, I ended up sprinkling the seed in a bed just outside the north vegetable garden.
Red buckwheat
For the past couple of months it’s been a 4-foot high cloud of pale red beauty, which, along with how easy it is to grow, earns it a place in next year’s garden. But where?

One other flower stood out also, delphinium. Not a five foot spire of pale blue — I also have them, the Pacific Giant hybrids — but a spire less than two feet tall with dark blue flowers.
Delphinium, Blue Mirror
It’s Blue Mirror Chinese delphinium (www.reneesgarden.com) and it surprised me by blooming its first year from seed. Let’s see how perennial this perennial turns out to be. Around here, its giant cousins typically die out after a  couple of years.

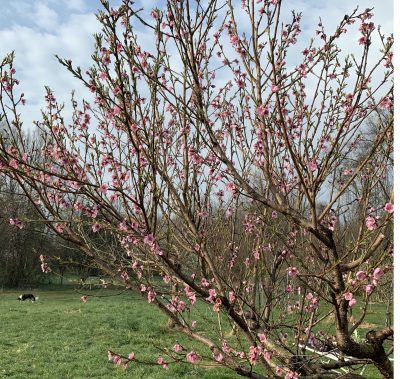
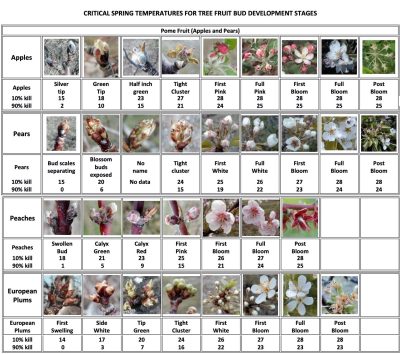
All in all, it’s been an excellent growing season. Spring frost hazard was minor for tree fruits. Rainfall and sunshine were balanced well. Pest problems were minor. Pears are still challenging to harvest at just the right moment so that they can ripen indoors to that delectable window between underripe grassy and overripe sleepy. I did get Concorde at the right moment this year. The ripe fruits are delectable, combining some of the smooth buttery sweetness of Magness pear along with a dash of vanilla.

SOME THINGS FOR SOME SENSES

Visual Delight, and some Aroma

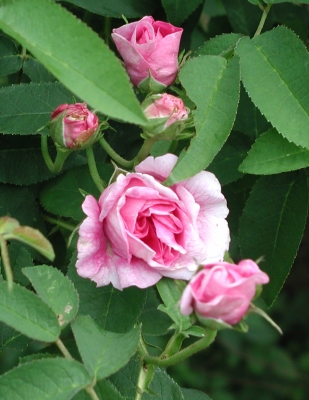
I once grew a rose, Bibi Maizoon, that I considered to be as close to perfection as any rose could be. Its blooms, that is. They were cup-shaped and filled with loosely defined row upon row of pastel pink petals, nothing like the pointed, stiff blossoms of hybrid tea roses. Completing the old-fashioned feel of Bibi Maizoon blossoms is the flowers’ strong, fruity fragrance.
Bibi Maizoon rose
(In case you don’t know who Bibi Maizoon was, she was a member of the royal family of Oman. The Bibi Maizoon rose was bred by British rose breeder David Austin.)

The bush itself was as imperfect as the blossom were perfect. Where to begin? For starters, the thin stems could hardly support the corpulent blossoms. Couldn’t, in fact, so the blossoms usually dangle upside down. Upside down blossoms were not that bad because I considered Bibi best when cut for vases indoors to better appreciate her rare appearances and fragrance.

Top those deficiencies with the fact that Bibi Maizoon was also only borderline cold hardy in my garden and you would rightly guess that I no longer grow this rose.

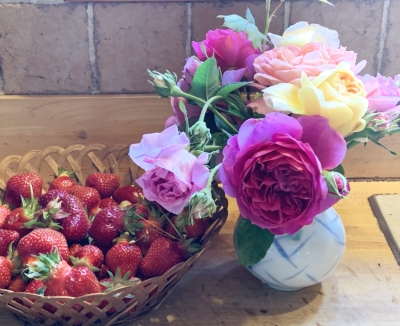
I haven’t abandoned David Austin roses. I generally like them for their old-fashioned look: the bushes are, well, bushy and full; the blossoms have softer colors than those of traffic-stopping hybrid tea roses; and they are disease resistan and strong-growing.

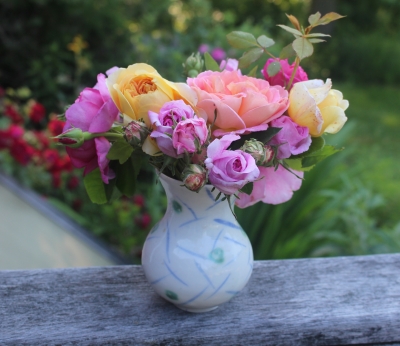
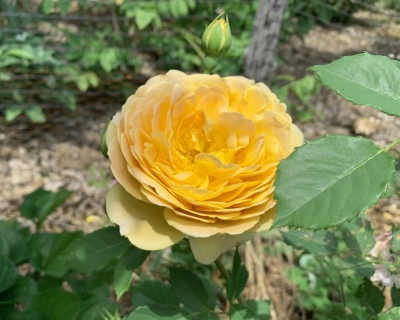
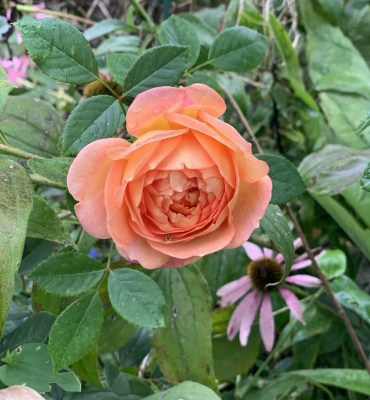
I’ve previously praised the variety L. D. Braithwaite for its almost nonstop, dark red blossoms, red tinted leaves, and ability to laugh off any amount of cold. Three other varieties — Golden Celebration, Lady of Shallot, and Dame Judi Dench — came into my garden in the last year, their blossoms with varying degrees of yellow, the first a pure golden yellow, the second apricot-yellow, and the third apricot orange. Delicious. They all seem, so far, near-perfect.

Golden Celebration rose

Golden Celebration rose

Lady of Shallot rose

Lady of Shallot rose

Organoleptic Delight, and also Beautiful

Ellison’s Orange is as unknown to most people as is Bibi Maizoon. It’s an apple, an old and very delicious apple, and, oddly enough, ripening right now. Everywhere else I read that this apple is supposed to ripen later in September and on into October, yet every year my Ellison’s Orange fruits ripen about this time of year.

Like Bibi Maizoon, Ellison’s Orange has its good and bad sides. On the plus side, it bears very well and at a young age. It also seems to be somewhat resistant to scab and cedar apple rust diseases, contradicting other sources on this point also. And what a beauty the fruit is, with its orange blush over a yellow background.

For me, the downside of this variety is the absolute necessity to pick it at just the right moment. One day an apple seems puckery underripe; the next day it might be sleepy and soft. If I harvest very carefully, I catch an apple at its delectable best, which is sprightly with an intense flavor that hints of anise seed.
Ellison's Orange apple
I made my tree from a piece of stem whose cells trace back over a hundred years, to the garden of a Reverend Ellison in Lincolnshire in the east of England. The parents of the reverend’s new apple weren’t lightweights. One parent, Cox’s Orange Pippin, the king of British apples, has an intense flavor that sometimes hints of anise seed. The other parent, Calville Blanc, an old French apple popular in the court of King Louis XIII, has a spicy flavor with just a hint of banana. No wonder Ellison’s Orange tastes so good – as long as I catch it at the right moment.

Another Tasty Delight

If you buy corn at a farmstand or market these days, no need to have boiling water ready, as gardeners did in the past to stop enzymes from starting the conversion of kernels from sugary sweet to starchy bland. Two genes incorporated into modern corn varieties dramatically slow this flavor decline. They also ratchet up the sugars, making modern corns supersweet to begin with.

Call me old-fashioned, but my favorite variety of sweet corn, the only variety that I grow, is the old variety Golden Bantam, which lacks those modern corn genes. Although not nearly as sweet as modern hybrids, Golden Bantam has a very rich corny flavor with – to some tastes — just the right amount of sweetness.

 Golden Bantam, a hit since 1906

Golden Bantam, a hit since 1906

Golden Bantam was introduced into the seed trade in 1902 by W. Atlee Burpee Company, who got their original 2 quarts of seed from New York farmer William Coy, who had tasted and enjoyed eating some ears at his cousin’s house in Massachusetts. Long story short: Everyone fell in love with Golden Bantam and it became the most popular corn of its day. An article in The Boston Transcript of 1926 states that “In the twenty-four years since [1902] it has made more friends than anyone else could make outside the movies. Which proves that popularity does sometimes follow real merit.” It’s an odd way to compliment but you get the picture.

Golden Bantam pre-dates hybrid varieties, the latter of which, in addition to other characteristics, ripen very uniformly. In a backyard garden, a whole bed of corn ripening at once isn’t necessarily a plus. I want to eat some corn every day, with a little extra each day for freezing.
Corn hills
My four beds of corn, the first planted in mid-May (around the date of our last-killing frost of spring)  and the subsequent beds staggered every two weeks, provides just that. We’ve eaten corn almost every day since each mid-August and Golden Bantam shows no signs of slowing down or boring us.

Seeds Want to Grow

Yes, They Want To, But . . . 

Today, as I was carefully planting a bed with turnip, arugula, and mustard seeds, I got to thinking how easy it is to grow plants from seeds. It’s not surprising. After all, seed plants evolved millions of years ago and over the years have further evolved to germinate and grow under varied conditions. This would be especially true of those plants we call weeds.
Cynara, cardoon, in bud

So, with all that evolution backing me up, why the great care in planting those seeds today? Seeds do want to grow, but extra care increases the chances for success. The threats to germination and growth are competition from weeds, temperatures that are too warm or not warm enough, old seed, and insufficient soil fertility, air, or moisture. That’s not all, of course; there’s too many salts in a soil (and not just NaCl “salt”), seed-eating animals, and infections from pathogenic fungi. 

Whew! That list makes growing from seed seems fraught with roadblocks. But it’s not.

Steps to Improved Germination and Growth

My extra care in planting began back last autumn when I spread an inch depth of compost on top of the bed right after clearing it of garden plants and weeds. That compost provides nutrients, beneficial microbes, and increases aeration and water retention.

Earlier this season, the bed had been home to bush beans. Bean roots, left in the soil to rot, will provide further fertility — mostly nitrogen — for today’s planting.

The bean plants, and a few weeds, were cleared from the bed a couple of weeks ago, still too early for today’s planting of fall crops. While the ground was waiting, I covered it with a black tarp. The tarp, an old billboard sign (from www.billboardtarps.com and reusable for years) that is black on its back side, stimulated growth of ever present weed seeds in the soil. The seeds germinated, then died from lack of light beneath the tarp.

After year upon year of compost applications, the soil has very good tilth, so all it needed, once I removed the tarp, was a light raking to present a loose seedbed. Into it, with a trowel, I carved the first furrow the length of the bed. 

Depth of planting is important. An oft-repeated rule of thumb is that the depth to sow seeds is twice their thickness. Not true! Correct planting depth needs to also take into account the looseness of the soil; looser soil, more depth. And anyway, the seeds that I planted are only about 1/32” in diameter, making it well nigh impossible to make a furrow 1/16” deep. In my loose soil, that depth would dry out too quickly. I went with the less precise “sow shallowly.”
Radish seedlings

Garden plants grown from seed can suffer from competition not only from weeds, but also from each other. True, the young seedlings could be thinned out if too crowded after germination. With seed less than two years old and care in planting, I was confident about germination, so sowed the seed thinly.

After sowing the seeds and covering them came the all-important firming of the soil. The removal of the bean plants and the pre-plant raking to smooth the surface left plenty of large pores, through which water would run right through. 

Tamping down the soil with a garden rake over the covered furrow tightened up the pores so that they can hold capillary water. Remember high school chemistry class (or was it biology class) when water was shown to be drawn up into a capillary tube against the force of gravity? Firming the soil keeps moisture around the newly sown seeds; plus, water can be drawn upwards or sideways to that area. Weed seeds, sitting in still loose soil beyond the tamped area, won’t have such an easy time of it.

Finally, I watered — thoroughly enough for the water to penetrate but, to avoid washing away the seeds, not too fast. My vegetable garden has drip irrigation; I moved the drip line up right next to where the furrow was. Frequent watering is needed until seeds germinate and their new roots reach the wetting from down in the soil. An electronic moisture probe can indicate how deep moisture lies beneath the surface.

And Now for a Flower, or Is It a Vegetable?

Many years ago I grew cardoon, a vegetable whose 3-foot-high stalks are something like celery on steroids. Cardoon stalks growing in gardenThe flavor hints of artichoke, a close relative. None the less, for me the flavor was awful and the stalks were tough. (Cardoon is usually covered to blanche them a few weeks before harvest. Blanching did not make mine more edible.)

Yet I am now enamored with this plant — not for eating but for its thistle-like flower. Cardoon is a perennial that begins to bloom in its second year, after experiencing a period of cool temperatures in winter. Cool, not frigid; cardoon is not cold hardy here in the Hudson Valley.

Last summer I planted seed and grew the plant in pots. Those pots spent the winter in my greenhouse, where temperatures never dipping below 35° F. reminded them of their Mediterranean origin. Once warm weather settled in this spring, I planted them out in my flower garden.Cardoon in flower

The bud on one plant that has been slowly unfurling is well worth the care I put into the plants.

Of Roses and Berries

Roses Come and Go

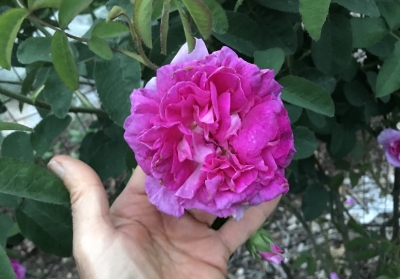
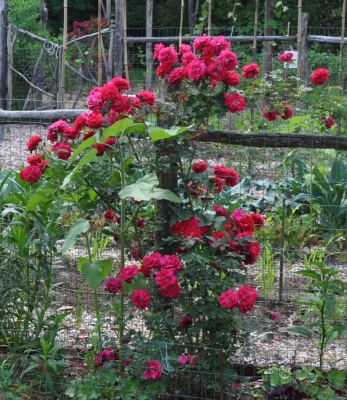
I once grew a beautiful, red rose known as Dark Lady. For all her beauty, she was borderline cold-hardy here. Many stems would die back to the graft, and the rootstock, which was cold-hardy, would send up long sprouts. Problem is that rootstocks are good for just that, their roots; their flowers, if allowed to develop, are nothing special.Dark Lady roseAfter a few years of watching the weakened plant recover each season, I made cuttings from some of the stems. The cuttings rooted and the new plants, rather than being grafted, were then growing on their own roots. Even a cold winter wouldn’t kill the roots, living in soil where temperatures are moderated. If the stems died back to ground level, new sprouts would still sport those dark, red blossoms.

I planted my new Dark Lady in a bed on the south side of my house. There, with the brick wall of the house adding a few extra degrees of warmth in winter and spring, Dark Lady might better survive winters coldest nights and get a jump on spring. What’s more, the roots had ample soil to explore rather than being restricted within the narrow, dry bed along my terrace where the mother plant had grown.

The new Dark Lady grew reasonably well in its new bed, but still not as well as I had hoped. Dark Lady is one of the many “English roses” bred by David Austin to have the blowsy look and fragrance of old-fashioned roses coupled with disease resistance and repeat blooming of contemporary roses.

Dark Lady eventually petered out. She’s been superseded by some newer creations from David Austin: L. D. Braithwaite and Golden Celebration are standouts as far a hardiness and beauty, and I expect the same of Dame Judi Dench and Lady of Shalott.

L D Braithwaite rose

L D Braithwaite rose

Global warming has, no doubt, also been a help.

No Sharing of My Highbush Blueberries

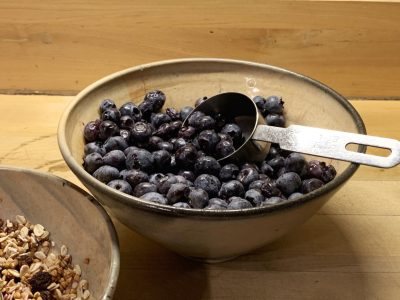
Pity the poor birds. My fat, juicy blueberries have been ripening and now there’s a net between them and them.Blueberries galorePutting up the net always brings the words of fruit breeder Dr. Elwyn Meader to mind. When I visited him back in the 1980s, the old New Englander, still active in his retirement and growing about an acre of blueberries, among other crops, recounted in his slow, New Hampshire accent, “It takes a patient man to net an acre of blueberries.” Covering my two plantings encompassing a total of about a thousand square feet always creates a little tension.Netting blueberriesI now feel like a captain setting sail on an old sailing vessel, with all the sails trim and masts set. Except rather than sails and masts, it’s a blueberry net that’s spread tightly over the permanent, 7-foot-high perimeter of locust posts and side walls of anti-bird, plastic mesh. That netting covers 16 bushes within a 25 foot by 25 foot area. Rebar through holes near the tops of the locust posts keeps that side wall mesh taught and 18” high chicken wire along the bottom keeps rabbits, which love to teethe on that plastic mesh, from doing so.Netted blueberriesDon’t worry about the birds. They get their fill of berries elsewhere. I don’t net my lowbush blueberries, nor my mulberries or gumis. Birds don’t usually share the mulberries or gumis with me. This year, for some reason, they are sharing.

Juneberry, a Blueberry Look-alike

Birds also have free access to a blueberry look-alike, juneberries, the plants of which are sometimes called serviceberry, shadbush, and, in the case of one species, saskatoon. The bushes are common in the wild and, because of their pretty flowers, fall color, and neat form, also planted in landscapes.

Juneberries are small, blue, and dead-ringers for blueberries but have a taste all their own: Sweet with the richness of sweet cherries, along with a hint of almond. The birds seem to enjoy them as much as they do blueberries.Juneberries, fruit in handJuneberries are related to apples and pears, not blueberries, and share some of their kin’s pest problems. Especially in my garden. They’re one fruit that didn’t grow well for me so, years ago, I finally dug the plants up.

Neither I nor birds need go far to find wild juneberries or bush or tree types planted for landscaping. They usually bear pretty well because of growing in microclimates more suitable than here on the farmden. In this low-lying valley, the air is too humid, cool, and conducive to disease.

With all the rain this spring, I’ve noticed that the crop on wild and cultivated juneberry plants has been hit hard by rust disease. I hear tell, though, that plants were bearing well at a nearby shopping mall: There, sunlight beating down on nearby concrete and, perhaps, less rust spores wafting about, create a microclimate conducive to good crops of berries.

—————————————— 

Any gardening questions? Email them to me at garden@leereich.com and I’ll try answering them directly or in this column. Come visit my garden at www.leereich.com/blog.

TIME TRAVEL

18th Century, Here I Come!

Is that me playing the fife? No.

I just returned from time travel one month forward and a couple hundred years backward. Both at the same time! I did this with a trip to Colonial Williamsburg, Virginia, where black locust trees were in full bloom, which is about a month ahead of when they will be blooming up here in New York’s Hudson Valley.

The impetus for this time travel was Colonial Williamsburg’s Annual Garden Symposium, at which I was one of the presenters. (I did presentations on espalier fruit plants and on growing fruits in small gardens.)

Williamsburg is a magical place anytime of year, and especially so, for me, in spring. (I first fell in love with the place on a family trip when I was 7 years old; on subsequent visits, I’ve forgone the three-cornered hat I wore on that first trip.)

The governor's garden

The governor’s garden

The Symposium included tours through many of the colonial gardens, where we  could see, in action, “colonial” gardeners caring for their plants — in many cases using some of the same techniques we use today. Glass cloches, for instance, covered portions of some gardens to hasten warming of the soil for earlier sprouting of seeds. Colonial vegetable gardeners at workFlowering meads of herbs, flowers, and grasses blanketed the ground beneath most of the orchards, providing — probably unknown back in colonial days — forage for beneficial insects to help protect crop plants.

The flowers and vegetables — and fruits in the orchards — are the kinds and varieties grown in colonial times: cardoon, cornflower, chives, cockscomb, pot marigold, nasturtium, hollyhock, Johnny-jump-up, Tennis Ball lettuce, Yellow Crookneck squash, chard, and, of course, corn. Field corn, probably, but also, possibly, sweet corn, which was first given by the Iroquois to settlers in the late 18th century.

Espalier apple trees border vegetable plots

Espalier apple trees border vegetable plots

The gardens in Williamsburg provided and provide more than just sustenance. As in the orchards, flowers mingle with crop plants, in this case, vegetables. Most yards in the reconstructed town are one-half acre, with the land separated into sections with white wood fencing. The whole effect is très charmante. Couple that look with the lack of automobiles within the reconstructed town, and the quiet nights illuminated by the soft glow of fire and candle light (supplemented by electric lights with a candle-like glow), and I think I may want to move back into the 18th century.

Wall Envy

One problem I had with Colonial Williamsburg was wall envy. The church on Duke of Gloucester street, the governor’s mansion, and some other public spaces were enclosed by beautiful brick walls capped with functional and decorative rounded brick.

Most of the homes were covered with white-painted, wooden clapboards. The church and the governor’s mansion were made of brick, which, obviously, harmonized well with their brick walls. Brick wallsMy own home is brick; even a few four-foot-high walls around my vegetable garden and in other areas would improve the general appearance — and provide, warmer microclimates for cold-tender plants or early harvests. Not that the rustic locust fencing and arbors enclosing my vegetable garden look unsightly . . . but I’d like some brick walls.

Incidentally, bricks are made on site at one of the many trades demonstrated within the reconstructed town. I stopped in at the gun shop and stayed soaking up history I never learned in school — how most colonists owned relatively inaccurate muskets which were good enough for hunting and keeping varmints out of gardens, and the real sharpshooters were those with “long rifles,” that is, firearms with rifled barrels that spun their lead shot. But winning a battle wasn’t all about sharpshooters. Long rifles took much longer to reload than muskets, and which side threw the most lead in the air often was what decided who won.

(As part of my immersing myself in 18th century life, I signed up to go to a shooting range to actually fire a flintlock musket. This event, as recorded with 21st century technology, a phone, is documented Musket shooting1, Williamsburg, Musket shooting2, Williamsburg.)

Bricks, rifles, furniture: all these trades are practiced as they would have been in the 18th century. The rifle maker begins his work with nothing more than a block of wood and a block of iron. Four-hundred  hours later, he has in hand a finished rifle. Fabric artisans begin with a sheep or flax seeds and some natural dyes. Cabinetmakers begin with trees or rough cut wood. Their tools are the same as those that to which their 18th century forebears had access.

Plant Envy

In addition to my wall envy, I also experienced the usual plant envy that afflicts me when I go south. Southern magnolia tree reach majestic proportions in Williamsburg; I would like to, but cannot, grow them in this cold climate. Crape myrtle is another, for its flowers and its bark mottled in pastel shades; too cold here for this one also.

I did come upon a number of specimens of fringe tree (Chionanthus spp.), with which I’m only vaguely familiar. The fringes of white blossoms dangling in profusion from the branches made me want to become more familiar, i.e. to plant, this shrubby tree. It turns out that I could — and will — grow fringe tree.Sheep and a barn

Increasing My Hyacinthal Holdings

Hyacinth City

I’ve admitted this before; here’s more evidence of my addiction — to propagating plants. I currently have a seed flat that’s only 4 by 6 inches in size and is home to about 50 hyacinth plants. Obviously, the plants are small. But small and sturdy.

The genesis of all these plants goes back a couple of years when I needed photos for my book The Ever Curious Gardener: Using a Little Natural Science for a Much Better Garden. For the chapter on some aspects of the science of plant propagation and the practical application of that science, I made photos of some methods of multiplying hyacinth bulbs. Here’s an excerpt of that section:
Hyacinth growing bulblets“Knowing what a bulb really is makes it easier to understand how they can multiply so prolifically that their flowering suffers, and how to get them to multiply for our benefit. Dig up a tulip or daffodil and slice it through the middle from the tip to the base. What you see is a series of fleshy scales, which are modified leaves, attached at their bases to a basal plate, off of which grow roots—just like an onion (but, in the case of daffodil, poisonous!). The scales store food for the bulb while it is dormant.

That bottom plate is the actual stem of the plant, a stem that has been telescoped down so that it’s only about a half-inch long. Those fleshy scales are what store food for the bulb, and, depending on the kind of bulb, are nothing more than modified leaves or the thickened bases of leaves.
Bulb cross-section diagramLook at where the leaves meet the stems of a tomato vine, a maple tree—any plant, in fact—and you will notice that a bud develops just above that meeting point. Buds likewise develop in a bulb where each fleshy scale meets the stem, which is that bottom plate. On a tomato vine, buds can grow to become shoots; on a bulb, buds can grow to become small bulbs, called bulblets. In time, a bulblet graduates to become a full-fledged bulb that is large enough to flower.”

Natural Increase

“Let’s see just how the big three flowering bulbs—tulips, daffodils, and hyacinths—grow. With tulips, the main bulb, the one that flowers, disintegrates right after flowering and is replaced by a cluster of new bulblets or bulbs. The mother bulb of a daffodil continues to grow after flowering, at the same time producing offsets of bulbs or bulblets which may remain attached to the mother bulb. Hyacinths grow the same way as daffodils, except for being much more reluctant to make babies.

All those bulblets and bulbs can, in time, crowd each other for light, food, and water, so flowering suffers. When my daffodils, tulips, or hyacinths seem to be making too many leaves and too few flowers, I know it’s time to dig them up and separate all the bulbs and bulblets. The best time for this operation is just as the foliage is dying back in spring or early summer because after that plants are out of sight until the following spring. Replanting can be done immediately or delayed until autumn.”

The Scoop on Propagating Bulbs

“Knowing something about bulb structure also gives me inside information on how to multiply my holdings faster, perhaps to make enough plants for a whole field or a giant flower bed. Merely digging up and planting offsets is one way of doing this. Also, knowing that the bottom plate is a stem and that the offsets come from side buds lets me coax those side buds to grow just as can be done with any other stem.

Pinching out the growing tip of any stem makes side buds grow. One way you get rid of, or ‘pinch out,’ the growing tip of a bulb is to turn the bulb upside down, then scoop out the center of the bottom plate with a spoon or knife. Bulb scoopingAnother way is to score the bottom plate with a knife into 6 pie shaped wedges, making each score cut deep enough to hit that growing point. Bulb scoringAfter scoring or scooping, set the bulb in a warm place in dry sand or soil for planting outdoors in a nursery bed in autumn.Hyacinth dormant bulbletsAfter a year, as many as 60 bulblets might be sprouting from the base of each scooped or scored bulb. Each bulblet does take 4 or 5 years to reach flowering size, but no matter. To quote an old Chinese saying: ‘The longest journey begins with the first step.’”

My little hyacinth bulblets are now in their second season of growth. I’ll keep them growing strongly until their leaves yellow as they go naturally dormant, probably late this spring. Come fall, I’ll dig them all out, separate them, and then plant them out in a nursery bed or else in their permanent homes. I expect aromatic bliss in a couple of years.

And, On Another Note

I was recently a guest on Susan Poizner’s radio show/podcast where we talked about growing uncommon fruits, here at my farmden and in general. Hear it at https://orchardpeople.com/growing-uncommon-fruits/