NICE HIPS, BUT WHOSE?

2 Contenders for Hips and Rabbi Samuel Redux

As I walked along the beach, I took a look and my first thought was “Nice hips.” But what about the flowers? I’d have to return to the plant next summer to find out, a problem since I was 4 hours from home visiting a relative in Rhode Island.

Most of the roses you see growing seaside are Rosa rugosa. Common names for this plant are Japanese rose, indicating its origin, saltspray rose, indicating its tolerance to beach sand, and rugose rose. “Rugose” means “wrinkled,” which is what leaves of R. rugosa are.

The particular planting of nice-hipped roses staring back at me did not have rugose leaves. What’s more, the hips were about 3/4 of an inch across and bright red. Hips of rugose rose are usually an inch or more across and orangish-red. With this slightly different morphology and the fact that rugose rose is listed as an invasive plant, I assumed that the nice-hipped roses, recently installed as landscape plants, were another species.

Those are Rosa rugosa hips on the left, Rosa canine(?) hips on the right

Those are Rosa rugosa hips on the left, Rosa canine(?) hips on the right

With such nice hips, the plants could possibly be dog rose, R. canina, the other rose species valued for its hips. The lack of sepals on the hips also pointed the finger at dog rose. (Rugose rose hips have persistent sepals.) A even closer look would have nailed it; rugose rose’s stems have numerous prickles throughout their length while bold, large, wide, downward-facing thorns line dog rose stems. But I didn’t look closer.

Dog rose, although much less frequently seen, is also considered invasive in some places.

Sowing Seeds for More Hips (and Flowers)

As potentially invasive plants, rugose rose or dog rose should be easy to grow from seed. But no. I’ve propagated roses from seed, and it’s a slow process.

Last summer's Rosa rugosa blossoms

Last summer’s Rosa rugosa blossoms

Rose seeds, like those of most other fall-ripening seeds of temperate zone plants, have a physiological dormancy that prevents their immediate sprouting, the consequence of which would be death from cold. So they just sit in moist earth until they have experienced a number of hours of chilly temperatures — 30 to 45° F is ideal — before sprouting, at which time winter has presumably given way to spring weather. Instead of moist earth, that chilly habitat could be within the refrigerator in a plastic bag filled with peat moss and perlite.

But rose seeds have another impediment to germination: a tough seed coat. Plant the seed outdoors and shoots might not poke through the surface of the ground for 2 years. The first winter and summer are spent softening the seed coat, making it permeable to moisture. Beginning the second fall, chilling hours begin to accumulate so that by the second spring, the seed can awaken and grow.
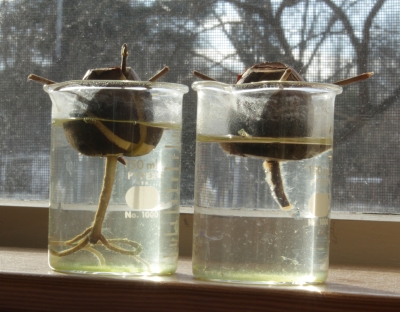
I did pluck a few fruits from that Rhode Island, nice-hipped rose bush, and plan to make new bushes. But I’m too impatient to wait 2 years. “Scarifying” the seeds is a quick way to make the seed coats more permeable. Nicking them with a wire cutter does the trick but would be difficult with such small seeds. An hour or so in warm, concentrated sulfuric acid — followed by a thorough rinsing in water — is likewise effective but a bit dangerous. I’ll follow Mother Nature’s lead and soften the seed coats by keeping the seeds warm and moist. No matter how the seed coat is softened, subsequent cool, moist conditions are still needed before the seeds will sprout.
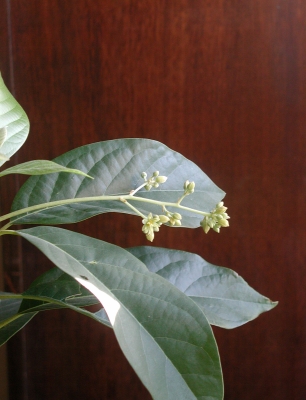
There’s barely time to get those seeds growing this spring. Two months in moist warmth followed by 2 to 3 months in moist peat and perlite in the refrigerator should awaken them. It’s exciting to check the bag in the refrigerator because, once mechanical and chemical barriers to germination have been overcome, a bag of seeds is usually transformed to a bag of white root sprouts, all at once, as if a switch had been turned on.

The Rabbi Multiplies

I’ll have to make up some extra peat-perlite mix. Cutting all the vertical shoots of Rabbi Samuel fig espalier back to the horizontal arms of the permanent “T” framework have yielded a pile of long stems. I can’t bear to throw them away because every foot-long section has the potential to make a whole new plant.

Rabbi Samuel fig, pruned

Rabbi Samuel fig, pruned

The rooting media for these hardwood cuttings? Peat and perlite again. A bunch of the stems in a deep pot with just their top buds up out of the peat mix should sprout and root by spring.

Not sure what I’ll do with all the resulting fig plants.

So Many Roses, I Hope

I’m also not sure what I’ll do with all the anticipated rose seedlings, especially since I’m not even sure of their species. I did telephone the public works department of the Rhode Island town where the roses were planted and was told that they were Rosa rugosa. I think they are wrong.

Fig cuttings

Fig cuttings

No matter: Rosa rugosa is one of the most fragrant roses with deep pink, sometimes white, flowers that are borne all summer long. Also, like dog rose, with nice, fleshy hips, good enough fresh and excellent for jam and tea.

STILL SOME FRESH FRUIT, and GENDER STEREOTYPING

Fruit for My Mouth, Flowers for My Eyes

As I write this, on December 1st, the Rabbi — that’s the Rabbi Samuel fig — is still ripening fruit in my barely heated greenhouse. That’s commendable. Not so commendable, however, is the flavor; cooler temperatures and sparse sunlight have taken their toll. The drooping fruits look ripe and ready to eat, inside and out, but they are no longer worth eating.

End of the fruiting season for Rabbi Samuel fig.

End of the fruiting season for Rabbi Samuel fig.

On the other hand, another fruit, Szukis American persimmons, hardly look edible but still have rich, sweet flavor. Outdoors, fruits of this variety of American persimmon cling to bare branches. Their orange skins once stretched almost to the point of breaking over the soft flesh within. Now, alternate freezing and thawing temperatures and drier air have sucked moisture and temper from the flesh, so the skins have shriveled and barely cling. Their darkening does nothing to increase the fruits’ visual appeal.

Szukis persimmons, starting to look ugly, but still honey sweet

Szukis persimmons, starting to look ugly, but still honey sweet

The ripe fruits are hard to distinguish, by eye, from the almost ripe fruits. The latter still retain some mouth-puckering astringency which has given American persimmons a bad name. An unripe persimmon “will draw a man’s mouth awrie with much torment” wrote Captain John Smith 400 years ago. I give Szukis’ branches a slight shake and only ripe fruits come raining to the ground, at which point the Captain’s further words ring true: “When [persimmon] is ripe, it is as delicious as an apricot.”

Can’t Help Wanting African Violets

New leaf cuttings

New leaf cuttings

Man can’t live by bread alone; a feast for the eyes is also in order. Well, maybe not a feast, but an appetizer, some winter flowers. Probably the easiest and most longlasting of winter blossoms are those of African violet. Okay, okay, I know that African violets have been mostly associated with doilies, lace curtains, and other appurtenances of old ladies (nothing against old ladies).

Generally, I don’t even like the color violet. But African violet’s flowers do brighten up a windowsill that looks out upon a gray and brown landscape.

Plantlets forming at bases of leaf cuttings

Plantlets forming at bases of leaf cuttings

Now that I’ve gotten my secret attraction to African violets off my chest, let’s talk horticulture. African violet’s whorl of leaves, like those of many low-growing perennial flowers, is actually a compressed stem, one that has been telescoped down so that each leaf and associated node originates just a fraction of an inch above the next lower leaf. But there is some distance between those nodes, so over time the stem does slowly elongate, rising higher and higher out of the ground. And side branches occasionally sprout forth from the leaf axils. The result of all this is that the potted plant becomes, over time, so overgrown with layer upon layer of leaves that the plant no longer can gather enough energy to flower well.

African Violet in all its glory.

African Violet in all its glory.

The solution to this problem is to make new plants and then chuck the old ones. All that’s needed to make a new plant is a leaf from an old plant and patience. So a few weeks ago I plucked a few leaves (a few, for insurance) from my old, overgrown African violet and plunged their stalks into a moist mix of peat moss and perlite. A plastic bag covering and held above the leaf cuttings by some twigs provided the needed humidity until roots could develop to keep the leaves turgid. Bright but indirect sunlight fueled, via photosynthesis, new root growth, and within a few weeks, resistance to a gentle tug on the leaves told me that roots had developed.

I removed the cover and now little plants are poking up through the ground alongside the leaf stalks. I’m going to transplant my rooted cuttings into larger pots and should, in a few weeks, be enjoying flowers. By then, I’ll have my knitting also ready.

11th Hour Apple Tree Planting

On to less gender stereotyped gardening: tree planting. Picture the day before Thanksgiving, November 26th. A wet snow is falling and beginning to whiten the ground. In my garage are two sturdy, bare root apple trees, a Hudson’s Golden Gem and an Ashmead’s Kernel, recently arrived from Cummins Nursery and needing planting.

Fortunately, I prepared the plantings site a couple of weeks previously with a 4-inch-deep, broad circle of leaf compost, the most immediate purpose of which was to keep the ground from freezing. Rushing to beat out the snow, I pulled enough compost aside to make space to dig holes, spread tree roots out in each hole, backfilled the soil, sifting it around the roots by pressing with my fingers and bouncing the tree up and down, and then settled all into place with a couple of gallons of water per plant.

I like autumn for tree planting. Roots have opportunity to grow in still warm soil (especially if mulched) while stems won’t grow and need water until spring. The soil is crumbly and soft, in good condition for digging and planting. And autumn planting leaves one less thing to do in the flurry of spring gardening.

However, winter temperatures and furry creatures can be a hazard to autumn-planted trees. The first line of defense, to fend off  mice and rabbits and moderate temperatures on the trunk, is a spiral plastic tree guard. An 18” high cylinder of 1/2” hardware cloth provides further defense against mice and rabbits. Beyond that, a higher and wider cylinder of 2×4 fencing should fend off deer and my puppy Sammy. (Past puppies considered newly planted trees as playthings, fun to tug out of the ground.) And finally, the well-furnished, new tree goes into winter with some perfume, a deer-repellant spray, any of which is effective if applied before the plant gets nibbled and renewed monthly.

I expect to harvest the first apples from the new apple trees expected in 3 years.

HOME-MADE TOOLS, GOOD, BAD, AND SOMETIMES IMPOSSIBLE

Needed Now, A Hay Rake, Garden Line, & Bulb Planter

The small meadow that stretches south of my vegetable garden is more than just a meadow. It also provides mulch for my trees and shrubs, and food for my compost “pet.” All this necessitates moving the greenery — or brownery, when it’s old — from the field to the trees, shrubs, and compost bins. I cut the hay with a scythe, gather it together with a rake, scoop it up with a 4-tine pitchfork, then pile it high in the garden cart for transport.

The tools needed seem straightforward enough, except for the rake. An ordinary garden rake would not do. It’s too small for so large an area and its heavy, short, sharp teeth would too readily tangle up in the mown hay without reaching deeply enough too grab a sufficient amount with each pull. A leaf rake likewise would not do; the fine teeth would merely skim the surface layer of hay or break off.

Years ago, rather than purchase a bona fide hay rake, which may or may not have worked as expected, I thought I’d save some money and get just what I wanted by making one. A quickly made homemade rake would tide me over until I felt like purchasing one or made a new one, improved by my experience using the original. That was years and years ago! The old wooden rake, originally with dowel teeth, later upgraded to teeth of metal spikes, and handle made from a long tree branch, served me well. Eventually, sun, rain, and use tore it apart.

My homemade kay rake of aluminum, PVC plastic, and bamboo

My homemade kay rake of aluminum, PVC plastic, and bamboo

Recently, after looking over all the options — including an antique wooden hay rake, a “professional” rake, a “grading rake” — and not knowing which might work best, I decided, once again, to make one.

And proud I am of my new rake, both in function and beauty. Four-inch lengths of aluminum dowels, rounded at their bottoms with a grinder, are evenly spaced and firmly anchored with small screws at their tops and the upper part of their sides to a 40 inch wide piece of aluminum angle stock to make up the head. A short piece of aluminum angle stock in the middle of the head provides an anchor for the handle, which starts out as an 18” length of 1” diameter PVC pipe. To complete the handle, I slid into the PVC pipe a 7 foot long, straight, strong piece of bamboo, home grown. The rake is a meeting of universes, two corners of the high tech, embodied by aluminum and plastic, with the natural, bamboo. They seem happy together.

Bad Home-Made

With all that’s available in stores and online, it may seem archaic to fashion one’s own tools. But doing so — as is the case with my new rake — can get you a custom-made implement, exactly to your particular specifications. I had the luxury and job of choosing the length and spacing of my rake’s teeth as well as the width of its head, even its weight, depending on the materials I chose. The finished product works well and everything, from lining up drilled holes as I seated the teeth into position to choosing a bamboo handle to fit securely into its PVC sleeve was very satisfying work.

Garden line, a design failure for me

Garden line, a design failure for me


Such is not always the case with homemade. Years ago I needed a garden line that could be wound up quickly and easily, and mounted on a spike that could be stuck in the ground. I made one. Not a very good one in form or function. It’s time to finally cannabalize it for its string which I’ll just wind up around a piece of wood — for now.

Good Bought or Borrowed

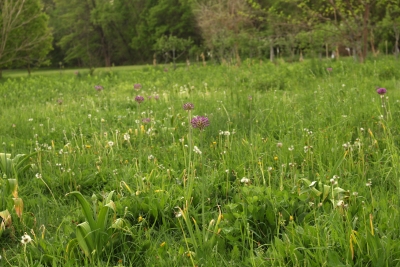
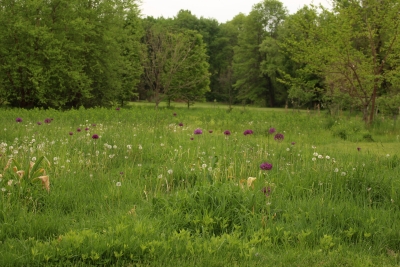
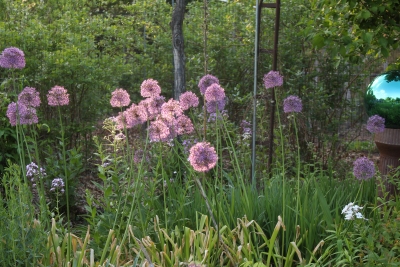
Okay, some gardening tools cannot be homemade so are better bought. Case in point: I’m hoping for a dramatic planting of ornamental alliums in part of the meadow. Dramatic, as in 125 bulbs, 100 of which (Purple Sensation) will make purple globes 4 inches across, and 25 of which (Ambassador) will have purple heads 7 inches across, all these heads sitting high atop 3 to 4 foot high stalks. The hope is that their leaves will be up, do their photosynthetic job, and be out of the way before the surrounding grasses and herbs pick up enough steam to choke them out. If so, allium flowers will brighten the meadow year after year.

Sammy the Dog inspects the powerful B&D drill and bulb auger.

Sammy the Dog inspects the powerful B&D drill and bulb auger.

Pushing a shovel through dirt and roots 125 times would be an arduous task indeed. So I borrowed an earth auger from my friend Bill and inserted it into the chuck of my Black & Decker 20 volt cordless drill. If it seems as if, by explicitly naming it, I’m promoting this Black & Decker product, I am. The tool has power, longlasting power, enough to muscle the auger 6 inches deep into the soil. (Full disclosure: No rocks here.) In one hour, all the bulbs were planted.

No, I’m not about to cobble together a cordless drill. Same goes for the earth auger. This particular one, borrowed, was an antique, cast from solid steel.

The humongous Ambassador alliums were too large for the auger holes so I did have to dig those 25 holes by hand.

Farmdening, Not Too Much

Earlier, I mentioned using a scythe to mow the vegetation. The scythe is an archaic yet very useful and enjoyable tool, but, as Charles Dudley Warner wrote in his 1871 classic My Summer in the Garden, “Blessed be agriculture! If one does not have too much of it.”

At one time I did mow the whole, one acre meadow with a scythe — 3 times each season so that the vegetation would not get too long to be mowed. No longer. That much scything got tedious, and I got tennis elbow. So now the scythe takes care of my mowing enough hay for my mulch and compost needs, and a Kubota tractor with a brush hog, once a year, takes care of the rest.

FLOWERS FOR THE VEGGIE GARDEN

Zinnias In and Colchicum Outside

And the winner is  . . . Every year boxes of plants arrive at my doorstep, sent by nurseries and seed companies hoping to wow me with their products which I will then praise and induce you all to purchase. Most of the plants turn out to be ho-hum, perhaps new but not necessarily better than what’s been around for decades. Not so this season, for a charming yellow flower that’s been blooming nonstop all summer long and offers no indication as yet of expiring.Yellow blossoms of Zahara zinnia

That plant is  . . . unfortunately I lost the label so have been sleuthing for days now to give this winning plant a name. It looks much like a zinnia, a single flowered zinnia, that is, one with a single row of petals. The plants are compact, a little more that a foot high and wide, and — very un-zinnia-like — show no signs of powdery mildew.

My first guess for the plant was creeping zinnia, which actually can be one of two different plants. The first is a true zinnia, Zinnia angustifolia, and the second is not really a zinnia; it’s Sanvitalia procumbens. After getting out my botany books (books!) and magnifying glass and staring at the peduncle, receptacle, and disk and ray flowers of a flower from my plant and comparing it with written descriptions, I was still scratching my head to give my plant a name.

In frustration, I went to the garage to my “miscellaneous” bucket into which I sometimes toss plant labels that I might need to reference again at a later date. Digging down deep amongst all shapes and sizes of labels, I came upon one printed “Zahara Yellow Improved Zinnia.” Back inside, on the web, comparing descriptions and photos verified that — yes — that’s the plant.

The botanical name listed for Zahara zinnias, which also come in other colors, is Zinnia Marylandica.  That species name looks and is fake. Zaharas are interspecies hybrids, with some creeping zinnia (the Z. angustifolia c.z.) in their blood. So my guess at their being creeping zinnia was not far off.

Looking over at my conventional zinnias (Zinnia elegans) for comparison, they appear gawky witI their large flowers, both new and faded ones, prominently perched atop long stalks. Their many petalled blossoms look too full of themselves. Zahara buries its spent blossoms out of sight amongst new flowers and foliage of the compact plants.

Next year, I’m planting Zahara Yellow Improved Zinnias again.

A Vegetable Factory Functionally, But Not Visually

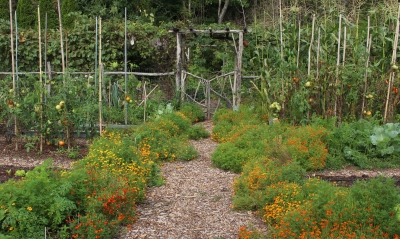
Those Zahara zinnias, planted along the main path of the vegetable garden joining arbored gates at either end, create two golden ribbons to draw you along the path. As I walk the path and glance left, north, I see, just outside the garden fence, another ribbon, this one a broad brush stroke of purple with not a hint of green. (More on that later.)

Yellow zinnias line the main path in the vegetable garden

Yellow zinnias line the main path in the vegetable garden

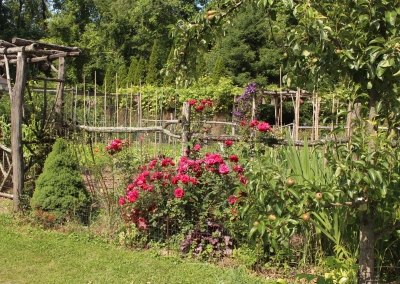
A vegetable garden need not be a vegetable factory. Too many look as if dropped from the sky, plopped down in the middle or far corner of lawn and enclosed with a strictly functional fence. Why not make the vegetable garden pretty and cozy it up near the house? Beds paint a two-dimensional design on the ground. A nice fence helps; even better if it integrates with the style of the home.

Vegetable gardens often look stark because of the abrupt transition between the vertical fence and adjacent, horizontal lawn. Decades ago, I regularly rototilled around the outside of my fence to keep weeds away from the fence line. I decided that was wasted space, so planted it with shrubs, flowers, and vegetables that didn’t need fencing. It was a good decision, softening the transition from garden to lawn.

So gussy up your vegetable garden with ornamental plants inside and out, with decorative fencing and arbors, perhaps an herb-lined path drawing you within, or perhaps with a bench, bird bath, or gazing globe as a draw.

And A Stripe of Purple to Gussy Up the North

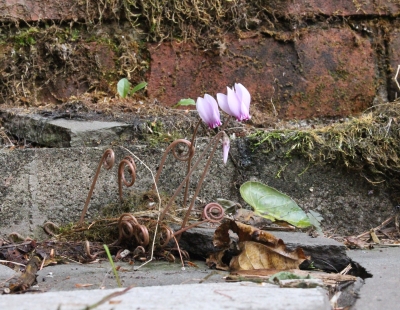
That purple brush stroke north of my vegetable garden are the petals of autumn crocus, Colchicum autumnale. In contrast to the Zahara zinnias, autumn crocus has been cultivated hundreds of years, and my plants are run-of-the-mill species rather than any hifalutin variety.

Purple autumn crocuses, in a row

Purple autumn crocuses, in a row

Like Zahara zinnias, autumn crocus has nomenclature issues. To whit, it is not a crocus. Further complicating things, there are true crocuses that bloom in autumn, sometimes called autumn-blooming crocuses, among them the saffron crocus, Crocus sativa. Colchicum autumn crocus, my purple brush-stroke, is poisonous.

The purple of my autumn crocuses is so bold because leaves don’t accompany the flowers (again, in contrast to autumn-flowering crocuses, whose leaves appear with the flowers). Autumn crocus leaves are big and bold, appearing in spring and looking something like ramps, the edible wild onion species. In Europe, where both autumn crocus and a ramp-like relative, grow, people have been poisoned for mistaking one plant for the other.

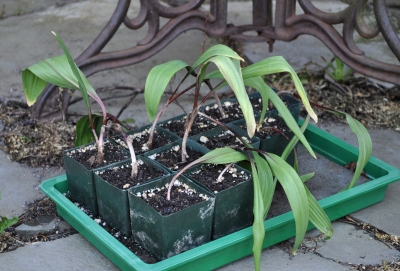
But toxicity isn’t what keeps more people from planting autumn crocus. Daffodils, after all, also are toxic. The problem is timing: Autumn crocus bulbs are ready for planting in late summer, before daffodils, tulips, and other fall planted bulbs are ready. It’s hard for nurseries to get people excited about yet another bulb planting season, and only for this single species. If not planted soon enough, autumn crocus bulbs grow, even without soil. The bulbs multiply quickly and when I divided and replanted them last summer, I kept a few out, three of which now sit naked in a bowl on the dining table, blooming.