(Micro)climate Change

As the train rolled southbound along the east bank of the Hudson River, I took in the varied landscapes along the opposite west bank. Spilling down the slope to the river on that bank at one point was what appeared, from a distance, to be a vineyard. I was envious.

(I never could understand why the region here is called the Hudson Valley. Along much of the Hudson, the land rises steeply right up from river’s edge. Where’s the valley?)

I wasn’t envious of the riverfront site of the vineyard property. I wasn’t even envious of having a whole vineyard  of grapes. (I cultivate about a dozen vines.)

What I did envy was the microclimate of the site. Microclimates are pockets of air and soil that are colder, warmer, more or less windy, even more or less humid than the general climate, due to such influences as slopes, walls, and pavement. 

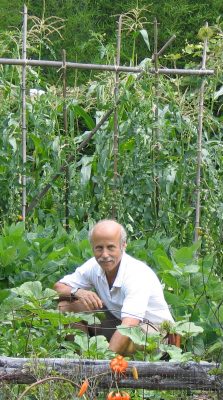
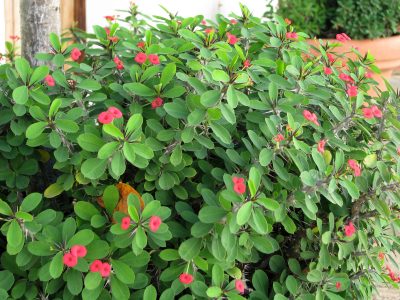
The vineyard was not that far from my home, but the microclimate was worlds apart. Every parcel of land, from a forty-acre farm field to a quarter acre lot, will have some microclimates, and siting plants with this in mind can spell the difference between whether or not they thrive or even survive. Microclimate, early tulips
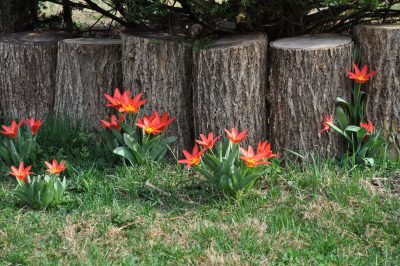
I’m banking, for instance, on the slightly warmer temperatures near the wall of my house to get my stewartia tree, which is borderline hardy here, through our winters. (It has.) And I expect spring to arrive early each year, with a colorful blaze of tulips, in the bed pressed up against the south side of my house. Proximity to paving also warms things up a bit.

Microclimate for cold, microclimate for warmth

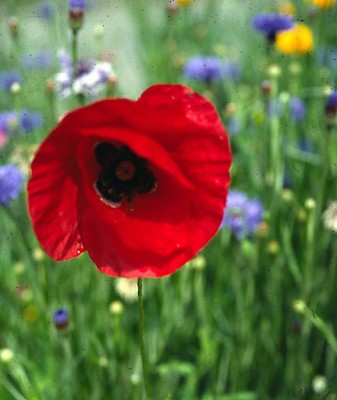
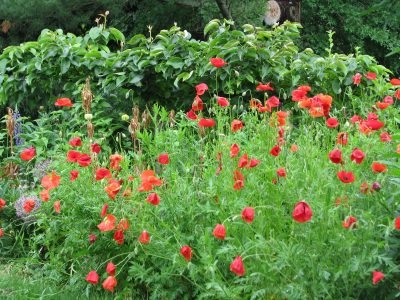
Microclimate isn’t always about trying to keep a plant warmer in winter, or speeding up growth in spring. It’s also useful for keeping plants cooler. By training my hardy kiwifruit (Actinidia spp.) vines right up against the shaded, north sides of their hefty supports, I keep the sun off their trunks in winter and avoid the splitting that occurs when trunks are warmed during winter days, then precipitously cooled as the winter sun drops below the horizon. Microclimate, lingering snow
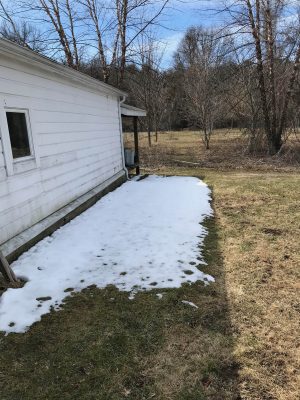
By planting the coveted blue poppy in a bed on the east side of my house, I hoped to give the plant the summer coolness that it demands. (That east bed was still too sultry; the plants collapsed, dead.)

Microclimates are important when growing fruit plants that blossom early in the season because frozen blossoms do not go on to become fruits. Early season bloomers need microclimates that are slow to warm up.

South facing slopes stare full face at the sun, so these slopes warm up early in spring and are warmer in both summer and winter. Therefore, a south facing slope—even if the grade is only slight—can be used to hasten fruit ripening on a plant like persimmon, which blooms late but needs a long season when grown near its northern limits.

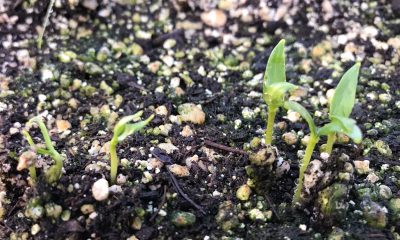
Right after I push soil over the first seeds of sweet corn that I plant, I firm it over that hole with my foot at an angle to make a south-facing depression in the ground. That mini-slope will warm up just a wee bit sooner than flat ground.

The sun glances off north slopes, delaying their warming in spring and keeping them cooler in summer. Such a microclimate is ideal for an early blooming fruit tree like apricot or peach, and for plants, such as sweet peas, that enjoy cool summer weather. Likewise ideal for such plants is near the north side of a building, where shade remains through winter and the early part of the growing season.

If a slope actually has some elevation to it, the air is going to cool by one degree Fahrenheit every three-hundred feet going up the slope. If I had sloping ground, which I don’t, and sought a cooler location for planting, I’d avoid planting at the very top of the slope, though, because the upper reaches are usually windy.
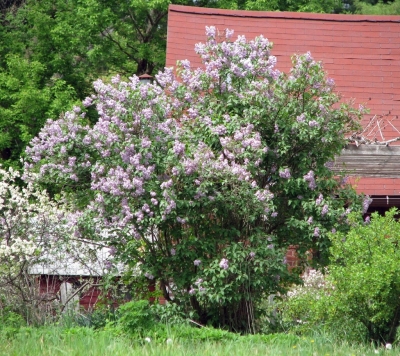
A cold spot, here

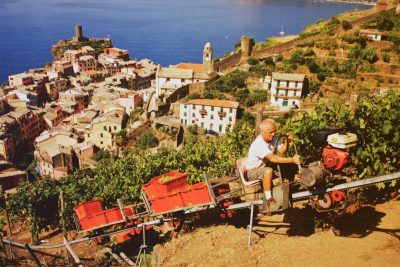
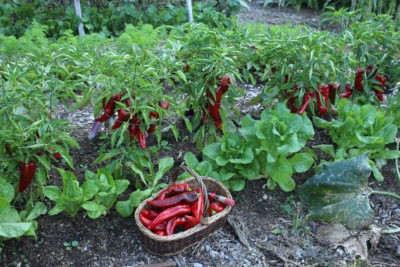
Ideal vineyard site, from plant perspective, in Germany

Counterintuitively, the very bottom of a slope will also be a cooler microclimate. On nights when the sky is clear, with no clouds or leafy trees to block re-radiation of the sun’s heat from the ground back to the heavens, the air at ground level cools. An “inversion” occurs, with warmer air higher up. The cold air, which is denser than warm air, flows downhill to settle into depressions, just as a liquid flows downhill. A low point would be the worst possible location for planting strawberries, which grow near ground level and whose early blossoms are threatened by late frosts in spring. Any dense fence or shrubbery on a slope stops the downward flow of cold air, which will pool, just as dammed water would, near the upper side of the barrier.

Among the fruits I grow are apples, peaches, plums, and pears, all of which tend to bloom early. My site, unfortunately, is just about the worst possible site for growing these fruits. Apple blossoms
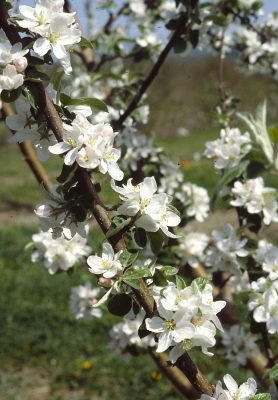
The cold air that settles here on clear spring nights increases the likelihood of late frosts and also causes moisture to condense on the plants, leaving them more susceptible to disease. Hence my envy for that sloping vineyard site.

Check out my new book, The Ever Curious Gardener, for more on microclimate!!

Doing Good with Saw and Lopper

Fruitful Pruning

To begin, I gave the bush in front of me a once over, eyeing it from top to bottom and assuring it that the next few minutes would be all to its good. It was time for my blueberries’ annual pruning, the goals of which were to keep them youthful (the stems, at least), fecund, and healthy.

Blueberries galore

Blueberries galore

I peered in at the base of the plant, eyeing now the thickest stems. Blueberry bushes bear best on stems up to 6 years old, so the next move was to lop or saw any of these stems — usually only 3 or 4 of them, more on a neglected plant — as low as possible.

Sammy & me, pruning blueberries

Sammy & me, pruning blueberries

To keep track of the ages of individual stems, I mark off the age of them each year with a Sharpie. Just kidding! The thickest ones are the oldest ones, and 6-year-old stems are generally an inch or more in diameter on healthy bushes.

Removing those stems that are over the hill frees up space for younger stems to develop. Each year blueberry bushes send up new sprouts from ground level, usually a few too many of them. They need to be thinned out so they don’t crowd each other as they age. I leave a half dozen or so of the most vigorous new sprouts, lopping all others to the ground.

That’s pretty much all there is to pruning a blueberry bush. With the very oldest and some of the very youngest stems cut to the ground, the bulk of pruning the bush is finished.

Blueberry bush, before & after pruning

Blueberry bush, before & after pruning

  I’ll also snip off any dead stems, remove a branch here and there where they are congested, and shorten any stems that will arch to the ground when laden with fruit.

That’s it. Finished, except to step back and admire my handiwork.

And Now, For Other Shrubs

The same pruning done on blueberry could, in essence, be applied to lilac,Lilac in flower 
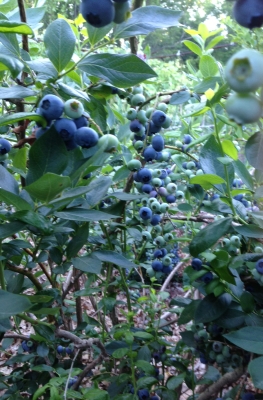
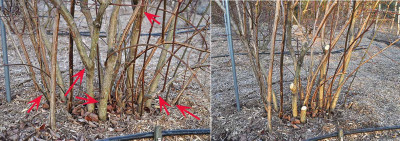
forsythia, mockorange, hydrangea, and any other informal shrub. This technique is known as rejuvenation pruning because, over time, the above ground portion of the shrub is annually rejuvenated. In the case of blueberry, the roots live unfettered year after year but the bush never sports stems more than 6 years old. A perennially youthful blueberry bush can go on like this, bearing well, for decades like this.

Not all shrubs perform best on stems up to 6 years old. Some, such as kerria, snowberry, rambling roses, and summer-bearing raspberries perform best on 1-year-old stems. So every year those 1-year-old stems are lopped to the ground and the youngest stems are thinned out.

Some shrubs, such as butterfly bush, everbearing raspberries, and red twigged dogwood, perform best on new stems. In this case, the whole plant gets lopped to ground level each year. (Everbearing raspberries actually bear on both new stems and on 1-year-old stems, so could be pruned as in the previous paragraph. That takes more time but does yield a midsummer crop on the 1-year-old stems and a late summer and fall crop on the new stems.)

At the other end of the spectrum in shrub pruning are witch hazel, tree peonyTree peony blossoms, rose-of-sharon, climbing roses, and flowering quince. These shrubs are among those that perform well year after year on the same old, and always growing older, stems. They also grow few or no suckers each year. The upshot is that thesis shrubs are the easiest to prune: Don’t.

I detail the ages of stems that are “keepers” for every shrub, plus other details in pruning all kinds of plants, in my book The Pruning Book.

Getting Formal

All this pruning refers to informal shrubs. For formal shrubs, such as the privet hedge near one edge of my yard, I put aside the lopper, pruning shears, and pruning saw, and get out the hedge trimmer. Shearing all the youngest twigs, working, this time, higher in the bushes rather than down near ground level, elicits repeated branching which results in dense growth.

To keep this formal hedge clothed from head to toe in leaves, I keep the row of plants narrower towards their upper portions. This lets sunlight beam down on the shrubs from top to bottom.

Northern Figs? Yes!

Faking The Subtropics

At first blush, the setting would not seem right for fig trees. There they were, in pots sitting on my terrace — so far so good — but with snow on the ground around them. Figs? Snow?Potted figs and snow

Figs seem so tropical but, in fact, are subtropical plants. And it does sometimes snow in subtropical regions. Climatewise, subtropics are defined as regions with mean temperatures greater than 50 °F with at least one month below about 64 °F. Further definitions exist but the point is that it does occasionally snow in subtropical regions; temperatures just never get very cold.

My potted figs couldn’t have survived our winters outdoors. They wintered in my basement, where winter temperatures are in the 40s. Cool temperatures are a must to keep the stored plants from waking up too early indoors, then, because the weather is too cold to move them outdoors, sprouting pale, sappy shoots in poor indoor light. Even sunny windows don’t hold a candle (pardon the pun) to sun in the great outdoors.

Sleep, Sweet Figs

My goal is to keep the plants asleep as long as possible and then to move them outdoors just as soon as temperatures are unlikely to plummet low enough to do them harm. I figure that date was yesterday, April 2nd. Most fig varieties tolerate cold down into the 20s, some even lower.

Roots of all plants have evolved in, of course, the ground, where temperatures are more moderate than the air. So they can’t tolerate as much cold as can stems. With cold penetrating the exposed soil in pots, more so the smaller the pot, I have to keep an eye on the outdoor temperature and, if it gets too low, whisk all the pots into the shelter of the garage.

In the ideal world, temperatures will slowly warm without any dramatic lows or highs, and fig buds will gradually unfold into shoots along whose length will develop and then ripen juicy, sweet Celeste, Genoa, Excel, Ronde de Bordeaux, and Rabbi Samuel figs.Plate of figs

Cold concerns this time of year don’t apply to one of my potted figs, a Himalayan fig (Ficus palmata). I rooted a cutting of this plant a few years ago. It’s billed as being much more  tolerant of both cold and summer rain than common figs (F. carica), both assets for a fig in this part of the world. I have yet to see fruit from this plant.

Primal Urges?

What is it about figs that makes so many people want to grow them? I know of someone in Sweden who grows them. Even someone in Canada who has a collection of over 200 varieties (www.adrianosfigs.com)! Figs are an ancient fruit with origins in the Fertile Crescent, so is it some primal connection with the distant past that is the attraction?

A big part of the attraction is, of course the flavor of fresh figs, which is unlike that of the dried fruit. Market figs don’t make the grade because figs have to be picked dead ripe for best flavor, at which point they’re too delicate to travel much further than arm’s length from plant to mouth.

As would be expected of so ancient a fruit, hundreds of varieties exist — and perhaps thousands of names because more than one name has been ascribed to many varieties. My variety Rabbi Samuel, for instance, mentioned above, is, I know a made-up name. 
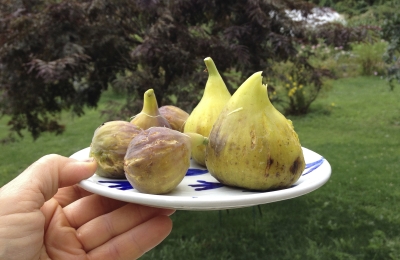
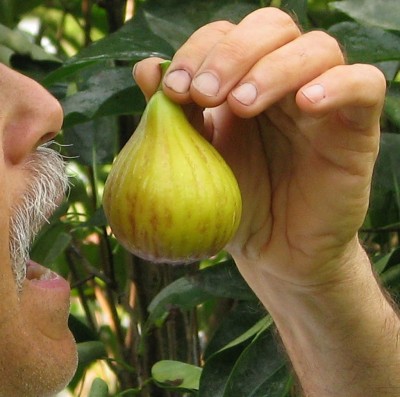
A friend made it up because he got it from some Hassidic Jews who had no name for it. And the frequently grown variety Brown Turkey is a name assigned to two different varieties, one more common on the west coast and the other more common on the east coast. And the east coast variety has a number of other names, including Everbearing, Texas Everbearing, and La Perpetuelle.

The first plant I ever grew once I got the gardening bug (in my 20s) was, in fact, Lee’s Perpetual (another name for eastern Brown Turkey). I grew it in a pot in a not very sunny window of the apartment I was renting. Not surprisingly, in retrospect, the plant never fruited.

Nowadays I think of the climate in which figs are native when growing my figs: cool, moist winters (as in my basement) and hot summers with plants baking in abundant sunlight. I now harvest plenty of figs.

Postscript April 6th: Temperatures of 22 °F perhaps prompted me awake at 3 am; I got up and lugged all 11 potted figs into the shelter of my unheated garage. 

And The Season Begins . . .


St. Patty’s Day Passed; No Matter

Uh oh! St. Patrick’s Day was way passed and I hadn’t planted my peas. No matter. St. Patty’s Day is the right time to plant peas in Virginia, southern Missouri, and other similar climates, including, probably, Ireland.Peas in pod

Around here, in New York’s Hudson Valley, where the average date of the last killing frost is sometime in the latter half of May, April 1st is more like it. That’s the date that I shoot for, at least. Some springs, like the spring of 2017, earlier plantings would have done better. But you never know what bodes for the weather, so playing the averages is the best bet.

The problem with planting pea seeds too early is that the seeds will just sit and perhaps rot in cold soil. The problem with planting peas too late is that temperatures are too hot when the plants are supposed to be in all their glory, so they peter out rather than bear well. Again, an April 1st planting date, around here, generally works best.

Soil temperature is an even better guide than calendar date; pea seeds germinate when the soil warms to 40°F. Or a phenological indicator; blossoms of spring-flowering trees and shrubs open in response to warmth. Forsythia blossoms are just about to open at about the same time that the ground has warmed to that 40° temperature.

Get ‘Em Up

Peas grow as vines anywhere from a foot and a half tall to more that 6 feet long. Whether short or long, the vines are not self supporting. The laissez faire gardener just lets the vines sprawl on the ground, then lifts them to harvest.

For a neater garden and cleaner pods, I trellis my peas. By exploiting a third dimension — up — I also reap more productivity per square foot of garden space from trellised peas. Peas on trellis
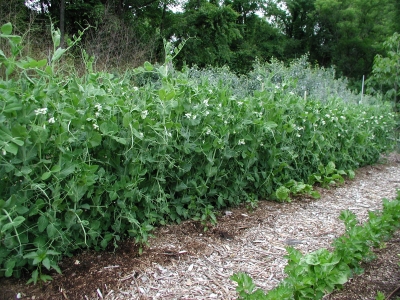
Plus, if the peas are planted down the center of my 3-foot-wide garden beds, I can flank them with other vegetables, such as carrots, radishes, lettuce, and arugula.

Peas, like other vegetables, should be rotated around the garden, that is, not planted in the same place again within 3 years. Crop rotation avoids the buildup of pest problems that overwinter in the ground. Without their host plants, they starve.

With this caveat, peas need temporary trellising, trellising that can follow them around the garden.  Traditional temporary trellising for peas, and very British, are pea sticks. Looking quite charming, this trellis is made by merely sticking brushy twigs into the ground along the pea row. Pruning off branches sticking out perpendicular to the row leaves a flat plane of twigs up which the clinging vines can clamber.

The traditional pea trellis takes some time to set up and requires some time gathering a lot of suitable twigs.

Second Best Pea Trellis

I opt for the “second best pea trellis” which starts out by my pounding an old piece of inch-thick iron plumbing pipe into the ground at each end of my pea row. The trellis itself is chicken wire, each end of which I weave onto the pipes. The chicken wire can then be cut to the length of the row, or excess roll can just be left standing just beyond the pipe. The chicken wire slides down the pipes most easily if kept almost parallel to the ground, so I attach one end partway on one pipe, then the other end partway on the other pipe, and keep going back and forth easing the mesh down to the ground.

At this point, the trellis is quite floppy. I strengthen it with some of those inexpensive, fiberglass posts sold for electric fencing, weaving one of these posts into the chicken wire every three feet or so and then pushing it into the ground.Pea trellis

Presto! In about fifteen minutes, I’ve erected a serviceable and inexpensive pea fence. This fence can be erected just after the peas emerge through the soil, so what it lacks in beauty it makes up for by spending little time uncovered with pea vines. After pea harvest is over, I pull the vines down off the trellis and dismantle the fence in a reversal of the steps described. The fence, not being permanent, can move around the garden to a different location each spring — just as should the peas.Snow peas on vine

Make a Tree!

Grafting workshop ad

Spring Inspires

Even Bob Got the Bug

As I write, daily high temperatures are in the 30s and snow is predicted. Nonetheless, just a few warm, sunny days and almost everyone is going to be inspired to garden. Or at least do something plantwise. Even my friend Bob.

Bob’s non-interest in gardening was demonstrated decades ago as I was starting my first very own garden at a house I was renting. Bob was there as I pushed my shovel into the clay soil of the lawn to turn over spadeful after spadeful. Bob watched peacefully lying beyond the proposed plot with his head propped up on his hands. (Not so another friend, Hans, who grabbed another shovel, and dug. Now that I think of it, perhaps I owned only two shovels.)

Crown of thorns

A crown of thorns (not Bob’s)

Bob’s current interest centers around one plant, a potted crown of thorns plant (Euphorbia milii). Crown of thorns is very easy to grow because it’s a succulent. Like other succulents, crown of thorns can store water, in this case in both its thick stems and its fleshy leaves.

The stems, armed with stout thorns, are what give crown of thorns its common name. Legend has it that this plant was woven into the crown of thorns worn by Jesus. Although the plant is native to Madagascar, it had made its way to the Middle East by the time of Christ. But it probably was not the plant that made his crown of thorns.

I once had a crown of thorns plant, and, unlike Bob, with his plant, pretty much ignored it as far as care. Mine flowered occasionally, which was enough because I had a lot of other plants to entertain me. Bob, on the other hand, is becoming a crown of thorns maven, tweaking conditions to try to eke the most and best blooms from his one plant. We go back and forth on how much light they need (the more the better) and how frequently to water (I suggest infrequent but deep watering). The final word has not been said.

Differences of opinion may be traced to differences of plants. Crown of thorns became a popular plant in the 1970s and new varieties were being offered, among them hybrids between E. milii and E. lophogona. The latter species have long, leathery leaves and flower more freely than the former. Some varieties of these hybrids had stouter stems and thinner leaves; others had thinner stems and thicker leaves. Flower sizes increased and a range of shades, from white to pink to red, became available.

Not all hybrid crown of thorns plants enjoy the same growing conditions. Some of the hybrids prefer their soil consistently moist rather than cycling between bone dry and wet. More light is generally better for more flowers although some plants need long nights without any light at all for best flowering.

In a few weeks Bob is going to prune his plant so I’ll get a few cuttings to make plants of my own. The cuttings root in a month or two if their cut ends are dipped in cold water to prevent excess loss of the white sap, slid into a well drained mix, such as peat and perlite, and kept slightly moist.

Horticultural Evolution

So Bob has horticulturally evolved to lavish care on his one plant. He’s busy repotting it this time of year.

I’ve also horticulturally evolved. I would no longer begin a garden by turning over shovelful after shovelful of soil. Nowadays my method is to smother lawn grass beneath wetted paper topped with compost for planting areas and wood chips for paths, which avoids two problems with that first planting: having to wait a couple of weeks before planting, and then having to deal with the sea of quack grass and other weeds that result from turning over the soil.  More details on this in my book Weedless Gardening.

Peppers & Potting Soil

Concerned

You’d think that there’d be no reason for me to be concerned. After all, year after year I raise my own seedlings for the garden. Nonetheless, every day I take a look at the small tray of soil in which I had sowed eggplant and pepper seeds, waiting for little green sprouts to poke through the brown surface of the potting mix.

These plants are on a schedule. They get a start indoors — in a greenhouse now; under lights or in sunny windows in years past — so that they have enough time to start ripening their fruits by midsummer.

Italian Sweet peppers

Italian Sweet peppers

Even an early-ripening pepper wouldn’t ripen its first fruits before October if seeds were sown directly in the garden once the soil had warmed enough for germination, which isn’t until the end of May around here.

Ingredients for Good Transplants

Not that raising transplants for the garden is difficult. All that’s needed is attention to details, the first of which is using seed that is not too old. The dry tan pepper and eggplant seeds might not look alive, but they are. And they do age. Under good storage condition — cool and dry — pepper seeds retain good viability for only a couple of years, eggplant seeds for 4 years.

Next in importance is the container and potting mix. Old yogurt containers, egg cartons — people have come up with all sorts of containers for growing transplants. They’re all fine as long as they’re at least an inch and a half deep and have holes in their bottoms to let excess water drain out.

Garden soil, even good garden soil, is not suitable for containers. It stays too wet, suffocating roots. So all potting mixes contain aggregates, such as sand, perlite, vermiculite, or calcined clay (a.k.a. kitty litter), which are large mineral particles that make room for air in the mix. Mixes also contain some organic material, such as compost, peat moss, or coir (made from coconut waste), to help them retain moisture.

You can purchase potting mixes made with or without real soil in them, and either sterilized or not. Sterilization kills potential pests that might lurk in the raw ingredients. Not sterilizing keeps living things, including potential enemies of any potential pests, alive in the mix. I make my own mix, usually unsterilized, from equal parts compost, garden soil, peat moss, and perlite.

With seeds sown and then covered with about a half inch of potting mix, the container is gently watered, then covered to keep in moisture.

Warmth is the next ingredient for good germination. Seeds need more warmth to sprout than than a seedling needs for good growth. In the case of pepper and eggplant seeds, between 70 and 80° F. is ideal for sprouting. The top of a refrigerator might provide a warm home for the seeds to get started, as might a shelf above a radiator. I use a soil heating mat.

The last ingredient in raising seedlings is the most difficult one for me to provide, at least with pepper and eggplant seeds. Patience. Even under good conditions, these seeds might take a week or two to sprout. All I need, then, is to be rational. I sowed the seed on March 5th; I provided good conditions. As I write this, it is March 12th. One week, a not unreasonable time for the seeds not to yet show signs of life.

Not to Worry

Growing transplants is generally easy. Although I’m a little concerned until pepper and eggplant sprouts emerge, I’m more laid back with pretty much all other seedlings. Tomatoes, for example, are among the quickest and easiest to grow, and, because of the wide choice of varieties when growing your own transplants, very satisfying.

Once the peppers and eggplants sprout, they, like other sprouts, need to be moved to where they are bathed in light. Along with light, slightly cooler temperatures from then on make for sturdy, healthy growth. And then, towards the end of May, out to the garden they go.

Update: March 17th. I was about to re-sow the pepper seeds. But first I checked the ones sowed March 5th. They sprouted!Pepper seeds sprouting

Warm, Spring Weather is Coming

Poppies in Snow

Snow today (March 7) — a perfect time to plant seeds outdoors. Yes, really!
Obviously, not just any seed can be sown in snow. The ground is still frozen solid so I can’t easily cover seeds with soil. And cold temperatures are going to rot most seeds before the weather warms enough for them to germinate and grow.

I’m planting poppy seeds. It does seem harsh to sow a flower whose seeds are hardly finer than dust and whose petals are as delicate as fairy shawls. But early sowing is a must, because poppy seedlings thrive during the cool, moist weather of early spring. Covering the seeds with soil? No problem: Poppy seeds sprout best left uncovered. And because poppies don’t transplant well, their seeds are best sown right where the flowers are going to grow.

I’ll be sowing annual poppies, whose petals and leaves are more delicate than those of Oriental poppies. Corn poppy (Papaver rhoeas) once dotted the grain fields of Europe with its blood red flowers.

corn poppy

Corn poppy

Corn poppies and pear trees

These flowers were immortalized in the poem Flander’s Fields, symbolizing lives lost in World War I. On Memorial and Veteran’s Day, red tissue-paper “corn poppies” are still distributed in memory of wars’ victims. Shirley poppy is a kind of corn poppy that has white lines along the edges of its petals. Corn and Shirley poppies begin blooming shortly after spring-flowering bulbs have finished their show, and continue blooming through July.

California poppy (Eschscholtzis californica) was named in honor of Dr. Eschscholtz, a Russian ship surgeon who found these bright orange flowers blanketing California hillsides. California poppy is a perennial but in our harsh winters must me treated like an annual and sown yearly.

Each winter, it doesn’t seem possible that the dust-like seeds I sprinkle atop the ground’s chilly, white blanket could ever amount to anything. Each spring, I’m amazed to see myriad of ferny poppy leaves, then flowers.

Warmer Spring in Greenhouse

The sun is getting brighter in the sky day by day so it’s mostly lack of heat that’s holding back plant growth. Outdoors, there’s not much to do about a lack of heat. In the greenhouse, it’s time to turn up the thermostat a bit.

Thus far, I’ve let greenhouse temperatures drop no lower than about 38 degrees F. During bright, sunny days, of course, temperatures push up into the 80s. Seedlings in greenhouse
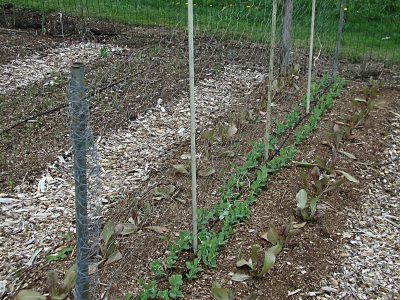
An exhaust fan keeps temperatures from getting too high, which, with lows in the 30s, would wreak havoc with plant growth, at the very least causing lettuce, mustard, and arugula to go to seed and lose quality too soon.

Adding just a few degrees at the bottom end of the temperature scale will spur growth in the newly sprouting lettuce, arugula, onion, and leek seedlings. This new minimum temperature of 43 degrees Fahrenheit strikes a congenial balance between plant growth and the cost and conservation of energy, propane in this case.

Bottom Heat for Seedlings

I’m not skimping on heat when it comes to germinating seeds. Seeds require more heat to sprout than seedlings need to grow. Too little heat and seeds either rot or sprout too slowly.Heating mat
Fortunately, seeds need little or, in some cases, no light to sprout. Some people use the warmth atop their refrigerator for seed germination; the top of my refrigerator isn’t warm at all. Some people germinate their seeds at a warm spot in their house, such as near a heating duct; my home, heated mostly with wood, has no such oases. The temperatures near the wood stove swing over too wide a temperature range for good germination.

Years ago I invested in a thermostatically controlled heating mat, made especially for gardening. The mat is in the greenhouse, so even if greenhouse temperatures drop to 43 degrees F., my seed flats sit with their bottoms soaking up 75 degree warmth from the mat below.

That’s how much warmth is needed to get the pepper and eggplant seeds I sowed this week to sprout.

Make your own pear tree; a workshop

New Book by Lee!

A Book Is Born

            Finally, after all the hard work, I have in hand the first copies of my new book The Ever Curious Gardener: Using a Little Natural Science for a Much Better Garden. The Ever Curious Gardener
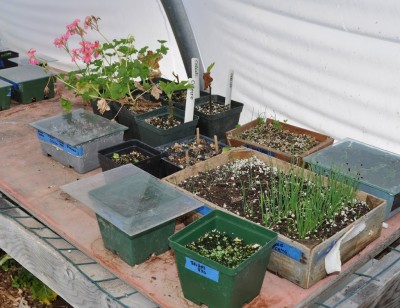
This book grew out of my long love affair with gardening—such a congenial confluence of colors, flavors, and aromas all seasoned with the weather, whatever pests happen to stop by that year—and the science behind it all!

            And the science behind it all is what this book is about. No, it’s not a comprehensive overview of botany and related sciences. It is some of the natural science that can be applied in the garden. Science may seem out of place in so bucolic an activity as gardening. After millions of years of evolution, seeds want to sprout, and plants want to grow, even in such diverse soils and climates as the Arctic tundra, the Arizona desert, and my garden in New York’s Hudson Valley. So it’s possible to have a decent garden with minimal effort or know-how.

            But with some understanding of what’s going on behind the scenes, and application of that understanding, gardening can be something more than this business as usual, with commensurately more rewards.

In The Beginning . . .

            The beginnings for this book came to me one day as I was piling recently scythed hay and horse manure, along with old vegetable plants and sprinklings of soil and dolomitic limestone, into one of my compost bins. I realized that what I was adding to the pile and how much of each ingredient, even how I fluffed them up or patted them down with my pitchfork, and then watered, all reflected what I had learned over decades of gardening. My classrooms have included actual classrooms; gleanings from magazines, books, and scientific journals; conversations with other gardeners and agricultural scientists; and (most importantly) the garden itself.

            My garden education has been unusual. Growing up in the suburbs, the tenure of our family’s small vegetable garden was soon eclipsed by a swing set.Lee, 1955, in garden Wait! How about that potted banana tree and one hyacinth bulb that I nurtured under the purple glow of a Growlite in the basement during high school? Or the potted cactus that I bought to adorn my bedroom windowsill in graduate school. Hints of future interest? Perhaps.

            Graduate study in those cactus days was in chemistry, a continuation of an interest kindled by my high school chemistry teacher. But coming to the conclusion that graduate study in quantum chemistry was not going to answer any fundamental questions, I dropped out, moved to Vermont, and got the gardening bug. Because I was living in a third floor apartment, I expressed that gardening bug with a voracious appetite for books—books about gardening.

            A year later, I dove into agriculture in earnest, and was fortunate to land in a graduate program in soil science. My interest and education in chemistry proved a good foundation for soil science.

            A small plot of land began my education “in the field” and complemented my academic studies. Lee, 1974, in garden
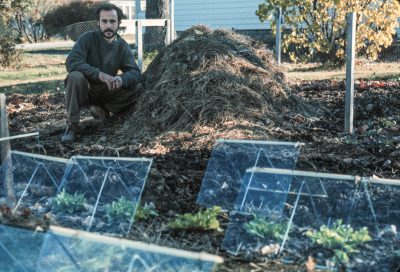
The university’s agricultural library offered more books to further round out my education. (I remember coming across a whole book on lettuce seed!)

            Eight years later, with two framed diplomas to hang on my wall, one for a master’s degree in soil science, and the other for a doctorate degree in horticulture, I was still gardening with the same exuberance and learning about gardening through experience, the printed word, and contact with others “in the know.” Thinking back, how little I knew about gardening. And so it goes.Lee, 2014, in garden

A Little Natural Science for a Lot Better Garden

            Back to my compost pile… I took into account the meadow hay’s youthful lushness, which influences its ratio of carbon to nitrogen, as I layered it into the bin along with the horse manure. Manure is usually thought of as a high nitrogen material, but I looked at what was in the cart and, eyeing the amount and kind of bedding (wood shavings) with which it was mixed, made a rough estimate in my head of how much to use to make a good balance with the meadow plants. When the pile was finished, I checked my work by monitoring the temperature of the pile’s interior with a long-stemmed compost thermometer. Etc., etc. There’s art in making compost. But also science.

            With this book, I hope to show how knowing and using a little of the natural science behind what’s happening out in the garden can make for a lot better garden in terms of productivity, beauty, plant health, sustainability… and interest. Knowing some of the underlying science at work in the garden also makes for a more resilient gardener, better able to garden at a new location or in a changing environment.

The Ever Curious Gardener is available in bookstores and online in mid-April, 2018, or now, signed from me, at https://leereich.com/books/the-ever-curious-gardener-using-a-little-natural-science-for-a-much-better-garden.