The End

Snow Day

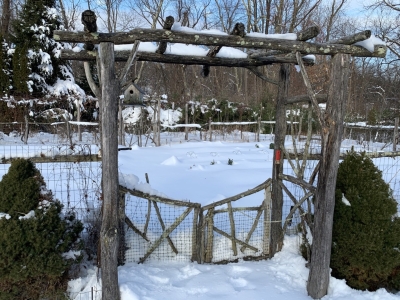
On December 2nd, my gardening season officially ended. It was brought to a screeching halt as a foot of heavy, white powder descended to democratically blanket my meadow, my vegetable beds, my terraces, and my deck.
Snow in garden, Dec. 4
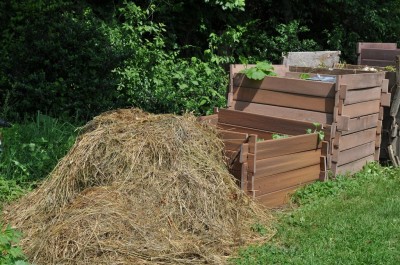
I have to admit that it was welcome as I had spent the previous few weeks furiously getting ready for the end. Compost now covers most of the vegetable beds. Wood chips and neighbors’ raked leaves lie thickly beneath berry bushes and recently planted Korean pine (for nuts), chestnut, and pear trees.

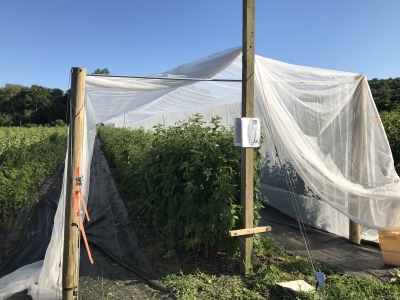
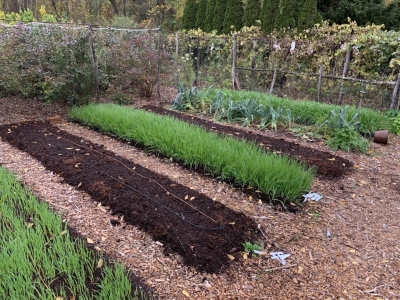
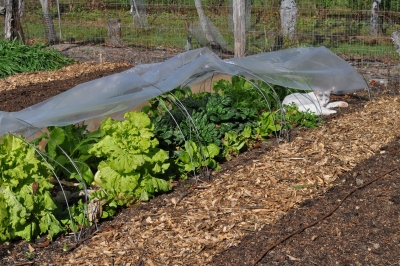
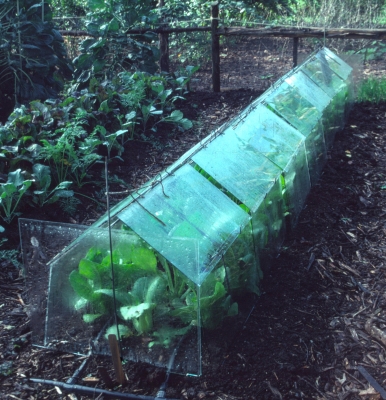
Left in place, the one tunnel protecting a bed in the vegetable garden would have been collapsed by a heavy snow; I dismantled it. This tunnel consisted of metal hoops, 4 feet apart, each 5 feet long with either end pushed into the ground at each edge of the bed. The row of hoops was covered with vented, clear plastic and then, for added cold protection, a layer of “row cover” (a diaphanous fabric that lets air, water, and some light penetrate while affording a few additional degrees of cold protection).
Clear plastic tunnel
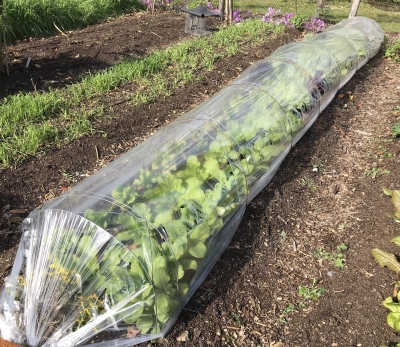
I secured the clear plastic and the row cover layers by “planting” another metal hoop over them, right where the first hoops were”planted.” This setup makes it easy to slide the layers up and down, as needed, to reach in for harvest.
Tunnel and cat
After dismantling the hoops and coverings, I picked over what remained. Cold  had turned the few heads of lettuce left in the tunnel to mush. Surprisingly, a few small heads of pac choi (the varieties Joi Choi and Prize Choi) and large heads of napa type Chinese cabbage (the variety Blues) were in pretty much perfect condition.
Chinese cabbage, harvested from tunnel
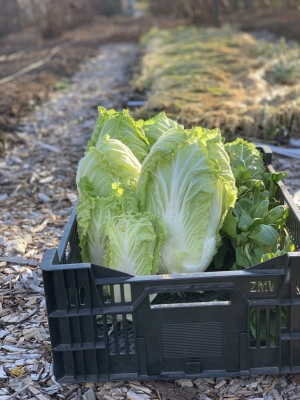
My surprise came about because I had checked my minimum-maximum thermometer which registered the minimum temperature this fall as having dipped as low as 11° Fahrenheit. That’s very good protection from a thin layer of clear plastic topped by a layer of row cover — coupled with what are evidently quite cold-hardy varieties of Chinese cabbage.

Cloche History

Cold protection has come a long way since I started gardening. Over the years, cold protection devices, commercial and home-made, have undergone various incarnations in my gardens. Early on, with a bow to traditional cloches, I cut bottoms off gallon glass jugs for mini-greenhouses over individual or groups of very small plants.

(Cloche, pronounced klōsh, is the French word for “bell.” The original cloches were large bell-shaped jars that 19th-century French market gardeners placed over plants in spring and fall to act as portable miniature greenhouses. At one time, these glass jars covered acres of fields outside Paris that supplied out-of-season vegetables to the city’s households and restaurants.)

The classic glass bell jars are still available but have some significant limitations. Because they’re made from heavy glass and are small, the air trapped within can quickly get too hot on sunny days, cooking plants. And close attention needs to be paid to ventilation. A professional gardening friend, trained many years in France, tells of trudging out to cloche-covered fields on bright, frosty mornings to slide a block of wood under one side of each cloche to vent it during sunny days. In late afternoon he’d walk the field kicking out the blocks, setting each cloche flat on the ground to seal the warm air in for the night.

Although modern versions of these individual cloches are not as elegant as the traditional glass bell jars, some offer the same or a better degree of frost protection, are made of lightweight materials, are easier to vent, and are more convenient to store.

Modern variations on the cloche include: Clear umbrellas, which fold and unfold for easy storage, with spike handles that hold them in place; lightweight, durable, and inexpensive plastic versions of the traditional glass jar cloche; plastic milk jugs with the bottoms cut and vented by opening the lid; waxed-paper Hot Kaps. These vary in the degree of cold protection they offer as well as the size of the area they protect.

Tunnel type cloches protect whole rows or beds of plants. My original tunnel cloches were ersatz, British-made Chase cloches, which cleverly held glass panes into a ventable barn shape. Placed end to end, they created a tunnel, mini-greenhouse. I originally made my own from straightened coat hangar wire, then got hold of the real thing.

Chase cloches

Chase cloches

Problem was, I discovered, that they work best in climates where temperatures are moderated, such as in northern Europe or near large bodies of water. (Anybody in those locations want some Chase cloche wires?)

So I graduated to the much more effective but much less attractive tunnel cloches, or “tunnels,” I described above.

SEEKING TRUTHS

(The following is adapted from my most recent book, The Ever Curious Gardener: Using a Little Natural Science for a Much Better Garden, available from the usual outlets or, signed, from here.)

OBSERVE AND ASK

Charles Darwin did some of his best work lying on his belly in a grassy meadow. Not daydreaming, but closely observing the lives and work of earthworms, eventually leading to the publication of his final book, The Formation of Vegetable Mould through the Action of Worms. He calculated that these (to some humans) lowly creatures brought 18 tons of nutrient-rich castings to the surface per acre per year, in so doing tilling and aerating the soil while rendering the nutrients more accessible for plant use.
Darwin and worms
We gardeners can also take a more scientific perspective in our gardens without the need for digital readouts, flashing LEDs, spiraling coils of copper tubing, or other bells and whistles of modern science. What’s most needed is careful observation, an eye out for serendipity, and objectivity. 

Observation invites questions. How many tons of castings would Darwin’s earthworms have brought to the surface of the ground in a different soil? Or from soil beneath a forest of trees rather than a grassy meadow? 

And questions invite hypotheses, based on what was observed and what is known. Darwin’s prone observations, along with knowledge of soils, earthworms, plants, and climate, might invite a hypothesis such as “Earthworms would bring a greater amount of castings to the surface in a warmer climate.” Is this true? How can we find out? 

MAKE A HYPOTHESIS

Gardens are variable and complex ecosystems, which makes growing plants both interesting and, if you want to know why a plant did what it did, frustrating. Many gardeners do something — spraying compost tea on tomatoes to reduce disease, for example — and attribute whatever happens in the ensuing season to the compost tea, ignoring the something else, or combination of things, that might also have made contributions to whatever happened. 

Enter the scientific method, a way to test a hypothesis. You put together a hypothesis by drawing on what is known and what can be surmised. In spraying compost tea, your hypothesis, could be based perhaps on the idea that beneficial microbes in compost tea could could fight off pathogens, just as they do in the soil. (Many gardeners do, in fact, recommend compost tea for plant health. Do I? See https://leereich.com/2015/03/compost-tea-snake-oil-or-plant-elixir.html.)

Less disease on your sprayed plants would strengthen the case for further study. Why further study? Because the response of plants in a given season at a given location is not sufficient to make a general recommendation or make a theory. 

The way to truly assess the benefit of the spray is to subject it to scientific scrutiny: Come up with a hypothesis, such as “Compost tea reduces tomato leaf diseases,” and then design an experiment to accurately test the validity of the hypothesis. 

DESIGN AN EXPERIMENT

A well-designed experiment would need more than just one treated (compost tea sprayed) plant and one control (water sprayed) plant. Grow ten tomato plants of the same variety under the same conditions and some will grow a little more than the others, some a little less. With too few test plants, natural variation in growth from plant to plant might overwhelm any variation due to a treatment (spraying with the tea in this example). Given enough plants to even out the natural variations in, say, disease incidence, the effects of a treatment can be parsed out. Greater natural variations would require more plants for the test. 
Variability in plant populations
A garden experiment might have additional sources of variation. Perhaps one side of your garden is more windy, or the soil is slightly different, or basks plants in a bit more sunlight than the other side. Rather than have all the treated plants cozied together growing better or worse because of this added effect, even out these effects by randomizing the locations of treated and control plants. 
Experimental design
Now we’ve got an experiment! All that’s needed is to spray designated plants with either the compost tea or the water, and then take measurements. Plug those measurements into a software program for statistical analysis and a computer will spew out a percent probability, based on variability within and between each group of plants, that the tea was responsible for less disease. A test with 90% or 95% probability is usually considered sufficient to link cause and effect. You can then answer “yea” or “nay” to the hypothesized question; you now have a theory, or not. 

IS IT SIGNIFICANT?

A good test could involve a lot of plants and a lot of measurements, more than most of us gardeners are willing to endure. A danger exists, as Charles Dudley Warner so aptly put it in his 1870 book, My Summer in a Garden: “I have seen gardens which were all experiment, given over to every new thing, and which produced little or nothing to the owners, except the pleasure of expectation.” Then again, setting up something less than a full-blown experiment could be fun and, while not proving something to a 95% confidence level, still suggest a possible benefit. 

Knowing what’s involved in testing a hypothesis also increases appreciation for all that can affect plants. Perhaps your tomato plants’ vibrant health wasn’t from your compost spray. Knowing something of the scientific method can help you assess, whether observed in your own garden or a friend’s garden, or reported in a scientific journal, the benefit of the spray. 

So go out to your garden and look more deeply into Nature, perhaps, like Darwin, lying on your belly. Understanding some of the science at play in the garden takes it to the next level. And you’ll find that the real world, neatly woven together, is imbued with its own poetry, with science being one window into that poetry.

Me mulching, even as a beginning gardener

Me mulching, even as a beginning gardener

FRUITS OF ISRAEL

Olives Galore

Now I feel foolish buying olives. I recently returned from visiting Israel where there were olive trees everywhere. Irrigated plots of greenery thrived in the broad expanses of the otherwise grays and browns of the desert. Trees popped up here and there in backyards and front yards of homes in streets lined with apartment buildings as well as along cobblestone streets in rural areas. Trees were even prominent in city parks, either as self-sown wildings in less tended areas or as formal plantings.
Woman harvesting olives in Jerusalem park
And oodles of ripe or ripening olives were clinging to branches or littering the ground. Need some hand lotion? Just pluck a ripe olive, squeeze it gently, and spread out the fresh oil that drips onto your hand. 

Want some olives for eating? Not so fast. Fresh-picked ripe or green olives are extremely bitter (due to oleuropein). That bitterness is removed with brine, multiple changes of water or lye solution followed by fermentation. My favorite olives are “naturally, sun-cured,” which, I imagine, means left hanging on the tree a long, long time. The dried, ripe olives I found still-clinging to branches tasted awful!
Green olive fruits
I was tempted to harvest some olives to bring home. A few other people had similar ideas, as evidenced by one woman on a ladder in a park in Jerusalem. Of course, these people were only miles or less from home; I was 5,000 plus miles from home. I let the olives be.

I actually grow olives here in the Hudson Valley, in a large container that spends summers outdoors basking in sunlight and winters in my cold basement near a large window. I should say that I grow an olive tree, rather than olives. My maximum harvest has been a half-dozen olives — which I did let hang for a long, long time, at which point they tasted delicious.
My potted olive treeMy olive harest-3 fruits
Olive fruits are borne on one-year-old shoots. This year, before moving my tree to the basement, I pruned more severely than usual. That should stimulate more one-year-old shoots this spring, to, I hope, yield more fruit.

——————————————

Another of my favorite Mediterranean fruits also growing in abundance in as many guises as olive in Israel was pomegranate. Unfortunately, I just missed the harvest of this fruit. All that remained on wild plants were a few red arils still clinging to darkened portions of skins.  Fruits must have been ripe somewhere because ripe fruits and fresh squeezed juice were available in markets and and street carts everywhere. 
Pomegranate espalier, IsraelPomegranate display, Israel
I, of course, also grow pomegranate, similarly to olive except that, being deciduous, this plant does not need light in winter. It spends those months in a dark, walk-in cooler. 

Sad to admit, my yields of pomegranate fruits have been even less than my yields of olive. As in zip, zilch, zero. The plants flower every spring and with a small brush I’ve transferred pollen from the anthers of male blossoms to the stigmas of female blossoms. (Plants each have separate male and female blossoms.) Bases of female blossoms begin to swell hopefully. Then they drop.

Every year I threaten my plant with a walk to the compost pile — to no avail.

——————————————

The third plant of the triumvirate of my favorite Mediterranean fruits is, of course, figs, which I saw in abundance in Israel mostly in wild settings. The plants lacked fruit, except for a few with small, green figlets that will either drop or ripen next spring. Fig is rather unique in its fruiting habit, able to bear fruit on one-year-old wood as well as on new, growing shoots, and the latter crop just keeps forming and ripening as long as growing conditions are to its liking.
Wild olive tree in Israel
One old tree growing in a courtyard in charming town of Sfad was hosting an old friend  — or, rather, enemy — of mine, fig scale insects. I’ve battled it one my greenhouse figs.

Figs were available in the markets but I was reluctant to even try them knowing that figs must be dead ripe to taste good. At that, stage they can hardly be transported more than arm’s length from hand to mouth.
Figs for sale, Israel
Figs are one Mediterranean fruit that I grow with great success, both in my greenhouse (minimum winter temperature 37°F) and, wintering in my walk-in cooler and summering outdoors, in pots like my pomegranate. Figs are generally easy to grow because of their unique bearing habit, their lack of need for pollination, and their general tolerance for abuse.

My last day I broke down and, against my better judgement, bought some figs. Mine are better.
Me eating one of my figs

MORE AUTUMNAL NEATENING

An Upbeat Closing

I don’t know about you all, but I have a great urge to tidy up my garden this time of year. Partly it’s because doing so leaves one less thing to do in spring and partly because, as Charles Dudley Warner wrote in My Summer in the Garden in 1889, “the closing scenes need not be funereal.” All this tidying up is usually quite enjoyable.
Pulling creeping charlie
Moist soil – and not too, too many weeds – make weeding fun. Creeping Charlie (also know as gill-over-the-ground) has sneaked into some flower beds. Its creeping stems are not yet well-rooted so one tug with a gloved hand and a bunch of escaping stems slithers back from its travels forward from beneath and among flower plants and shrubs. What remains are occasional tufts of grassy plants, especially crabgrass, easily wrenched out of the ground or coaxed out with my Hori-Hori garden knife.

This tidying is intimate work: me, the soil, weeds, and garden plants at close range. While I’m down there on hands and knees, I’ll also cut back some old stalks of perennial flowers. When everything is cleaned up, I’m going to spread a blanket of chipped wood (free, a “waste” product from arborists) over all bare ground.

The one thing not to do this time of year, as far as tidying up, is pruning. Better to prune after the coldest part of winter is over and closer to when plants can heal wounds.

A Real Crocus, Now

A few weeks ago, I, along with anyone visiting my garden, was wowed by autumn crocuses then in bloom. As I pointed out, they weren’t not true crocuses (they were Colchicum species), they just acted like crocuses – on steroids. Then, a couple of weeks later, I noticed that my true autumn crocuses (that is, the ones that are true Crocus species) were in bloom.
autumn crocus
And I did really have to stop and notice them after that most flamboyant show of fake autumn crocuses. These true crocuses (crocii?) are dainty plants, just like spring crocuses, and their colors are subdued: some are pale violet and some are white. In contrast to the fake autumn crocuses, which multiplied like gangbusters, the real autumn crocuses look about dense as when I planted them. Both kinds of crocuses wait until spring to show their leaves.

It’s fortunate that the part of my garden that’s home to autumn crocuses, real and fake — the mulched area beneath the dwarf apple trees — is free of weeds. Otherwise, the real autumn crocuses, being so dainty and lacking a supporting role of leaves, would be swallowed up, visually or for real.

Weed? Perhaps.

Back to weeds . . . I’m trying to see the positive side of all that creeping Charlie I’ve been pulling. Bits of it that have insinuated themselves in amongst the bases of stems of woody shrubs, especially thorny ones like the Frau Dagmar Hastrup rose, are not that much fun to weed out. So what’s good about creeping Charlie?
creeping charlie
For one thing, with shiny, round leaves of a deep, forest green color, it’s not a bad looking weed. The flowers are an attractive, purple color although neither big nor prominent enough to make a statement. The otherwise excellent reference book Weeds of the Northeast (Cornell University Press) erroneously states that “the foliage emits a strong mint-like odor when bruised.” That would be nice except that I’ve never noticed that odor and didn’t even when I just ran outside to crush some leaves check up on this statement.

Creeping Charlie grows well in sun or shade, so well that when I worked in agricultural research for Cornell University, I considered the plant as a possible groundcover to replace the relatively sterile herbicide strips in apple orchards. It grows as such beneath my dwarf pear trees.

Creeping Charlie beneath trees

Creeping Charlie beneath my pear trees

The plant could even be a somewhat ornamental groundcover, making up for any lack of great beauty with its capability to rapid fill in an area and grow only a couple of inches high. You couldn’t ask much more from a plant – except to keep out of some of my flower beds.

A MONTH OF RECOGNITION

Good in the Lab

National Fruit Fly Month — October — has drawn to a close. (That designation is my own, not the federal government’s.) Sure, a few still flit about here and there. But no longer do clouds of them hover over bowls of fruit in my kitchen. In case you haven’t experienced them, fruit flies, Drosophila species, are cute little (about 1/8 inch long) flies that feast on overripe and damaged fruit as well as other plant material.
Fruit fly
I, and perhaps you, were first introduced to fruit flies in middle school biology, raising them on some mix of banana and agar-agar. In those days, I got more intimate with them as part of a science project: My project was to test whether x-rays cause mutations. My dentist agreed to help. After raising a batch of flies, I went to his office and laid a vial of them on the dental chair whereupon Dr. Golden zapped them with a beam of x-rays. After the buggers and a similar vial of non-irradiated buggers had reproduced, I examined the offspring, especially their eyes and their wings. My experiment “proved” x-rays benign (as least as far as could be detected morphologically by a 13-year-old).

Fruit flies’ fecundity is what has earned them prominent positions in science. An adult lives for only about a month but during that tenure she may lay as many as 500 eggs. The courtship ritual of those little guys and gals is intricate, involving a kind of dance along with some instrumentation, provided by sounds from leg tapping, and some singing. Each gal gets involved with a number of guys.

Fun fact: Despite the small size of fruit flies, they have the longest sperm cells of any known organism — over 2 inches long for D. bifurca. Most of that length is the sperm’s tail. During mating, those tails are wound up in tightly tangled coils.

Not So Good in the Kitchen

Fruit flies are very interesting and useful in the lab but not in the kitchen. The flies lay eggs on the surfaces of fruits and vegetables. The eggs hatch into larvae which feed, in time turning the fruits and vegetables into a slimy mush. After molting twice, they morph into adults, who flit away to generate more offspring.

Growing up, I only knew fruit flies from the lab, never my mother’s kitchen. Why do they invade my kitchen? One possibility could be the smorgasbord my garden provides, more than ever spread on counters of that kitchen of yore. Also, refrigeration drastically slows the flies’ development but also can suppress or ruin flavors (tomatoes, for example) or speed wilting (lettuce, for example); I only refrigerate for longer term storage, not usually for fresh eating.

And being home grown, my fruits and vegetables need not aspire to the same cosmetic standards as commercial fruits and vegetables. Small wounds that I ignore or cut away provide access to fruit fly activity.

Still, I can’t let the flies run amok. Fortunately, fruit flies are easy to trap. And one of their favored baits, vinegar, is readily available. (Fruit flies have also been called “vinegar flies.”) Just put out a glass of vinegar and you’ll soon see a crowd of fruit flies flocking to it. That, of course, doesn’t trap them.  Make that glass of vinegar into a trap by adding a little soap or detergent to the vinegar to decrease its surface tension so that, once in the drink, the fly can’t fly out.

Various kinds of vinegars are effective. Some people recommend apple cider vinegar. Or apple cider vinegar with a slice of banana thrown in. My preference is for balsamic vinegar. A mix of sugar, yeast, and water also works.
Fruit fly trap
Look on the web and you’ll see all sorts of more intricate — but none very intricate — traps for fruit flies. My method is to take a plastic carryout container with a lid, punch or drill a 1/8” wide hole in the lid, pour some balsamic vinegar into the container, then replace the lid.

A more Frightening Relative

Spotted wing drosophila

Spotted wing drosophila

October isn’t the only month of prominence for fruit flies. They are out there whenever the weather is congenial and food is available. One of them, spotted wing drosophila (SWD) is fairly unique in that this species need not wait for a fruit to be overripe, damaged, or nearly rotting to attack. It threatens intact, even underripe, fruit such as raspberries, blueberries, and other fruits of summer.

SWD is a relatively recent arrival on the garden scene (2008 in California, 2013 in my garden). At first it seemed that was going to be the end of blueberries, my favorite fruit. Over the years, I’ve been able to mitigate damage. Early on, I tried sprays of Entrust and Neem, as per recommendations. But even though organically approved, for me these sprays take some of the enjoyment out of growing and eating the berries. Fine mesh covering over a whole planting has also been tried (effective, but not tried by me).
Netting for SWD
This year, and for the past few years, my blueberry planting has yielded its usual, good harvests utilizing a multi-pronged approach. For starters, I grow a dozen or so varieties that extend the season from late June until early September. SWD, here, at least, is inconsequential until early August, by which time our bellies and the freezer are almost full of berries.

In the latter part of July, I hang out traps, one per bush, that I’m helping test for Cornell’s Peter Jentsch. They are baited with raspberry essence laced with boric acid, which needs to be renewed by weekly spraying (of the trap, not the plants). After 3 years of testing, the traps seem to be effective. 
SWD bait and kill trap
During summer, there’s always a bowl of freshly picked berries on the kitchen counter; by early August, fresh picked fruit goes into the refrigerator or, if the freezer’s quota still not yet filled, also into the freezer. Any larvae within fruit are killed after 3 days of refrigeration.
Bowl of blueberrires
Fruit flies and even SWD, despite their fecundity, aren’t about to take over the world. These pests have their pests, which include yellow jackets, ant, various other kinds of flies, and even smaller creatures, such as nematodes. Quoting Jonathan Swift, “. . . a flea, Hath smaller fleas that on him prey; And these have smaller fleas to bite ‘em, and so proceed ad infinitum.”

YOGI WAS RIGHT

To Do List

“It ain’t over ’til it’s over” said Yogi Berra, and so says I. Yes, the outdoor gardening season is drawing to a close around here, but I have a checklist (in my head) of things to do before finally closing the figurative and literal garden gate.

Trees, shrubs, and woody vines can be planted as long as the ground remains unfrozen. To whit, I lifted a few Belaruskaja black currant bushes from my nursery row and replanted them in the partial shade between pawpaw trees. A Wapanauka grape vine, also in the nursery row, is now where the Dutchess grape — berries too small and with ho-hum flavor — grew a couple of months ago. And today a couple of black tupelos are moving out from the nursery row to the edge of the woods, where their crimson leaves, the first to turn color, can welcome in autumn each year.

Kale, lettuce, endive, turnips, radishes, leeks, and celery still grow in the vegetable garden, but many beds are vacated for the season. Any remaining old plants will become food for the compost pile and the cleared off beds will then get a one-inch dressing of crumbly, brown compost from a pile put together last year.
Clearing bed of all weeds and plants in preparation for its layer of compost.
Freezing weather would burst the filter, pressure regulator, and timer for the drip irrigation system, so these components have been brought indoors. The rest of the system stays in place.

The drip system may now be out of commission but some watering may be needed. Occasional days with bright sunlight and warm mean hand watering. How primitive!

Planning Ahead, Soil-wise

Making compost for use next year, same time, same place, is also on my checklist. Especially today, so the compost creatures within the pile can take advantage of lingering warmth in the air to work overtime. A pile that gets hot cooks to death most weed seeds and pests that hitchhike into the pile on what I throw in. And I throw in everything, in spite of admonitions from “experts” to keep diseased or insect-ridden leaves, stems, or fruits out of compost piles.

So today, after loading horse manure, with wood shavings bedding, into my truck pitchforkful by pitchforkful, I drove home and unloaded everything pitchforkful by pitchforkful into my compost bins. Each bin got a lot more than a restricted diet of just the horse manure mix, though. I alternated layers of manure with mowings scythed from my small hayfield, wetting down each layer well and sprinkling occasional layers with soil, for bulk, and ground limestone, to counteract soil acidity.
Compost bins
Manure is not a necessity for good compost. The manure mostly is for nitrogen, one of the two main foods of compost microorganisms. Some of my piles get that nitrogen from soybean meal, an animal feed usually meant for creatures that you don’t need a microscope to see. Early in the season, young grasses and weeds, which are high in nitrogen, do the same. And truth be told, any pile of plant material, if left long enough, will turn to compost. The nitrogen helps the material chug along faster on its way to compost, and the faster the microbes work, the hotter it gets.

Winter Work for Microbes

I’ll be feeding my last compost pile of the season all winter long. Just a little at a time, mostly scraps and vegetable trimmings from the kitchen with occasional toppings of leftover hay. Adding stuff slowly to a compost pile doesn’t let enough critical mass build up for heat, and especially not in winter’s cold.
Dog and chickens on compost pile
No matter. I just let piles that don’t heat up sit longer before I use them. It’s the combination of time and temperature that does in all the bad guys that hitchhike into my compost piles. So 1 hour at 140° F. might have the same deadly effect as a week at 115° F. My hot piles sit for a year before I use them; the cold piles cook longer. It ain’t over ‘til it’s over.

TASTING AND TIDYING, OR NOT

Fruit Heaven

Hudson's Golden Gem apple

Hudson’s Golden Gem apple

I remember a few years ago of having a most fruitful — and I mean this very literally — experience visiting one of the USDA’s germplasm repositories. “Germplasm repository” doesn’t sound like the kind of place anyone would want to be, but these USDA repositories are, in fact, sunny, colorful places, often redolent with enticing aromas. In the case of the one I visited, the aroma was of ripening apples.

Germplasm is the stuff that gives rise to an organism, and the USDA has set up repositories around the country to house various kinds of plants. Each repository is situated where a particular group of plants grows well. So Davis, California is home to the repository for figs, pomegranates, and Asian persimmons; Corvallis, Oregon is the repository for pears, gooseberries, and mint; and Geneva, New York, where I visited, houses the collections of apples and American-type grapes. (My own gooseberry collection helped build the gooseberry collection at Corvallis about 30 years ago.)

Taking into account seed collections and other, related work, these repositories maintain over 20,000 accessions of plants representing over 300 species. Germplasm from these collections is available to scientist and other interested citizens, which is how I obtained grafting wood to make most of the rare varieties of apples and pears that I grow.

So there I was — a fruitophile — standing with clipboard in hand and camera in pocket in in a field of apple trees, each one a different variety. My mission: Photograph and collect 3 to 4 samples of a couple of dozen varieties. What sweet labor! (I had previously contacted the repository staff and received permission).

Up and down the rows I went, photographing, collecting, and, of course, tasting. Apples have been cultivated for so long and are so popular a fruit that it’s no wonder that such great variation exists in the fruits’ appearances and flavors. Flavors include anise-flavored Ellison’s Orange, sweet Mollie’s Delicious, spicy-tart Cox’s Orange Pippin, and everything in between and beyond. The range in color goes from gray-brown Pomme Grise to cheery red-splashed yellow King of the Pippin. And then there are variations in fruit size and shape and, less obvious, characteristics such as pest resistance, productivity, and cold tolerance.

Ashmead's Kernel apple

Ashmead’s Kernel apple

Most important, to me, is flavor. I should have brought a palate cleanser because after a while all the varieties were beginning to taste like . . . well . . . apples. Nonetheless, two varieties that I did not grow did stand out for flavor; I ordered grafting wood of Hudson’s Golden Gem and Pitmaston Pineapple to graft onto trunks of my Ingrid Marie trees once I lop their tops off.

After the apples, there were grapes to photograph and sample.

Tidy Not

Boy, would I love to tidy things up with some pruning now. The Golden Celebration rose bush would look nicer in coming months with those couple of tall, gawky stems cut off or back.
Golden Celebration rose
Grape and hardy kiwi stems are reaching out all over the place, grabbing onto each other and anything else they can wrap around.
Kiwi vines
The pear trees have a nice spreading form — except for watersprouts shooting vigorously skyward from the uppersides of some of the spreading branches. How nice it would be to cut these plants back now rather than in spring.

But I’m going to restrain myself from doing any pruning. As stated in The Pruning Book (by me!), “Although immediate regrowth rarely occurs after late summer or autumn pruning, cells right at the cut are stirred into activity to close off the wound. Active cells are liable to be injured by cold weather, which is a reason to avoid pruning in late summer or autumn except in climates with mild winters or with plants that are very hardy to cold.”

Gooseberries and currants are super cold hardy plants and begin growth relatively early in spring. All of which makes a good case for pruning those plants now.

And a Case for Not Tidying

Rather than prune, a good place to re-channel that “tidy everything up” urge is in the vegetable and flower garden.

Cleaning up is one way to lessen pest problems next year. As I pulled out spent bush bean plants, I gingerly placed them into the garden cart and, from there, onto the compost pile, trying not to disturb the resident bean beetles. Those bean beetles had hoped to spend the winter on site, to emerge next spring and lay eggs on next year’s bean plants. I’m hoping to “cook” as many of them as possible in the compost pile.

Tomato plants are looking a bit ragged even though they’re still bearing some tomatoes for fresh eating. Gathering up all stems, leaves, and old fruits and composting them reduces the inoculum load of diseases such as early blight and septoria leaf spot. Left in place, they would spend winter out in the garden ready to infect next year’s plants. It’s not a question of eradication, which isn’t possible, but of balance.
Tidy vegetable garden beds
Cutting down old peony stems and composting them takes inoculum for next years botrytis disease off-site. Left to infect plants next spring, botrytis could keep peony flower buds from unraveling.

As Charles Dudley Warner wrote over a hundred years ago (in My Summer in the Garden, which I highly recommend and is much more than a gardening book), “the closing scenes are not necessarily funereal . . . a garden . . . goes into winter-quarters . . . neat and trim . . . so that its last days shall not present a scene of melancholy ruin and decay.”

Video of Lee on “Growing a Greener World”

https://www.growingagreenerworld.com/episode-1007-gardening-with-the-masters-growing-unusual-fruit-with-lee-reich/?fbclid=IwAR38OASi5mi1JaezpeQ9aImCByAIvnkTFfGSdL0Z7zQIcSkGOBE8OZg_VAA

Battle for Figs: Victory

Some History

I don’t know the score over the years, but this year’s victory is mine. The battles have been with scale insects, both armored scales and their cousins, mealybugs (but rarely both in the same year), on my greenhouse fig plants.
Eating a fig
Those fig plants are planted in the ground in a minimally heated greenhouse, where winter temperatures can sink to about 35°F. The oldest of these plants have trunks 8 inches in diameter. They thrived for years without any pest problems, scale of otherwise. A few years ago, the insects made their appearance, sometimes ruining almost the whole crop.
Mealybug
Over the years I fought them in various ways. One year it was spraying the dormant plants with alcohol. Another year it was, more aggressively, scrubbing trunks and stems of dormant plants with a toothbrush dipped in alcohol. Ants herd and protect scale insects, so another year I fenced the ants off the plants with a band of masking tape coated with forever (almost) sticky Tangletrap around the trunk of each plant.

An expensive but short-lived success was the two releases of the predatory ladybird beetle Cryptolaemus montrouzieri and the parasitoid wasp Anagyrus pseudococci.

Mealybug destroyer

Mealybug destroyer

These biocontrol helpers ended up valuing each fig at about a dollar, still worth it. I screened all openings in the greenhouse, hoping to perennialize them inside. (It was not effective.)

Battle Plan, Done

So this year I tried a multipronged approach.

The biggest change was, rather than growing the figs as bushy trees, training them as espaliers. Espalier is the training of plants to an orderly, usually two-dimensional form both for beauty and, in the case of fruit plants, for good production of high quality fruit. For my figs, an additional benefit would be that each plant would only have one point of contact — its trunk — with the ground. IA band of masking tape coated with Tangletrap would be a roadblock on the ant highway. (Plus the look of the plants always elicits a “Wow” from visitors.)
Rabbi Samuel fig, espaliered in greenhouse
The fig plant growing near the greenhouse endwall has a short trunk that, after rising to about 18 inches from ground level, bifurcates into two, self-supporting horizontal arms extending parallel to the wall in opposite directions. At the head of each of the south beds, a fig tree is planted each of whose trunk is terminated by just a single, self-supporting, horizontal arm reaching down the bed to the sidewall. With just a trunk and one or two arms, thoroughly scrubbing down the dormant plant with alcohol is a relatively quick job. Quick enough to prevent 2 or 3 scrubbing before plants resume growth in early spring from becoming tedious.

Another nice feature of this training system is that pruning the plants at the end of the season is a no-brainer. Vertical shoots that rise up from the horizontal arms are thinned to keep neighboring shoots 8 inches apart and helped along in their vertical growth by being trained to pieces of bamboo attached to the greenhouse roof. (Yes, an ant could walk up the wall and across the roof of the greenhouse and then down the bamboo to get at the plants but they are either not that smart or energetic; it hasn’t happened.)
San Piero fig
A little later in the early part of the greenhouse growing season I gave the plants some dowsings with neem oil. I’m not sure how effective the neem component is but “horticultural oil” itself is effective in fighting off scale insects.

A ring of cinnamon around the base of each plant provided further disincentive to the ants, who will not cross a cinnamon line. The cinnamon and the Tangletrap did need renewal once per season.

As new fig shoots soared skyward near the greenhouse roof, I used a pole pruner to prune out the top of the growing shoot. Side branches, of course, then grew, and I periodically had to to hack them back also.

Uh Oh, But All Still Good

Everything was copacetic and we were harvesting figs, which formed along the vertical stems at the juncture of almost every leaf. Then, in late August I noticed some mealybugs on one plant. Time for Cryptolaemus montrouzieri again. I released them in early September and we were back in business, harvesting large handfuls of three different varieties of delciously sweet figs — San Piero, Brown Turkey, and Rabbi Samuel — daily.

And then, just today, I noticed armored scales on the plants, and a few ants! I’m not sure how the ants are getting onto the plants, but one possible “benefit” of the armored scales is hardly any mealybugs. Perhaps they can’t coexist.
Fig scale
All the measures I took against mealybugs should also be effective against the armored scales, except for the Cryptolaemus montrouzieri. Their predator Aphytis melinus, also known as the Golden Chalcid, has been effective against armored scales.

I’m not taking action. With less sunlight and cooler temperatures the figs trees have slowed down, running out of new stems on which to hang fruit. No matter; it’s been a good season of fresh figs.

Colorful, Sometimes Tasty, Ground

Lurid Ground

Lurid, violet flowers have sprouted in the wood chip mulch beneath my row of dwarf pear trees. The flowers are autumn crocuses, the first part of the two-part flowery show that takes place each autumn in that piece of ground.
colchicum
The second part of that flowery show, soon to follow, will be autumn crocuses. “But,” you exclaim, “autumn crocuses were the first part of the show!” Let me explain.

This first show is from a flower called autumn crocus but which is botanically a Colchicum species. It’s not really a crocus, not even related. Colchicum flowers resemble true crocus flowers, on steroids. The second show will be from true crocuses (that is, Crocus species) that happen to bloom in autumn. The Crocus autumn crocuses are dainty and in colors like our spring crocuses.

What’s really unique about the colchicum flowers, and what makes them so striking, is that, first, they emerge from the soil this time of year, and second, that they do so without any leaves, making the contrast between the mulched ground and the flowers all the more dramatic. The color itself is dramatic, the row of bold-colored blossoms painting a wide swath along the ground.
Purple autumn crocuses, in a row
Cochicums, like every other plant, need to photosynthesize, and, like every other plant, need leaves to do so. Those leaves, which are wide, long, and fairly large, appear for awhile in spring and look nothing like true crocus leaves. Not only do the plants not need leaves in autumn, they also don’t need soil. Colchicum bulbs will sprout their lurid violet flowers even if just left sitting on a bench or table!

Green Tastes Good

Aside from spots of bright color, the dominant color in my garden is green. That verdure is especially evident in my vegetable garden, now in its autumn glory – lush and green – and becoming more so every day. I’ve been sowing and planting with almost the same fervor as in spring.

Bed of lettuce and chinese cabbage

Bed of lettuce and chinese cabbage

A few weeks ago I made my last planting of outdoor lettuce, using transplants that had been growing in seed flats for about a month. The varying textures and colors of the different varieties make a pretty tapestry on the ground, so pretty that it seems almost a shame to pick any of the tender, tasty heads and ruin the picture. I’m not sure how large they’ll grow before stopped or turned to mush by really cold weather. Protection beneath a tunnel of clear plastic with, later, an additional covering of some spun-bonded row cover material, should keep them and me happy into December.

Other beds display yet more shades of green with varying textures. There’s a bed of kale, which has been pumping out deep green leaves for good eating since spring. Another bed has endive – Broad-Leaved Batavian — planted close enough so neighboring plants push each other’s leaves over the loosely forming heads. Shaded from sunlight, those inner leaves become tender and sweet, livened up with just a hint of bitterness.

Green, Not for Eating

Lushest green of all beds in my garden are those that are sprouting oats. Yes, that’s the same oats that we (and horses) eat, except that I didn’t plant these oats for eating. I plant oats as so-called cover crops, which are plants grown to improve and protect the soil.

I can only eat just so much lettuce, endive, kale, and other greens. If I’ve filled this quota for planting and no longer have further use for every bed this season, I plant it with oats. September 30th is my deadline because after this date — here in the lower Hudson Valley, at least — days are too short and weather becomes too cold to expect much growth.
Oat cover crop
Oats, just one of a number of potential cover crops, thrive in the cool weather of autumn and early winter. Their roots, pushing through the soil, crumble it and latch onto nutrients that might otherwise wash down below the root zone. After the roots die, they enrich the soil with humus and leave behind channels through which air and water can move within the soil. Above ground, the stems and leaves protect the soil surface from being washed around by pounding raindrops.

Most of all, I like the look of that green carpet of grassy oat leaves. Both I and Mother Nature abhor bare ground, which becomes subject to wind and water erosion, and large swings in temperatures through the year.