HEATHERS & BARBERRIES & TICKS, OH NO!

An Evil Beauty

   Uh oh! I was pulling an odd weed here and there in my heath bed and came upon a seedling of Japanese barberry (Berberis thunburgii). Should I start checking myself for deer ticks? Are all the plants in the bed soon to expire?
    Japanese barberry is a commonly planted ornamental that was introduced into this country almost 150 years ago. For decades upon decades, it sedately graced landscapes with its boxwood-like leaves (but not evergreen), yellow flowers, and bright red berries, all set off against a backdrop of dark brown, thorny stems.

Barberry in woods

Barberry in woods

    For some reason, the plant began to spread about 35 years ago. Perhaps it was the increased planting of barberries around homes, along highways, and outside shopping malls. Those plants spawned yet more plants as birds ate the berries and spread the seeds. Perhaps it was the surge in deer populations, a response to the creep of suburbia as well as to the decreased number of humans willing to take to the woods, rifle in hand, to fell a deer. All the while that deer were munching away on our roses, rhododendrons, yews, and other landscape plants, they rarely browsed barberry.
    Okay, so more deer means more Lyme disease. Deer blood is what nourishes adult ticks and, as they feed, they reproduce and hitchhike across the landscape on their deer hosts.
    But the Lyme bacteria actually get into the ticks only after feeding on the blood of small rodents, such as white-footed mice, that are harboring the bacteria. Recent research in Connecticut has shown that barberry also creates a very nice, sheltered habitat for mice.
    To make matters worse, barberry also makes things homey for the deer ticks themselves, mostly by providing humidity. A forest with barberry growing in it hosted 120 Lyme-carrying ticks per acre; without barberry, a mere 10 per acre.

Earthworms, Friends No More?

    So much for the threat of Lyme disease in my heath bed. What about the demise of the plants there?
    Turns out that barberry is also prime habitat for earthworms, which, at first blush, would seem like a good thing. After all, earthworms are a gardener’s friend, right? Maybe. North of where the last glacier descended, the southern extent of which cut into much of northern U.S., all native earthworms were wiped out. The natives have been very slow to re-colonize but earthworms from Europe and Asia that arrived here in ship hulls and soil, and as fishing bait, have not been shy. They’ve spread rapidly.
    Non-native earthworms thrive especially well in the soil beneath barberry bushes. It could be that barberry leaves are more digestible to them; it could be that barberry alters the soil chemistry to their liking.

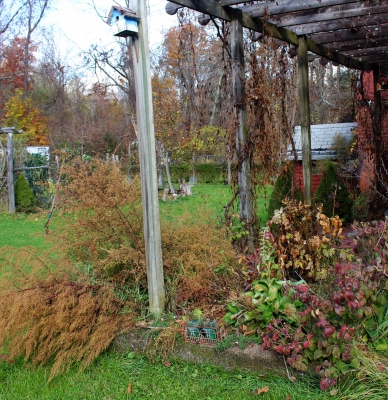
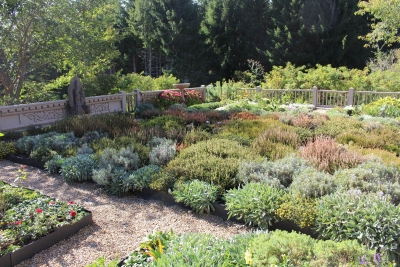
My heath bed in autumn

My heath bed in autumn

    These exotic earthworms are good at gobbling up raw organic matter, as in the leaf litter that blankets our forests — and my heath bed, to which I import leaves. The newcomers can actually gobble up forest litter faster than it is replenished, changing the soil habitat and exposing the soil to erosion. Plants in the heath bed, i.e. plants in the heath family, like that leaf litter; it keeps the soil cool and moist  and, as it slowly decomposes, enriches the soil beneath with decomposed organic matter, or humus. There is some evidence that the makeup of our native forests, which includes rhododendrons, also in the heath family, is changing due to the work of exotic earthworms.
    And all this from barberry!

Some Redemption

    I’m not all that worried about ticks or the demise of my heath bed. The bed is small enough and watched closely enough so that all barberries can be ripped out — just like the one I saw yesterday. My cat keeps mice at bay, and my dogs do likewise for deer. And I import more leaves each year than earthworms, even exotic ones could gobble up.
    The extensiveness of wild settings makes barberry control there difficult. Options there are cutting, pulling, fire, and/or herbicides.

Heath bed in June

Heath bed in June

    No need for such drama In a home landscape. Here, barberry is easily controlled, if desired, by nothing more than being pulled out or repeatedly cut to the ground. One or a few bushes are not going to significantly impact mouse populations or Lyme hazard. Their greatest impact would be to make berries that, with the help of birds, would further the spread of this bush. Newer, sterile varieties offer ornamental mounds of greenery that don’t contribute to the plant’s spread.

Heather, and Friends

    My heath bed, incidentally, has no heath plants. Heaths (Erica spp.) would die from in our cold winters. I call my bed a “heath bed” because in it I grow Heath Family (Ericaceae) plants in it: rhododendrons, mountain laurels, lingonberries, huckleberries, swamp azalea, and some heather (Calluna spp.). I group these plants together because all demand special soil conditions, conditions quite different from that of most cultivated plants.
    Most heath plants need a soil that is very, very acidic, relatively infertile, well-aerated, consistently moist, and rich in organic matter. As mentioned above, these plants thrive where the ground also has a mulch of leaf litter, wood chips, or other organic matter, a mulch that disappears too quickly where soils harbor large populations of the non-native earthworms that thrive beneath barberry bushes.

MAKING THE MOST OF WET GROUND

Have Fun, You Silly Ducks

    Wouldn’t you know it: I write about the extended dry spell one week, and the next week, which is now, the rain comes and doesn’t let up. Not that all this rain makes me regret having a drip irrigation system watering my garden. Rainfall could come screeching to a halt and send us into another dry spell.

Ducks, off to work and play

Ducks, off to work and play

     My five Indian runner ducks offer many advantages here on the farmden, not the least of which is affording me the pleasure of watching creatures that actually enjoy cool, rainy weather. The ducks also are entertaining and decorative, spend much of their days scooping insects and slugs out of the lawn and meadow and into their bills, and, especially when living on that diet of insects, slugs, and greenery, lay very tasty eggs. The downside to ducks is that they are dumb, and don’t know to stay out of the road.
    My four chickens offer many of the same advantages as the ducks, except they never seem as at peace with the world as do the ducks. Also, chickens scratch. Scratching at the bases of mulched trees and shrubs exposes roots; scratching elsewhere wrenches young transplants out of the ground.
    Chickens abhor rainy weather.

You ‘Shrooms, Also Enjoy This Weather

    Mushrooms I “planted” last spring are, like the ducks, reveling in this rainy change. “Planting” these mushrooms involved nothing more than pounding short lengths of wooden dowels, purchased with shiitake mushroom spawn growing in them, into numerous holes drilled in freshly cut pin oak logs. A cap of hot wax over each plug sealed in moisture. The 4-foot-long by 4” diameter logs lay in a shady place through summer while being colonized by thin threads of fungal hyphae growing out from the plugs.
 

Shiitake logs fruiting

Shiitake logs fruiting

   This spring was to be the start of a few years of “fruiting,” that is, making mushrooms, the spore bearing structures of fungi that taste so good sautéed with some onions and butter or olive oil. Dry weather of the past few weeks was slowing the mushrooms’ first appearance, so I decided to shock them. Just bouncing the end of a log against a hard surface, such as a sidewalk, sometimes wakes them up. I opted for a water shock treatment, giving the logs a 24 hour soak in a shallow kiddie pool.
    Right on schedule, within a week of being soaked, mushrooms began popping out all over the logs. With their ends levered into the horizontal openings of a metal fence gate tipped on its side against a tree, the logs and their attendant mushrooms are cantilevered out, perched above slugs and other organisms that might have enjoyed nibbling the fruits of my labor.
    The shock treatment has resulted in a mushroom tsunami. Excess go into the dehydrator, which has them crispy dry and ready for long term storage in about 4 hours. Once the tsunami ends, the fungi need to rest for a month and a half before they’re ready for another shock. Or I can do nothing, and let nature pump out mushrooms more slowly over a longer period of time. Of course, if this rain keeps up — 3 inches in the last couple of days — another tsunami might anyway be in the offing.

And I Can Plant . . . White Strawberries

    With the ground thoroughly soaked, it’s a good time to get plants in the ground . . . except in wet, clay soils. Working a wet clay ruins the almost crystalline structure that develops when it is well managed. Then, instead of the small particles aggregating together to make larger particles with larger pores in between them, letting air into the soil, the structure is reduced to only small unaggregated particles. Spaces between these small particles are so small that they draw in water by capillary action, and there’s no room available for air, which plant roots need. Good for pottery, bad for plants. Wait for any clay soil to dry a bit before digging in it, until it crumbles between your fingers with just a little pressure.
    My soil is a silt loam that’s been enriched with plenty of compost, which helps aggregation, so I can plant now, even right after rain.

'Pineapple Crush' strawberries

‘Pineapple Crush’ strawberries

    Among the plants I’ll be setting in the ground will be strawberries, right in a garden bed. Strawberries, you wonder? Big deal. But these are alpine strawberries. Okay, many people grow alpine strawberries. But these are white alpine strawberries, white, that is, even when dead ripe.
    Alpine strawberries are different from common garden strawberries in that they are a different species (Fragaria vesca), they don’t make runners, and both the plants and fruits are small, the latter about the size of a nickel. Previously, I’ve put a few in pots sitting along my front path for a nibble on the way to the door, or a few at the foot of garden beds, again, for a nibble, here while working in the garden. I want to see how the plants do under the better growing conditions of compost-enriched soil and drip irrigation right in a garden bed.
    Alpine strawberries are small but have very intense flavor, which needs to be fully developed before being picked. I especially like the white ones’ flavor, which can develop fully because, being white when ripe, they’re ignored by birds. The variety name Pineapple Crush gives a good approximation of the flavor.

DRIP, DRIP, DRIP, WHERE’S THE AGUA?

 I’m Dripping, So Why Am I Watering?

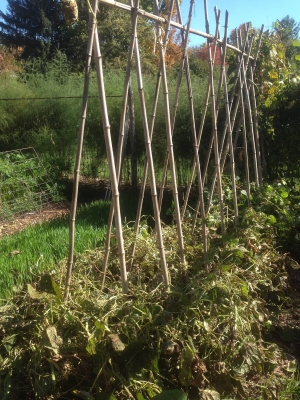
  Up to a couple of weeks ago, little water had dropped from the sky this spring here in the Hudson Valley. But a drip irrigation system automatically waters many of my plants. So why have I been spending so much time with hose in hand?Dripline with beans
    Not all my plants drink in the drips. Trees and shrubs are on their own except their first year in the ground when I religiously hand water them every few days initially, and then once a week throughout the season. These plants get 3/4 gallon per week for every square foot spread (estimated) of their root systems. That’s equivalent to an inch of rainfall which, if it does fall, exempts me from a few days of watering.
    A couple of inches depth of hay, leaf, or wood chip mulch around the trees and shrubs seals in moisture to make best use of my efforts. Also, I start with smaller plants — less than 4 feet tall — which become independent of my watering sooner because a larger proportion of their roots are soon foraging around in surrounding soil that those of larger plants.
    My flower beds also don’t get dripped. Although the soil surface is dry, moisture carried over from winter still sits in lower depths, into which established perennial flowers’ roots can tap. Annuals and newly planted perennials need to be watered on the same schedule as young trees until their roots reach that moisture.

My blueberries are my only dripped shrubs

My blueberries are my only dripped shrubs

   It is my garden vegetables that drink in the benefits of my drip system. But even here some hand watering is needed these days. Down each bed runs 1 or 2 drip lines, with emitters along the lines spaced 6 inches apart. As water enters the soil, capillary pull from small spaces between the soil particles draws water sideways and, along with gravity, downward. The resulting wetting fronts have the shape, if you could look at a cross-section of the soil, of an ice cream cone. In clay soils, with small particles and, hence, a lot of capillary draw, that ice cream cone is very fat; in sandy soils, it’s narrow, a couple of feet wide at its broadest as compared with the 6 foot spread in a clay soil.
    The wetting fronts start their sideways spread below the soil surface, deeper in sandy soils, more shallow in clay soils. In either case, the soil surface remains dry except right at the point of drip. So any vegetable transplants or seeds I set in the ground need to be hand watered until their roots reach the wetting front — except for seeds or transplants set right under or along the drip line.

Drip Irrigation Workshop June 20th; see “Workshops“, at this site, for more information.

A Statue of David

    My friend David was wondering why the leaves of his Romaine lettuce plants flopped down. I gave my usual response to most gardening questions: “Too little water.” (My other usual response is “Too much water,” often following my first response if the questioner tells of watering all the time.)
    So I asked David how much he watered, and he said he thoroughly soaked the ground by spraying it with water. Busted! It really was a water problem, too little in this case.Hand watering
    In fact, thoroughly wetting the soil with the usual 4-foot-diameter, hand held spray is almost impossible. “Thoroughly wet” means soaking the ground to at least a 6-inch depth. For his hand held sprayer to do that, David would have to stand in place like a statue, sprayer in hand, unmoving, for about an hour to wet one 4-foot-diameter part of the garden before moving on to the next 4-foot-diameter area.
    When I’m watering plants in the ground by hand, I’m wetting only the small area beneath an individual plant, just enough to soak its roots as they establish themselves in the surrounding soil.

Probe the Soil

    People find it hard to believe that that statuesque watering posture is really necessary. All you have to do is scratch the soil surface after a David-esque spraying of plants to see how deeply the water percolated, and you’d find only a thin layer of wet soil, at the surface.
 

Digital moisture probe.

Digital moisture probe.

   Digging a hole in the ground is a good way to tell if watering was sufficient. But it’s also inconvenient.
    For just a few dollars, I invested, years ago, in an electronic gizmo that bypasses all that hole digging. This soil moisture sensor has a metal probe that you plunge into the soil. Atop the probe is a dial or digital readout that tells whether the soil is “DRY,” “WET,” or something in between. More accurate sensors cost over a hundred dollars, but the cheap ones are fairly accurate and work well if coupled with observation.

Good for Pot(s) Also

    The soil moisture meter is especially useful with potted plants, which might need watering every day when the weather is warm, sunny, and breezy. (With experience, lifting a pot to feel its weight is also a good measure of moisture level, as is just getting to know your plants better.)
    I’m still hand watering the pots because I haven’t yet connected the drip tubes that will direct water to each of the pots.

MONOCOT THREATENED, MONOCOT SUCCESS

DRIP, DRIP . . . A WORKSHOP

Drip irrigation has many benefits: saves water, healthier plants, easily automated, less weeds. I’ll be holding a DRIP IRRIGATION WORKSHOP on June 20, 2015 in Bloomington, NY. Learn why drip is the better way to water and the components and designing of a drip system. And then, hands-on, we’ll design an install a system in an existing vegetable and flower garden. For registration and information, go to www.leereich.com/workshops.

Lily Turds

   The turds on my crown imperial plants were unwelcome, but no surprise. I’d been forewarned that the red lily beetle (Lilioceris lilii) was in the area. Finally, it found my garden and my crown imperials.
    For a relatively mobile insect, the beetle was surprisingly slow in its arrival. This native of Europe made its North American debut in Montreal in 1945 and its entrance stateside, in 1992, in Massachusetts. Since then, it has spread. Gardeners are on alert for the beetle as far away as the Pacific northwest since its sighting near Seattle in 2012.

Red lily beetle on crown imperial.

Red lily beetle on crown imperial.

   Those turds I saw actually are turds, the beetle larvae’s excrement, piled on their backs as they feed. Perhaps the greenish brown slime that hides the red larvae will not make the larvae unappetizing to my ducks or chicken. Those larvae are hatchlings from eggs adult beetles laid a few weeks ago. After a few weeks of feeding, the larvae will pupate. New emerging adults will feed until making their way to their winter homes in fall. The worst culprits, in terms of plant damage, are the larvae.
    There are many ways to skin a cat, and many ways to deal with red lily beetles, none of which need involve highly toxic pesticides. Easiest, of course, would be to avoid growing susceptible plants. Mostly, the beetles fare are lilies (Lilium spp., which does not include daylilies) and Fritillaria species, which includes crown imperials. Susceptibility varies among lily species, with Asiatic hybrids the most vulnerable and some Oriental hybrids more resistant. Lilium henryi ‘Madame Butterfly’, Lilium speciosum ‘Uchida’, and Lilium ‘Black Beauty’ are among the most resistant.
    Because I’m already growing lilies and fritillarias, I might opt for the wait and see approach, hoping for the chickens or ducks to take care of the problem. Or take the mano a mano approach, regularly inspecting plants to pick off eggs, larvae (yuck), or adults by mano. A container of soapy water held under a leaf is useful for handpicking adults because they drop soil-ward when disturbed — also emitting a defensive chirp or squeal.
    Neem is a relatively nontoxic (to humans) pesticide and deterrent extracted from, you guessed it, the neem tree, in India. It’s effective if sprayed on very young larvae. I have too many crown imperial plants scatted about to easily spray.
    Best of all would be to find some natural controls, and they have been found. Three species of parasitoid wasps (Lemophagus errabundus, Diaparsis jucunda, and, especially, Tetrastichus setifer) have proven effective. Releases have been made in New Hampshire, Rhode Island, Maine, and Connecticut. Come on, New York, let’s get some parasitoids.

What Beautiful Onions, Thank You

    Moving on to another monocotyledenous plant, this one with no pest to speak of: ornamental onions, which also go by their botanical name, alliums.
    (“Monocotyledonous,” what a mouthful! This refers to the plants leaves, or cotyledons, which function either as seed leaves or as storage structures. Monocots are one broad group of flowering plants; dicots, with two seed leaves, are the other broad group).

Alliums starting to open

Alliums starting to open

   Last fall I reported on my planting of Allium giganteum ‘Ambassador’, which makes volleyball-sized heads of purplish blue flowers, and A. hollandicum (or A. aflatuensis) ‘Purple Sensation’, bearing similar flowers in tennis ball- sized heads. Both are nice plants for flower beds, but, as I reported, I wanted to see if they would naturalize in my south meadow.
    Early on, this spring, the experiment seemed a success. The broad, green, strappy onion leaves unfolded, drinking in sunlight, before the surrounding grasses and other meadow plants had hardly budged. As warmer weather moved in, surrounding vegetation grew more boldly, soon beginning to get the upper hand on the onions.Allium hollandicum, Purple Sensation, field2
    Then the onions, the smaller ‘Purple Sensations’ onions, began to bloom. The blue heads were lost, at first, in the sea of dandelions, orchard grass, goldenrod, and other plants coming on strongly. But ‘Purple Sensation’ heads evidently weren’t yet at their peak. They came increasingly into focus as the heads continued spreading their starbursts of blue blossoms. ‘Ambassador’, as I write, has still to show its heads.
    Flowers are pre-packaged within fall-planted bulbs. The true test will be whether or not the alliums bloom as strongly, or at all, next spring. Perhaps the ‘Ambassador’ bulbs will even multiply, as they have in the less competitive terrain of the flower garden.

Alliums in the garden.

Alliums in the garden.

EEK, A DINOSAUR IN MY COMPOST PILE!


A Creature Not Really So Strange

    One of the strangest creatures I ever found in my compost was the dinosaur that emerged today as I turned the pile. It was worse for the wear, the gash in its head probably from my machete, the “solar powered” shredder I use for stemmy compostables like corn stalks. (Think about it.) After a year in the pile’s innards, the dinosaur’s greenish, scaly skin has been bleached almost white.

Dinosaur emerging from compost pile

Dinosaur emerging from compost pile

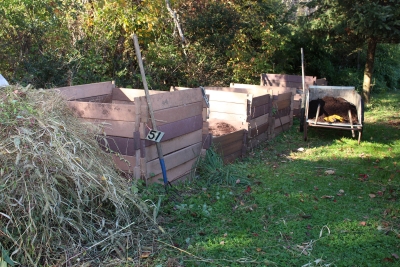
    I typically build compost piles through summer and into fall, then turn them the following spring. Turning, not absolutely necessary, lets me mark the piles progress and, as needed, fluff it up for aeration or sprinkle it if too dry. Many people use fencing to enclose a compost pile, which is effective as an enclosure but exposes the pile to too much drying air. My bins, made from artificial wood decking, stacked edgewise and notched together like Lincoln Logs, have solid walls which helps hold in some heat and moisture.
    I should mention, at this point, that the dinosaur might, in fact be a lizard. Oh, and something else: It’s made of a rubbery plastic. This ‘saur was unearthed many years ago as I was digging up a mulberry tree. Once salvaged, it resided in one of my garden beds, where it startled people (including me, occasionally) despite its mere foot-long length. It must have hitchhiked along to the compost pile with some garden debris at the end of the season.

Good Feedstuffs Make Good Compost

    Just about everything goes into the compost piles: weedy hay, garden debris, kitchen scraps, horse manure, old cotton or wool clothes, weeds, and anything else that is or was living, that is, organic. Also, some dolomitic limestone, which is rock so never was living but is “organic” in the cultural and legal sense. Dolomitic limestone adds calcium and magnesium to the finished mix, increases the alkalinity of the finished compost (to offset the naturally increasing acidity of soils here in the humid northeast), and improves its texture.
 

Sweater, almost composted

Sweater, almost composted

   The other ingredients offer a spectrum of macro- and micronutrients to the finished compost. Carbon and nitrogen are the two feedstuffs that composting microorganisms need in greatest amounts. I don’t dwell too heavily on the ideal 15 to 1 ratio of carbon to nitrogen for a balanced feed that gets the pile heating and the compost finishing up quickly. Much depends on the size of the feedstuffs and the presence of other natural chemicals, such as natural lignins in wood shavings that slow down its decomposition irrespective of carbon to nitrogen ratios.
    I do pay attention to what I put in the piles, using a thermometer, my nose, and my eyes to monitor progress. No heat, bad smells, and slow progress indicate, respectively, too much or too little moisture or too little nitrogen, too much water or nitrogen, and too much or too little moisture or too little nitrogen. It’s all good though. Adjustments can be made when turning a pile, or do nothing and wait longer. Any pile of organic materials eventually becomes compost.

Real Reptiles in the Pile

    Other strange denizens, living denizens this time, of my compost piles have been black rat snakes. A few years back, I’d bump into them slithering out of the compost pile as well as coiled into the branches of a blueberry bush and, unfortunately, coming out of the chicken house, two swollen lumps in their bodies evidence of a recent two-egg meal. All-in-all the snakes are welcome for their meals of mice and rats.

Solar-powered compost shredder

Solar-powered compost shredder

    I’d also come upon clusters of the snakes’ soft-shelled eggs, up to two dozen or more, as I turned the compost. After incubation in a terrarium, out slid not-very-cute baby snakes.

Decisions, Decisions

    Turning compost piles provides relatively mindless relief from more thoughtful gardening such as planting decisions. Where to plant, for example, a dwarf shipova tree, an Alderman plum, and a Concorde pear? And should I risk planting out the borderline hardy Flying Dragon hardy orange (Poncirus, now named Citrus, trifoliata)?
    Easier to place are the vegetables, which need to be rotated every year, never (well, almost never) grown in the same location more than once every three years. Rotation prevents overwintering, nonmobile pests from having something to attack close at hand. The vegetable garden is in two banks of beds, so I just move what’s planted in each bed two beds counterclockwise each year, two beds to get them further away from previous years location than would a one bed rotation.
    Still, lettuce transplants, extra onions to be harvested as scallions, radishes, and short rows of arugula get spotted in willy nilly.

Heady Stuff, Here

    May 5th: This calm, warm morning the whole yard is awash in the sweet, spicy scent wafting from yellow trumpets of clove currant (Ribes odoratum) flowers. In August, this deer, drought, cold, heat, and pest resistant plant will be covered with large, black sweet-tart currants.

Clove currant flowers

Clove currant flowers

Clove currant fruit

Clove currant fruit


DRAMATIC PRUNING & NOT-TOO-BIG ONIONS

Henry IV Method of Pruning

   Deb get’s a little nervous every time a go into the garage for some pruning tools this time of year. Not because she’s afraid I might hurt myself but for what I might do to the plants. Today it was so-called “renovative pruning” of the St. Johnswort ‘Sunny Boulevard’ shrubs that line the western edge of the brick terrace. I approached the shrub with some unconventional pruning tools.
    Let’s first backtrack and put everyone at ease. A shrub is a shrub because it’s shrubby; that is, it’s always growing new shoots at or near ground level rather than developing a permanent, upright trunk off which permanent limbs and new shoots grow. Some shrubs — most shrubs, in fact — get congested with too many new and older shoots rising from their base and too many old shoots that no longer perform well, in this case performance meaning a good show of flowers. An old stem can put on a good show for only so many years before becoming decrepit.

St. Johnswort, pruned

St. Johnswort, pruned

    The obvious solution to the above two problems with shrubs is to, first, limit the number of new shoots arising low in or around the plant. It’s a matter of judgement for how many to leave. (Pruning is art and science, and my book, The Pruning Book, attempts to make readers better artists and scientists, when pruning, at least.) As far as those old stems, they should be cut down near ground level once they’ve overstayed their welcome.
    So much for maintenance pruning. Sometimes a shrub has gotten too out of hand for all this detail work. Enter renovative pruning. It’s very easy: You just lop everything down to the ground, which is what I did to ‘Sunny Boulevard.’ I started out using a chain saw, my Stihl pole chain saw. This saw has a smaller blade and a long reach, which allowed me to get to the base of the plant without battling all the arching stems. After that, I sawed back stems arching over the hypertufa wall edge of the terrace with a Porter Cable sawzall powered by a 20 volt battery. Final cleanup was with my Fiskars Powergear lopper and Felco pruning shears. (That’s a lot of product recommendations, but I highly recommend all of them.)

All’s Well That Ends Well (in Pruning)

    So what was I left with when I was done pruning? Nothing. Nada. Zip. Well, not really; the roots were still alive and in the ground. And I’m banking on those roots sending up new sprouts. And because ‘Sunny Boulevard’ is slated to start blossoming in July on buds that form on new shoots, I’m also banking on blossoms on those new shoots. Because they’re beginning growth way down at ground level, blossoming might begin a bit later than usual.
    Shrubs that blossom early in the season, such as forsythia, lilac, and mockorange, form their flower buds a year before they actually open. Hence, the best time to prune these shrubs, if you want a full show of blossoms, is right after the blossoms fade. Prune them before blossoming and you cut off potential blooms.
    Still, having a clean slate after a dramatic renovative pruning is appealing, sometimes even with a sacrifice of blooms. Deb is now nervous about the lilac bush, which also needs some renovation. I’m planning to do a less dramatic renovative pruning on it, and I’ll probably wait until after it blossoms.

Onions’ Size Matters

    Big onions or medium-sized onions or small onions, what to grow? The choice is mine (and yours). Much depends on planting distances.
    I’m opting for medium-sized onions, about 3 inches in diameter. Yesterday I set out about 250 transplants grown from seed I sowed in early February in a tub of potting soil: Three varieties: Ailsa Craig, an heirloom from 1887, for sweet, mild onions that need to be used early because they don’t store well; New York Early, a nonhybrid variety selected over the years by New York onion growers, for medium term storage; and Copra, a rock-hard, hybrid onion that stores very well, all the while maintaining some sweetness.  In a 3-foot-wide bed, I planted 5 rows of onions, with about 4 inches between rows and about 4 inches between onions in each row.
Onions, planted    Planting distances are not the end-all for onion size. Variety also figures in; given enough space, In northern areas, such as around here, long-day varieties, which form bulbs when daylength is 14 hours or more, get largest because they grow the most leaves before bulbing begins. More leaves means bigger bulbs, which also a reason to plant as early as possible. (Note to myself: Plant onions earlier next year, in mid-April.)
    Even among northern varieties of onions, potential sizes vary. Ailsa Craig onions have the potential grow quite large, which is why they’re grown for exhibition at state fairs and the like. I’m banking on the close spacing keeping them from growing too big, 5 pounds or more by some accounts.
    Of course, good growing conditions also make for more leaves sooner. Got that. I spread compost an inch deep over the already mellow soil and drip irrigation lines are poised to quench the plants’ thirst.

FEAST OR FAMINE

Is Gardening Too Easy?

    Control yourself, Lee! Growing seedlings this time of year is too easy. Within a single packet of seeds  is the potential for a gardenful of vegetable or flower plants, even shrubs and trees. As such, a packet of seeds is relatively inexpensive.
    I have envisioned delphinium in my garden, its tall, blue studded spires backed by the fence surrounding my blueberry planting. I could have just gone out and purchased a few potted delphinium plants, but I wanted a bolder effect so purchased instead a packet of seeds. Who would have thought that germination would be so good. After all, the seed germinates best when fresh and likes some cool temperatures to awaken; some people freeze the seeds in ice cubes for awhile before sowing them. I used nothing but patience, and not that much was needed.
    I couldn’t bear to discard most of the seedling, so “pricked out” 24 of them into cells of my APS seedling flat.

Seedling plants (and Sammy the dog) in spring

Seedling plants (and Sammy the dog) in spring

    The same thing happened with red lupines, chocolate daisies, Yellow Gem marigolds, and . . .  Growing transplants is the easy part. The difficulty will be in about a month when I’m wandering around the garden, seedling flat in one hand, trowel in the other, wondering where to plant all these flowers. (This problem does not arise with growing vegetable transplants because I keep harvest records for vegetables that let me know how many plants I need of each. Could my eyes get too full or too fat on too many flowers? No.)

Damn-ping Off, No More

    Raising transplants wasn’t always so easy for me. Decades ago, as a graduate student, I lived in a converted motel room which also became home to seedlings for my first garden. The shelves were lined with peat pots of sprouting chamomile (very easy), lettuce, beans, and other plants.
    Thence was my abrupt introduction to “damping off,” a disease that attacks seeds and newly emerged seedlings. Imagine the disappointment of a beginning gardener (me) watching seedling stems pinch in at he soil line and topple over — the telltale symptom of damping off disease.
    I soon learned that damping off was not uncommon, even among experienced gardeners. The disease is caused by any one of a few soil dwelling fungi  that raise their ugly head (figuratively) given the right conditions (for them). One obvious way to try to avoid the problem is to sterilize the potting media.
    Most commercial potting mixes are sterile, as were the peat pots I was using. The problem is that the culpable microbes are everywhere, just waiting to attack when conditions are just right, conditions that I unknowingly provided for them in my motel room. The peat pots were excessively moist; the air stood still; and little light entered the room — perfect for damping off development.
    Nowadays, my seedlings rarely experience damping off. The plants get off to a good start at temperatures they enjoy, bathe in light in my greenhouse or sunny windows (or, in the past, cozied up very close to fluorescent bulbs), and a fan keeps the air moving. I also add sufficient perlite to my potting mixes so that excess water drains feely down and out of the mix.
    Years ago, soothing brews of chamomile tea would also come to the rescue — for the seedlings, not for me. That tea hasn’t been needed for a long time. I also don’t pasteurize or sterilize my potting mixes. Beneficial microbes, from the compost in my mix, and good growing conditions have thankfully made damping off nothing more than a distant memory for me.

Oh Deer!

    Bigger creatures are still an ever present nightmare. Especially deer and especially after this winter. They have sheared the greenery from nearly every evergreen they could reach here, the hollies, arborvitaes (white cedar), yews, hemlock, and junipers (red cedar).

Deer damaged arborvitae and balsam fir.

Deer damaged arborvitae and balsam fir.

    Interesting about the yews, because the foliage is toxic to many ruminants; a mouthful will kill a horse or cow within 5 minutes. Deer, according to most reliable sources, can feed on yew without ill effect. With that said, this past winter, I did find a deer dead on the ground near my yew bushes, which had been nibbled free of their foliage.
    How about the plants; how will they fare, bare. Yew tolerates all sorts of abuse in the form of pruning. Soon, new needles will start appearing along their stems. Or, if the stems are cut back, new needled shoots will soon appear. My other evergreens should also fare well. Rhododendrons and mountain laurels, which the deer left alone, also generally sprout new growth when nibbled. So any of these so-called random-branching conifers or broad-leaved evergreens can be pruned to look prettier after deer have ravaged them.
    Not so with so-called whorled branching conifers, such as pines, spruces, and firs. They generally do not resprout from bare wood, so there’s not much that can be done to prettify them now. Just lop back bare branches because they’re always going to be just that: bare.
    For more about pruning evergreens, and other plants, see my book, The Pruning Book.

QUICK, NO WORK GARDEN, FOR STARTERS

Prescription for a New Gardener

    It seems like everybody’s a gardener, or is becoming one, this time of year. And a lot of people have been asking me questions. Like my niece Lana, for instance, who moved along with her husband, a baby, and a toddler to a new house last fall and is ready to dig into a garden this spring — but, as Lana said, a garden “that will be easily manageable for her and interesting to her 3 year old.” (The one-year-old is still enthralled with her thumb and other such things.) So, for Lana and other beginning or non-gardeners, here is a simple plan for a small garden that requires almost “no time.”

A small, productive garden

A small, productive garden

    The most stringent requirement for this garden is sun. The more the better. And the closer the garden is to the back door, the more you will be drawn to it, whether to dash out to pick a few leaves of lettuce, or to pull a wayward weed. This garden can be, probably should be, small. Let’s assume it is ten feet by ten feet.
    The second requirement is soil that does not stay sodden for hours after a heavy rain. Push a can with both ends open into a hole in the soil and add water; it should drain faster than an inch an hour. If not, choose a new location or make raised beds.
    With sun and water taken care of, soil preparation begins. And ends a few minutes later! Blanket this area with a four-sheet thickness of newspaper (do not use colored pages), overlapped and wetted.  Done, almost. The newspaper will smother existing vegetation, and keep out weeds during the growing season. And as the paper rots away, it will enrich the soil.
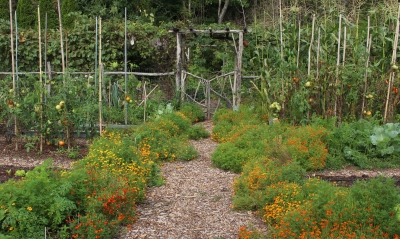
    The planting plan is simple: divide the garden into four beds, delineated by two 18 to 24 inch wide paths going up the center of each side and crossing each other in the center of the garden. Cover the newspaper in the paths with wood chips, wood shavings, sawdust, or pine needles. In the beds, purchase some weed-free compost, enough to lay at least a one-inch depth over the newspaper.
    Sow seed right into the compost layer. Peas and lettuce need to be planted early — as in now — because they both enjoy cool weather in rows about a foot apart. Make each pea row four inches wide, then scatter the seeds so they are about an inch apart down and across the row.
    The next wave of planting takes place after warm weather has settled, in late May. Buy tomato transplants and set them in one of the northern quadrants. If needed make a hole through the newspaper into the soil below to accommodate the full depth of the transplant. Grow a variety for flavor, like Brandywine, Sungold, or Amish Paste. Each plant should be two or three feet from its neighbor, depending on whether you are going to stake your tomatoes or allow them to sprawl. Eventually you will have a jungle of vines in danger of overtaking or enlarging your garden, so take a few minutes occasionally during the summer to prune wayward stems from the tomato plants.
    Plant sweet corn and cucumber seeds at the same time as tomato transplants. Since corn is a tall grower, it gets the other northern quadrant. Plant three seeds together in “hills,” which are groups of seeds, not mounds of dirt, spaced two feet apart each way. Cucumbers get the final, southern quadrant. Sow six seeds per hill, with hills three feet apart. Grow a bush-type cucumber, like Salad Bush or Bush Pickle. Once the corn and cucumber seeds are up and growing vigorously, ruthlessly thin the plants so each corn hill has only one plant and each cucumber hill has three plants.
    This garden gets one final planting in early July. But where, since all four quadrants are used up? Pull out the peas and lettuce, which flag anyway during hot weather, and plant in their place bush beans. Bush Blue Lake and Bush Romano are good choices.
    This garden will produce a limited amount of vegetables with a minimum amount of work. Success may tempt you to enlarge your garden and grow a greater variety of plants next year.

Get Your Compost On

    A gardening friend called to ask how much compost is needed to cover his garden. It turns out that a one inch depth of compost will supply all the nutrition, plus a lot of other goodies, that a vegetable garden needs to nourish the plants for one year. So that one-inch depth needs replenishment annually.
 

Spreading compost on bed

Spreading compost on bed

   (Less compost could be used if the deficit is made up by fertilizer. But compost is the Cadillac of plant foods while also offering protection against pests, improved aeration and water retention in the soil, protection against erosion, and other known and unknown benefits.)
    Back to the amount needed: 1/3 of a cubic yard (300-500 pounds, depending on moisture) will cover 100 square feet 1 inch deep. That’s a lot of compost, which beginning gardeners will likely be buying. If you’re buying compost in bulk, which is the least expensive way to purchase it, make sure it’s good stuff by asking some questions, such as what went into the compost. Avoid using compost that contains industrial wastes — especially in the vegetable garden — because of possible toxins like excessive quantities of heavy metals that could contaminate your food. Also ask how the compost has been prepared and stored.
    The ideal would be to make enough of your own compost. Next year, perhaps.

BLUEBERRIES OUTSIDE, APHIDS INSIDE

 Plant the Best-Tasting Fruit

   My sixteen blueberry plants keep me in blueberries year ‘round, so I’m not planting any this year. But you are, or should be. The bushes are attractive in every season, with white blossoms in spring, foliage that looks spry all summer and turns crimson red in fall, and stems that shade to red in winter. The bushes are almost pest-free. And the berries are healthful and delicious.

Blueberry fruits on plant
Blueberry fall color    All you would-be blueberry planters out there: Pay attention to the soil for your plants, about which I’m going to offer advice. Too many people plunk a blueberry bush into a hole dug in their lawn and then wonder about the lack of berries. Poor growth, that’s why. The plants bear fruit on one year old stems. If shoots grow only a few inches one year, there’s little room on which to hang berries the following year.
    Taking a cue from wild blueberries, here’s what the bushes need, soil-wise: acidity (pH 4-5.5), organic matter, relatively low fertility, moisture, air, and no competition from weeds. For starters, check the soil pH with either a home testing kit or by taking a sample to a Cooperative Extension office or soil testing laboratory. If soil is not sufficiently acidic, add sulfur, preferable pelletized sulfur for ease of handling, 3⁄4 pound of sulfur per 100 square feet in sandy soils or three times this amount in heavier soils, for each pH unit the soil is above 4.5. Contrary to popular myth, adding oak leaves or pine needles will NOT do the trick. Spread sulfur over the ground as far as the eventual spread of the roots, which is about 3 feet in all directions.Planting blueberries
    Then dump a bucketful of peat moss right where you plan to dig each hole. Dig the hole deep and twice as wide as needed to get the plant in the ground, mixing the peat moss with the soil. Peat moss provides a long-lasting source of organic matter, which also helps with aeration and water retention.
    Finally, plant and water.

My planting, 7 years later

My planting, 7 years later

   Wait, you’re not finished yet. Right after planting, spread some organic mulch, such as wood shavings, leaves, or pine needles, a couple of inches deep and as wide a spread as the roots. Mulch keeps the soil moist and further enriches the ground with organic matter as its lower layers decompose.

Soil & Birds

    Ongoing soil care for blueberry bushes is simple and necessary, mostly food and drink.
    Assuage the bushes’ thirst with, barring rain, three-quarters of a gallon of water per week for each square foot spread of the roots. Satisfy their hunger by spreading a high nitrogen fertilizer late each fall. I use an organic fertilizer, such as soybean or alfalfa meal, at the rate of 1.5 pounds over every hundred square feet of root spread. These fertilizers offer nitrogen throughout the growing season in a form blueberries can use.

Blueberry temple in winter

Blueberry temple in winter

    Periodically re-check the soil pH and add more sulfur, if needed. Replenish the mulch each fall, laying the new mulch right on top of the old mulch.
    For the future — harvest of first berries should begin within a couple of years — think about birds. Are you going to share? Are they going to share? I opt not to share, enclosing my whole planting in netting, to create a walk-in “blueberry temple.”

Aphid Attack & Counterattack

    Turning inward, not introspectively, but to the greenhouse, I see aphids getting a foothold. Their populations soared a few weeks ago as young and old feasted on aging celery and arugula plants beginning to send up seed stalks.
    My first counterattack was to cut down or dig up these old plants and whisk them to the compost pile before too many insects dropped off to take up residence on smaller plants and seedlings. Not that there weren’t plenty of stragglers fattening up on younger plants.
    My tack with the stragglers has been to set my watering wand on “fan spray” and blast the plants with water. Most aphids that get knocked off plants don’t return. I spray on mornings of sunny days so leaves dry relatively quickly, limiting potential disease problems. The temporary increase in humidity might increase the likelihood of aphids’ getting fungal diseases, to which they are very susceptible.
    Of less effect are the ladybugs I periodically introduce into the greenhouse, in large part because I don’t have enough of them. They used to enter my home in large numbers via leaks around an old, south-facing window and nearby crack in the wall. I’d merely vacuum them up as they clustered on the window pane and shake the contents of the hand-held vacuum among plants in the greenhouse late in the day. That window and the wall crack have been repaired, so few ladybugs end up indoors.
    I’m considering making a hole in the wall to let the ladybugs indoors again and hanging a ladybug live trap (available commercially or made from online plans at http://www.ars.usda.gov/is/br/lbeetle/001030.trap.pdf) right near the hole.
    Thus far, though, cleanup and water sprays have kept aphids under control, and plants are growing well. Once transplanted outdoors aphid problems vanish because of the weather and natural predators.

HOME GROWN GRAIN & GRAIN-ISH


Popcorn & Chestnuts, Bigger is Better But Not Always

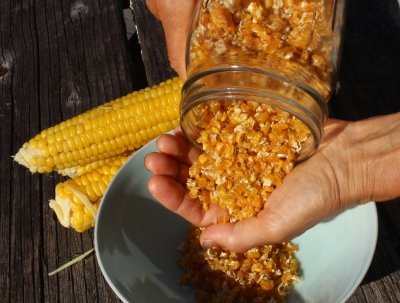
   Orville Redenbacker’s popcorn may be an “exclusive kernel hybrid that pops up lighter and fluffier than ordinary popcorn,” but my popcorn — nonhybrids whose seeds I’ve saved for many years — tastes better. I grow two varieties, Pink Pearl and Pennsylvania Dutch Butter Flavored Popcorn.
    This winter my popcorns’ poppability was especially poor, probably because of the weather. Really! Popcorn pops when the small amount of water within each kernel, heated above the boiling point, builds up enough pressure to explode the kernel, turning it inside out. For good popping, a kernel needs an intact hull and moisture within. Not just any amount of moisture, though, but as close as possible to 13.5%.
    (Other whole grains, such as wheat berries and rice, don’t pop with the same explosive force as popcorn because their hulls are porous.)Popcorn hanging from rafters for winter
    My popcorn spends winter, as ears, hanging from the kitchen rafters. I suspect the kernels are too dry because colder winter weather results in drier air indoors. Cold air holds less moisture than warm air so the colder the outdoor temperatures, the drier the air, once it is warmed.
    The kernels need moisture, but not more than 13.5%. Fortunately, for us popcorn lovers, back in 1950 a Mr. Stephen Dexter of Lansing, Michigan came up with an easy way to get the moisture just right, as spelled out in U.S. patent number 2497399. And for those of us who want to start eating our home-grown popcorn early in the season, when kernels may be too moist, his method also sucks excess moisture out of the kernels to bring the level down to 13.5%. Watch out Orville!
    Now for the method . . .  to quote, “I have discovered that popcorn can be maintained at the best popping condition or restored to that condition by storing it in a closed container in which the atmosphere is maintained at approximately 75% Popcorn being treated to pop betterrelative humidity. This relative humidity can be maintained throughout a wide range of temperatures by placing in the container a saturated solution of common table salt.” So the first step is to create a saturated solution of salt; I dissolved as much salt as possible (about 1.5 ounces) in a half a cup of water, and then added a little more to make sure that it was saturated.
    It’s important that the popcorn kernels don’t make contact with the salt solution. Mr Dexter maintained the right atmosphere by putting blotting paper soaked in the solution in a sealed container with the kernels. I put the kernels into a Mason jar and then set a beaker with the solution on top of the kernels.

A Little Science, A Lot Better Poppability

    Not to doubt Mr. Dexter or the patent process, but the scientist in me had to test the method. A handful of shucked kernels went into each of two Mason jars. One jar was left open to the atmosphere. The other was sealed after I set the beaker of salt solution atop the kernels. Poppability tests came 3 days later. Pennsylvania Dutch Butter Flavored Popcorn, which normally pops pretty well, popped to 1/3 greater volume after the moisture treatment. Pink Pearl awaits testing.

Positive results of popcorn treatment

Positive results of popcorn treatment

    At their best, neither would compare in volume increase with Orville Redenbacher’s popcorn, which claims a 44:1 increase. My popcorn costs nothing except my time (pleasantly spent) and is an organically grown, wholesome, whole grain that hangs decoratively from my kitchen rafter and tastes better. Let Orville have his fluff.

Editing my Chestnut Planting

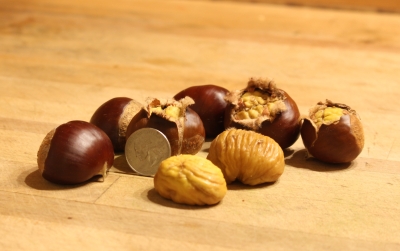
    On to another grain, chestnuts, called the “grain that grows on trees” because, unlike other nuts, it’s low in fat and protein but high in starch. My trees demand little more from me than daily harvest during their two-week ripening period. I have 4 trees but harvest all the nuts I need from one tree, aptly named Colossal for the truly colossal size of the nuts it yield.
    Colossal, a hybrid of Castanea sativa (European chestnut) and C. crenata (Japanese chestnut), has its Achilles heel. Make that Achilles heels, plural. The first is that it is susceptible to the chestnut blight that decimated chestnut trees from

My majestic seedling Chinese chestnut

My majestic seedling Chinese chestnut

Maine to Georgia in the 20th century. Colossal is probably not quite as susceptible to blight as are American chestnuts; my trees, knock on (chestnut) wood, are 17 years old and have never had blight.
    More serious is IKB, internal kernel breakdown, which turns the kernels dark and ruins their flavor. IKB occurs in a certain percentage of nuts of European x Japanese varieties when they are pollinated by a Chinese chestnut (C. mollissima) or hybrid. And vice versa. Most of my other trees are Chinese or Chinese hybrids.
 Sprouting chestnut   I was going to plant some of my Colossal nuts to make more suitable pollinators for Colossal but, as chestnut researcher Dr. Dennis Fulbright of MSU pointed out to me, those seedlings would have some Chinese “blood” in them. Too bad; I wintered the nuts in a baggie with moist potting soil in my unheated basement. Those nuts now believe that winter is over, and are already sprouting roots.
    I’ll grit my teeth and put the chainsaw to my beautiful, large Chinese and Chinese hybrid chestnuts, and rely on my one, smaller Marigoule chestnut, a European x Japanese hybrid, to offer pollen to Colossal. Marigoule is blight susceptible, so I’m looking to plant another European x Japanese hybrid called Labor Day, which is blight resistant.

Filbert catkins

Filbert catkins

    At any rate, coming on the heels of winter, it’s nice to see something growing, even if it’s nothing more than a 2 inch root sprout that pushed its way out of a chestnut. Oh, and outside, filbert branches are now draped with catkins, chains of male flowers. And fuzzy, gray catkins have puffed out (indoors, on branches in a vase) on contorted stems of fantail pussy willow. And an abundance of tender green seedling are sprouting in the greenhouse. Happy spring!