A BRIGHT FUTURE

As Good As It Gets

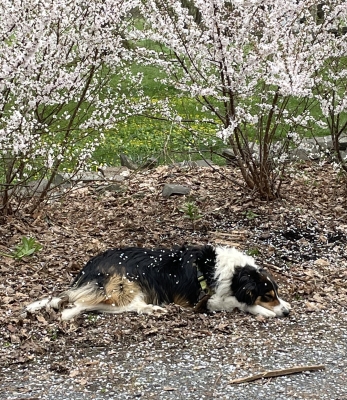
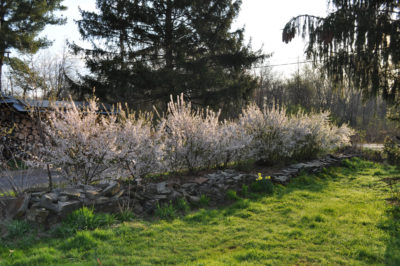
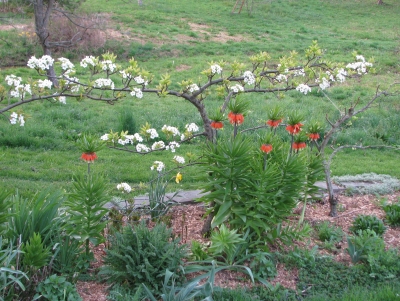
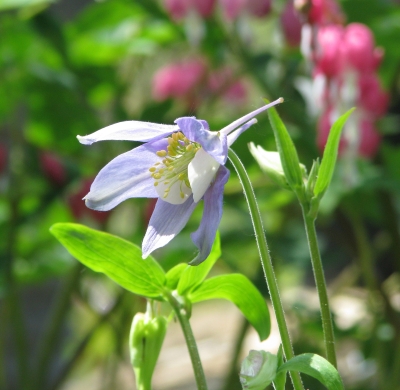
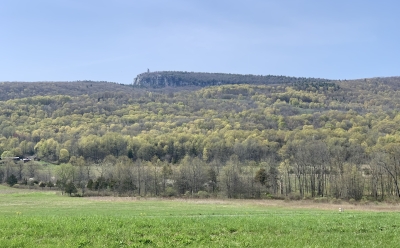
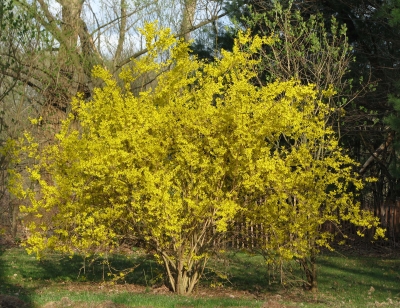
You might think that writing about good weather would tempt the fates. I’ll thumb my nose at the fates and go ahead and write that this spring is the best spring, gardenwise, ever in all the decades since I’ve been gardening. The flowers have been more vibrant with color and, it seems, also in greater profusion. The air has been particularly fragrant, especially now with the intoxicating aroma of black locust blooms following closely on the heels of autumn olive’s sweet scent.
Apple tree in bloom
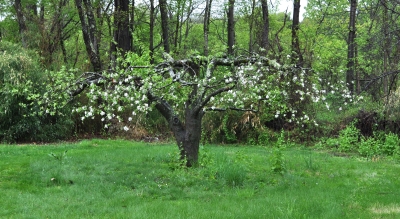
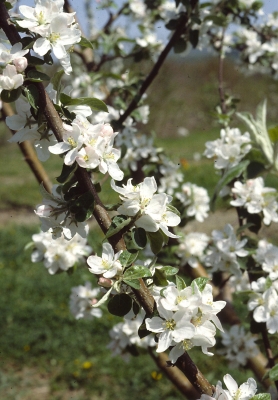
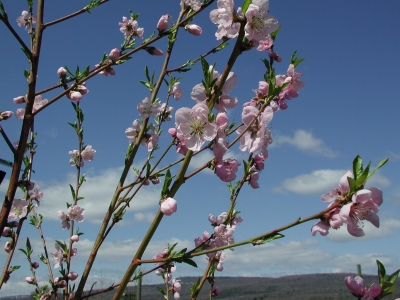
My fruit trees are most thankful for this spring’s beneficence. In all the years of growing fruit here on the farmden, never has the landscape been so brightened by snowballs of white blooms of plum and pear trees, pinkish blossoms of apples, and peaches’ pure pink blossoms.
Apple blossoms
Peach blossoms
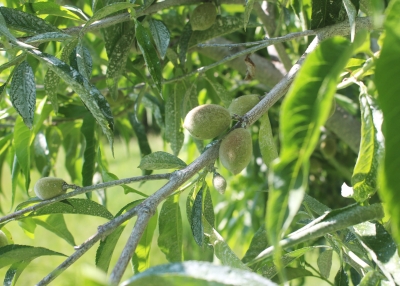
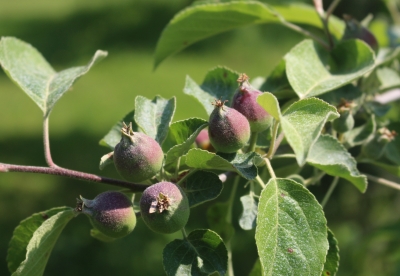
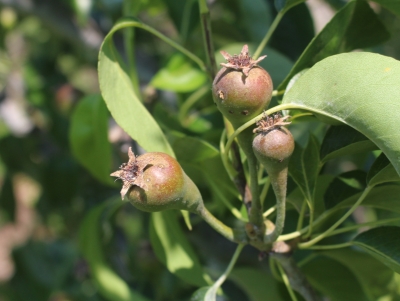
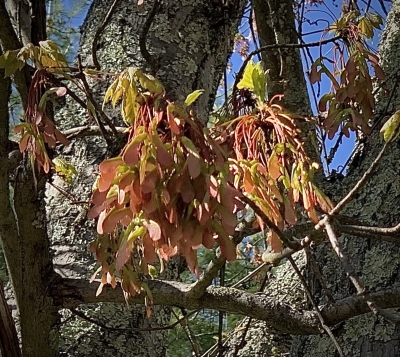
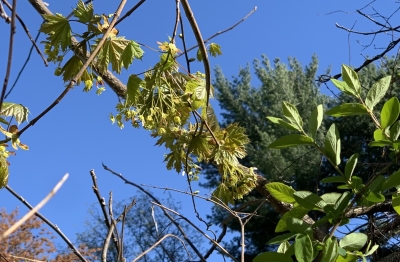
The now-fallen petals are no cause for wistfulness, because those clusters of flowers have now morphed into clusters of fruits

Why this Year?

What makes for such a glorious spring? The weather, of course, both this spring’s in addition to last winter’s and even last spring’s. Let’s first go back to last spring’s weather effects.

During spring 2020 the weather warmed going into April, coaxing flower buds on fruit trees to swell. Then, towards the end of that month and into May, a number of nights saw temperatures that nipped life from many flowers, then open, especially the 22° temperature on April 23rd and then subfreezing temperatures on May 9th, 13th, and 14th. (All this information handily recorded and passed onto my computer via Sensorpush sensors I have at two locations outdoors and one location in the greenhouse.) 
Peach fruitlets
Prelude to the present season began with a relatively mild winter, for which peach flower buds, which suffer damage at around minus 15°, were especially appreciative. And this spring has seen more or less gradually warming temperatures with — and this is most important — no late, damaging frosts. Buds for a current spring’s blossoms develop the summer of the previous year. Seeds in developing fruits produce a hormone that suppresses flower bud formation, so a heavy crop one year means a lighter crop the following year, and vice versa, all other things being equal. Last year’s late frosts knocked out much of the potential fruit crop so this year the trees did what they do, compensating for last year’s loss with more blooms.
Asian pear espalier
Fruit trees can afford to lose a certain number of flowers to cold each year. For instance, each flower bud of an apple tree unfolds to five flowers, and only 5 percent of those flowers need to set fruit for a full crop of apples. Furthermore, a temperature below 32° doesn’t always cause damage; just how much damage ensues depends on the the growth stage of flower buds and how cold it gets. Using apples, again, as an example, when their buds have expanded just enough to hint at the five flowers within (the “tight cluster” stage), 27° will kill 10 percent of them, 21° will kill 90 percent of them. More details for apples and other fruits can be found here.

Another variable is that temperatures can vary a little at various points within a tree, which can be important at these critical temperatures.

Not Yet Home Free

This auspicious spring is not a call for me to just sit back and wait for the delicious bounty to hang on the branches awaiting my picking. My work is cut out for me.

One job, to begin soon, will be thinning the fruit, that is, removing lots of them. In addition to upping the chances for a good return bloom and harvest next year (remember the seeds and the hormones), fruit thinning lets the trees channel more of their energy resources into fewer  fruits. The result: Fruits that remain are larger and more flavorful. Fruit thinning also lessens the chance of limbs breaking under the the load of too many fruits, and lessens pest problems. Two apples touching each other provide good cover for the larvae of codling moths to burrow into the fruits to become the classic “worm in the apple.”

Apple fruitletsCommercially, tree fruits are thinned with chemical sprays but I’ll be thinning by hand. The plan is to reduce the number of fruits to one per bud, leaving the largest and most pest-free, and allowing remaining fruits to sit no closer than about a half a foot apart along branches. Larger kinds of fruits are the ones that need thinning, which is nice because it would be very tedious to thin small fruits, such as cherries. Winter pruning removes some branches with fruit buds, so also contributes to reducing the load, as does trees’ natural shedding of some excess fruits.
Pear fruitlets
Another job, which began a few weeks ago, is keeping an eye out for and protecting fruits from insects and diseases — particularly problematic on a less than perfect site such as here on the farmden. All of the common tree fruits, except for pear, are very prone to these problems throughout much of eastern North America.

On a backyard scale, the problems are few but serious, in some cases serious enough to eliminate almost the whole crop or render it inedible. The major culprits are plum curculio, codling moth, apple maggot, oriental fruit moth, brown rot, apple scab, fire blight, and cedar apple rust. Not to mention deer and squirrels.

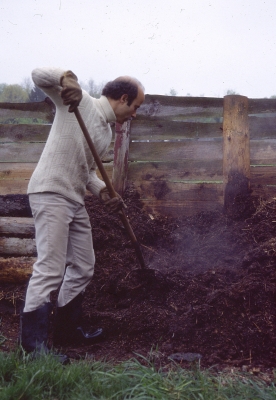
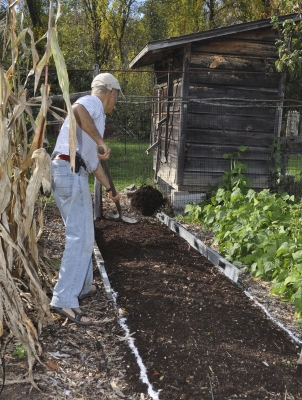
My tack is to take a multi-pronged approach, with some spraying (mostly organic), nurturing the soil (lots of mulch and compost) and the plants (pruning and fruit thinning), fostering beneficial insects with plantings that encourage their presence and with careful choice and limited amount of sprays, trapping pests (hanging fake apples, Red Delicious, with sticky Tanglefoot in trees), and possibly bagging individual fruits. See Grow Fruit Naturally for more about these approaches.

Even if there is “many a slip ‘twixt the cup and the lip,” every fruit grower has to be an optimist.

Plant Sale Reminder

This is the last week of my annual plant sale. For more information, go to https://leereich.com/2021/05/last-week-of-2021-plant-sale.html

And, A Free Webinar, “Weedless Gardening”

For more information, go to www.leereich.com/workshops.

LAST WEEK OF 2021 PLANT SALE

Lee Reich’s 13TH (?) ANNUAL PLANT SALE
(of mostly lesser grown but delectable fruits)

fig, lowbush bb, alpine sbBecause of covid, the sale is now online, with scheduled pickups here at the farmden in New Paltz, NY.

Limited quantities of plants are still available (September Sun female kiwiberry, various varieties of fig, Blue Sunset lowbush blueberry, and Pineapple Crush white alpine strawberry). All are truly delectable fruits on truly beautiful planats. So order soon.

To see plant list, order, pay, and — VERY IMPORTANT — schedule a pickup time (May 29-31 and June 2, 2021) when you order, go to https://leesannualplantsale.squarespace.com

GARDENING “HANDWORK”

To Haul or Not to Haul

Hauling manure hardly seems to make sense these days, considering that lugging 500 pounds of horse manure gives plants about the same amount of food as a 50 pound bag of 10-10-10. And the latter for only about ten bucks!

Human manure piles, China, 1900

Human manure piles, China, 1900

But whereas 10-10-10 supplies only food (and only three of the sixteen needed nutrients at that), manure has other benefits: it aerates the soil; it helps soil capture and cling to water; and it renders nutrients already in the soil more available to plants. Nutrients from synthetic fertilizers are used up or washed out of the soil by the end of a season, yet benefits from each application of manure last for years. Even ingredients of a concentrated organic fertilizer have little benefit as far as soil aeration and water retention are concerned.

Manure is a traditional way of feeding plants, to the extent that applying synthetic (chemical) fertilizers once was referred to as a form of “manuring,” and certain plants grown specifically to improve the soil are called “green manures.”

When we talk of manure, though, we really mean animal excrement plus bedding. The bedding itself –- usually hay, straw, or wood shavings -– is itself responsible for some of the benefits of manure. The amount of nourishment manure supplies to a plant the first season depends on the ratio of bedding to excrement. More bedding means less nourishment to plants the first season, but greater residual effect for subsequent seasons. Unfortunately, bedding also can be a source of weed seeds.

Mostly manure pile

Long ago my compost piles were mostly manure

“Hot manures” are so called because they readily heat up when stacked in a pile. The heat comes from the burst of microbial activity stimulated by these manures’ relatively high concentrations of nitrogen and low concentrations of water. Horse and poultry manures are “hot;” cow and pig manures are “cold.”

How to Handle It, Generally

Okay, so you have manure in hand, or rather in pitchfork (a five-tined pitchfork is my preference for manure handling). What next?

Most gardeners dig it into the soil immediately. If the manure is well rotted -– meaning bits of hay, etc. no longer are recognizable –- planting can proceed as soon as the soil is smoothed.

If the manure is relatively raw, wait at least 2 weeks for things to settle down, microbially speaking, before planting. Especially if this raw manure has a high proportion of bedding, a much longer wait is needed before planting. Microbial decomposition of that extra carbon-rich bedding requires nitrogen which, if in sufficient amounts are not in the associated manure, must come from soil reserves. Microbes are more adept at getting at that nitrogen than are plants, so plants are starved — at least until the extra carbon is digested (and the carbon/nitrogen ratio in the ground is about 20/1). One advantage to digging manure into the garden in autumn is that it avoids any delay in planting in spring.

Spreading manure on a farm

Spreading manure on a farm

In lieu of digging, just lay manure on top of the ground as mulch. This is fine if the manure is rotted, but nitrogen volatilizes from fresh manure exposed to sun and wind. The nitrogen loss is wasteful, but may be worth the sacrifice considering the benefits of the mulch. And the nitrogen starvation mentioned previously doesn’t occur because decomposition is very slow, at the interface of the mulch and the soil.

And More Specifically

Spreading compost on established bed

I have access to more horse manure than I could ever possibly want, and the way I usually handle the manure is to compost it before putting it on or in the soil. In a compost pile, manure is mixed with other ingredients (garden residues, vegetable scraps, leaves, soil, etc.), so the result is a better-balanced fertilizer. Also, the heat of composting kills most weed seeds present in either the excrement or the bedding.

The amount of manure to add to soil depends on whether the manure is rotted or fresh, and what kind of animal provided the manure. You can add too much manure to soil: I once had a chicken farming neighbor who killed his asparagus bed by blanketing it under 6 inches of chicken manure (very hot stuff!). Twenty-five to 50 pounds per hundred square feet is about the right amount.

(Manure is the only bulky, beneficial source of organic nitrogen. Some other sources are kitchen scraps, young plants, cultivated and wild — as in “weeds” —  and especially, legumes.)

  The word “manure” comes from the old French word manoevrer, meaning “to cultivate by hand” (in turn from the Latin words for “hand” and “work”). All this manure handling is a lot of physical work, but isn’t exercise another benefit of gardening?

Plant Sale in Progress (mostly fruits, many uncommon, and uncommonly delicious ones)

A reminder: my plant sale, online with live pickup, is in progress for another few days. To view the plant list, to order, to pay, and — VERY IMPORTANT — to schedule a pickup time (May 29-31 and June 2), go to https://leesannualplantsale.squarespace.com

PLANT SALE NOW LIVE

Lee Reich’s 13TH (?) ANNUAL PLANT SALE
(of mostly lesser grown but delectable fruits)

Because of covid, the sale is now online, with scheduled pickups here at the farmden in New Paltz, NY.

Note that there are limited quantities of al plants, each available to the first taker. So order soon.

To see plant list, order, pay, and — VERY IMPORTANT — schedule a pickup time (May 29-31 and June 2), go to https://leesannualplantsale.squarespace.com

MICHELANGELIC ASPIRATIONS

I Start with the Easiest

I spent an hour or so today working on my sculptures. Yes, they were out in the garden. No, they were not stone renderings of fish spouting water into a pond or of ethereal females sprinkling the ground with flower petals. These sculptures are quite large and, as you might guess, the are green, with leaves. 

Some of the sculptures have been completed; some are works in progress. The easiest of these sculptures are nothing more than short hedges, one of boxwood and the the other of yew. Each makes a cozy enclosure, the yew for my front stoop and the boxwood for a bed of Smooth (Hills-of-Snow) hydrangea, a hop vine climbing a trellis, and a Sweet Autumn clematis climbing a brick wall.

Yew at front stoop
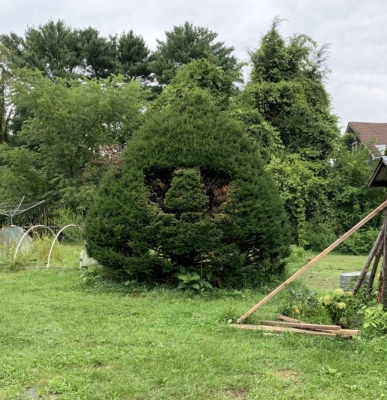
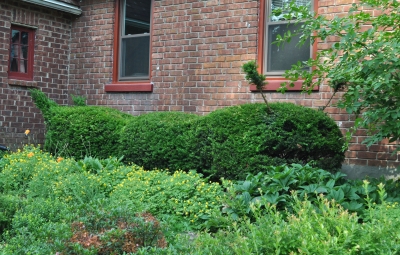
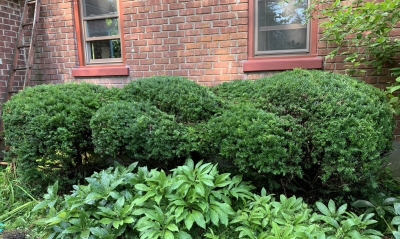
With flat tops and nearly vertical sides, both hedges are quick and easy to prune. They both widen slightly from head to toe because, quoting from the “hedging” section of my book, The Pruning Book, “If the top is wider than the bottom, the bottom will become shaded. Over time, the shaded portions will die out, leaving gaps in the hedge.”

(Could these two hedges hardly qualify as “sculpture?” I contend that creating any three-dimensional object requiring aesthetic decisions as to shape and size qualifies as “sculpting.”) 

A hedge out in back of my home takes longer to prune because the hedge itself is longer as well as, in some parts, higher. This 50 foot row of privet bushes is waist height through most of its length except for the gentle upward sweep it takes as it approaches either end. After climbing 8 feet, the sweeps level out, continuing on to create the top of an arch beneath which is an opening through which I can walk, even drive my tractor.

Catty-corner to the swooping hedge (which, in its earlier stages, I was going to sculpt into a two-headed dragon) is another hedge with a pass-through. This hedge forms a high wall a few feet off the back wall of my workshop, and it’s pass-through iswide enough and, with its slight bump up above it, also high enough so that anything that fits through the barn door can also fit through the pass-through. 
Intersecting hedges
The plant that makes up this hedge is Tea crabapple (Malus hupihensis), an interesting plant not usually hedged. It produces seeds that are apomictic, a botanical quirk where, to quote from another of my books, The Ever Curious Gardener, the plant produces “seeds that are not the result of pollination, but that develop from the same kind of cells that make up the rest of the plant.” (All seedlings and the mother plant are clones of each other. These were extra seedlings from those I had grown for research use when I worked for Cornell University.)

Left to its own devices, a Tea crabapple would grow up to 40 feet high and produce fragrant, white blossoms and cherry-size crabapples. For decades, I’ve kept the row of seven of them only 15 feet long, 3 feet wide, and 9 feet high. They don’t mind except with all that pruning, flowers or fruit are rare.

Heads and Clouds

Now we come to the more difficult hedges, ones that are more sculptural. Both are yews, a plant that tolerates just about any kind of pruning. I have written about both hedges previously. Since I revisited them today with pruning and hedge shears, I thought it was time to revisit them on the page also.

The first is not a hedge, but a solitary, giant old yew bush that, at more than 40 years old, predates my tenure here. For most of that time, it was pruned to the shape of a 15 foot high and wide cone. More recently I’ve pared away at it to try to morph that cone into a giant head.

Problem is that the interior of a plant cone that size is dark, so the stems within lose their leaves. Some of them dry out and die back. As a result the yew head’s eye sockets and mouth, both of which were supposed to be green recesses are dark — and a bit foreboding.
Yew bush pruned to a head
Today’s pruning was geared to shearing the whole bush to keep it from growing too large, and shortening all the dead wood deep within the eye and mouth sockets. New sprouts should then appear within those once-shaded gaps. 

The other sculpting challenge started life very conventionally, as four yew hedges planted along the house wall. It was your typical “foundation” plants and planting. Years ago, for fun, I sculpted the hedge into a giant whale and, a few years later, a giant caterpillar. Easy.
Caterpillar yew
More recently, I decided to go more abstract and artistic, with “cloud pruning.” Or, as Jake Hobson more accurately terms it, in his informative and visually inspiring book The Art of Creative Pruning, “organic topiary.” He describes this pruning as creating forms that take “on a decidedly organic character, as though they were made of wax and exposed to the sun too long. Definition is lost, in favour of natural, flowing lines.” That’s my goal, thus far hinted at but unachieved. I find it difficult to unshackle the hedge from the three individual bushes that comprise it.
Organic topiary yew

If Only Michelangelo…

So much in gardening involves taking time to step back and admire your finished work. With these sculptures, even the simplest ones, it’s important to do so periodically while sculpting.

It’s all fun and very satisfying. If I make a mistake, I can just wait for the plant to grow back. Just think if Michelangelo could have stepped aside for a few weeks while his marble grew back for another round of being chipped away.

On the other hand, he would not have to chip away at the finished piece every few months through summer to keep it in shape. These sculptures need multiple prunings through the growing season to keep their shape.

CALLING ALL VOLUNTEERS

A Returning Beauty

I have some of the nicest volunteers in my garden. Some of them have been people, many of them are plants, and one of my favorites – among the plants, that is – is columbine. Years ago, I planted some native columbines, those dainty plants whose orange and yellow flowers hover on thin stalks above their ferny foliage. Since being planted, these wildings self-seed – volunteer, that is — every year in various nooks and crannies around my yard, such as in the thin crevice of soil between my bluestone front path and the adjacent stone wall.
       Native columbine
I once also planted cultivated columbines, the common McKana Giants, and their offspring have been volunteering around the yard as well. Flowers and foliage of these more cultivated sorts are similar to the natives, just bigger in all respects, which is not necessarily better. Or worse. Just different.
Cultivated columbine
Colors of these larger columbines are different from that of the natives. My original McKana Giants sported various colored bracts and petals. Seedlings of these plants, 20 years later, have segregated out into just a few solid colors, and the cool thing is that each year’s colors are a bit different from the previous years’.

Columbine and trumpet honeysuckle

The once “high-bred” columbines back by my vegetable garden have mostly soft pinks flowers, a color that marries well with the scarlet of the trumpet honeysuckles behind them.
Right near my front door, poking through cracks between the bluestone patio and my home’s brick wall, is a big, beautiful columbine with dusky, purple flowers.

I do help out these volunteers by weeding out those in excess or interloping where they shouldn’t.
volunteer columbine

Greenhouse Volunteers

Not all my volunteers are beauties. Some are only practical.

For instance, in the greenhouse, I once planted claytonia, also known as miner’s lettuce. It’s one of many lesser known “greens” that thrive in cool weather so are good for adding variety to salads once fresh cucumbers and tomatoes are just a memory.

Since that first planting, late every fall claytonia shows up all over the place in the greenhouse with no help from me. “All over the place” usually applies to a weed, but when I grab a whorl of claytonia leaves and lift gently, the plant gives in and lifts, hardly disturbing the soil.
Claytonia in greenhouse
This past winter was relatively mild and, for the first time, I see a few claytonia plants out in the garden. Uh-oh.
Claytonia in garden
Years ago, I would sow celery seeds in flats in February for transplanting in May; the seeds take a long time to sprout and then the seedlings grow very slowly. No more. I once grew celery for winter in the greenhouse and, in spring, when seed stalks started pushing up from the plants’ middles, I decided to let the plants do their thing. They self-seeded, so all I need to do these days is weed out excess. Some of those excess can also be potted up for transplanting into the garden.

Some greenhouse volunteers — mâche and cilantro — help out both in the greenhouse and in the garden. That’s nice of them because then I get the early crop in the greenhouse and the later crop outdoors.

Mâche show up in winter in the greenhouse, again in early spring and then again in late summer. The early spring crop is from plants that overwintered; mâche, though delicate in texture and flavor, is perhaps the most cold-hardy and among my favorite of all fresh salad greens. In spring, plants go to seed and the seeds slumber in the ground until cool weather coaxes them to sprout.

Mache

Mache

Cilantro, in contrast, only sprouts in late winter in the greenhouse and mid-spring out in the garden. It does so profusely. Like claytonia it never segues over into the category of “weed” because any excess is easily removed.

Sacrilege and Hope

One volunteer that shows up only outside, in the garden, is garlic. This may sound like sacrilege, but I don’t grow garlic. Many years ago I did, and then decided to devote the garden space to vegetables whose garden-fresh flavor is truly better than anything I could buy. And anyway, I don’t use that much garlic. So I stopped planting it.

Garlic did not go away, though. It’s been propagating by the little offsets it produces atop its flower stalk to the point where it’s everywhere among the leaf-mulched berry plants adjacent to my garden. (It’s not allowed in my garden.) The mostly grassy plants hardly ever yield bulbs worth saving but the tender, grassy stalks are useful. If I call this a weed in my garden, the parts of my garden where I grow it are indeed very weedy.
Naturalized garlic
At the other extreme is one volunteer that once liked it here, but evidently no longer does. That’s dill, which used to self-seed in just the right amount, and usually would confine itself to the same corner of my vegetable garden.

A couple of years ago, only one or two plants showed up, and last year none. I’m not sure why. I want it to come back so I bought some seeds for this year. I’m hoping it comes back as a volunteer again in future years.

MARKING SPRING’S ONWARD MARCH

It’s spring, a time when a man’s thoughts turn to . . . flowers, of course. (At least this man’s thoughts, some of them, do.) Sure, I’ve been reveling in the colorful progression of blossoms beginning, this year, with cornelian cherry and hellebore on about the first day of spring, and moving on to forsythia, plum, Asian pear, flowering quince, European pear, cherry, and — probably by the time you read this — apple followed by shipova. All this is the flamboyance of spring.

This year, I’ve also been admiring a few of the more subtle flowers of spring.

MAPLE BEAUTIES, AND OTHERS

Some of the maples are now in bloom. Sugar maples (Acer saccharum) is perhaps the prettiest and most useful of the maples. Unfortunately, it’s also the least tolerant of compacted or wet soils, or a warming climate. The beauty of sugar maples lies not just in the leaves’ autumn show of color or the majestic form of an older tree.

Acer, sugar maple flowers, closest

Acer, sugar maple flowers, closest

Check out sugar maple’s flowers. They dangle like pale green wisps of lace from the branches, subtly attractive in their own right viewed up close and especially so in the forest. As a prominent species in the Shawangunk Mountains here in New York’s Hudson Valley, en masse the trees suffuse the view of the mountainside from afar with a welcoming softness.
View of Shawangunk Mountains
Red maple I(Acer rubrum) is another very attractive — and very variable — maple. The showiness of its blossoms relies on color, a deep, deep red. The blossoms arrive very early, and what I’m seeing is the aftermath of the blooms, clusters of red seeds, their wings spread as if ready to fly, which they soon will.

Acer, red maple seeds

Acer, red maple seeds

Not nearly as appealing, in many ways, as a tree, but even more cosmopolitan in its environmental tolerance, is silver maple (A. saccharinum). Flowers are blah. The tree tends to drop branches. No autumn color to speak of, either. It is fast-growing, though. As expected, the roots are equally fast growing and shallow. I once lived in a house in front of which grew two giant silver maples. One day, while investigating a clogged water line in the crawlspace, I came upon what looked like a thick, half-buried leg of an elephant. It was one of the silver maple’s roots.

The last —unfortunately too common — maple around here whose flowers or fruits I’ve been noticing is Norway maple (A. platinoides). This species was once widely planted as an ornamental but is now frowned upon because it casts a lugubrious shade beneath which grass or, in the woods, many wildflowers have difficulty growing. It’s an invasive plant that can displace sugar maple in wild settings. In autumn, leaves hang on for a long time, long enough to look forlorn after being burned by a freeze or, barring that freeze, for occasional leaves to begin turning a sickly yellow before naturally dropping.

Norway maple flowers

Norway maple flowers

Norway maple’s flowers, viewed up close, are surprisingly attractive, something like those of sugar maple as clusters of them hang downward on stalks, something like a chandelier. But with none of the grace of sugar maple’s long flower stalks.

PHENOLOGY

I believe I have earned the title of “phenologist.” No, I haven’t been measuring skulls to assess character, which is the realm of phrenology. Phenology, which I have been practicing, is the study of climate as reflected in the natural cycles of plants and animals.

For the past 30 plus years, I have recorded the dates on which various plants have blossomed or ripened their fruits. My interest has been horticultural: In spring, plants blossom after experiencing a certain accumulation of warm temperatures; fruit ripening reflects, to a lesser degree, further accumulation of warmth. The amount of warmth needed to bring on those flowers or ripen fruits varies with the kind of plant, sometimes even with the variety of plant. 

Forsythia in bloom

Forsythia in bloom

Depending on late winter and spring weather, blossoming dates for various plants can vary quite a bit. Microclimate also plays a role, so I’ve tried to always note blossoming on the same plant from year to year. This year, forsythia bloomed about April 9th, which is pretty early as compared with previous years although in 2010 it bloomed on April 1st and that was topped by 2012’s bloom on March 20th. Contrast that with 1984, when it bloomed on April 25th! On average, bloom dates have crept earlier and earlier over the years, a reflection of global warming.

In the garden, seeds and seedlings shouldn’t be sown or transplanted until the soil has warmed sufficiently, which likewise reflects that accumulation of warmth. Some seeds or seedlings require more warmth before they can grow (or survive) than do others. Knitting all these phenomena together, I plant, for example, lettuce seeds when forsythias blossom, broccoli transplants when pears blossom, and sweet corn when honeysuckles blossom. 

Pears in bloom

Pears in bloom

These sunny days and balmy temperatures are heavenly – except that they’re also coaxing earlier blossoms from my fruit trees, blossoms that could get burned by subsequent frosty nights. The earlier these trees bloom, the more chance for those blossoms to get burnt on a subsequent frosty night.

The historical average date of the last killing frost around here is about the middle of May. Even warming trends might accommodate a frosty night or two that can wipe out a whole season’s harvest of apples or peaches, the first of which is about to bloom and the second of which has bloomed.

Still, it’s a glorious time of year, with no small contribution from the maples.

MY MENAGERIE EXPANDS (and a free webinar)

A Little Bit of the Mediterranean

The UPS guy arrived yesterday with a long, narrow cardboard box containing the latest addition to my menagerie, a menagerie of mostly Mediterranean plants. “Mostly” because not all of them have roots in the Mediterranean. But all of them thrive and are grown in Mediterranean climates of mild winters and sunny summers.

My collection is a “menagerie” because, although all the plants thrive and are grown in Mediterranean climates, the makeup is quite diverse. There’s the evergreen pineapple guava (Acca sellowiana that also goes under the common name feijoa), olive, rosemary, bay laurel, and Meyer lemon.

Pollinating pineapple guava

Pollinating pineapple guava

And a few of the plants — black mulberry (Morus nigra), Pakistani mulberry (Morus macroura), pomegranate, and fig — go dormant and lose their leaves in winter.

Pakistan mulberry fruit

Pakistan mulberry fruit

Here at the farmden, winter temperatures can plummet to minus 20°F, so getting these plants to thrive involves more than just giving them a nice, sunny spot in the ground outdoors. Except for the figs, some of which are in the ground in the greenhouse, all the others grow in pots. Every couple of years or more, depending on the plant, I slide a potted plant out of its pot, shave off some of its roots, and then put it back into its pot with some new potting soil. Stems likewise need pruning to keep a plant from growing too big and, in the case of fruiting plants, to keep the plant fruitful.

Root pruning and repotting

Root pruning and repotting

Potted plants spend summers basking in sunlight, just as they would in a Mediterranean climate. Come winter, they’re protected from frigid weather but kept cool, ideally 25 to 45°F. The winter home for the deciduous plants is in the dark of either in my walk-in cooler or my cold basement. Evergreen plants need light year ‘round, which they get in various south-facing, sunny windows in cool rooms. More light allows for warmer winters indoors.

If all this sounds like a lot of trouble, it is. So why do it? I like the way the plants look but, even more so, I like the way the plants taste, especially those that bear fruit. Thus far, my most successful Mediterranean fruit has been fig; black mulberry and Meyer lemon have borne pretty well; my harvest from pineapple guava and olive have been only a few fruits each year. Still nothing from the pomegranate.

Another -Quat besides Kumquat and Sunquat

The newest addition to my menagerie is loquat (Eriobotrya japonica), bearer of plum-size yellow or orange fruits. I’ve only tasted two loquats in my life, both from fruit stands at a market (Paris and Jerusalem); neither was anything to write home about. But I know from experience the superiority of home-grown fruits. And descriptions I’ve read that loquat’s flavor combines that of apricot and peach, or that of peach, citrus, and mango. would alone would warrant my giving this plant a
try. 
Loquat
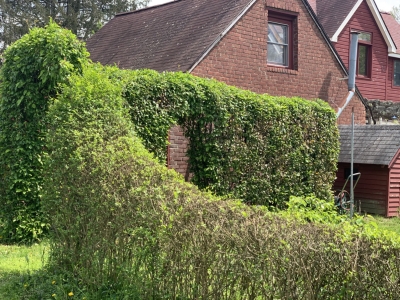
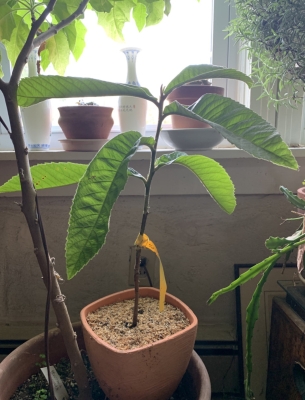
I’m also attracted to loquat for its several unique features. It’s a distant relative of apple, pear, and plum, yet it flowers in autumn and the fruits ripen in spring or early summer. The leaves, large, leathery, and dark green are ornamental enough for some gardeners in equable climates to grow this plant strictly as an ornamental. Loquat leaf
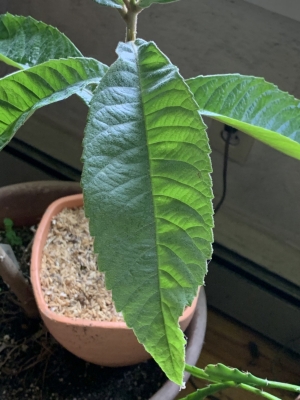
An attractive potted plant would do well to boost the eye appeal of my ragged collection of potted plants hugging sunny windows in winter.

Loquat’s small, white flowers emit a sweet and heady aroma — another plus — and are borne in clusters at the branch tips. Good to know when it comes to pruning: if I shorten too many branches, I’ll have to say good-bye to flowers.

As an evergreen, this plant will join other Mediterranean evergreens in winter at a sunny window in a cool room. Light through even a sunny window pales compared to outdoor sunlight at the same time of year. One source says that loquat tolerates a bit of shade. That’s hopeful.

From China, Around the World, and Now Here

Loquat’s botanical roots are in China. From there, it travelled to Japan where it evidently was a hit. The Japanese have been enjoying the fruits for about 1,000 years. Now the plant is widespread in climates where it can be grown. Because the plant is a little finicky about fruiting, with 26° killing the flowers, 24° causing developing fruits to drop, 19° killing unopened flower buds, and the whole plant dying at 12°. Add to that the plants’ not liking too much summer heat or wind. No wonder commercial production of this fruit is limited.

Looking at my loquat’s leaves, I feel almost like I’m looking at an old friend, or at least a close relative of an old friend. Yes! The plant reminds me of medlar (Mespilus germanica), a cold-hardy uncommon fruit that I’ve grown and enjoyed for many years (described in my books Landscaping with Fruit and Grow Fruit Naturally, and also in my, for now. out of print Uncommon Fruits for Every Garden). Besides similar leaves, both fruit at the tips of new stems growing off one-year-old wood.

Medlar

Medlar

The fruit has even been called “Japanese medlar,” and the Spanish word nispero can mean either medlar or loquat. At one time, loquat was placed in the genus Mespilus, along with medlar.

My loquat, the variety Golden Nugget, does not need a pollinator and is allegedly “juicy, firm, meaty, and sweet.” And grafted trees (mine is) bear within 2 or 3 years. So I’m hopeful. If my Golden Nugget loquat is really flavorful it will earn a place, along with four in-ground figs, in the greenhouse, where the climate is truly Mediterranean.

FREE WEBINAR ON PRUNING FRUIT TREES, SHRUBS, AND VINES!

I’ll be giving this free webinar on Saturday, April 24, 2021 from 9-10:30AM EST. Register for it at https://www.eventbrite.com/e/pruning-fruit-trees-shrubs-and-vines-tickets-149851978301

FRUITFUL FUTURES

Making the Best of It

Eek! Mice (or rabbits)! Not the animals but the damage they have wrought. The bark on virtually all my pear grafts of last year has been nibbled off enough to kill the grafts.

Once I calmed down, I realized that all was not lost. All the chewing was above ground level, leaving a small amount of intact bark still in place. The plants aren’t dead, just their portions above the chewing. The near-ground portions could be grafted again.

Daisy showered with petals (more on this later)

Daisy showered with petals (more on this later)

(Most fruit trees neither come true from seed nor root readily from cuttings, so are propagated by grafting a scion — a short length of one-year-old stem — of the desired variety onto a rootstock. The rootstock is the same kind of plant as the scion variety and could be a seedling or a variety developed for special rootstock purposes. My nibbled trees are pear trees, Highland, Blake’s Pride, and other varieties, each grafted on a rootstock named Old Home X Farmingdale 87, which dwarfs the trees’ final height to about half that of a full-size pear tree, as well as induces it to yield its first fruits sooner.)

Damaged rootstock

Damaged rootstock

Crouched way down at ground level would be a tough position for grafting, not to mention trying to keep dirt and debris off the cut surfaces. So I dug up each plant for “bench grafting,” so named because it’s done at a bench or, more generally, upright and in the comfort and better light of indoors.

My graft of choice for these wounded plants is the whip graft. It’s a simple graft, especially for apple and pear; I typically expect 95+ percent “takes.” With a well-honed, preferably straight-edged (and preferably single-bevelled) knife, I make a smooth, sloping cut about 3/4-inch long on the rootstock. Typically, I would make the cut longer but there’s not that much viable stem above-ground. 

Making the cuts on rootstock and scion

Making the cuts on rootstock and scion

Next, I take a scion of similar thickness to the rootstock, although this is not all-important, and make a similarly smooth, sloping 3/4-inch long cut.

If the cuts are secured face to face and then sealed against moisture loss, cells at the cuts start to multiply, eventually knitting the two pieces together and joining their vascular tissue. If the two plant pieces are not matching in thickness, success can still be achieved if just one side of the two of them is aligned. A piece of rubber, either a cut open rubber band or a bona fide grafting rubber, keeps cut edges of scion and rootstock intimate, and then the wound is sealed with Tree-Kote or similar tree wound material, or Parafilm tape.
Cuts on stock and scion in place
Wrapping the graft

Sealing the graft with Parafilm

Sealing the graft with Parafilm

Keeping the roots moist and the plants indoors for a couple of weeks speeds growth of new cells. After that, the plants will go outdoors, either potted up or planted in the ground.

The Downside to Low Grafting

Grafting so low on the plant does have its downsides. For one thing, a certain amount of rootstock stem above ground level is needed for the dwarfing effect. For full effect, grafts are usually made 6 to 12 inches above ground level.

Also, if a graft is very low on a plant so that over the years it gets covered with soil, the scion is could eventually root. At which point the dwarfing and other benefits of the rootstock are lost.

On the plus side, if any of my grafts fail, the still viable rootstock will undoubtedly send up a new shoot, which can be grafted next spring — and done well above ground level.

So How Do You Get a Rootstock?

The way to get a rootstock is to buy one (ha, ha). But how does as nursery make, for instance, an Old Home X Farmingdale 87 pear rootstock if pears (and most other tree fruits) are so hard to root and don’t come true from seed.

Rootstocks are bred or selected to impart special characteristics to the tree for which they provide roots and a short length of stem — very short stems in the case of this week’s pear grafts. Another characteristic that might be sought in a rootstock is ease of propagation, perhaps even by cuttings.

Whereas a pear variety such as Blake’s Pride is propagated from mature, fruiting wood, a rootstock might be propagated from juvenile wood, that is, wood that that has never grow to maturity. All plants are easier to multiply from juvenile wood. Near the base of a plant that has been raised from seed, the wood retains its juvenility, so a seed-propagated rootstock variety that was repeatedly cut back would provide stems that were juvenile and could be rooted as cuttings.

And there are other ways to coax new plants from an existing plant, such as tissue culture and stool layering. Maybe something about these methods at another time.

Fruitful Near Futures

Even grafted higher atop a rootstock that imparts precocity, my pear grafts aren’t apt to yield their first crop for a few years. My Nanking cherry bushes (Prunus tomentosa), on the other hand, are slated to have bright red cherries arching their stems to the ground in a couple of months or so.

A profusion of Nanking cherries!

The cherries are small, but are very juicy with a refreshing flavor that combines that of sweet and tart cherries. Another plus for these plants is that they are more or less free of pest problems, requiring no care on my part beyond picking the fruit. Read more about them in my book Landscaping with Fruit.

No need to ignore the bushes until payday because payday is also right now, visually. Along the length of my driveway, the hedge of Nanking cherries has turned into a cloud of dense, slightly pink, white flowers. This time of year it’s not uncommon for a biker or walker to stop and ask the name of the plants. “Nanking cherry!”

Nanking cherry hedge

Nanking cherry hedge

TRANSPLANT GROWING, A BETTER WAY

Snicker if You Will

I don’t know about your propagation space, but mine is getting overcrowded. Yes, now with a greenhouse, I’ve got more room than in the the past when I grew seedlings in windowsills or in my basement under lights. But my greenhouse is small, and with greenhouse beds home to fig trees and early spring lettuce, arugula, and other greenery, seedlings are relegated to a 12 by 2 foot shelf along the north wall.

I make the most of that shelf by “pricking out.” Snicker if you will at this Britishism, but pricking out is a way to get a lot of bang for your buck space-wise, whether in a greenhouse, on a windowsill, or beneath lights. It also makes more economical use of seeds.
Seedlings in spring, greenhouse
The process begins, for me, with either 4 by 6 inch or 6 by 8 inch seed flats, which are plastic pans a couple of inches deep with drainage hole drilled in their bottoms. I fill one of these with potting soil, firm it, and then treat it like a miniature farm field, making 4 or 5 furrows along the short length. I press these furrows into the potting soil with a board that fits the flat to the underside of which I attached dowels where I wanted the furrows.
Seed flats and furrowmaker
The first cool thing about this whole process is that each furrow can be sown to a different variety. I generally sow the flat to different varieties of the same kind of plant so that germination of the whole flat is fairly uniform. Looking over at one of my larger flats, I see newly emerged sprouts of Nepal, Belgian Giant, Paul Robeson, Amish Paste, and Blue Beech tomatoes. All taking up a mere 48 square inches!
Sowing lettuce seeds in flats
Flats of tomato seed were planted April 1st, watered, and kept warm, and those sprouts emerged today, the 6th. No light is needed until sprouts emerge. After a week , now with good light, those cotyledons (seed leaves) will darken and true leaves will appear. That’s when it’s time to actually “prick out.” Mind you, for two weeks, all those potential tomato plants have been getting started in a mere 48 square inches, the first week of which they didn’t even need light!
Lettuce seedlings
Other kinds of seeds take longer to germinate. Or shorter. And temperature also figures in. Tables of optimum germination temperatures for various kinds of seeds are available on the web and in some seed catalogs.

The Process

Pricking out is transferring the still tiny seedlings from the seed flat to individual cells to “grow on,” another Britishism. For these containers I’ve used saved cell-packs from plants I’ve bought in the past; now I mostly use Growease Seed Starters automatic watering  system from gardeners.com. Depending on how many plants you’ll be growing and what you’ve got, small yogurt containers, even jumbo egg cartons could also fill the bill.
Pricking out containers
To start, I take a dibble, for this use, a pointed plastic cylinder about 3/4 inch across, and make a hole in one potting-mix-filled cell. (Etymologically, “dibble” originally was, or is, Manchester British slang for a police officer, from a character in a cartoon. How did that become the name for the black plastic thing I’m holding?)

Back to the seed flat . . .  time to lift individual seedlings out of their seed flat and into their newly dibbled hole. Those seedlings are very delicate and will die if the stem is injured. So I take a knife or a spatula and scoop up underneath a clump of seedlings to loosen the potting soil around their roots, and then take gentle hold of one of their leaves to lift the plantlet free.
Pricking out lettuce
After lowering one plant’s roots into its waiting hole, I firm the potting soil around the roots. No, not pressing against the stem, which could injure it, but pressing down into the potting soil. And not too hard. Just enough to firm it around the roots. One advantage of pricking out is that you can set the little seedling deep in the hole, up to its true leaves, so that the leaves are no longer supported by the weak, young stem.

Water is needed right away, either from below by sitting the container in a pan of water for awhile, or with a gentle shower from above. The newly planted seedlings are not turgid for a few hours so water from above often accumulates on the leaves to weigh down the plant. The wet leaves, flopped down on wet potting soil, are apt to rot, so with my finger I go plant by plant flicking off the water, and then the plants stand up straight.

After about 5 more weeks of growth with bright light and slightly cooler temperatures, the plants will be sturdy and the season will be ripe for tomato planting. Sometimes I caress my plants to encourage stocky growth, raking my hand gently over their tops, ideally once a day. The effect, called thigmotropism, is the same as that which causes dwarf, stocky growth of pine trees on wind mountain outcroppings.
Pricked out seedlings
Not all seedlings follow tomato’s schedule. Celery, for instance, might take 3 weeks to germinate and then another 9 weeks to grow to transplant size. (For details on when to sow, based on the average date of the last spring frost where you garden, see the vegetable section of my book Weedless Gardening.)

Followup on Previous Weeks’ Blogs

My first batch of birch syrup from a couple of weeks ago was, according to a friend who boiled it down for me, awful. “Worst thing I ever tasted,” says he.

But some of that syrup was cloudy from microbial activity during the warm weather. That could have caused that distinctive flavor.

Colder weather followed, and I tried again, discarding any cloudy sap. Boiled into a syrup, the flavor was still distinctive, not awful, but also not really good. Something reminiscent of cough syrup or molasses. The sap is high in fructose, which burns at a lower temperature than sucrose, the primary sugar in maple sap. It more easily takes on a scorched flavor, which my syrup definitely has, in excess.

Perhaps a species other than river birch would have been better, even good. The syrup is usually made from paper birch. All I grow here is river birch, though. They are, at least, beautiful trees.

And a followup on my overwintered artichoke plants. Or, I should write, my non-overwintered artichoke plants. Perhaps something will eventually emerge. No sign of anything yet, and I’m not hopeful.