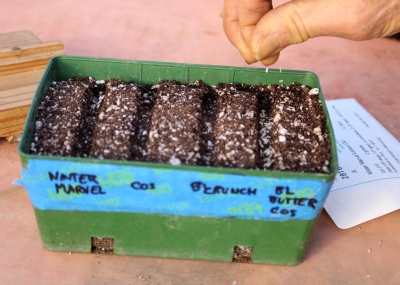
SPRING SEEDING: WHEN?

Truth From a Thermometer

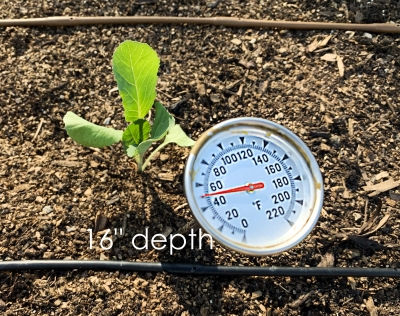
Stop by my vegetable garden this time of year and you might see one or more thermometers poking out of the ground. No, I’m not experimenting with a new way to monitor the soil’s health. Soil temperature can serve as a guide for timely sowing of seeds outdoors. Seed sown in soil that is too cold won’t germinate; just sitting there waiting for warmer weather, ungerminated seeds are liable to rot or be eaten by animals.Temperature in shallow soil

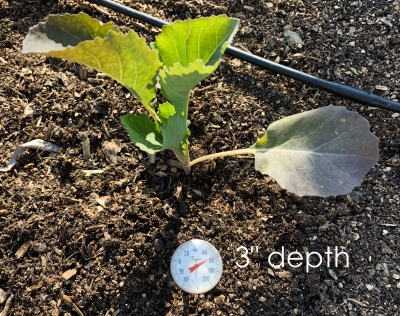
Lettuce, onion, parsnip, and spinach seeds can be planted earliest. They’ll germinate just about as soon as ice in the soil thaws. At the other end of the spectrum are seeds of melons and squash, which won’t germinate until the soil temperature reaches sixty-five degrees. The minimum temperature required for germination of other vegetable seeds is as follows: forty degrees for beets, cabbage and its kin, carrots, peas, chard, parsley, celery, and radishes; fifty degrees for sweet corn and turnips; and sixty degrees for beans, cucumbers, and okra. 

Temperature deeper in the soilThe above listing gives minimum, not optimum, temperatures for germination. Optimum temperatures might be even thirty degrees higher than the minimums, as in the case of celery which germinates quickest at seventy degrees. Waiting for the optimum temperature isn’t advisable, though. To delay sowing until the soil temperature reached the optimum temperature for pea germination (seventy-five degrees) would result in a midsummer harvest, when hot, dry weather turns peas coarse in taste and texture.

But What Temperature is Best?

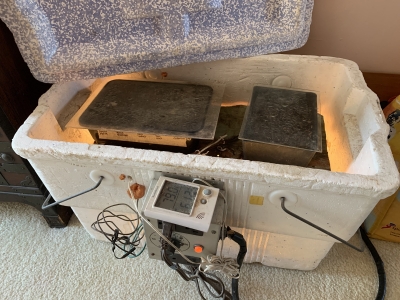
For indoor seeding in seed flats, I use an electric, thermostatically controlled heating mat, waterproof and made for seed germination. With so many different kinds of seeds to grow, I can’t be twisting the thermostat dial up and down to suit each seed’s optimum. The temperature remains set at about 80 degrees. Which is why lettuce sown a couple of weeks ago still hasn’t sprouted.Heating mat

Each kind of seed also has a maximum temperature at which it will sprout. For lettuce, that’s about 80 degrees. I resowed a few days ago, setting the lettuce flat on the cooler greenhouse bench instead of the mat, and green leaves have already shown their faces. Other vegetable seeds notorious for sulking in the heat are parsnip, celery, and pea. Turnip is interesting for being eager to sprout anywhere in the broad range of 60 to 105 degrees!

For more details on temperatures needed for seed germination, as well as plant growing and charts and tables with lots of other stuff about growing vegetables, I highly recommend Knott’s Handbook for Vegetable Growers, available in hard copy or online.

Tips to Advance the Season

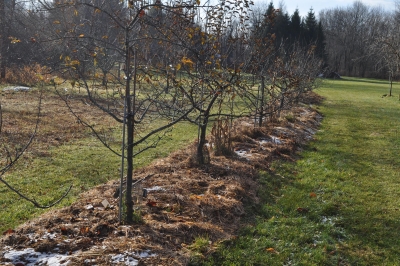
No need to twiddle your thumbs waiting for the soil to warm; the warming process can be speeded up. (I detail a number of ways to do this in my book Weedless Gardening.) A thick, organic mulch, though generally beneficial to the soil, insulates the soil and hence delays warming this time of year. So for early sowings, rake back the mulch to expose the soil to the sun. Once the soil is warm — about mid-June — replace the mulch to recoup its benefits.Raking up mulch

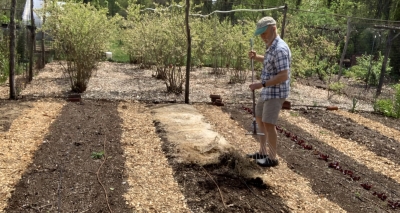
Where soil is not blanketed with mulch, warming can be hastened by forming small ridges oriented east and west. You plant seeds on the south faces of these ridges. With sunlight beaming directly down on these south-facing ridges, the soil there warms a bit faster than the surrounding soil. Soil warmed on ridges
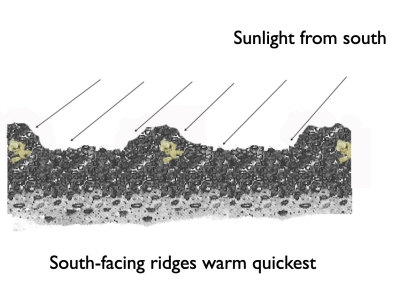
(For the same reason, here in the Northern Hemisphere, south-facing slopes are warmer than north-facing slopes. North-facing slopes ideal for planting peaches and apricots to delay their flowers to when there’s less possibility of a later spring frost snuffing them out.)

Another way to warm the ground for early spring planting is to grow plants in raised beds. In raised beds the soil warms early because it’s more exposed to ambient air temperatures. Raised beds are well-drained, so dry more quickly; it takes more heat to warm a wet soil than a dry soil.Raised beds

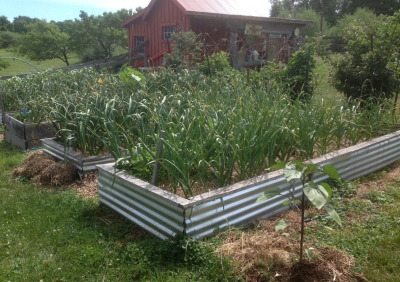
Changing the color of the soil surface affects its temperature. Black plastic mulch is unsightly, but it does warm the soil. Hide the plastic’s ugliness with a layer of bark chips and the plastic’s warming effect will be lost. In climates such as ours, where the soil is just marginally warm enough for vegetables like peppers, melons, and eggplants even in summer, the plastic mulch improves growth if left in place the whole season.

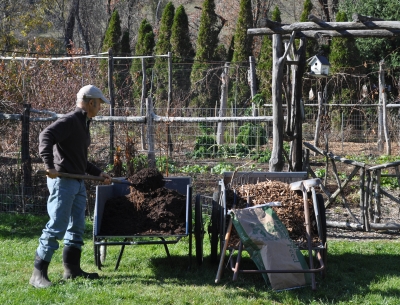
A top layer of compost on the ground darkens the soil in a more attractive manner than black plastic, though the effect on soil temperature is less dramatic.  Compost does, of course, confer other benefits to the soil, such as improving the soil’s physical structure and providing essential nutrients. These benefits are lacking with black plastic.

Natural Indicators

All these techniques warm the soil a little faster than it would otherwise. You can measure the effect with a soil thermometer, but a thermometer is not mandatory for determining when to sow seeds. The soil slowly but surely warms up at about the same rate each spring, so you can sow by calendar dates, subtracting a few days if you deliberately hasten soil-warming. Garden bed with compost

Since the soil temperature and spring blossoms are influenced by the same general warming trend, even better is to sow seeds according to what perennial or woody plants are in bloom. For instance, you might plant peas just as the forsythias blossom, and corn according to the traditional indicator — when oak leaves are the size of mouse ears. A soil thermometer should register about forty degrees in the first case, and fifty degrees in the second. 


Webinar planned: GROWING FIGS IN COLD CLIMATES

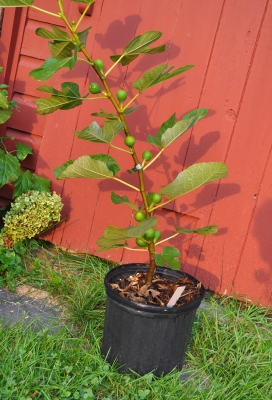
Yes, you can be picking fresh fruit from your own fig tree even if you live in a cold climate! I’ve grown figs for decades, beginning in Wisconsin and now in New York’s Hudson Valley. 

Figs can be grown successfully in cold climates because, among other things, they are adaptable plants and have unique bearing habits.

Learn various ways to get plants through cold winters, how to prune the plants, how to harvest the fruit, how to speed ripening, and more. If you already grow figs, this webinar will help you grow more or better figs, and be able to manage them more easily. If you haven’t yet experienced the rewards of growing figs, you have a treat in store for you.

Monday, June 6, 2022, 7-9 pm Eastern Time

Cost: $35

Registration is necessary; register and pay (credit card or Paypal) at:

https://us02web.zoom.us/webinar/register/WN_4hqKduDNSyiuRGPBlmBObg

SOMETIMES CALLED SPARROW GRASS, SOMETIMES ASPARAGOS

Many Reasons to Grow Asparagus

In my book Weedless Gardening, I begin the section about asparagus with the statement “Forget about the usual directives to excavate deep trenches when planting one- or two-year-old crowns of asparagus.” More about planting in a bit; let me first lay out my case about why YOU should grow asparagus.

With most vegetables, by the time you taste them fresh-picked somewhere, it’s too late in the season to plant them in your garden. Not so with asparagus. Asparagus spear
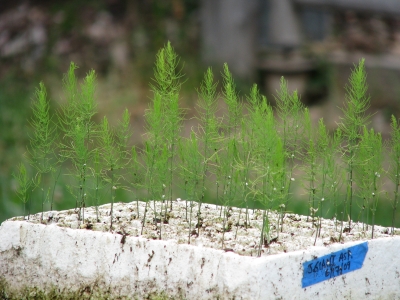
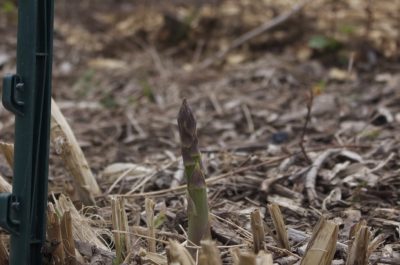
Borrow a taste from a neighbor’s asparagus bed, or from a wild clump along a fencerow, and you’re likely to want some growing outside your own back door. Minutes-old asparagus has a very different flavor and texture (both much better) than any asparagus that reaches the markets. The time to plant is now.

A big plus for asparagus is that it’s a perennial plant, so once a bed is planted, more time is spent picking than any other activity. An established planting can reward the gardener with tender green spears for a half a century or more. My asparagus bed is thirty-six years old and about twenty-five feet long; on every warm day, the bed offers enough stalks for a meal for two.

Deer and rabbits don’t have a taste for asparagus so no need to plant it within the vegetable garden or any protected area. (My dogs have eclectic palates, and they joined in on the harvest until I made clear that asparagus was not dog food.)Asparagus growing through mulch 
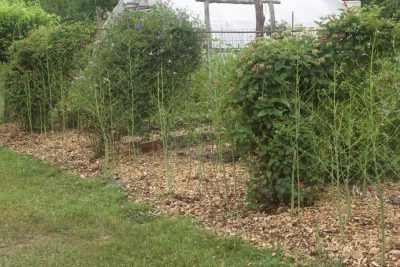
Planting asparagus beyond the confines of the vegetable garden works out well because the lacy, green foliage stands as a backdrop for perennial flowers. Or, it can soften the line of a wall or fence.Asparagus in August

Traditional Planting Method is Unduly Hard

Now, back to what I wrote about planting asparagus in Weedless Gardening, (available, by the way, at the usual sources as well as, signed, from my website, here).

The traditional method for planting an asparagus bed entails digging a trench a foot or more deep, setting the roots — one-year-old roots establish best — in the bottom with a covering of a shovelful of soil, then filling in the trench gradually as the stalks grew.

Whew! I planted my own asparagus bed just deep enough to cover the upward pointing buds from which the roots radiate, and the plants do just fine.

The main reasons for the traditional deep planting were to protect the crowns from overzealous hoes or other tillage implements, and from knives during harvest. But I don’t till my asparagus bed. I just pile on some mulch every year. And I harvest by snapping the stalks off with my fingers, rather than cutting into the soil with a knife.Asparagus harvest

Gardeners with patience sow seeds, which need a year more in the ground than roots before harvest can begin. Seed sowing is straightforward, except that germination is slow. Soak the seeds in water for a few hours before sowing to shorten germination time.asparagus seedlings

Whether starting with seeds or plants, the bed needs to be planted in full sun, with eighteen inches between plants in the row, and four feet between rows.

Tune into Asparagus’s Life Cycle

Although asparagus roots live on year after year, the feathery tops turn brown and die back to the ground every fall. Asparagus, yellowing foliage
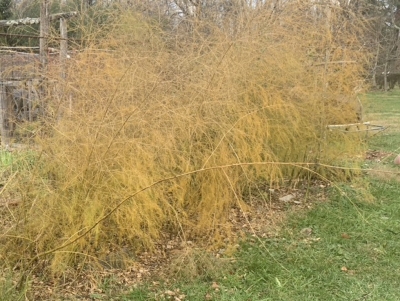
Then, when the spring sun warms the soil, energy stored in the roots fuels growth of the spears. As the spears grow higher and higher, feathery green branches unfold. Photosynthesis within these green branches pumps energy to the root system, energy that keeps the roots alive through the winter and fuels early growth of spears the following spring, thus completing the plant’s annual cycle. (The true leaves of asparagus, which are the small scales on the stems, are much reduced in size and function; the green stems take on most of the job of photosynthesis for this plant.) 

Harvesting asparagus steals some of the energy that had been stored in the roots. The plant must build adequate reserves before tender stalks can be spared for our plates, and then each season left enough time to grow freely to replenish its energy reserves.

The first season of planting, no asparagus is harvested; if good growth was made the first season, some can be harvested the second season. The plants are ready for a full harvest by the third season. 

Full harvest means cutting all stalks from the time they first emerge until about the end of June. asparagus
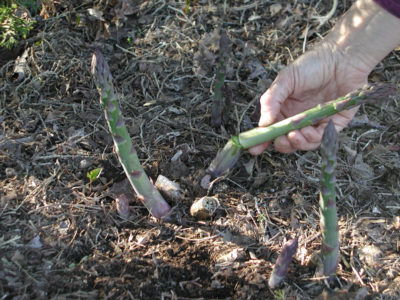
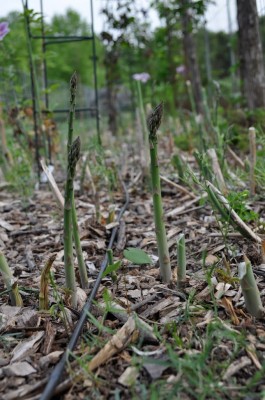
Remember, the plants do need some time to nourish their roots in preparation for winter. Following the last harvest, all new green stems are left untouched until their summer job is over, as they turn brown in the fall.

Asparagus grew wild along the shores of the Mediterranean before plants were transplanted to Greek and Roman gardens. The steaming dish of asparagus on my table today is virtually identical to the asparagus enjoyed by the ancients over 2000 years ago. Even our word for the vegetable is nearly identical to, and derived from, the Greek word asparagos. 

Asparagus came to America with the early colonists and has been cultivated extensively here since then. The red berries borne on female plants attract birds that spread the seed, so asparagus now pops up as an “escape” from cultivation along fencerows and roadsides.


THE JOY(S) OF COMPOSTING

Dinosaurs and Snake Eggs, and More

Most benefits of compost are well-known: it takes out your “garbage,” it fertilizes your plants, it’s teeming with beneficial microorganisms, yadda, yadda, yadda. One too often overlooked plus for compost is the thrill of discovery, discovery of things other than compost in the pile.

Discovery might range from the mundane to the sublime. Among the mundane discoveries is that glint of a lost kitchen fork as it emerges from within the chocolatey pile. Same for the favorite vegetable peeler or the lost stainless steel coffee strainer.

More towards the sublime end of the spectrum would be the dinosaur that surfaced as I was turning a pile a few years ago. A dinosaur! Yes, a small, plastic one that got there from who knows where. 

More seriously sublime was the clutch of about three dozen soft, white eggs about the size of quail eggs that came into view as my pitchfork lifted a clump of compost for turning into the adjacent compost bin. Turns out they were snake eggs, those of a black rat snake. Adult black rat snake
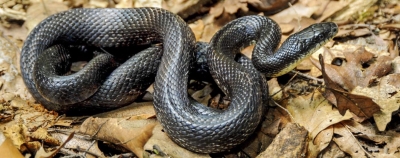
Some snakes give birth to live young, ready to crawl; black rat snakes lay eggs.

I put a few of those snake eggs into a terrarium along with some compost to see if they would hatch. For the uninitiated (me), it’s an eerie sight to see such a traditionally maligned creature emerge from such a welcome, traditional symbol of springtime rebirth. Baby black rat snakes are not black. Instead, bands of dark and light gray run across their backs.Baby black rat snake

Another time, while turning my compost pile, I accidentally disturbed a mating pair of black rat snakes in flagrante delicto.

Ducks and Grubs, and More

White grubs occasionally turn up in my pile, but a couple of days ago, one of my piles was home to at least two dozen of the C-shaped, creamy white grubs resting within. Grubs in compost
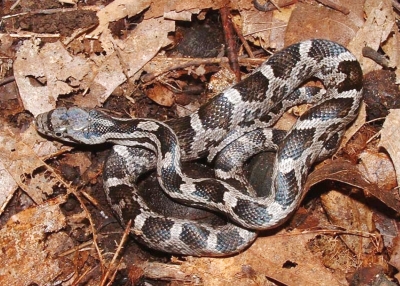
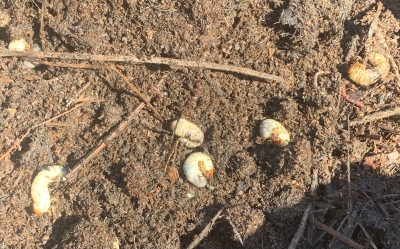
On the chance that they were grubs of Japanese beetles, I started picking them out and yelling “Quack, quack.” No, I hadn’t lost my mind; I was calling the ducks over for a treat of beetle grubs. They dashed for each tossed grub as it hit the ground.

And then a mouse, disturbed in my compost turning, made a dash out of the bin and across the lawn. A mouse in a compost bin is not that surprising, although the construction of my bins and my two dogs are pretty good at keeping mice at bay. (I make efforts to limit mouse populations because they can spread diseases such as hantavirus, salmonella, and lymphocytic choriomeningitis.)

One of the ducks took a break from grub hunting to grab the mouse which, judging from the chase the other ducks gave the lucky duck, is more of a gourmet duck food than even the grubs. Soon only the mouse’s tail was hanging out the duck’s beak, and then the mouse was down the gullet. Here’s a video I took of the Duck eating mouse

But Does Compost Really Need Turning?

You might wonder: What’s with all this compost turning? Each of my compost bins holds a half to three-quarters of a ton of compost, each pile gets turned once, and I have a number of piles. Is it worth all that  work?

Turning a compost pile lets me see how the process is chugging along. I keep a record of when a pile was built, and then months later, when it’s turned, how far along it is to being ready to use. After I turn a pile a make a guesstimate of percent decomposition, which is accurate enough for me to know about when it will be ready for spreading.

Turning a pile also lets me get a look at the compost-to-be and then to make any adjustments that might be necessary. I’ll lightly hose down every few inches of turned material, enough to make the ingredients glisten. Anything looking exceptionally dry gets extra water. Occasionally, part of the pile is too wet. I fluff it up as I flip it over into the adjacent bin. Parts of the pile might be compressed into a dense mat. Throwing it into the adjacent bin might be enough to loosen it up; if not, I pick at it with the tines of the pitchfork.Compost pile turned

Turning the pile also mixes up the ingredients more than when the pile was built. Each part of the pile, then, gets new neighbors in the form of new ingredients and new microorganisms.

Turning a compost pile is not absolutely necessary, although it’s probably best to leave a bin intact longer if the pile isn’t turned. On the other hand, I find turning a compost pile not only interesting, but also enjoyable and nice exercise.

PLANT STRAWBERRY PLANT(S)

Humble Appearing Beginnings

The UPS man’s face is a familiar one this time of year, as he brings me boxes and bags of plants from all around the country. I can’t count how many times I’ve met his brisk walk up the driveway to retrieve a box of strawberry plants. A strawberry bed languishes after a few years, typically five years, and when that happens, I just choose a new site and order new plants.

Epsey strawberry, painted in 1911

Epsey strawberry, painted in 1911

I begin again with new plants, because although strawberries are perennial plants, old plantings eventually pick up diseases from wild strawberries and related plants. By planting a new bed the year before the old one is due to expire, there’s no break in enjoying fresh strawberries every June.

Opening the box of strawberry plants just arrived provides a sorry sight to the eyes: twenty-five plants, leafless or nearly leafless, bound with a rubber band into a package small enough to hold in my fist. But I take heart; the plants are dormant and, given warmth and soil, will come to life. Immediately as I say good-bye to the UPS guy I open the plastic bag to make sure there’s some moisture within. If not, I add some and reseal the bag. In either case I put the bag in the refrigerator until I’m ready to plant.

Planting Location and Design

Let’s hold off planting a minute and see what type of site I choose for my strawberry beds. The plants thrive best with full sun (at least 6 hours per day with Ol’ Sol beaming directly on the plants) and in a soil that is both well-drained and rich in organic matter. Anything less than the above and fruit flavor suffers and plants are more prone to disease.

Strawberry plants spread by runners, which are stems that creep along the ground forming new plants at intervals along their length. Strawberry runner
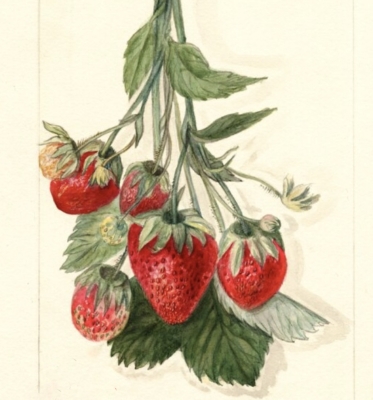
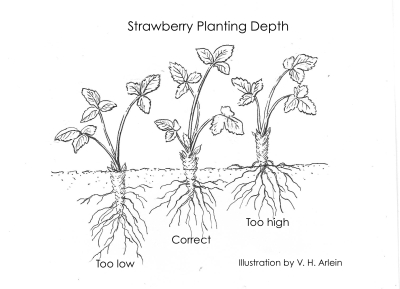
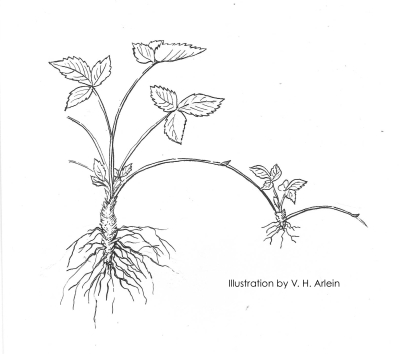
Eventually, plants in a strawberry bed should be 6 to 12 inches apart. The “matted row” system of strawberry planting makes full use of these runners. Plants are set far apart (4 feet between rows and 2 feet between plants) and the spaces between the plants fill in with runner plants which fruit the following season. Strawberry matted row
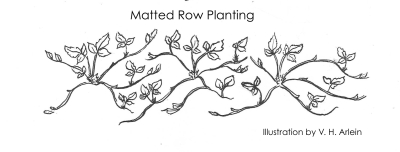
The matted row is allowed to fill in to a width of 2 feet, and all plants attempting to spread beyond that width are kept in bounds with a rototiller or by hand. With age, that 2 foot ribbon rapidly becomes overcrowded unless old plants are weeded out.Basket of strawberries

I prefer the opposite extreme in strawberry planting systems, the “hill” system, whereby plants are set in a double row with 12 inches between the rows and between plants in the row. (If there’s more than one double row, the next double row is 3 feet away.) Strawberry hill planting
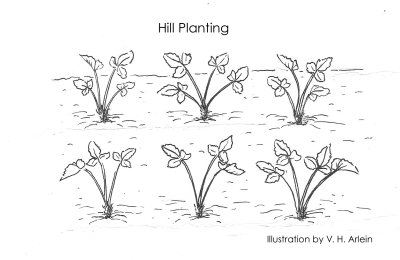
The hill system demands the somewhat tedious job of pinching off all runners through the summer, but the planting stays neater and yields the most berries the first bearing season.

The “spaced plant” system splits the difference between the hill system and the matted row system. Plants are set moderately far apart, and only 4 or 5 daughter plants are allowed to take root, carefully spaced around each mother plant. 

And Into the Ground They Go

Actual planting of strawberries in the ground takes little time if the soil is in good condition — weed-free, rich in humus, and not too dry and not too moist. Gently squeeze a handful; it should crumble.

I prepare the plants by retrieving them from the refrigerator, undoing the bundle, and trimming the roots back to three or four inches. Then I drop the plants into a shallow pan of water to keep them moist while I plant.Trimming strawberry roots

To plant, I thrust a trowel straight down into the soil, then pull the handle towards me enough to open up a slit for a plant. Setting a strawberry plant in soil
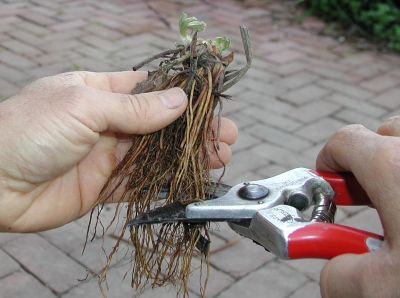
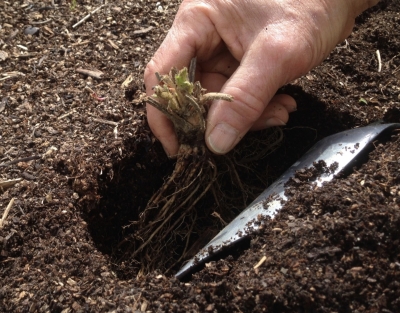
With the roots fanned out by my other hand, the trimmed plant’s roots fit easily into the waiting slit. Planting is completed as I remove the trowel and firm soil against the roots with the heel of my hand.Firming soil after planting

Planting depth is important. Set too shallow and the plants dry out, set too deeply and they suffocate. The ground line should go right through the middle of the crown, which is actually a stem that’s been telescoped down so that each leaf grows off it right next to the next leaf along the stem, rather than a few inches apart, as in most stems.Strawberry planting depth illustration

A number of years back I was helping my friend Helene plant her first strawberry bed. Sorry Helene, gotta write about it. My job was to open up the holes; your job was to plant. After a dozen holes, I glanced back over my shoulder to check your progress. You had listened carefully: each plant was set with the ground line through the middle of the crown, against which the soil was firmed, even lovingly smoothed. And, as I had instructed, you had neatly fanned out each plant’s roots. How did I know? Because the plants were upside down, with their roots splayed upward in the air!

First blueberries on heels of last strawberries

First blueberries on heels of last strawberries

TEASING APART HYDRANGEAS

Good Answer

When someone asks me how they should prune their hydrangea, I give them the answer that most people don’t like to any question “It depends.” What else can I say? It DOES depend. One or more of a few species of hydrangeas commonly make their home in our yards, and you have to approach each, pruning shears or loppers in hand, differently.

Let me tease apart the answer by, first, taking a look a what hydrangea or hydrangeas we may be growing, and then how they grow and flower, which, in turn, speaks to when and where to start snipping away.Climbing hydrangea at Mohonk Mountain House

Mopheads and Lacecaps, and Oakleafs

If the hydrangea plant in question is a shrub bearing blue or pink flowers, it’s a so-called Bigleaf Hydrangea (Hydrangea macrophylla). Mopheads types, also called hortensias, bear softball to volleyball size clusters of florets. Lacecap types bear flat-topped cluster of small, hardly conspicuous florets surrounded by rims of showy, larger, 4-petalled florets.Mophead hydrangea

Whether mophead or lacecap, Bigleaf Hydrangeas flowers open from buds they set up the previous year. Those buds are big and fat, in contrast to the skinny buds that grow out to become shoots.

Prune Bigleaf Hydrangea stems as far as the fat buds while the plants are leafless (now, for instance). Right after bloom, cut the stems further back to near ground level.

Problem is that while the plants can stand up to bitter cold, the flower buds can’t, expiring at temperatures below about minus 5° Fahrenheit. Some varieties set their flower buds lower on the stem than do others. Their buds might more reliably stand up to winter cold if plants are mulched in late fall with some loose organic material like straw or arborists’ wood chips.

Pushing Bigleaf Hydrangea growing further north are some recently developed varieties that bloom on new, growing shoots. These new varieties — the first one of which was named Endless Summer — will bloom anywhere. Blossoms on new shoots unfurl later in the season than those on older wood, too late in some gardens (like mine, some years). Cutting back older shoots after they flower fuels a better show from the young, growing shoots. 

Oakleaf Hydrangea (H. quercifolia) is another hydrangea that is very cold hardy, except for it flower buds. Flowers sit on the ends of stems in elongated clusters, like cotton candy. Oakleaf Hydrangea can be pruned just like Bigleaf Hydrangea, except that it grows as a large shrub so need not be cut back so much.Oakleaf hydrangea

Lack of a flowery show from Oakleaf Hydrangea is no loss because a billowing mound or mounds of the oak-like leaves are attractive in their own right through summer, and also in fall, when the leaves turn rich, burgundy red. Even where winter cold would test the reliability of flowering, Oak Leaf Hydrangea is often planted solely for its form and its leaves.

A Beautiful Climber

Years ago, I planted a Climbing Hydrangea (H. animal petiolaris) at the base of the north wall of my home. It took a couple of years or more to get in gear, but now completely clothes that wall. Though leafless through winter, the peeling, light mahogany bark stands prettily against the brick red backdrop. Hydrangea animala bark
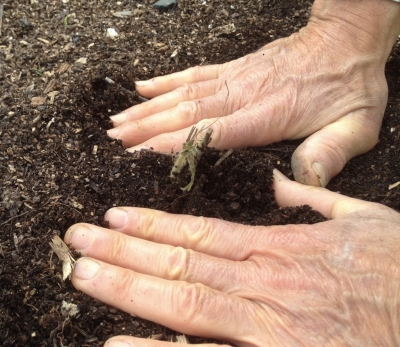
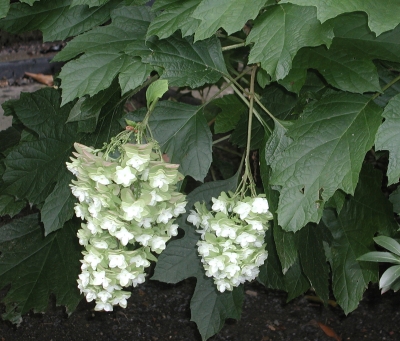
Soon the stems will be draped in glossy, green leaves and, a little after that, white flowers that stand proud of the wall on short stalks and glow against their dark backdrop like a starry night.

This time of year my pruning consists of shortening shorten flower stalks that reach too far out from the wall and vigorous stems that keep trying to sneak around the wall to clothe the rest of the house. Twice in summer I prune stems again to restrain the plant to only the north wall.

Perhaps I’ll plant another Climbing Hydrangea at the base of my 90 foot tall Norway spruce that with age is thinning out. The hydrangea tolerates sun or shade, and can climb a tree without causing harm.

And, Easiest of All

Rounding out this romp through pruning hydrangeas are two of the easiest to prune plants of the species. The first, Smooth Hydrangea (H. arborescens), grows long shoots from ground level, each capped in early summer with half-foot-wide clusters of of white or pastel flowers. To prune, just lop all stems right to the ground in late winter or early spring.Smooth Hydrangea

And finally, we come to PeeGee, sometimes called Panicle, Hydrangea (H. paniculata grandiflora), growing like a small tree or large shrub. This one blossoms in late summer on new growth, so if it is going to be pruned, that needs to be done before growth begins. Hydrangea paniculata
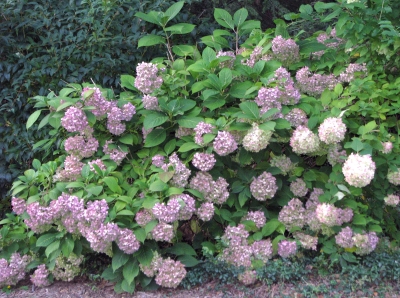
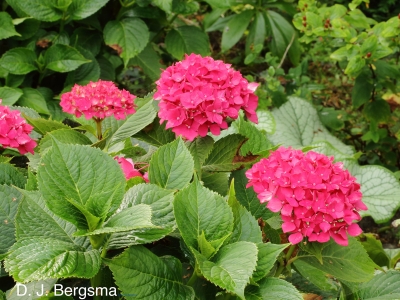
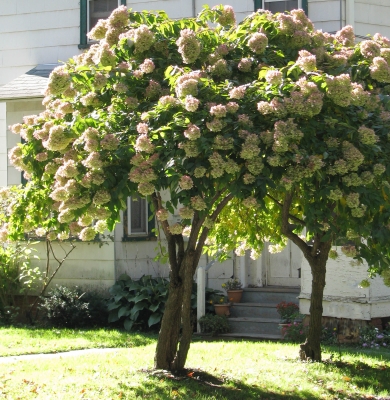
With that said, Panicle Hydrangea develops a permanent trunk or trunks, making it difficult to reach high into its dense head for pruning. No matter, because the plant flowers quite well with little or no pruning.

Hydrangea is only one group of closely related plants where species differ in how they are pruned. Roses would be another example; climbing roses are pruned very differently from rambling roses, which are pruned very differently from . . . you get the picture. Clematis also. For more details about the individual pruning needs of these as well as lots of other trees, shrubs, vines, flowers, fruits, and houseplants, and special pruning techniques like pollarding, mowing and scything (yes, that’s pruning!), and espalier, take a look at my book The Pruning Book. It’s available through the usual sources or, signed, directly from me here.The Pruning Book

GOURMET FERTILIZER

Vegetarian Plants

The other day in the hardware store I overheard someone ask the clerk for some rose food. My eyebrows went up as I thought to m’self, “Are they kidding, thinking that roses need their own special food? Next, I’ll hear about plants that prefer vegetarian or kosher food, perhaps fish emulsion on Fridays?”Mulching young tree

All this food science when it comes to plants may boost fertilizer sales, but it hardly bothers plants either way. Plants take up the bulk of their nutrients as ions (charged atoms or groups of atoms) that are dissolved in water in the soil. Rock particles, as well as humus and organic fertilizers, decompose to release nutrient ions slowly into the soil solution. Chemical fertilizers are already in ionic form, so when you sprinkle a handful on the soil, they dissolve as soon as they contact water.

A Well-Rounded, Wholesome Diet

What’s so special about rose food for roses? Nothing. All plants need healthy doses of nitrogen, phosphorus, and potassium, and lesser amounts of other nutrient elements. But unless a soil is an infertile sand where neither crop rotation nor some weed growth is allowed to balance soil nutrients, specific foods don’t usually have to be tailored for specific plants.

My garden grows pretty well, and I feed all my plants the same diet: An annually replenished mulch of wood chips, leaves, or compost, and, if extra nitrogen is needed, an annual sprinkling of soybean meal. Theoretically and in practice, an inch depth of compost alone provides sufficient nourishment for the plants. composted garden beds
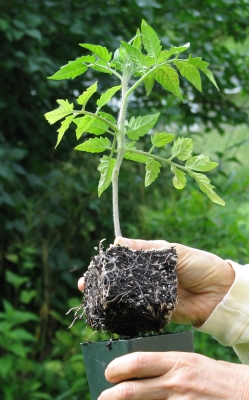
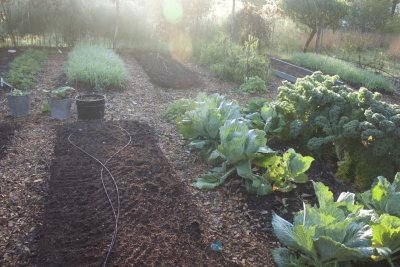
That inch depth of compost is the only thing my vegetable beds get each year, and it nourishes closely planted cabbages, tomatoes, lettuces, and other plants from the first breath of spring until cold weather barrels in to shut down production.

Garden plants that are pressed into sustained production (nonstop flowering of those rose bushes, for example) or vegetables best plumped up with extra-succulence, like some leafy vegetables, might need an extra push with additional nitrogen. Or not.Fertilizer application

Soybean meal, available in garden centers as well as anywhere selling animal feeds, is insurance in the form of a high nitrogen, organic fertilizer. Cottonseed meal, hoof and horn meal, alfalfa meal, or blood meal would serve as well. Soil microorganisms decompose the proteins in any of these fertilizers in a series of steps to produce amino acids, then ammonium ions, then nitrate ions. The latter two ions are the forms of nitrogen most utilized by plants.

I grew Brussels sprouts unsuccessfully for many years, with sprouts hardly bigger than marbles lining up along the spindly stalks. So last year, I sprinkled some soybean meal (2 pounds per hundred square feet) on the ground before laying down the compost. Success! The plants grew into sturdy, five-foot-high stalks along which were lined up almost golfball-sized sprouts.Brussels sprouts success

Flowers and mature trees and bushes get nothing more than arborists’ wood chips, leaves, hay, straw, or wood shavings here. Even these low nitrogen mulches eventually release nitrogen as their lower layers break down in the soil.Hay mulched apples

But Still . . .

You might point out that, still, there are some plants that need a specialty plant food: “acid plant food” for azaleas and rhododendrons, for example. You’ve got a point; these plants do have special needs. But my universal pabulum of mulch and soybean meal also suffices for them.

The special requirement of these plants is an acid soil. If a soil is not naturally acidic, the soil doesn’t need an “acid plant food,” it needs to be made acidic. The way to make a soil  acidic is with sulfur, a naturally mined mineral. The amount needed depends on the existing soil acidity (determined with a quick soil test), the desired soil acidity (a pH of about 5 for acid-loving plants), and whether the soil is sandy or clayey. A sandy soil needs about 3⁄4# per 100 sq. ft. for each pH unit change; clay soils need about two-and-a-half times that amount. The sulfur to use is “pelletized” because it’s less dusty to work with. And, obviously, any compost for these plants should have had no added limestone.

What about the special nitrogen requirement of these plants? Commercial “acid plant food” supplies acid-loving plants with their preferred form of nitrogen, which is ammonium ion. Let’s see what happens to my soybean meal in an acid soil. A few paragraphs earlier, I wrote that though an orchestrated series of steps, various soil microorganisms gobble up proteins in soybean meal or other organic fertilizers, breaking them down to amino acids, ammonium ions, and then nitrate ions. In acidic soils, microorganisms that do that last job are absent. Breakdown stops at ammonium ion — just what those plants like best.

  Plants don’t need haut cuisine, just plain, wholesome food. (More details about this in Weedless Gardening and The Ever Curious Gardener.)Wholesome food for soil

EVOLUTION AT WORK

Green Thumb Not Needed

Anybody out there now sprinkling seeds into mini-furrows in seed flats, flowerpots, or repurposed yogurt cups? How many of us are then disappointed when, a few days later, there’s no sign of green sprouts poking up through the brown soil? Or not enough of them.

A green thumb isn’t a prerequisite for growing seedlings indoors to give plants a head start for earlier ripening of tomatoes and peppers or earlier blooms of zinnias or marigolds. Backing up every seed is 350 million years of trial and error; seeds have evolved to sprout. So why, sometimes, don’t they, and how do to right any wrongs?Healthy tomato transplant

Good Seeds and Good (Potting) Soil a Must

Seeds are living, breathing creatures, and don’t live forever. How long a seed remains viable depends on the kind of seed. Longevity of vegetable seeds under good storage conditions goes from just a year for onion, parsnip, and parsley seed to more than four years for seeds of cucumber, lettuce, and cabbage and its kin. Most annual flower seeds are good for one to three years, most perennials two to four years.

But don’t take any reports of seed longevities too much at face value. Storage conditions play an important role, with the best conditions being cold and dry. I store my seeds in an airtight tub along with packets of silica gel that I weigh and refresh, if needed, in a microwave oven. The tub winters in my unheated garage and summers in my cool basement, or freezer.Seed storage, in tub

Next, turn to the soil or, more correctly, the potting mix or potting soil. Don’t sow seeds in garden soil, even good garden soil. Garden soil becomes too sodden in the confines of a container. Purchase or make your own mix (both of which I wrote about my March 15, 2022 blog post).

Gather up some bona fide or makeshift containers, and you’re ready to plant. Any container that’s a couple of inches deep with drainage hole in its bottom is suitable. Fill it with the potting mix and gently firm it.

What Next?

A guideline that I don’t follow rigorously is to plant seeds at a depth approximately four times their thickness. A lighter, airier mix warrants deeper planting or seeds will dry out too quickly. Still, bigger seeds do warrant deeper planting than smaller seeds. With really tiny seeds, like foxglove or portulaca, I just sprinkle them on the surface, perhaps with a smidgen of potting mix for a very light cover. Tiny seeds have tiny energy reserves, and if planted too deep, they burn up all their energy before peering aboveground to drink in energy-giving light. No matter the depth, right after sowing I firm the seedbed for good contact between seeds and mix.Sowing lettuce seeds in flats

And then I water. I could water from above with a gentle “rain” from the fine rose of my watering can or hose wand, but prefer to minimize washing around the potting mix and seeds, especially small seeds, by watering from below. I set the seed flat or container in a pan with an inch or so of water and let it sit for a few hours. By then the potting mix is saturated with water; lifting the container out of the water and then tipping it at an angle drains excess (gravitational water) from the mix. A pane of glass over the top of the container prevents evaporation to lock in moisture.

All the seeds now need to coax them out of the slumber is warmth. Each kind of seed has a minimum, a maximum, and an optimum temperature for germination. Unfortunately, it’s not the same for all seeds. Between 70 and 80 degrees Fahrenheit (21-27° C.) strikes a nice balance for all of them.

Armed with a thermometer, check out warm spots around your home: perhaps it’s a warm room, the top of a refrigerator, an insulated container along with a periodically refreshed hot water bottle, or near a furnace. Electric seed heating mats are available, some raising the temperature 10° F above ambient, more expensive ones raising the temperature to whatever amount you dial in.

I made my own germination chamber from a styrofoam cooler along the bottom of which I wired two sockets each with a 15 watt lightbulb. Above the bulbs sits a rack for the seed flats. The bulbs are wired into a thermostat on which I can dial the desired temperature set, always, in my case, set to 80° F.Seed incubator

One Final Ingredient and You’re Good to Grow

That’s it, except for one final ingredient: patience. Even with ideal conditions, seeds vary in how long they take to germinate. 

I check the containers every day and as soon as sprouts appear, I uncover and whisk the container to bright light. From then on, cooler temperatures — about 10° F. less than germination temperatures —  and bright light are ideal.Tomato seeds sprouted 2

SHRUBS, I’M SHARPENING MY SHEARS AND LOPPERS

Shrubs are Shrubby

A shrub is a shrubby, woody plant. (Now, that’s profound.) Numerous stems originating at or near ground level are what make a plant shrubby. Usually, no one stem ever gets the upper hand over other stems. For most shrubs, you need to get out there with your pruners to snip and lop every year.

How to prune a shrub depends on when it flowers and on what age stems provide the most ornamental effect. Does the shrub flower early in the spring, or later in the summer? Does it flower on old stems, on those that grew last year, or on new shoots?

Tree peony bloom

Tree peony

And one more thing before we dive in: Here, I’m writing about pruning shrubs growing informally. Let’s shelve pruning hedges and, because they vary so much in their pruning needs, roses for another time.

Deciduous shrubs can be put into one of four categories according to the age of stems that flower or otherwise look their best. Here are some bare-bone guidelines for each of these categories. In my book, The Pruning Book, from which this is excerpted, I offer more detailed guidance with extensive lists of plants in each category (and, of course, details on pruning hedges, roses, and just about any other plant or pruning technique you can think of. Really.)

Old Looks Best

Deciduous shrubs whose old wood flowers or looks best. Included within this category are shrubs — witch hazel, rose-of-sharon, tee peony are examples — that naturally build up a permanent framework of branches. Rarely do they send up new suckers at or near ground level. These shrubs flower directly on older wood, or from shoots that grow from older wood.Witch hazel 
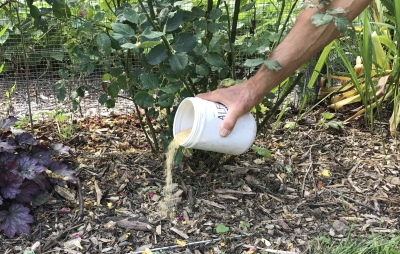
Grouping plants always entails a certain degree of arbitrariness, and because of their disinclination to sucker, a few plants in this category could also be considered “trees,” especially if deliberately trained to one or a few trunks..

These shrubs are the easiest shrubs to prune: mostly, just don’t!

Some Annual Pruning Helps

Deciduous shrubs that flower best on one-year-old wood. Because they all flower only on wood that grew the previous season, annual pruning is needed to stimulate new growth, each year, for the following year’s flowers.

Renewal prune each year, removing the very oldest stems to make way for younger, floriferous stems to step in and replace older stems. Cutting a few stems low in the shrubs is also less work than shearing, and creates a more graceful, fountain-like growth habit, and keeps the plant low, neat, and abundantly flowering.
Renewal pruning
Prune those shrubs that flower early in the season right after their blossoms fade. But now, or just before growth begins, is the time to prune those shrubs that flower from summer onward. Pruning early-flowering shrubs right after they bloom allows you to enjoy their blossoms, but still leaves enough time for shoots to grow and ripen wood sufficiently for next season’s blooms.

The one-year-old shoots on which flowers are borne may grow mainly from older stems up in the shrub, or else mostly from ground level. The location of these flowering shoots determines pruning technique, so I have subdivided this category into two groups, grouped plants accordingly, and follow with instructions for each. 

Shrubs such as lilac, forsythia, and mock orange flower best on one-year-old wood originating from older wood up in the plant.

Lilac flowering habit

Lilac flower buds
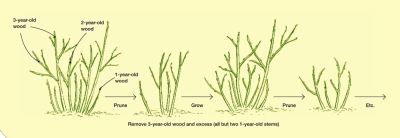
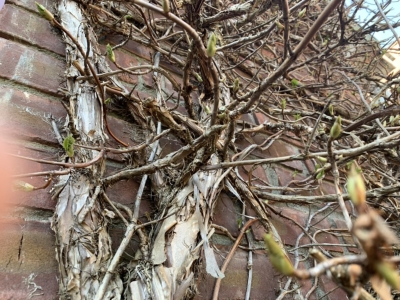
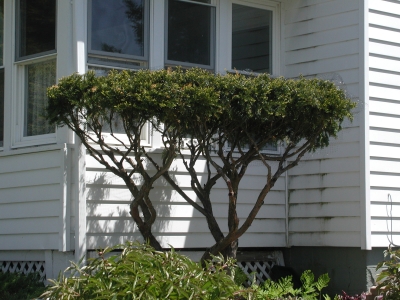
Peer in at the base of the mature plant and you’ll notice wood of various ages growing up from ground level. Begin pruning by cutting away near ground level, some of the very oldest stems. Those oldest stems are also the tallest ones, so these first cuts quickly lower the plant.Plants blooming on 1-year old stems up in plant 

Each year also remove at ground level a portion of the youngest stems so they don’t crowd with age.

Abelia and kerria are among those shrubs that flower best on one-year-old wood originating at ground level; they need more drastic pruning. Every year cut away all wood more than one-year-old, either right to ground level or else to a vigorous branch originating low on the plant. You can tell the age of a stem by its thickness and, with many plants, by the color or texture of the bark. Kerria blossoms

Blossoms on New, Growing Stems

Deciduous shrubs whose current growth flowers or looks best: Here we have shrubs valued only for their new growth. And yes, in some cases we value the plant for the young stems themselves.

Red-osier dogwood stems in winter

Red-osier dogwood stems in winter

This group of shrubs, which includes red-osier dogwood (whose young, red stems “ignite” with winter cold), butterfly bush, New Jersey tea, and Hills-of-Snow hydrangea, is very easy to prune: simply lop the whole plant down to the ground just as buds are swelling. Butterfly bush


Time for Renovation?

  You perhaps have inherited, with your property, a neglected, old shrub offering you a tangled mass of stems, an awkward posture, and few flowers. Can this shrub be brought back to its former glory? Probably.

You have two options in renovating this shrub. The first is the drastic one: you merely lop the whole plant to within one foot of the ground just before growth begins for the season. The plant won’t be pretty for a few years but after that you’re on your way to a “new,” shrub, full of blossoms and with a graceful growth habit, a whole new plant from the ground up.

A second option is gradual renovation, removing a couple of the oldest stems each year over a period of four or five years. Although this takes more time, the plant will look decent throughout the recovery period. 

Rather than renovation, you might instead consider capitalizing on your overgrown shrub’s age and venerability by transforming the plant into a picturesque small tree. Not all shrubs make this transition gracefully; devil’s walkingstick, hawthorn, and hazelnut are among those that do. 

Select as trunks two or three of the oldest stems having pleasant form and growing from ground level to as high as the proposed crown of your tree-to-be. Remove all other growth from ground level to the proposed crown. 

Even easier is to let the deer prune for you, in which case the bottom of the crown will be as high as the deer care to reach.

Deer pruned yew

Deer pruned yew

BREWING UP BATCH OF POTTING SOIL

Prime Ingredients for Any Potting Mix

Many years, my gardening season begins on my garage floor. That’s where I mix the potting soil that will nourish seedlings for the upcoming season’s garden and replace worn out soil around the roots of houseplants. Why do I make potting soil? Why does one bake bread?

There is no magic to making potting soil. When I first began gardening, I combed through book after book for direction, and ended up with a mind-boggling number of recipes. The air cleared when I realized what was needed in a potting soil, and what ingredients could fulfill these needs. A good potting soil needs to be able to hold plants up, to drain well but also be able to hold water, and to be able to feed plants. The key ingredients in my potting mix are: garden soil for fertility and bulk; perlite for drainage; and a mix of peat moss and compost for water retention. 
Components of potting soil
Why not just dig up some good garden soil? Because a flower pot or whatever container a plant is growing in unavoidably creates “perched water table” at its bottom. Garden soil, even good garden soil, is so dense that it will wick too much water up from that perched water table. Waterlogging is apt to result, and waterlogged soil lacks air, which roots need in order to function. (More about perched water tables and lots of other stuff about soil, propagation, plant stresses, and more can be found in my book The Ever Curious Gardener: Using a Little Natural Science for a Much Better Garden.)
Perched water table
Coarse mineral aggregates — perlite, in my mix — make potting soils less dense, so water percolates more readily into the mix, through it, and out the bottom of the container. Other aggregates include vermiculite, sand, and calcined montmorillonite clay (aka kitty litter). I chose perlite because vermiculite breaks down with time and can contain asbestos. Sand is heavy, although this can be an effective counterbalance for top heavy cactii.

The peat moss and compost in my mix are organic materials that slurp up water like a sponge; plants can draw on this “water bank” between waterings. One peat to avoid is “peat humus,” a peat that is so decomposed that it has little water-holding capacity. Organic materials also buffers soil against drastic pH changes and cling to nutrients which are slowly re-released to plant roots. Otherwise these nutrients run out through the bottom of seedling flats and flower pots. 

Peat is relatively devoid of nutrients but the compost provides a rich smorgasbord of nutrients. And I can brew it myself. Just letting piles of autumn leaves decompose for a couple of years produces “leaf mold,” which has roughly the same properties as compost.

Potting soils made with garden soil and compost might need to be pasteurized to eliminate pests especially weeds. Too much heat should be avoided, however, because toxins which injure plants will form and beneficial organisms will be eliminated. When I am going to pasteurize, I do so only to the garden soil in the mix; my composts get to above 150°F all on their own.

To pasteurize potting soil, put it in a baking pan, bury a potato in it, and bake it in a medium oven. When the potato is baked, the soil is ready. Pasteurization is not absolutely necessary; I pasteurize to kill weed seeds.Begonia, Mandarin & cats

What You Buy Isn’t . . . 

Go out and buy a potting mix and, in all likelihood, that mix will be devoid of any real garden soil. You can mix up a so-called “soil-less” potting mix by sieving together equal volumes of peat moss and perlite. Since the mix has no garden soil or compost to supply nutrients, add 1/2 cup of dolomitic limestone, 2 tablespoons of bone meal, and 1/2 cup of soybean meal to each bushel of final mix. This mix has enough fertility for about a month and a half of growth without additional fertilizer.

I favor traditional potting mixes, which contain real garden soil. Real soil adds a certain amount of bulk to the mix, as well as a slew of nutrients and microorganisms. Real soil provides buffering capacity, which allows for some wiggle room in soil acidity.

The Magic Happens

I wrote early on, “There is no magic to making potting soil.” I could toy with ratios and make a potting mix from perlite plus compost, perlite plus compost plus garden soil, even straight compost, depending on the texture of the compost.

Going forward, I’m going to experiment with coir and/or PitMoss, both possible substitutes for peat moss, the harvest of which is environmentally questionable.

For my first batch of potting mix for this season, I’ll stick with my usual recipe. Step one is to give the garage floor a clean sweep. potting soil, piling ingredients
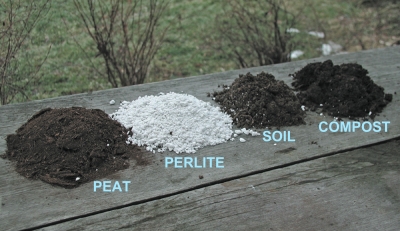
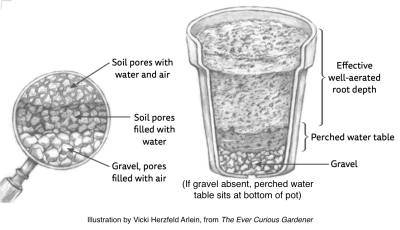
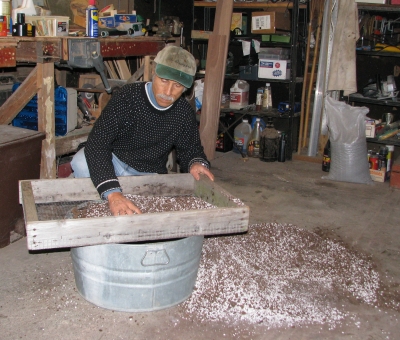
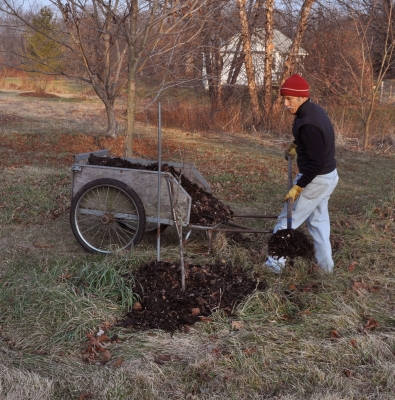
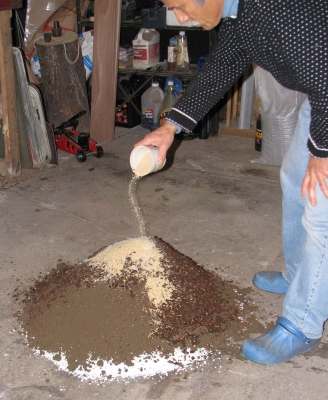
Then I pile up on the floor two gallons each of garden soil, peat moss, perlite, and compost. On top of the mound I sprinkle a cup of lime (except if I’ve sprinkled limestone on the compost piles as I build them), a half cup soybean, perhaps some kelp flakes.

This is a mixed bag of ingredients, but I reason that plants, just as humans, benefit from a varied diet. I slide my garden shovel underneath the pile and turn it over, working around the perimeter, until the whole mass is thoroughly mixed. potting soil, mixing
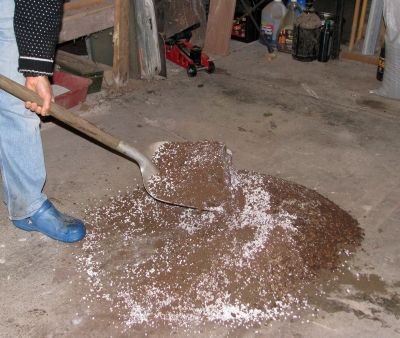
I moisten it slightly if it seems dry. When all mixed, the potting soil gets rubbed through a 1/2″ sieve, 1/4” if it’s going to be home for seedlings.potting soil, sifting

I end by clicking click my heels together three times and reciting a few incantations to complete this brew that has worked its magic on my seedlings, houseplants, and potted fruits each season.