WINTER ‘SHROOMS, SUMMER DREAMS, & A WINNER

Mushrooms Think It’s Autumn Again

   The 15 oak logs sitting in the shade of my giant Norway spruce tree more than earned their keep last year. Seven of them got inoculated with plugs of shiitake mushroom spawn in the spring of 2013; eight of the were inoculated in the spring of 2014. With little further effort on my part, reasonably good flushes of mushrooms appeared through spring and summer, then heavy flushes through fall until the mild weather turned frosty.Indoor shiitakes
    My friends Bill and Lisa, also shiitake growers, told me a few days ago how they’re still harvesting good crops, cold weather notwithstanding. They brought one of their logs indoors, where it stands in the sink of their laundry room. Great idea!
    I don’t have a laundry room, but I do have a cool, dark, moist basement, i.e. mushroom heaven. So a few days ago I carried one of my logs down the narrow basement stairway and propped it against the wall in a dark corner near the sump pit. That nearby pit could catch excess water in case the log needed to be watered.
    No watering was needed: A few days after taking up residence in the basement, fat, juicy shiitake mushrooms exploded from the plugs up and down the log — so many that we had enough to dry for future use.
    I’ll leave the log down there to see if it flushes again. If nothing happens within a few weeks, I’ll carry it back under the spruce and replace it with another log from outside. The few weeks in the cool basement might be enough time for more mycelial growth in the log in preparation for another flush. And then, sitting for some time in cold weather beneath the spruce might be just what a shiitake log needs to shock it into another cycle of production.
    Rotating the logs between the basement and beneath the spruce could keep us in fresh mushrooms all winter long.

Winter Green

    Most years, by this time, piles of snow would make it difficult for me to get to those outdoor shiitake logs. Recent weather, and predictions for the coming months, makes me wonder if I should even keep using the word “winter.”
    I’d sacrifice fresh shiitakes for a real winter with plenty of snow. (We have enough quart jars of dried shiitakes to last well into warm weather.) It’s nice to have that white stuff to ski on. Snow even fertilizes the ground (“poor man’s manure”) as well as insulates it against cold.

Bamboo after a mild winter

    On the other hand, a mild winter has its appeal. Most winters, leaves and canes my yellow groove bamboo (Phyllostachys aureosulcata) are damaged — or, like last winter — killed back to the ground. The roots survive to re-sprout but the leaves turn brown and the new canes in spring are spindly. Some winters, like this winter probably, make for attractive (and useful) tall, thick canes dressed all winter long in green leaves.
    Chester blackberry is another borderline hardy plant. It’s the hardiest of the thornless blackberries yet comes through most winter with many stems dried and browned — dead, that is. In the spring after our mild winters, stems are still green, foreshadowing a good crop of blackberries in late summer.
    I’ve been waiting for a string of reliably milder winters to plant out my hardy orange plant (Citrus trifoliata). Yes, a citrus whose stems can just about survive to flower and fruit outdoors here, where winter temperatures normally plummet to minus 20°F or below. The fruit, sad to say, is only marginally palatable.
    One more plus for a mild winter is the color green. The green of plants comes from chlorophyll, which is always decomposing, so must be continuously synthesized if the plant is to remain green. Synthesis requires warmth and sunlight, both at a premium during winters here. So most winters turn lawns muddy green or brown; even the green of evergreens, such as arborvitae, turn chalky green.
    But not this winter — so far. Grass is still vibrant green, as are the arborvitaes and other evergreens.

My Favorites

    My friend Sara asked me if I had yet ordered my seeds, and if I was getting anything especially interesting. Yes and hmmm.Some of my favorite tomatoes
    As far as hmmm . . . I’ve tried a lot of very interesting plants over the years, too many of which — celtuce, garden huckleberry, vine peach, and white tomatoes, for example — were duds. So mostly, I restrain myself, devoting garden real estate to what I know either tastes or looks good, and grows well here in zone 5 or, more specifically, on my farmden. Some of my favorites include Shirofumi edamame, Blue Lake beans, Blacktail Mountain watermelon, Hakurei turnip, Sweet Italia and Italian Pepperoncini peppers, Golden Bantam sweet corn, Pennsylvania Dutch Butter Flavored and Pink Pearl popcorn, Lemon Gem marigold, and Shirley poppy.
    I’m very finicky about what tomato varieties I plant, so won’t even mention them. Oh yes I will: Sungold, San Marzano, Paul Robeson, Brandywine, Belgian Giant, Amish Paste, Anna Russian, Valencia, Carmello, Cherokee Purple, and Nepal, to name a few.

And the Winner Is (drum roll) . . .

Thanks for all your comments, requested on last week’s post, about your soil care. Looks like you readers (or, at least, those of you who commented) are very savvy gardeners, enriching your soils with lots of organic materials.  I chose one comment randomly fro the lot, the writer of which gets a free copy of my book Grow Fruit Naturally. Congratulations Selena.

For those of you who subscribe — or have attempted to subscribe to my weekly blog, a glitch is preventing you from getting email notifications. I just found out that the glitch has been glitching since back in September. I hope to get it fixed soon. Any suggestions? (The blog is in WordPress and subscriptions are with Feedburner, whatever that means). Stay tuned. If you want to just go to my blog site, new posts come out towards the end of every week.

TO SAVE OR NOT TO SAVE, & A FREE BOOK!

New Seeds Needed?

    “Ring out the old, ring in the new.” But not all the “old,” when it comes to seeds for this year’s garden. I’m flipping through my plastic shoeboxes (I think that’s what the boxes are meant for) of vegetable and flower seeds, assessing what old seeds are worth keeping and what new seeds I need to order.
    Seeds are living, albeit in a dormant state, and, as such, have a limited lifespan. The longevity of any seed depends, first of all on the kind of seed, its genetics. Most seed packets come dated; if not, I write the date received on the packet.
    Few seeds have as short a viability as parsnips. (No matter to me; I don’t grow them.) More astounding is the longevity of some seeds, especially the current record-holder for longevity, Silene stenophylla seed, possibly 32,000 years old, found buried in a squirrel burrow in the Siberian tundra. At the other end of the spectrum are seeds that remain viable for even less time than parsnip. The record at that end is probably held by seeds in the family Tillandsioideae, related to pineapple, with a viability of 4-6 weeks. Swamp maple, Acer saccharinum, seeds retain their capacity to germinate for only about a week.
    It’s not worth the risk to sow parsnip, spinach, or salsify seeds after they are more than one year old. Two years of sowings can be expected from packets of carrot, onion, okra, pepper, and sweet corn seed; three years from peas and beans, radishes, celery, and beets; and four or five years from cabbage, broccoli, brussels sprouts, radish, cucumbers, beet, endive, melons, eggplant, tomato, and lettuce.
    Among flower seeds, the shortest-lived are delphiniums, aster, candytuft, and phlox. Packets of alyssum, Shasta daisy, calendula, sweet peas, poppies, and marigold can be re-used for two or three years before their seeds get too old.

Life Extension, for Seeds

    As with humans, genetics and lifestyle determine actual longevity, lifestyle, in the case of seeds, being storage conditions. So although onion seeds remain potentially viable for 2 years, I replace the year old, dog-eared seed packets in shoeboxes in my garage with new packets each year.Bicycle vacuum pump
    Conditions that slow biological and chemical reactions also slow aging of seeds, i.e. low temperature, low humidity, and low oxygen. All winter, my seeds find their low temperature and low humidity storage in my garage. Good for seeds. But come summer, my garage becomes warm and humid. Bad for seeds.
    If my seed boxes could be kept well sealed, I could eke more sowings from a packet of seeds by lowering the humidity with a packet of silica desiccant.
    Reducing oxygen levels has generally not been practical . . . until I came across plans for converting a bicycle pump into a vacuum pump (http://www.instructables.com/id/make-a-manual-vacuum-pump-for-under-$20-by-convert/). Going forward, my plan is to stuff some packets of seed into large-mouthed mason jars, then evacuate them with the reversed bicycle pump plugged into a “FoodSaver Wide-Mouth Jar Sealer.” I’d like to figure out some box I could make, modify, or buy in which I could more conveniently put my seeds, and then evacuate. Any suggestions?
    I’ve already tried this on a number of mason jars of dried tomatoes, dried shiitakes, nuts, and beans. The vacuum is not very strong (0.74 atmospheres), but sucking out air also sucks out moisture. Some testing will determine just how it affects seed longevity.

Test It

    So I don’t really know how viable my seeds are. One option is to order all new seeds each year. That could be very expensive. Another option is to guesstimate my seeds’ viabilities, taking into account their inherent longevity and storage conditions. That’s my approach, seasoned with yet another option: testing the viability of some of my seeds.

Testing seed germination

   I test viability by counting out 10 to 20 seeds from each packet to be tested, and spreading the seeds between two moist rounds of filter paper on a plate. Enclosing the plate in a plastic bag to hold in moisture, and putting the bagged plate somewhere warm, preferably around 75 degrees, provides just about perfect conditions for germination. (Alternatively, place seeds on a damp paper towel, roll it up, bag it, and put it somewhere warm.)
    After one to two weeks, germination occurs — if it is going to. Peeling apart the filter papers (or unrolling the paper towels) lets me count the number of seeds with little white root “tails”.
    Seeds with low or no percentage germination got tossed into the compost pile. If the germination percentage isn’t too low, I’ll use the seeds and adjust the sowing rate accordingly.

A Freebie

A book giveaway, a copy of my book GROW FRUIT NATURALLY. Reply to this post telling us, if you grow vegetables, how you maintain soil fertility year after year, and how it’s working, or not, for you. Let us know what state you are in (as in NY, OH, CA, etc., rather than happiness, wistfulness, etc.). I’ll choose a winner randomly from all replies received by January 22nd.

MULCH, SOMETIMES BETTER LATE THAN EARLY

Cardoon Gets to Stay

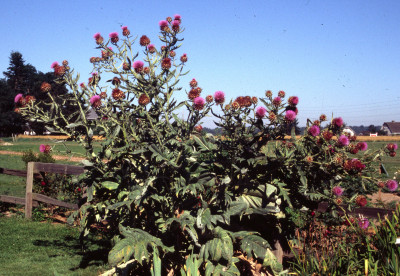
    I haven’t yet given up on cardoon — growing it. But eating it? I just about give up. It’s like eating humongous stalks of stringy celery having just a hint of artichoke flavor.
    As an ornamental is how cardoon has made itself garden-worthy. Like most perennial plants, it grew only leaves this past season, its first season here. But what leaves they were! As I said, like “humongous stalks of celery.” Not much good for eating but nice to look at. The edges of the three-foot-high stalks were winged with undulating, pointed blades (each stalk is a leaf), and the whole plant is a very Mediterranean-looking olive-green.Cardoon in late fall
    If all goes well, next year should provide an even better show, when flowers also appear. Cardoon is in the thistle family. It’s as if you injected our common (Canadian) thistle with steroids. In addition to those giant leaves, the flower stalks rise to 6 feet and are then topped by fat, spiky, cerulean balls, each a couple of inches across.
    Cardoon not only looks Mediterranean; it is Mediterranean. As such, is not cold hardy this far north. Temperatures in the 20s do no harm to the top of the plant, but the top will die back when temperatures turn colder. The crown of the plant and the roots, shielded in the ground, tolerate even lower air temperatures. Eventually, though, our winter cold penetrates the ground to do them in.
    But not if I soften that cold affront. Once temperatures turn colder, and stay reliably so, I’m going to lop back the tops of the plants, then pile on a thick layer of mulch, from a couple of large bags of leaves I stockpiled back in November. The reason to hold off until the soil turns colder is because in still-warm soil, the crown would have pushed out new growth beneath the mulch. That new growth would have died from lack of sun, or rotted.
    Cardoon’s fleshy crown is especially prone to rotting, so I’ll lay a flat piece of plastic over the pile of mulch. That should shed rainwater while allowing some breathing room from the side.
    Perhaps next year I’ll get to enjoy the flowers. Perhaps the stalks will be worth eating.

I Put The “Straw” In (On) Strawberry

    Cardoon isn’t the only herbaceous perennial that needs protection from cold. Another is strawberry.
    The crown of a strawberry plant is, in essence, a stem that has been telescoped down. Instead of a few inches from leaf to leaf along the stem, only a fraction of an inch separates a leaf from its next higher or lower neighbor. So instead of elongating a foot or two every year, like most stems, a strawberry crown elongates only a fraction of an inch each year.
    Still, over time, that crown rises higher and higher up out of the ground, each year becoming more exposed to cold. Mulching prevents cold damage to strawberry in the same way as it does for cardoon. As with cardoon, the time to cover the plants is AFTER cold has penetrated the ground. When the soil has frozen about an inch deep is about the right time.
    Strawberry crowns are not particularly prone to rotting, so there’s no need to lay a water shedding cover over the mulch. Or to cut back the leaves; strawberry leaves aren’t fleshy and don’t rise high above the ground.

Doin’ Some Dustin’

    In addition to leafy mulches, already spread beneath other trees and shrubs, one other sign of creeping cold is the gray dust that has settled on parts of the meadow, beneath the pear trees, and around the currant bushes. There’s more to come, and it’s not snow. It’s ash, from the wood stove.
    Spreading wood ashWood ash is both a waste product and a resource, depending on how much you have and how much space you have to spread it. As a resource, it’s high in potassium, an essential nutrient for plants, and contains other essential elements. Wood ash decreases the acidity of soils which, around here, mostly increases naturally over time.
    But too much potassium can be a bad thing. As can too little acidity; slightly acid soil is what’s ideal for most plants.
    Since wood ash varies somewhat in its composition, it’s impossible to put a number on how much to spread. No more than 20 pounds per thousand square feet is reasonable, except on alkaline soils (pH greater than 7) or beneath acid-loving plants such as blueberry, azalea, and rhododendron, which should get none. I disperse it over the whole farmden — on the meadow and the lawn, beneath fruit and nut trees and bushes — to avoid concentrating it anywhere. I also save some to spread on icy walks and to sprinkle around plants if slugs become a problem.

OTHER APPROACHES TO SUSTAINABLE VEGETABLES

“Grass-fed Vegetables”

    With gardening activities grinding almost to a halt, I can take a breath and reflect on the past season — one of the best seasons ever. Of course, I’ll “blame” the bountifulness mostly on the weather. Maybe I’m also becoming a better gardener. (Thomas Jefferson wrote, “Though an old man, I am a young gardener.”)
    I wrote a couple of weeks ago about soil management here on the farmden. It’s simple and possibly sustainable. For the vegetable gardens: no digging, permanent beds, and an inch depth of homemade compost annually slathered onto those beds. For trees and shrubs, mulches of compost, wood chips or leaves, supplemented, if necessary, with soybean or alfalfa meal for additional nitrogen.
    My September trip to Maine afforded me two other perspectives on soil management. The first came from a presentation by, and conversation with, Jim Kovaleski, who farms in northern Maine. His system is also simple and possibly sustainable. His farm has 5 acres of hayfield that feeds 1/2 acre of vegetables. “Grass-fed vegetables,” as he calls it. All he does is scythe the hayfield portions and pile the mowings onto the growing areas, in so doing suppressing weeds, locking moisture within the soil, and feeding the ground with the decomposing hay.

Me, scything my field

Me, scything my field

    The question is whether or not the mowed portions can naturally regenerate nutrients through dissolution of native minerals and nitrogen fixation by microbes to keep up with the removal of mowings. Possibly, some essential micronutrient might be missing from that particular piece of ground. To avoid that possibility here on my farmden, I feed my compost a diversity of organic materials, from old Levi’s to orange peels, from Florida oranges, to neighbor’s autumn leaves, and, just to make further sure, kelp.
    I didn’t get to visit Jim’s farm, but did hear first-hand testimonials praising the quality and yield of his vegetables.
    Come fall, Jim moves his show south, with repeat performances at his mini-farm in suburban Florida, there using yard waste compost and seaweed he harvests to build and maintain soil health, sustainably.

Chicken-fed(?) Vegetables

    I did get to visit Four Season Farm, the Maine farm of vegetable guru Elliot Coleman. His system is to grow vegetables for a season, then till the ground and sow grass and clover, graze chickens on that piece of land for a season before tilling it again to grow vegetables. The chickens’ diet is supplemented with bought grain.
Eliot Coleman with carrots and broccoli    The bought grain reduces the system’s “sustainability quotient.” On the other hand, as Elliot emphatically pointed out, he is also growing chickens!
    It would be interesting to measure all the inputs and outputs from my soil management, as well as those of Jim and Elliot. And also to quantify any trends in measures of soil health (nutrients, organic matter, soil tilth, etc.) and quality of vegetables.

A Fruitful Year, Literally!

    As I drove the highways and byways of Maine, I was astounded at the number of wild, roadside apple trees, and their fruits’ freedom from pests. First, why so many wild trees? Does everyone there munch on apples while driving, then toss the cores out their windows? Why are there so few wild trees here in the Hudson Valley, a major apple-growing region?
    And second, why so few pest blemishes on the fruits? In the Northeast — nay, the whole eastern part of the country — pests generally run rampant on apples. Then again, apples have done relatively well, pest- and otherwise this season here in the Hudson Valley also.

Maine's wild apples

Maine’s wild apples

    For that matter, it’s generally been an excellent season for all fruits. Even black walnuts, whose nuts haven’t filled out for the past few years (a legacy from hurricane Irene and tropical storm Lee?) bore abundant crops fat with nutmeats this year.
    I had only one failure this year, pawpaws, and it was the first crop failure in decades. Why the poor showing? Again, I’ll blame it on the weather. But what about the weather could be to blame?

SUSTAINABLE DIRT

 Dirt is Free, Almost

   Sustainability is such a buzzword these days. Okay, I’ll join the crowd and say, “I’m growing fruits and vegetables sustainably.” But is this true. Can they really be grown sustainably, that is, in such a way to be able to continue forever?
    As any plant grows, it sucks nutrients from the soil. Harvest the plant and you take those nutrients off-site. Eventually, those nutrients need replenishment. That’s what fertilizer does, but spreading fertilizer — whether organic or chemical — is hardly sustainable. Organic fertilizers, such as soybean meal, need to be grown, harvested (taking nutrients off site), processed, bagged, and transported. Chemical fertilizers need to be mined and processed, or manufactured, and then also bagged and transported.
    About half the volume of most soils is mineral, the rest being air, water, and organic matter. The mineral portion derives from rocks that, with time, temperature changes, and the jostling and chemical action of plant roots, fungi, earthworms, and other soil microorganisms, are ground finer and finer. Plant nutrients once locked up in those rocks become soluble and available to plants. Over time, a soil naturally offers a pretty much unlimited supply of plant nutrients. That sounds sustainable . . .  but wait; three important caveats.
    First, it takes time to release those nutrients. Remove too much too fast and it’s like taking money out of the bank faster than you put it in.
    Second, one very important nutrient, nitrogen, does not come from rocks. It comes from the air, “fixed” by soil microorganisms, then incorporated into plants. As plants die, the nitrogen is incorporated into the organic fraction of the soil, from which it is slowly released into the ground for other plants to use — unless it washes away or becomes a gas again. Nitrogen is the most evanescent of plant nutrients.
    And third, a soil could be naturally lacking in one or more essential plant nutrients. If so, the deficiency needs to be corrected by bringing in and spreading what’s needed.

Hay, Time, & a Little Manure

    Okay, here’s my stab at sustainability: My vegetables get “fed” only compost, a one-inch depth laid on top of each bed each year. This much compost releases enough nitrogen, as well as other nutrients, to keep plants happy and healthy for a year.

The season's last hay gathering

The season’s last hay gathering

    But the sustainability meter must examine what goes into the compost. The bulk of my compost is made from hay harvested from my one acre hayfield. Here’s the rub: If I harvest the hay too frequently, I’m mining the soil, pulling out nutrients faster than they are naturally replenished. So I focus on different parts of the field in different years, giving previously harvested portions time to rejuvenate.
    Early morning forays into the field with my scythe provide enough hay for compost making during the growing season. Last week, I did what I do each fall, attaching the brush hog to my tractor and mowing the whole field. (Mostly, this prevents the field from morphing over time, first to a field of brambles, multiflora roses, and autumn olives, and then on to forest.) After brush hogging, I rake up a few clumps of hay here and there for the final “feeding” of the season’s compost piles.
    This end-of-season stuff is not very nutrient-rich, so what little I harvest takes little from the field in terms of nutrients. This cutting mostly supplies carbon compounds, which it got from via photosynthesis from carbon dioxide, to feed the compost microorganisms.
    Keeping an eye on the character of the hayfield should give me some idea of how it’s doing nutritionally. More grasses, more nutrients. Areas of goldenrod, yarrow, and other forbs get mowed, but not raked.
    My compost pile also gets fed horse manure that I haul in from a local stable. My use of manure is sustainable only in the sense that it’s someone else’s waste product. Other additions to my compost pile are kitchen scraps and spent garden plants (which recycles rather than adds nutrients), and old blue jeans and other biodegradable clothing. Using humanure (see The Humanure Handbook by Joseph Jenkins), if I had a composting toilet, would further close the nutrient cycle.
    Two final additions, sustainable except that they need to be transported here, are ground limestone and kelp. The limestone holds soil acidity near neutral, which, among other benefits, puts  nutrients in forms most accessible to plants. The kelp, replete with a spectrum of micronutrients, is for insurance, just in case my soil naturally lacks any essential plant (or human) nutrient.

And Now for the Cart’s Sustainability

Garden cart, all dressed up in aluminum

Garden cart, all dressed up in aluminum

    Hay is bulky stuff; same goes for manure. I move all that bulky stuff to my compost piles, then move the finished compost away from the piles. All this moving is done with the help of my “Vermont garden cart,” which has two heavy duty, bicycle-sized tires sitting just about midway across a sturdy plywood bed surrounded by three sturdy plywood walls. Although the cart can haul up to 400 pounds, shoveling out manure or compost scrapes away at the plywood base. That, along with jabs from the pitchfork as I pile in hay severely compromised the wood . . .  until this summer.
    A sheet of aluminum, a friend’s brake for making sharp bends in the sheet, and some screws, and I had the bottom of the cart, and a few inches up each side, protected from my shovel, pitchfork, and moisture. These carts should be sold already aluminized.
    The only problem is that aluminum is very unsustainable. Although abundant, enormous amounts of electricity are required to free it from the raw material, bauxite. On the plus side, aluminum is very long-lasting; I’ll never have to replace it in my carts.

CLEAN UP, THEN SHAVE

 Out with the Old (Plants)

   Ostensibly, I’m clearing away old plant debris from the vegetable and flower gardens to spare next year’s garden a full onslaught of overwintering disease and insect pests, and so that, come spring, the soil is ready and waiting for seeds and transplants. I’ll admit it, though: I like the garden looking neat going into late autumn. As Charles Dudley Warner wrote in his book My Summer in the Garden (1889), “the closing scenes need not be funereal.”
    As of this writing, frost has not yet struck; as of your reading, it probably will have. Following that event, I will remove all dead plants. I’ll grasp the tops of smaller plants, such as marigolds and basil, give them a twist to sever the smaller roots, then lift and toss the plant into a waiting garden cart. If I tried to do that with old pepper, tomato, or okra plants, they would laugh at me. I lop off the bulk of their tops, then cut around the plant with a Hori-hori knife so that I can lift the remaining stem and main roots out of the ground.Beans cleared away; only poles still standing, for now
    In either case, my goal is to remove everything but the smaller roots. Left in place, they’ll rot to add organic matter to the soil, leaving behind channels to let air, water, and creatures move through the ground.
    Even now, before frost, cleanup is well under way. Tomatoes are spent; I cleaned them up yesterday. Beans are spent; I’ll clear them away today. Leaving bean roots in the soil is like sprinkling organic fertilizer from the free nitrogen they gathered from the air.
    Along with garden plants, weeds also get cleared away, again removing only top portions and the main roots. Small roots don’t have the energy to re-sprout.

In With the New (Compost)

    More than just looking neat, the cleaned up garden is — to my eye — ornamental. Think of the calm beauty of Zen gardens, some of them little more than boulders and raked gravel. Mine is wood chips (in paths) and raked soil.
 

Beds in fall: veggies, oat cover crops, compost

Beds in fall: veggies, oat cover crops, compost

   Well, not really raked soil. Bare soil looks ugly to me because I know it’s too exposed to rain and wind. So as soon as I’ve cleared a bed, I immediately put a blanket on it. Before the end of September, that blanket was oat seed topped with an inch of compost. Those beds are now lush strips of green. Post-September beds get blanketed with just an inch of compost. It’s roughness helps protect the surface, and next spring I can sow seeds or plug transplants right into it. That much compost is all the nourishment plants will need for the whole growing season next year.
    And then there are the beds still green with carrots, turnips, endive, lettuce, kale, and other cold-hardy plants. I’ll dig the root crops, for storage, at my leisure. The others, we will eat, also at our leisure.

Nothing Wasted

    All that stuff that I am clearing out of the garden is going right into the compost pile. Yes, everything! I’m occasionally asked if I put leaves and stems that are infected or infested with blight, aphids, or other pests into my compost pile. Yes! Everything goes into the pile.
    I contend that if you looked closely enough (perhaps needing a microscope) at almost any leaf, stem, fruit, or root, you’d probably find some evidence of a “bad guy” on it. No matter. The combination of time and temperature within any compost pile does them in.compost piles
    This time of year, piles build rapidly. By paying attention to water and air within the pile as well as the balance of high nitrogen materials (manures and lush greenery such as vegetable plants and young weeds) and high carbon materials (old, browning plants, wood chips, autumn leaves), I’m able to get my compost piles up to 160° F.
    Soon, cooler temperatures combined with less stuff to feed the pile makes for cooler composting. I let these piles “cook” longer, the longer time making up for lower temperatures.

Lookin’ Good and Ready for Spring

    Getting everything ready for winter is a leisurely process, inching along over the next few weeks. By then, tender vegetable plants and weeds will have been tucked into compost piles and beds will be blanketed in either compost, compost and growing oats, or late fall vegetables. Mr. Warner, mentioned in my opening paragraph, went on to say, “A garden should be got ready for winter as well as for summer . . . I like a man who shaves (next to one who doesn’t shave) to satisfy his own conscience, and not for display, and who dresses as neatly at home as he does anywhere. Such a man will be likely to put is garden in complete order before the snow comes, so that its last days shall not present a scene of melancholy ruin and decay.”
    I’m going to shave now.

Luxuriating in my Greenhouse

How Cool is That (Greenhouse)?

    Having a greenhouse is a much-appreciated luxury. To avoid being profligate, I eke all that I can from its every square inch in every season.
    For starters, it’s a cool greenhouse — temperature-wise “cool,” not “ain’t this a cool greenhouse” cool. Winter temperatures are permitted inside drop to 35°F. before the propane heater kicks on. And in summer, roll-up sidewalls let in plenty of cooler, outside air to save energy (and noise) in running the cooling fan. Demands on the cooling fan are also minimized by letting summer temperatures reach almost 100°F. before the fan awakens.
    I have to choose my plants carefully for them to tolerate such conditions.Grennhouse beds in October
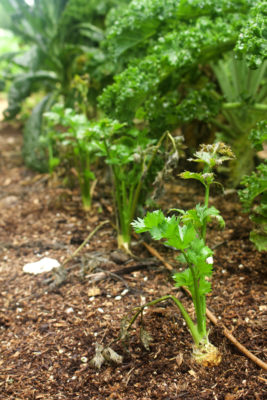
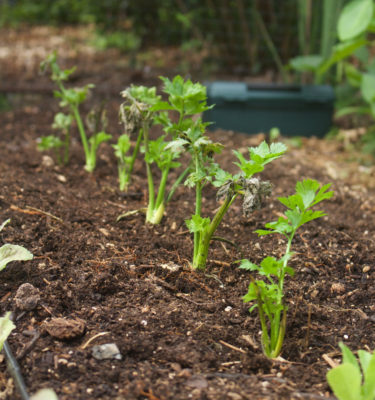
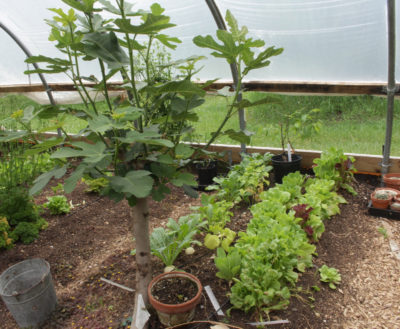
    Right now, lettuce, arugula, mâche, celery, parsley, kale, and Swiss chard seedlings and small transplants trace green lines up and down ground beds in the greenhouse. I sowed seed of most of these cold-loving vegetables about a month ago. They’re too small to harvest now. No matter: The outdoor vegetable garden is still replete with greenery available for harvest through November and, probably, on into December. By then, greenhouse greenery will have grown to harvest size, then continue to do so very slowly through the dark, cold days.
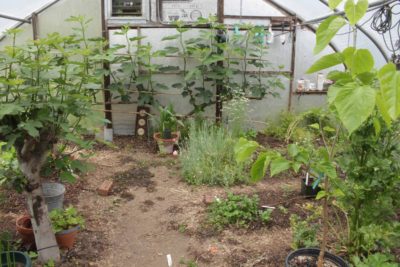
    And the 100° summers in the greenhouse? Above the beds spread the branches of three large fig trees, planted right into the ground (rather than pots). From those branches dangle ripe and ripening figs, as they have since July. Figs originated in the searing heat of summers in Western Asia; they can take the 100° heat of my greenhouse. Soon, cooler temperatures and lowering sun will drive the trees to stop ripening fruits, and lose their leaves and enter dormancy. (Figs are subtropical, rather than tropical, trees, so enjoy a cool — but not frigid — winter rest.) The few, leafless branches, most of them pruned back, will cast little shade to let the cool weather greenery in the ground beds below bask in what little sunlight fall and winter have to offer.
    Starting in February, my greenhouse does triple duty, becoming also a home for transplants for the upcoming season’s vegetable and flower gardens. I plant the first seeds — onions, lettuce, celery, and leek — in early February, sowing them in seed flats on the narrow bench along the greenhouse’s north wall.

(Hot) Beds in Summer

    As each spring morphs into summer in the greenhouse, fig growth begins anew and winter’s cool weather vegetables wane and are cleared away.
    How about putting the ground beds beneath the awakening fig trees to some good use? In the past, I’ve tried growing melons and cucumbers, all of which originated in hot regions of Africa and Asia, in those beds. Neither the melons nor the cucumbers did particularly well — yet.

Ginger Loved the Heat

    Which brings us to this week’s ginger harvest. Greenhouse beds this summer provide a warm, moist home in which to grow ginger, a plant indigenous to the hot, muggy climate of south China. Ginger would be hardly worth growing if all I wanted was the khaki-skinned rhizomes that I could pick off a supermarket shelf. Those tough-hided roots are mature ginger, which has a fibrous flesh.
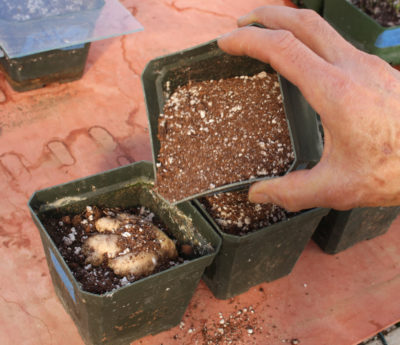
 Digging up ginger   What I was shooting for was baby ginger, whose pink-tinged, white skin, encloses flesh that is tender, lily-white, and free of fibre.  The flavor is a little different than mature ginger, cleaner. This tropical plant I figured could — and it did — thrive in my hot greenhouse all summer.
    To get started, way back in March, I purchased a single root of mature ginger at the supermarket, broke it into four sections, and potted each section into a 4 inch pot. As I said, the plant needs heat, so I set the pots on my seed-starting mat to maintain a temperature of about 70°F. Still, it took awhile for green sprouts to show.
    The potted ginger plants were ready to plant out in a greenhouse bed just as the last of winter’s vegetables were being cleared away there. After planting, I refurbished the soil with a mulch of compost. Cool soil got the plants off to a slow start but once summer heat kicked in outdoors, and then really kicked in within the greenhouse, the ginger thrived.Harvested ginger
    The goal was to let ginger linger to eke maximum yield but not so long that the rhizome would begin to mature. I also needed space for this winter’s plantings. As it turns out, the first objective, maximum yield, was moot. Yields were prodigious, four plants yielding much more than we could possibly eat.

Pickle It

    The first order of business with the harvested baby ginger was to pickle it. All that was needed was to slice it thinly with a carrot peeler then pour boiling vinegar sweetened with a bit of maple syrup over it.

SLOW SEED

 Appreciated but not Touched

   “Flower in the crannied wall, I pluck you out of the crannies, I hold you here, root and all, in my hand, Little flower . . . “ Whoa! Hold on there Lord Tennyson! Relax, little flower. I’m not doing any plucking.
    I had hardly a hand in some of my best plantings, and that little flower is one of them.
    There’s a small, moss-covered ledge at the base of the brick wall next to my front door, an east-facing spot that enjoys some morning sun in summer but shade from the nearby north wall the rest of the year. In short, it’s a perfect place for a summer vacation for my orchids, bonsai, and cyclamen.

Cyclamen flower in a crannied wall

Cyclamen flower in a crannied wall

    The cyclamen is Cyclamen hederifolium, sometimes commonly called Persian violet (though a violet it is not; hence the need for botanical names). Although the flowers and leaves resemble those of the better known florist’s cyclamen (C. persicum), the two cyclamen species part company in some ways. Both the flowers and the leaves of Persian violet are much smaller than those of florist’s cyclamen, and the leaves of this diminutive species have decorative patterning. They resemble those of English ivy; hence the specific epithet “hederifolium.” Hedera is the botanical genus of English ivy. Flowers hover a few inches above the leaves on thin stalks, much like small, pink butterflies.
    Best of all, Persian violet is cold-hardy where winter lows plummet as low as minus 20° F. Florist’s cyclamen must be grown as a houseplant.
    Decades ago, I purchased seeds of Persian violet, and managed to raise a small stable of plants. They are ideal for naturalizing in partially shaded areas. While naturalizing the cyclamens seemed like a good idea, the dainty cyclamens would be gobbled up by the exuberant growth coaxed in the rich soil here. So my carefully nurtured cyclamens remained in their pots, wintering in a very cold spot in my basement and summering on that ledge near my front door.
    Lo and behold, this year I’ve noticed two little plants that have seeded themselves in the bit of soil where the flagstone terrace butts up again the ledge. The effect is subtle, to say the least, but the flowers are all the more charming for their shyness. I can appreciate the second half of Lord Tennyson’s poem — “Little flower—but if I could understand, What you are, root and all, and all in all, I should know what God and man is” — but feel no need to, an aversion, in fact, to plucking the flower from its crannied wall.

Slow Cyclamen

    Years ago, I learned three things about growing cyclamen from seed. Fresh seed is best. Keep the growing medium consistently cool and moist. Be patient; germination could take many weeks, and keep plants growing well for at least two years to allow the tuber to develop.
    After that, plants can begin their spring dormancy, flowering and sprouting new leaves in late summer, the latter lasting well into winter, depending on temperatures.

Slow Ramps

    Ramps (Allium tricoccum) are all the rage; here also, and my plan is to expand my ramp planting of two potted plants into a passel of ramps by growing them from seed. My experience in growing cyclamen from seed might come in handy here.
    Although both plants enjoy similar growing condition, at least as far as the need for part shade in spring, the life cycle of ramps is different from cyclamens. Ramps sprout leaves in spring, send up a flower stalk, and then the leaves fade away as the plant goes dormant. The flowers talk remains, developing a head full of seeds — which I collected last week.
 Ramp seedlings    I planted the small seeds in potting soil in a flower pot. The journey begins. Those seeds could take anywhere from 6 to 18 months to sprout. When just ripe, ramp seeds have an under-developed embryo, a situation that inhibits germination. Keeping the seed warm and moist permits development of the embryo and, eventually, root growth.
    Once root dormancy has been broken, there’s still shoot dormancy to contend with. Shoots won’t grow until the seeds, with their root sprouts, have experienced a period of cool, moist conditions — that is, they recognize that winter is over and it’s safe to send a green shoot aboveground.
    If root dormancy isn’t completed before winter sets in, it has to finish the following year, with shoot dormancy needing fulfilling after that: 18 months after sowing. Fulfilling root dormancy before winter allows shoot growth the following spring: 6 months after sowing.  I’m making sure of root dormancy being fulfilled before cold weather sets in by keeping the pot of seeds moist and in the greenhouse. Temperatures are cool in the greenhouse in winter, so I’m expecting — hoping — for sprouts to appear by late winter.
    Growing ramps and cyclamen from seed is similar in that a prime ingredient for success is patience. In the case of ramps, if everything goes right, I could be harvesting my first home grown ramps in 5 to 7 years.

SUCCESSES, EDIBLE AND OTHERWISE

 Stand Up Straight!

   I am particularly proud of my Brussels sprouts this year — and I haven’t even tasted them yet. How odd that I should be proud of this vegetable that I spurned in the past, often quoting a friend who referred to them as “little green balls of death.” Then I put my own twist on that description, saying that perhaps the friend meant that Brussels sprouts were only palatable a “little boiled to death.”
    I’ve come around, and decided, a couple of years ago, that Brussels sprouts were worth growing, despite their high demands on space and time. For good production in northern climates, the seeds need to be sown indoors in early March, and then harvest doesn’t start until October or sometime after the first frost. And for all that waiting, each plant — a mere single stalk with whorls of leaves from top to bottom and a sprout at the base of each leaf — takes up an area of about three feet by three feet.

Gustas Brussels sprouts, standing up straight.

Gustas Brussels sprouts, standing up straight.

    Things would be bad enough if a Brussels sprouts plant just grew straight up to fill its allotted area. But the plant can’t support itself, so in its youth it flops down on the ground. Once that supine stem has created a firm base upon which to rise, the end of the growing stem curves more or less upward according to original plan. That youthful waywardness wastes and muddies lowermost sprouts, with the sprawling plant demanding even more space, which is a problem in an intensively-planted garden.
    This summer, before the plants even had time to consider flopping down, I poked a bamboo pole into the ground next to each one, which I tied to the pole, adding ties to keep up with growth. Perhaps a bit too orderly  for a vegetable garden, but my Brussels sprouts “trees,” each now over four feet tall, look quite attractive.
    The “trees” are not likely to grow much higher because I pinched out the top bud of each plant in early September. This pinching redirects the plants energy from the highest growing point to the side shoots — which are the sprouts. All month, the sprouts have been fattening, soon to be snapped off and eaten.

Not Your Average Marigold

    I also count among this season’s successes two little-known flowers, both of which elicited “oohs and ahhs” from visitors here. One of the flowers were Signet marigolds. You might think, marigolds?, they’re okay, but more “ho hum” than “ooh and ahh.” Not so.
    Signet marigolds, Tagetes tenuifolia, are a different species from common marigolds, and they look a little different. Mostly, they’re smaller, expanding into amorphous mounds of fine, lacy, lime-green leaves, from which stare out small yellow or orange blossoms — most charming. A lemony-marigold aroma wafts from both the blossoms and the leaves.
    Actually, the aroma can waft over the whole garden if you plant enough Signet marigolds — which I did this year. In the past, the seeds never germinated very well for me, so I just spot planted what few seedlings I could raise here and there in the garden.
 Signet marigolds lining garden paths   This spring, in mid-April, I sowed the seeds densely in an 8 by 6 inch seed flat. The dense planting led to an excessive number of crowded seedlings. While they were still young, I gently lifted each one to transplant into its own potting-soil-filled cell to grow for a month or so before planting out in the garden.
    The few plants I poked in at the feet of vegetable beds on either side of the main path through the vegetable garden have grown into sprawling mounds that wash into the main and side paths of the vegetable garden like seawater into an undulating beach. The flowing mounds effectively soften any excessive orderliness of the garden — from the soldier-straight Brussels sprouts plants, for example.

A Cardinal in our Midst

    My grape arbor creates a horizontal roof nine feet above my terrace. Each of the four grape vines rises to that height on a single trunk. What an opportunity for a climbing vine, especially one that climbs by twining! My other floral success this year has been with such a twining plant, cardinal climber (Ipomoea x multifida, a hybrid created by mating I. coccinea and I. quamoclit).
    In the past, other species of Ipomoea climbed those trunks. Morning glory was one, but that only blooms, of course, in the morning. Moonflowers have also dressed up the trunks, but they bloom only at night.Cardinal climber
    So this year, cardinal climber was the Impomoea species for the grape trunks. It blooms all day long, clothing itself in blossoms from top to bottom. The size and color of the blossoms, an inch or so across and cardinal red, seem best for relatively close viewing when sitting on the terrace.
    No need for these flowers to soften any excessive orderliness of the arbor. The grape trunks wend their way skyward and their long, new shoots create plenty of disarray except right after they are pruned each spring.

VEGETABLE GARDEN FRUITS

End of Summer But I Still Need some Watermelon

    Given sun, heat, and reasonably moist, fertile soil, watermelons are easy to grow. The greater challenge is in harvesting them at their peak of perfection. Even professionals sometimes fall short, as witnessed by not-quite-ripe watermelons I “harvested” awhile ago from a supermarket shelf and, a couple of weeks later, from a table at a local farmers’ market.
    That was while I was waiting for my own watermelons to ripen — the delectable variety Blacktail Mountain. But should I have been waiting?
    All sorts of indicators are touted for telling when a watermelon is ripe. The part of the melon laying on the ground supposedly turns yellow. The tendril opposite where the melon in question is attached dries up. Or my favorite method: thumping. Knock you knuckles on your forehead, your chest, and your stomach. The sound of a ripe watermelon should match the sound of the chest thump. The forehead sound indicates that the melon is underripe; the stomach thump, overripe.

Watermelon, it was ripe & delicious

Watermelon, it was ripe & delicious

    Sure, one could pull out the bells and whistles. As I wrote, even professionals have problems determining watermelon ripeness. To aid in commercial harvesting, nuclear magnetic resonance, one possibility, was considered — at $60,000 to $1,000,000 — out of budget. Acoustic resonance testing ($950) was a more viable alternative, but still not for me, with my five plants.
    After my two disappointing purchases, my mouth was watering for my own melons. I ignored the question mark hovering in air above the largest of the lot and, despite its lack of a dried tendril, a yellow bottom, or a telltale thump, cut it from the plant. Long story short: It was delicious, perhaps just a tad overripe.
    What about the other waiting melons? I’m just going to harvest them, as needed, and hope for the best.
    Update: I may have one more addition to the imperfect list of watermelon ripeness indicators. It seems that ripe melons might develop a whitish, waxy “bloom” on their skins.
    Update on the update: Scrap that way bloom indicator. Or, it might be part of the picture. Now I look for a number of indicators, and if some indicate ripeness — I thump the melon before picking.

Next Year: More Watermelon Plants

    Part of the watermelon problem is that I don’t grow enough watermelons. I once lived and gardened in southern Delaware, a few miles from one of the epicenters of watermelon production. With ideal climate and soil (sandy), I grew an abundance of large watermelons. Whether or not a single melon was picked underripe was not so critical. Once ripening began, any unripe ones could be relegated to the compost pile; a better one was always in the offing.

My Favorite Vegetable (Fruit?)?

    Like watermelons, sweet corn is also easy to grow. It can get by with less heat than watermelon, but demands a more fertile soil. Harvesting sweet corn at its peak of perfection also can be a challenge, though not nearly the challenge of watermelon. Picked too soon, corn is tasteless and toothless; picked too late, and it’s too starchy and toothy, a delight for animals, excepting humans.
    The first hint as to when I get to pick corn is when tassels atop the stalks begin to shed pollen grains — millions per tassel!
 

Corn, testing for ripeness

Corn, testing for ripeness

   About three weeks later, I start peering into the corn bed to look at the silks spewing out the ends of each ear. Silks are more or less dry on a ripe ear. At that point, I can usually tell ripeness by just wrapping my hand around the ear to feel its fullness, although less than perfect pollination can drain the bulk of a ripe ear so it feels underripe. (It’s hard to imagine less than perfect pollination when you consider that each tassel sheds literally millions of pollen grains; then again, each grain remains viable for only a few minutes; then again, again, it can travel hundreds of feet in that few minutes; then again, again, again, each kernel only develops if a pollen grain lands on a germinates on the single silk to which it is attached.)
    Any doubt about ripeness, and it can be confirmed before committing to harvest by peeling back the husk just enough to see some kernels. Their color and plumpness might be a giveaway. If not, a thumbnail pressed into a kernel should yield a milky fluid.
    Sweet corn, in contrast to watermelon, is easy to produce in quantity, even in a relatively small garden. So tasting an ear is no great sacrifice; there’s plenty more.
    Hybrid varieties of corn tend to ripen uniformly, so once one ear in a bed is ripe, the whole bed is likely also ready for harvest. A bed of a non-hybrid variety requires more frequent assessment and harvesting, which is better for home use where you might want a few ears each day or so, rather than a once-over harvest. With successive planting and selective harvesting, we’ve been enjoying sweet corn almost daily since the end of July.