ON TRIAL

And the Best Cherry Tomato Is . . .

 Take your picks from the descriptor grab bag: Honey, Gold, Drop, Sun, Bunch, etc. Now put a couple of them together and you might end up with a luscious-sounding name for a tomato variety. People have done this, and reeled me right in. This year I got fished into planting a few, new (for me) varieties of cherry tomato.
    Sungold is the gold standard of cherry tomatoes, the one I always grow. Its rich aroma underlies a sweetness livened with just the right amount of tang. One problem with Sungold is that it’s an F-1 hybrid, which means that you can’t save the seed and expect the resulting seedlings’ fruits to have the flavor of Sungold. The flavor might be better, but it’s more likely to be not as good. The other problem with Sungold is that the seeds, which must be purchased, are expensive.
    The first of this year’s lineup was the variety Solid Gold, a yellow, teardrop shaped tomato. Like Sungold, it’s an F-1 hybrid. Perhaps it would offer better or different, but also excellent, eating. It has been billed as having “outstanding flavor of true grape tomatoes” (by those selling the seeds). Grape tomatoes are tiny tomatoes, a different species from other tomatoes, with very good, very sweet flavor.

Tomatoes-Honey Drop, Honey Bunch, Solid Gold

Tomatoes-Honey Drop, Honey Bunch, Solid Gold

    Honeybunch, the second in the lineup, is another F-1 hybrid, this one red and teardrop shaped. “As if a pearl tomato(?) had been drizzled with honey,” so they say.
    The flavor of another variety, Honey Drop, was likened to that of honeydew melon. This one’s a Sungold look-alike and is open-pollinated, so seedlings should generally yield the same fruits as the parent.
    All three of these new varieties have borne early, and their stems have been heavy all season long with beautiful golden or red fruits. One reason their stems are so laden with fruits is because we don’t pick them. Not when we also have Sungold tomatoes to munch on. Solid Gold, Honey Bunch, Honey Drop, and the unnamed variety are all very good tomatoes, but why eat a very good tomato when you can eat the best tomato?

Filbert Plague, How Bad?

    Moving out into the field, literally, to my filbert (hazel) nut bushes . . . East of the Rocky Mountains, most people who plant filberts, and especially permaculturalists, plant American filberts (Corylus americana). This species is resistant to eastern filbert blight, a fungal disease endemic in these parts. I once grew American filberts, and they are beautiful in fall when their leaves turn blazing shades of red. Unfortunately, their nuts are small, with bad flavor — a good wildlife food, a poor human food.
 

Pustules of filbert blight

Pustules of filbert blight

   European filberts (C. avellana), and various hybrids, are what yield the large and tasty nuts of commerce. Orchards of these filberts are mostly in the Pacific Northwest. About 50 years ago, Eastern filbert blight made inroads to those orchards, which prompted breeding programs for blight-resistant varieties.
    I’ve planted a number of blight resistant filbert varieties, including some older varieties bred decades ago in the East. As  it turns out, though, the the blight fungus exists in more than one regional strain; like some other fungi, the blight fungus might also morph over time.
    Join me as I walk my row of filberts and note the performance of the various varieties. Four of the plants are only in their second year and are from the New Jersey breeding program of Tom Molnar, at Rutgers. The hope is that they’ll be more blight resistant than the western-bred varieties.
    The worst of the older plants include the varieties Clark, Eta, and Hall’s Giant. Clark and Eta are western-bred, while Hall’s Giant is an older, easter-bred variety that is bearing a moderate number of good-sized nuts in spite of the blight.
    Santiam, from the west, is afflicted with a moderate amount of blight. The nuts it bears are small but still much larger and tastier than native American filberts.

Ripe filbert nuts

Ripe filbert nuts

    Least blight-infected are the western varieties Lewis and Yamhill, the Italian variety Tonda di Giffoni, and Graham, an older, eastern variety. Thus far, my favorite is probably Graham, a hybrid of American and European filberts bred by Samuel H. Graham of Ithaca, New York, and introduced in 1950. It yields the largest nuts of the lot and shows its American parentage in its wide suckering growth habit and the fiery red of its leaves in autumn.

Results May Vary

    As they say in ads: “Your results may vary.” The above are my experiences. Filbert blight, like any disease, only thrives with suitable environment, a susceptible host, AND presence of pathogen. My farmden fulfills all three conditions, with varying host plant susceptibility. But I only am growing one plant of each variety; slightly different conditions might affect susceptibility of individual plants.
    Now, about my cherry tomato experiences: Tomato flavor varies little with climate or growing conditions, so your results probably would NOT vary from mine. Except of course, that it’s surely a matter of taste when it comes to taste.

I WAS WRONG

 Hog Peanuts, Groundnuts, Whatever

   I was wrong. A few weeks ago I wrongly dissed groundnut (Apios americana) for invading my flower garden. Yes, I planted it; that was 30 years ago, and it’s resisted my attempts at eradication for the past 28 years.
    The worse culprit, this year at least, is related to groundnut. Like groundnut, it’s a legume, it’s native, it’s edible, and it’s a vining plant with compound leaves. But each leaf of hog peanut (Amphicarpaea bracteata), has 3 egg-shaped leaflets, as compared with groundnut’s 5 lance-shaped leaflets.

Hog peanut leaves

Hog peanut leaves

    Hog peanuts produce flowers both above ground and below ground. Below ground is where the goodies are. Pods that form there enclose peanut-sized seeds that allegedly are tasty raw or cooked. I’ll see if I can dig some up in a few weeks. Like groundnuts, hog peanuts provided food for Native Americans; the plants were among the four sacred plants of the Osage.
    So what can be bad about a plant that tolerates some shade, adds nitrogen to the soil, and yields an allegedly tasty seed below ground? The problem is that it’s run wild over the flower bed, the fine stems and leaves attempting to smother, sometimes successfully, every plant in its path. Even non-native, invasive Japanese stilt grass and garlic mustard can’t hold their own against hog peanuts.

Permaculture Reality

    Low maintenance, protection and enrichment of soil, and edible parts recommend hog peanut and groundnut to permies (permaculturalists). As with so much in permaculture, these plants perform better in theory than in practice.
 

Hog peanut & groundnut strangling crocosmia

Hog peanut & groundnut strangling crocosmia

   In humid climates, plant growth — and not just groundnut and hog peanut — can run rampant. Growth needs to be controlled and balanced, a job made more difficult in a permaculture “guild” of groups of plants working together. I’m all for interplanting different species to make best use of light, water, and soil resources, and form communities that resist pests — to a point.
    I’ve had the opportunity, over the years, to visit the permaculture garden planted by students at the University of Massachusetts in Amherst. Now in its 5th year, the garden pays tribute to the compost, mulch, and sweat students put into soil preparation. The plants have grown very well. Too well, perhaps. One could say that the plants have commingled nicely; from another perspective, one could say that they are overunning each other. A blackcurrant bush or bushes has swelled into a mass of unapproachable stems 10 feet deep and wide. Chives and oregano have each taken over their areas. (How much chives or oregano can you eat? I’d rather eat tomatoes.)
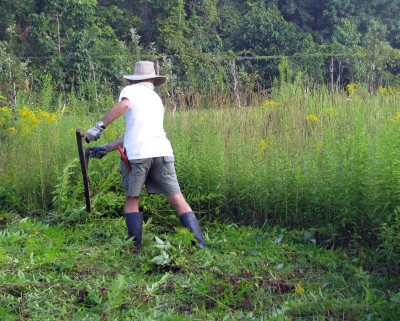
    Not that I’m immune to such errors. A few years ago I created a very permaculturesque planting that included elderberries, seaberries, and rugose roses almost elbow to elbow. It all looks very nice but these three shrubs all spread by suckers. I keep everything in check with elbow grease and a scythe . . .  for now, but Mother Nature is relentless. Am I?
    The most productive and accessible parts of the UMass garden are the beds of kale, beets, and other vegetables — straight rows in cultivated soil. How un-permaculturalesque.
    Oh, I forgot to mention the groundnuts at UMass. Stems of those plants are twining around and overpowering others in their guild in an ever-widening circle. Even if the groundnuts could peacefully coexist with their neighbors, grubbing up the golf ball size tubers will require an inordinate amount of time and soil discombobulation.
    My memory fails me. Perhaps it was hog peanut rather than groundnut vines threatening their neighbors. Perhaps it was both plants. Hog peanut has been suggested for erosion control, and as a groundcover, a livestock forage, and a food for humans. My suggestion: Hog food. Turn some hogs loose in a patch, and they’ll fatten as they clear the ground of this pernicious weed. Does anybody have a small hog for rent?

Elderberry Wine — No, Syrup

    Elderberry looked to be one of the most successful plants in the UMass permaculture garden. It grows fast and it grows high. My two plants, now in their third year, yielded more than four gallons of berries. And harvest, last week, was quick and easy; aggressively tickling the umbels had the berries quickly filling a basket.Elderberry harvest
    Elderberries can also be recommended for their flowers and the berries’ deep, blue color. Flowers open in June to dinnerplate size umbels of small, white blossoms. They’re good for tea, fritters, or to flavor wine.
    The berries impart their good color, but little flavor, to wine, pie, and juice. (They should not be eaten uncooked or unripe.) There’s a bit of scientific evidence than an extract or syrup of the berries  can help fight flu, perhaps other ailments also. I’m good at growing fruit, not cooking it, so I gave my crop to Dina Falconi who concocted a syrup using the recipe from her book Foraging & Feasting. I look forward to tasting the benefits of my horticultural and her culinary skills.
Elderberry flowers

GOLDEN REWARDS, NOW & FUTURE

 Why Grow Sweet Corn?

   With all the supersweet, tender ears of corn readily available at farms, farmers’ markets, even supermarkets these days, why do I bother to grow my own sweet corn? Because it tastes better, much better. Corn can be too sweet, and too tender for many of us maizophiles.
    I grow the variety Golden Bantam, which was the standard of excellent in sweet corn a hundred years ago. Its fat, golden kernels are toothsome, giving you something to chew on (but they’re not too chewy), with a rich, corny flavor. And yes, they are also sweet, just not supersweet.
 A bed of ripe Golden Bantam corn   Corn is a relatively pest-free vegetable that warrants space in any garden. I grow corn in hills (clusters) of three plants each with 2 feet between hills in the row and two rows of hills down each 3-foot-wide bed. With each stalk yielding one to two ears, I reap 30 to 60 ears for each ten feet of bed! That’s a lot of ears, and it’s in space in which I sow early lettuce or spinach before planting the corn, and late turnips or, again, lettuce, spinach, arugula, or other cool season vegetables to follow the corn harvest.
    Of course, I plant more than just one 10 foot bed of corn and I spread the harvest season with successive sowings, 4 of them 2 weeks apart.
    There is one limitation to backyard corn: raccoons. Given the opportunity, they will harvest every ripe ear. Trapping is one way to keep them at bay. My dogs, Sammy and Scooter, spend day and night frolicking outdoors — and convincing raccoons to search for greener pastures.

GMO and Crap Shooting

    Golden Bantam corn, because it originated in 1906, is, of course non-GMO, that is, a “non genetically modified organism.” (As of now, almost all commercial sweet corn is still non-GMO; just about all field corn, which makes its way into animals, corn syrup, and more packaged products than you can imagine, is GMO.) This is my lead-in to clearing up some basic misconceptions about what GMO means.
    When the pollen from any plant lands on the female part of a flower of another plant, cross-pollination occurs. The resulting seeds and the plant growing from those seeds carry genes contributed from each of the two parent plants. As a result, the offspring are similar to, but not genetically identical, to the parents. The offspring is a natural hybrid.
    Enter Homo sapiens . . . Since the dawn of civilization, we humans have sought certain traits in our plants. To get plants with such traits, we chose plant parents having qualities to our liking and deliberately mated them in the hopes that their offspring would pick up only the parents’ good traits. The more offspring that are grown, the better the chance of finding a hybrid — one produced with human assistance, in this case, possessing desirable traits.
    Besides the crapshoot of traditional breeding, success is further limited by our only being able to choose from among plant parents that are related closely enough to breed. For instance you could not mate a tomato plant, which is not frost tolerant, with, say, a flounder, a fish very tolerant of freezing temperatures, in an effort to make a frost tolerant tomato. Tomatoes and fish are not even distant kin and could never breed with each other under natural conditions.
    About 30 years ago, scientists developed methods for circumventing the capriciousness of natural or human-assisted breeding. Laboratory methods were developed for teasing a desirable gene out of a cell of one organism, then injecting the gene into cell of another organism to create new organism — a GMO. And I do mean a “new organism,” because it contains genetic material that need not have come from a related organism.
    That “fish tomato” was, in fact, created by incorporated the so-called antifreeze gene from winter flounder into a tomato. It turns out that gene expression is not as straightforward or as predictable as once imagined. The fish tomato was a commercial flop in its frost tolerance and other agronomic characteristics; perhaps it would have been a good swimmer.
    Since that fish tomato came and went, other GMOs have been developed. Many have been commercial successes.
    Just to be clear: While it is true, as is often stated in support of GMOs, that hybridization or cross-breeding has been going on in nature for eons, that cross-breeding has always been between closely related species. Humans intervened, but nature could also have produced those traditional hybrids.
    All the above involves, in some sense, genetic modification. You are a genetic modification of your parents. But the term “genetically modified organism,” or GMO, genetically engineered, or transgenic organism, signifies an organism that has picked up genes via manipulation in a laboratory, often genes that never could have showed up naturally in the organism.

Some Summer in Winter

    I awaited my first taste of this season’s Golden Bantam with more anticipation than my first taste of tomato. Finally, we’re awash in sweet corn, more than we can eat.Dried sweet corn, for storage all winter.
    But six weeks of sweet corn will not satisfy, so we’re packing away some for winter. Steaming or boiling the shucked cobs arrests enzymes that change kernel’s sugars to starches. With sweetness retained, we slice kernels from cobs, then either freeze them or dry them. Either way, they are a flavorful addition to soups, stews, and breads on dark, cold, winter days. But nothing like biting into a freshly steamed cob in the heat of summer sun.

For More, Live . . .

Check out my upcoming lectures for the weeks and months ahead at https://leereich.com/lectures

SUNNY DAYS & YOGA, BUT TOMATOES?

Springtown Farmden Health Spa

    In the past, I have written of rei-king and sie-thing as two of the many healthful exercises offered here at Springtown Farmden Health Spa. We now have a new offering at the spa: garden yoga or, more catchy, gardoga or yōgdening. I like the last one best.
    Yōgdening grew out of my respect for the soil, my desire to maintain and foster a healthy balance of life below ground. A healthy population of bacteria, fungi, worms, actinomycetes and other below-ground dwellers translates to healthy plants above ground. Those beneficial creatures need to breathe, which is why most gardeners and farmers till their soil. To aerate it.

Yogdening, for health and weedlessness

Yogdening, for health and weedlessness

    But tilling a soil also burns up valuable organic matter. This organic matter feeds soil organisms and, in turn, plants, makes nutrients already in the ground more accessible to plants, helps hold moisture for plants, and helps aerate the soil.
    I avoid the need to till my soil for aeration by almost never walking, rolling a wheel barrow, or allowing any other traffic where plants are growing. Plants in fields and forest grow well despite never being tilled except what earthworms and other small animals manage to do. (No small amount: Charles Darwin computed that earthworms completely turn over the upper six inches of a pasture soil every 10 to 20 years — in England, at least.)
    Getting back to yōgdening . . . Weeds are making inroads into certain parts of my gardens. Not my vegetable gardens, the 3-foot-wide plant beds of which I keep well weeded with my feet firmly planted in the 18-inch-wide paths bordering the beds. But the only way I can reach into some other planted areas, a bed of various flowers sprawling beneath some Asian pear espaliers, for example, is by stepping into them. To minimize foot traffic, after stepping into a planted area, I try to keep my foot anchored in place, from which I pull every weed I can reach.
    As you might imagine, reaching every weed possible with feet planted in one place calls for all sorts of contortions and stretches forwards, backwards, and sideways involving my legs, trunk, shoulders, arms, and neck. My guess is that after a half-hour of weeding, I’ve run through a close approximation of Utthia Trikonāsana (Triangle Pose), Vīrabhadrāsana (Warrior Pose), and Uttānāsana (Standing Forward Fold Pose), to name a few classic yoga poses — and cleared away weeds!
    Weeding (or, perhaps, I should write “we-ding,” another spa offering) is especially satisfying this time of year. Dry weather has slowed sprouting of new weeds so cleared areas remain clear.

Brown Rot Not (Too Much)

    Dry weather is also good for fruit ripening. That is, ripening rather than rotting. As sweetness develops in ripening fruits, they become more susceptible to rotting. Fungi, like humans, can make quicker use of simple sugars than more complex carbohydrates, such as a are found in unripe fruits. Fruits with thin skins are especially susceptible to attack from fungi.
    For a variety of reasons, known and unknown, this has been a good year for plums. In past years, late frosts in spring have snuffed out blossoms or plum curculio has caused many, if not all, plumlets to rain to the ground. This year, blossom buds were unscathed from winter cold or spring frosts, curculios were kept at bay by my spraying Surround, a commercial product that is nothing more than kaolin clay.
 

Shiro plum

Shiro plum

   Current dry weather should also limit plums’ other nemesis: brown rot, a fungal disease that turns ripening fruit gray and fuzzy and then, at the end of the season, into dark brown, shriveled mummies. (Of course, beautiful clear days are often followed by clear nights during which water, in the form of dew, condenses on fruits and leaves.) The mummies hang from the branches, along with cankers on branches, spread spores and infection the following year. Fallen mummies are also a source of the following season’s infection.
    Brown rot gets to work early in the season, around blossom time, and then later in the season, as fruits are ripening, which is now, for my Shiro plums. Early in the season, I added sulfur, a naturally mined mineral whose use as a fungicide goes back to the ancient Greeks, to the mix when I was spraying Surround.
    Supplementing that spraying was cleaning up hanging and fallen mummies at the end of the season, and promoting drying of branches and fruits with pruning and thinning out of excess fruits.
    The upshot is that some brown rot is showing up on ripening plums. But not all of them. And those that have been spared are delectable. Even the birds think so. Their peckings, unfortunately, like wounds inflicted by plum curculios, increase fruits’ susceptibility to brown rot.

Tomatoes, Where Are You?

    Tomatoes are growing like gangbusters, here and in other gardens I’ve seen locally. And the fruits are likewise growing very plump.
 Tomatoes, not yet ripe   But the scene is not as rosy as it should be, literally, because too many of the tomatoes are still green. Again, other local gardens mimic my experience. How are your tomatoes doing this year?
    Day after day of bright sunny, weather and moderate temperatures should have promoted ripening. Then again, day after day of rainy weather last month might have retarded it. At any rate, in gardening and farming, you can’t go wrong blaming the weather.
   

HOT DAYS, BUT PREPARING FOR FALL

Ignoring My Gut

Like other parents, I don’t hold back preparing for fall just because of hot, sun-drenched sunny days. But my preparations don’t entail trips to the store for notebooks, pencils, rulers, and other school gear. My daughter is old enough to gear up for herself. Instead, I’m preparing for a garden that becomes lush with ”cool weather” vegetables just as tomatoes, peppers, okra, and other warm weather vegetables are fading OUT.
    Much of gardening entails NOT going with your gut. If I went with my gut, I’d be planting more tomatoes and sweet corn and, perhaps, if I was really going with my gut, even banana trees on today’s ninety plus degree, bright, sunny, humid day.

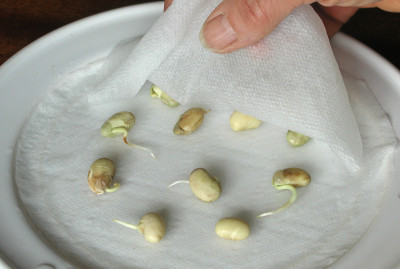
Sprouting seedlings, planting seeds, and transplants

Sprouting seedlings, planting seeds, and transplants

    Although tomatoes, peppers, and cucumbers presently have more appeal, fall vegetables will have their day. I have to remind myself how a lowering sun and cooler weather make more appealing the lush green leaves of cabbages, brussels sprouts, endive, lettuce, kale, celery, and, below ground, radishes, turnips, carrots, and celeriac. And anyway, I’ll have no choice because summer vegetables will have waned by then.
    That lush fall garden, almost like a whole new garden, comes about only if I do something about it now!

To Every Thing There is a Season, a Time to Plant, A Time to…

    Timing is (almost) everything for a productive fall garden. Planted too early, some leafy fall vegetables bolt — send up tough seed stalks — because of heat and long days. Right now, I’m sowing turnips and winter radishes, the especially tasty varieties Hakurei and Watermelon respectively. Among leafy, salad vegetables, lettuce, mustard (the variety Mizuna), and endive, with repeated sowing of lettuce every weeks until early September.
    It’s still a too early for spinach, arugula, mâche, short season Chinese cabbages, and spring radishes. Some time later this month would be about right for these vegetables. My book, Weedless Gardening, gives a detailed schedule for when to plant what vegetables for specific regions.
    For a truly bountiful fall garden, more advance planning was needed. For instance, I won’t be harvesting brussels sprouts until October, but for sprouts lining stalks three to four foot tall, I sowed those seeds indoors in March. Celery and celeriac seed got sprinkled in mini-furrows in seed flats way back in early February.

Zero Tolerance for Weeds, Almost

    Almost as important as timing for my fall garden is weeding. The enthusiasm of many gardeners peaks in spring and then slowly wanes as summer heats up. Not mine.
    Every time I see a lambsquarters weed, the thought of the eventual 100,000 seeds it might sow prompts be to bend down and yank it out. Same goes for purslane plants, whose seeds remain viable in the soil for decades. And spotted spurge; each plant not only spreads thousands of seeds, but those seeds sprout quickly to mature new plants that make even more baby, then adult, spotted spurges. How could I bring myself not to pull these weeds. (Yes, I know, lambsquarters and purslane are edible — if you like their flavor.)
    With weeds kept in check through June, much less effort has been needed to maintain the status quo. Mostly, this is because drier weather has limited weed growth and seed germination, and because any watering in my garden is with drip irrigation. Rather than coaxing weed growth in pathways (and also wasting water), as do sprinklers, drip irrigation pinpoints water to garden plants.

Fresh Figs Bring Me back to Summer

    Back to enjoying summer . . . we’ve been enjoying the first crop, known as the breba crop, of figs from the ‘Rabbi Samuel’ fig tree espaliered in the greenhouse.
 

Rabbi Samuel fig, espaliered in greenhouse

Rabbi Samuel fig, espaliered in greenhouse

   Most fruit plants bear fruits on one-year-old, or older, stems. Figs, depending on the variety, can bear on one-year-old stems, on new, growing shoots, or on both one-year-old stems and on new, growing shoots. ‘Rabbi Samuel’, I have found, bears on both.
    The tree is trained to a T, with two horizontal arms growing in either direction from atop an 18” high trunk. New shoots spring up vertically at about 6 inch spacing along the arms. Late each fall, I cut all those shoots almost back to the arms to make room for and coax new fruiting shoots for the following year.

Early, breba fig crop not ripening on old stub

Early, breba fig crop not ripening on old stub

       The stubs left after cutting back the season’s shoots are one year old, and that’s where brebas have been borne. This fall, I’ll leave some a few inches long, for a larger breba crop next July; the next year I’ll shorten them more drastically and leave others a few inches long; and so on, year after year.
    The main crop, on new, growing shoots, should begin ripening not to long after the  last of the brebas have been harvested. With sufficient sunlight and a bit of supplemental heat in the greenhouse, harvest of the main crop will continue until November’s days grow too short, soothing the transition from the summer to the fall garden.

SPROUTS MAKE ME HAPPY, DARWIN DOESN’T

More Citrus in the Making

You wouldn’t think that a couple of small, green sprouts could elicit so much excitement. Especially this time of year, with vigorous, green shoots sprouting up all over the place. But they did, in me. Not that anyone else would notice the two sprouts.
    The sprouts were from grafts I made a couple of months ago. Over the years I’ve done hundreds of successful grafts; these two were special.
    The first was citrus, special because the trees are subtropical and evergreen. The many apples, pears, and plums that I’ve grafted over the years are deciduous. I graft them when they are leafless and just about ready to start growing. Because the grafts are leafless, the wood, as long as the graft union is sealed, won’t dry out.
    Not so for citrus, more specifically for the stems I clipped off my potted Golden Nugget tangerine tree. What was needed, then was a rootstock on which to graft that stem. The result would be a Golden Nugget plant above the graft (which stays right where it is no matter how much the plant grows). Clipping all the leaves from the stem forestalled moisture loss.
    My home is also home to kumquat, another citrus that lives in a pot here, outdoors in summer and in a sunny window in winter. A couple of February’s ago, I glanced down at the kumquat seeds I had just spit out from fruits I harvested and ate. Not being able to squander their potential, I planted them in pots. A decade might have gone by before they were old enough to bear fruit but, after two years, the pencil-thick stems were large enough for grafting.

Citrus graft, a success

Citrus graft, a success

   With kumquat rootstocks poised for the operation and Golden Nugget scions (the stem to be grafted atop the rootstock) stripped of leaves and also ready, the procedure was the same as for apple trees and other deciduous plants: matching, sloping cuts on rootstock and scion held in place by a wrapping with a rubber strip; covering the wound to prevent moisture loss. My usual choice of covering is Tree-Kote, which gets painted on, or Parafilm, a stretchy film that adheres to itself.
    The citrus scion was fleshy enough to also lose moisture right through the bark. To prevent this, I wrapped the whole scion in the Parafilm. A blackened scion had followed previous attempts at grafting citrus without wrapping the stem.
    A week or so ago, it was time to unwrap the Parafilm from around the stem. If the grafted parts were going to knit together, they should have done so by then. Lo and behold, a small, green sprout soon pushed out from the top bud of the scion.

 Nutty Grafting

    Not all deciduous trees are as easy to graft as apple and pear. Nut trees in the Juglandaceae family, which includes black walnuts, English walnuts, butternuts, pecans, and hickories, are notoriously difficult. Part of the reason is because cutting a stem in spring, which is, of course, unavoidable when grafting, makes these trees bleed, messing up the works.
    With a slew of failures at grafting this family under my belt, I needed to try again. The candidate this year was a nut tree called buartnut, and hybrid tree with a hybrid name, the latter a non-euphonious combination of the words “heartnut” and “butternut.” Heartnut is a Japanese species of walnut, notable mostly for how easily it cracks to yield two heart-shaped nutmeats. Butternut is a richly flavored nut borne on a native tree that is becoming increasingly rare because of a blight disease.
    Buartnuts allegedly need cross-pollination to bear nuts. My tree, large and spreading though only about 15 years old, lacked a mate. The mate needn’t be a whole other tree; a branch from another tree, grafted on my tree, would suffice and avoid the need to plant a whole new tree or wait the years it would take to flower. Grafted branches bear much more quickly than new trees.
    Fortunately, I knew of another buartnut tree that could provide pollination. Last winter, I clipped off a few of its stems, packed them in a plastic bag, wrapped the bag in a wet towel, and then packed that whole mess into another plastic bag and then into the refrigerator. There, they remained hydrated and dormant until needed.

Heartnut graft, one sprout

Heartnut graft, one sprout

    The key, I’ve been told, to grafting Juglandaceae, is to wait in spring until a spate of 80 degree plus weather is predicted. Conditions seemed right on a day last May. Because of past failures, I attempted numerous grafts, three different kinds: the bark graft, the banana graft, and the whip graft. To promote bleeding off-site rather than at the grafts, I slit stems below the grafts. I covered one of the bark grafts with a plastic bag and then, for shade so the stems wouldn’t cook, a paper bag.
    Almost all the grafts failed. Except one. Just one stem of just one of the bark grafts (each of these bark grafts carries 4 or 5 stems) sprouted. How exciting!

Temple Disruption

    Exciting goings-on in the blueberry patch also. Birds are flitting about every morning, enjoying a few berries despite our repeated efforts to secure any openings in the walk-in “Blueberry Temple.” I threaded some string to more tightly join the top and side netting. As previously, I think this will solve the problem.
    Then again, this may be a Darwinian experiment. Birds never used to work their way into the Temple. Openings in the top netting are 1” across; I fear the net is breeding for smaller models of cedar waxwings and catbirds. Or perhaps smarter ones better at finagling their way to the blueberries

DUCKS WORKING, BUT NOT ON GROUNDNUTS

 THE DUCKS CALL THIS “WORK”?

   My ducks told me that the hardy kiwifruits were ripe. No, they’re not trained to give a specialized “hardy kiwifruit ripe” quack. Instead, they’ve taken to hanging out beneath the vines to scoop up dropped fruits. No training needed for this.

Hardy kiwifruits trained for easy harvest

Hardy kiwifruits trained for easy harvest

    Those dropped fruits are one reason that these vines — Actinidia kolomikta — are not as popular for fruit as another species, Actinidia arguta. Ripening, and dropping, is fast in the heat of July. Arguta kiwis ripen in late summer and early fall, and possibly cling to the vines more reliably then because cooler weather slows ripening.
    Not that either of the fruits are well known. Both are cousins to the fuzzy kiwis (A. deliciosa), ubiquitous in supermarkets. Both hardy kiwis differ from the fuzzies in being cold-hardy (only to 0°F for the fuzzy as compared to minus 30°F for A. arguta and to minus 40°F for A. kolomikta), grape-sized, with smooth, edible skins, and better flavor than the fuzzies.
    In addition to ripening earlier and dropping more readily, kolomikta kiwis differ from arguta kiwis in coming into bearing much sooner, often in their second year, and growing much less rampantly. Argutas are hard vines to tame. Ornamental vines of both species gracing historic gardens for decades before their fruits were noticed and appreciated is testimonial to their beauty. Kolomikta’s leaves are brushed silvery white with random pink blushes.
 

Variegated leaves of A. kolomikta

Variegated leaves of A. kolomikta

   Back to harvest. Harvest from the ground is unfeasible because the green fruits are too hard to find among the blades of green grass. And unhealthy because of all the processed kiwifruits — poop — the ducks eject at their far end as they gobble up the berries. A ground cloth to catch the berries would become similarly soiled unless I went to the trouble of spreading it, shaking the vines, then gathering up the cloth after gathering up the fruits.

Hardy kiwifruit harvest into inverted umbrella

Hardy kiwifruit harvest into inverted umbrella

    Instead, I’ve taken to walking beneath the vines with a large umbrella, upturned, and shaking portions of the vines right above the umbrella. Ripe fruit drop into the waiting “funnel.” Sure, many fruits are lost, but the vine bears more than enough to share with the ducks, who can enjoy the missed fruits.

RIPENING OFF THE VINE, HOW CONVENIENT

    Like apples, bananas, and avocados, kiwifruits of all stripes are climacteric fruits. Instead of steady ripening, climacteric fruits, just before they are ready to eat, go through a burst of ripening with sugar levels and carbon dioxide production all of a sudden rapidly increasing. Fruit quality begins to decline right after this burst.
    Ethylene, a simple gas that is also a naturally occurring plant hormone, also spikes during this burst. And ethylene further accelerates ripening, which increases ethylene production even more, which increases ripening even more, and . . .  Disease, wounds, and decay also stimulate ethylene production, which is why “one rotten apple spoils the barrel.”
    If picked when sufficiently mature, but not dead ripe, kiwifruits store well for a few weeks. They’ll ripen during storage, slower under refrigeration, faster at room temperature. From experience, I know that “sufficiently mature” for kiwis is when the first fruits start ripening. So, in addition to my umbrella harvesting, I’m harvesting a bunch of the unripe fruits and refrigerating them to extend their season. Don’t worry; there’ll still be plenty for the ducks.

SOMETHING FOR YOU PERMACULTURALISTS

    Every time I walk back to the kiwi vines, I pass a perennial flower bed. Or, at least, what was supposed to be a flower bed and now is bordering on half flowers and half weeds. The major two weeds, I admit, are my own doing.
    The first of these weeds is dayflower, which arrived here with some bee balm plants from a friend. It’s actually a pretty plant with small, blue flowers, and it’s easy and satisfying to pull out. To a point.

Groundnut tubers, in years' past

Groundnut tubers, in years’ past

    The other weed, groundnut, was a deliberate planting, by me, about 20 years ago. It seemed interesting, bearing edible, golf-ball-sized tubers that string along underground like beads. Groundnut reputedly is the food that got the pilgrim’s through their first winter. Occasionally the plant, a vine, flowers, bearing chains of pale chocolate-colored blossoms. Do I remember them smelling like chocolate also? Perhaps. With all the other vegetation in the bed, the plants haven’t flowered in a long time.
  

Groundnut flowers

Groundnut flowers

 The problem is that those chains of tubers spread to make more chains of tubers which, in turn, do likewise, ad infinitum. The vines now creep over almost every plant in that bed but rarely get enough space to themselves to make tubers anymore. No matter. They didn’t taste that good anyway.
    I wasn’t as foolish as might seem planting groundnut in that flower bed. Twenty years ago that flower bed wasn’t a flower bed, but just a place for interesting plants in my then small garden.

BLUEBERRIES GALORE, COMPOST TEA REDUX

On My Knees for  Blueberries

    For the last few years, my blueberries have had a problem. Perhaps yours also. Rather than grow upright, the stems arch downward, some so drastically that they actually rest on the ground.

Blueberries galore

Blueberries galore

    A few years ago, I pinned blame on the weather. Not that it was evident just how the weather could be responsible, but it’s always convenient, in gardening, to blame things on the weather. But this explanation is hardly convincing. Spring and summer weather have not been consistent enough over the years to be able point my finger at too much rain and/or not enough sunlight (the combination of which could lead to those bowing branches).
    How about pruning or fertilization? Too much of either could promote lush growth that couldn’t support itself. Except that my pruning has been consistent over many years. And Dr. Marvin Pritts, berry specialist at Cornell, confirmed that he and others saw the same problem, without definitive explanation, a couple of years ago.
    I like the green thumb explanation best: That is, that I’m such a good blueberry grower that the branches can hardly support the prodigious crops I’ve coaxed from them. So I’m not really complaining. Just curious. And having to get on my knees to harvest low hanging fruit.

Remember Fruit Flies?

    There is one fly in the green thumb ointment. A fly, literately. A tiny fruit fly called the spotted wing drosophila or, quicker to say, which is necessary for this fly that’s getting a lot of buzz lately, SWD. The fly attacks many small fruit, starting the season with honeysuckle berries, then moving on to raspberries, blackberries, and . . . blueberries.
    Most fruit flies lay their eggs in overripe, or at least ripe fruit. Not SWD. She lays her eggs in unripe fruit. The eggs are small and what hatches from them are small; their being “maggots” sort of takes the appeal from the berries.
    SWD is a new pest, so new ways of thwarting them are being tried. Covering the plants with fine netting very early in the season is effective but would be very bothersome, for my planting, at least. Various organic sprays are another possibility: Entrust, which is derived from a soil bacterium, is effective if used STRICTLY according to directions; horticultural oil might prove effective. Traps are also under test.
    One way to bypass the problem is to grow only earlier varieties of blueberries. SWD has not showed up here and at many other sites until early August. Plenty of varieties — Duke, Earliblue, Toro, and Blueray, for example — are finished before then.
    But I want fresh blueberries on into September. Harvesting blueberries (or raspberries or other berries) and whisking them into a refrigerator at 34 degrees for 72 hours will kill eggs and larvae. Freezing, the destiny of about half our harvest, also kills the eggs and any hatched larvae. A little egg and meat boosts the protein content of the berries.

I Backpedal, Sort Of

    It may be time for me to eat pie. Not blueberry pie, but humble pie. Regular readers of my words probably realize that I take a certain amount of pleasure in iconoclasm. And one recipient of my eye-rolling has been compost tea, something that many gardeners and farmers love to love even though there’s little theoretical or empirical support for its efficacy.
 

Compost tea, quick mix

Compost tea, quick mix

   “Little” but not “none.” A number of peer-reviewed articles describe benefits from using NON-AERATED compost tea to thwart root diseases. (The relatively recent interest in compost tea is for AERATED compost tea, often sprayed on leaves. Aerated compost tea, the brainchild and business of Dr. Elaine Ingham, is compost tea that’s bubbled with air for en extended period, often with molasses or other additions. Generally, experiments have not supported touted benefits of aerated compost tea.)
    For the past number of years, my pea crops have been failures, the plants yellowing and dying soon after harvest begins. Fusarium or some other root disease is the probable cause.
    In desperation, five times this spring, at about weekly intervals, I put a shovelful of compost into a 5 gallon bucket and filled the bucket with water. After one day of steeping, the tea was strained, put it into a watering can, and drenched on the soil beneath of my thirty foot, double rows of peas.
    Lo and behold: The peas look healthy and have been yielding good crops!

A healthy row of peas

A healthy row of peas

    I won’t say for sure it was the compost tea or what in the tea, if it was the tea, did the trick. But nothing else jumps out this year as the savior of my peas. For a more definitive tea endorsement, next year I should grow a row or two without the tea, and a row or two with the tea. I might try that, although it presents the possibility of my ending up with a row or two of unproductive vines.
    For now, I’ll just have humble pie. And tea. 

DRIP, DRIP, DRIP, WHERE’S THE AGUA?

 I’m Dripping, So Why Am I Watering?

  Up to a couple of weeks ago, little water had dropped from the sky this spring here in the Hudson Valley. But a drip irrigation system automatically waters many of my plants. So why have I been spending so much time with hose in hand?Dripline with beans
    Not all my plants drink in the drips. Trees and shrubs are on their own except their first year in the ground when I religiously hand water them every few days initially, and then once a week throughout the season. These plants get 3/4 gallon per week for every square foot spread (estimated) of their root systems. That’s equivalent to an inch of rainfall which, if it does fall, exempts me from a few days of watering.
    A couple of inches depth of hay, leaf, or wood chip mulch around the trees and shrubs seals in moisture to make best use of my efforts. Also, I start with smaller plants — less than 4 feet tall — which become independent of my watering sooner because a larger proportion of their roots are soon foraging around in surrounding soil that those of larger plants.
    My flower beds also don’t get dripped. Although the soil surface is dry, moisture carried over from winter still sits in lower depths, into which established perennial flowers’ roots can tap. Annuals and newly planted perennials need to be watered on the same schedule as young trees until their roots reach that moisture.

My blueberries are my only dripped shrubs

My blueberries are my only dripped shrubs

   It is my garden vegetables that drink in the benefits of my drip system. But even here some hand watering is needed these days. Down each bed runs 1 or 2 drip lines, with emitters along the lines spaced 6 inches apart. As water enters the soil, capillary pull from small spaces between the soil particles draws water sideways and, along with gravity, downward. The resulting wetting fronts have the shape, if you could look at a cross-section of the soil, of an ice cream cone. In clay soils, with small particles and, hence, a lot of capillary draw, that ice cream cone is very fat; in sandy soils, it’s narrow, a couple of feet wide at its broadest as compared with the 6 foot spread in a clay soil.
    The wetting fronts start their sideways spread below the soil surface, deeper in sandy soils, more shallow in clay soils. In either case, the soil surface remains dry except right at the point of drip. So any vegetable transplants or seeds I set in the ground need to be hand watered until their roots reach the wetting front — except for seeds or transplants set right under or along the drip line.

Drip Irrigation Workshop June 20th; see “Workshops“, at this site, for more information.

A Statue of David

    My friend David was wondering why the leaves of his Romaine lettuce plants flopped down. I gave my usual response to most gardening questions: “Too little water.” (My other usual response is “Too much water,” often following my first response if the questioner tells of watering all the time.)
    So I asked David how much he watered, and he said he thoroughly soaked the ground by spraying it with water. Busted! It really was a water problem, too little in this case.Hand watering
    In fact, thoroughly wetting the soil with the usual 4-foot-diameter, hand held spray is almost impossible. “Thoroughly wet” means soaking the ground to at least a 6-inch depth. For his hand held sprayer to do that, David would have to stand in place like a statue, sprayer in hand, unmoving, for about an hour to wet one 4-foot-diameter part of the garden before moving on to the next 4-foot-diameter area.
    When I’m watering plants in the ground by hand, I’m wetting only the small area beneath an individual plant, just enough to soak its roots as they establish themselves in the surrounding soil.

Probe the Soil

    People find it hard to believe that that statuesque watering posture is really necessary. All you have to do is scratch the soil surface after a David-esque spraying of plants to see how deeply the water percolated, and you’d find only a thin layer of wet soil, at the surface.
 

Digital moisture probe.

Digital moisture probe.

   Digging a hole in the ground is a good way to tell if watering was sufficient. But it’s also inconvenient.
    For just a few dollars, I invested, years ago, in an electronic gizmo that bypasses all that hole digging. This soil moisture sensor has a metal probe that you plunge into the soil. Atop the probe is a dial or digital readout that tells whether the soil is “DRY,” “WET,” or something in between. More accurate sensors cost over a hundred dollars, but the cheap ones are fairly accurate and work well if coupled with observation.

Good for Pot(s) Also

    The soil moisture meter is especially useful with potted plants, which might need watering every day when the weather is warm, sunny, and breezy. (With experience, lifting a pot to feel its weight is also a good measure of moisture level, as is just getting to know your plants better.)
    I’m still hand watering the pots because I haven’t yet connected the drip tubes that will direct water to each of the pots.

QUICK, NO WORK GARDEN, FOR STARTERS

Prescription for a New Gardener

    It seems like everybody’s a gardener, or is becoming one, this time of year. And a lot of people have been asking me questions. Like my niece Lana, for instance, who moved along with her husband, a baby, and a toddler to a new house last fall and is ready to dig into a garden this spring — but, as Lana said, a garden “that will be easily manageable for her and interesting to her 3 year old.” (The one-year-old is still enthralled with her thumb and other such things.) So, for Lana and other beginning or non-gardeners, here is a simple plan for a small garden that requires almost “no time.”

A small, productive garden

A small, productive garden

    The most stringent requirement for this garden is sun. The more the better. And the closer the garden is to the back door, the more you will be drawn to it, whether to dash out to pick a few leaves of lettuce, or to pull a wayward weed. This garden can be, probably should be, small. Let’s assume it is ten feet by ten feet.
    The second requirement is soil that does not stay sodden for hours after a heavy rain. Push a can with both ends open into a hole in the soil and add water; it should drain faster than an inch an hour. If not, choose a new location or make raised beds.
    With sun and water taken care of, soil preparation begins. And ends a few minutes later! Blanket this area with a four-sheet thickness of newspaper (do not use colored pages), overlapped and wetted.  Done, almost. The newspaper will smother existing vegetation, and keep out weeds during the growing season. And as the paper rots away, it will enrich the soil.
    The planting plan is simple: divide the garden into four beds, delineated by two 18 to 24 inch wide paths going up the center of each side and crossing each other in the center of the garden. Cover the newspaper in the paths with wood chips, wood shavings, sawdust, or pine needles. In the beds, purchase some weed-free compost, enough to lay at least a one-inch depth over the newspaper.
    Sow seed right into the compost layer. Peas and lettuce need to be planted early — as in now — because they both enjoy cool weather in rows about a foot apart. Make each pea row four inches wide, then scatter the seeds so they are about an inch apart down and across the row.
    The next wave of planting takes place after warm weather has settled, in late May. Buy tomato transplants and set them in one of the northern quadrants. If needed make a hole through the newspaper into the soil below to accommodate the full depth of the transplant. Grow a variety for flavor, like Brandywine, Sungold, or Amish Paste. Each plant should be two or three feet from its neighbor, depending on whether you are going to stake your tomatoes or allow them to sprawl. Eventually you will have a jungle of vines in danger of overtaking or enlarging your garden, so take a few minutes occasionally during the summer to prune wayward stems from the tomato plants.
    Plant sweet corn and cucumber seeds at the same time as tomato transplants. Since corn is a tall grower, it gets the other northern quadrant. Plant three seeds together in “hills,” which are groups of seeds, not mounds of dirt, spaced two feet apart each way. Cucumbers get the final, southern quadrant. Sow six seeds per hill, with hills three feet apart. Grow a bush-type cucumber, like Salad Bush or Bush Pickle. Once the corn and cucumber seeds are up and growing vigorously, ruthlessly thin the plants so each corn hill has only one plant and each cucumber hill has three plants.
    This garden gets one final planting in early July. But where, since all four quadrants are used up? Pull out the peas and lettuce, which flag anyway during hot weather, and plant in their place bush beans. Bush Blue Lake and Bush Romano are good choices.
    This garden will produce a limited amount of vegetables with a minimum amount of work. Success may tempt you to enlarge your garden and grow a greater variety of plants next year.

Get Your Compost On

    A gardening friend called to ask how much compost is needed to cover his garden. It turns out that a one inch depth of compost will supply all the nutrition, plus a lot of other goodies, that a vegetable garden needs to nourish the plants for one year. So that one-inch depth needs replenishment annually.
 

Spreading compost on bed

Spreading compost on bed

   (Less compost could be used if the deficit is made up by fertilizer. But compost is the Cadillac of plant foods while also offering protection against pests, improved aeration and water retention in the soil, protection against erosion, and other known and unknown benefits.)
    Back to the amount needed: 1/3 of a cubic yard (300-500 pounds, depending on moisture) will cover 100 square feet 1 inch deep. That’s a lot of compost, which beginning gardeners will likely be buying. If you’re buying compost in bulk, which is the least expensive way to purchase it, make sure it’s good stuff by asking some questions, such as what went into the compost. Avoid using compost that contains industrial wastes — especially in the vegetable garden — because of possible toxins like excessive quantities of heavy metals that could contaminate your food. Also ask how the compost has been prepared and stored.
    The ideal would be to make enough of your own compost. Next year, perhaps.