HINTS OF SPRING, REMEMBRANCE OF SUMMER


Greenery, For Humans And Ducks

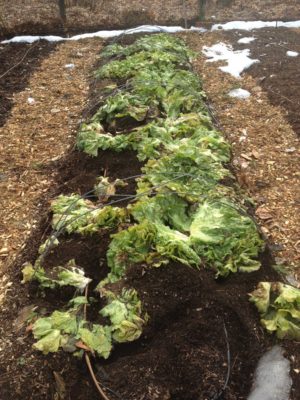
Spring has come early, as usual, in my greenhouse. Growth is shifting into high gear as brighter sunlight fuels more photosynthesis and warms the greenhouse more and for a longer time each day. Giant mustard plants, which provided greens all winter, are no longer tasty now that they have shifted their energy to stalks topped with yellow flowers. No matter. I’m digging the plants out and sowing lettuce seeds.

Paths in the greenhouse are carpeted in green — mostly from weeds, mostly chickweed, which is also soaking up the sun’s goodness. No matter. I’m also digging these plants out before they go to seed and threaten takeover of the greenhouse.Greenhouse weeds & claytonia

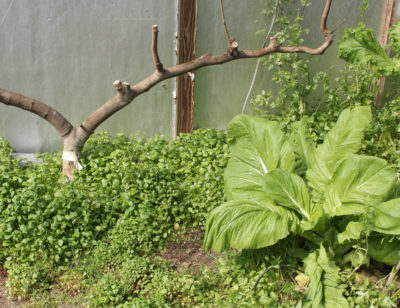
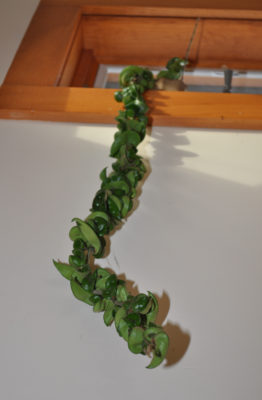
To take over the greenhouse, the chickweed would have to do battle with claytonia, which already has self-sown to  bogart much of the greenhouse floor. Fortunately, the claytonia is good fresh in salads.

Chickweed is also good — to some people — for eating. But not for me. My ducks, however, love the stuff. So it’s a win-win situation. I weed the greenhouse paths, gather together a pile of chickweed, then throw it to the ducks as I walk past them on my way back to the house. They rush over to reach it soon after it hits the ground, gobbling it up at a frantic (for a human) pace. Good thing they don’t have to chew.Ducks eating weeds

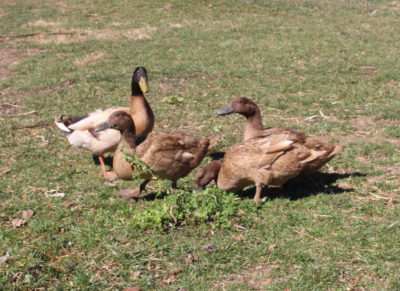
The ducks also enjoy the flowering mustard plants which, along with the chickweed, transmute into delicious duck eggs.

Bottled Summer Goodness

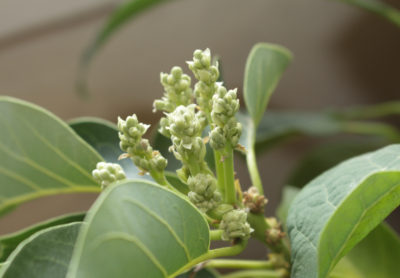
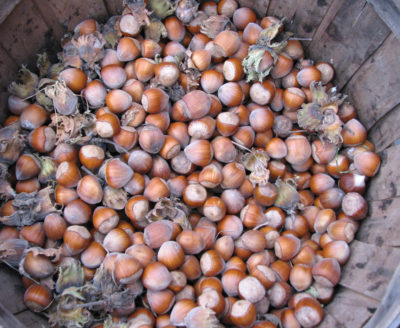
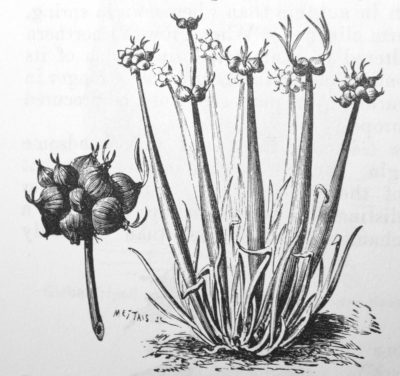
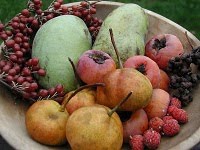
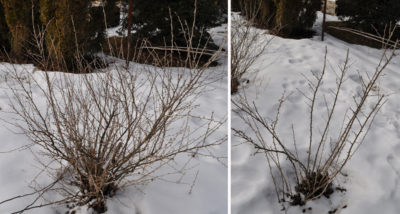
A couple of weeks ago I finished off the last of the elderberry fruit syrup I made this past fall. No fruit could be easier to grow than elderberry. In just a couple of years, the bushes have grown to enormous size, their clusters of creamy white flowers bowing to the ground at the ends of stems late each spring. Later in summer, those flower clusters morph into blue-black fruits, which, admittedly, aren’t very flavorful plain (and shouldn’t be eaten raw).Elderberry blossoms

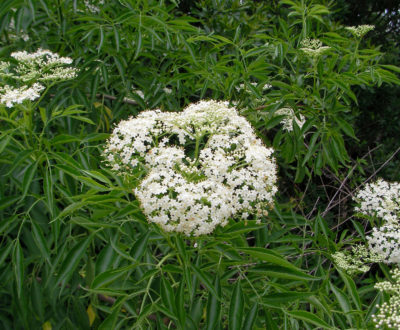
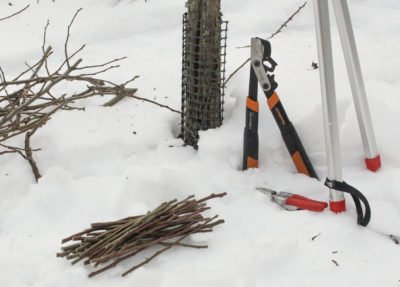
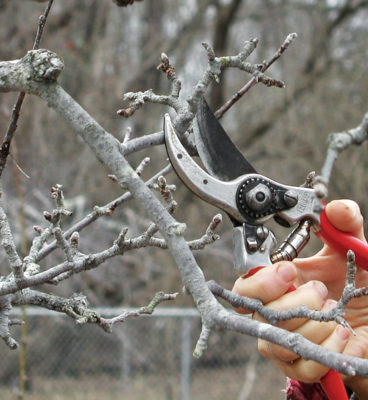
The only care I’m planning for my plants is to prune them every year or so. Pruning will entail cutting some of the older stems to the ground to make way for younger, more fruitful stems, as well as shortening any branches that arch down so much that their fruit would rest on the ground.

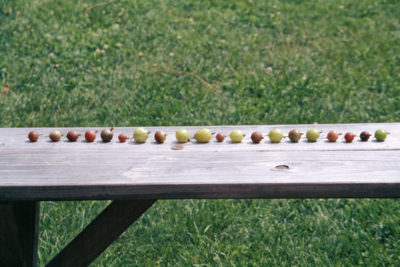
In summer, I stripped the ripe fruits from their clusters into a half-bushel basket, and, postponing what to do with them, froze them. Come fall, I cooked them in a little water, added some maple syrup, crushed them with a potato masher, and then jarred them up.Elderberry harvest

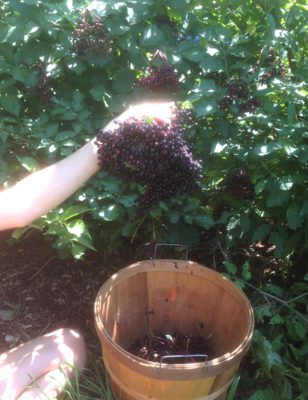
Why all this trouble for a fruit that’s not very flavorful? Because the berries are so healthful! Studies have shown them, or their extracts, to be “supportive agents against the common cold and influenza.” Other benefits have also been ascribed to use of elderberry, but common cold and influenza are enough for me.

Now that I’m out of elderberry syrup, I already feel a slight cold coming on.

Timing Is Important

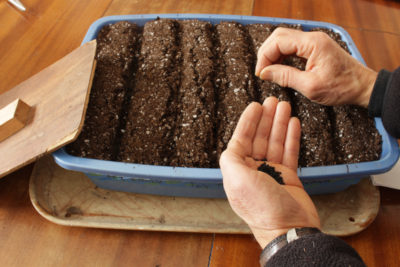
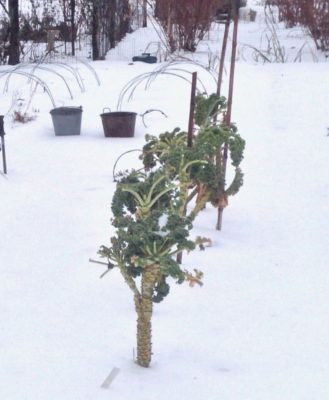
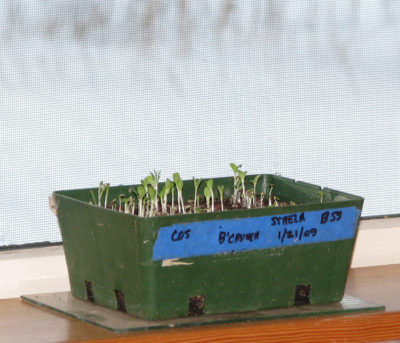
Back to the greenhouse . . .  and sowing seeds of the cabbage family (Brassicaceae), also called crucifers. Which gets me thinking back to last fall when a friend was bemoaning the lack of fat sprouts and the puny growth of his brussels sprouts plants. I asked when he sowed the seeds. “Back in early August,” I think he said. At any rate, back in summer.

It’s no wonder he wasn’t going to be harvesting brussels sprouts. The plants need a long season to mature, from 90 to 120 days, depending on the variety. For best yields, this means sowing seeds now, growing them as transplants for about 6 weeks, and then planting them out for harvest that will begin in late summer. At the very least, the seeds could be planted directly in the ground in a few weeks.Crucifer seedlings

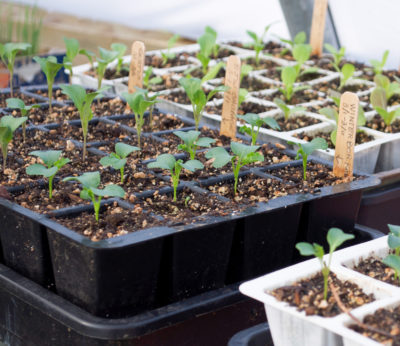
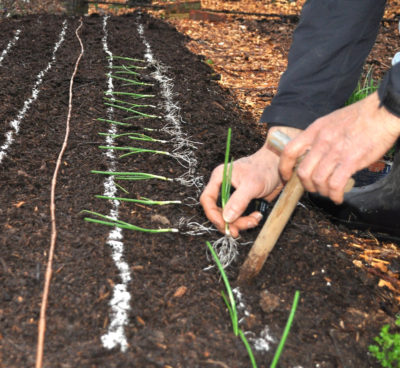
I’m sowing other crucifers now, not because they need such an inordinately long growing season, but so that they can be harvested in late spring and early summer. First harvests will be of miniature bok choys, and then cabbages and, if I grew them (I don’t), broccoli and cauliflower. Kale is the most versatile member of the family — and the one I grow in greatest quantity — amenable to sowing anytime from now until later in summer for harvest in late spring, through summer, and on into fall and winter.

Mustard, turnips, and arugula are also crucifers, the whole family most easily identified by their four-petaled blossoms in the shape of a cross, the root of the word crucifer.

IT’S SPRING! INDOORS, AT LEAST


A Big, Fat, Red Flower; Perfect For Now

One spring day many years ago, my friend Bill looked out upon the daffodils blooming and other stirrings, and summed up the scene with the statement that “It’s spring and everything is wigglin’.” We haven’t yet come that far along, but things are wigglin’ — indoors. (Little did I know that 2 days after writing this, all would be buried under two feet of snow!)

Most dramatic among the wigglins is the big, fat flower bud pushing up from the big, fat amaryllis bulb. True, the goal of most people is to have the flamboyant, red blossoms open for Christmas, which requires beginning a bulb’s dormant period in the middle of August. It’s cool temperatures, around 55°F., and dry soil that puts an amaryllis bulb to sleep. Then, in early November, warm temperatures and just a little water wakens the bulb out of its slumber, with increasing watering, commensurate with its growth, bringing the bulb fully awake and ready to burst forth in bloom 6 weeks later.Amaryllis late last winter

In mid-August, I’m more focussed on harvesting tomatoes and peppers, readying endive for October harvests, making compost, and other garden goings-on than on the amaryllis bulb that I tipped out of its pot and planted in the ground in late spring. And anyway, a few red flowers, even flamboyant ones, do little to counteract December’s grayness.

So I let my amaryllis flower in its time, which should be within a couple of weeks or so, and add to the indoor late winter wrigglin.

Citruses Come Awake

Much more exciting are the less dramatic signs of growth on some of my potted subtropical trees.

As subtropical plants, citrus trees push out multiple flushes of growth through the year. The first flush is about to begin on Meyer lemon, Golden Nugget mandarin, and Meiwa kumquat.

One or more of those citrus flushes also bears flowers, which lead to fruits. The kumquat typically flowers late. My Golden Nugget mandarin hasn’t yet ever flowered for me, so I’m not sure when to expect those blossoms. Wait! Do I see the tiny beginnings of a flower bud on that nascent stem?

Golden Nugget awakening

Golden Nugget awakening

Meyer lemon is notorious for its free flowering. Looking closely, I see that some of the new growth includes flower buds. At the same time, I see that the lemon fruits that had their beginnings last year are now swelling more rapidly. I’m predicting to have new lemons forming even as I am harvesting ripe ones.Meyer lemon flower buds

Fresh-picked Avocados, in New York?

Most exciting are the fat buds expanding on my potted avocado tree, grown from a seed I planted a couple of years ago. I grafted this seedling with a stem of the Marcus Pumpkin variety of avocado that I got about this time last year from a friend in Florida.

An avocado tree grown from seed would take many years — if ever, as a houseplant this far north — to reach maturity, that is, to be old enough to be able to flower and fruit. A stem taken from a fruiting plant is already mature, though, and remains so even if grafted on a young seedling. The grafted stem of Marcus Pumpkin on my avocado tree is, in fact, about to burst into bloom.

Avocado flower buds

Avocado flower buds


Much can happen ‘twixt the bloom and the mouth; I’m guardedly hopeful to be guacamole-ing freshly plucked avocados in a few months. The problem is synchronous dichogamy, which may end up being more of a mouthful than my avocado fruit. The upshot of this mouthful is that each of an avocado plant’s gazillion flowers stays open for 2 days. When the flower first opens it is in the female phase, receptive to pollen; this phase lasts 2 to 4 hours. Day 2 has the flower in its male phase, shedding pollen. The male and female flower parts being out of synch is good for avocado evolution but bad for me as far as home-grown gucamole.

Depending on the variety, avocado flowers might be Type A or Type B. Type A flowers are not ambitious, competitive, or impatient like Type A humans. Or maybe they are, because the female parts are open and receptive only in the morning of the first day; these same flowers open as males in the afternoon of the second day. Type B flowers aren’t ready for action until the afternoon of their first day; then they open a males the next morning.

The upshot of all this is that it’s best to have two different avocado varieties, a Type A and a Type B. The morning phase of Type B, as males, can pollinate the morning phase of Type A, which are females. And vice versa.

Marcus Pumpkin is a Type B avocado. When I grafted it, I also grafted Lula, a Type A avocado, on another seedling. Although Lula failed to take, all may not be lost. My plan is to dab the Marcus Pumpkin flowers in the afternoon with an artist’s brush, tap the pollen into a petri dish, cover it, and the next morning dab the brush from the collected pollen to the Marcus Pumpkin flowers in their female phase.

Perhaps I’ll be harvesting fresh avocados in a few months. Perhaps I’ll be just buying fresh avocados in a few months. At any rate, as a northern gardener, it’s very exciting to have my avocado tree about to flower.

And Even Hints Of Spring Outdoors

All is not so quiescent outside. After a couple of warm days, I see that winter aconites have spread their cheery, yellow petals. (But not for long.)Winter aconite

‘SHROOMS

Home-Grown Oysters

Move over shiitakes, you fancy, reputedly healthful mushrooms offered on supermarket shelves and at farmers’ markets at high prices. Make way for oyster mushrooms.

Many of us have chosen to grow shiitakes rather than pay the high prices for them. This means laying in a stock of freshly cut hardwood logs and riddling them with holes that are plugged with inoculated dowels pieces, then sealed with wax. A dose of patience is also needed for home-grown shiitakes, even after going through all that trouble, because a year is needed until first harvest.

My logs, from two and three years ago, yielded mushrooms last spring and autumn. But those logs are sleeping now; what about mushrooms now?Shiitake logs

Enter oyster mushrooms. Oyster mushrooms are much more cosmopolitan about their nourishment. And planted now, harvest could begin within a few weeks.

The basics of growing any mushroom are the same. You inoculate a substrate (some material high in cellulose) with purchased or home-grown mushroom spawn. Fungal threads colonize the substrate and then, after a certain amount of time or in response to some stimulation, such as being dunked in water, mushrooms pop out of the surface of the substrate. In between short rests, they’ll pop out repeatedly until the substrate is exhausted. Then you start again with a new inoculation.

Toilet Paper Mushrooms!?

A few years ago, I grew oyster mushrooms on nothing more than a fresh roll of toilet paper, which provided a conveniently configured source of cellulose. I got the spawn for inoculation from Field & Forest Products (their TeePee™ kit). All that’s needed is to pour boiling water over a roll of fresh toilet paper, let excess water drain off, then put the roll into the plastic bag that is provided.

I inoculated, as directed by filling the center tube with the mushroom spawn and sealed the bag closed. Every once in a while I opened the bag to mist the inside with water, and watch the fungus grow its way out into the paper. After colonization is complete, mushrooms started popping up from the top of the roll.

Okay, my wife did express some aversion to eating food growing out of toilet paper. And the whole setup, admittedly, is not really all that attractive.

Coffee Grounds, Another Substrate

Not to give up on winter mushrooms, I could try growing oyster mushrooms on another readily available substrate: coffee grounds, a waste product from coffee shops, bakeries, and fast food joints. I also remember a previous foray into “espresso mushrooms” a few years ago. The Pohu strain of oyster mushrooms are among the best for coffee grounds.

To inoculate, you just break up and mix the spawn, a compressed mass mixed with sawdust, with (clean) hands and/or a knife in with the coffee grounds. The mixture then goes into a (clean) bucket having drainage holes, which, after a thorough watering, is covered with the plastic bag

After sitting in a bright location and misted daily, the coffee grounds becomes covered with  fuzzy, white fungal threads. Within a few weeks, fat mushrooms swell up from the substrate, ready for harvest when their caps become just concave.

In my previous experience with espresso mushrooms, I remember an invasion of fruit flies having a field day on and in the coffee grounds. Or were they fungus gnats? Avoiding overwatering should keep fungus gnats in check, and fruit fly season is past, so espresso mushrooms are worth another try.

The nice thing about growing oyster mushrooms on coffee grounds is that there’s no need to purchase new spawn when production slows. A nice chunk of the exhausted coffee grounds can be used to inoculate some fresh grounds.

The cleaner everything that comes into contact with the spawn and the substrate right from the start, the less chance for contamination and the longer the process can be kept going. It can become an indoor game, to see how many oyster mushroom cycles can be grown before new spawn is needed again. In addition, of course, there’ll be some tasty harvests.

An Early Spring, For Shiitakes

Now that I think of it, I could be sitting down to a meal with fresh shiitakes — just fool some logs into thinking it’s spring. Which it is, in my greenhouse. I’ll move a couple of logs in there, where I’ll bet the warmth and high humidity will soon pop out some mushrooms.

A WINTER DAY WITH SPRING IN THE AIR

Spring Dreams

Looking out a window today, all I see is white, a thick blanket of snow covering the ground and howling winds periodically puff clouds of it swirling into the air. Still, I can feel the pull of spring. Perhaps it’s the bright sunlight. Couple that with the colorful gardening magazines and catalog strewn on the kitchen table, and how can I resist vicarious planting — by ordering plants instead.

David Austin roses, whose blooms have the look and fragrances of yesteryear (pastel colors and blowsy form), and the repeat blooming of pest-resistance of presentyear roses, are always a draw. Every year, new varieties are offered, some, I’m gad to see, that are cold-hardy to zone 4.

Rose, L. D. Braithwaite

Rose, L. D. Braithwaite

And m–m-m-m, the thought of picking fresh, ripe sweet cherries is also enticing. No, no! I ordered and planted what was allegedly a self-fertile Compact Stella cherry tree seven years ago. It wasn’t compact and it has yet to bear a cherry. I tell others that sweet cherries are a poor bet around here because of winter cold, spring frosts, and various inset and disease pests. And, after that, even if fruits do develop, birds will likely eat them. I should have been listening when I dispensed that advice.

The cherry tree has one more season to prove it’s worth. If it doesn’t, I have a replacement plant (hardy orange, Citrus trifoliata) anxiously waiting in the wings.Hardy orange

I’ve always wanted to plant a magnolia, of which there are many newer and older varieties, but where could I plant it? Now that I think of it, I did plant a magnolia last spring. It died. And a few years back, I planted a sweetbay magnolia (Magnolia virginiana) purchased on an impulse at a nursery a few years ago. I remember planting it, but not what happened to it, except that it’s no longer around.

The magnolia that I really want to plant is southern magnolia, Magnolia grandiflora. This large evergreen gracing many homes from Virginia southward with its large, glossy, dark green leaves and it’s large, lily-white, fragrant blossoms seems to politely call for a chair in its shade, a frosty mint julep on the armrest.

Problem is that southern magnolias are not hardy here — yet. I know of a gorgeous tree about an hour south of here and two varieties — Edith Pogue and Bracken’s Brown Beauty — are hardy below zero degrees F. It hardly gets below zero here these past few winters and, with global warming . . . ?

Yes, it is hard to keep my wits about me as spring approaches, and will be increasingly so as spring edges in. “I will not buy another sweet cherry tree, I will not buy another apricot tree (even more problematic), I will not buy another magnolia (yet), . . .”

Dorris, I’d Like To Meet You

Uh oh, another new variety of filbert from the breeding program at Oregon State University. This variety, Dorris, is, like some of its recent predecessors, immune to the eastern filbert blight that has for so long made filbert growing east of the Rockies unfeasible. They’re breeding blight-resistant filbert in Oregon because the blight fungus has made its way west.

Filbert nut harvest last fall

Filbert nut harvest last fall

But eastern filbert blight is a capricious fungus, sometimes changing in a way that let’s it attack even “resistant” filberts. So I’m constantly cutting down diseased filberts and replanting “resistant” ones. One of the newest varieties, which will get a spot in the line of filberts that draws my eyes and footsteps along the edge of  meadow, is Dorris.

Good luck Dorris.

Making Trees

Some trees and shrubs coming to my garden this year are going to be home-made, that is, created by me from seeds, cuttings, or grafts. To that end, I recently collected hackberry seeds as well as scions (for grafting) of persimmon, pear, and cornelian cherry, and packed them all away in an insulated box in my garage. I will deal with them in a few weeks.

Gathering scionwood

Gathering scionwood

Collecting scionwood for grafting segue nicely with pruning. From the prunings strews about on the ground, I cut and save one-year-old stems into foot-long sections.

NO SIGN OF SPRING HERE YET, BUT . . .

The Onion Cycle Begins Again

Early February, February 6th to be exact, was the official opening of my 2017 gardening season. No fireworks, waving flags, or other fanfare marked this opening. Just the whoosh of my trowel scooping potting soil into a seed flat, and then the hushed rattle of seeds in their paper packets. And the grand opening was not for a flamboyant, who-can-reap-the-earliest-meal of a vegetable like peas or tomatoes.

No, the grand opening for the season is rather sedate: I sowed onion seeds in mini-furrows in a seed flat. Why onions? In addition to the fact that I love the flavor of onions raw and cooked, onions need a long growing season. The summer growing season is cut short because the plants stop growing new leaves to put their energy into swelling up their bulbs when daylengths grow sufficiently long, 14 hours long, to be exact. Around here, that happens sometime in May. The more leaves the plants make before then, the bigger the bulbs. Hence my early planting.Sowing onions indoors

So I poured about a 3-inch depth of potting soil into an 18 by 24 inch plastic tub in which I had drilled drainage holes, and then made seven parallel furrows in the soil into which I dropped onion seeds. This year I’m growing New York Early, Patterson, and Ailsa Craig. (I also sowed leeks in one of the furrows.) After closing up the furrows, I watered, covered the tub with a pane of glass, and put the tub on a heating mat set at 75 to 80° F.

Done. The season has begun.


Other Beginnings

There are so many ways to grow onions. Let me count the ways, some other ways.

1, and easiest, is to just plant onion sets, those mini-onions you can buy to plant as soon as the ground outside warms and dries up a bit. One downside to sets is that the variety selection is very limited. Not only limited, but also restricted to so-called “American-type” varieties, which keep very well but are very pungent and not very sweet. Onion sets that are too large — larger than a dime — tend to go to seed. Plants going to seed look very pretty but don’t make bulbs for eating.

Number 2 method overcomes one of the limitations of method number 1: Purchase onion plants, which are growing plants, with leaves. The sweet “European-types” — Ailsa Craig, Sweet Spanish, and Granex, for example — are available in this form. The plants are grown in fields in the South, and there’s the potential to bring a disease into the garden on these plants. Also, “organic” onion plants might be hard to find.

Setting out onion transplants

Setting out onion transplants

Method number 3 is the most involved. (I’ve never tried it.) Grow your own onion sets. The trick is to sow the seeds outdoors densely enough so that they bulb up while still small — dime size. Once bulbs mature, their harvested to store for winter, and then planted in spring just like the sets in Method 1.

Method number 4 is fairly easy, and that is to sow seeds of the Evergreen variety onions right in the ground in spring. This variety never forms bulbs but makes tasty green onions, or scallions. It’s also perennial, so any scallions left in the ground will multiply year after year. The downside here is that you don’t get onions for winter. I grow these every year and do get them for winter use also, in my greenhouse. 

Method number 5 is easiest of all. Grow Egyptian, or Walking, onions. This is another perennial onion. It “walks” by forming bulblets on top of some stalks. The weight of the bulblets pulls down the stalk, and when the bulblets touch ground, they root to make new plants. The new plants eventually send up bulblet-topped stalks which likewise bend to the ground, etc., etc., walking the plants around. To me, Egyptian onions are all hotness with little other flavor. I no longer grow them.

Walking onions

Walking onions

I learned of method number 5 from Jay at Four Winds Farm. Simple enough. Just sow the seeds outdoors as soon as the ground is warm enough and dry enough for a nice seedbed. A nice seedbed is key here, because onions compete very poorly with weeds and the goal is to get the seeds to germinate as fast as possible. I tried this last year and the bulbs ended up pretty much the same size as those from the plants I sowed last February and then transplanted into the garden in April. So I get a wide choice of varieties without having to start the seeds in February. Thanks Jay. (I’m growing transplants and direct seeding this year, just to make sure.)

My Pea Planting Will Not Be On St. Pat’s Day!

My early February onion-sowing date isn’t some magical date. My greenhouse is only minimally heated, making for very slow growth early in the season. Growth picks up as sunlight grows more intense and further warms the greenhouse. A week or more difference in sowing date early in the season doesn’t translate into that much difference in growth near harvest time.

The same goes for pea-planting, which is attended by more fanfare than onion planting. Many gardeners rush to get their pea seeds planted by St. Patrick’s day, but planting a week later doesn’t delay that harvest by a week. Perhaps by a couple of days or by a few hours, depending on the season. And anyway, St. Patrick’s day might be the traditional date for planting peas in Ireland, but it would be way too early in Maine and way too late in Georgia. I plant peas here in Zone 5 on April 1st, give or take a few days.

In my book Weedless Gardening, I have a chart that shows what and when to plant, whether as seeds, indoors or out, or as transplants, for all regions. All you have to do is plug in your average date for the last killing frost of spring and the first killing frost of autumn. This date is available from your local Cooperative Extension Office. 

I TAKE A CLOSER LOOK, AND LIKE WHAT I SEE


Hey Bud, ‘Sup?

Nothing like winter to force me to take a closer look at my trees and shrubs. “To see what, you may ask?” To look at their buds, within which lie the makings of this season’s flowers and shoots. Not only are the buds quite distinctive, but they also offer a crystal ball into the future, which is very important to me as a fruit grower.

Trees’ and shrubs’ fruit and shoot buds look different from each other. It’s the fatter ones that open to become flowers and then, barring damage from late frosts, insects, diseases, or hail, fruits.

Last year, perhaps because of dry weather or a late spring freeze, my pawpaw crop was a failure. This explains why I now see so many distinctive plush, velvety, fat, brown buds — flower buds — lining the stems. For any fruiting plant, a light crop of fruit one year generally makes for a bumper crop the following year.

Pawpaw buds

Pawpaw buds

Cornelian cherry buds

Cornelian cherry buds

My cornelian cherry tree also prognosticates a bumper crop, even more obviously, because its flower buds stand prominently proud of the stems like buttons on the ends of short stalks.

On peach trees, flower buds develop only on one-year-old stems. The flower buds aren’t that distinctive except for being fat. The buds at some nodes, the junction where leaves met stems last summer, come in triplets, one single, small shoot bud wedged practically into hiding between two big, fat flower buds. The buds tell of a good crop of, at least, flowers.

Peach buds

Peach buds

Apple buds are different still. Their flower buds are mostly on spurs, which are short, stubby growths that elongate only a half and inch or so each season. Not all buds on these spurs will open to flowers, though. Some — again, those that are less fat — will open to shoots that will grow only a fraction of an inch longer and then flower the following year.

Apple buds

Apple buds

Pear buds are very similar to apple buds, the main difference being that I find it harder to differentiate, especially now, between their shoot from flower buds. As spring inches closer, these and other buds will all begin to swell to let their plans be better known.

A Bud Is Like A Crystal Ball


All this staring at buds is not just for winter entertainment. It also guides me in pruning.

To ripen a fruit demands a lot of a plant’s energy. If a tree or shrub bears too many fruits, it will, once danger from frosts and many other hazards are behind it, naturally shed some of the excess. But what’s left might still be more than it could ripen to perfect size and flavor for us humans.

One reason I’m stomping around among my trees and shrubs outside is to prune them, and one of many reasons that I prune them is to remove some of the fruits before they even begin to form. Cutting back some stems cuts off some flower buds, which makes for less fruits.

With all their fat flower buds, my pawpaw trees will get a severe pruning. The same for my peach tree, but not quite so severe. I’ll wait on the apples and pears until it becomes more evident what’s what.

Not that my sole purpose in pruning is to cut back fruit production. Some kinds of pruning cuts also are meant to stimulate vigorous shoot growth to reinvigorate a plant or provide flower buds for the following year. I’ll also prune to let branches bathe in light and air, keeping photosynthesis chugging along this summer and limiting pest problems. My cuts will also be directed towards maintaining strong limbs able to support a good crop. (Interested in more about pruning? See my book, THE PRUNING BOOK.)

Nice Bark, Woof, Woof


Looking at buds isn’t the only winter entertainment provided by my plants. How about checking out their bark?

Among the trees and shrubs I’ve planted, my three favorites barks are those of hackberry, river birch, and stewartia. Hackberry has a gray bark with ridges on it that, when struck by low winter sun, have a distinct, achromatic light and shadows that remind me of photos of the lunar landscape. My tree still have some years to grow before their bark is notable; for now, I enjoy looking at he bark on some wild plants I know.

Hackberry bark

Hackberry bark

River birch bark has a cinnamon-colored bark that naturally curls and peels off up and down the trunk to create a colorful mix of creamy white, pink, and brown colors.

River birch

River birch

My Japanese stewartia has the bark that would stop traffic, if there was traffic here. This bark is mottled with dark brown, light brown, and silvery patches. In a few months, leaves will mostly hide the bark, but then white blossoms that look much like camellias will continue the show.

Stewartia bark

Stewartia bark

LECTURES IN THE PACIFIC NORTHWEST!

Please join me for the following presentations later this month in and near Seattle:A bowl of fresh gooseberries

February 23, 2017
21 Acres Center for Local Food & Sustainable Living
13701 NE 171st St., Woodinville, WA 
“Uncommon Fruits for Backyard and Small Farm”

February 24-25, 2017

Northwest Flower & Garden Show

Seattle, WA

“Luscious Landscaping with Fruiting Trees, Shrubs, and Vines”

“Fruits for Small Gardens”

STEPPING INTO SPRING

Cleanup Time Re-Starts in Veggie Garden

Warmer weather, even if it’s not all that warm, makes me feel like spring is just around the corner. The ground — in my vegetable beds, at least — isn’t even frozen, no doubt because water doesn’t linger long in the well-drained soil and because the dark-colored compost blanket I laid down in autumn sucks up the sun’s warmth.

So yesterday seemed like a perfect time to continue the garden cleanup that screeched to a halt when frigid weather struck, and some snow fell, a couple of months ago. Old cabbage heads that never quite ripened were laying on the ground like ratty, pale green tennis balls (with stalks attached). The four-foot-high stalk of one Brussels sprouts plant, stripped in autumn of its sprouts, stood sentry like a decrepit soldier in the same bed.Kale in winter

Of course, kale also still stood, except for those that flopped to the ground under their own weight. The latter were mostly the variety Tuscan (Lanciata). The Dwarf Blue Scotch plants, which I think taste better, stood more upright and compact, helped along, I’ll admit, with some bamboo stakes pushed into the ground next to them back in summer. I dug up the Tuscan kale plants and stripped yellowed and flaccid leaves from the Dwarf Blue Scotch plants. My guess is that by April they’ll be unfolding new, tasty leaves.

Stepping over to another bed, I twisted or coaxed out, with the help of my Hori-Hori knife, stumps from harvested lettuce and Chinese cabbage. A row of arugula in that bed showed enough life to awaken in spring with fresh, new leaves. I left it.

All this cleanup gets a jump on spring and removes debris that might harbor insect or disease pests that could infest or infect this season’s plants. The debris went into my garden cart and thence to the compost pile. The winter pile doesn’t heat up, so I’ll give the bacteria, fungi, actinomycetes, and earthworms two years to get their jobs done, killing off any “bad guys.”

Cursed Voles!

Stepping over to the remains of the endive bed that I planted towards the end of last summer and began harvesting in October — what havoc has been wreaked!

The bed had been covered with a tunnel of clear plastic and row cover to provide extra warmth to the plants in cold weather. Extra warmth also to some furry creatures, it seems.

Taking off the cover, I saw a bed riddled with tunnels along with the scattered remains of unharvested endive plants. This has happened in the past; something about endive seems particularly attractive to the furry creatures (and to me), which I assume are voles, which are mouse-like creatures.Endive with mouse damage

My garden must be vole heaven. The cat rarely hops the garden fence to hunt because she has to cross the DMZ zone to get to the garden, and she’s scared of our dog, Sammy. The compost-enriched soil has plenty of earthworm for good eating, as well as all the tasty, organic produce. So far, though, the voles have been satisfied with just the endive.

Short of planting the cat in the garden, which Sammy can’t enter, my plan is to do extensive trapping. One web site recommendation for a small garden is for twelve traps baited with oatmeal and peanut butter, or with apple.

As consolation, vole populations are said to decline after 3 to 5 years. It’s almost time, although the declined population might still be too many for me. And all is not bad with voles; they help stir the soil to distribute nutrients.

Pre-Season Warmup

While in the garden, I also did some pre-season weeding. Creeping Charlie, which enjoys cool weather, is always sneaking in here and there once I turn my attention away from the garden.

All this garden cleaning and straightening up isn’t all for practicality. It makes the view of the garden each morning from my second floor bedroom window prettier.


OF FLOWERS AND TEMPERATURES

Flower, You Hoya

I probably shouldn’t admit this, but some plants suffer much neglect in my hands. My aloe, for example, has occasionally gone a whole year without a drop of water.

Hoya, also known as wax plant or Hindu rope plant, is another of my neglected plants. This plant is about 25 years old and has sat in the same pot in the same location for the past 15 years. The pot is only 3 inches square, dwarfed by the 3-foot-long “Hindu rope,” a single stem along which grow thick, green, involuted leaves. The hoya sits on a west-facing windowsill of a tower window in my house, and the lanky stem can drip down another 2 to 3 feet before it’s got to be shortened to keep from being bumped by anybody beneath it. One reason the plant gets watered so infrequently is because watering involves pulling out and climbing a ladder stairway to get to and gingerly water the relatively small pot.Hoya stems

Another reason for the neglect is because hoya is a succulent whose thick fleshy leaves store water. The plant is more likely to die from too much water than too little.

Although I occasionally glance admiringly at the stem tracing down the wall, there are time periods when hoya grabs my attention. That’s when it flowers. The flowers arise in sprays of about a dozen, pinkish, tubular blossoms, each looking as if has been sculpted from wax. Not only are these flowers pretty, but they also emit the most delicious aroma of chocolate.

I’m not sure when or why my hoya flowers. Failure to bloom can be attributed to, according to reliable sources, “over-watering, over fertilization, insufficient sunlight, or plant immaturity. “ Ha! My guess is that a period of consistent, but not excessive, watering following the dry spells would coax the plant to flower. Now might be the time to start watering because, perhaps in celebration of lengthening days, the plant has, after all these years, sprouted a new shoot.

I’ll go and water the hoya right this minute.

And The Temperature Is . . . ?

“You never miss the water till the well runs dry,” goes the line from the old blues tune. In the same vein, you — or I, at least — never miss the thermometer till it breaks. I never realized how tied I was to the temperature until the number boxes on my digital thermometer started reading “- – – – -.”Digital thermometer, malfunctioning

Thermometers have come a long way since the liquid-in-glass ones that served so well for so many years mounted outside so many kitchen windows or on porch posts. You had to get close to read them, and they picked up some heat from proximity to the house.

After that came indoor-outdoor ones, using the same principal but with two glass columns. The “outdoor” column is fed by a thin tube threaded through a small hole in a window frame and ending with a sensing bulb. These thermometers let you essentially get your eyes further from the sensing portion.

Then came digital versions of both types of liquid-in-glass thermometers. Digital thermometers are just the ticket for those of us who like to know if the temperature is 31.4° F. or 32.2° F. Not that the sensors of these thermometers were necessarily accurate to 0.1° F (as stated, sometimes, in the fine print), but they did give a feeling of exactitude.

Still, all these thermometers measure temperatures in or near the house, unless you mounted one on a post out in the garden and kept running out to check the temperature. Or, you had a liquid-in-glass thermometer that registered the minimum and maximum temperatures since the last reading. As you might guess, I have one, have had it for over 30 years, in fact. Two sliding, iron indicators are pushed by the expanding fluid, with one indicator staying where it is pushed to its high point, the other to its low point. High and low temperatures are indicated for the period since the sliders were last reset by being slid back with a magnet against the fluid. Very elegant and very accurate, but you still have to run out to the garden to read the present temperature.Minimum-maximum thermometer

Enter wireless, digital, minimum-maximum thermometers, the ultimate in temperature readiness. With this thermometer (which, as you might have again guessed, I own), I can read present and extreme temperatures from the warmth of my bedroom. Except when they stop working. Then you really miss knowing the temperature to within a tenth of a degree.

Epilogue

Epilogue: Yes, I checked and changed the batteries. Customer support, last time I got through to them, tells me I have to use fresh batteries, not the rechargeable ones. And I have to take all the batteries out for 15 minutes. Then, while the outdoor and indoor sensors are 3 to 5 ft. apart, I have to first put in the outdoor sensor’s batteries, followed by the indoor sensor’s batteries, and let the sensors “communicate” for 20 minutes. Etc., etc. The thermometer still doesn’t work. Perhaps I should click my heals together three times. I bought a new, and, I hope, better one.

THE WEATHER WON’T PUSH ME AROUND

Breaking (Pruning) Rules

Snow squall or not, I just had to get outside. Not enough snow for a cross-country ski, but, after too much time indoors, I had to do something outside.

I was driven to break a fundamental rule of the garden. I pruned, and that’s a no-no. Pruning is best delayed until at least after the coldest part of winter is over, ideally closer to the time when warmth and sun are stirring buds to swell in preparation for their final burst. I did rationalize that any pruning now would leave me that much less to do amidst the hubbub of spring gardening activities.

I wasn’t indiscriminate in trespassing this Rule of Gardening. The plants that I pruned were gooseberries, which are very cold-hardy plants so are unlikely to suffer any cold damage as a result of untimely pruning. Also, no need to wait, as is done with peaches, for growth to begin to see which branches have died back from winter cold; none ever do so on a gooseberry bush.

Pruning without spring breathing down my back made for a very relaxed pruning session. I had plenty of time to pay attention to details and prune a little differently than in the past.

Gooseberries bear fruits on stems that are 1-, 2-, and 3-years-old, so the usual method of pruning is to cut away any stems more than 3-years-old and remove all but six of the sturdiest 1-year-old stems. The pruned bush, then, is left with a half-dozen each of 1-, 2-, and 3-year old stems. Each year a bush is renewed as oldest stems are removed, and new grow kept vigorous and healthy as excess young stems are thinned out.

Gooseberry before & after pruning

Gooseberry before & after pruning

The gooseberry bushes always bear many more berries than we can eat, and their weight bows the branches to the ground. So this year I decided to also prune each side branch on the older stems back to a couple of inches long. I’ll reap fewer berries, but those that remain should be larger and more accessible among the thorny stems.

Great Gooseberries

Is it worth mentioning such details about growing gooseberries? After all, who eats gooseberries these days? To most people, a gooseberry is a small, green, tart berry suitable only for pies, jams, and fools (a dessert made by folding cooked, sweetened, sieved gooseberries into whipped cream).A bowl of fresh gooseberries

If small, green, and tart is your idea of a gooseberry, you’ve never tasted a so-called dessert gooseberry. Dessert gooseberries are sweet and flavorful right off the bush; they are, as Edward Bunyard wrote almost a hundred years ago in The Anatomy of Dessert, “the fruit par excellence for ambulant consumption.” (He was from England, where gooseberries are more appreciated and known than here.)Gooseberry varieties on a bench

Only certain gooseberry varieties warrant the label “dessert gooseberry,’ of which I grow about a dozen varieties. My favorites include Hinonmakis Yellow, Poorman, Black Satin, Webster, Red jacket, and Captivator. Their sweet flavors carry wine-y overtones and reminiscences of plum or apricot. Some have soft skins, others have firm skins that explode with the flavorful, sweet juice when you bite into them. I devote a whole chapter to the history and varieties of gooseberries as well as how to grow them and where to get them in my book Uncommon Fruits for Every Garden (available from the usual sources and, from me and signed, at my website).

Back Indoors, But Still Gardening

Frozen fingertips eventually drove me back indoors. But I’m now on a gardening roll, spurred on further by a box of seed packets that arrived in the mail.Lettuce seedlings

Lettuce, claytonia, and celery from the greenhouse have been filling our salad bowls all winter. As these plants wane or go to seed, we’ll need more. So today I sowed seeds of Black-Seeded Simpson, Romaine, Buttercrunch, Blushed Butter Cos, and Majestic Red lettuces. Some I sprinkled into seed flats that can be kept warm for quick germination. Some I sowed right in the ground beds in the greenhouse; they’ll germinate more slowly but hold their quality longer than those that are pricked out from seed flats into “cells” and then into the garden.

Sometime soon, I’ll grab my pruning shears and get back to the gooseberries. And then on to the grapes, the kiwis, the apples, the pears, the . . .