BLUEBERRIES GALORE, COMPOST TEA REDUX

On My Knees for  Blueberries

    For the last few years, my blueberries have had a problem. Perhaps yours also. Rather than grow upright, the stems arch downward, some so drastically that they actually rest on the ground.

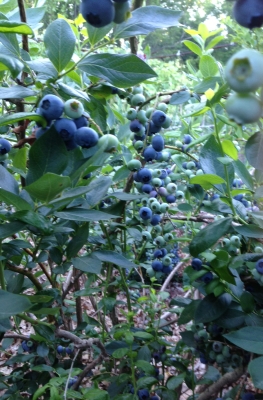
Blueberries galore

Blueberries galore

    A few years ago, I pinned blame on the weather. Not that it was evident just how the weather could be responsible, but it’s always convenient, in gardening, to blame things on the weather. But this explanation is hardly convincing. Spring and summer weather have not been consistent enough over the years to be able point my finger at too much rain and/or not enough sunlight (the combination of which could lead to those bowing branches).
    How about pruning or fertilization? Too much of either could promote lush growth that couldn’t support itself. Except that my pruning has been consistent over many years. And Dr. Marvin Pritts, berry specialist at Cornell, confirmed that he and others saw the same problem, without definitive explanation, a couple of years ago.
    I like the green thumb explanation best: That is, that I’m such a good blueberry grower that the branches can hardly support the prodigious crops I’ve coaxed from them. So I’m not really complaining. Just curious. And having to get on my knees to harvest low hanging fruit.

Remember Fruit Flies?

    There is one fly in the green thumb ointment. A fly, literately. A tiny fruit fly called the spotted wing drosophila or, quicker to say, which is necessary for this fly that’s getting a lot of buzz lately, SWD. The fly attacks many small fruit, starting the season with honeysuckle berries, then moving on to raspberries, blackberries, and . . . blueberries.
    Most fruit flies lay their eggs in overripe, or at least ripe fruit. Not SWD. She lays her eggs in unripe fruit. The eggs are small and what hatches from them are small; their being “maggots” sort of takes the appeal from the berries.
    SWD is a new pest, so new ways of thwarting them are being tried. Covering the plants with fine netting very early in the season is effective but would be very bothersome, for my planting, at least. Various organic sprays are another possibility: Entrust, which is derived from a soil bacterium, is effective if used STRICTLY according to directions; horticultural oil might prove effective. Traps are also under test.
    One way to bypass the problem is to grow only earlier varieties of blueberries. SWD has not showed up here and at many other sites until early August. Plenty of varieties — Duke, Earliblue, Toro, and Blueray, for example — are finished before then.
    But I want fresh blueberries on into September. Harvesting blueberries (or raspberries or other berries) and whisking them into a refrigerator at 34 degrees for 72 hours will kill eggs and larvae. Freezing, the destiny of about half our harvest, also kills the eggs and any hatched larvae. A little egg and meat boosts the protein content of the berries.

I Backpedal, Sort Of

    It may be time for me to eat pie. Not blueberry pie, but humble pie. Regular readers of my words probably realize that I take a certain amount of pleasure in iconoclasm. And one recipient of my eye-rolling has been compost tea, something that many gardeners and farmers love to love even though there’s little theoretical or empirical support for its efficacy.
 

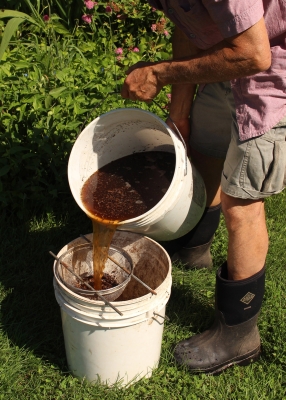
Compost tea, quick mix

Compost tea, quick mix

   “Little” but not “none.” A number of peer-reviewed articles describe benefits from using NON-AERATED compost tea to thwart root diseases. (The relatively recent interest in compost tea is for AERATED compost tea, often sprayed on leaves. Aerated compost tea, the brainchild and business of Dr. Elaine Ingham, is compost tea that’s bubbled with air for en extended period, often with molasses or other additions. Generally, experiments have not supported touted benefits of aerated compost tea.)
    For the past number of years, my pea crops have been failures, the plants yellowing and dying soon after harvest begins. Fusarium or some other root disease is the probable cause.
    In desperation, five times this spring, at about weekly intervals, I put a shovelful of compost into a 5 gallon bucket and filled the bucket with water. After one day of steeping, the tea was strained, put it into a watering can, and drenched on the soil beneath of my thirty foot, double rows of peas.
    Lo and behold: The peas look healthy and have been yielding good crops!

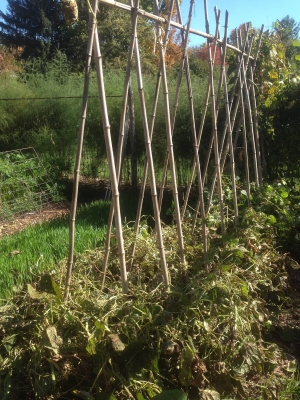
A healthy row of peas

A healthy row of peas

    I won’t say for sure it was the compost tea or what in the tea, if it was the tea, did the trick. But nothing else jumps out this year as the savior of my peas. For a more definitive tea endorsement, next year I should grow a row or two without the tea, and a row or two with the tea. I might try that, although it presents the possibility of my ending up with a row or two of unproductive vines.
    For now, I’ll just have humble pie. And tea. 

UNTRADITIONAL ROSES AND HOEING

 Rose Fan: No, Yes?

   I’ve said it before and I’ll say it again: I’m not a big fan of roses. But I can’t help myself. The garden is awash in golden yellow, crimson red, soft pink, apricot pink, and plain old pink blossoms. Almost all of this is thanks to David Austin, breeder of roses.
    My father was a big fan of roses, so I was exposed to them at an early age. Pre-dating Mr. Austin’s creations, my father’s roses were the ever popular — except with me — hybrid tea roses which everyone — except me — liked and likes for their pointy, formal blossoms, their bold colors, and their repeat bloom. Nobody mentions their gawky stature, general lack of strong or interesting fragrance, and attraction to pests.

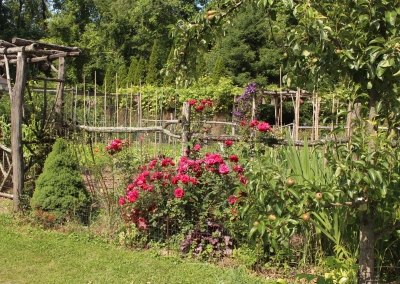
L. D. Braithewaite rose, cold-hardy and just keeps blooming

L. D. Braithewaite rose, cold-hardy and just keeps blooming

    David Austin roses won me over with their softer colors, fuller blossoms borne on more full-bodied bushes, delicious fragrance, disease resistance, and repeat bloom. Not all have all of these qualities, of course.
    L. D. Braithewaite has been the most florific of my David Austin roses, even weathering two very cold winters unscathed. The crimson, red petals made their first appearance a few weeks ago, and are still going strong. They’re not my favorite color, though. Least successful of my roses has been Bibi Mazoon,  which is my favorite of the David Austin roses, in its blossoms, at least. Cup-shaped and apricot pink, the blossoms are admittedly few and far between, and can hardly be held up by the weak stalks. The rich yellow color of Golden Celebration is another of my favorites; this variety blooms fairly well and also pulled through winter unscathed.
    I grow a few pink David Austin roses, including Charlotte, Brother Cadfael, Sharifa Asma, and they’re all looking pretty and growing well.
    Of all the roses I grow, my favorite is . . .  well, I’m not one hundred percent sure of its name. It started life here many years ago as a cutting of Rose de Rescht, given to me by local herbalist Anne Solomon. Except that, reading descriptions of Rose de Rescht, I came to realize that mine wasn’t it. Whatever the name (after all, “a rose is a rose is a rose . . .”), the attractive crumpled, crêpe-paper blossoms fill the air with a delectable, heady fragrance, more than that of any of the roses I grow. The bush, robust, armed with prickles and clothed in leaves having having a bluish cast, has never been fazed by pests or cold.
    With the help of some rosarians (especially those at www.heirloomroses.com), Rose de Rescht was assigned its probable proper name: Ispahan. The alluring name, the blossoms, and the toughness of the plant more than offset the plant’s one deficiency, that of blossoming only in spring.

Hoe, Hoe, Hoe, But It’s Not Xmas

    I can’t just stop and smell the roses all day long; there’s work to be done. Time to grab a hoe and hoe, hoe, hoe. How retro, you may think. What with all sorts of mulches and tillers and tilthers available, the hoe is an under appreciated and underused garden tool these days.
 

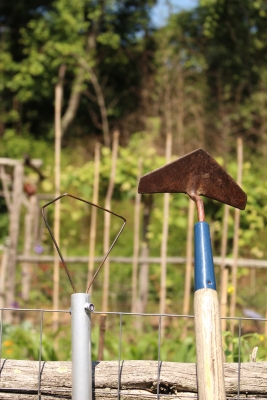
My favorite hoes: wire weeder and winged weeder

My favorite hoes: wire weeder and winged weeder

   But a hoe does good work — if you use the right hoe in the right manner. The best hoes, which include the scuffle hoe, the stirrup hoe, and the colinear hoe, have sharp blades that, in use, run parallel to the surface of the ground. Among these types of hoes, my personal preference has always been for the winged weeder, which looks like an airplane wing, sharpened fore and aft, attached at an angle to a long handle.
    I’ve recently taken up with another hoe, the wire weeder (from http://twobadcatsllc.com), whose head is a stiff wire cleverly bent to be easily worked amongst plants. Rotated 90 degrees puts its short edge to work, which is very useful for wending the head in amongst closely spaced plants. The lightweight aluminum handle doesn’t look  traditional but makes the tool very light and spry in use.
    Ideally, I’m out in the garden with my winged weeder or wire hoe on sunny mornings following rains. (I’m not sure which hoe I like better, so I alternate between them.) The goal is to loosen the soil, uprooting weed seedlings before they establish, and leaving a rough surface to welcome in the next bit of rain. The work, if it could be called that, is quick and easy if done before weeds grow large.
    Only when weeds get out of hand is it necessary to get out the tool that most people associate with the word “hoe,” the traditional garden hoe with the large blade at 90 degrees to the handle. This hoe is also the one Charles Dudley Warner was referencing when he stated (My Summer in a Garden, 1870), “what a [gardener] needs is a cast-iron back, with a hinge in it.” I reserve mine for mixing concrete.

Hoe or Mulch

    Not that mulching doesn’t also have its place in the battle with weeds`. Mostly, though, you have to do one or the other — mulching or hoeing — thoroughly. It’s impossible to hoe even thinly mulched ground.

Vegetable garden, kept "weed-free" and fed by compost mulch

Vegetable garden, kept “weed-free” and fed by compost mulch

    Unless, that is, the mulch is compost. Given that mulch is anything that covers the ground, compost qualifies as mulch, except that you can plant right in, or hoe, a compost mulch just as if it was soil.
    Weeds occasionally poke up through or sprout within the inch of compost with which I blanket my vegetable garden beds each year. I pull large weeds individually. Periodically, or where small weeds are starting to show, I’m out in the garden, sliding the business end of either my winged weeder or wire hoe back and forth, or just pulling it along, just beneath the surface of the ground.

HEATHERS & BARBERRIES & TICKS, OH NO!

An Evil Beauty

   Uh oh! I was pulling an odd weed here and there in my heath bed and came upon a seedling of Japanese barberry (Berberis thunburgii). Should I start checking myself for deer ticks? Are all the plants in the bed soon to expire?
    Japanese barberry is a commonly planted ornamental that was introduced into this country almost 150 years ago. For decades upon decades, it sedately graced landscapes with its boxwood-like leaves (but not evergreen), yellow flowers, and bright red berries, all set off against a backdrop of dark brown, thorny stems.

Barberry in woods

Barberry in woods

    For some reason, the plant began to spread about 35 years ago. Perhaps it was the increased planting of barberries around homes, along highways, and outside shopping malls. Those plants spawned yet more plants as birds ate the berries and spread the seeds. Perhaps it was the surge in deer populations, a response to the creep of suburbia as well as to the decreased number of humans willing to take to the woods, rifle in hand, to fell a deer. All the while that deer were munching away on our roses, rhododendrons, yews, and other landscape plants, they rarely browsed barberry.
    Okay, so more deer means more Lyme disease. Deer blood is what nourishes adult ticks and, as they feed, they reproduce and hitchhike across the landscape on their deer hosts.
    But the Lyme bacteria actually get into the ticks only after feeding on the blood of small rodents, such as white-footed mice, that are harboring the bacteria. Recent research in Connecticut has shown that barberry also creates a very nice, sheltered habitat for mice.
    To make matters worse, barberry also makes things homey for the deer ticks themselves, mostly by providing humidity. A forest with barberry growing in it hosted 120 Lyme-carrying ticks per acre; without barberry, a mere 10 per acre.

Earthworms, Friends No More?

    So much for the threat of Lyme disease in my heath bed. What about the demise of the plants there?
    Turns out that barberry is also prime habitat for earthworms, which, at first blush, would seem like a good thing. After all, earthworms are a gardener’s friend, right? Maybe. North of where the last glacier descended, the southern extent of which cut into much of northern U.S., all native earthworms were wiped out. The natives have been very slow to re-colonize but earthworms from Europe and Asia that arrived here in ship hulls and soil, and as fishing bait, have not been shy. They’ve spread rapidly.
    Non-native earthworms thrive especially well in the soil beneath barberry bushes. It could be that barberry leaves are more digestible to them; it could be that barberry alters the soil chemistry to their liking.

My heath bed in autumn

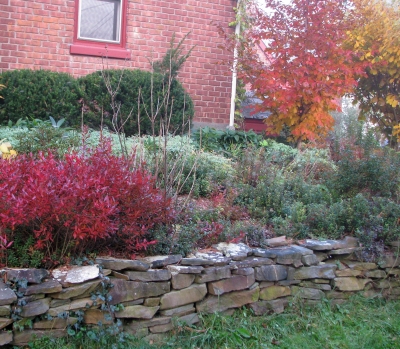
My heath bed in autumn

    These exotic earthworms are good at gobbling up raw organic matter, as in the leaf litter that blankets our forests — and my heath bed, to which I import leaves. The newcomers can actually gobble up forest litter faster than it is replenished, changing the soil habitat and exposing the soil to erosion. Plants in the heath bed, i.e. plants in the heath family, like that leaf litter; it keeps the soil cool and moist  and, as it slowly decomposes, enriches the soil beneath with decomposed organic matter, or humus. There is some evidence that the makeup of our native forests, which includes rhododendrons, also in the heath family, is changing due to the work of exotic earthworms.
    And all this from barberry!

Some Redemption

    I’m not all that worried about ticks or the demise of my heath bed. The bed is small enough and watched closely enough so that all barberries can be ripped out — just like the one I saw yesterday. My cat keeps mice at bay, and my dogs do likewise for deer. And I import more leaves each year than earthworms, even exotic ones could gobble up.
    The extensiveness of wild settings makes barberry control there difficult. Options there are cutting, pulling, fire, and/or herbicides.

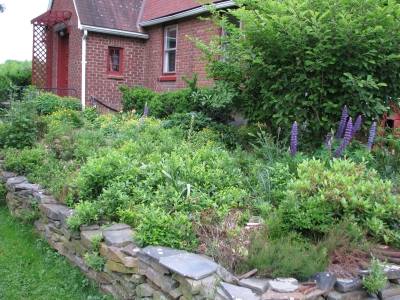
Heath bed in June

Heath bed in June

    No need for such drama In a home landscape. Here, barberry is easily controlled, if desired, by nothing more than being pulled out or repeatedly cut to the ground. One or a few bushes are not going to significantly impact mouse populations or Lyme hazard. Their greatest impact would be to make berries that, with the help of birds, would further the spread of this bush. Newer, sterile varieties offer ornamental mounds of greenery that don’t contribute to the plant’s spread.

Heather, and Friends

    My heath bed, incidentally, has no heath plants. Heaths (Erica spp.) would die from in our cold winters. I call my bed a “heath bed” because in it I grow Heath Family (Ericaceae) plants in it: rhododendrons, mountain laurels, lingonberries, huckleberries, swamp azalea, and some heather (Calluna spp.). I group these plants together because all demand special soil conditions, conditions quite different from that of most cultivated plants.
    Most heath plants need a soil that is very, very acidic, relatively infertile, well-aerated, consistently moist, and rich in organic matter. As mentioned above, these plants thrive where the ground also has a mulch of leaf litter, wood chips, or other organic matter, a mulch that disappears too quickly where soils harbor large populations of the non-native earthworms that thrive beneath barberry bushes.

MAKING THE MOST OF WET GROUND

Have Fun, You Silly Ducks

    Wouldn’t you know it: I write about the extended dry spell one week, and the next week, which is now, the rain comes and doesn’t let up. Not that all this rain makes me regret having a drip irrigation system watering my garden. Rainfall could come screeching to a halt and send us into another dry spell.

Ducks, off to work and play

Ducks, off to work and play

     My five Indian runner ducks offer many advantages here on the farmden, not the least of which is affording me the pleasure of watching creatures that actually enjoy cool, rainy weather. The ducks also are entertaining and decorative, spend much of their days scooping insects and slugs out of the lawn and meadow and into their bills, and, especially when living on that diet of insects, slugs, and greenery, lay very tasty eggs. The downside to ducks is that they are dumb, and don’t know to stay out of the road.
    My four chickens offer many of the same advantages as the ducks, except they never seem as at peace with the world as do the ducks. Also, chickens scratch. Scratching at the bases of mulched trees and shrubs exposes roots; scratching elsewhere wrenches young transplants out of the ground.
    Chickens abhor rainy weather.

You ‘Shrooms, Also Enjoy This Weather

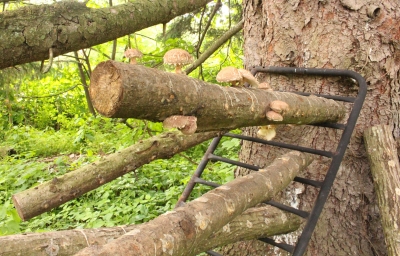
    Mushrooms I “planted” last spring are, like the ducks, reveling in this rainy change. “Planting” these mushrooms involved nothing more than pounding short lengths of wooden dowels, purchased with shiitake mushroom spawn growing in them, into numerous holes drilled in freshly cut pin oak logs. A cap of hot wax over each plug sealed in moisture. The 4-foot-long by 4” diameter logs lay in a shady place through summer while being colonized by thin threads of fungal hyphae growing out from the plugs.
 

Shiitake logs fruiting

Shiitake logs fruiting

   This spring was to be the start of a few years of “fruiting,” that is, making mushrooms, the spore bearing structures of fungi that taste so good sautéed with some onions and butter or olive oil. Dry weather of the past few weeks was slowing the mushrooms’ first appearance, so I decided to shock them. Just bouncing the end of a log against a hard surface, such as a sidewalk, sometimes wakes them up. I opted for a water shock treatment, giving the logs a 24 hour soak in a shallow kiddie pool.
    Right on schedule, within a week of being soaked, mushrooms began popping out all over the logs. With their ends levered into the horizontal openings of a metal fence gate tipped on its side against a tree, the logs and their attendant mushrooms are cantilevered out, perched above slugs and other organisms that might have enjoyed nibbling the fruits of my labor.
    The shock treatment has resulted in a mushroom tsunami. Excess go into the dehydrator, which has them crispy dry and ready for long term storage in about 4 hours. Once the tsunami ends, the fungi need to rest for a month and a half before they’re ready for another shock. Or I can do nothing, and let nature pump out mushrooms more slowly over a longer period of time. Of course, if this rain keeps up — 3 inches in the last couple of days — another tsunami might anyway be in the offing.

And I Can Plant . . . White Strawberries

    With the ground thoroughly soaked, it’s a good time to get plants in the ground . . . except in wet, clay soils. Working a wet clay ruins the almost crystalline structure that develops when it is well managed. Then, instead of the small particles aggregating together to make larger particles with larger pores in between them, letting air into the soil, the structure is reduced to only small unaggregated particles. Spaces between these small particles are so small that they draw in water by capillary action, and there’s no room available for air, which plant roots need. Good for pottery, bad for plants. Wait for any clay soil to dry a bit before digging in it, until it crumbles between your fingers with just a little pressure.
    My soil is a silt loam that’s been enriched with plenty of compost, which helps aggregation, so I can plant now, even right after rain.

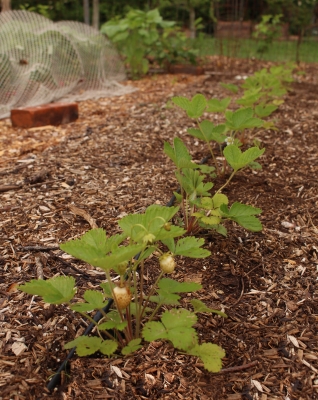
'Pineapple Crush' strawberries

‘Pineapple Crush’ strawberries

    Among the plants I’ll be setting in the ground will be strawberries, right in a garden bed. Strawberries, you wonder? Big deal. But these are alpine strawberries. Okay, many people grow alpine strawberries. But these are white alpine strawberries, white, that is, even when dead ripe.
    Alpine strawberries are different from common garden strawberries in that they are a different species (Fragaria vesca), they don’t make runners, and both the plants and fruits are small, the latter about the size of a nickel. Previously, I’ve put a few in pots sitting along my front path for a nibble on the way to the door, or a few at the foot of garden beds, again, for a nibble, here while working in the garden. I want to see how the plants do under the better growing conditions of compost-enriched soil and drip irrigation right in a garden bed.
    Alpine strawberries are small but have very intense flavor, which needs to be fully developed before being picked. I especially like the white ones’ flavor, which can develop fully because, being white when ripe, they’re ignored by birds. The variety name Pineapple Crush gives a good approximation of the flavor.

DRIP, DRIP, DRIP, WHERE’S THE AGUA?

 I’m Dripping, So Why Am I Watering?

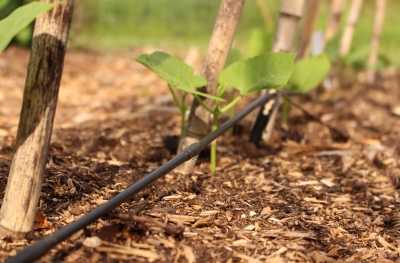
  Up to a couple of weeks ago, little water had dropped from the sky this spring here in the Hudson Valley. But a drip irrigation system automatically waters many of my plants. So why have I been spending so much time with hose in hand?Dripline with beans
    Not all my plants drink in the drips. Trees and shrubs are on their own except their first year in the ground when I religiously hand water them every few days initially, and then once a week throughout the season. These plants get 3/4 gallon per week for every square foot spread (estimated) of their root systems. That’s equivalent to an inch of rainfall which, if it does fall, exempts me from a few days of watering.
    A couple of inches depth of hay, leaf, or wood chip mulch around the trees and shrubs seals in moisture to make best use of my efforts. Also, I start with smaller plants — less than 4 feet tall — which become independent of my watering sooner because a larger proportion of their roots are soon foraging around in surrounding soil that those of larger plants.
    My flower beds also don’t get dripped. Although the soil surface is dry, moisture carried over from winter still sits in lower depths, into which established perennial flowers’ roots can tap. Annuals and newly planted perennials need to be watered on the same schedule as young trees until their roots reach that moisture.

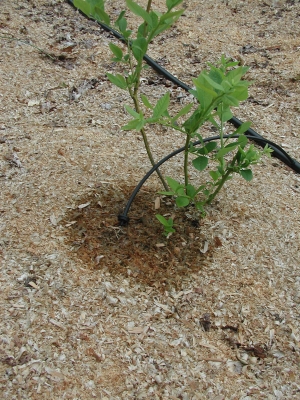
My blueberries are my only dripped shrubs

My blueberries are my only dripped shrubs

   It is my garden vegetables that drink in the benefits of my drip system. But even here some hand watering is needed these days. Down each bed runs 1 or 2 drip lines, with emitters along the lines spaced 6 inches apart. As water enters the soil, capillary pull from small spaces between the soil particles draws water sideways and, along with gravity, downward. The resulting wetting fronts have the shape, if you could look at a cross-section of the soil, of an ice cream cone. In clay soils, with small particles and, hence, a lot of capillary draw, that ice cream cone is very fat; in sandy soils, it’s narrow, a couple of feet wide at its broadest as compared with the 6 foot spread in a clay soil.
    The wetting fronts start their sideways spread below the soil surface, deeper in sandy soils, more shallow in clay soils. In either case, the soil surface remains dry except right at the point of drip. So any vegetable transplants or seeds I set in the ground need to be hand watered until their roots reach the wetting front — except for seeds or transplants set right under or along the drip line.

Drip Irrigation Workshop June 20th; see “Workshops“, at this site, for more information.

A Statue of David

    My friend David was wondering why the leaves of his Romaine lettuce plants flopped down. I gave my usual response to most gardening questions: “Too little water.” (My other usual response is “Too much water,” often following my first response if the questioner tells of watering all the time.)
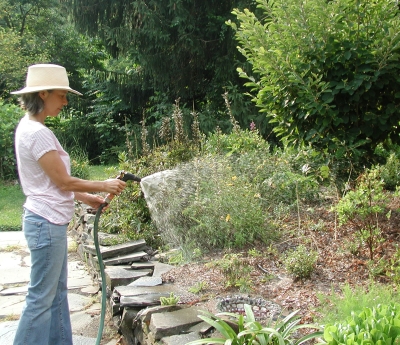
    So I asked David how much he watered, and he said he thoroughly soaked the ground by spraying it with water. Busted! It really was a water problem, too little in this case.Hand watering
    In fact, thoroughly wetting the soil with the usual 4-foot-diameter, hand held spray is almost impossible. “Thoroughly wet” means soaking the ground to at least a 6-inch depth. For his hand held sprayer to do that, David would have to stand in place like a statue, sprayer in hand, unmoving, for about an hour to wet one 4-foot-diameter part of the garden before moving on to the next 4-foot-diameter area.
    When I’m watering plants in the ground by hand, I’m wetting only the small area beneath an individual plant, just enough to soak its roots as they establish themselves in the surrounding soil.

Probe the Soil

    People find it hard to believe that that statuesque watering posture is really necessary. All you have to do is scratch the soil surface after a David-esque spraying of plants to see how deeply the water percolated, and you’d find only a thin layer of wet soil, at the surface.
 

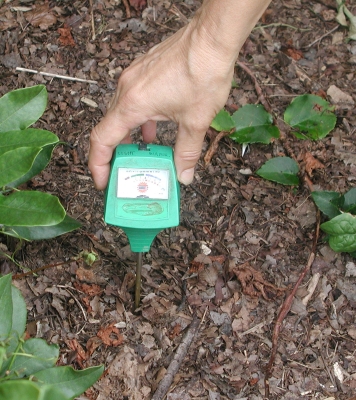
Digital moisture probe.

Digital moisture probe.

   Digging a hole in the ground is a good way to tell if watering was sufficient. But it’s also inconvenient.
    For just a few dollars, I invested, years ago, in an electronic gizmo that bypasses all that hole digging. This soil moisture sensor has a metal probe that you plunge into the soil. Atop the probe is a dial or digital readout that tells whether the soil is “DRY,” “WET,” or something in between. More accurate sensors cost over a hundred dollars, but the cheap ones are fairly accurate and work well if coupled with observation.

Good for Pot(s) Also

    The soil moisture meter is especially useful with potted plants, which might need watering every day when the weather is warm, sunny, and breezy. (With experience, lifting a pot to feel its weight is also a good measure of moisture level, as is just getting to know your plants better.)
    I’m still hand watering the pots because I haven’t yet connected the drip tubes that will direct water to each of the pots.

BLUEBERRIES OUTSIDE, APHIDS INSIDE

 Plant the Best-Tasting Fruit

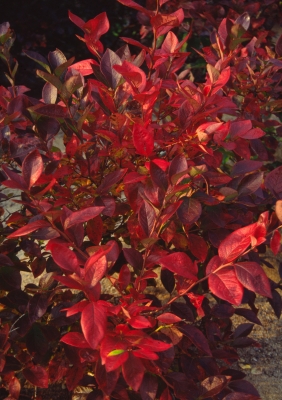
   My sixteen blueberry plants keep me in blueberries year ‘round, so I’m not planting any this year. But you are, or should be. The bushes are attractive in every season, with white blossoms in spring, foliage that looks spry all summer and turns crimson red in fall, and stems that shade to red in winter. The bushes are almost pest-free. And the berries are healthful and delicious.

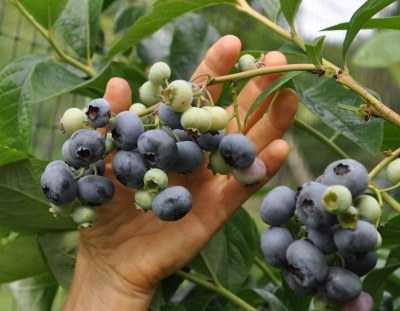
Blueberry fruits on plant
Blueberry fall color    All you would-be blueberry planters out there: Pay attention to the soil for your plants, about which I’m going to offer advice. Too many people plunk a blueberry bush into a hole dug in their lawn and then wonder about the lack of berries. Poor growth, that’s why. The plants bear fruit on one year old stems. If shoots grow only a few inches one year, there’s little room on which to hang berries the following year.
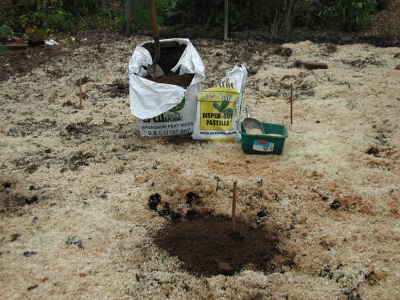
    Taking a cue from wild blueberries, here’s what the bushes need, soil-wise: acidity (pH 4-5.5), organic matter, relatively low fertility, moisture, air, and no competition from weeds. For starters, check the soil pH with either a home testing kit or by taking a sample to a Cooperative Extension office or soil testing laboratory. If soil is not sufficiently acidic, add sulfur, preferable pelletized sulfur for ease of handling, 3⁄4 pound of sulfur per 100 square feet in sandy soils or three times this amount in heavier soils, for each pH unit the soil is above 4.5. Contrary to popular myth, adding oak leaves or pine needles will NOT do the trick. Spread sulfur over the ground as far as the eventual spread of the roots, which is about 3 feet in all directions.Planting blueberries
    Then dump a bucketful of peat moss right where you plan to dig each hole. Dig the hole deep and twice as wide as needed to get the plant in the ground, mixing the peat moss with the soil. Peat moss provides a long-lasting source of organic matter, which also helps with aeration and water retention.
    Finally, plant and water.

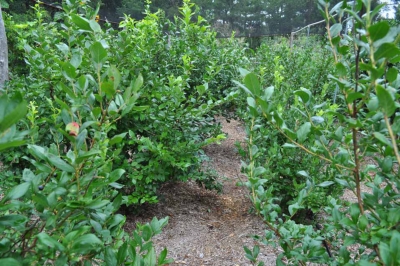
My planting, 7 years later

My planting, 7 years later

   Wait, you’re not finished yet. Right after planting, spread some organic mulch, such as wood shavings, leaves, or pine needles, a couple of inches deep and as wide a spread as the roots. Mulch keeps the soil moist and further enriches the ground with organic matter as its lower layers decompose.

Soil & Birds

    Ongoing soil care for blueberry bushes is simple and necessary, mostly food and drink.
    Assuage the bushes’ thirst with, barring rain, three-quarters of a gallon of water per week for each square foot spread of the roots. Satisfy their hunger by spreading a high nitrogen fertilizer late each fall. I use an organic fertilizer, such as soybean or alfalfa meal, at the rate of 1.5 pounds over every hundred square feet of root spread. These fertilizers offer nitrogen throughout the growing season in a form blueberries can use.

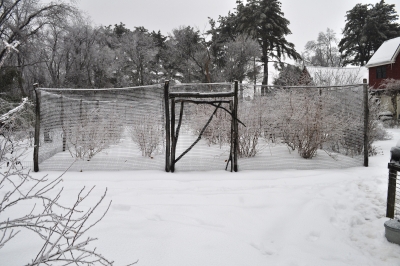
Blueberry temple in winter

Blueberry temple in winter

    Periodically re-check the soil pH and add more sulfur, if needed. Replenish the mulch each fall, laying the new mulch right on top of the old mulch.
    For the future — harvest of first berries should begin within a couple of years — think about birds. Are you going to share? Are they going to share? I opt not to share, enclosing my whole planting in netting, to create a walk-in “blueberry temple.”

Aphid Attack & Counterattack

    Turning inward, not introspectively, but to the greenhouse, I see aphids getting a foothold. Their populations soared a few weeks ago as young and old feasted on aging celery and arugula plants beginning to send up seed stalks.
    My first counterattack was to cut down or dig up these old plants and whisk them to the compost pile before too many insects dropped off to take up residence on smaller plants and seedlings. Not that there weren’t plenty of stragglers fattening up on younger plants.
    My tack with the stragglers has been to set my watering wand on “fan spray” and blast the plants with water. Most aphids that get knocked off plants don’t return. I spray on mornings of sunny days so leaves dry relatively quickly, limiting potential disease problems. The temporary increase in humidity might increase the likelihood of aphids’ getting fungal diseases, to which they are very susceptible.
    Of less effect are the ladybugs I periodically introduce into the greenhouse, in large part because I don’t have enough of them. They used to enter my home in large numbers via leaks around an old, south-facing window and nearby crack in the wall. I’d merely vacuum them up as they clustered on the window pane and shake the contents of the hand-held vacuum among plants in the greenhouse late in the day. That window and the wall crack have been repaired, so few ladybugs end up indoors.
    I’m considering making a hole in the wall to let the ladybugs indoors again and hanging a ladybug live trap (available commercially or made from online plans at http://www.ars.usda.gov/is/br/lbeetle/001030.trap.pdf) right near the hole.
    Thus far, though, cleanup and water sprays have kept aphids under control, and plants are growing well. Once transplanted outdoors aphid problems vanish because of the weather and natural predators.

COMPOST TEA: SNAKE OIL OR PLANT ELIXIR?

Is the Jury Still Out on Compost Tea?

    In gardening, as in life, you can’t help but want to love some things, compost tea being one of them. After all, compost is good, tea is soothing, so what’s not to love about compost tea?
    Perhaps it depends on how you brew your tea. Traditional compost tea was and is made by hanging a burlap bag of compost in water, then diluting and drenching the ground or the potting mix of a potted plant with the nutritious, coffee-brown liquid.
    More recently, “aerated compost tea” (ACT) has soothed gardeners from coast to coast, the result mostly of the promotional efforts of soil scientist Dr. Elaine Ingham. This tea is brewed similarly to the traditional tea, except that extra foods, such as molasses (honey would seem more in keeping with the tea theme), brewers yeast, and bran, are also added, and — most important — the tea is aerated throughout the brewing process.

Brewing up a batch for some plants.

Brewing up a batch for some plants.

    The soothing effect from ACT is not nutritional, but biological. You spray the tea on leaves or soil to spread beneficial microorganisms leached from the compost whose populations were beefed up by all that aeration and added nutrients. These happy microbes fight off attack by pathogens and insects, perhaps by making the offenders sick or unable to reproduce, perhaps by making the plants more healthy, or any one of a number of other hypothesized manners.
    Coming from their home in the dark, moist, nutrient-rich innards of a compost pile, could these friendly microbes really be expected to survive on the bright, dry, nutrient-poor surface of a leaf? And evolutionarily-speaking, when would Mother Nature ever have made provisions for compost, let alone compost tea, let alone ACT microbes, to colonize a leaf and do good there? But this is all speculation; surely someone must have tested whether or not compost tea is really “soothing”  to plant life.

How to Really Test Effectiveness

    A slew of gardeners and farmers have tried ACT and can attest to its benefits. Matter of fact, a whole industry is dedicated to testing composts and compost teas, even selling compost tea brewers and compost tea itself.
    The way to truly ascertain the efficacy of compost tea is to subject it to the same scientific scrutiny as you would anything else: Come up with a hypothesis (such as “Compost tea prevents powdery mildew of squash plants”) and then design an experiment to test the hypothesis. Said experiment would need both treated (compost tea sprayed) and control (water sprayed) plants. Most gardeners and farmers go to the trouble of spraying compost tea because they believe it will be effective, so are not willing to leave a portion of untreated (control) plants. Their endorsements, then, must be taken with a grain of salt, and the same must be said for endorsements from anyone reaping financial gain from compost tea.
    One treated and one control plant, even one treated and one control plot of plants, would not be sufficient for a good test. Biological systems are complex. Grow 10 tomato plants under exactly the same conditions and some will grow a little more, some a little less than the others. With too few test plants, natural variations in plant growth might overwhelm variation due to a treatment. With enough plants to even out and offer a measure of natural variations in, say, plant growth, effects of a treatment are better parsed out.
    And finally, randomization is needed to even out any effects of, say, location. Perhaps one side of a plot is more windy, or the soil is slightly different, or there’s a bit more sunlight. Rather than have all the treated plants cozied together growing better or worse because of this added effect, even out these effects by randomizing the location of treated and control plants.
    Now you’ve got an experiment. Using a few arithmetic formulas or, these days, a computer program, you plug in the numbers and come up with a probability of an effect of the treatment. In agriculture, a 90% or 95% probability is usually considered sufficient. You can then answer “yea” or “nay” to the hypothesized question, in this example, “Does compost tea prevent powdery mildew of squash plants?” with a 90% or 95% confidence level

Okay, I’ll Try It

    I have a friend who is a big proponent of compost tea. Finally, he convinced me to give it a try but only after I made him agree to supply me with a brewer, some compost, and explicit instructions, just to avoid his finding excuses for failure of the tea treatment.
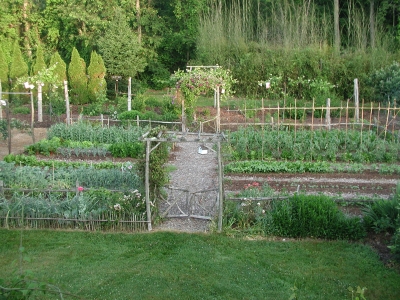
    A red flag went up when he advised me not to use it in my vegetable garden because it was “too organic.” I ended up, on his suggestion, spraying a few strips down my lawn and parts of some bean rows on a friend’s farms.
    This admittedly nonscientific test conclusively showed no benefit at all from the tea.

Snake Oil, Mostly

    So what’s the scientific verdict on compost tea? The answer is not so simple, in part because it depends whether the reference is to traditional compost tea or ACT, the kind of plant, the compost ingredients, how long the tea is brewed, how often tea is applied, etc.
 

Spreading compost, letting rain make the "tea."

Spreading compost, letting rain make the “tea.”

   Good experiments have been performed, from which the following general conclusions can be made: 1) ACT  is not reliably beneficial (and often has a negative effect or spreads human pathogens such as Salmonella); 2) Traditional compost tea has been shown to be often but only mildly beneficial for root diseases; 3) If sufficiently, but not too, dilute, either ACT or traditional compost tea can supply nutrients to feed plants.
    My pea plants succumb early every summer to some root disease, possibly fusarium. I am tempted to drench the soil for the peas with traditional compost tea. Perhaps I’ll even set it up as a crude experiment, keeping in the back of my mind the admonition of Charles Dudley Warner (My summer in A Garden, 1871), “I have seen gardens which were all experiment, given over to every new thing, and which produced little or nothing to the owners, except the pleasure of expectation.”
    Mostly, though, I’ll continue to do what I’ve been doing, spreading compost on top of the ground and letting rainwater make the tea.

MANURE ABSOLVED, PRUNING STARTED

Horse Manure: Not Guilty, So On To Pruning

    A dark cloud no longer hangs over my horse manure, that is, the horse manure that I occasionally truck over here to add to my compost piles. I wrote a few weeks ago about the possibility of herbicide that, when applied to hay, retains its toxic effect when an animal eats the hay and even, for a long time, after that animal’s manure has been composted or spread on the ground.
    My herbicide residue concerns were soothed with a simple assay that showed satisfactory growth from bean seeds in both hay that was suspect and hay of known integrity. Also, the bedding in the horse manure is mostly wood shavings rather than hay.
    But another ugly dragon kept raising its head above the manure. Another chemical, this time, Ivermectin, a de-worming medication given to horses (and other animals). Ivermectin or its metabolites might pass through the animal and injure soil dwelling creatures such as beneficial nematodes and earthworms. Past studies have shown negative effects on, for example, “dung fauna and degradation of faeces” (to quote a research paper from 2006).
    Ivermectin is, admittedly, a very useful material, even useful in humans to combat lice, bedbugs, and some more frightening tropical afflictions such as river blindness and elephantiasis. Agriculture is always a balancing act, but I like to keep my soil-dwelling partners happy.
    So I was gladdened when a veterinarian recently directed me to a Stanford University publication that summarized research findings on the environmental effects of Ivermectin. To whit: Ivermectin is excreted and it can affect earthworms, springtails, and other fauna. But it degrades quickly at summer temperatures (1-2 weeks, but much longer in winter) and within a day or two of exposure to bright sunlight. With temperatures within my compost bins reaching 150°F., or more, with the compost sitting many months before use, and with the compost being spread on top of the ground, little Ivermectin would end up in the soil. And soil anyway naturally has low levels of this compound.

Snow Makes Me Taller

    Let’s look aboveground, at stems; there’s pruning to be started. With well over a foot of snow on the ground, I turn my attention to taller plants. The snow is actually an advantage because, with snowshoes on, I can reach more than a foot higher into the branches without a ladder.

Sammy (the dog) and I pruning pawpaws

Sammy (the dog) and I pruning pawpaws

    For now, I’m going to start with the easiest pruning, mostly with plants that don’t need regular pruning beyond removing dead, diseased, broken, and grossly misplaced branches. Right here, such plants include pawpaws, plums, cornelian cherries, and a teenage honeylocust tree. Light is important for fruit production from the fruit trees and, generally, to keep diseases and insects at bay, so I also prune away enough branches to let remaining branches bathe in sunlight.
    I go at the pawpaws with one more goal in mind, to keep fruit from forming either too high in the tree or two far out on the limbs. Pawpaw trees will grow 15 to 25 feet high but I harvest fallen fruit from the ground. By my estimation, fruit can make a soft landing, undamaged, from a height of about 10 feet onto mulched ground. So I lop back the tops to weak side branches at about that height.
    Each pawpaw flower is a multiple ovary, potentially spawning up to nine fruits, each of which can weigh more than half a pound. That’s a lot of weight perched onto the end of a branch, so I shorten long branches to decrease leverage of that fruit load.
    (More about all types of pruning on all kinds of plants in my book, The Pruning Book.)

A Beautiful Climber

    I actually did begin pruning a few weeks ago, before the first snow fall. The plant was hydrangea — no, not the common bigleaf hydrangea which has many people scratching their heads about how to prune, but climbing hydrangea (Hydrangea anomala subsp. petiolaris).
 

Climbing hydrangea in summer

Climbing hydrangea in summer

   Climbing hydrangea is one of the most beautiful vines, even right now as the peeling, pale cinnamon, bark is in focus among the leafless stems. All summer long, the stems are clothed in lustrous green foliage and, in early, summer clusters of white flowers twinkle against that backdrop like stars in the dark sky.
    As expected, the vine took a few years to get firmly established. Now it threatens to engulf my brick home except that I want to restrict it to only the north wall. Every year now, I prune back stems creeping like groping fingers around the east and west walls. And each year the flower stems reach further directly out from the wall, so I also shortened them.

Climbing hydrangea, partially pruned

Climbing hydrangea, partially pruned

    The present pruning doesn’t permanently subdue the plant. This summer, I’ll again shorten the wandering stems, and I’ll be back at it again next winter and for winters to come.

FIRST SOWINGS OF THE YEAR, DEADLINE MISSED

 Onions & More, Late But They’ll Be Fine

   I missed my deadline by four days, sowing onion seeds on February 5th rather than the planned February 1st. That date isn’t fixed in stone but the important thing is to plant onions early.
    Onions are photoperiod sensitive, that is, they respond to daylength (actually, night length, but researchers originally thought the response was to light rather than darkness, so the phrase “daylength sensitive” stuck). Once days get long enough, sometime in June, leaf formation comes screeching to a halt and the plants put their energies into making bulbs. The more leaves before that begins, the bigger the bulbs.
    Plants from seeds sown outdoors — towards the end of March — won’t have as many leaves as plants given a jump start indoors. I like big bulbs; hence the early February sowing.

Fresh Seeds & Mini-furrows in a Plastic Tub

    First step on my way to onion-dom is to get fresh seeds. Onion seeds are relatively short lived and I want to give the plants plenty of time to grow. I don’t risk delays from poor germination and replanting of old seed.Onion seeds being sown in mini-furrows in pan of potting soil.
    Seeds get sown in a miniature “field:” A plastic tub 18 inches by 12 inches, with drainage holes drilled in its bottom and filled 4 inches deep with potting soil. Some weed seeds are unavoidably lurking in the garden soil and compost in my homemade potting mix, so I top the potting mix with a one inch depth of a weed free, 1:1 mix of peat moss and perlite.
    The edge of a board pressed into the firmed soil mix in the tub makes furrows, 6 of them equally spaced and about 1/2 inch deep within the tub. Into each furrow go onion seeds, sprinkled at the rate of about 7 seeds per inch. Once the furrows are closed in over the seeds, I water thoroughly and, to avoid washing away seeds, gently.
    Covered with a clear pane of glass and warmed to 70 to 75° F, the seeds should appear as grassy sprouts above the soil mix within a couple of weeks. From then on, my goal is to keep the plants happy with abundant light and water as needed. They get a haircut, their leaves snipped down to 4 inches, whenever they get too floppy. The compost and alfalfa meal in the potting mix should provide sufficient nourishment to the seedlings until they are ready for the great outdoors. That deadline is April 15th, weather permitting.

Other Cool Temperature Seeds Join the Party

    Onions won’t be alone on the seedling bench in the greenhouse. I’m also now sowing seeds of celery, celeriac, and leek. All, like onion, need a long period of growth before they’re ready for outdoors.
 

Onion seedlings, up and growing.

Onion seedlings, up and growing.

   These seeds get sown in furrows in small seed flats from which the seedlings, once they have two leaves, are gingerly lifted and cozied into waiting holes poked into the potting mix filling seed trays with individual cells. Little growing space is needed because a single seed flat can be home to a few kinds of seeds and the celled trays in which the seedlings grow until planted outdoors can house about two dozen plants in a square foot.
    I’m sowing lettuce in a similar manner. In contrast to celery and company, lettuce grows quickly. It’s needed to fill in gaps opened up from winter harvests of kale, lettuce, mâche, claytonia, celery, and parsley in the greenhouse, and should be ready to eat in April.

Nature & Nurture & the Spiciness of Onions

    Last year’s onions were abundant, large, sweet, and juicy. Anticipating their not keeping well, we ate them quickly, pulling the last ones from their hanging braid in the basement sometime in November. These were so-called European-type onions, varieties such as Ailsa Craig and Sweet Spanish.
    Next year we should have fresh onions for soups and stews on into winter because I’m growing some American-types, New York Early and Copra. American-type onions are actually sweeter than European-type onions, but their sweetness is masked by their increased pungency. That pungency comes from sulfur compounds, which are vaporized during cooking. Those sulfur compounds are also what help these onions keep longer.

Stored onions, in basement

Stored onions, in basement

    Soil enters the picture when it comes to onion flavor and storability. Sulfur is an essential plant nutrient and the more sulfur in the soil, within limits, the more sulfur in the onions. Sulfur is a key component of organic matter, so my compost-rich soil (with a whopping 15% organic matter) should have plenty of sulfur.
    Still, I’m thinking about spreading sulfur, the same pelletized sulfur I use to maintain soil acidity beneath my blueberry bushes, on half my onion beds to see if flavor or storagability are noticeably affected.

HOW TO FEED THE WORLD

Perennial Wheat to Save Our Soil, But What About Compost?

    We — that is, almost all of humanity — get all our sustenance from the thin skin that covers out planet, the soil. In appreciation of this, the United Nations has declared 2015 “The Year of Soil.” “Soil is more important than oil,” stated Wes Jackson, founder of the Land Institute, in his keynote at this year’s recent NOFA-NY  conference. Like oil, soil is a nonrenewable, or only slowly renewable, resource. Centuries go by before rainfall, freezing, thawing, and microbes and plants eat away at rocks to make new soil; on average, it takes a thousand years for the creation of a mere half-inch of new soil.
    The problem is that, as with oil, we humans are using up soil faster than new soil is being created — 10 to 40 times faster! Also, as with oil, that soil, as it is used, releases carbon dioxide and other greenhouse gases. Tillage exposes carbon stored in the ground to air, burning” it up, and annual crops, which are represented by sweeping fields of corn, soybeans, wheat, and other staples of civilization, put little of the carbon that they take in from air below ground. Agriculture is the second highest generator of greenhouse gases.
    Whew, what to do? Dr. Jackson’s tack, for the past half century, has been to focus on shifting our staples from annual to perennial crops. Wheat, for instance. Kanza, a hybrid, perennial wheat under development at the Land Institute, would sequester carbon by not requiring annual tillage and by packing carbon compounds into its long-lived root system. Perennial crops also decrease opportunities for soil erosion (another source of soil loss), grow with less added fertilizer and water,  and have the potential to increase biodiversity for a healthier ecosystem.

Organic Materials: Wasted Fertilizer

    What about vegetables, how are they treating our resources? Up to the podium stepped Tim Crews, director of research at the Land Institute, to give the roomful of organic and aspiring organic vegetable farmers and gardeners bad news: Our soil care is not sustainable. All that manure hauled onto our fields or piled high into compost piles is bedded with hay or comes from animals that have been fed grain. The grain or hay was grown in fields that were fertilized, most of it with commercial fertilizer which is mostly made from atmospheric nitrogen via the Haber-Bosch process which requires — you guessed it — fossil fuel for energy.Organic materials feed compost pile.
    Still, the fact that organic farming and gardening wastes less energy than conventional farming and gardening should assuage some of the guilt that resonated through the room. The soil of a good organic farmer or gardener will, in general, be higher in organic matter (5.4% vs. 3.5%) and, hence, carbon. Said plot will require less water, less pesticide, and less manufactured nitrogen for fertilizer.

Compost, Garden — and Small Farm — “Gold”

    Compost, and compost alone, is how I maintain fertility in my vegetable beds. I do haul in some horse manure for that compost, and, as Dr. Crews pointed out, somewhere way back in that manure’s history, fossil fuel needed to be burned.
    But civilization, and especially industrialized civilizations, generate many waste products, of which horse manure is one. Picture also all the food waste from restaurants and supermarkets, autumn leaves and grass clippings that are considered “garbage,” even sewage effluent. All these organic materials contain carbon, some of which could be sequestered in the ground, to the benefit of agriculture and the environment, and some of which feed soil organisms and, in turn, plants.
 Turning compost pile.   Better to recycle as much of those organic materials as possible into agriculture than let them go to waste or cause pollution. The bottlenecks here are cultural and political rather than agricultural.

Grow Your Own Fertilizer

    Another way, as I suggested at the conference, to make vegetable farming more sustainable would be to grow your own carbon and fertilizer. A perennial grain or hay field could be harvested for the grain or hay for the animals or, even more efficiently, just for hay to use either as mulch or for composting. Running hay or grain through animals burns up carbon to grow and fuel the animal to the tune of, on average, about 6 times more needed in terms of calories. That is, for every 6 calories we grow and feed to a cow, we get only one calorie back when we eat the cow.
    Left to its own devices, any field will naturally build fertility. Bacteria, free-living bacteria and symbiotic with the roots of legumes, harvest atmospheric nitrogen and put it in the ground, and the combined action of myriad soil organisms slowly chew away at a soil’s rocky matrix to release other nutrients for plant use. Plants grow, their roots oozing substances that further stimulate microbial activity and soil fertility.

Nodules from nitrogen-fixing bacteria on soybean roots.

Nodules from nitrogen-fixing bacteria on soybean roots.

    The key word in the previous paragraph is “slowly.” In order to be able to harvest fertilizer in the form of hay from a field year after year, sufficient time must be allowed between harvests for fertility to be garnered from the air and rocks. For that you need either more land or less harvest. The big picture, then, is to have more land, to make better choices in how the land is used, to utilize organic practices, and have fewer people.
    With the problems of soil improvement, global warming, sustainability, and agricultural production solved, I’m going to sow onion seeds. Planted in flats in potting soil at 7 seeds per inch, I should have plenty of pencil-thick seedlings ready to poke into holes in compost enriched beds in early May.