UNPERMACULTURE

Accusations,  (Mostly) not True

I’ve understandably been accused of being a “permie,” that is, of practicing permaculture.
    (In the words of permaculture founder, Bill Mollison, “Permaculture is about designing sustainable human settlements. It is a philosophy and an approach to land use which weaves together microclimate, annual and perennial plants, animals, soils, water management, and human needs into intricately connected, productive communities.” In the words of www.dictionary.com, permaculture is “a system of cultivation intended to maintain permanent agriculture or horticulture by relying on renewable resources and a self-sustaining ecosystem.”)
    Walk around my farmden and, yes, you’ll come upon Nanking cherry bushes where forsythia bushes once lined the driveway, an American persimmon tree where a lilac bush once stood, and other edible plants used also for landscaping. In the vegetable garden, I preserve soil integrity by never tilling it, and, in the south field, blackcurrant bushes make use of the space beneath pawpaw trees. There’s the requisite mushroom yard of shiitake-inoculated logs, free-range poultry, solar panels, a rain barrel . . .

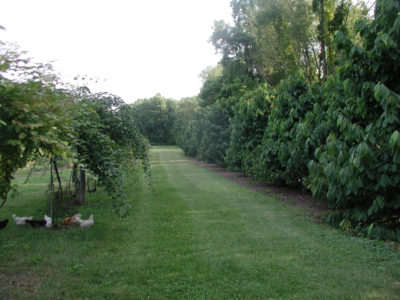
Pawpaws interplanted with blackcurrants, and a row of hardy kiwis

Pawpaws interplanted with blackcurrants, and a row of hardy kiwis

    But no! I am not a permie. My vegetables grow in beds in parallel, straight rows (rather than keyhole plantings) and, despite that commingling of blackcurrants and pawpaws, most trees, shrubs, and vines here keep to themselves. Permaculture plantings of, say, hazelnuts in tall grass and rubbing elbows with elderberries, seaberries, apples, pears, and other edibles become, over time, an unproductive management nightmare with some plants drowning out others, productivity declining due to shade, and diseases increasing from tangled stems creating dank conditions. The paltry output of such planting are best left for wildlife, who can afford to spend all day foraging for a few tidbits of food.
    My hazelnuts are grown in a mown strip that, for easy gathering, is sheared low as nuts ripen.
    Low maintenance is a goal touted by permaculturalists; understandably so. But taken to the extreme, low maintenance means not giving the grape vine the pruning it needs to be a healthy vine yielding the most flavorful berries that are easy to harvest. (One book suggests, rather than troubling with a trellis, growing grape vines up trees; the vines do so in the wild, but such fruit, in partial shade and not easily accessible, can never be high quality.)
    Much of permaculture seems to me to be not only unrealistic, but also no fun. I enjoy caring for my plants, reaping the gustatory and other rewards for a job well done. I like the challenge of researching some pest or nutritional problem and finding a solution. I like watching how plants respond to my ministrations, whether I’m wielding pruning shears, a pitchfork piled high with compost, or my winged weeder hoe.
    Agriculture is about balancing Nature’s designs and human will. Too much of the latter is a losing battle. Too much of the former leaves nothing worth harvesting.

Big Bantam, an Oymoron

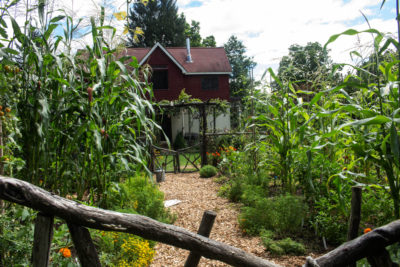
    My planting of sweet corn is very un-permaculture. It’s high-culture: 6 seeds per hill dropped into compost-enriched ground maintained weed-free, timely watering with drip irrigation, hills thinned to 3 stalks per hill, even stakes to keep the stalks standing soldier straight. I mentioned, last week, how my Golden Bantam variety of sweet corn isn’t bantam at all. The stalks soar over 10 feet high.
    Was it because of my green thumb? No. I now know that it is genetics.
    This year I made four plantings of Golden Bantam. The two later plantings are, in fact, bantam-size. Looking over my seed orders, I see that I had planted Golden Bantam Corn, Original 8-row Golden Bantam Corn, and Improved Golden Bantam Corn.
    Golden Bantam is an open-pollinated variety. As with any open-pollinated variety, various strains might arise, strains which might differ in some ways from the original. With any good variety, the hope is that progeny are monitored to eliminate any off-type varieties — or to look for something that might be better than the original.

Golden Bantams compared

Golden Bantams compared

    So the name Golden Bantam could be attached to the original Golden Bantam, from 1902, or any strain, which could also have “Improved,” “Original,” etc. attached its name. (Golden Bantam was also developed into a hybrid, Golden Cross Bantam, which, like other hybrids, would be genetically more consistent and ripen in a shorter window of time.)
    On the theory that bigger is better, “Improved” was tacked onto name of the strain of my early plantings. The original Golden Bantam was 8-row; Improved Golden Bantam is 10 to 14 row. I should have read the catalog more closely because Improved Golden Bantam casts too much shade, ripens too late for my intensively planted vegetables, and yields less, with but a single ear per stalk. The original also has better flavor, to me.

Permaculture, but not by Me

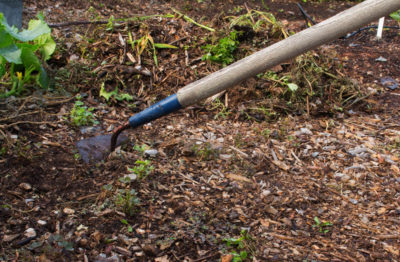
    Walking down the main path of my vegetable garden yesterday, you’d come upon a very permaculturalesque planting — in the path. The path was overrun with purslane, which I didn’t even have to plant. Purslane is a tasty, very nutritious vegetable enjoyed raw or cooked. But not by me.Hoeing purslane in path
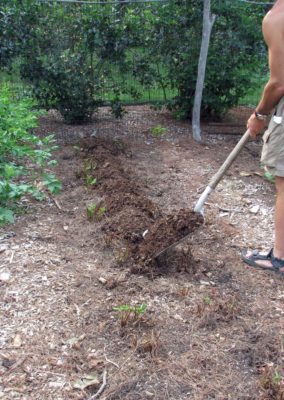
    I grabbed my winged weeder and hoed the purslane loose from the soil. As a succulent, purslane can continue to grow — and seed! — even with its roots flailing in the air. So after hoeing, I scooped the plants up to feed to the compost file.

ROT AND FLOWERS

 Brown Rot Strikes Again

   The plan was for me to be now sinking my teeth into the soft, juicy, rich flesh of my Oullins golden gage plums. The tenuous start this past spring, with a freak late freeze that sent temperatures plummeting into the low teens, had me worried. The trees shook off the cold and, when warmer weather returned, burst into snowballs of white blossoms. Tiny fruitlets that followed those blossoms have swelled to the bountiful crop now dangling from the branches.
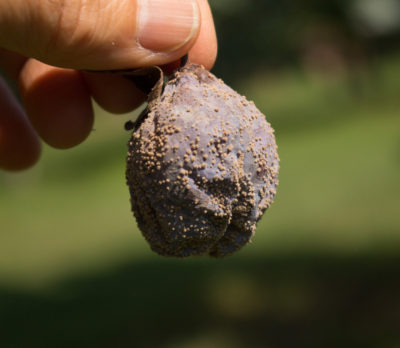
    The plan has been foiled — by brown rot disease. Almost every plum, just as its skin starts to shade towards ripeness, becomes spotted with fuzzy, gray droplets that, with good weather (good for the fungus, that is), soon covers the fruit.Brown rotted plum fruit
    Brown rot was not unexpected, and a counterattack was planned. All through spring, before blossoms even unfolded, I doused the plant with insecticide and fungicide sprays. Insecticides help control brown rot by preventing insects, most notably plum curculios, from laying eggs in the developing fruitlets. Even if the egg-laying itself doesn’t cause the fruit to drop, holes left behind provide easy entrance for the brown rot fungus.
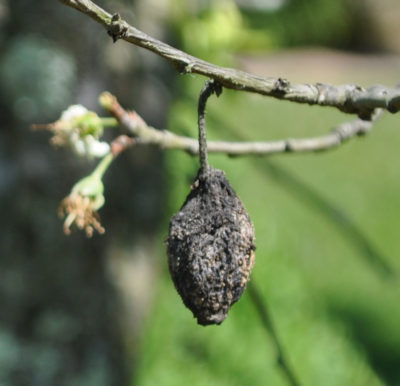
    Perhaps I was too lenient, using relatively benign (to us humans, that is), organically approved sprays. ‘Surround’, a commercial formulation of kaolin clay for the insects. And sulfur, a naturally occurring mineral, for the brown rot fungus.Brown rot mummy
    That’s not all. Gathering up infected fruits cuts back the number of new disease spores that waft among the branches looking for new fruits to infect. In fall and winter, those infected fruits are easily recognized as blackened, dry “mummies.” They lose their dryness and come to life, fungal life, with spring’s warmth and moisture. I’ll gather them up also. I’m hoping my ducks develop a taste for the fresh, dropped, rotten fruit; so far, they seem to be picky eaters.
    My late winter pruning of the trees should also have helped reduce brown rot disease. Removing enough stems and limbs to allow those that remain to bathe in light and breezes allows for quicker drying from dew or rain.

The Disease Triangle

    Three conditions must be satisfied for any disease, whether in animals or plants, to take hold: inoculum must be present, the host must be susceptible, and the conditions must be suitable for disease development. Check, check, check for my Oulin plum (a susceptible host plant) getting brown rot here in the Hudson Valley, throughout most of the humid eastern U.S., in fact. We have plenty of wild and cultivated plums and related plants here to provide brown rot inoculum from infected fruits, and the weather is usually just about perfect (for the disease, that is).
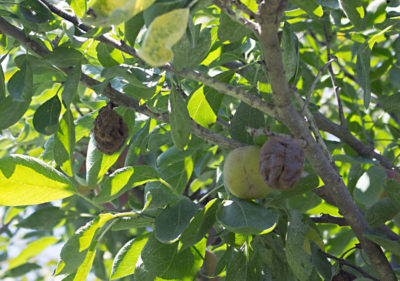
    But Oullin isn’t the only great-tasting plum. How about a less susceptible host variety? Fungi are picky eaters, and varieties of plants vary in their susceptibility to specific diseases.(Unfortunately, most gage-type plums, which are heart-shaped, with greenish flesh, are very susceptible to brown rot.)Infected plums on tree
    My plum trees are grafted to multiple varieties. The variety Shiro also finds a home on the tree grafted to Oullin. This year, and in years past, Shiro seems to be somewhat resistant to this disease. And I see that Cummins Nursery has a variety called Jam Session that also is resistant. This past spring I also planted the varieties Alderman and Superior, which are American hybrids with some alleged resistance.
    As consolation, plums are, at least, less susceptible to this scourge than are peaches and apricots.

Flowers to the Rescue?

    I’m planning and planting for flowers for next season and for years to come, with perennials.
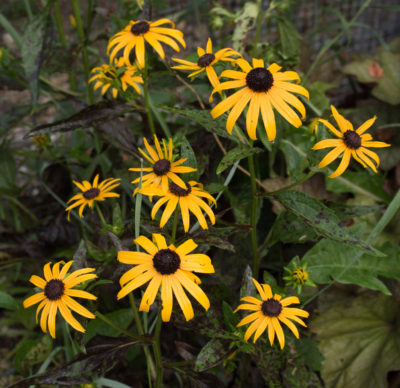
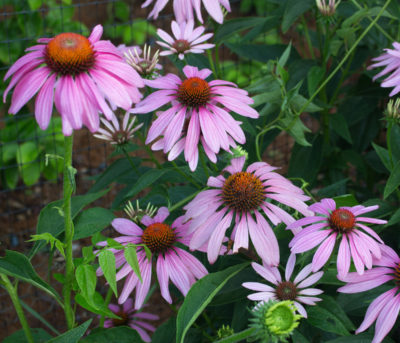
    I could, of course, just purchase some potted plants to plug into the ground now or next spring. I could buy seeds and sow them next spring. Instead of those two options, I’m sowing seeds now, a time when, admittedly, there’s not that frenzied urge to plant seeds as in spring.Black-eyed SusanPurple coneflower
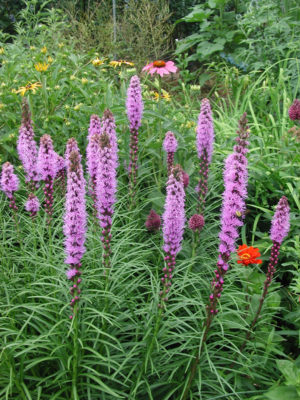
    One packet of seeds can — should — result in oodles of plants, plenty to plant and to give away. Sown now, the seeds should grow into plants that will be large enough to weather autumn, then winter’s, cold. Plants should also be large enough to flower next year. Their experience of cold, known as vernalization, will further coax them on to flower. Spring sown perennial flower seeds often don’t flower their first season, no matter what their size, because they have yet to be vernalized.Liatris
    I’m sowing purple coneflower (Echinacea), black-eyed-susan (Rudbeckia), and blazing star (Liatris). They’re all in the daisy family, a family known not only for its good looks but also for providing nectar to attract and help support beneficial insects. If I plant enough, perhaps the increased number of beneficial insects will significantly decrease the number of plum curculios and other plum fruit insects resulting in, because of less insect scarring of fruit, significantly less brown rot of my plums.
    It’s a stretch but the flowers, anyway, are very pretty.

PESTS, INCLUDING ME(?)

Watch Out, for Black Walnuts

Citizen scientists (that could be you and me), look up! At black walnut’s leaves. At the recent meeting of the New York Nut Growers Association (www.nynga.org), Karen Snover-Clift of Cornell University went over the ins and outs of “thousand cankers disease of walnut.”
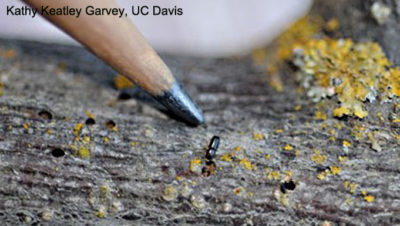
    Like Dutch elm disease — it pretty much wiped out American elms, once valued for creating a cathedral effect as their branches arched over tree-line streets — thousand cankers disease is spread by an insect. But the walnut twig beetle is only part of the problem. When it bores into the bark, it spreads a fungus that clogs up a tree’s “tubes.”
    With Dutch elm disease, once a tree is infected, the fungal culprit spreads within the tree to kill it. Not so with thousand cankers disease. With this disease, death comes from fungal infection that follows thousands of dark, dead cankers of insect feeding.
    Who cares about black walnuts? I do. Each fall the trees bear an abundance of nutritious and delicious nuts. (Not delicious to everyone; the strong flavor does not appeal to everyone. But no reason any food should appeal to everyone unless you’re MacDonald’s.) And, quoting from The Tree Book, written in 1914 by Julia Rogers, “The black walnut is majestic as a shade tree — a noble ornament to parks and pleasure grounds. It needs room and distance to show its luxuriant crown and stately trunk to advantage. Then no tree excels it.”

Walnut twig beetle

Walnut twig beetle

    And finally, black walnut yields among the most beautiful of woods for furniture and gun stocks. Again quoting Ms. Rogers, the wood has “silvery grain, rich violet-purple tones in the brown heart wood [and] exquisite shading of its curly veinings.”
    Thousand cankers disease moved into southwestern U.S. from Mexico (would a wall keep them out? will Mexico pay for it?) and has remained mostly in that region. Black walnut is native to eastern U.S., but the tree has occasionally been planted out west. More importantly, the disease has recently reared its ugly head at a few locations in the east. If infected trees can be identified, the disease can be contained to check its spread.

Thousand cankers

Thousand cankers

    Any tree with an infected branch is usually dead by the end of the season!
    So look up, scan the tops of any black walnut trees for limbs that are dead or show flagging foliage. Your job, and my job, is to look for these trees and then report them.
    For a more thorough treatment of thousand cankers disease, as well as reporting guidelines, see www.thousandcankers.com. A good start in confirming the disease would be to take some good digital photos and send them to the state diagnostic laboratory, the county Cooperative Extension office, or department of environmental conservation.

Chipmunks, Still Cute Here

    I find chipmunks cute, as I’m sure everybody would — except for anyone for whom chipmunk is a garden pest. This year, for some reason, an especially good crop of chipmunks are scurrying about. I see them everywhere, except on my farmden. Their absence here could be attributed to my dog friends Sammy and Scooter, and my cat friend Gracie.
    I would not tolerate chipmunks if they were to eat my blueberries, my filbert nuts, my . . . pretty much anything I’ve painstakingly planted and nurtured. Besides dogs and cats, traps also are effective.

No, I’m Not a Strawberry Pest

    As if plants didn’t have enough pest problems. I recently attacked my strawberry bed with my scythe, swinging the sharp blade low enough to cut off every last leaf from the plants. No, I’m not just another plant pest, trying to kill plants; I was “renovating” the bed, preparing it for next spring.
    Shearing off the leaves not only removes leaves, but also disease spores on the leaves that inevitably find their way into any strawberry bed. Obviously, I raked up the old leaves and carted them over to the compost pile.
    The next step in renovation was to pull out any weeds in the bed. The major weed in the bed was  . . . strawberries. Strawberries spread by creeping stems along which grow new plants that take root, making them usually their own worst weed. Each plant needs about a square foot of elbow room to realize its full potential of one quart of berries per plant.
    So I ruthlessly ripped out enough plants so that my 3-foot-wide bed was left with a double row of plants spaced a foot apart. Older plants get decrepit with age, so those were the first to go.Spreading compost in strawberry bed
    Finally, icing on the cake. I laid a 1 inch depth of compost all over the bed and tucked up to each of the remaining, leafless strawberry crowns. A little fertilizer and straw, pine needle, wood shavings, or any other weed-free organic material would be almost as good.
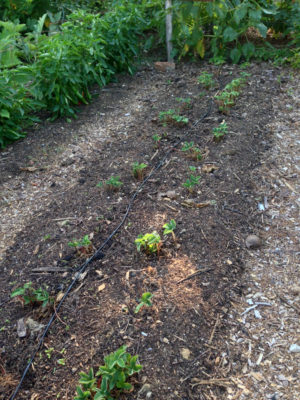
    It’s been a few weeks and already new leaves are sprouting. The plants are on their way to a healthful and healthy crop of sweet, juicy berries next spring.Strawberry plants, a few weeks after renovation

GOOD FRUITS, ONE A VEGETABLE

World’s Best Fruit?

    Finally, I reap the fruits of one of my labors. Literally. The fruit is black mulberry, the species, that is Morus nigra, rather than any of the black-colored mulberries that grow all over the place around here. The latter are species and natural hybrids of white and red mulberries (M. alba and M. rubra).
    Black mulberry, native to the Mediterranean climate of western Asia, is not cold-hardy below temperatures in the ‘teens (Fahrenheit) so definitely not cold-hardy here. I first tasted it at a fruit conference in Davis, California and it wowed me even from among bowls heaped high with fresh-picked apricots, peaches, and other seasonal fruits.
    I had to get a tree to grow, which I did (from www.whitmanfarms.com). The tree went into a pot with potting soil. As it grew, I moved it on into larger and larger pots, stopping at an 18-inch diameter pot. I figured that would be the largest pot I could muscle down the basement steps for cool, winter storage along with my figs and pomegranates.
    The tree bore quickly, and the “east coast” black mulberries were delicious, what few of them I harvested. Problem was that birds also found them delicious, a problem compounded by the fact that the berries are not at their best until matte black and ready to be released from the plant at the slightest touch. The birds don’t wait that long.
    Dead ripe, the fruits are so soft that they can’t help but stain your fingers. (The stain was once used as a dye, called “murry.”)

A Cagey Solution

    My first solution to the bird issue was to plant the mulberry in the ground in my cool (as in temperature cool) greenhouse, which is also home to some in-ground fig trees. Since mulberry seedlings pop up all over the place around here, I just dug up a seedling, grafted onto it a stem from my black mulberry, and planted it in the greenhouse.Fruit cage
    Mulberry trees can grow big, bigger than my greenhouse. My plan was to espalier the branches against the west wall of the greenhouse. The espalier worked as far as training the branches in an ornamental candelabra. The birds were kept at bay. The espalier did not work as far as bearing fruit, the reason for which I have no idea why. I dug up the tree.
    My original mulberry still grows in a pot and, despite its small stature, still bears good crops of fruit. A few weeks ago I saw advertised a walk-in, temporary cage for protecting plants from birds (available from Gardeners Supply Co.).
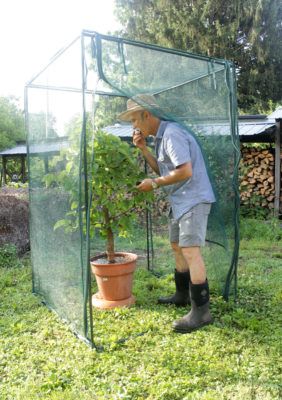
    The cage arrived just as the first black mulberries were ripening. Within 20 minutes I had the various pole pieces joined to each other and to the corner brackets, and the net attached over the top and sides. At 4 feet by 4 feet and 6 feet high, the cage easily accommodates my mulberry. Even another plant or two.
    Every couple of days, now, I unzip the door, enter mulberry paradise, and carefully peruse the plant for dead-ripe berries. I exit with purple-stained fingers. Success.

Eggplant + Oil, A Good Combo

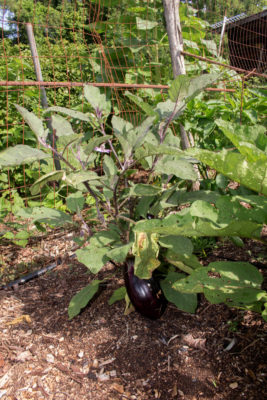
    Another success this year has been eggplant. I’ve gardened for many, many years, and for many, many years wasn’t able to grow eggplants well. Beginning gardeners are the ones who usually have greatest success with eggplant. Not exactly beginning gardeners, but beginning gardens.Eggplant plantEggplant, flea beetle damage
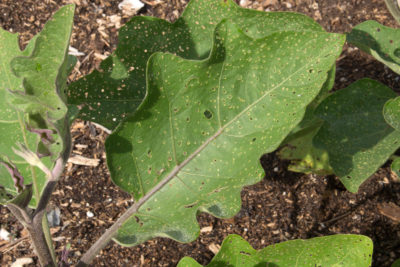
    Flea beetles love to eat eggplant (leaves). They pock the leaves with enough small holes so that only vigorously growing plants survive. But flea beetles rarely show up in a garden in its first year but by the second year they descend in hoards. Hence the successes of beginning gardeners in their beginning gardens.
    This year I tried controlling the beetles by spraying the plants weekly with “horticultural oil,” also called “summer oil,” which is a more refined and lighter version of “dormant oil.” I was mixing it up anyway to keep scale insects at bay on the greenhouse figs (more on that some other time). Long story short: The plants are only slight hole-y and I have a fine crop of eggplants on the way.   

HEAVEN AND(?) SOME HELL

The Blueberry Capital

    A few turns after Exit 38 on New Jersey’s Garden State Parkway and I, a blueberry nut, soon entered what a visit to Bristol, Virginia would be to a country music nut, what Tupelo, Mississippi would be to an Elvis Presley nut, what Springfield, Massachusetts would be to a basketball nut, what . . .  A big, blue sign declares Hammonton, New Jersey the self-proclaimed “Blueberry Capital of the World.” Literally millions of pounds of blueberries are picked and then shipped from this region of New Jersey each summer.
    A few more miles and a few more twist and turns through the New Jersey Pine Barrens brings you to Whitesbog, New Jersey, “the birthplace of the domesticated, highbush blueberry.”
    Let’s parse that last accolade.
    “Domesticated:” Blueberries are a native American fruit that up until the early part of the last century were harvested only from the wild. No one cultivated them! Then Elizabeth White, a cranberry grower in Whitesbog, teamed up with Dr. F. V. Coville of the USDA to study and improve the blueberry. Ms. White instructed her pickers to search out the best wild blueberry bushes, which were moved to her farm. Dr. Coville investigated the rather specific soils (such as those of the Pine Barrens) enjoyed by blueberries (such as those of the Pine Barrens), and further evaluated and bred Ms. White’s selections. And the rest is, as they say, history.
    “Highbush:” A number of blueberry species exist but the large berries for fresh eating that you see on market shelves are highbush blueberries, botanically Vaccinium corymbosum. Canned blueberries are usually another species, lowbush, botanically V. angustifolium. Dr. Coville and subsequent breeders have mated these two species as well as a number of other species with the goal of producing the elusive perfect blueberry. (Elusive to blueberry breeders, not to me; I like just about all of them.)

New Blues

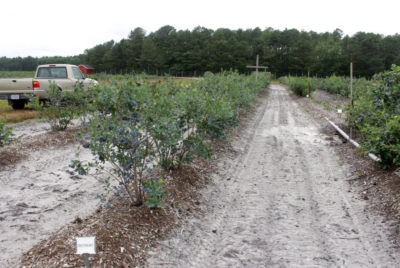
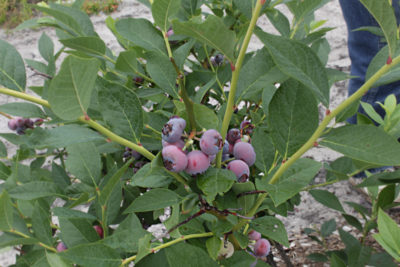
    After passing field after field of cultivated blueberries alternating with dense woodland, I turned into the parking area of the Marucci Center for Blueberry and Cranberry Research & Extension to meet with USDA research geneticist Dr. Mark Ehlenfeldt.Blueberry field at USDA
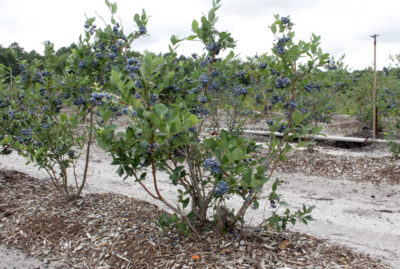
    We looked at the fields of sandy soils formed into caterpillar-like, mulched mounds atop which were planted the bushes. We talked about the various species — V. constablaei, V. darrowii, V. ashei,  in addition to the previously mentioned highbush and lowbush — that parented the various bushes.
    Best of all, we plucked fruit to taste from many different varieties, some of which I grow and others of which are new to me. A few new ones that really stood out for me were:
•Sweetheart, for its medium-size that ripen early with excellent flavor

Sweetheart blueberry

Sweetheart blueberry

•Cara’s Choice, also with excellent flavor, in addition to pinkish flowers; ripening mid-season
•Razz, a soft berry with a hint of raspberry flavor, and
•ARS 00-26, a small blueberry with a sweet, wild blueberry flavor.
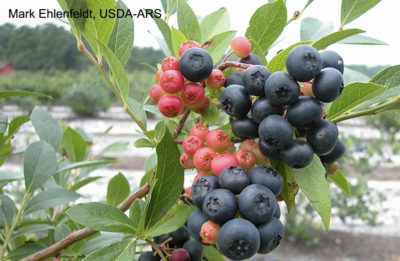
    Another blueberry variety that was very interesting, and perhaps tasty, was Nocturne, whose fruits, as they ripen, go from pink to bright red to blue black, making them very ornamental.

Pink Champagne

Pink Champagne

Nocturne blueberry

Nocturne blueberry

Nocturne fruits are supposed to have a unique flavor, sweet and somewhere between that of highbush and rabbiteye (V. ashei); they weren’t yet ripe so I wasn’t able to taste them. I did get a plant last year that is now ripening fruits so I can soon vouch, or not, for their flavor.
    Two hours and many blueberries eaten later, I was on my way home.
    Note: Not all the varieties mentioned are currently commercially available.

Beatlemania — I Hope Not

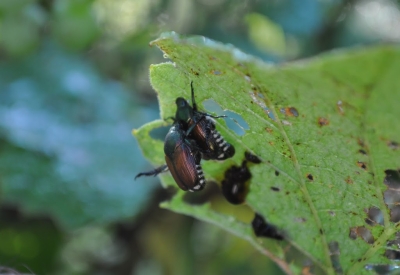
    On a negative note, I saw here today (June 29th) the first Japanese beetles of the season, three on some grape leaves and four on some black raspberry fruits. I could just throw up my hands and brace myself for the few weeks of attack. Spraying pesticides is not an option; the beetles feed on hundreds of species. I’d have to spray just about everything here, including fruits ready to harvest, which is a no-no.Japanese beetles
    I’m hoping the beetles take the same tack they have for the past two years, a few showing up, and then, shortly thereafter, doing about faces and leaving for the season. I have no idea why.
    Worst case scenario is that they descend in hordes, in which case I’ll remind myself that plants can tolerate a certain amount of damage, with remaining leaf area working harder to compensate for leaf area chewed away. Also, the beetles make their exit in August.
    I pulled the seven beetles I saw off their respective plants, threw them on the ground, and stomped on them. Not out of anger or meanness, though. Beetle feeding attracts more beetles. I didn’t want any invitations for their friends and relatives.

GOOD SUMMER BLUES

Plan Realized

   Almost two years after my plan was conceived . . . success. Looking across rows of tomatoes, corn, onions, and kale in my vegetable garden, I see tall, blue spires of delphiniums that have finally come of age.
    The spires required some effort. Coarse roots of the seedlings called for an extra dose of care. Potting soil could easily fall from the roots, exposing them to drying air, as the seedlings were successfully moved to larger quarters.
Delphinium at back of garden
    And then, once seedlings were planted out just beyond the western fence of the vegetable garden, my chickens threatened them. The poultry enjoy scratching for insects near the bases of plants. Doing so weakens larger plants, even woody shrubs; doing so can kill tender young seedlings. Chicken wire laid on top of the ground let the delphinium plants grow up through the 1 inch openings while preventing chickens’ scratching.

Planning for Future Blues

    The delphinium show will end any day now, especially with this hot weather. It’s hard to let go of the show — and I don’t necessarily have to. Sometimes a second, later show can be coaxed from the plants. If the stalks with spent blossoms are cut back to the bottom whorl of leaves, new flower stalks will spring forth that should bloom again later this season.
Rustic gate & delphinium
     Good growing conditions help bring on this second show. That means rich soil and water, as needed. These I have provided for my delphiniums in the form of compost topped with a leafy mulch, and drip irrigation. “Good growing conditions” also means cool growing temperatures, which I cannot provide.
    Even under the best of conditions, delphiniums, although perennials, are short-lived perennials. Before next spring I’ ll get some fresh seed — freshness of seed is important for good germination — and start a bevy of new plants. For the freshest seed possible, I’ll collect them from my own plants by gathering whole stalks when they are partly dry and then shaking out seeds. Planted immediately and kept slightly cool, they should sprout in a few weeks and flower next June. Sometimes they even self-sow.

Doing What Good Gardeners Do

    Self-sown delphinium seedings are most welcome; not so for many other self-sowers, that is, weeds. Now is the time when many summer weeds pick up steam. Now is also the time when good gardeners and mediocre gardeners take different paths.
    I want to be a good gardener so I’m planning, immediately after I dot the last word of this report, to go out and weed. My garden is generally not very weedy, mostly because I never — yes, never — till or otherwise turn over the soil. And because I snuff out small weeds with an annual mulch of compost in planting beds and wood chips in paths. (Mulching and never tilling also bring many other benefits, such as encouraging more vibrant soil life, better use of water, and, well, not having to till.)

Purslane

Purslane

    Still, weeds have made inroads. I can’t help but remind myself that every weed that goes to seed could self-sow to spawn myriad more of the same — for example over 50,000 seeds per pigweed plant, or almost 20,000 seeds per dandelion plant! Perennial weeds, unchecked, build up energy reserves in their roots and spread by traveling roots, as well as by self-sowing. Checking growth of these weeds now makes for a bountiful fall garden and much fewer weeds next year.
    Mostly, I just bend over and pull out weeds, coaxing them out, if need be, with my hori-hori knife. Where weeds are too numerous to make one-on-one treatment too tedious, I slide my winged weeder or wire hoe along the ground to dislodge them all at once. I gather up most pulled and hoed weeds and cart them over the the compost. Sweet revenge: light-, nutrient-, and water-stealing weeds recycled into garden goodness.
    Amongst the weedy interlopers are some worth separating out, for eating. Among my favorites are pigweed, which makes an excellent cooked green. And purslane, very healthful and tasty if doctored up correctly, good suggestions for which can be found in Foraging & Feasting: A Field Guide and Wild Food Cookbook by Dina Falconi and Wendy Hollender.

WEEDS (SOME GOOD)

Anti-Weed Tools

    Recently sown vegetable seeds that have sprouted are growing slowly; weeds and lawn are growing fast. Give weeds an inch, and they’ll take a mile. Ignore growing lawngrass, and soon you’ll need a tractor or a scythe to cut it down to size.Wire weeder and winged weeder
    But few people ignore their lawns. Dealing with the growing grass is straightforward: You get out the lawnmower and go back and forth or round and round until every grass blade has been sheared.
    Weeding demands more thought, technique, and intimacy with vegetation. Different weeds and different settings call for different approaches. In a vegetable garden, a hoe might be the tool of choice. My choices for hoes are the winged weeder, with a sharp blade that runs parallel to the ground surface and just slightly below ground in use, and the wire weeder, whose wire performs similarly.
    Mostly, though, I don’t need or use a hoe in my “weedless” (actually, “weed-less”) vegetable garden. Weeds are few enough and the soil is soft enough so that all that’s necessary is to bend over and pull out a weed, tops and all. Tap-rooted weeds, such as dandelion, need coaxing out with the aid of a trowel or hori-hori knife. That coaxing also helps lift a quackgrass plant gently enough to allow following its subterranean runner as far as possible until it breaks.Quackgrass with runner
    Along garden edges, my half-moon edger is very good at scouring out a dry moat that stops weed. Problem is that my garden has a lot of edges. And furthering the problem, any edges neglected for more than a couple of weeks during a spell of good growing conditions puts that edge back to square one.

Fire and Acid

    Just outside the glass sliding doors of my living room is a brick terrace that makes a nice take-off point to a short expanse of lawn and then, through an arbor, into the main vegetable garden. Or, turning, south, towards the greenhouse and meadow. You’d think that the brick surface of the terrace would be maintenance- and weed-free. Not so.
 Flame weeding   It’s a tribute to the tenacity of weeds how they manage to take root or sprout, and then thrive, in the small openings between adjacent bricks. Even in the small cracks between the bricks and the masonry wall of the house. Some of those “weeds” are actually welcome there — such as the wild columbines that send up thin stalks at the ends of which hover orange and yellow blossoms whose rear-pointing spurs gives the flowers the appearance of flaming rockets.
    Still, most of those weeds have to go. Pulling them out individually would be too tedious, and takes with them what little dirt or rock dust lies between the bricks. So I torch them, instead. A small, hand-held torch would be effective, but slow. I use the appropriately named Dragon Weeder, whose 3-inch diameter nozzle attaches, via a 10-foot long hose, to a 20 gallon propane tank. Fire roars out of this dragon’s mouth like a jet engine, and all that’s needed is a quick pass. No need to set plants on fire; just heat them enough to burst their cells. And this wet day is ideal to reduce the risk of fire spreading.
    Equally effective for an expanse like my terrace is to burn foliage with vinegar. Household vinegar, straight up (5 or 6% acetic acid), does the trick as long as the temperatures are above 70°F. Effectiveness is increased if 2 tablespoons per gallon of canola oil and 1 tablespoon per gallon of liquid soap is added to the vinegar, and if vegetation is not so large as to cause “shadows” where lower vegetation gets bypassed.
    Either fire or vinegar kills only the tops of plants. Roots might have sufficient stored energy to send up new sprouts, so treatments must be repeated until roots have used up all their energy.

Weed Food

    Corn salad is considered a weed in Europe. It’s borderline weedy in my garden, with its tufts of greenery clustering near the foot of some of my vegetable beds and occasionally elsewhere.
    No need to hoe it, hori-hori it, torch it, or vinegar corn salad. I let it be, even coax it along, in some areas, and weed it out in others. Corn salad and I can maintain this congenial relationship because I like to eat it.
    The same can be said for Good King Henry, another European import that could take over my garden if given free rein. It’s a relatively unknown relative of more familiar edibles like lamb’s-quarters (Cheno­pod­­­ium album), epazote (C. ambrosioides), and quinoa (C. quinoa), and, to me, the best-tasting of the lot. Even if you didn’t like the flavor of Good King Henry, you couldn’t help loving its botanical name, C. bonus-henricus. Eat it and weed.

OLD ENEMIES RETURN

Damn Damping Off

    My first garden foe, which I haven’t seen for years, recently sneaked into the greenhouse. Damping-off sounds pretty bad but not as bad as its scientific names, probably Rhizoctonia or Pythium, which, along with a few other fungi, can cause damping off.
    My introduction to damping-off disease came before my first plants even made it out to my first adult garden. At the time, I was living in a relatively dark apartment, a converted motel room, and was eager to start seedlings. I sowed all sorts of seeds in peat pots, stood them in a little water, then crowded them together on all the shelf space that could be mustered.Damping off of cabbage
    Young sprouts never appeared in some of the pots. In others, seedling emerged, then toppled over, their “ankles” reduced to a withered string of rotted cells, unable to support the small plants physically or physiologically.
    Conditions created were perfect for any one of the damping-off culprits: overly wet soil, cool temperatures, low light, weak growth, stagnant air. How was I, a beginning gardener, to know? I soon learned to avoid the disease by, in addition to providing good light, providing sufficient fertility to promote strong growth that resists disease, paying careful attention to watering, and using a fan to keep air moving.
    My seeds now go into a potting mix containing sufficient perlite to help drain away excess water. Sterile potting mixes, such a those sold bagged, are presumably free of damping-off culprits. But sterile mixes also lack beneficial soil microorganisms so afford free rein to any culprits that make their way into a mix. My home made potting mix isn’t sterilized.
    A couple of other tricks also limit damping-off disease. Spreading a thin layer of dry material, such as perlite, vermiculite, sand, or kitty litter (calcined montmorillonite clay) on the surface of the potting mix keeps the stem area dry. And there is some evidence that chamomile tea (cooled) controls damping-disease if sprayed on plants and soil surface.
    I’m considering this most recent damping-off incident to be a fluke, so far affecting just a single cabbage plant in a whole flat of cabbages.

Second Garden, Second Foe

     That first garden, my first garden, was short-lived. Not because of any horticultural trauma, but because it was begun on August 1st and, before the following year’s gardening season got underway, I had moved. My new site, home to my second adult garden, was also home to my second garden foe, which has been lurking in the wings of every garden ever since then.
 

Quackgrass with runner

Quackgrass with runner

   That foe is and was quackgrass, also known as witchgrass, couchgrass, and, botanically, Elytrigia repens. It is small consolation that quackgrass isn’t only my problem; this native of Europe,  north Africa, and parts of Asia and the Arctic, is now a worldwide weed.
    Soon after turning over the soil to begin that second garden, quackgrass invaded. With vengeance. Long story short: I had read of the benefits of mulches in smothering weeds; in Wisconsin, where I lived, lakes were becoming clogged with water weeds, which municipalities harvested; I convinced a water weed crew to dump a truckload of water weeds on my front lawn; my quackgrass expired beneath a slurpy mulch of quackgrass laid atop the ground pitchfork by pitchfork.

Foe #2, Defeated (Sort Of)

    Quackgrass has always stalked the edges of my gardens, waiting for a chance to slink in. It spreads mostly by underground rhizomes, which are modified stems that creep just beneath the surface of the ground. Growing tips of quackgrass rhizomes are pointed and sharp enough to penetrate a potato. Given time, quackgrass develops an underground lacework of rhizomes.
    My current garden never had a quackgrass problem, mostly because I never tilled it or turned over the soil. Tilling or hand-digging it, as I did in my second garden, compounds quackgrass problems because each piece of rhizome can grow into a whole new plant.
    My current hotspot of quackgrass found a fortuitous opening, creeping in among a planting of coral bells beneath a very thorny rose bush along the edge of my vegetable garden. Quackgrass rhizomes must be removed or the quackgrass smothered, either difficult to do among the coral bells and the rose.
 Concrete garden edge   My plan is to sacrifice the coral bells and pull out every rhizome I can find. In soft soil this time of year, long pieces can be lifted with minimum breakage or soil disturbance. A mulch with a few layers of newspaper, topped with a wood chip mulch (part of weed management, as described in my book Weedless Gardening) will suffocate any overlooked rhizome pieces trying to sprout. In the absence of other plants among which the rhizomes could sprout, mulching alone can do in quackgrass, as it did in my second garden.
    Longer term, barriers around garden edges could prevent quackgrass rhizome entry. Barriers need to be deep or wide. A concrete strip, 6 inches wide and decoratively inlaid with handmade tiles, has been effective elsewhere along my garden edge.
    For now, I have to stop writing and get to work on the quackgrass. I have too, after all, because a wrote a book called Weedless Gardening!

OF MITES & MOISTURE

It Mite be a Pest

    Mites! Eek! A new pest in town (for me). Actually, the mites, which showed up on some newly rooted Meyer lemon cuttings, don’t really scare me, nothing like the scale insects that regularly turn up on some of my citrus. Chigger mites, scabies mites, dust mites, itch mites — they’re not pests of plants, and they WOULD scare me.
    The cuttings were well rooted and just sitting still, basking in a south-facing window, waiting for longer days and warmer temperatures before they can come alive. (They pick up an attenuated version of seasonal temperature changes at that window.) A few weeks ago I noticed a yellow stippling developing on the green leaves.Mite damage symptoms
    No panic; the plan was to wait a few weeks and see if the stippling disappears or if new growth, unstippled, develops. Citrus sometimes develop iron deficiency, which also yellows leaves, in cold soils, not because the soil lacks sufficient iron but because the roots aren’t at the top of their game in cold soil.
    A closer look a few days ago revealed, to the naked eye, very small black specks on the leaves. An even closer look, with a hand-held lens, revealed tiny mites crawling around on the leaves.
    Mites are mostly problems in dry, dusty conditions, not atypical for a house heated in winter and the usual for summer in Mediterranean climates such as California. One simple cure is to make conditions less dry and dusty. Climate change within the whole house would be impractical. Instead, I started giving the plants a daily spritzing with water.
 

Mites, photo with iPhone + hand lens!

Mites, photo with iPhone + hand lens!

   More potent sprays may be needed; fortunately they need not be toxic to humans. “Horticultural oil” sprays are effective as are sprays of insecticidal soap. Problem is that these sprays are inconvenient to use indoors, where excess spray would end up on windows, furniture, and floors. Sprays need to be repeated weekly to kill mites that hatched from eggs (which are spray resistant) since the last spray.
    Because the Meyer lemon cuttings are still small with very few leaves, I chose to go at them mano a mano, merely rubbing my fingers across each leaf to crush the buggers (technically arachnoids, like spiders, not bugs). As with the oil or soap sprays, mano a mano combat must be repeated to crush newly hatched mites. But it’s quick and satisfying.
    Mites do have many natural predators, among them other kinds of mites. Just like Jonathon Swift’s flea that “Hath smaller fleas that on him prey; And these have smaller still to bite ‘em; And so proceed ad infinitum.”

Low-Tech Auto Water

    Every couple of days I have to think of all the plants in the house (they’re not all “houseplants”) that need water, including the mite-infested Meyer lemon cuttings. Two devices or setups keep me sane and my plants healthy in the face of all this watering.

Hydrospike

Hydrospike

    Larger, potted plants — those in pots over about 4 inches in diameter — are serviced by “water siphons” (aka “hydrospikes”, “self-watering probes”). A porous ceramic probe, previously soaked in water, filled with water, then capped, is pushed into the potting soil. The far end of the long, thin, flexible tube that comes out of the cap is plunked into a reservoir of water. I use mason jars as reservoirs and pre-fill the tube with water so that the water column is continuous from the ceramic probe to the reservoir.
    Voila! As the potting soil dries out, it sucks water from the ceramic probe which sucks water along the tube from the reservoir. Larger pots need more than one ceramic probe.
   Capillary mat For smaller pots, I use capillary mats, which are nothing more than water-absorbing mats (available from www.gardeners.com) on which sit the pots. The mat is laid on a stand that sits above a similarly shaped, one-inch-deep tray, with one end of the mat dipping down into the tray. The mat absorbs water from the reservoir and the potting soil in the pots, as they dry, absorb water from the mat.
    It’s important to maintain good capillary contact between the potting soil and the mat. This means no coarse drainage material in the bottom of the pots (a silly, counterproductive idea anyway), and no “feet” elevating the bottom of the pot.
    Not having to frequently water makes it all too easy to forget about watering. I already lost one old rosemary plant this winter. Hydrospikes and capillary mats don’t work — duh! — unless their reservoirs have water in them.

CLEAN UP, THEN SHAVE

 Out with the Old (Plants)

   Ostensibly, I’m clearing away old plant debris from the vegetable and flower gardens to spare next year’s garden a full onslaught of overwintering disease and insect pests, and so that, come spring, the soil is ready and waiting for seeds and transplants. I’ll admit it, though: I like the garden looking neat going into late autumn. As Charles Dudley Warner wrote in his book My Summer in the Garden (1889), “the closing scenes need not be funereal.”
    As of this writing, frost has not yet struck; as of your reading, it probably will have. Following that event, I will remove all dead plants. I’ll grasp the tops of smaller plants, such as marigolds and basil, give them a twist to sever the smaller roots, then lift and toss the plant into a waiting garden cart. If I tried to do that with old pepper, tomato, or okra plants, they would laugh at me. I lop off the bulk of their tops, then cut around the plant with a Hori-hori knife so that I can lift the remaining stem and main roots out of the ground.Beans cleared away; only poles still standing, for now
    In either case, my goal is to remove everything but the smaller roots. Left in place, they’ll rot to add organic matter to the soil, leaving behind channels to let air, water, and creatures move through the ground.
    Even now, before frost, cleanup is well under way. Tomatoes are spent; I cleaned them up yesterday. Beans are spent; I’ll clear them away today. Leaving bean roots in the soil is like sprinkling organic fertilizer from the free nitrogen they gathered from the air.
    Along with garden plants, weeds also get cleared away, again removing only top portions and the main roots. Small roots don’t have the energy to re-sprout.

In With the New (Compost)

    More than just looking neat, the cleaned up garden is — to my eye — ornamental. Think of the calm beauty of Zen gardens, some of them little more than boulders and raked gravel. Mine is wood chips (in paths) and raked soil.
 

Beds in fall: veggies, oat cover crops, compost

Beds in fall: veggies, oat cover crops, compost

   Well, not really raked soil. Bare soil looks ugly to me because I know it’s too exposed to rain and wind. So as soon as I’ve cleared a bed, I immediately put a blanket on it. Before the end of September, that blanket was oat seed topped with an inch of compost. Those beds are now lush strips of green. Post-September beds get blanketed with just an inch of compost. It’s roughness helps protect the surface, and next spring I can sow seeds or plug transplants right into it. That much compost is all the nourishment plants will need for the whole growing season next year.
    And then there are the beds still green with carrots, turnips, endive, lettuce, kale, and other cold-hardy plants. I’ll dig the root crops, for storage, at my leisure. The others, we will eat, also at our leisure.

Nothing Wasted

    All that stuff that I am clearing out of the garden is going right into the compost pile. Yes, everything! I’m occasionally asked if I put leaves and stems that are infected or infested with blight, aphids, or other pests into my compost pile. Yes! Everything goes into the pile.
    I contend that if you looked closely enough (perhaps needing a microscope) at almost any leaf, stem, fruit, or root, you’d probably find some evidence of a “bad guy” on it. No matter. The combination of time and temperature within any compost pile does them in.compost piles
    This time of year, piles build rapidly. By paying attention to water and air within the pile as well as the balance of high nitrogen materials (manures and lush greenery such as vegetable plants and young weeds) and high carbon materials (old, browning plants, wood chips, autumn leaves), I’m able to get my compost piles up to 160° F.
    Soon, cooler temperatures combined with less stuff to feed the pile makes for cooler composting. I let these piles “cook” longer, the longer time making up for lower temperatures.

Lookin’ Good and Ready for Spring

    Getting everything ready for winter is a leisurely process, inching along over the next few weeks. By then, tender vegetable plants and weeds will have been tucked into compost piles and beds will be blanketed in either compost, compost and growing oats, or late fall vegetables. Mr. Warner, mentioned in my opening paragraph, went on to say, “A garden should be got ready for winter as well as for summer . . . I like a man who shaves (next to one who doesn’t shave) to satisfy his own conscience, and not for display, and who dresses as neatly at home as he does anywhere. Such a man will be likely to put is garden in complete order before the snow comes, so that its last days shall not present a scene of melancholy ruin and decay.”
    I’m going to shave now.