VEGETABLE GARDEN FRUITS
/1 Comment/in Fruit, Gardening, Planning, Vegetables/by Lee ReichEnd of Summer But I Still Need some Watermelon
Given sun, heat, and reasonably moist, fertile soil, watermelons are easy to grow. The greater challenge is in harvesting them at their peak of perfection. Even professionals sometimes fall short, as witnessed by not-quite-ripe watermelons I “harvested” awhile ago from a supermarket shelf and, a couple of weeks later, from a table at a local farmers’ market.
That was while I was waiting for my own watermelons to ripen — the delectable variety Blacktail Mountain. But should I have been waiting?
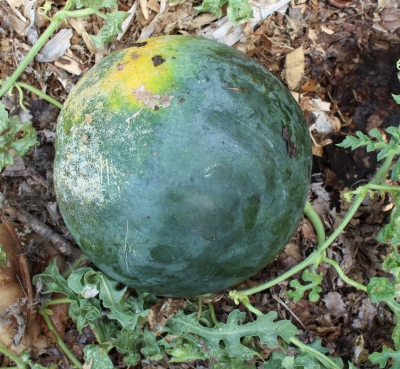
All sorts of indicators are touted for telling when a watermelon is ripe. The part of the melon laying on the ground supposedly turns yellow. The tendril opposite where the melon in question is attached dries up. Or my favorite method: thumping. Knock you knuckles on your forehead, your chest, and your stomach. The sound of a ripe watermelon should match the sound of the chest thump. The forehead sound indicates that the melon is underripe; the stomach thump, overripe.
Sure, one could pull out the bells and whistles. As I wrote, even professionals have problems determining watermelon ripeness. To aid in commercial harvesting, nuclear magnetic resonance, one possibility, was considered — at $60,000 to $1,000,000 — out of budget. Acoustic resonance testing ($950) was a more viable alternative, but still not for me, with my five plants.
After my two disappointing purchases, my mouth was watering for my own melons. I ignored the question mark hovering in air above the largest of the lot and, despite its lack of a dried tendril, a yellow bottom, or a telltale thump, cut it from the plant. Long story short: It was delicious, perhaps just a tad overripe.
What about the other waiting melons? I’m just going to harvest them, as needed, and hope for the best.
Update: I may have one more addition to the imperfect list of watermelon ripeness indicators. It seems that ripe melons might develop a whitish, waxy “bloom” on their skins.
Update on the update: Scrap that way bloom indicator. Or, it might be part of the picture. Now I look for a number of indicators, and if some indicate ripeness — I thump the melon before picking.
Next Year: More Watermelon Plants
Part of the watermelon problem is that I don’t grow enough watermelons. I once lived and gardened in southern Delaware, a few miles from one of the epicenters of watermelon production. With ideal climate and soil (sandy), I grew an abundance of large watermelons. Whether or not a single melon was picked underripe was not so critical. Once ripening began, any unripe ones could be relegated to the compost pile; a better one was always in the offing.
My Favorite Vegetable (Fruit?)?
Like watermelons, sweet corn is also easy to grow. It can get by with less heat than watermelon, but demands a more fertile soil. Harvesting sweet corn at its peak of perfection also can be a challenge, though not nearly the challenge of watermelon. Picked too soon, corn is tasteless and toothless; picked too late, and it’s too starchy and toothy, a delight for animals, excepting humans.
The first hint as to when I get to pick corn is when tassels atop the stalks begin to shed pollen grains — millions per tassel!
About three weeks later, I start peering into the corn bed to look at the silks spewing out the ends of each ear. Silks are more or less dry on a ripe ear. At that point, I can usually tell ripeness by just wrapping my hand around the ear to feel its fullness, although less than perfect pollination can drain the bulk of a ripe ear so it feels underripe. (It’s hard to imagine less than perfect pollination when you consider that each tassel sheds literally millions of pollen grains; then again, each grain remains viable for only a few minutes; then again, again, it can travel hundreds of feet in that few minutes; then again, again, again, each kernel only develops if a pollen grain lands on a germinates on the single silk to which it is attached.)
Any doubt about ripeness, and it can be confirmed before committing to harvest by peeling back the husk just enough to see some kernels. Their color and plumpness might be a giveaway. If not, a thumbnail pressed into a kernel should yield a milky fluid.
Sweet corn, in contrast to watermelon, is easy to produce in quantity, even in a relatively small garden. So tasting an ear is no great sacrifice; there’s plenty more.
Hybrid varieties of corn tend to ripen uniformly, so once one ear in a bed is ripe, the whole bed is likely also ready for harvest. A bed of a non-hybrid variety requires more frequent assessment and harvesting, which is better for home use where you might want a few ears each day or so, rather than a once-over harvest. With successive planting and selective harvesting, we’ve been enjoying sweet corn almost daily since the end of July.
ON TRIAL
/14 Comments/in Fruit, Gardening, Planning, Vegetables/by Lee ReichAnd the Best Cherry Tomato Is . . .
Take your picks from the descriptor grab bag: Honey, Gold, Drop, Sun, Bunch, etc. Now put a couple of them together and you might end up with a luscious-sounding name for a tomato variety. People have done this, and reeled me right in. This year I got fished into planting a few, new (for me) varieties of cherry tomato.
Sungold is the gold standard of cherry tomatoes, the one I always grow. Its rich aroma underlies a sweetness livened with just the right amount of tang. One problem with Sungold is that it’s an F-1 hybrid, which means that you can’t save the seed and expect the resulting seedlings’ fruits to have the flavor of Sungold. The flavor might be better, but it’s more likely to be not as good. The other problem with Sungold is that the seeds, which must be purchased, are expensive.
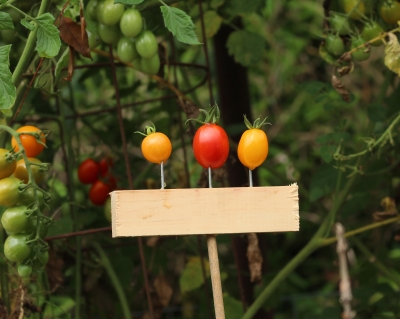
The first of this year’s lineup was the variety Solid Gold, a yellow, teardrop shaped tomato. Like Sungold, it’s an F-1 hybrid. Perhaps it would offer better or different, but also excellent, eating. It has been billed as having “outstanding flavor of true grape tomatoes” (by those selling the seeds). Grape tomatoes are tiny tomatoes, a different species from other tomatoes, with very good, very sweet flavor.
Honeybunch, the second in the lineup, is another F-1 hybrid, this one red and teardrop shaped. “As if a pearl tomato(?) had been drizzled with honey,” so they say.
The flavor of another variety, Honey Drop, was likened to that of honeydew melon. This one’s a Sungold look-alike and is open-pollinated, so seedlings should generally yield the same fruits as the parent.
All three of these new varieties have borne early, and their stems have been heavy all season long with beautiful golden or red fruits. One reason their stems are so laden with fruits is because we don’t pick them. Not when we also have Sungold tomatoes to munch on. Solid Gold, Honey Bunch, Honey Drop, and the unnamed variety are all very good tomatoes, but why eat a very good tomato when you can eat the best tomato?
Filbert Plague, How Bad?
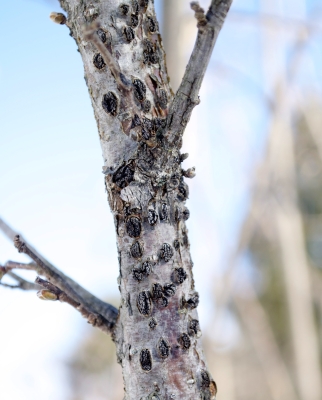
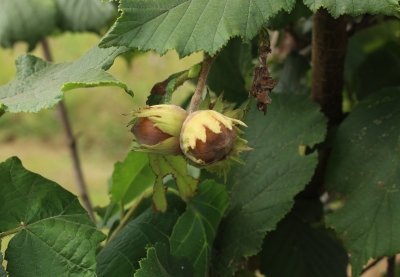
Moving out into the field, literally, to my filbert (hazel) nut bushes . . . East of the Rocky Mountains, most people who plant filberts, and especially permaculturalists, plant American filberts (Corylus americana). This species is resistant to eastern filbert blight, a fungal disease endemic in these parts. I once grew American filberts, and they are beautiful in fall when their leaves turn blazing shades of red. Unfortunately, their nuts are small, with bad flavor — a good wildlife food, a poor human food.
European filberts (C. avellana), and various hybrids, are what yield the large and tasty nuts of commerce. Orchards of these filberts are mostly in the Pacific Northwest. About 50 years ago, Eastern filbert blight made inroads to those orchards, which prompted breeding programs for blight-resistant varieties.
I’ve planted a number of blight resistant filbert varieties, including some older varieties bred decades ago in the East. As it turns out, though, the the blight fungus exists in more than one regional strain; like some other fungi, the blight fungus might also morph over time.
Join me as I walk my row of filberts and note the performance of the various varieties. Four of the plants are only in their second year and are from the New Jersey breeding program of Tom Molnar, at Rutgers. The hope is that they’ll be more blight resistant than the western-bred varieties.
The worst of the older plants include the varieties Clark, Eta, and Hall’s Giant. Clark and Eta are western-bred, while Hall’s Giant is an older, easter-bred variety that is bearing a moderate number of good-sized nuts in spite of the blight.
Santiam, from the west, is afflicted with a moderate amount of blight. The nuts it bears are small but still much larger and tastier than native American filberts.
Least blight-infected are the western varieties Lewis and Yamhill, the Italian variety Tonda di Giffoni, and Graham, an older, eastern variety. Thus far, my favorite is probably Graham, a hybrid of American and European filberts bred by Samuel H. Graham of Ithaca, New York, and introduced in 1950. It yields the largest nuts of the lot and shows its American parentage in its wide suckering growth habit and the fiery red of its leaves in autumn.
Results May Vary
As they say in ads: “Your results may vary.” The above are my experiences. Filbert blight, like any disease, only thrives with suitable environment, a susceptible host, AND presence of pathogen. My farmden fulfills all three conditions, with varying host plant susceptibility. But I only am growing one plant of each variety; slightly different conditions might affect susceptibility of individual plants.
Now, about my cherry tomato experiences: Tomato flavor varies little with climate or growing conditions, so your results probably would NOT vary from mine. Except of course, that it’s surely a matter of taste when it comes to taste.
I WAS WRONG
/0 Comments/in Design, Flowers, Fruit, Gardening, Planning, Vegetables/by Lee ReichHog Peanuts, Groundnuts, Whatever
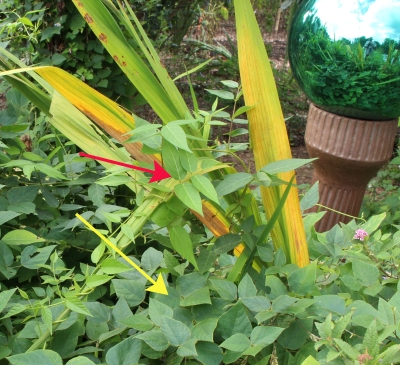
I was wrong. A few weeks ago I wrongly dissed groundnut (Apios americana) for invading my flower garden. Yes, I planted it; that was 30 years ago, and it’s resisted my attempts at eradication for the past 28 years.
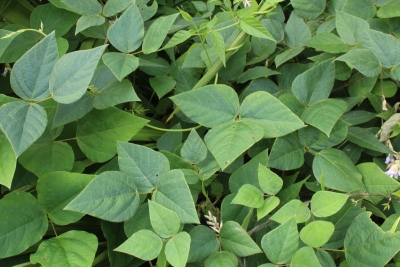
The worse culprit, this year at least, is related to groundnut. Like groundnut, it’s a legume, it’s native, it’s edible, and it’s a vining plant with compound leaves. But each leaf of hog peanut (Amphicarpaea bracteata), has 3 egg-shaped leaflets, as compared with groundnut’s 5 lance-shaped leaflets.
Hog peanuts produce flowers both above ground and below ground. Below ground is where the goodies are. Pods that form there enclose peanut-sized seeds that allegedly are tasty raw or cooked. I’ll see if I can dig some up in a few weeks. Like groundnuts, hog peanuts provided food for Native Americans; the plants were among the four sacred plants of the Osage.
So what can be bad about a plant that tolerates some shade, adds nitrogen to the soil, and yields an allegedly tasty seed below ground? The problem is that it’s run wild over the flower bed, the fine stems and leaves attempting to smother, sometimes successfully, every plant in its path. Even non-native, invasive Japanese stilt grass and garlic mustard can’t hold their own against hog peanuts.
Permaculture Reality
Low maintenance, protection and enrichment of soil, and edible parts recommend hog peanut and groundnut to permies (permaculturalists). As with so much in permaculture, these plants perform better in theory than in practice.
In humid climates, plant growth — and not just groundnut and hog peanut — can run rampant. Growth needs to be controlled and balanced, a job made more difficult in a permaculture “guild” of groups of plants working together. I’m all for interplanting different species to make best use of light, water, and soil resources, and form communities that resist pests — to a point.
I’ve had the opportunity, over the years, to visit the permaculture garden planted by students at the University of Massachusetts in Amherst. Now in its 5th year, the garden pays tribute to the compost, mulch, and sweat students put into soil preparation. The plants have grown very well. Too well, perhaps. One could say that the plants have commingled nicely; from another perspective, one could say that they are overunning each other. A blackcurrant bush or bushes has swelled into a mass of unapproachable stems 10 feet deep and wide. Chives and oregano have each taken over their areas. (How much chives or oregano can you eat? I’d rather eat tomatoes.)
Not that I’m immune to such errors. A few years ago I created a very permaculturesque planting that included elderberries, seaberries, and rugose roses almost elbow to elbow. It all looks very nice but these three shrubs all spread by suckers. I keep everything in check with elbow grease and a scythe . . . for now, but Mother Nature is relentless. Am I?
The most productive and accessible parts of the UMass garden are the beds of kale, beets, and other vegetables — straight rows in cultivated soil. How un-permaculturalesque.
Oh, I forgot to mention the groundnuts at UMass. Stems of those plants are twining around and overpowering others in their guild in an ever-widening circle. Even if the groundnuts could peacefully coexist with their neighbors, grubbing up the golf ball size tubers will require an inordinate amount of time and soil discombobulation.
My memory fails me. Perhaps it was hog peanut rather than groundnut vines threatening their neighbors. Perhaps it was both plants. Hog peanut has been suggested for erosion control, and as a groundcover, a livestock forage, and a food for humans. My suggestion: Hog food. Turn some hogs loose in a patch, and they’ll fatten as they clear the ground of this pernicious weed. Does anybody have a small hog for rent?
Elderberry Wine — No, Syrup
Elderberry looked to be one of the most successful plants in the UMass permaculture garden. It grows fast and it grows high. My two plants, now in their third year, yielded more than four gallons of berries. And harvest, last week, was quick and easy; aggressively tickling the umbels had the berries quickly filling a basket.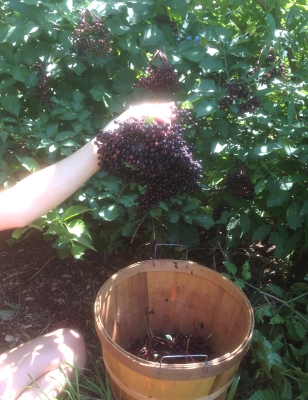
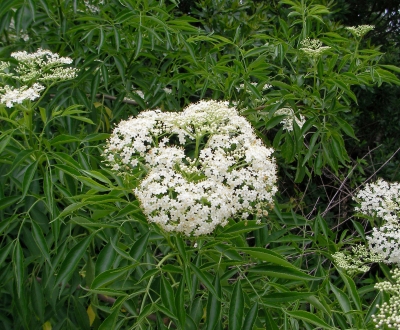
Elderberries can also be recommended for their flowers and the berries’ deep, blue color. Flowers open in June to dinnerplate size umbels of small, white blossoms. They’re good for tea, fritters, or to flavor wine.
The berries impart their good color, but little flavor, to wine, pie, and juice. (They should not be eaten uncooked or unripe.) There’s a bit of scientific evidence than an extract or syrup of the berries can help fight flu, perhaps other ailments also. I’m good at growing fruit, not cooking it, so I gave my crop to Dina Falconi who concocted a syrup using the recipe from her book Foraging & Feasting. I look forward to tasting the benefits of my horticultural and her culinary skills. 