FILBERT NUTS OR HAZELNUTS?
/16 Comments/in Planning/by Lee ReichSpecies Matter; Varieties Matter
You say “tomayto,” I say “tomahto.” You say “filbert,” I say “hazelnut.” (“Filbert” is from St. Philibert, to whom August 22nd, is dedicated and which is the day of first ripening of hazelnuts in England.) Although hazelnuts originally referred to native American filberts, hazelnut and filbert are now equivalent.
It’s been over twenty years since I planted my first hazelnuts. Fortunately, hazels bear quickly, often within 3 or 4 years. Unfortunately, a disease called eastern filbert blight can decimate the trees, and not begin to do so for about a decade. Our native hazels (Corylus americana), having evolved with the blight, are resistant. Not so for European hazels, which are the hazelnuts of commerce.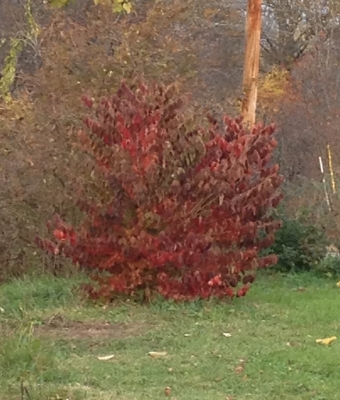
My first planting was of our native hazel, which I planted for beauty and for nuts. It did turn out to be an attractive, suckering shrub that lit up fall with its boldly colored leaves. The nuts themselves were less notable: small and not very good tasting.
Next I planted a few old varieties of hybrid hazels, Graham, Gellatly, and Halls Giant, followed, a few years later by Tonda di Giffoni, Lewis, and Clark. All were billed as blight resistant and did quite well. In the 1960s eastern filbert blight made its way to the Pacific Northwest, the hotbed of commercial hazelnut production in the U.S. (providing 99 percent of domestic hazelnuts), which prompted breeding of resistant varieties. Lewis and Clark are two such varieties. Two more such varieties, Santiam and Yamhill, were added to my collection 11 years ago.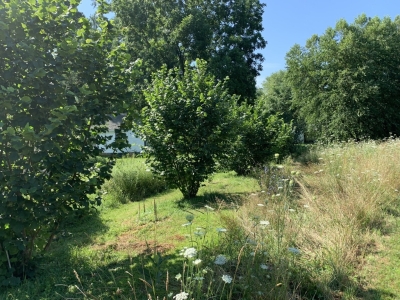
Right on schedule after about ten years, black pustules of blight began to show up on branches, which start to die, then finish. But the varieties I planted were blight resistant, you say. Resistance is a matter of degree (“immune” means no disease), and the varieties I planted evidently were not sufficiently resistant.

This doesn’t at all reflect poorly on breeders of these not-quite-resistant-enough hybrids. The blight fungus is capricious, changing with location and, perhaps, over time. I dug up and out all the nonproductive, diseased plants.
But I like filberts. Enter a few breeders breeding filberts right here in the northeast. One is Dr. Tom Molnar of Rutgers University, from whom I got a few selections (with nonluscious, early selection names like CR X R03P26 and CR X R11P07), which I planted back in 2014. And Jeff Zarnowski, of Z’s Nutty Ridge Nursery. And others. So now I grow Geneva (aka Gene, from Grimo Nut Nursery), Truxton, Dorris (another selection from Oregon), Raritan (a more advanced selection from Rutgers), as well as my original Rutgers plants.
I’m ready to cull again any varieties that catch blight or whose nuts are too small. For wherever plants are culled, I have potted plants of Monmouth, Hunterdon, and Somerset — all advanced Rutgers selections — waiting in the wings.
Streamlining Processing (On a Very Small Scale)
As with fruits in general, this year was also the best ever for nuts that I grow. Even the English walnuts (Juglans regia) bore a crop this year, their first substantial crop, all from 6 walnuts I planted back in 2006. I didn’t have high hopes for walnuts because they are susceptible to anthracnose disease, late frosts, and squirrels, which could conveniently harvest the nuts from the overhead squirrel highway along the road.
And the filberts — oodles of them. Mostly, we just shell and eat them. That’s fine. But for cooking with them or concocting a delicacy such as, say, fig-hazelnut jam, shelling nuts one at a time is too slow.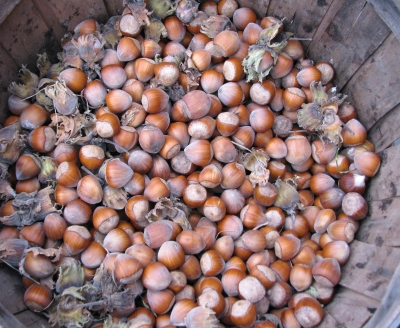
A quick web search turned up a couple of very elegant, home made shellers that work reasonably well. Luckily, before I delved too deeply in how I was going to fabricate one of these out of metal, I did a web search and found one available for about $30.
(These kitchen counter hazelnut sheller are manufactured in Turkey, which grows 70 percent of the world’s hazelnuts. Want another fun fact? Twenty-five percent of the world’s production goes into making Nutella and Ferrero Rocher, both hazelnut and chocolate confections made by the Luxemburger company Ferraro.)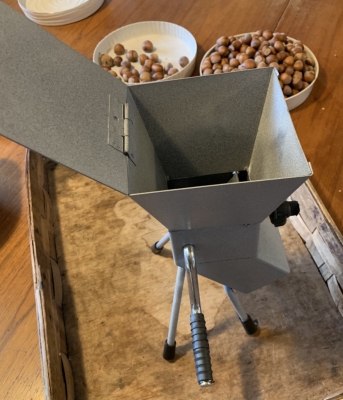
One problem with the sheller is that it needs adjustment for nut size, so it is recommended to do some sorting into size ranges before running nuts through the sheller. This I could make myself, easily. Basically, it is an open wooden box whose bottom has 3/8 inch square, wooden dowels spaced 5/8 inch apart, which is pretty much the size of my largest hazelnuts in the shell. The corners of the box are joined by hinges so that the sides can be moved to deform the shape. As the box deforms increasingly to a parallelogram, the distance between the dowels decreases. A pegged slat from one side of the box to n adjacent side holds the box to the desired shape and dowel spacing.
So I just adjust the box to the smallest dowel spacing needed, about 3/8 inch apart, dump on a bunch of nuts, and shake. Then I move the spacing up to about 1/2 inch, then shake again. And finally, move spacing to 5/8 inch, and . . . well, you know.

I could be on my way to hazelnut butter, chopped hazelnuts sprinkled on everything, that fig-hazelnut jam, perhaps even home made Nutella. No rush. Once sufficiently dried (to 6 percent moisture, which takes a couple of weeks), hazelnuts store well in their shells for over year. Shelled and refrigerated, they keep for for about six months
STUFFED
/6 Comments/in Gardening, Planning, Vegetables/by Lee ReichBreadcrumb Seeds?
Who’s getting stuffed for Thanksgiving this year, you or your turkey, or your tofurkey? A good stuffing (of the real or faux bird) is good enough to eat sans bird. And, for best quality, you can grow it yourself. Not by dropping seeds of a “stuffing plant” in the soil, but by planting all the ingredients you need.
The bread and butter of any stuffing is some starchy food, often bread and butter itself, the bread usually as crumbs. There’s no breadcrumb plant, so forget about growing breadcrumbs. Not that you couldn’t buy some wheat berries, plant them next spring, harvest the grain when the plants dry down, thresh and winnow out the berries, grind them into flour, make the flour into bread, then let the bread go stale and pound it into bread crumbs. Whew! Most of us are not going to do this.
“The Bread Tree”
As an alternative to bread crumbs, might I suggest chestnuts (Castanea spp.)? 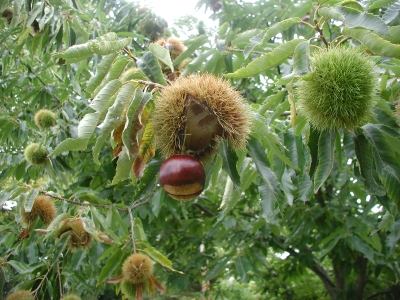 They’re often billed as the “bread tree” because in contrast to other nuts, which are high in fats and protein, chestnuts are high in starch. Obviously, you’re not going to be eating home-grown chestnut stuffing this year, or next, or the next; it takes awhile for a chestnut tree to start bearing. Not that long though. I’ve had plants grown from seed begin to bear within six years, and a grafted tree from a nursery should bear even sooner than that.
(Although their nuts look similar, chestnuts should not be confused with horse chestnuts, Hippocastanum spp.. The latter are toxic. Horse chestnuts have compound leaves, very showy flowers, and their nuts are encased in a spiky capsule. Edible chestnuts have simple leaves, nonshowy flowers, and the nuts are encased in a cupule riddled with very sharp spines.)
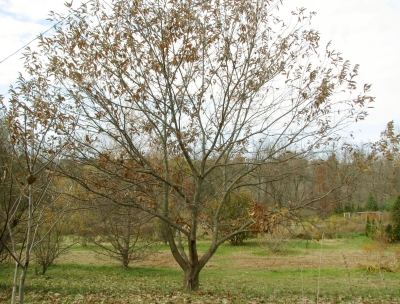
The North American, native and majestic American chestnut (C. dentata) has been decimated by chestnut blight but there are, fortunately other species that resist the blight. A good choice for nut production would be species or hybrids of Chinese chestnut (C. mollisima). Two different varieties are needed for cross-pollination.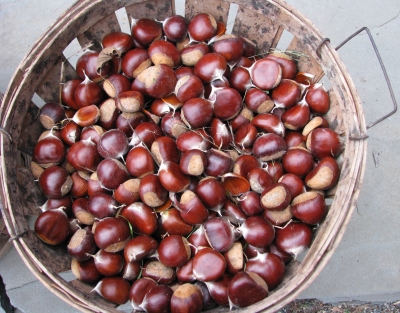
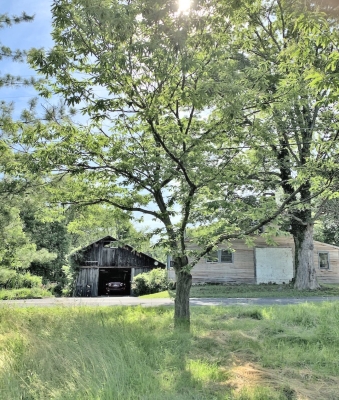
The only caution in planting chestnut trees is to avoid planting them near where people frequently walk. Each fall the ground beneath the trees is littered with the opened, spiny cupules.
More Crumby Alternatives
While you are waiting to harvest chestnuts, make stuffing based on one of the more quickly grown starchy vegetables. Potatoes, for instance. The best potatoes for making stuffing will be those that are dry and mealy, russet varieties such as Goldrush, Burbank, and Idaho.
“Dry and mealy” is also the mantra to use when choosing a winter squash variety to grow as a base for stuffing. The phrase “squash stuffing” has a nice ring to it, doesn’t it? My recommendation for a dry, mealy squash is a buttercup type called Chestnut or Sweet Mama.
If you really want a truly authentic starchy base for stuffing, the plant to grow is nu nu, a golfball-sized, starchy tuber also called makoosit or groundnut (Apios americana). 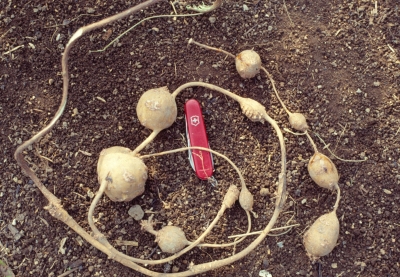 Native Americans harvested and ate nu nu, and this was one of the foods crucial in helping the Pilgrims survive their first winters in Massachusetts.
Be careful planting nu nu because it can spread like a weed to give you more stuff for stuffing than you would ever need. I planted it in a perennial flower bed decades ago. That was the wrong place for it, and I’ve spent decades trying to weed it out, unsuccessfully.
On the plus side, the plants do sport decorative and sweetly fragrant, lilac colored flowers, so it is worth growing where it can be regimented. Nu nu tubers grow attached a few inches apart along underground stems.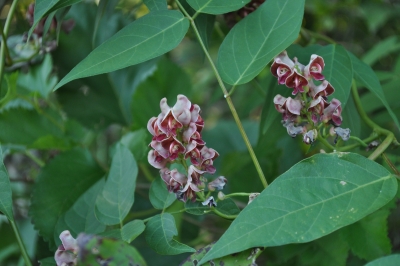
Seasonal Seasonings
Stuffing isn’t only about the bread-y ingredient. It also needs some seasoning. Parsley, sage, rosemary, and thyme, summer savory, sweet marjoram — they’re all very easy to grow. Sage and thyme are perennials, each also available in designer flavors. Pineapple sage, caraway thyme, and lemon thyme, for instance.
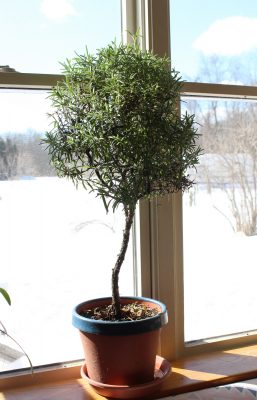
Rosemary is also a perennial, cold hardy to zone 7, possibly even zone 6. It’s is not hardy here but I grow it as a “standard” (trained as a small tree) in a pot that summers outdoors and lives indoors at a sunny kitchen window in winter to provide pretty greenery, piney fragrance, and savory snippings.
Some vegetables from the garden round out and make more interesting a stuffing. Onion, celery, and carrots are mainstays, but vegetables such as parsnips and garlic can make special — and powerful — flavor contributions.
Have a happy and healthy Thanksgiving!
PREPARING FIGS FOR A COLD WINTER
/29 Comments/in Gardening/by Lee ReichThey’re Not Tropical
Too many people think fig trees are tropical plants. They’re not. They’re subtropical plants and that’s one reason those of us living in cold winter climates can harvest fresh, ripe figs. In fact, fig trees like that little rest that cold weather offers them.
Here in Zone 5 (average winter lows of minus 10 to minus 20° F), I grow figs a number of ways. Figs are cold hardy to the low ‘teens, too cold for even subtropical plants to grow outdoors in the ground, their stems splayed to cold winter air like my apples and pears. Their roots, especially if mulched, generally will survive winters here in the relatively warmer temperatures underground. But then new shoot growth must originate at ground level, and the growing season isn’t long enough for figs that develop on those shoots to ripen.
Potted
Some of my figs, like many of yours, are in pots.
With nighttime temperatures now often below freezing, there’s an urge to grab the potted fig and carry it indoors. Don’t! As I wrote, fig trees like a little cold weather. Experiencing some cold weather also toughens them to be more able to withstand even colder weather. My goal is to get these potted plants into a deep sleep, and to maintain that state as long as possible through winter, ideally until they’re ready to be carried outdoors again in spring.

My friend Sara’s fig last summer
If temperatures are going to be super cold, below the low ‘teens, move the plant to a temporary, but cool, location such as an unheated garage or mudroom, or garden shed.
Plants might still sport some leaves this time of year. Perhaps some of those leaves have been frosted. Not to worry.
Eventually, a potted fig needs to be moved to a winter home. Around here, at least, not yet. Typically, I leave my potted fig trees outside — in a slightly sheltered spot near a wall of my home where temperatures are modulated — until sometime in December. A fully dormant fig tree sheds its leaves so won’t need light in winter. If any of my plants are still holding onto their leaves, I just pull them off before the plants move to their winter home.
The winter home should be cold, but not frigid, ideally 30 to 45°F. That previously mentioned unheated garage or mudroom, or garden shed might be suitable. A minimum-maximum thermometer is an inexpensive way to know just how cold a site gets during winter even when you’re not in there or looking — at 2 AM, for example.
Some of my potted figs retire to my basement for winter, where winter temperatures are usually 40 to 45°F.

Kadota fig stored in cold basement
More recently, I’ve set up an insulated, walk-in cooler, mostly for storing fruits and vegetables. There’s also plenty of space for some potted fig trees. The cooler, which needs a little heat in the dead of winter, maintains a pretty consistent temperature of 39° F.
To help the plants remain asleep, I keep them on the dry side, perhaps watering them once or twice during this period.
To a point, the more stem growth on a fig tree, the more fruit it bears. So a potted fig can only bear so much fruit. I want more figs from some of my trees.
Innovations for Greater Yields
Years ago, I built a greenhouse in which to grow cool-weather-loving salad stuff and greens such as lettuce, celery, kale, chard, arugula, mustard, mâche, and claytonia through winter. I soon realized that the hot summers and the cool (never below about 35°F) winters in the greenhouse mimicked the Mediterranean climate that figs call home. So I planted four fig trees right in the ground in the greenhouse. The vegetables don’t mind their figgy neighbors because they’re leafless in winter.
Those fig trees are more than just leafless in winter; they’re also pretty much stemless. Each tree is trained to have a short trunk off which grows one or two permanent, horizontal arms. (This method of training is called espalier.) 
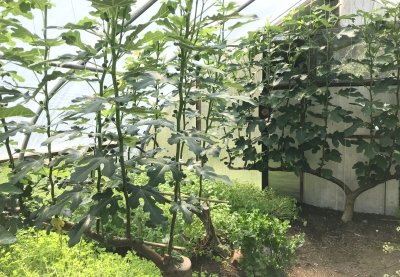
 Fruits are borne on shoots that grow vertically from these arms. Tomorrow I’ll lop all those vertical shoots back to the arms. Next year, new shoots will bear fruits and be cut back next fall, and the year after that, new shoots . . . and so on.
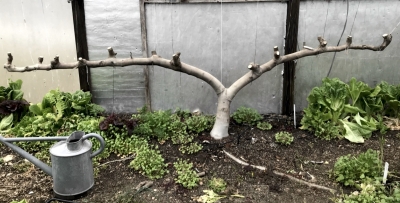
I’ve even used this method, this time with the horizontal arm trained just a few inches above ground level, for a fig tree I have growing outside. That low-growing arm is easily covered with a blanket of leaves, straw, or some other insulating material, how much depends on the depth of wither cold expected.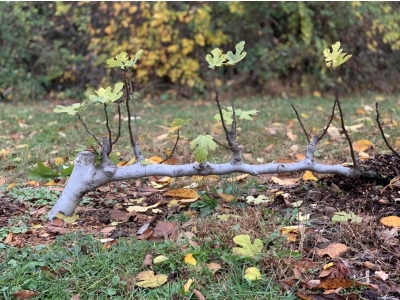
Once again, I’ll delay covering the plant until colder temperatures arrive so that the plant is hardened more against cold and goes into winter as dormant as possible.
Over the years, other figs of mine have weathered cold winters also by such methods as being bent over and covered to keep them warm and outdoors, by being grown in pots sunk into the ground then lifted, before the arrival of frigid weather. etc., etc. You want to harvest fresh figs in summer? There are many paths to this mountaintop.
The takeaway today is: Don’t protect your fig tree from too much cold too soon. Let the plant experience and benefit from the sleep-inducing and hardiness that some exposure brings.
And if you want to know more about growing figs in cold climate — varieties, method details, pruning, accelerating ripening, potting mixes, and more — see my book with the eponymous title GROWING FIGS IN COLD CLIMATES (available from the usual sources as well as, signed, from my website).Here’s a very short video I made back in October about some methods of growing figs in cold climates and my new book: Fig video

