
New Book by Lee!
A Book Is Born
Finally, after all the hard work, I have in hand the first copies of my new book The Ever Curious Gardener: Using a Little Natural Science for a Much Better Garden. 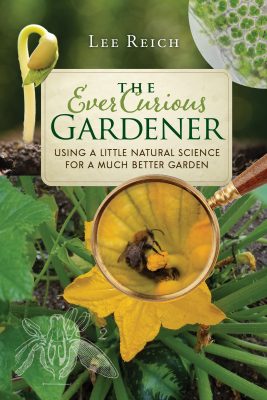 This book grew out of my long love affair with gardening—such a congenial confluence of colors, flavors, and aromas all seasoned with the weather, whatever pests happen to stop by that year—and the science behind it all!
And the science behind it all is what this book is about. No, it’s not a comprehensive overview of botany and related sciences. It is some of the natural science that can be applied in the garden. Science may seem out of place in so bucolic an activity as gardening. After millions of years of evolution, seeds want to sprout, and plants want to grow, even in such diverse soils and climates as the Arctic tundra, the Arizona desert, and my garden in New York’s Hudson Valley. So it’s possible to have a decent garden with minimal effort or know-how.
But with some understanding of what’s going on behind the scenes, and application of that understanding, gardening can be something more than this business as usual, with commensurately more rewards.
In The Beginning . . .
The beginnings for this book came to me one day as I was piling recently scythed hay and horse manure, along with old vegetable plants and sprinklings of soil and dolomitic limestone, into one of my compost bins. I realized that what I was adding to the pile and how much of each ingredient, even how I fluffed them up or patted them down with my pitchfork, and then watered, all reflected what I had learned over decades of gardening. My classrooms have included actual classrooms; gleanings from magazines, books, and scientific journals; conversations with other gardeners and agricultural scientists; and (most importantly) the garden itself.
My garden education has been unusual. Growing up in the suburbs, the tenure of our family’s small vegetable garden was soon eclipsed by a swing set. Wait! How about that potted banana tree and one hyacinth bulb that I nurtured under the purple glow of a Growlite in the basement during high school? Or the potted cactus that I bought to adorn my bedroom windowsill in graduate school. Hints of future interest? Perhaps.
Graduate study in those cactus days was in chemistry, a continuation of an interest kindled by my high school chemistry teacher. But coming to the conclusion that graduate study in quantum chemistry was not going to answer any fundamental questions, I dropped out, moved to Vermont, and got the gardening bug. Because I was living in a third floor apartment, I expressed that gardening bug with a voracious appetite for books—books about gardening.
A year later, I dove into agriculture in earnest, and was fortunate to land in a graduate program in soil science. My interest and education in chemistry proved a good foundation for soil science.
A small plot of land began my education “in the field” and complemented my academic studies. 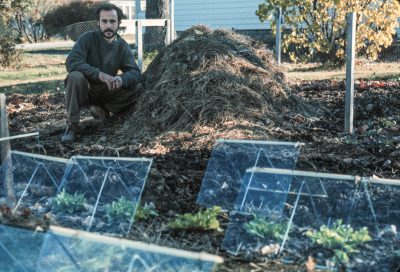 The university’s agricultural library offered more books to further round out my education. (I remember coming across a whole book on lettuce seed!)
Eight years later, with two framed diplomas to hang on my wall, one for a master’s degree in soil science, and the other for a doctorate degree in horticulture, I was still gardening with the same exuberance and learning about gardening through experience, the printed word, and contact with others “in the know.” Thinking back, how little I knew about gardening. And so it goes.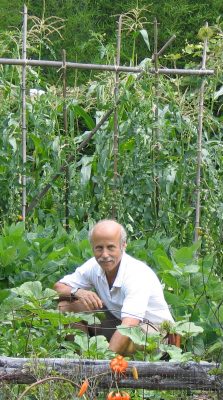
A Little Natural Science for a Lot Better Garden
Back to my compost pile… I took into account the meadow hay’s youthful lushness, which influences its ratio of carbon to nitrogen, as I layered it into the bin along with the horse manure. Manure is usually thought of as a high nitrogen material, but I looked at what was in the cart and, eyeing the amount and kind of bedding (wood shavings) with which it was mixed, made a rough estimate in my head of how much to use to make a good balance with the meadow plants. When the pile was finished, I checked my work by monitoring the temperature of the pile’s interior with a long-stemmed compost thermometer. Etc., etc. There’s art in making compost. But also science.
With this book, I hope to show how knowing and using a little of the natural science behind what’s happening out in the garden can make for a lot better garden in terms of productivity, beauty, plant health, sustainability… and interest. Knowing some of the underlying science at work in the garden also makes for a more resilient gardener, better able to garden at a new location or in a changing environment.
The Ever Curious Gardener is available in bookstores and online in mid-April, 2018, or now, signed from me, at https://leereich.com/books/the-ever-curious-gardener-using-a-little-natural-science-for-a-much-better-garden.
This Bud’s for You
Swelling Buds
What an exciting time of year! After a spate of 50 plus degree temperatures, lawn grass — bare now although it could be buried a foot deep in snow by the time you read this — has turned a slightly more vibrant shade of green. Like a developing photographic film (remember film?), the balsam fir, arborvitae, and hemlock trees I’m looking at outside my window, have also greened up a bit more.
Going outside to peer more closely at trees and shrubs reveals the slightest swelling of their buds. Earlier in winter, no amount of warmth could have caused this. As a cold weather survival mechanism, hardy trees and shrubs are “smart” enough to know to stay dormant until warm weather signals that it’s safe for tender young sprouts and flowers to emerge.
These plants stay asleep until they’ve experienced a certain number of hours of cool temperatures, the amount varying with both the kind and variety of plant.
Once that cold “bank” has been filled, the plants merely respond to warming temperatures. Which, for many plants, is now.
Physiology aside, the buds provide an interesting winter diversion; look at their sizes, their shapes, their colors, and textures. (Admittedly, their interest would pale in the landscape exploding into flowers and leaves, when the buds anyway mostly disappear into flowers or leaves until later in summer when new ones re-form.)
More than just interest, buds are useful. Buds can be used to identify the kind of plant as well as whether flower buds are in the offing. Or perhaps that flower buds were in the offing but were damaged by winter cold.
Info from Buds
The first bit of information I glean from winter buds is plant identification. To begin, how are the buds arranged along the stem? Buds directly opposite each other, which is relatively rare for local trees, narrows the choice down to maple, ash, dogwood, and horse chestnut, or, as some people remember it, MAD Horse.
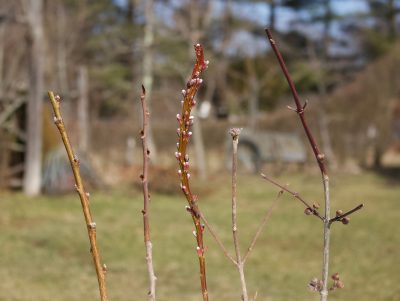
L to R: peach, pawpaw, fantail willow, viburnum, dogwood
Of course, once I identify a tree as, for example, a maple, I have to look for other details, such as the bark, to tell if it is a red, sugar, silver, or Norway maple.
(A few less common trees also have opposite leaves, including katsura and paulownia, both non-native, and viburnums, some of which are native. Most shrubs have opposite leaves.)
Buds that are not opposite each other along a stem might be alternating along the stem, they might be whorled, or they might be almost, but not quite opposite, presenting a much wider field of plants from which to choose.
Then it’s time for a closer look at the buds themselves. Some plants—viburnums, for example—have naked buds, enveloped only by the first pair of (small) leaves, rather than the scaly covering protecting the buds of most other plants. Buds of plants such as maples have buds enclosed in scales that overlap like roof shingles. Or two or three scales might enclose a bud without any overlap, as they do on tuliptree.
Mature plants have two kinds of buds. Those that are longer and thinner will expand into shoots. Flower buds are usually fatter and rounder. I note how dogwood flower buds stand proud of the stems like buttons atop stalks — very decorative if you take the time to have a look. I take a look at a peach branch with its compound bud: a single, slim stem bud in escort between two fat flower buds.
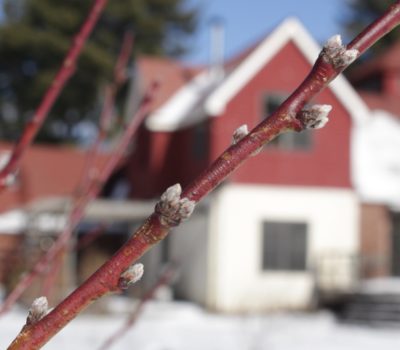
Peach buds
Apple and crabapple flower buds occur mostly at the ends of stubby stems, called spurs, that elongate only a half an inch or so yearly. Pawpaws fruit buds are fat and round with a brown, velour, covering.
Practicalities aside, buds can predict what kind of flower show or fruit crop to expect, barring interference from late frosts, insects, diseases, birds, or squirrels. If peach fruit buds just sit in place rather than fattening as winter draws to a close, I’ll know that the night back in January when temperatures plummeted to minus 18 degrees Fahrenheit did them in, or at least some of them.
More Winter Details
Back to winter plant identification and entertainment. Looking more carefully at these leafless plants promotes familiarity. Notice the intricacies of their various barks; shagboark hickory, sugar maple, persimmon, white birch, and, my favorite, hackberry,
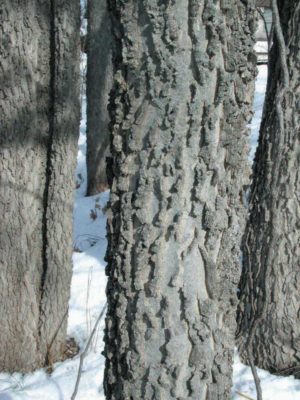
Hackberry bark
are very characteristic. Note twigs’ color, presence of ridges or lenticels (corky pores), even their taste or aroma. The aromas of yellow birch (wintergreen aroma), sassafras, and black cherry (almond) practically shout out their identification.
