Late Winter Sap, Pruning, and Planting

The Sap is Flowing

In past years, now is when we would always hope to make enough maple syrup to last until the following year at about this time. Maple syrup consumption has dropped dramatically, leaving me with quite a backlog of the stuff. So trees haven’t been tapped for the past few years.Tapping a maple tree

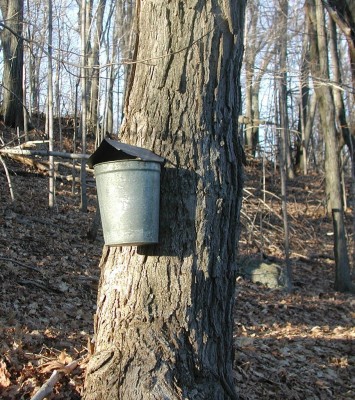
Not that we ever made that much maple syrup. Four tapped trees always produced sufficient sap for a year’s worth of syrup. It had to, because that’s how many spiles (taps) and buckets we own.

Our operation was nothing like what I came upon a couple of weeks ago cross-country skiing in the woods of northern Vermont. All of a sudden tubes had appeared in the pristine, white wilderness. Tubes everywhere! Baby blue plastic tubes, black plastic tubes, interlocking connectors, everything neatly wired into position at chest height and thoughtfully out of the way of any skiers enjoying the woods.

Processing the sap here at home is done quite differently from those commercial operations. Our low-tech approach was to merely add each day’s “catch” from the four buckets to a big stock pot sitting on the woodstove. The woodstove is stoked pretty much continuously this time of year, so the sap was always evaporating, with the added bonus of humidifying the house.Boiling maple sap

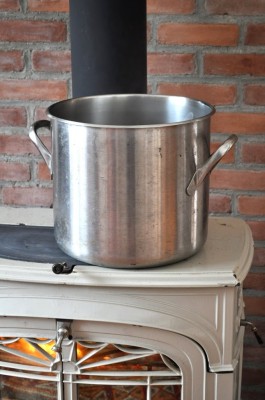
I see a few eyebrows going up. Sticky walls and ceiling are what comes to some minds upon the mention of cooking down maple sap indoors. Well, that’s usually myth. Sticky walls and ceiling only result when the sap is in an active boil and bubbles bursting on the surface of the liquid sent little droplets of sugar water into the air and onto walls and ceilings. But until the final stage of our sap-making, the sap was just slowly evaporating. The vapor given off by slowly evaporating, simmering, or boiling a solution of any sugar and water is nothing more than water vapor. That’s why the maple sugar becomes concentrated in the remaining liquid.

In those final stages of concentration, with much reduced liquid volume, the liquid can indeed reach an active boil. The pot of liquid announces that it’s nearing that stage by starting to gurgle like a baby, at which point it needs to be watched closely, mostly so that the syrup doesn’t get too concentrated or burn. The finish point is when the temperature of the liquid reaches about 219 degrees F.

Another Maple, Not So Good

Someone contacted me to say that, “The squirrels were chewing on Norway maple tree last week and sap was seen dripping down,” then went on to ask if that meant it was too late to prune. Perhaps the squirrels were enjoying some of the sweet sap. Yes, you can tap and boil into syrup the sap of all kinds of maples; I’ve tapped and made syrup from silver maple, red maple, boxelder, and, of course, sugar maple.

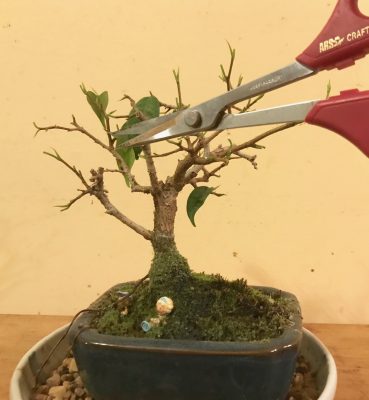
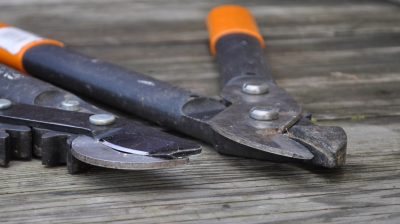
Getting back the pruning… It’s not at all too late. It’s fine to “dormant” prune any plants up until the time when they unfurl their leaves in spring.

Another good question might be: Why not just cut the Norway maple down to the ground? The trees are invasive and displacing our sugar maples, they have poor fall color, and they create lugubrious shade beneath which grass and much else can’t grow. Mostly, people keep these trees because they are already in place and full grown.

Pea Planting, Almost

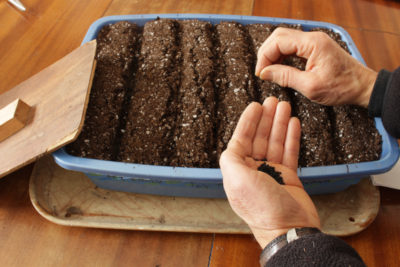
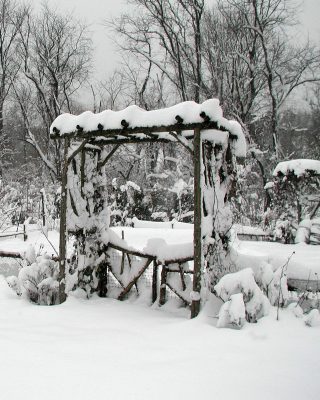
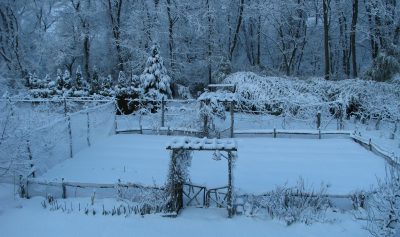
Despite snow covering the ground on the ground, I’m still planning to scratch open a furrow and plant peas – the first outdoor planting of the season – on April 1st.

Given the white blanket, which may not be around by the time you read these words, some people might think me crazed for planting peas so soon. Then again, those people who insist on getting their peas in the ground before St. Patrick’s Day might think I’m dragging my heals.Winter scene, N garden

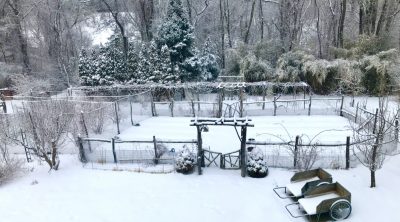
Here are the facts: Peas grow best at cool temperatures, making early sowing a must. The seeds will sprout whenever the soil temperature is above 40 degrees F. But St. Patrick’s Day can’t be the universally best time to sow peas because different places experience different climates on that date. It’s probably too late in Florida, too early in Maine, and just right in Ireland.

So call me a fool if you like, but I’m still planning on an April Fools Day planting for my peas. I’ll wait a few more days if the ground is frozen or covered with snow. Just a few days though, because things move quickly this time of year.Winter scene, looking south

Inside and Outside

Houseplant Envy

I wonder why my houseplants look so unattractive, at least compared to some other people’s houseplants. I was recently awed by the lushness and beauty of a friend’s orchid cactii, begonias, and ferns. I also grow orchid cactii and ferns, so what’s with mine?Houseplants at bedroom window

Perhaps the difference is that other’s houseplants have a cozy, overgrown look. Mine don’t. Most of my houseplants get repotted and pruned, as needed, for best growth. Every year, every two years at most, they get tipped out of their pots, their roots hacked back, then put back into their pots with new potting soil packed around their roots. In anticipation of lush growth, stems also get pruned to keep the plants from growing topheavy.

Rather than being scattered willy-nilly throughout the house or clustered cozily in corners, as in friends’ homes, my houseplants get carefully sited. For best growth, plants, especially flowering and fruiting plants, need abundant light, something that’s at a premium this time of year. So my houseplants huddle near south-facing windows like baby chicks near a heat lamp. And then in summer, when light, even indoors, becomes more adequate and the plants could move a bit back from the windows, I move them all outside so that summer sunlight, rain, and breezes can really get them growing.

What can I say? I’m too focussed on good growth, and that’s not necessarily what makes for the prettiest houseplant. It’s the difference between a lush plant packed into and overflowing its pot, along with elbow to elbow neighbors, versus one that’s had its soil refreshed frequently, its stems thinned out and pruned back, always with younger stems raring to grow. I can’t help myself.Houseplants, office window

Choice of houseplants also comes into play. Houseplants that are prettiest for the longest period of time — and need less light — are those valued for the shapes and colors of their leaves. I gravitate to houseplants with fragrant flowers or fruits, or — even better — fragrant flowers and fruits. Pumping out lots of flowers and, especially, fruits demands much more energy from a plant than just growing leaves. And that energy comes from sunlight and young leaves that are efficient at working with that light. Hence the repotting and clustering near sunny windows of my houseplants.Houseplants at living room window

Perhaps it’s also a matter of the “grass is greener,” to me, in someone else’s house. I’ll start looking at my houseplants more with the eye of an appreciative visitor.

Winter Cold: The Good and the Bad

The temperature was 9° and we were on our way to go cross-country skiing when a friend asked if there was any benefit to the cold weather. Plantwise, that is. We knew the weather was good for skiing. Interesting question, and the answer is “yes.”Vegetable garden in winter

The first benefit that comes to mind is the effect of cold on diseases, certain diseases, at least. The cold kills them. Peach leaf curl, for instance, is a disease that overwinters in peach buds, resulting in leaves that unfold thickened and twisted and eventually yellow and fall so fruiting and growth suffer. Except in cold winters. My winters are usually cold enough so this disease is rarely a problem.

A number of summers ago late blight disease of tomato went on the rampage here and throughout the Northeast. That disease can’t spend the winter this far north because it’s too cold. In that past summer and some other summers, the disease hitchhikes north on infected plants brought here or, when winds and humidity are just right, hopscotches along north from one infected field to the next.

Insect pests that overwinter in the soil are more damaged the colder the soil gets, and bare soil gets colder than mulched soil, all of which highlights the balancing acts necessary in gardening.

Pests notwithstanding, bare ground isn’t good for plants and soil. Plant roots are more likely to be damaged by the increased exposure and, especially evergreens, are more apt to dry out because more water will evaporate from bare ground and because roots have a hard time drinking in water from frozen ground. Bare ground is also subject to erosion and nitrogen loss.

On the other side of the coin, bare soil goes through more cycles of freezing and thawing, which breaks up and moves around soil particles, in effect tilling the soil. Back to the previous side of the coin, that freezing and thawing can move soil around enough to heave plants, especially small or newly rooted plants, up and out of the ground.

So, I like cold weather for my plants. But I mulch heavily. And I especially like it, as do the plants — and, admittedly, some pests — when there’s an additional blanket of snow over the ground. It also makes for good skiing.South field, winter view

Snowy Skies & Winter Colors

Snow Outside but Color Inside

A day like this, a gray sky and six inches of fluffy, fresh snow laid gently atop the white already resting on the ground, hardly turns my mind to gardening or plants. Even the greenhouse, usually a cheery horticultural retreat in winter, is dark and cold. Snow on the roof blocks what little light peeks through the gray sky, and the heater doesn’t come alive until the temperature drops to about 37° F.

Carrots from jonnyseeds.com

And then I reach into my mailbox, and out comes summer! Seed and nursery catalogs oozing with photos of fresh carrots, heads of lettuce, juicy peaches, and sunny sunflowers. I’ve already ordered all my seeds, or so I thought until I started thumbing through more catalogs. Offerings in vegetable seeds, in particular, seem to get more interesting each year.

Take carrots, for example. Carrots have long been available in all sort of shapes and sizes. Nowadays, I can also buy seeds for white carrots (White Satin variety), carrots deep purple through and through (Deep Purple variety), and purple carrots with orange centers (Purple Haze variety).

Caulifower is also getting colorful. Its curds no longer need to be only white. The variety Cheddar is the color of orange cheddar cheese. Graffiti is a purple variety, unique among purple cauliflowers for retaining its color after being cooked. Years ago, I used to grow Violet Queen cauliflower, which turns green after being cooked and tastes very good.

I’m not saying that any of these interesting varieties taste better than less flamboyant varieties. Just sayin’ . . . they’re interesting.

Which Hazel?

Besides perusing summer-y seed and nursery catalogs, another antidote for a gray winter day is to get outside and enjoy it. I’m hoping to do that today, to glide through wooded paths on cross-country skiis.

No doubt I will come across plants flaunting winter weather and showing signs of life —even on this gray day. Native witchhazels, the so-called “common witchhazel” (Hamamelis virginiana), ocacionally still are showing off some of their strappy yellow flower petals. Witchhazel in bloom
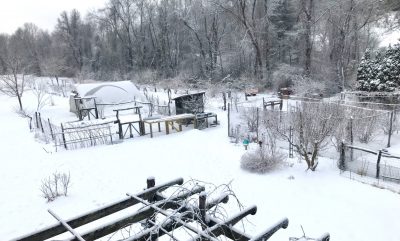
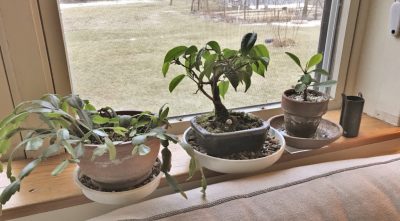
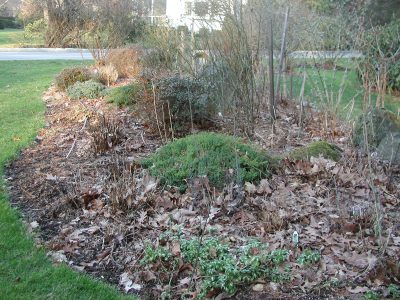
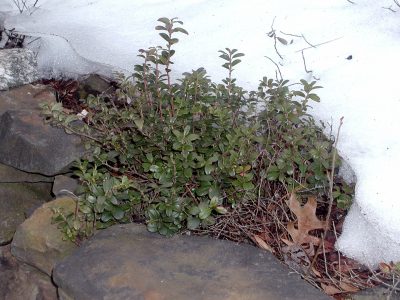
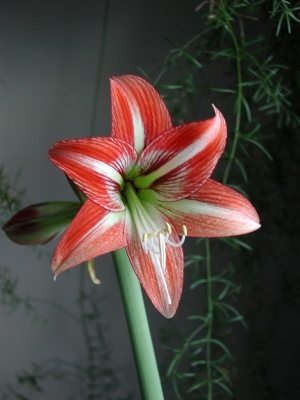
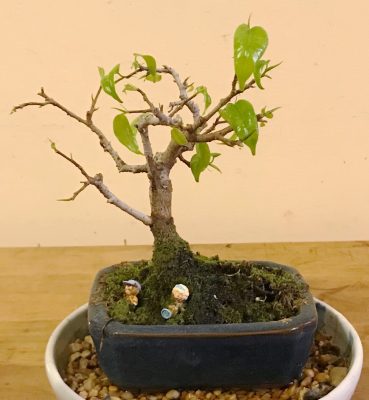
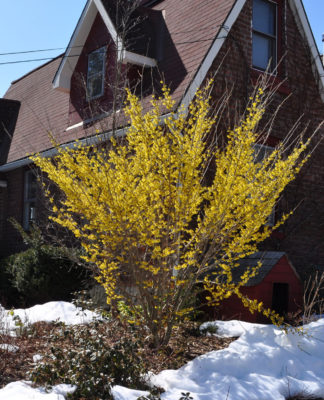
The flowers don’t exactly jump out at you so you have to get up pretty close to even notice them. Still, they are a sign of plant life in the depths of winter.

Common witchhazel typically begins blooming in September and finishes by December. How seemingly foolish! It’s been hypothesized that they bloom when they do so as not to compete with another species, vernal witchhazel (H. vernalis), where both are native. (This seems an unusual explanation because plant evolution is generally encouraged by cross breeding. That’s why an apple tree, for instance, can’t pollinate itself even though each of its flowers have both male and female parts; it has to cross with pollinate with a genetically different tree to make seeds and fruit.) Vernal witchhazel, at home in the midwest and south, begins blooming in January and might continue until spring.

Even without that competition, not much reproduction is going on with common witchhazel. It has a motley crew of pollinators: tiny wasps, fungus gnats, bees, flies, and winter moths. And even with all those matchmakers, less than 1% of flowers go on to form fruit and make seed. The seeds, 2 per fruit, are shot out of the fruits in autumn. After weevils, caterpillars, wild turkeys, and squirrels have had their fill, only about 15% of those few seeds survive. It’s a wonder that I come upon so many witchhazels in my winter glides and walks.

Looking over plant and garden notes from last year, I see that my cultivated witchhazel, the variety Arnold Promise, bloomed in my front yard in mid-March last year. That variety is a hybrid of Chinese and Japanese species. It blossoms later and its blossoms are much, much showier and more fragrant.

Sow Already?

Sowing onions indoors

Last year, sowing onion seeds

According to my notes, I’m due to plant onion seeds sometime soon. Yes, seeds. Seeds are the only way to be able to choose from the widest selection of onion varieties. Still, seeing witchhazel flowers will not be enough to well up in me an urge to plant anything. Tomorrow will be sunny; that should do it.

Update: Except that I chose the sunny day to go skiing instead. The onion seeds can wait. Growth is so slow early in the season that, come early May, there’s little difference in size among seedlings grown from seed planted now or within the next couple of weeks. 

Cold Rules

Water Freezes. Why Don’t Plants?

(The following is adapted from my book, The Ever Curious Gardener: Using a Little Natural Science for a Much Better Garden, available wherever fine books are sold, and my website.)

Not being able to don gloves and a scarf, or shiver, to keep warm, it’s a wonder that trees and shrubs don’t freeze to death from winter cold. They can’t stomp their limbs or do jumping jacks to get their sap moving and warm up. The sap has no warmth anyway.Trellis and snow

Sometimes, of course, plants do succumb to winter cold. But usually that happens to garden and landscape plants pushed to their cold limits, not to native plants in their natural habitats or to well adapted exotic plants. 

Think about it: water freezes at 32 degrees Fahrenheit—not a particularly cold temperature for a winter night—and plants contain an abundance of water. Water is unique among liquids in that it expands when it freezes, so you can imagine the havoc that could be wreaked as water-filled plant cells freeze and burst. Yet plants that must stand tall all winter do, of course, deal with frigid weather. 

A Helping Hand for Herbaceous Plants

Herbaceous perennials (non-woody plants) opt for the easiest survival route.Their roots are perennial but their tops die back to the ground each year. Anticipate cold weather, these plants start pumping reserve nutrients to their roots in late summer. That’s why asparagus, cone flowers, delphiniums, and peonies are reduced, in autumn, to nothing more than a few dry stalks. Mulched garden bed

What’s left of these plants spends a mild winter underground. Five feet down, the earth’s temperature hovers around a relatively balmy 50 degrees Fahrenheit.

Practical Rule #1: A thick blanket of some fluffy, organic material—leaves, straw, or wood chips, for example—further limits cold penetration.

Also for Woody Creepers

Low-growing, woody plants have it almost as good, with their stems shielded from the full brunt of cold winter winds. If Nature decides to throw down a powdery, white insulating blanket, so much the better: those leaves and low stems are protected even more. Lingonberry under snow

Practical Rule #2: In case Mother Nature is distracted with other activities, I provide my own low blanket for low-growing, woody or evergreen perennials—again, that fluffy cover of straw, leaves, or wood chips. Waiting to cover these plants until the weather turns relatively cold (soil frozen an inch deep is a good rule of thumb) lets plants acclimate to cold, and their stems and leaves have no chance of rotting beneath mulch that is still moist and too warm.

Tricks and Tips for Trees and Large Shrubs

What about trees and shrubs whose stems are fully exposed. One way they protect themselves from freezing is by shedding those parts most likely to freeze—their leaves.Blueberries and snow

Which introduces Practical Rule #3: I help plants along with their leaf shedding by letting plants naturally slow down and begin to reallocate their energy resources beginning in late summer. No water, fertilizer, or pruning at that time. 

Of course, their stems still have to stand up and face the cold. Their living cells are filled with water. If this water freezes, the cells either dehydrate or suffer physical damage from ice crystals. 

Water, whether in a plant cell or a glass, does not necessarily freeze as soon as the temperature drops below 32 degrees Fahrenheit. To freeze, water molecules need something to group around to form ice crystals, a so-called nucleating agent. Otherwise it “supercools,” remaining liquid down to about minus 40 degrees Fahrenheit, at which point ice forms whether or not a nucleating agent is present. 

All sorts of things can serve as nucleating agents—bacteria, for instance—so plants may not be protected all the way down to minus 40 degrees Fahrenheit by having their water supercool. But winter temperatures don’t plummet that low everywhere, so just a bit of supercooling may be all a plant needs to survive winter cold. 

Another trick, effective well below that minimum supercooling temperature, is for a plant to gradually move water out of its cells into spaces between the cells. As temperatures drop, ice crystals outside plant cells grow with the water they draw out of the cells; plants then are threatened by dehydration than by freezing. Plants toughest to cold are those that are best at reabsorbing the water outside their cells when temperatures warm. Kiwivines covered with ice

One other mechanism at work “freezing point depression,” which is why antifreeze keeps the water in your car radiator from freezing. Dissolving anything in water lowers the freezing point, more so the more that’s dissolved. As liquid in plant cells lose water, remaining water becomes more and more concentrated in sugars and minerals, its freezing point keeps falling. 

Plants actively prepare for cold, with cell walls increasingly strong and and permeable. Light supplies needed energy for all this, making Practical Rule #4 to make sure to site and prune plants for adequate light.

Unfortunately, all this fiddling with a plant to help it through winter palls in the face of genetics. The very most that I can do to help plants face winter is to plant those that naturally tolerate the coldest temperatures winter is apt to serve up.

Get Crackin’

Cured!

It’s finally time to get crackin’. Literally. Black walnuts are ready for shelling.
This nutty story goes back to early this past autumn as black walnut trees were shedding their nuts. The nuts fall in their husks, the whole package looking like green tennis balls. Lots of people curse the trees for littering lawns, sidewalks, and driveways. We, on the other hand, praise and collect the nuts.Cracked and whole black walnuts

The first step to the present day crackin’ was husking the nuts. The soft, fleshy covering is easy to twist off the enclosed, hard-shelled nut. But we’ve also tried many methods to speed up the process, from spreading the dropped fruit in the driveway and driving over them to pounding them through a 1-1/2” hole in a thick piece of plywood to running them through a suitably modified old-fashioned corn-sheller.Black walnuts in husksVarious black walnut hullers

There’s no way around it: Husking black walnuts is a tedious job. And messy, because the soft flesh readily releases a juice which stains everything a deep brown color.
A friend recently told me of some novice black walnut enthusiasts that husked the walnuts bare handed, assuming the stain would wash off when they were finished. Not so. My wife Deb, who husks our black walnuts, chooses to sit herself down on a stool, don rubber gloves, and twist off the hulls, coaxing firm ones off with an initial tap with a light sledge hammer.

(The stain, which is colorfast and resistant to ultraviolet rays, is very easy to extract from the hulls for ink, for dyeing textiles, and staining wood. Just mix the hulls or unhulled nuts with water and boil for awhile or let sit a longer while. Strain and you’re good to go.)

In not too long, we had a number of 5 gallon bucketfuls of hulled nuts — a slimy, ugly mess from bits of hull still attached to the nuts and from the myriad white maggots crawling.

Now it was my turn — to clean up the nuts. I loaded all the nuts into shallow harvest boxes that had plenty of large holes for air or water and drove over to a nearby car wash. After suiting up in an old pair of rain pants, a rain jacket, rubber gloves, and a face shield, and spreading out the boxes on the ground in the car wash, I gave them a thorough, water-only cleaning.Husked nuts

I then spread the boxes out in the sun for a couple of days to dry out the surface of the nuts. Squirrels would be a serious threat but I spread the boxes on our south-facing deck where our two dogs also spend much of the day unknowingly guarding the nuts. Each night, or if any rain was predicted, I stacked and covered the boxes.
After the nuts were sufficiently dry, I stacked the trays in the barn where our cat is the squirrel deterrent.

Then the nuts needed to be cured, which involves nothing more than leaving them alone in a cool, dry, squirrel-fee area. And that brings us up to the present day.

A Tough Nut

Black walnut is a hard nut to crack. No run-of-the-mill nutcracker is up to the job. The usual tool, which is effective, is a hammer against the nut resting on an anvil or concrete. Used with care, a vise might do the job.

Two problems: With the hammer, hitting your finger occasionally as you hold the nut is inevitable. You could, I guess, hold the nut in a pliers. With either method, you have to use just the right amount of force to crack the shell sufficiently in order to extract the nutmeats in reasonable sized pieces without crushing everything too, too small.
The hands-down best job for cracking black walnuts is, in my opinion, the “Master Nut Cracker” (http://www.masternutcracker.com). It’s expensive but well worth the money for the speed with which the nuts can be cracked and the large nutmeats that result from efficient cracking. Besides which, it’s a very well-made tool with a very ingenious design.

Once nuts are cracked, nutmeats still occasionally need further coaxing to free them from the shell. A useful tool that I use that almost everyone has is a type of wire cutter sometimes called a diagonal cutting plier. The right squeeze in the right place, the result of observation and practice, yields large nutmeats that pop right out.Prying out nuts with pliers

But Is It For You?

Black walnuts have a strong flavor that, like dark beer and okra, is loved by some but not enjoyed by everyone. But there’s no reason why everyone should like everything. Leave that goal to MacDonald’s. As L. H. Bailey, a doyen of horticulture, wrote back in 1922 (about apples), “Why do we need so many kinds of apples? Because there are so many kinds of folks. A person has a right to gratify his legitimate tastes.”

Black walnut is one of my favorite nuts. And, the trees and nuts abound around here, and elsewhere, free for the taking.black walnuts in jar

Gardening by the Book

An outdoor temperature of 8.2 degrees Fahrenheit this morning highlighted what a great time winter is for NOT gardening, but for reading about gardening. A lot of gardening books, new and old, end up on my bookshelves, and I’d like to note a few favorites new to my shelves last year.

(Disclaimer: I had a new book published last year, The Ever Curious Gardener — available here. I like the book very much.)

The Ever Curious Gardener

For anyone serious about vegetable growing, Eliot Coleman, gardener extraordinaire, is the author to seek out. The Winter Harvest Handbook builds on his The New Organic Grower (recently re-issued to celebrate its 30th year since publication!) and Four Season Harvest, delving into innovative techniques for growing vegetables more efficiently and year ‘round, with minimum heat inputs even in northern climates.

The “aha” moment for me in reading Eliot’s method’s for year ‘round harvests was that sunlight, even this far north, is not limiting plant growth in winter. New York City and Madrid are at the same latitude! Mediterranean gardeners don’t abandon their vegetable gardens in winter; they just change plants, growing vegetables, such as spinach, lettuce, cabbage, and radish, that tolerate and enjoy cold weather. What we need on this – the cold side – of the big pond are ways to contain the earth’s heat and/or to provide heat efficiently to keep plants alive and growing. Read the book.

The title of the book Tricks with Trees, by Ivan Hicks and Richard Rosenfeld, doesn’t do justice to the neat things shown that people have done, and you could do, with trees. How about a tree trained as a chair, a living chair? Don’t expect to move such a chair anywhere because it’s rooted in the ground. One of my other favorites in the book is the “cloud seat.” (Use your imagination and you might guess what this is.)

People love the idea of meadows, perhaps because meadows seem low maintenance, perhaps because humans originated in the savannahs of Africa. Meadows have become very popular over the last few decades, and lots has been written about them. (I even have a meadow section in my book Weedless Gardening.) The American Meadow Garden, by John Greenlee, offers all you need to know and to grow a meadow. Saxon Holt’s photographs were so inspiring I contemplated turning my one-acre meadow into, well, more of a meadow. After seeing the photograph on page 41, I want shooting stars, a milkweed relative, in my meadow, which gets nothing much more than a yearly mowing.

Greenlee’s book does keep you grounded with plenty of information about the plants, about preparing the ground, and about maintenance, especially weed control. Maintenance? Weed control? Yes, a meadow, depending on your aspirations, may need both. My only beef with this book is that Greenlee makes no mention of mowing with a scythe, a most pleasant and very efficient tool for meadow maintenance.

Last, but certainly not least, is Science and the Glasshouse by William Lawrence. If the title sounds a bit old-fashioned, it’s because the book is old-fashioned; it was written in 1950. I visited Eliot Coleman this past summer and sometime during the visit we were lobbing titles of our favorite books back and forth. He threw me this one after I had lobbed to him Intensive Gardening, by Rosa O’Brien, also 1950 vintage and one of my favorite gardening books of all time (and one he had suggested to me back in 1973).

Back to Science and the Glasshouse, which I ordered asap, actually asaicgo (as soon as I could get online). My favorite thing about this book is that it challenges many commonly held notions by testing them scientifically. Mr. Lawrence, then head of the Garden Department of the acclaimed John Innes Horticultural Institute in Britain, subjected to scientific inquiry such beliefs as: cold soil is harmful to potted seedlings (it is not); crowding potted plants decreases growth of individual plants (sometimes); size matters, in pots for transplants (yes), and so on.

The second half of the book is devoted to the “glasshouse,” which greenhouses literally were back then. Mostly, his testing showed that plants in greenhouses did not always get all the light they should, not because of a lackadaisical old sol but because of dirty glass, poor orientation, and other things we can control. Which brings us around full circle back to Eliot Coleman’s capitalizing on winter sunlight.

Some Dirt Under the Fingernails

Okay, I am, in fact, doing a little gardening. I went down to the basement and brought 2 amaryllis plants upstairs to get them started growing for blossoms in February(?).

A Wizening Little Tree

Now, in its tenth year, my weeping fig is just waking up. (This plant is not one of my edible figs weeping from sadness, but a species of fig — Ficus benjamina — with naturally drooping branches.) As a tropical tree, its sleep was not natural, but induced, by me.

Bonsai fig

In its native habitat in the tropics, weeping fig grows to become a very large tree that rivals, in size, our maples. The effect is all the more dramatic due to thin aerial roots that drip from the branches, eventually fusing to create a massive, striated trunk. Because the tree tolerates low humidity, it’s often grown as a houseplant. Growth is rapid but with regular pruning the plant can be restrained below ceiling height.

At ten years old, my weeping fig is about four inches tall with a trunk about 5/8 inch in diameter and no aerial roots. Four inches was about the height of the plant when I purchased it in the houseplant section of a local lumberyard. Actually, four of these plants were growing in a 4 inch square pot. I separated them and potted one up with the idea of creating a bonsai.

The bonsai has been a success. Each year the trunk and stems have thickened to create the wizened appearance of a venerable old tree, in miniature. The soil beneath the spreading (if only 3 inch) limbs is soft with moss which has crept slowly up the lower portion of the trunk.

To Sleep, My Little Tree

Even after ten years the plant is in the same pot in which I originally planted it, a 4 by 6 inch bonsai tray only about an inch deep. Biannual repotting and pruning has been necessary to keep the stems and roots to size, and to refresh the potting soil to provide nutrients and room for roots to run (albeit very little room for a tree with such size potential).

Bonsai at one-year old

Back to my tree’s sleep: A few weeks ago, the sun dipping lower in the sky for a shorter time each day seemed to me like a good time to give the plant a rest, which it surely would be taking following my operation. 

I began with the roots. After tipping the plant out of its pot, I used a fork to tease soil away from the bottom of the root ball. Roots left dangling down in mid air as I held the plant aloft were easy to trim back. I was careful to leave the top portion of the roots and soil undisturbed in order to keep the mossy blanket intact.

Root pruning bonsai

With enough fresh potting soil added to the pot so the tree (despite its size, I think I can call it a “tree”) would sit at the same height in the pot as previous to pruning, the tree was ready to return to its home. I firmed it in place.

Next, I turned to the above ground portions of the plant, beginning by pruning stems so the tree would look in proportion to the size of its container and to maintain the increasingly rugged look of a tree, in miniature, beyond its actual years.

Finally, I clipped each and every leaf from the plant. This shocks the plant to sleep and reduces water loss, important for a plant from which a fair share of its roots have been sheared off. Clipping off leaves also induces more diminutive growth in the next flush of leaves, so they are more in proportion to the size of the whole plant.

Bonsai, fig, clipping leaves, '18

After a thorough watering, the tree was back in its sunny window. And there it sat, leafless, until a few days ago, when small, new leaves emerged.

Bonsai, fig, '18, new leaves

Pruning Moves Outdoors, Prematurely Perhaps

Pruning and repotting the bonsai wasn’t enough gardening for me. A couple of sunny days couldn’t help but drive me outdoors. A pile of wood chip mulch delivered a few months ago beckoned me; I spread it in the paths between my vegetable beds, a pre-emptive move to smother next season’s weeds.

I don’t usually prune this time of year (The Pruning Book, by me, recommends against it!), but couldn’t restrain myself. I started with the gooseberries and currants, both of which are super cold hardy plants so are unlikely to suffer any damage from pruning now. Plus, they start growth very early in spring.

Any of this gardening could be postponed until late winter or early spring. But why wait? 

Shears Galore


For Those Smaller Cuts

What gardener doesn’t need to prune some thing at some time? In many cases, a thumbnail suffices, as when pinching out the growing tip of a marigold or basil plant to make it grow more bushy. Or pinching off the soft green tip of a young apple shoot to temporarily stall its growth and let the leader, destined (by you) to be the future trunk and main limb, to remain top dog. Your thumbnail, though, isn’t always sufficiently long to use as a pruning tool, or else stems have toughened up beyond your thumbnail’s capabilities.7 pruning shears

When more than your thumbnail is needed, there are many pruning tools from which to choose. If you’re going to own but one pruning tool, that tool should probably be a pair of hand shears, which are useful for cutting stems up to about 1/2” across.

As with everything these days from cold cereals to corn chips to soaps, a wide, confusing array confronts you whether in a catalog, the web, or a store shelf. Having written a book about all aspects of pruning, inc

Bypass blade (left) vs anvil blade (right)

Bypass blade (left) vs anvil blade (right)

luding the tools of the trade (The Pruning Book), I’ve been afforded the opportunity to try out a slew of pruning shears. Looking for a pair to buy? I’m going to make it easier for you

Okay, okay, personal taste does come into play here. That’s why the ideal is to be able to fondle a candidate before purchase or, even better, try it out. Still, some general design features are important to function.

The blades, for instance. Blade configurations fall into one of two categories: anvil and bypass (the latter sometimes called “scissors”). The business end of the anvil-type shears consists of a sharp blade that comes down on top of an opposing blade having a flat edge. The flat edge is made of plastic or a soft metal so as not to dull the sharp edge. Bypass pruners work more like scissors, with two sharpened blades sliding past each other.

Anvil shears generally are cheaper than bypass shears — and the price difference is reflected in the resulting cut! Unless the single, sharp blade is kept truly sharp, the anvil pruner will crush part of the stem. And if the two blades do not mate perfectly, the cut will be incomplete, leaving the two pieces of the stem attached by threads of tissue. That wide, flattened blade also makes it more difficult to get the tool right up against the base of the stem you want to remove.

The blades of some bypass shears are hooked at their ends to help prevent stems from slipping free of the jaws as you cut. Other shears achieve the same effect with a rolling action of one bypass blade along the other as the handle is squeezed.Beyond blade design, certain special features found on some pruning shears might appeal to you personally. Some shears are tailored to fit left hands or small hands, although on some of the latter the effect is achieved by merely shrinking the maximum blade opening when adjusted to the smaller hand size. 

To make it easier to slice through thick stems, some shears have a ratchet action; weigh the virtue of more power against the need for repeatedly squeezing the handles for each cut. Other shears (allegedly) ease hand strain by having models with hand grips that rotate as you make the cut and/or varying the angle of the blades in relation to the handles.

And My Favorite Pruning Shear Is . . .

I have a collection of pruning shears and they all hang on the wall near the back door. A good test of how I actually feel about a particular pruning shear is how frequently I grab it as I go out the door.

I have narrowed down my favorites to three, which are  . . . ‘rat-a-tat-tat’ drum roll. Well, it depends on what I’m pruning. If it’s just light pruning, I generally reach for my Pica shears, a model that should be better known. They’re light but sturdy, and their blades are hooked at their ends to (I guess) help prevent stems from slipping free of the jaws as you cut.

For the heaviest cuts I’d make with a hand shears, I reach for my Felco No. 7, universally recognized as great shears by those in the know. It has a nice feel, although a little topheavy, and the blades are of high quality steel and are replaceable, as are most parts.

My favorite all-around shear, the one I’d get if I could own only one shear (shudder the thought!), is my ARS VS-8 pruner.

ARS VS-8 hand shear


Not a catchy name, but a top notch pruner with good weight, good steel, replaceable parts, and — my favorite part — easily opened with just a firm squeeze of the handles.

So there they are, my recommendations. Consider these before making an impulse purchase for whatever shear happens to be staring you in the face.