Berries Begin
/13 Comments/in Fruit, Gardening, Planning/by Lee ReichGreen Thumb Not Necessary
Every day, for some time now, my strawberry bed has yielded about five cups, or almost 2 pounds of strawberries daily. And that from a bed only ten feet long and three feet wide, with a double row of plants set a foot apart in the row.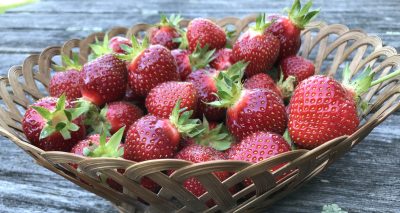
Good yield from a strawberry bed has nothing to do with green thumbs. I just did what’s required to keep the plants happy and healthy. To whit . . .
I planted the bed last spring to replace my five-year-old bed. About five years is about how long it takes for a strawberry bed to peter out due to inroads of weeds and diseases, including some viruses whose symptoms are not all that evident.
To keep my new plants removed from any problems lurking in the old soil, I located the new bed in a different place from the old one. Further forestalling problems, plants came not from a generous neighbor and not from my old bed, but from a nursery selling “certified disease-free” plants.
I chose to grow them in a “spaced plant” system (which does not involve getting plants high, ha, ha) but allows each plant a square foot of space. Throughout the growing season, I clipped off any runners and daughter plants attempting to establish themselves and crowd into the mother plant’s space.
Other growing systems allow for runners, which makes for more economical planting of a bed but reduced initial yield. Given free rein, though, new plants eventually become the worst weed in any strawberry bed; they must be dealt with in some way.
Did I mention that the new bed, like the old one, was in the vegetable garden, where the soil is rich in nutrients and organic matter, with plants’ thirst quenched daily via drip irrigation?
In late December, when the ground had frozen about an inch deep, plants were snuggled beneath mulch as protection from winter cold. Straw, pine needles, wood shavings — any loose organic material will do.
Come spring, just as soon as plants began to awaken, I pulled back new growth beneath the mulch and tucked it under the plants’ leaves. I also trimmed off any dead leaves. The new job for the mulch was then to keep the soil moist and the soon-to-form ripening berries clean of soil.
That’s it, for all those berries, fresh picked every morning. Every morning for a little while longer, that is. I planted a “junebearing” variety of strawberry, Earliglow, known for earliness and good flavor, but bearing only for a few weeks in June. Other varieties, so called “everbearing” and ”day neutral” varieties, bear repeatedly through the season.
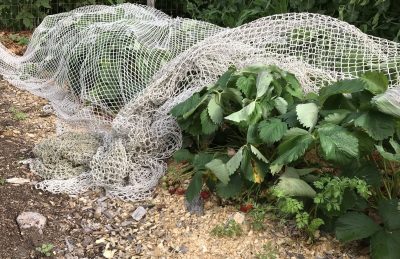 Once Earliglow stops bearing for the season, the bed will need renovation and, through the season, its runners pinched off weekly to keep each plant “spacey.”
Better Berries
You might wonder: Why such a relatively small planting of strawberries, and why only junebearers? This admission may be sacrilege: I’m not a big fan of strawberries. I like the fruit well enough, but mostly because they are the first fresh fruit of the season.
(One other fruit does beat out strawberries as the first fruit of the season. They are honey berries, a kind of edible honeysuckle. Their flavor, thus far, has not impressed me. Breeding and cultivating honeyberries is in its infancy. They’re perhaps where apple was 2000 years ago, and the future might bring more flavorful ones.)
Back to strawberries . . . another of their deficiencies, in my view, is that you have to crawl for the fruit. And, as mentioned previously, although technically perennial, beds should replanted in a new location every 5 years or so.
The Best Berries
The fresh strawberries came on the scene on the tails of last year’s frozen blueberries, one of my favorite fruits. Perfect. (The loss of frozen blueberries is softened by the freshness of the strawberries.)
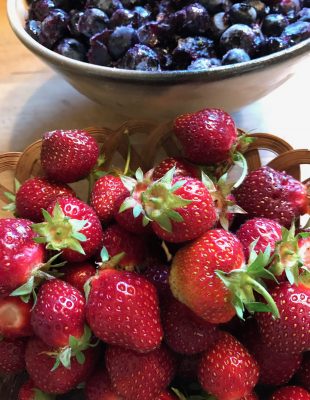
Last frozen blueberries, fresh picked strawberries
And just as the fresh strawberries fade out for the season, fresh blueberries will begin yielding this season’s bounty. Also, at the same time, black currants and red currants. And then black raspberries, and then . . . and on and on.
All You Need To Know About Blueberries
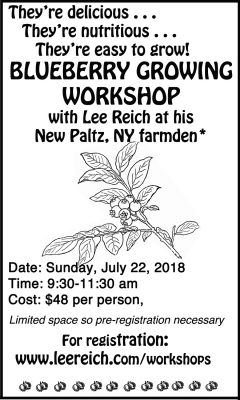
Interested in growing your own blueberries? It’s easy, if you meet their basic needs, all of which, including varieties, harvest, and other pressing questions about growing blueberries, will be covered at my upcoming BLUEBERRY GROWING WORKSHOP. The workshop will take place on my New Paltz farmden on July 22, 2018 from 9:30-11:30am, at a cost of $48. Registration is a must. For more information and registration, go to www.leereich.com/workshops.
Immigrants Welcomed
/5 Comments/in Flowers, Vegetables/by Lee ReichSad to See This One Leave, ‘Til Next Year
“So sad,” to quote our current president (not a president known, so far at least, for his eloquence). But I’m not sliding over into political commentary. I use to that pithy quote in reference to the fleeting glory of Rose d’Ipsahan.
A little background: Rose d’Ipsahan was given to me many years ago by a local herbalist under the name of Rose de Rescht, which it soon became evident it was not. 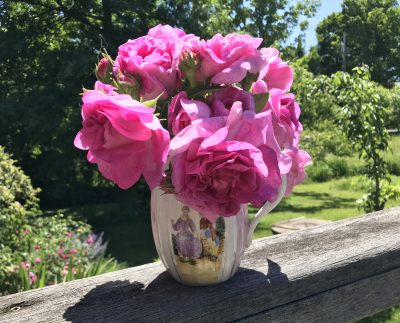 Descriptions of Rose de Rescht tell how it blossoms repeatedly through the season; not my rose. I finally honed down my rose’s identity from among the choices suggested by a number of rose experts based on photos and descriptions I had sent them.
Under any name, Rose d’Ipsahan would be my favorite rose. Without any sort of protection, it’s never suffered any damage from winter cold. Insect and disease pests do it little or no harm. And rather than intimidating thorns, the stems are covered by more user-friendly prickles.
The best part of Rose d’Ipsahan is its blossoms, a loosely packed head of soft, pink petals that are attractive from the time the opening bud shows its first hint of pink until the head fully expands. 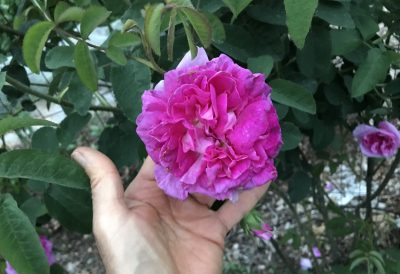 And the fragrance! Intense, and my favorite of all roses. Rose d’Ipsahan is a variety of Damask rose and has the classic fragrance of that category of rose.
This rose was discovered in a garden in the ancient city of Esphahan (sometimes written as Ispahan, Sepahan, Esfahan or Hispahan) in Iran, making its way to Europe from Persia sometime in the early 19th century. Interesting that a rose claiming as home a part of the world with very hot summers, mild winters, and a year ‘round very dry climate does so well in my garden. And elsewhere; this is a cosmopolitan plant.
Why, the “So sad?” Because Rose d’Ipsahan blossoms only once a season. Then again, it does have a relatively long season — for a Damask rose. I’m thinking of making some new plants to plant near the east or north wall of my home where spring’s later arrival would delay the onset — and finish — of blossoming a few days after my plants in the sun. Rose d’Ipsahan also tolerates some shade.
A Wild Italian
Another immigrant in my garden is arugula. Not your run-of-the-mill arugula (Eruca sativa), but a different species, this one usually known as Italian or wild arugula (Eruca selvatica). Italian arugula has a peppery flavor similar to common arugula, to me a little less sharp.
Italian arugula has it over common arugula in two ways. First of all,I think it’s prettier, with deeply lobed rather than mostly rounded leaves. 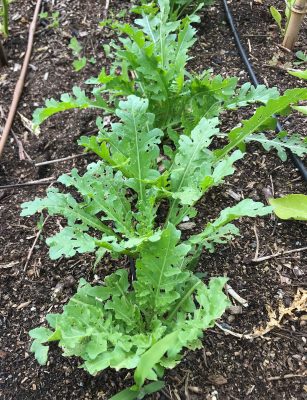 More important, Italian arugula tolerates heat better. As my rows of common arugula are sending up seed stalks, the Italian arugula just keeps pumping out new leaves.
The native home of arugulas, common and Italian, is the Mediterranean, where their flavors have been enjoyed since Roman times. Perhaps more than just for their flavor. In his poem Moretum, Virgil has the line “et Venerem revocans eruca morantem“ which translates to “and the rocket, which revives drowsy Venus’ [sexual desire].” Perhaps that’s why it was forbidden to grow arugula in monastery gardens in the Middle Ages.
It’s also been suggested that the reason arugula is often mixed with lettuce in a salad is to counteract arugula’s effect; lettuce contains the chemical lactucarium, a non-narcotic sedative and analgesic, structurally similar to opium. Lactucarium isn’t nearly as strong as opium, to say the least, because studies have shown none of the alleged effects from “lettuce opium,’ as the lettuce compound has been called. (I didn’t come across any studies confirming or denying the effects of arugula beyond good taste.)
Glad to Have These Immigrants
So there you have it, two immigrant plants well worth growing. I’m glad I welcomed them into my garden, and suggest you do so also.

