SOME THINGS FOR SOME SENSES
/5 Comments/in Flowers, Fruit, Gardening, Vegetables/by Lee ReichVisual Delight, and some Aroma
I once grew a rose, Bibi Maizoon, that I considered to be as close to perfection as any rose could be. Its blooms, that is. They were cup-shaped and filled with loosely defined row upon row of pastel pink petals, nothing like the pointed, stiff blossoms of hybrid tea roses. Completing the old-fashioned feel of Bibi Maizoon blossoms is the flowers’ strong, fruity fragrance.
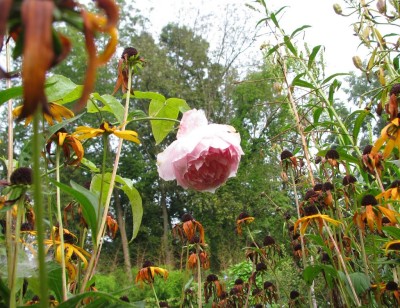
(In case you don’t know who Bibi Maizoon was, she was a member of the royal family of Oman. The Bibi Maizoon rose was bred by British rose breeder David Austin.)
The bush itself was as imperfect as the blossom were perfect. Where to begin? For starters, the thin stems could hardly support the corpulent blossoms. Couldn’t, in fact, so the blossoms usually dangle upside down. Upside down blossoms were not that bad because I considered Bibi best when cut for vases indoors to better appreciate her rare appearances and fragrance.
Top those deficiencies with the fact that Bibi Maizoon was also only borderline cold hardy in my garden and you would rightly guess that I no longer grow this rose.
I haven’t abandoned David Austin roses. I generally like them for their old-fashioned look: the bushes are, well, bushy and full; the blossoms have softer colors than those of traffic-stopping hybrid tea roses; and they are disease resistan and strong-growing.
I’ve previously praised the variety L. D. Braithwaite for its almost nonstop, dark red blossoms, red tinted leaves, and ability to laugh off any amount of cold. Three other varieties — Golden Celebration, Lady of Shallot, and Dame Judi Dench — came into my garden in the last year, their blossoms with varying degrees of yellow, the first a pure golden yellow, the second apricot-yellow, and the third apricot orange. Delicious. They all seem, so far, near-perfect.
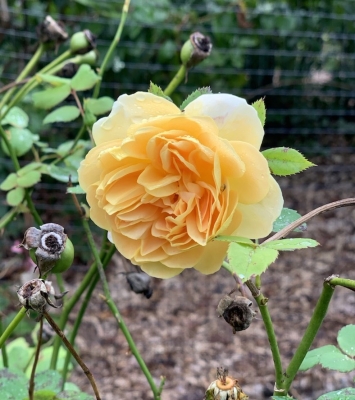
Golden Celebration rose
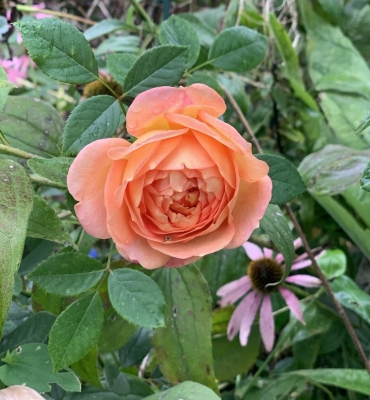
Lady of Shallot rose
Organoleptic Delight, and also Beautiful
Ellison’s Orange is as unknown to most people as is Bibi Maizoon. It’s an apple, an old and very delicious apple, and, oddly enough, ripening right now. Everywhere else I read that this apple is supposed to ripen later in September and on into October, yet every year my Ellison’s Orange fruits ripen about this time of year.
Like Bibi Maizoon, Ellison’s Orange has its good and bad sides. On the plus side, it bears very well and at a young age. It also seems to be somewhat resistant to scab and cedar apple rust diseases, contradicting other sources on this point also. And what a beauty the fruit is, with its orange blush over a yellow background.
For me, the downside of this variety is the absolute necessity to pick it at just the right moment. One day an apple seems puckery underripe; the next day it might be sleepy and soft. If I harvest very carefully, I catch an apple at its delectable best, which is sprightly with an intense flavor that hints of anise seed.
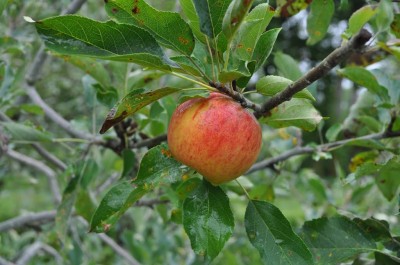
I made my tree from a piece of stem whose cells trace back over a hundred years, to the garden of a Reverend Ellison in Lincolnshire in the east of England. The parents of the reverend’s new apple weren’t lightweights. One parent, Cox’s Orange Pippin, the king of British apples, has an intense flavor that sometimes hints of anise seed. The other parent, Calville Blanc, an old French apple popular in the court of King Louis XIII, has a spicy flavor with just a hint of banana. No wonder Ellison’s Orange tastes so good – as long as I catch it at the right moment.
Another Tasty Delight
If you buy corn at a farmstand or market these days, no need to have boiling water ready, as gardeners did in the past to stop enzymes from starting the conversion of kernels from sugary sweet to starchy bland. Two genes incorporated into modern corn varieties dramatically slow this flavor decline. They also ratchet up the sugars, making modern corns supersweet to begin with.
Call me old-fashioned, but my favorite variety of sweet corn, the only variety that I grow, is the old variety Golden Bantam, which lacks those modern corn genes. Although not nearly as sweet as modern hybrids, Golden Bantam has a very rich corny flavor with – to some tastes — just the right amount of sweetness.

Golden Bantam, a hit since 1906
Golden Bantam was introduced into the seed trade in 1902 by W. Atlee Burpee Company, who got their original 2 quarts of seed from New York farmer William Coy, who had tasted and enjoyed eating some ears at his cousin’s house in Massachusetts. Long story short: Everyone fell in love with Golden Bantam and it became the most popular corn of its day. An article in The Boston Transcript of 1926 states that “In the twenty-four years since [1902] it has made more friends than anyone else could make outside the movies. Which proves that popularity does sometimes follow real merit.” It’s an odd way to compliment but you get the picture.
Golden Bantam pre-dates hybrid varieties, the latter of which, in addition to other characteristics, ripen very uniformly. In a backyard garden, a whole bed of corn ripening at once isn’t necessarily a plus. I want to eat some corn every day, with a little extra each day for freezing.
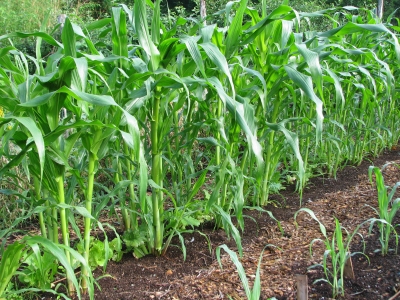
My four beds of corn, the first planted in mid-May (around the date of our last-killing frost of spring) and the subsequent beds staggered every two weeks, provides just that. We’ve eaten corn almost every day since each mid-August and Golden Bantam shows no signs of slowing down or boring us.
Interesting and Fun
/17 Comments/in Pests, Soil/by Lee ReichInteresting, But I Could Do Without It
Out doing stuff in the garden, I sometimes wonder: What’s fun about gardening? What’s interesting about gardening?
European hornets are interesting. My first encounter with them — large, intimidating looking hornets with fat, yellow and black striped bodies, was a few years ago when I saw it feeding on kitchen trimmings as I was about to add more to the compost pile.

The thought of a sting from this brute seemed horrendous; I learned, though, that they’re not particularly aggressive and their sting belies their ferocious look. The menacing-looking brute that entered the schoolyard turned out to be a pretty nice guy.
My next significant encounter with European hornets was this week, as I was gazing up into the branches of my plum tree admiring the ripe, red plums, ready for harvest. Reaching up and picking a fruit left me in hand with hardly more than the shell of a fruit that had been eaten out from the inside via a large hole chewed on the far side. In another fruit, I saw the culprit — a European hornet — at work. Lots of plums were being destroyed, as well as near-ripe apples.
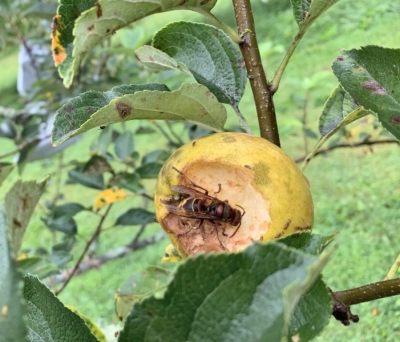
How interesting (and unfortunate). Now, what to do. Deb immediately suggested bagging the remaining fruits. I had a stock of “Japanese fruit bags” purchased many years ago and within the hour, all remaining apples a plums were harvested, if sufficiently ripe, or bagged.
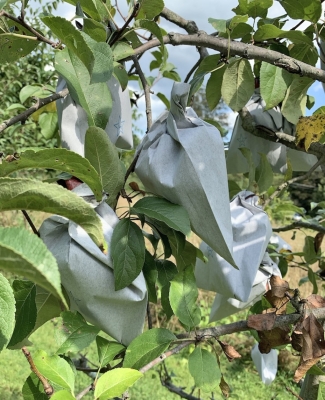
As for next year, perhaps European hornets will, as in past years, no longer be troublesome. Perhaps I’ll try trapping them; a research paper showed that they were attracted to funnel traps baited with a mix of equal parts glacial acetic acid and isobutanol. I’ll watch and wait.
Interesting, and Good
Also interesting (and this time fortunate) was the activity of local squirrels this year. Squirrels are particularly fond of peaches and plums, especially early in the season when fruits are dime-size. Not ever here, though. Good. But they are also particularly fond of my hazelnuts. Left to their own devices, they will strip the plants clean.
Over the years I’ve developed a multipronged approach to keeping squirrels at bay, usually, but not always, with success. This year, the hazelnuts were totally spared. Why? Was it my deterrents?
Now that I think of it, birds also acted out of character here this year. They usually strip every fruit from the Illinois Everbearing mulberry tree and the gumi bush. (My blueberry bushes sit within the Blueberry Temple, protected by bird netting.) This year birds again got most of the mulberries but left plenty of gumis for me.
The only time birds left all the gumis and mulberries for me was the back in 2013, the summer of the 17-year cicadas. Birds evidently relish cicadas more than my fruits.
Compost Fun
So what is predictably fun about gardening? Yesterday’s spreading of compost, that’s what.
The first of four beds of sweet corn had been harvested so I prepared the bed for an autumn harvest of “greens.” For starters, I chopped corn stalks off a couple of feet above ground level, then chopped them into smaller pieces in the garden cart. Digging around the base of each hill of plants was enough to sever the largest roots and allow the stalks to be tugged out of the ground and then also to the cart. I lightly raked off any remaining debris from the bed, pulled weeds, and then they went to . . . guess where? All this was added to a bin containing a growing compost pile.
Near that bin was another bin, a “finished” bin of dark, crumbly, and sweet-smelling (well, not sweet, but pleasantly fragrant) compost. Into the cleaned out cart it went.
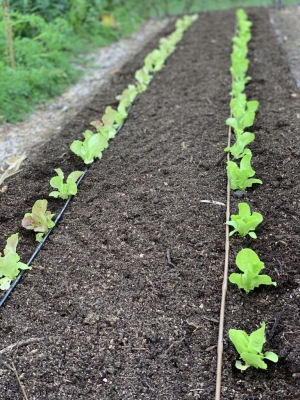
Back in the garden, I demarcated the edges of the old corn bed with a line of limestone and laid a metal 2 by 4 along each edge as a guide. Into the bed went enough compost for a leveled 1-inch depth. That amount of compost, in addition to smothering small weeds, letting rainfall percolate gently into the soil, maintaining moisture in the soil, and providing food and lodging for beneficial soil life, will provide all the nourishment vegetables in that bed will need for a whole year hence.
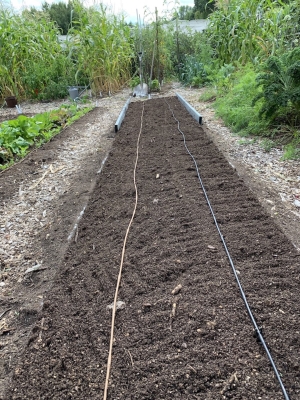
I firmed the compost by patting it with the back of my 6-pronged pitchfork creating what I, at least, thought was a nice pattern on the surface, perhaps inspired by a photo I’ve seen of a zen monk raking the gravel garden at the Ryōan-ji monastery in Japan. Final dressing on the bed was lettuce transplants, started about a month ago and ready to pop into the compost-dressed ground.
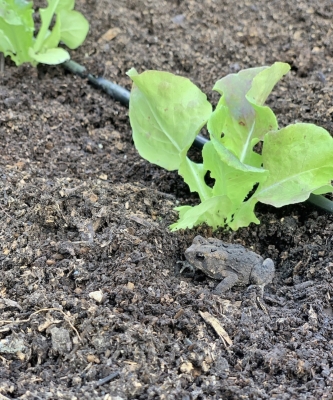
The toad liked my bed also.
Finally, I stood back and admired my work. What fun, and that bed is (to me) a thing of beauty.
Mmmmmmmm
/17 Comments/in Fruit, Vegetables/by Lee ReichGenetics, Timely Harvest, and ?
As I led my nephew Jeff, his wife, and their two kids around the garden a couple of days ago, I plucked fruits and vegetables here and there for them to sample. They could compare them with what New York City, where they live, has to offer. They were blown away by the flavors here.

Okay, I cheated a little. They got to sample some of the best of the best: figs so soft they were drooping from their stems, white alpine strawberries, Sungold cherry tomatoes, Golden Bantam sweet corn, and Kentucky Wonder green beans, all picked on the spot and at their peak of perfection. The Golden Bantam corn, you won’t find that offered for sale pretty much anywhere these days although it was the standard of excellence in sweet corn 100 years ago. The white alpine strawberries (Pineapple Crush) are too small and too soft for anyone to market commercially.
But genetics isn’t the whole story. Timely harvest is as important. Commercial considerations aside, it takes a certain skill to know just the right moment to do the deed.
With some plants, especially vegetables, timely harvest is easy. You pick such vegetables as lettuce, beans, and okra as soon as they’re big enough to suit you. You pick tomatoes when they’re red, which is also when I pick sweet peppers; red peppers taste quite different and, to me, a lot better than green peppers.
I haven’t grown eggplants that much over the years. This year they are particularly abundant and I’m still learning how to pick them. Full size? Glossy?
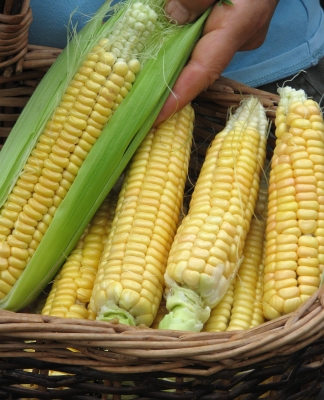
Sweet corn can also be tricky. It took me a few years to get the knack of picking it at its best. I first look for dried up silks and then, taking a tip the vegetable extension specialist at the University of Wisconsin passed on to me many years ago, I wrap my fingers around the ear and feel for fullness. That’s when it’s time to snap the ear down and off the stalk. Gauging that fulness does take practice.
Test for Ripeness
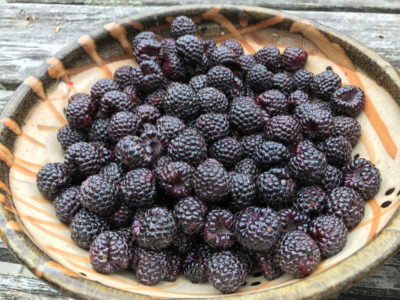
Fruits are a little trickier than vegetables, especially some fruits. Easiest of all are raspberries and blackberries. Tickle the clusters and let the truly ripe ones drop off, as they are wont to do, into the palm of your hand. Too many people tug at blackberries to get them off the plants; flavor suffers. Blueberries are similar to blackberries in that color doesn’t tell of full ripeness; the tickling method does.
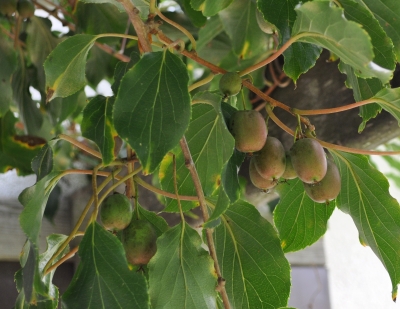
I grow a number of varieties of two vining fruits: grapes, of course, and hardy kiwifruits. The kiwifruits, which will begin ripening in a couple of weeks, retain their fresh, green color right through ripeness. What they do do when ripe is to soften. But not all together. Fortunately, when sufficiently mature on the plant, these fruits can finish ripening after harvest. As soon as the first kiwis ripen, I pick them all. They ripen to perfection in a few days at room temperature, longer under refrigeration.
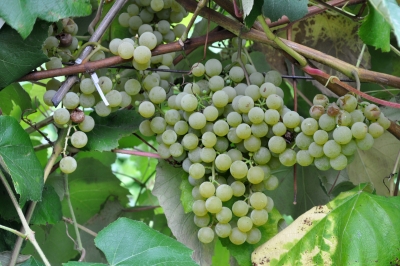
Blue or red grapes seem ripe when they turn their final color. Ripe for commercial purposes perhaps, but not perfectly so. When truly ripe the whole bunch will snap easily from the cane to which it is attached. I sometimes leave the bunches (the ones I enclosed in paper bags in early summer) even longer and, to a point, their flavor just gets better and better.
Most fruits, in fact, taste best if harvested when ready to part with the plant. That’s why for fresh eating, not storage, I sometimes harvest my apples from the ground, daily, the morning they drop. This might not be the best method for all varieties but makes for the very best Macoun apples.
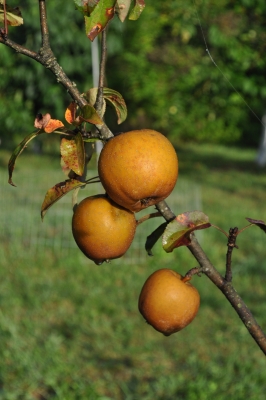
Generally, with tree fruits, I look for a change in color, especially background color, before considering harvesting a fruit. If there’s any green, I let it be. If color tells me that a fruit is potentially ready to be picked, I cup the fruit in hand, then lift and twist. If ripe, the fruit stalk readily separates from the plant. If that doesn’t happen, the fruit needs more time on the plant.
Tricky, for Me at Least
Two fruits whose harvest moment I’m still honing are watermelon and European pears.
I’ve tried all the methods with watermelon: thumping for a sound not too hollow and not to dull (the sound of knocking your knuckles against your chest as opposed to your forehead or stomach); a dried tendril opposite the fruit; a yellow-bellied fruit. They’re all guides but none are the end-all to timely harvest. I never had that problem with my large watermelon crop from my garden in southern Delaware.
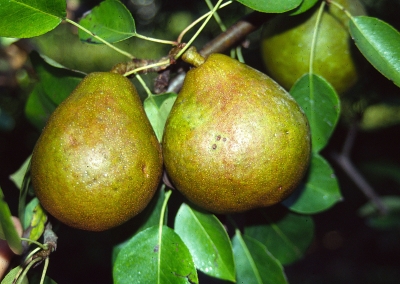
Magness pear
European pears ripen from the inside out so become mush if left on the plant to thoroughly ripen. They need to be harvested mature but not yet ripe as indicated by some fruits dropping, a slight change in skin color, and readiness of the fruit stem to part from the branch. Fruits brought indoors to finish ripening are ready to eat when the flesh at the stem end gives with slight finger pressure.
Still, it takes a certain je ne sais quoi. And again, I’m adept at timely harvest of those varieties I’ve grown the longest and of which I have the most.
Climacterics
One reason pears and kiwifruits can ripen to perfection after harvest is because they are climacteric fruits, which undergo a burst of respiration and ethylene (a plant hormone) production as ripening begins. Some of these fruits, which also which include banana, apple, tomato, and avocado can, if sufficiently mature, ripen following harvest. Soon after their climacteric peak, these fruits start their decline.
Citrus, fig, strawberry, plum, and raspberry are examples of non-climacteric fruits, whose ripening proceeds more calmly. Non-climacteric fruits will not ripen at all after they’ve been harvested. They might soften and sweeten as complex carbohydrates break down into simple sugars, but such changes are indicative of incipient rot rather than ripening or flavor enhancement.
For more about flavor, ripening, and climacteric, see my latest book The Ever Curious Gardener: Using a Little Natural Science for a Much Better Garden.

