A MONTH OF RECOGNITION
/7 Comments/in Pests/by Lee ReichGood in the Lab
National Fruit Fly Month — October — has drawn to a close. (That designation is my own, not the federal government’s.) Sure, a few still flit about here and there. But no longer do clouds of them hover over bowls of fruit in my kitchen. In case you haven’t experienced them, fruit flies, Drosophila species, are cute little (about 1/8 inch long) flies that feast on overripe and damaged fruit as well as other plant material.
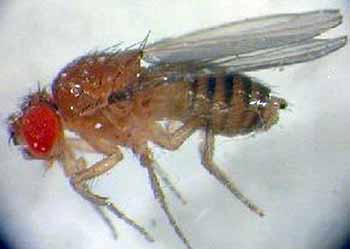
I, and perhaps you, were first introduced to fruit flies in middle school biology, raising them on some mix of banana and agar-agar. In those days, I got more intimate with them as part of a science project: My project was to test whether x-rays cause mutations. My dentist agreed to help. After raising a batch of flies, I went to his office and laid a vial of them on the dental chair whereupon Dr. Golden zapped them with a beam of x-rays. After the buggers and a similar vial of non-irradiated buggers had reproduced, I examined the offspring, especially their eyes and their wings. My experiment “proved” x-rays benign (as least as far as could be detected morphologically by a 13-year-old).
Fruit flies’ fecundity is what has earned them prominent positions in science. An adult lives for only about a month but during that tenure she may lay as many as 500 eggs. The courtship ritual of those little guys and gals is intricate, involving a kind of dance along with some instrumentation, provided by sounds from leg tapping, and some singing. Each gal gets involved with a number of guys.
Fun fact: Despite the small size of fruit flies, they have the longest sperm cells of any known organism — over 2 inches long for D. bifurca. Most of that length is the sperm’s tail. During mating, those tails are wound up in tightly tangled coils.
Not So Good in the Kitchen
Fruit flies are very interesting and useful in the lab but not in the kitchen. The flies lay eggs on the surfaces of fruits and vegetables. The eggs hatch into larvae which feed, in time turning the fruits and vegetables into a slimy mush. After molting twice, they morph into adults, who flit away to generate more offspring.
Growing up, I only knew fruit flies from the lab, never my mother’s kitchen. Why do they invade my kitchen? One possibility could be the smorgasbord my garden provides, more than ever spread on counters of that kitchen of yore. Also, refrigeration drastically slows the flies’ development but also can suppress or ruin flavors (tomatoes, for example) or speed wilting (lettuce, for example); I only refrigerate for longer term storage, not usually for fresh eating.
And being home grown, my fruits and vegetables need not aspire to the same cosmetic standards as commercial fruits and vegetables. Small wounds that I ignore or cut away provide access to fruit fly activity.
Still, I can’t let the flies run amok. Fortunately, fruit flies are easy to trap. And one of their favored baits, vinegar, is readily available. (Fruit flies have also been called “vinegar flies.”) Just put out a glass of vinegar and you’ll soon see a crowd of fruit flies flocking to it. That, of course, doesn’t trap them. Make that glass of vinegar into a trap by adding a little soap or detergent to the vinegar to decrease its surface tension so that, once in the drink, the fly can’t fly out.
Various kinds of vinegars are effective. Some people recommend apple cider vinegar. Or apple cider vinegar with a slice of banana thrown in. My preference is for balsamic vinegar. A mix of sugar, yeast, and water also works.
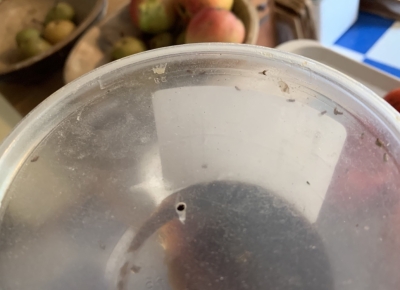
Look on the web and you’ll see all sorts of more intricate — but none very intricate — traps for fruit flies. My method is to take a plastic carryout container with a lid, punch or drill a 1/8” wide hole in the lid, pour some balsamic vinegar into the container, then replace the lid.
A more Frightening Relative
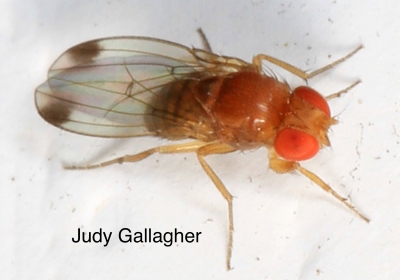
Spotted wing drosophila
October isn’t the only month of prominence for fruit flies. They are out there whenever the weather is congenial and food is available. One of them, spotted wing drosophila (SWD) is fairly unique in that this species need not wait for a fruit to be overripe, damaged, or nearly rotting to attack. It threatens intact, even underripe, fruit such as raspberries, blueberries, and other fruits of summer.
SWD is a relatively recent arrival on the garden scene (2008 in California, 2013 in my garden). At first it seemed that was going to be the end of blueberries, my favorite fruit. Over the years, I’ve been able to mitigate damage. Early on, I tried sprays of Entrust and Neem, as per recommendations. But even though organically approved, for me these sprays take some of the enjoyment out of growing and eating the berries. Fine mesh covering over a whole planting has also been tried (effective, but not tried by me).
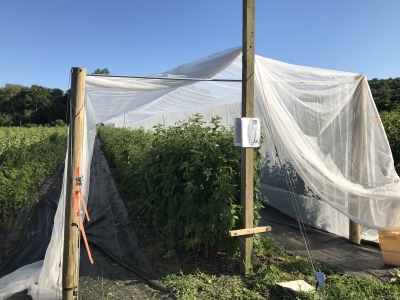
This year, and for the past few years, my blueberry planting has yielded its usual, good harvests utilizing a multi-pronged approach. For starters, I grow a dozen or so varieties that extend the season from late June until early September. SWD, here, at least, is inconsequential until early August, by which time our bellies and the freezer are almost full of berries.
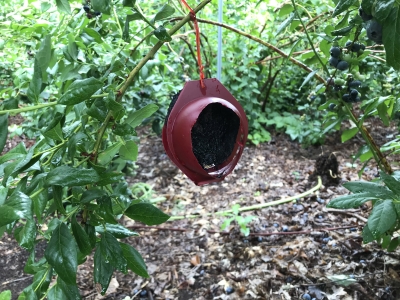
In the latter part of July, I hang out traps, one per bush, that I’m helping test for Cornell’s Peter Jentsch. They are baited with raspberry essence laced with boric acid, which needs to be renewed by weekly spraying (of the trap, not the plants). After 3 years of testing, the traps seem to be effective.
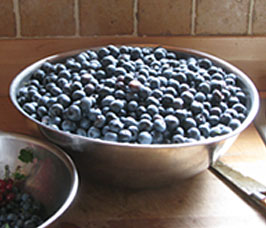
During summer, there’s always a bowl of freshly picked berries on the kitchen counter; by early August, fresh picked fruit goes into the refrigerator or, if the freezer’s quota still not yet filled, also into the freezer. Any larvae within fruit are killed after 3 days of refrigeration.
Fruit flies and even SWD, despite their fecundity, aren’t about to take over the world. These pests have their pests, which include yellow jackets, ant, various other kinds of flies, and even smaller creatures, such as nematodes. Quoting Jonathan Swift, “. . . a flea, Hath smaller fleas that on him prey; And these have smaller fleas to bite ‘em, and so proceed ad infinitum.”
YOGI WAS RIGHT
/9 Comments/in Fruit, Vegetables/by Lee ReichTo Do List
“It ain’t over ’til it’s over” said Yogi Berra, and so says I. Yes, the outdoor gardening season is drawing to a close around here, but I have a checklist (in my head) of things to do before finally closing the figurative and literal garden gate.
Trees, shrubs, and woody vines can be planted as long as the ground remains unfrozen. To whit, I lifted a few Belaruskaja black currant bushes from my nursery row and replanted them in the partial shade between pawpaw trees. A Wapanauka grape vine, also in the nursery row, is now where the Dutchess grape — berries too small and with ho-hum flavor — grew a couple of months ago. And today a couple of black tupelos are moving out from the nursery row to the edge of the woods, where their crimson leaves, the first to turn color, can welcome in autumn each year.
Kale, lettuce, endive, turnips, radishes, leeks, and celery still grow in the vegetable garden, but many beds are vacated for the season. Any remaining old plants will become food for the compost pile and the cleared off beds will then get a one-inch dressing of crumbly, brown compost from a pile put together last year.

Freezing weather would burst the filter, pressure regulator, and timer for the drip irrigation system, so these components have been brought indoors. The rest of the system stays in place.
The drip system may now be out of commission but some watering may be needed. Occasional days with bright sunlight and warm mean hand watering. How primitive!
Planning Ahead, Soil-wise
Making compost for use next year, same time, same place, is also on my checklist. Especially today, so the compost creatures within the pile can take advantage of lingering warmth in the air to work overtime. A pile that gets hot cooks to death most weed seeds and pests that hitchhike into the pile on what I throw in. And I throw in everything, in spite of admonitions from “experts” to keep diseased or insect-ridden leaves, stems, or fruits out of compost piles.
So today, after loading horse manure, with wood shavings bedding, into my truck pitchforkful by pitchforkful, I drove home and unloaded everything pitchforkful by pitchforkful into my compost bins. Each bin got a lot more than a restricted diet of just the horse manure mix, though. I alternated layers of manure with mowings scythed from my small hayfield, wetting down each layer well and sprinkling occasional layers with soil, for bulk, and ground limestone, to counteract soil acidity.
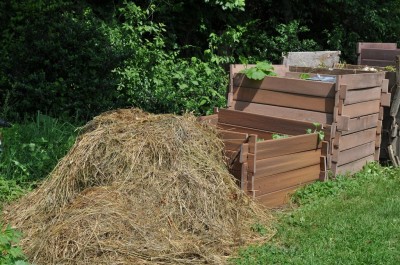
Manure is not a necessity for good compost. The manure mostly is for nitrogen, one of the two main foods of compost microorganisms. Some of my piles get that nitrogen from soybean meal, an animal feed usually meant for creatures that you don’t need a microscope to see. Early in the season, young grasses and weeds, which are high in nitrogen, do the same. And truth be told, any pile of plant material, if left long enough, will turn to compost. The nitrogen helps the material chug along faster on its way to compost, and the faster the microbes work, the hotter it gets.
Winter Work for Microbes
I’ll be feeding my last compost pile of the season all winter long. Just a little at a time, mostly scraps and vegetable trimmings from the kitchen with occasional toppings of leftover hay. Adding stuff slowly to a compost pile doesn’t let enough critical mass build up for heat, and especially not in winter’s cold.
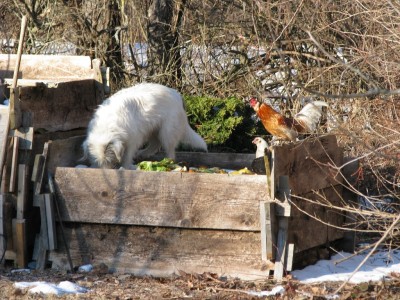
No matter. I just let piles that don’t heat up sit longer before I use them. It’s the combination of time and temperature that does in all the bad guys that hitchhike into my compost piles. So 1 hour at 140° F. might have the same deadly effect as a week at 115° F. My hot piles sit for a year before I use them; the cold piles cook longer. It ain’t over ‘til it’s over.
TASTING AND TIDYING, OR NOT
/8 Comments/in Fruit, Pruning, Soil/by Lee ReichFruit Heaven
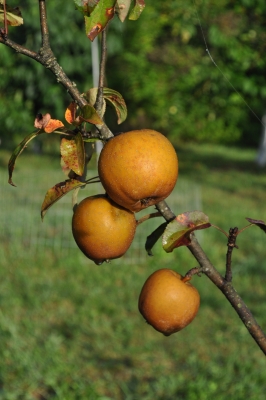
Hudson’s Golden Gem apple
I remember a few years ago of having a most fruitful — and I mean this very literally — experience visiting one of the USDA’s germplasm repositories. “Germplasm repository” doesn’t sound like the kind of place anyone would want to be, but these USDA repositories are, in fact, sunny, colorful places, often redolent with enticing aromas. In the case of the one I visited, the aroma was of ripening apples.
Germplasm is the stuff that gives rise to an organism, and the USDA has set up repositories around the country to house various kinds of plants. Each repository is situated where a particular group of plants grows well. So Davis, California is home to the repository for figs, pomegranates, and Asian persimmons; Corvallis, Oregon is the repository for pears, gooseberries, and mint; and Geneva, New York, where I visited, houses the collections of apples and American-type grapes. (My own gooseberry collection helped build the gooseberry collection at Corvallis about 30 years ago.)
Taking into account seed collections and other, related work, these repositories maintain over 20,000 accessions of plants representing over 300 species. Germplasm from these collections is available to scientist and other interested citizens, which is how I obtained grafting wood to make most of the rare varieties of apples and pears that I grow.
So there I was — a fruitophile — standing with clipboard in hand and camera in pocket in in a field of apple trees, each one a different variety. My mission: Photograph and collect 3 to 4 samples of a couple of dozen varieties. What sweet labor! (I had previously contacted the repository staff and received permission).
Up and down the rows I went, photographing, collecting, and, of course, tasting. Apples have been cultivated for so long and are so popular a fruit that it’s no wonder that such great variation exists in the fruits’ appearances and flavors. Flavors include anise-flavored Ellison’s Orange, sweet Mollie’s Delicious, spicy-tart Cox’s Orange Pippin, and everything in between and beyond. The range in color goes from gray-brown Pomme Grise to cheery red-splashed yellow King of the Pippin. And then there are variations in fruit size and shape and, less obvious, characteristics such as pest resistance, productivity, and cold tolerance.
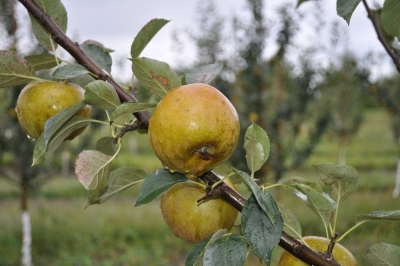
Ashmead’s Kernel apple
Most important, to me, is flavor. I should have brought a palate cleanser because after a while all the varieties were beginning to taste like . . . well . . . apples. Nonetheless, two varieties that I did not grow did stand out for flavor; I ordered grafting wood of Hudson’s Golden Gem and Pitmaston Pineapple to graft onto trunks of my Ingrid Marie trees once I lop their tops off.
After the apples, there were grapes to photograph and sample.
Tidy Not
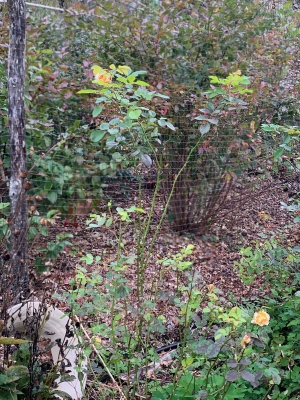
Boy, would I love to tidy things up with some pruning now. The Golden Celebration rose bush would look nicer in coming months with those couple of tall, gawky stems cut off or back.
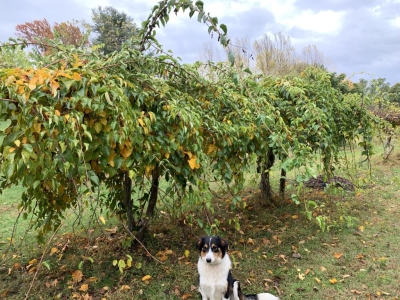
Grape and hardy kiwi stems are reaching out all over the place, grabbing onto each other and anything else they can wrap around.
The pear trees have a nice spreading form — except for watersprouts shooting vigorously skyward from the uppersides of some of the spreading branches. How nice it would be to cut these plants back now rather than in spring.
But I’m going to restrain myself from doing any pruning. As stated in The Pruning Book (by me!), “Although immediate regrowth rarely occurs after late summer or autumn pruning, cells right at the cut are stirred into activity to close off the wound. Active cells are liable to be injured by cold weather, which is a reason to avoid pruning in late summer or autumn except in climates with mild winters or with plants that are very hardy to cold.”
Gooseberries and currants are super cold hardy plants and begin growth relatively early in spring. All of which makes a good case for pruning those plants now.
And a Case for Not Tidying
Rather than prune, a good place to re-channel that “tidy everything up” urge is in the vegetable and flower garden.
Cleaning up is one way to lessen pest problems next year. As I pulled out spent bush bean plants, I gingerly placed them into the garden cart and, from there, onto the compost pile, trying not to disturb the resident bean beetles. Those bean beetles had hoped to spend the winter on site, to emerge next spring and lay eggs on next year’s bean plants. I’m hoping to “cook” as many of them as possible in the compost pile.
Tomato plants are looking a bit ragged even though they’re still bearing some tomatoes for fresh eating. Gathering up all stems, leaves, and old fruits and composting them reduces the inoculum load of diseases such as early blight and septoria leaf spot. Left in place, they would spend winter out in the garden ready to infect next year’s plants. It’s not a question of eradication, which isn’t possible, but of balance.
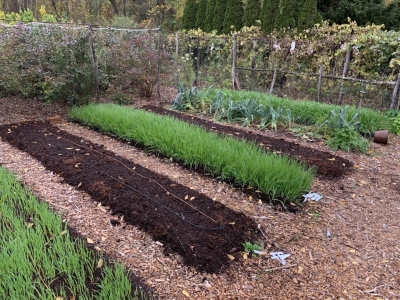
Cutting down old peony stems and composting them takes inoculum for next years botrytis disease off-site. Left to infect plants next spring, botrytis could keep peony flower buds from unraveling.
As Charles Dudley Warner wrote over a hundred years ago (in My Summer in the Garden, which I highly recommend and is much more than a gardening book), “the closing scenes are not necessarily funereal . . . a garden . . . goes into winter-quarters . . . neat and trim . . . so that its last days shall not present a scene of melancholy ruin and decay.”

