I MAKE TREES

Here are 3 Easy, Fun Grafts I Made Yesterday

Finally, the weather cooperated and I got around to doing some grafting. I could have done it a couple of weeks ago, as I had planned, but I’m blaming cooler weather for the delay. Not that I couldn’t have done it back then, but things chug along more quickly in warmer weather, so I waited.
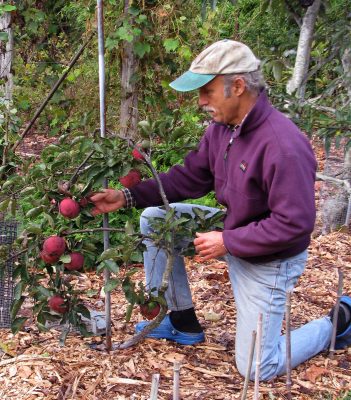
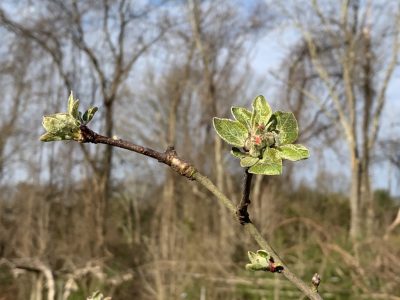
Apple tree on very dwarfing rootstock

Apple tree on very dwarfing rootstock

I’m going to describe 3 easy grafts I did yesterday. Which one I chose to do depended on the size of the rootstock on which I was grafting. The scions, which are the varieties I’m grafting on the rootstocks, are all one-year-old stems 6 to 12 inches long and more or less pencil-thick (remember what pencils are?). They have been stored, wrapped to prevent drying out, in the refrigerator so that they are more asleep than the awakening rootstocks.

The principles that make any graft work are all the same. Close kinship of stock and scion. Close proximity of the cambium — the layer just beneath the bark — of the stock and of the scion. All open wounds sealed against moisture loss. And immobilization of rootstock and scion until graft succeeds. My book, The Ever Curious Gardener: Using a Little Natural Science for a Much Better Garden, goes into more detail about the why and the how of grafting.

A Tree Make Over

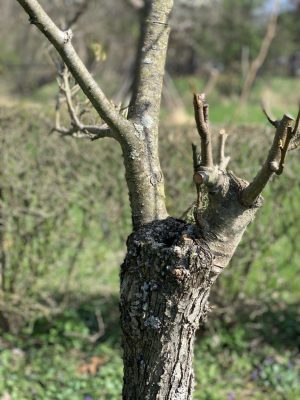
For starters, I turned to the bark graft, good for grafting on rootstocks a couple or more inches across. This first graft was on a Tyson pear tree whose flavor wasn’t up to snuff, so that graft began with doing a Henry the Eighth, lopping off the tree’s head to graft height, which was a couple feet from ground level.

The bark graft comes with an good insurance policy. That’s because onto each rootstock, depending on its diameter, I can stick 3, 4, 5, or even more scions. Only one scion needs to grow, but the more that are grafted, the greater the chance of at least one growing. 

I prepared a scion with a bevel cut 2 inches long, at its base, not quite all the way across from one side to the other. On the opposite side of the cut, I nicked off a short bevel.
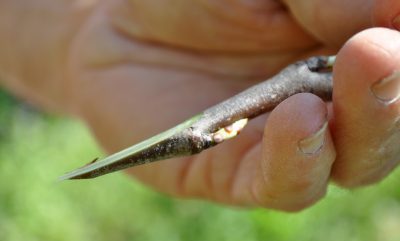
Bark graft scion prepared
Then, into the freshly cut stub on the rootstock, I made two vertical slits through the bark, each about 2 inches long and as far apart as the width of the base of the scion.
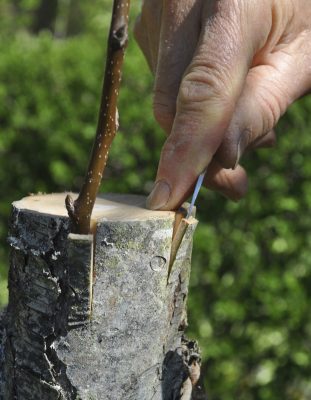
Bark graft rootstock prep
Carefully peeling back the flap of bark welcomed in the long, cut surface of the scion, putting the cambial layers of rootstock and scion in close contact. This was repeated with the other scions, all around the stub. With the peeled back flaps of bark from the rootstock pushed back up against each inserted scion, one or two staples from a staple gun or a tight wrapping with stretchy electrician’s tape sufficed to hold everything in place.

Finally, I sealed all cut surfaces against moisture loss, for which there are a number of home-made and commercial products. My favorite is a commercial product called Tree-Kote, a black goo that works really well and absorbs sunlight.
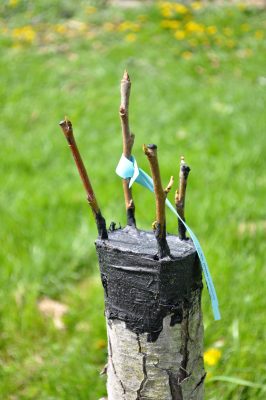
Bark graft, completed

Another Tree Make Over, For Smaller Trunks

For smaller rootstocks, say 3/4 inch up to a couple of inches across, there’s the cleft graft. This also comes with an insurance policy, though not as good as that of the bark graft because it only gets two scions per graft. Still, it’s easy so chances for success are high.

At the base of each of the two scions, I made two bevel cuts less than halfway through, each two inches long and not exactly on opposite sides. Viewed head on and from below, the uncut portion was slightly wedge-shaped.
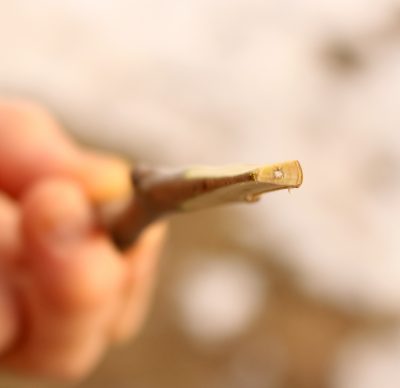
Scion ready for cleft graft
Turning to the rootstock, an older rootstock (OH x F 87), I lopped it off squarely, with a saw, then created a split a couple of inches deep in the middle of the cut surface by hammering a heavy, sharp knife right down into it. After removing the knife, a screwdriver pushed down into the split separated it enough to insert the two prepared scions at each edge of the cleft with their cambiums aligned with the cambium of the rootstock.
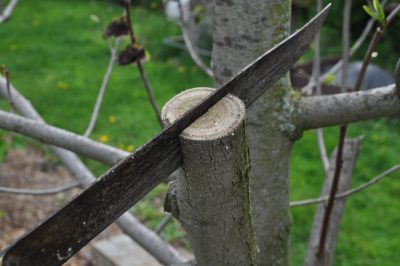
Preparing rootstock for cleft graft
Pulling out the screwdriver caused the springiness of the rootstock to close the cleft and hold the scions securely in place. As with the bark graft, all cut surfaces got smeared with Tree-Kote.
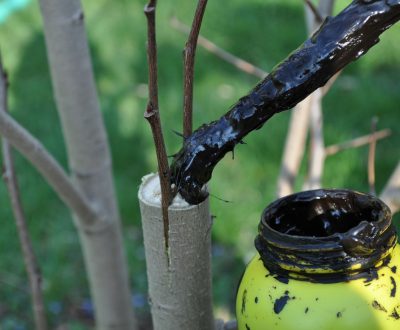
Sealing cleft graft

And Some Baby Tree Grafts

The whip graft is my graft of choice when rootstock and scion are about the same thickness, pencil-thick. Rootstocks for whip grafts were again OH x F87 pears, this time one-year-old rootstocks, pencil-thick.

I cut at the bottom of the scion with a smooth, sloping cut an inch to an inch and a half long, and made a similar cut at the top of the rootstock.
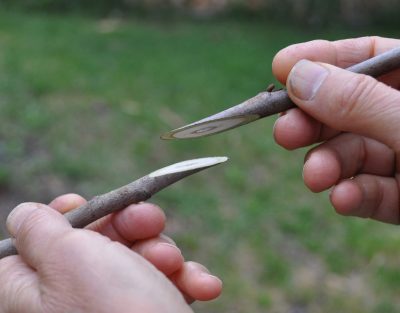
Whip graft stock and scion
Holding the sloping cuts against each other and aligning just one edge of each if their diameters didn’t exactly match, I bound rootstock and scion together with a rubber grafting strip. (I’ve also used thick rubber bands, sliced open.)
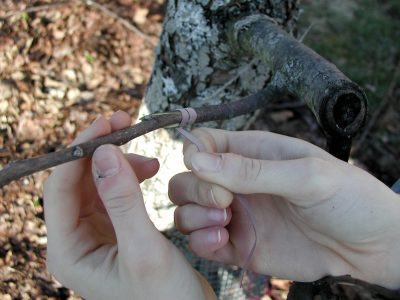
Wrapping whip graft

Wrapping whip graft

As with any graft, cut surfaces must be sealed against moisture loss. Parafilm® helps holds the graft together and seals in moisture. Once my whip graft scions are growing strongly, I’ll cut a vertical slit into the binding to prevent it from choking the plant.
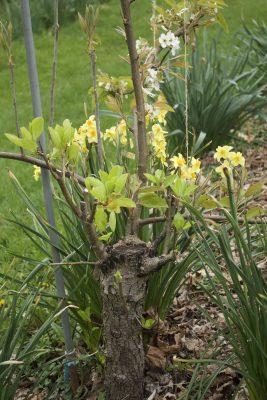
Bark graft 3rd season

Bark graft, season 3, note flowering

There you have it: 3 easy grafts to make new trees or make over an older tree. Now the excitement begins, watching and waiting for new growth. Sometimes, with that large root system fueling growth, a bark graft scion will grow 2 or 3 feet its first season!

PRUNING FOR BEAUTY, FUN, AND FLAVOR

Yew Love

Mundane as she may be, I love yew (not mispelled, but the common name for Taxus species, incidentally vocalized just like “you”). Hardy, green year ‘round, long-lived, and available in many shapes and sizes, what’s not to love? Perhaps that it’s so commonly planted, pruned in dot-dash designs to grace the foundations in front of so many homes.

Still, I love her. For one thing, Robin Hood’s bow was fashioned from a yew branch (English yew, T. baccata, in this case). Two other species — Pacific yew (T. brevifolia) and Canadian yew (T. canadensis) — are sources of taxol, and anti-cancer drug.
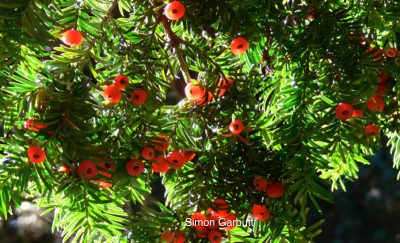
Yew berries
At a very young age, I became intimate with yew bushes surrounding our home’s front stoop, on which my brother and I would often play. Yew’s red berries, with an exposed dark seed in each of their centers, would give the effect of being stared at by so many eyes. Sometimes we’d squish out the red juice, carefully though, because we were repeatedly reminded that all parts of the plant are poisonous. (I’ve since learned that the red berries are not poisonous; but  other parts of the plant, including the seed within each red berry are poisonous.)

If yew has, for me, one major fault, it’s that deer eat it like candy. Interesting, since grazing on yew can kill a cow or a horse.

Mostly, I love yew because she takes to any and all types of pruning. My father once had a very overgrown yew hedge threatening to envelope his terrace. I suggested cutting the whole hedge down to stumps. Following an anxious few weeks when I thought my suggestion perhaps overly bold, green sprouts began to appear along the stump. A few years later the hedge was dense with leaves, and within bounds.

Although usually pruned as a bush, yew can be pruned as a tree. A trunk, once exposed and developed, has a pretty, reddish color. Deer sometimes take care of this job, chomping off all the stems they can reach to create a high-headed plant with a clear trunk. 

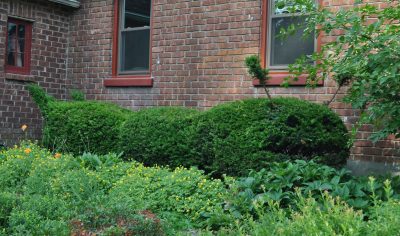
As an alternative to being pruned to dot-dash spheres and boxes, yew hedges can be pruned to fanciful shapes, including animals, or “cloud pruned” (niwaki, the Japanese method of pruning to cloud shapes). Many years ago, I followed the herd and planted some yews along the front foundation of my house, pruning them to one long dash. No dots.
Yew caterpillar
Since then, I’ve converted that hedge to a giant caterpillar and, more recently, tired of the caterpillar and attempted to cloud prune it, not with great success so far. (It’s my shortcoming as a sculptor, not the plant’s fault.) The goal in this case is not the kind of cloud pruning with clouds as balls of greenery perched on the ends of stems. My goal is to blend the four plants together as one billowy, soft cloud.

Facing my kitchen window is another yew, a large one that was planted way before I got here. Its previous caretaker, and up to recently I, have maintained it as a large, rounded cone. Last year I decided to make that rounded cone more interesting, copying a topiary in Britain. The design is in its early stages, awaiting some new growth this year to fill in bare stems now showing in interior of the bush.
Yew topiary in progress

Not Too Late for Peaches

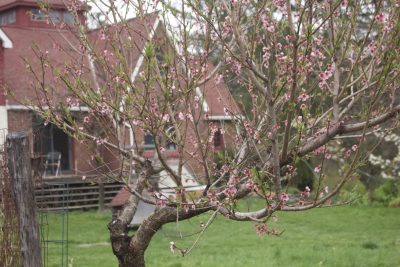
Moving on to more pragmatic pruning . . . peaches. No, it’s not too late. In fact, the ideal time to prune a peach tree is around bloom time, when healing is quick. This limits the chance of stem diseases, to which peaches are susceptible.

Peach tree, before pruning

Peach tree, before pruning

Peach trees need to be pruned more severely than other fruit trees. As with other fruit trees, the goals are to avoid branch congestion so remaining branches can be bathed in light and air, to plan for future harvests, and to reduce the crop — yes, you read that right — so that more energy and better quality can be pumped into remaining fruits.

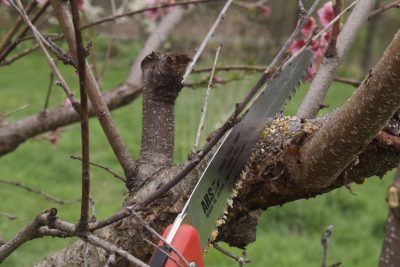
To begin, I approached my tree, loppers and pruning saw in hand, for some Sawing peach limbmajor cuts aimed at keeping the tree open to light and air.
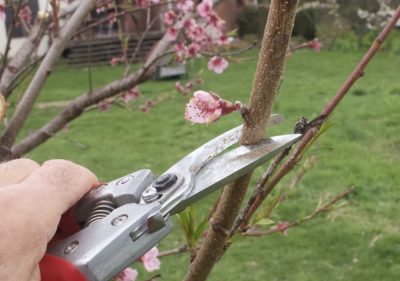
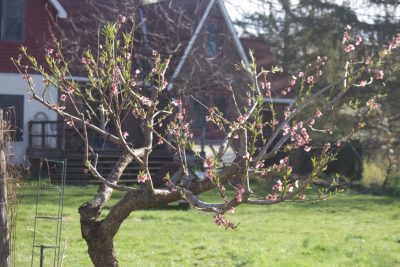
Peaches bear each season’s fruits on stems that grew the previous season. So next, with pruning shears, possibly the lopper, in hand, I went over the tree and shortened some stems. This coaxes buds along those stems to grow into new stems on which to hang next year’s peaches.
Shortening peach branch
And finally, I went over the tree with pruning shears, clipping off dead twigs as well as weak, downward growing stems. They can’t support large, juicy, sweet fruits.

Done. I stepped back and admired my work.
Peach tree after pruningAnd, of course, for more about pruning, there’s my book, The Pruning Book.
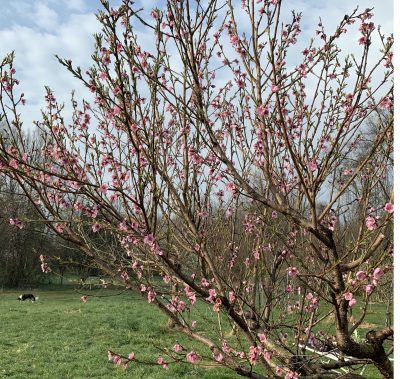
Spring: A Manic Time in the Garden

The Season’s Ups and Downs

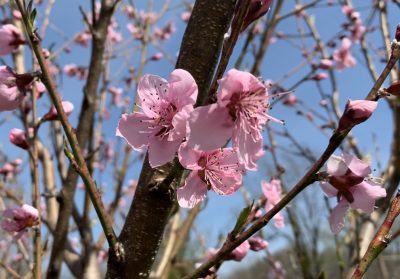
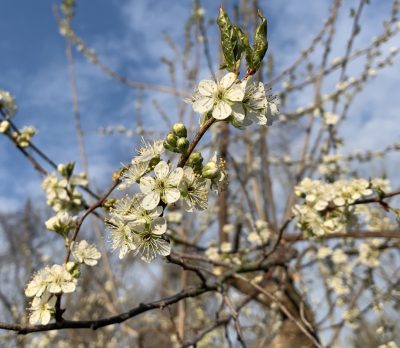
To me, spring can be a manic time of year. On the one hand, no tree is more beautiful or festive than a peach tree loaded with pink blossoms. I’d say almost the same for apples, pears, and plums, their branches laden with clusters of white blossoms.
Peach tree in bloom
And it’s such a hopeful season. If all goes well, those blossoms will morph, in coming months, into such delicacies as Hudson’s Golden Gem and Pitmaston Pineapple apples, and Magness, Seckel, and Concorde pears. My peach tree was grown from seed, so has no name. With all this beauty and anticipation, I can periodically forget the pandemic that’s raging beyond my little world here.

But even as my eyes feast on the scene and I forget about the pandemic, I can’t forget about the weather’s ups and downs. Specifically, the temperature: Frosty weather has the potential to turn blossoms to mush and ruin the chances for fruit. Especially on my farmden, here in the Wallkill River valley. As in other low-lying locations, on clear, cold nights, a temperature inversion occurs, with heat radiated to the clear sky making ground level temperatures low. Cold air is denser than warmer air, so all the cold air flows down slopes to collect in valleys.

There’s not much to do to avert that frost damage. A blanket thrown over a tree would help but my trees are too large and too many. Branches could be sprayed with water; water, in transitioning to ice, releases its heat of fusion as long as it’s continuously applied. A helicopter or a “wind machine” could dilute colder air at ground level with warmer air from higher up. These methods might be used commercially but, to quote the sage of Newburgh (that’s another story), “That’s not gonna happen” here.

Therapy, a Plan

Rather than worrying myself into the manic phase of spring, I’m going to assess the damage and live with it. For starters, I need to know the temperature.

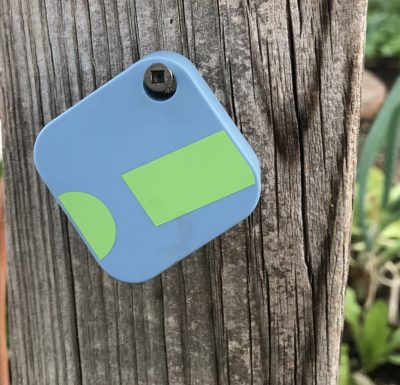
I have been using is a nifty little device called Sensorpush, a 1-inch square cube, perhaps a half-inch thick, that I have mounted outside and that continually transmits the temperature to my cell phone.Sensorpush receiverGreat. Even better, temperature (as well as humidity) is recorded, and can be displayed graphically or downloaded to my computer. So I didn’t have to be awake to find out the mercury hit 32.5°F at 12:16 AM on the night of April 17th and stayed there until it began rising around 7 AM.
Sensorpush readout
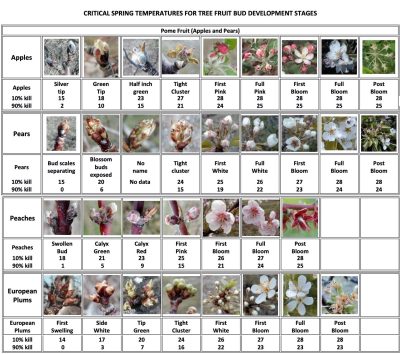
Fortunately, researchers have compiled temperatures at which damage to blossoms occurs. Specifically, damage enough to wipe 10% of the crop, and damage enough to wipe out 90% of the crop. And more specifically, applying those numbers to various kinds of fruits, which vary in their blossom’s cold tolerances. And even more specifically to the various stages of blossoming for each kind of fruit. Generally, less cold is required to kill a blossom the closer it is to bloom time.

Here is a chart compiled and photographed by Mark Longstroth of Michigan State University:
Critical temperatures for fruit buds

So now I can take this information, couple it with data recorded by Sensorpush, and foretell my sensory future, pomologically speaking. Below freezing temperatures since trees awakened have been 24° on April 17th, 27° on April 19th, and 26° on April 21st. Of course, it ain’t over till it’s over, and the average date of the last frost here is about mid-May.

Peach blossoms

Peach bloom

Plum blossoms

Plum blossoms

My plum trees were in full bloom on April 13th, at which time the blossoms are susceptible to 10% kill at 28° and 90% kill at 23°. That makes only 10% loss. The peach tree was also in bloom on that date, and is very similar in it’s blossom’s cold tolerance, so only 10% loss there also, so far.

Asian pears were showing “first white” and “full white” on April 19th, when the low hit 27°. That temperature would cause them no damage. The same would be true, going forward, for subsequent temperatures above 27°. The Europeans should be fine because today, April 21st, they are in tight cluster, and cold hardy to 24°.

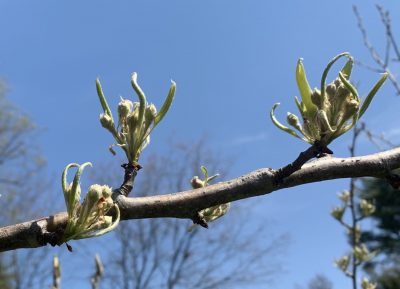
Asian pear blossom

Asian pear full white

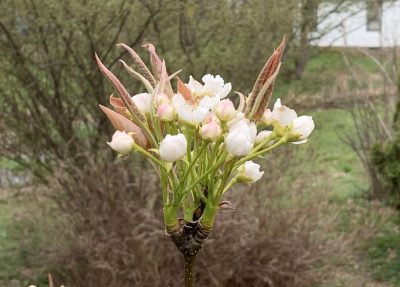
European pear blossom

European pear tight cluster

Apples also are fine, also in tight cluster so, according to the chart, undamaged by temperatures above 27°.

Apple blossom pink tip

Apple blossom tight cluster

And a Sprinkle of the Unknown

All this seems very science-y comforting, and it is. As with most garden science, though, things are more complicated, to some extent, than can be easily predicted. For one thing, some variation in cold hardiness undoubtedly exists from one variety to the next. In the case of my trees, I have an American hybrid and some European hybrid plums; they might more generally differ in blossom hardiness. And what about the length of time at a given temperature, and the effect of humidity?

Overall, the chart has calmed me down. Not to mention that a certain amount of fruit loss would be a good thing. A tree has just so much energy, and too big a crop makes for less flavor and size. Only 5% of blossoms of an apple tree need to set fruit for a full crop.

Now, I can move on to worry about insect and diseases that might hone in on my fruit.

I GET MY KICKS

Roots Do It

Some people get their kicks from hang gliding; some from racing cars. Call me mundane, but I get a similar thrill, minus the fear, from seeing cuttings of some new varieties of figs that I am propagating take root. The cool thing about hang gliding, racing cars, and rooting cuttings is also the sense of satisfaction you get from doing it well.

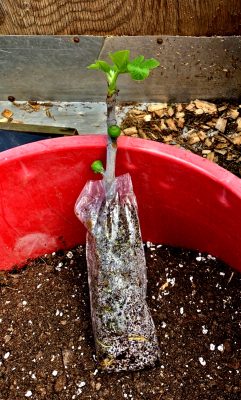
The current batch of cuttings provides special satisfaction because the method I used, gleaned from the web (see, for instance, what turns up with a search for “fig pops”), permit me to check and observe progress frequently. Usually, I stick a cutting into a rooting mix and learn that rooting has taken place by the resistance of the stick to an upward tug or by roots escaping through the drainage hole in the bottom of the pot. With fig pops, I get to see each cuttings wiry, white roots wending their way through the rooting mix soon after they first start to develop. Fig pops are also a way to root lots of cuttings in a small space.
A fig pop
The current figs are rooting in 3” by 8” clear, thin plastic bags filled with my usual 1:1 mix of moist peat moss and perlite.  I pushed the cuttings, fig “sticks” of last year’s growth 1/4 to 1/2 inch thick, into the mix almost to the bottom, then sealed the top closed with a twist-tie. One cutting per bag. Roots need to breathe, so I poked each bag full of holes with a toothpick. That’s it, except when the bags seemed too dry I stood them in a pan with a couple of inches of water for awhile.

(Dipping the cuttings in a commercially available rooting hormone would probably improve rooting, but I don’t use them. To me, the health precautions needed when dealing with them takes the fun out of gardening.)

All that, and time, would have been enough. But to speed things up, I moved the cuttings to a place where they’d get some warmth on their bottoms. That could have been atop a refrigerator, above, but not on a radiator, or, in the case of my cuttings, on a seedling heating mat.
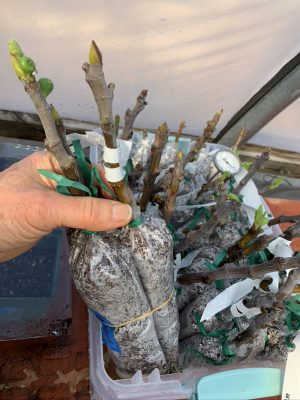
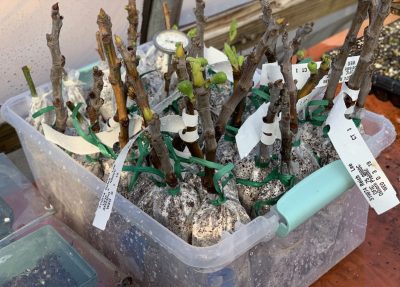
Fig pops
Fig pops together in tubNo light is needed until cuttings start to leaf out. Which is an exciting moment, because roots might — or might not — begin to show about then. All that’s needed is to lift a fig pop and take a look. Some of mine showed roots after only 3 weeks! But it’s good to let them get well rooted before disturbing them.
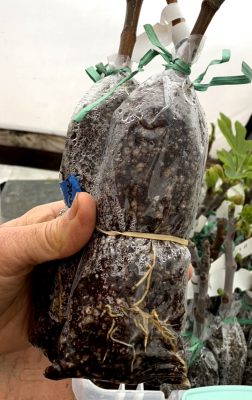
Rooted figs
When the time came to move a well rooted cutting, I sliced the plastic on the bottom and up along one side of its bag and put the whole root ball in a bona fide pot, filling in with bona fide potting soil around it.

That’s it. Growth will pick up with increasing warmth and sunlight. And then fruit, which could arrive on the branches even this growing season. Figs are admittedly easy to root by any method. As with any cutting, an important ingredient for success is patience.

Graft (Nonpolitical) is Good

Moving on, next week, to another perennial source of excitement here in the garden: grafting. I do this every year about now? Why every year? Because I’m always getting scions (1-year-old stems for grafting) of new varieties of fruits, mostly pears, to try out or to replace existing varieties. Or I might want another tree or two of a variety particularly worth growing here.

If I’m replacing an existing variety, I do a Henry the Eighth on the tree, lopping off its head, low, to graft a new variety onto the remaining stump. With the established root system underfoot, these grafts grow very vigorously and bear relatively quickly — sometimes the year after grafting. 

Alternatively, I make a whole new tree by grafting a scion onto a one-year-old rootstock that I purchase or grow. These small trees will take longer to come into bearing, how long depending on the kind and variety of fruit, and the rootstock.

Stump of older graft

Stump of older graft

A rootstock, whether the remaining stump of a lopped back mature tree or a pencil-thick young plant, has to be closely related to the scion that will be grafted atop it for the graft to be successful. Rootstock and scion in the same genus generally do well together, so pear on pear, apple on apple, even peach on plum are compatible. Occasionally, plants in the same family but different genus, such as pear and quince, also join well.

Whip graft close up

Whip graft

One way to create a rootstock would be to just plant a seed, giving rise to the appropriately named “seedling” rootstock. A seedling rootstock’s main claims to fame might be its general toughness and its genetic diversity from other seedlings. That genetic diversity is a downside if you want to plant an orchard of uniform trees; it’s an asset if you don’t want some pest all of a sudden wiping out all your plants with genetically the same rootstocks.

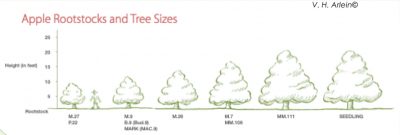
Rootstocks have been selected or bred that impart special qualities to a tree, and these rootstocks are propagated not by seed, but by any one of a number of methods of cloning (cuttings, tissue culture, mound layering, etc). Most dramatic might be the effect on plant size. The Malling 27 variety of apple rootstock, for instance results in a tree that matures at about 7 feet high. As with many dwarfing rootstocks, the tree also yields its first harvest quickly with, although less fruit per tree than a larger tree, more fruit per sure foot of space. And you can plant many dwarf trees in the same space as one full-size tree.
Apple rootstocks
Dwarf trees also have the advantage that pruning, harvesting, and other needs can be met with your feet planted on terra firma. Any disadvantages? Yes: more finicky about growing conditions, much shorter lifespan, and often needing staking throughout their lives. But there are many rootstocks from which to choose, especially with apples and pears, so you can choose what suits you from a fully dwarfing tree on up to full-size tree. A rootstock might also be selected for its tolerance for certain soil conditions, hardiness, and other environmental hazards.

Most important: The rootstock, for all its effects, has little or no influence on the flavor of fruit grafted upon it.

I’ll be grafting next week. Stay tuned for the 2 or 3 easy grafts I use to make trees.

PINING FOR PINES

More Than Just Pignolis and Piñons

Pine trees first appeared on earth 170 million years ago amidst lush, steaming forests of tree ferns and the footprints of dinosaurs. In time, human footsteps replaced those of the dinosaurs. Pines and humans have been intimately associated ever since. The trees have been worshipped; the cones have represented symbols of fertility; the pitch has sealed ship hulls; and the wood has been used for construction and for paper.

Korean pine

Korean pine

Throughout this long association, seeds of certain pines have been part of our diets. The flavorful seeds of native pines have a long history of use as “nutmeat” by the people of Siberia, the Himalayas, southern Europe, and the American Southwest. Look into almost any Italian grocery store in America, and you’ll find tempting cookies studded with pignolis, which are seeds of the Italian Stone pine (Pinus pinea). Pine nuts are the nut for pesto and dolmas. And from the American Southwest come seeds of the piñon pine. 

Although pine nuts usually are associated with the dry, mild climates of Southern Europe, the American Southwest, and northern Mexico, there are pine species that will produce edible nuts outside of their native range — even in the humid, often frigid, climate of my farmden. Nut-producing pines run the gamut from scrubby shrubs to majestic trees, some with needles that are soft and misty, others with needles that are dark and somber.  

Korean pine (P. koraensis), Swiss Stone pine (P. cembra), and Siberian pine (P. sibirico) are the three most reliable nut-producers for cold climates. All are hardy to at least minus twenty-five degrees Fahrenheit. The Korean pine is the most commercial of the three, producing 5/8-inch-long seeds that are exported from China. The tree itself will eventually tower to a soft, dark-green pyramid of 150 feet. 

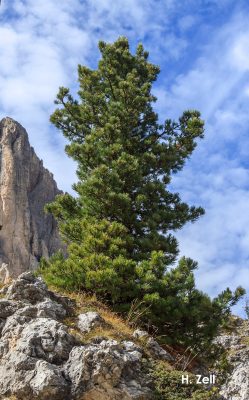
Swiss Stone pine finds a congenial home in the small garden, eventually reaching 50 feet or more, but very slow-growing. Native to central European Alps, this pine has dark, almost blackish-green, needles that, with the short branches, seem to hug the trunk. The Siberian pine is similar, except faster growing.  

Swiss Stone Pine

Swiss Stone Pine

Many other pine species potentially could produce pine nuts outside their native range, though their adaptability to very cold winter climates has not been not thoroughly tested. The closely related Colorado Pinyon (P. edulis) and Singleleaf Pinyon (P. monophylla) pines are bushy trees that become flat-topped with age. I planted a Singleleaf pine years ago; it’s annual growth was measured in inches. With the slow growth and lack of nuts, I eventually tired of it.

One of my favorites, unfortunately not hardy below 10°F, is the Digger (P. sabiniana). I saw many of these trees years ago as I was driving west down from the Sierra Nevada mountains; I came screeching to a stop when I spotted one of the large cones lying near the road. Passing motorists might have taken me for a lunatic as I tried to smash open the coneby smashing it repeatedly on the guardrail. This species bears lima bean sized pine nuts.

Some other pine species producing edible, albeit small seeds, are Himalayan pine (P. wallachiana), Limber pine (P. flexilis), Jeffrey’s pine (P. jeffreyi), and Japanese Dwarf Stone pine (P. pumila).

My Personal Pinetum

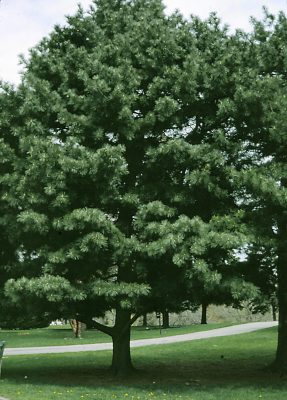
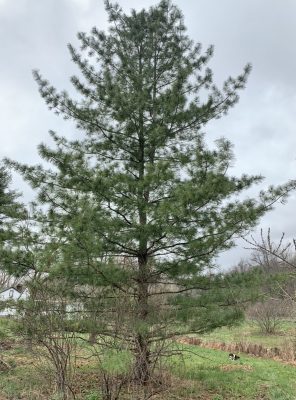
I’ve entered the world of nut pines with some plants here on the farmden. I began, of course, with Korean pine, but can’t claim great success. My largest tree, now about 35 feet high, has occasionally produced a cone near its summit. Perhaps some squirrels got them; I didn’t. The tree is a dead ringer for our native white pine (Pinus strobus); the most direct way to differentiate the two would be from the Korean pines cones, which are about half the length (about 4 inches) of white pine’s cones.

My older Korean pine

My older Korean pine

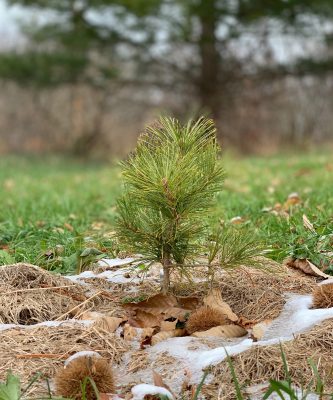
Just this year I purchased two more Korean pine seedlings. They’re each only a few inches high now, and I hope they bear like a friend’s Korean pine, which was loaded with cones when a mere 6 feet in height.

My younger Korean pine

My younger Korean pine

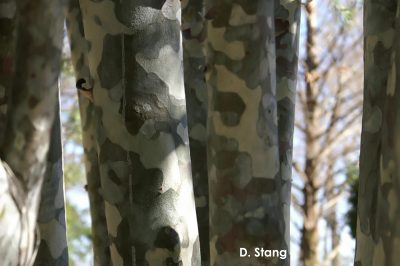
I’ve also planted a lacebark pine (P. bungeana). Besides offering pine nuts, the bark of this pine flakes off to yield pleasing patterns similar to that of sycamore. Neither nuts nor flaking bark here yet, though.

Lacebark pine

Lacebark pine

 Care and Feeding

 Nut pines, in common with most other pines, require little care. They are frugal plants, getting by with minimum water and fertility. They do require full sun and well-drained soil, though. Think of those dry, rocky slopes to which pines cling in the wild.

Two seasons are usually required for a female pine cone to produce ripe seeds. The cone is a primitive type of flower constructed of a tight cluster of either male or female reproductive cells at the bases of scales which spiral around a short axis. In the spring gusts of wind shake loose pollen from the male cones, which are catkin-like clusters located mostly at the tips of the trees’ lower branches.  Yellow clouds of pollen waft upwards to the female cones, most of which are high in the trees. Fertilization, the actual union of the male and female reproductive cells, takes place during the spring following pollination, within the tightly closed, green female cone. Seeds ripen at the end of the second season.

How a pine disperses its ripe seeds can mean the difference between getting pine nuts into your pesto or losing them to foraging squirrels or in the needles beneath the trees. With some pines, ripe seeds drop from open cones that remain attached to the trees. Other pines will not open their cones to release their seeds except with the stimulus of heat or the blow of a hammer. Such a mechanism, making it possible to beat the squirrels to the bounty, exists for the Swiss stone pine and the Siberian pine. The Swiss Stone pine clings to its neat little seed packages until the third spring from flowering.

It’s almost impossible to suggest an expected yield of nuts from a single tree. The trees are rarely grown in plantations. Most nuts are harvested from more or less wild trees, rather than from trees growing under uniform orchard conditions. And even then, yields are variable and erratic.

Lack of precocity or erratic nut production shouldn’t be a deterrent to planting a nut-bearing pine. What these pines lack in instant gratification, they furnish in “piney” fragrance,  longevity, and for the beauty and character they bring to a landscape.

COVID-19 OR NOT, THE GARDEN MARCHES ON

A Special Week

Coronavirus has come, and it will go, but the natural world soldiers on. My dogs, Sammy and Daisy, are as happy as ever, oblivious to the pandemic. My garden will respond likewise, trucking forward and offering a centering point as the world around has its ups and downs.

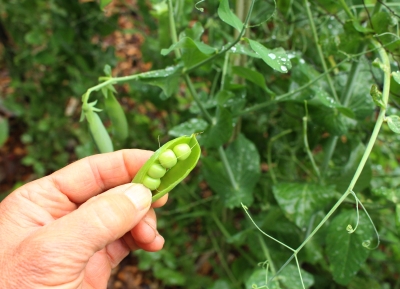
This week is a very special one in my gardening year; it’s the week I plant peas. April 1st, to be specific. It’s sort of the official beginning of the vegetable garden. “Sort of” because actually have been planting and harvesting lettuce, mâche, arugula, claytonia, kale, bok choy, chard, and celery all winter in the greenhouse.Peas in pod

Not Too Early, Not Too Late

For some gardeners, St. Patrick’s Day is the date for sowing peas. Yes, that is the correct date for pea sowing — in Ireland, Virginia, and other places where I imagine soil temperatures reach about 40° F by that date. Above 40° F, and pea seeds become most likely to sprout rather than rot. On the other hand, waiting too long to plant pea seeds has the plant bearing during hot weather; peas don’t stand the heat well.

I mostly plant shelling peas, which are admittedly more trouble because they need shelling. To me, they’re worth it, for their flavor. (Then again, with the pandemic, more people are spending more time at home; gather ‘round and let’s shell peas.) I recommend the very tasty varieties Green Arrow and Lincoln.

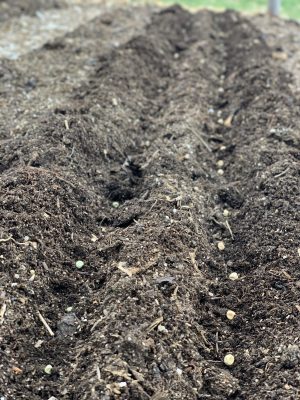
My pea plants grow right up the center of 3-foot-wide beds. I make two furrows a couple of inches deep, one on either side of a bed’s center, and 4 inches apart. The seeds go in a couple of inches apart.
Pea seeds in furrows
Pea plants are sometimes available as transplants, or, as my neighbor used to call them, “starts,” in cell-packs. Don’t buy them. Peas are a vegetable for which you sow the seeds directly in the garden. The reason is that the yield from a single plant, even six plants in a cell-pack is too minuscule to be worth it. And pea seeds sprout readily. Have some faith.

Once seedlings poke up through the ground surface, I put a trellis up the middle of the row. My trellis is temporary, able to move around the garden, just as do the pea plants, to a different bed each season. I pound a metal post into the ground at each end of the row, and then weave 3 foot high poultry netting (“chicken wire”), inch-and-a-half mesh, onto the posts. I use fiberglass electric fence posts, but any thin stakes woven at intervals into the netting and pushed into the ground keeps the fence from being floppy. After the final harvest, I pull up the pea plants, pull up the thin stakes, remove and roll up the netting, and pull up the end posts for use next year.
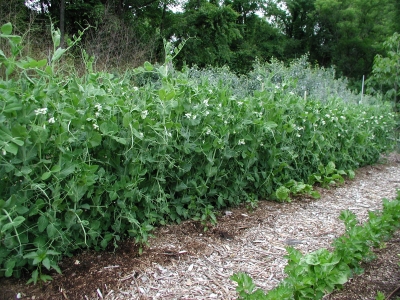
Peas on trellis
A number of other seeds can be planted on that seminal (for here) April 1st pea planting date. Those would include, except celery, the vegetables I mentioned above that have been growing in the greenhouse all winter. Radishes could also be included here, and spinach. And potatoes, as 2 ounce, whole tubers or pieces of cut tubers.

Best Tomatoes For . . . ?

Also significant about April 1st on my gardening calendar is that it’s my date to sow tomato seeds, indoors in seed flats. It’s not that tomato is my favorite garden vegetable; it’s just that it’s such a popular vegetable and perhaps the most versatile.

For a cherry tomato to just pop right in my mouth or put in salads, I grow Sungold. That’s all they’re good for, but they’re really, really good for that.

Sungold, hands down the best tasting cherry tomato

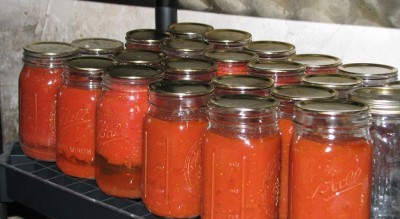
I dry many varieties, especially Amish Paste and Anna Russian. Some of them also go into jars, along with San Marzano, arguably the best tasting tomato for canning. (In Italy, cans of tomato made with San Marzano tout that on the label.) Blue Beech is another variety, this one with a unique flavor, that I both can and dry.
Canned tomatoes
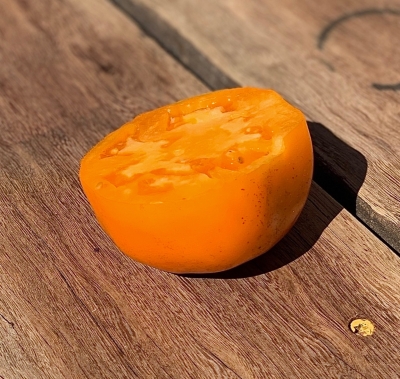
For good, fresh eating and very pretty tomatoes, I’m growing Nepal, Carmello, and, with a bright orange skin, Valencia. All three varieties are round tomatoes with smooth, crack-free skins.

Valencia tomato

Valencia tomato

For the very best in fresh eating tomatoes, there are many to choose from. I’m growing Paul Robeson and Pink Brandywine this year, although many others, such as Belgian Giant, Cherokee Purple, or others with “Brandywine” in their name could also fill the bill. Extras of these and the previous mentioned “good, fresh eating” varieties go into sauce, but not, of course, the dedicated San Marzano batches. Besides being good for cooking and drying, Amish Paste and Anna Russian are also good fresh. Not San Marzano, though; it’s awful raw.

As with pea planting, my tomato-sowing date is not for everyone; what is for everyone is to sow the seeds about 6 weeks before the local “average date of the last killing frost,” a date that is available online or from the local County Cooperative Extension Office. Sowing on this date strikes a nice balance between plants being small enough to make a smooth transition out to the garden and being sufficiently large for a timely first harvest.

April 1st isn’t the date to start all transplants. I sowed onion seeds way back in early February, and pepper and eggplant seeds in early March. For an early crop of cucumbers or melons, I’ll sow those in early May for transplanting at the end of the month. Or I’ll plant the seeds directly in the ground sometime soon after the “last killing frost” date. (I made a whole chart of vegetables and garden sowing, indoor sowing, and transplanting dates, keyed to whatever anyone’s “last frost date” is, in my book Weedless Gardening.)

Take Care

The garden marches smoothly forward, snubbing its nose at the pandemic. We can do likewise if we stay home if possible, wash our hands frequently and thoroughly and keep them away from our faces, and protect ourselves and others if we must go out. Consider that everything you touch off-site could be contaminated, or could be made so by you.

VEGETABLE MATTERS

Homebound? Plant Vegetables!

Working from home, I’m used to being homebound. And I like it. Not everyone feels this way, and now COVID-19 has forced this situation on many people.

For anyone who isn’t growing some vegetables, if there ever was a time to start a vegetable garden, it’s now. 
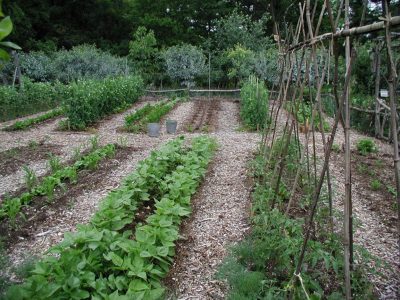
Vegetable garden
A garden will provide pleasant and interesting diversion, some exercise, a chance to be outdoors, the need for less frequent trips to the market, a good family project/activity, and some savings of food dollars. And the experience of — wonder of wonders — watching seeds sprout and grow into plants.

Growing vegetables is easy. Seeds have been practicing sprouting for millions of years. That’s what they do. Sprout. And plants have been doing likewise. 

Paying attention to some basic plant needs will make your garden even more successful. As far as soil, don’t worry about fertility or acidity for now. The most important consideration is drainage. That is, does water move down through the soil or does it just sit in place for a long, long time.

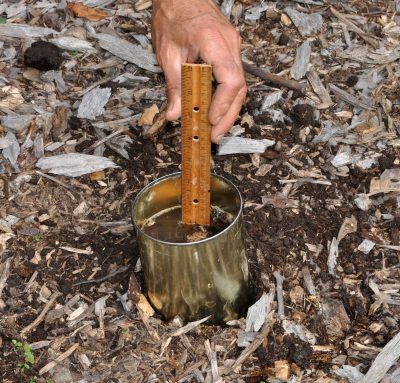
What’s a “long, long time?” If you really want to know, cut the bottom and top off a coffee or similar can, and set the can into a hole a few inches deep, pushing it into the soil (not if it’s frozen) in the bottom of the hole. Fill the can with water, let it drain, then fill it again. If the water level  drops slower than 1” per hour, drainage is poor. Find another site or make raised beds.
Measuring water drainage
No backyard or front yard in which to grow vegetables? No problem. Grow them in a tub or flowerpot. Pay attention to drainage even if your “garden” is a tub or a large flowerpot. The container must have drainage holes in its bottom to let water drain out. And you’re going to fill that container with “potting soil,” not with dirt from your garden. Water can’t drain well through garden soil in the confines of a container, which is why potting soils have, among their ingredients, perlite, vermiculite, or other mineral aggregate to speed water flow.

Whether in a container or in your front or back yard, vegetables need sun, about 6 hours of direct summer sunshine daily. 

Soil Matters

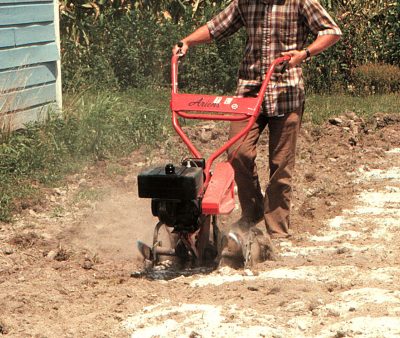
Next, ready the ground. For most newbies, that means transmuting a patch of lawn to a vegetable garden. There are two options. The first is the traditional one, turning over and mixing up the top few inches of ground to kill existing vegetation and leave a surface in which you can plant seeds. Do that, using a shovel, garden fork, or rototiller as soon as the soil is dry enough to crumble, not wad up, when squeezed gently in your hand.

Me, rototillingWait two weeks for Mother Nature to work her magic decomposing some of that existing vegetation. Or, rather, part of her magic. After two weeks, dig up the ground again, this time adding some compost or fertilizer. You could dispense with the compost or fertilizer this season if whatever was growing there before digging looked vibrant. Better not to go out to a store these days if you don’t have to anyway. Wait another two weeks, and when you’re ready to plant, use a garden rake to tickle the surface of the ground and crumble it.
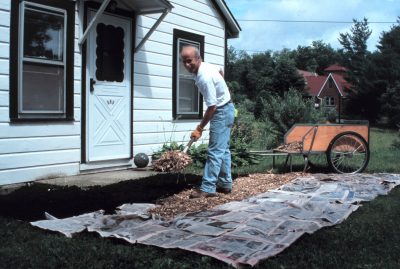
Digging up the ground may be a nice way to get your blood pumping on a spring day, and may even give you a feeling of righteousness, but there’s a better, quicker, and easier way, to prepare the garden site. There’ll also be less weeds in weeks to come.

For option number two, you will need a supply of compost and either wood chips, straw, sawdust, or wood shavings. This option is easy: just cover the garden area with newspaper, four sheets thickness and overlapping, and then wet the newspaper to keep it from blowing away. Mark out 3 foot wide beds and 18 to 24” wide paths with string, and lay an inch or more of compost in the bed areas, and enough of the wood chips, straw, sawdust, or wood shavings in the paths to cover the paper. You’re all set to plant!
spreading wood chips in path
In most places, but not everywhere, a fence is needed to fend off rabbits. Two-foot high chickenwire (“poultry netting”) will do the trick.

(All this, and more, in my book Weedless Gardening.)

What to Grow

What to grow is a matter of taste. Kale, collards, and Swiss chard offer maximum nutrition and a very long harvest season. For some home-grown calories, potatoes and sweet corn. For rounding things out with great flavor, tomato, eggplant, pepper, cucumbers. Think about what you want to grow, look at seed catalogues, order seeds, and when we next cross paths, I’ll say something about timing.

Inspiration and Humor for the Pandemic

In these times of pandemic, the insouciance of animals and the humor they offer (and washing hands, social distancing, and covering up coughs and sneezes) is welcome. Here is a short video clip of my ducks:
Duck video

NOW, WITH COVID-19, ANOTHER REASON TO GARDEN

Not Necessarily Anti-Social

I’m feeling very lucky these days, lucky to be happy to stay home. An important way to deal with the current COVID-19 pandemic, both from a personal and a societal standpoint, is not to be out and about.

(If you are infected, you may not show any symptoms for awhile, or symptoms may be very mild. During that time, though, you could infect others. It’s estimated that, at present, every infected person infects 3 others before they get well or die. Those 3 other each infect 3 more, and so on; ten transmissions has almost 60,000 people infected. 

Social distancing brings that number of 3 new infections from each infected person down to a number of cases our health care system would be able to handle. So stay at home, if possible, maintain a six foot distance from other humans, be aware of contaminated objects and surfaces, and wash hands frequently.)

For all the downsides of the internet, a big plus now is the ability it gives us to interact socially without spreading disease.

Home is Nice, Gardening

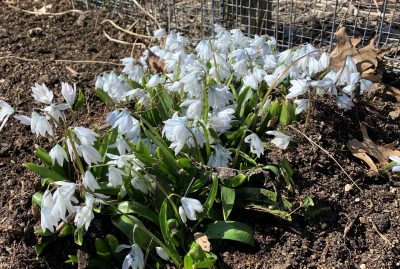
What’s so great about staying home? In my case, I have my garden, of course. Spring, as always, is a busy time in the garden.SquillBusy, such as: attending to my compost. The last compost pile of late fall and winter is an accumulation of end-of-season debris from garden cleanup, bedding from the duck house, and kitchen scraps. Not much happens in it with the slow additions and winter cold. I decided to dig into the pile to see how it was doing. Not good!
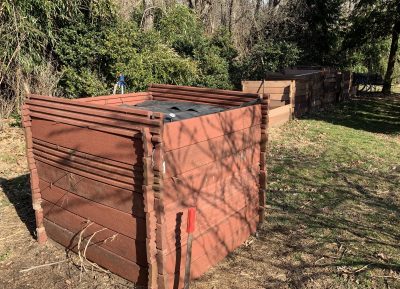
The innards were smelly and sodden, which could have been avoided if I had regularly thrown some straw, autumn leaves, or any other dry, old plant matter into it periodically. Oh well. 

Given enough time, even that smelly, cold, sodden pile would turn to compost. I prefer to speed things up, getting the pile hot and quickly killing many weed seeds.

Aeration and some dry material could remedy the situation. I left home and got a load of horse manure mixed with dryish sawdust bedding from a nearby stable. (No human contact was needed to get the manure). Then I began turning the pile, layering in the manure and some old hay that I had cut and raked last fall. The way I tell how its doing is by taking its temperature with a long-stemmed compost thermometer. Three days after the turning, the pile is warming, 90° and rising.Compost pile

Seed Starting, When?

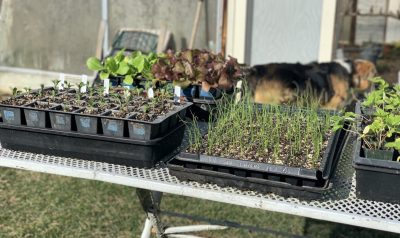
Busy, such as: starting seedlings indoors for later planting outdoors. The ideal is to have seedlings the right size when it’s time for that outdoor planting, so they can make a smooth transition from container to ground hardly knowing they’ve been moved. Each vegetable has its own timetable for how fast it grows to transplant size and then when it can be planted outdoors.

For instance, here on the farmden, the historical average date of the last killing frost is May 21st. Cabbage seedlings need about 6 weeks of growth before they’re large enough to transplant. Since they tolerate some cold, they can be planted out here on May 1st. Six weeks before May 1st is March 15th, which is when I sowed those seeds.

Let me also use tomato as an example because that’s one that many gardeners plant too early or too late. Tomato seeds need about 7 weeks of growth before they’re ready to plant out. Freezing temperatures are not good for them, so I plant them out around the end of May. The end of May minus 7 weeks is around April 1st, which is when I’ll be sowing tomato seeds.
Seedlings
Sowing and planting dates are not set in stone. Temperature, potting mix, and container size all influence how fast seedlings grow. And there’s wiggle room because sowing or planting out tomatoes a week earlier or later doesn’t change the date of the first harvest that much because plants grow slowly early in the season. 

One thing to avoid is being pushed around too much by the weather. Don’t let a 3 day warm spell in March convince you to sow tomatoes then, or a 3 day warm spell in early May to plant out tomatoes earlier. In the first case, the plant, being too large at transplant time, will have a harder transition to open ground; you’ll harvest earlier tomatoes, but less over the whole season. In the latter case, a subsequent cold spell might kill the plants (unless you cover them for protection).

I detail out recommended sowing and planting dates for vegetables according to locale in my book Weedless Gardening. At the very least, write down what you do in your garden this year and tweak it closer and closer each season.

Planting, What?

Busy, such as: planting out new trees, shrubs, and vines. After so many years here at the farmden, you’d think that I would have planted every tree, shrub, or vine I could have wanted. Tain’t so.

I’m very specific about what varieties I want to plant so I usually order bare root plants, which are available in greater variety than potted plants. Ideal size for a tree is about 4 feet high because their roots can establish in their new home quickly. Of course, a potted plant, if that variety is available locally, would establish even more quickly.

In the pipeline this year are Egremont Russet and Rubinette apples, Dr. Goode grape, Mohler persimmon, and a number of low bush blueberries and lingonberries.

I remember a sunny day years ago, right after hurricane Irene. The back part of my property, where my vegetable gardens are, was high and dry, a glorious early fall day. But turning 180 degrees, looking to the front, the Wallkill River and associated flood debris was flowing past my doorstep. These days, my thoughts are often on COVID-19. Again, the garden — or a hike in the woods and other home enjoyments — provide needed respite from a bad situation.
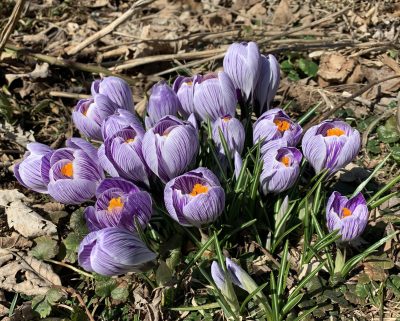
Crocus flowers

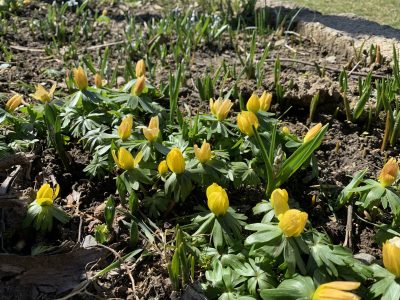
Winter aconite flowers


INTO THE WOODS

Forest Garden Skeptic

“Forest gardening” or “agroforestry” has increasing appeal, and I can see why. You have a forest in which you plant a number of fruit and nut trees and bushes, and perennial vegetables, and then, with little further effort, harvest your bounty year after year. No annual raising of vegetable seedlings. Little weeding, No pests. Harmony with nature. (No need for an estate-size forest; Robert Hart, one of the fathers of forest gardening, forest gardened about 0.1 acre or 5000 square feet.)

Is this a forest garden?

Is this a forest garden?

Do I sound a bit skeptical? Yes, a bit. Except in tropical climates, forest gardening would provide only a nibble here and there, not a significant contribution to the diet in terms of vitamins and bulk. A major limitation in temperate climates is that most fruit and nut trees require abundant sunlight to remain healthy; the same goes for most vegetables.

The palette of perennial vegetables in temperate climates is very limited, especially if you narrow the field down to those tolerating shade. I’m also not so sure that weeding would be minimal; very invasive Japanese stilt grass has been spreading a verdant carpet on many a forest floor whether or not dappled by sunlight.

The case could be made — has been made — that some of the dietary vegetable component could be grown on trees. Robert Hart wrote of salads using linden tree leaves instead of annuals such as lettuce and arugula. I’ll admit that I’ve never chewed on a linden leaf. (I’ll give it a try as soon as I come upon one that has leafed out.) My guess is that its taste and texture would leave much to desire.

And how about squirrels? I grow nuts, and part of my controlling them involves maintaining meadow conditions around the trees. This exposes them to predators, including me and my dogs, without their having tree tops to retreat to and travel within. Unprotected, I’ve had nut plants stripped clean by squirrels.

The book Edible Forest Gardens by Dave Jacke offers a very thorough exploration of forest gardening. 

But Did I Plant a Forest Garden?

I’ve actually planted a forest garden! Well, perhaps not a forest garden. Over 20 years ago, I did plant a mini-forest. My forest, only about 300 square feet, was originally planted for fun (I like to plant trees), for aesthetics, and for some nutrition. So far I’ve reaped immense visual rewards for my effort.

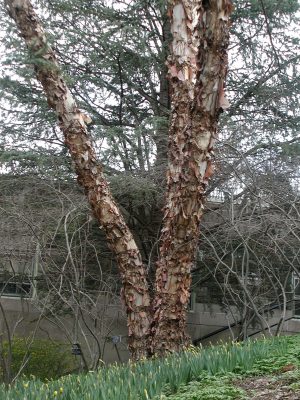
Here’s what I planted: Bordering a swale that is rushing with water during spring melt and periods of heavy rain went four river birch (Betula nigra) trees. They evidently enjoy the location for they’re now each multiple trunked with attractively brown, peeling bark and towering to about 60 feet in height.

River birch

River birch

I also planted 3 sugar maple trees to provide sap for maple syrup for the future. The future is now (except I no longer use enough maple syrup to justify tapping them.)My mini-forestI also planted a white oak (Quercus alba), whose sturdy limbs, I figured, would slowly spread wide with grandeur in about 150 years, after the maples and birches were perhaps long gone. Unfortunately, the white oak died, probably due to winter cold; its provenance was a warmer winter climate. My mistake.
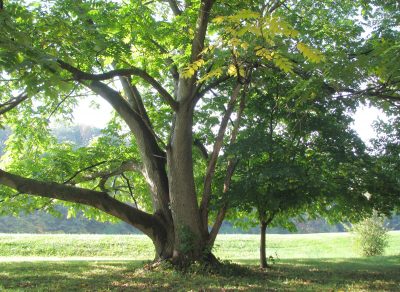
Since that initial planting, I’ve also planted a named variety of buartnut (Juglans x bixbyi), which is a hybrid of Japanese heartnut and our native butternut.

Buartnut

Buartnut (not mine, yet)

I hadn’t realized it, but that tree has grown very fast and now spreads its limbs wide in much that habit as a white oak. The other two trees that I planted are named varieties of shellback hickory (Carya laciniosa). These trees are slow growing but eventually will offer good tasting nuts. They’re quite pretty, even now, with their fat buds.

A Vegetable Also

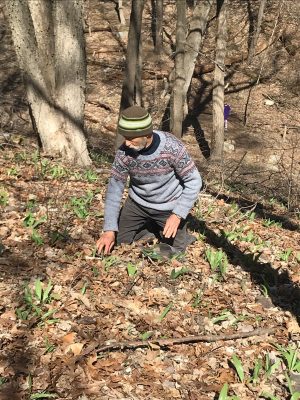
What about vegetables in my mini-forest? They were not part of my original plan. It turns out that ramps, a delicious onion relative, a native, which I’ve been growing for a few years beneath some pawpaw trees, are spring ephemerals. Spring ephemerals are perennial plants that emerge quickly in spring to soak up sunlight before its blocked by leaves on trees, then grow and reproduce before the tops die back to the ground.

Ramps (Allium tricoccum) are perfect forest vegetable, so I wanted to make the ground beneath my mini forest more forest-y before moving the ramps from beneath the pawpaws. Nothing fancy. All I did was to haul in enough leaves to blanket the ground in the planting area a few inches deep. That leafy mulch will suppress competition from weeds and add organic matter to the soil.

Collecting ramps for transplanting

Collecting ramps for transplanting

In just a few years, the ramps will be sufficiently established to provide good eating, perhaps along with some buartnuts and hickory nuts, all from my forest(?) garden.

Drip Opportunity

I’m looking for a site within 20-30 minutes of New Paltz, NY in which to hold a drip irrigation workshop. What I need is a vegetable garden in beds (not necessarily raised beds) for which I would design a drip system. Workshop attendees I would install the system after learning about drip irrigation. Host pays fo materials. Contact me if interested.