Posts

THE GOOD OL’ DAYS

Corn Made Even easier

I can understand why corn was so popular a crop early on in the settlement of our country by Europeans. Sure, it tastes good popped, ground and cooked, and, while immature, fresh from the cob. Mostly, though, corn was easy to grow in the rough soil left from recently cleared forest.

Most of my corn grows in my two vegetable gardens where the soil is crumbly and weed-free, watered gently by drip irrigation, and nourished annually with an inch depth of compost.

Highly cultivated sweet corn

Highly cultivated sweet corn

The south garden is home, every year, to a couple of beds (about 60 square feet) of popcorn, and the north garden to 4 beds (about 215 square feet) of sweet corn. Those two gardens provide us with all the sweet corn and popcorn we eat for a year.

Separate gardens are needed because if sweet and popcorn cross-pollinate, the sweet corn will be less sweet and the popcorn won’t pop as well.

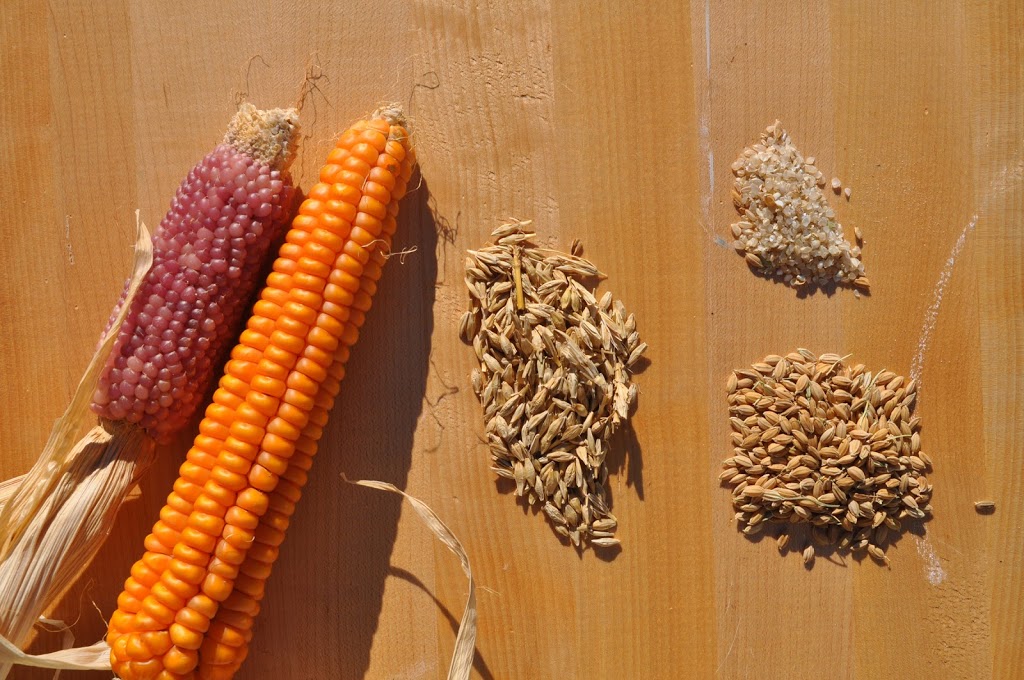
I also grow polenta corn, an heirloom Italian variety called Otto File. But I only have two vegetable gardens. So this corn goes out in the field into the weedy soil between my dwarf apple trees. Conditions there aren’t as rough as cornfields wrought from forests in colonial times, but out there the corn must deal with weeds, grasses, rabbits, and drink only water that falls from the sky.

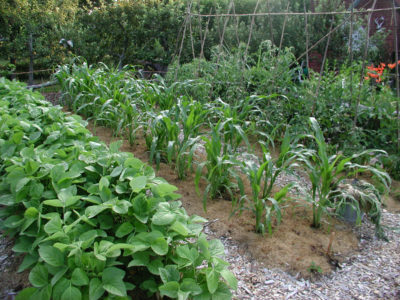
I did not use colonial methods to ready the soil for planting. Instead, I mowed all vegetation to the ground, and covered the planting areas, 2 beds each about 3 feet wide for a total of about 100 square feet of planting, with gray resin paper. (Sometimes called building paper, gray resin paper is used in construction, usually as underlayment under flooring and siding.) I topped the paper with an inch or so of compost, then made two rows in each bed, in each row poking holes 2 feet apart into each of which I dropped 6 Otto File seeds followed by a sprinkling of water.

The seedlings are up and looking strong, so I thinned them out to 3 or 4 plants per hole, pulling out a few weeds as I thinned. I’ll weed one or two more times and then leave the plants to themselves. Weeds will grow, but the then-tall corn plants should shade some into submission and hold their own against the more aggressive ones.Otto File planted in field

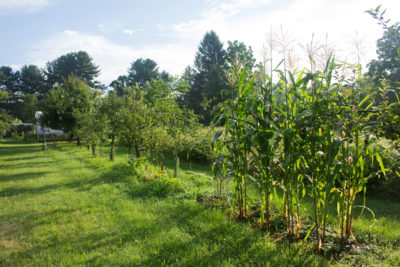
For authenticity, yes, I could have buried some fish in the ground at each planting hole. But that would be more work, and I’m interested in production with minimal effort from that planting. Each year those beds have provided a year’s supply of polenta corn.

Apple Threats

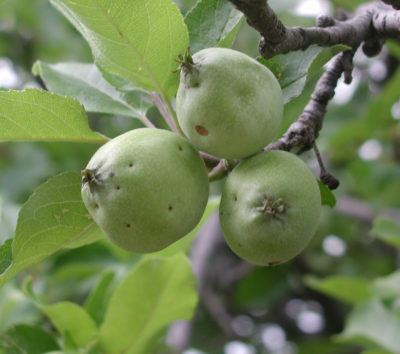
Apple trees flanking the Otto File beds are loaded with a hopeful crop of cherry-sized fruits. The dreaded plum curculio, which is as happy to ruin a crop of apples, peaches, nectarines, or cherries as well as plums, should have ceased their egg-laying by now, and burrowed into the soil to prepare for next year’s onslaught. (Surround® is an organically approved spray of specially formulated kaolin clay that controls curculios.)

Just because the nascent fruits have come along this far does not mean I’m home free. Apple maggot reliably makes its appearance just as the curculios vanish. This pest doesn’t usually make the fruit drop, as do curculios, but it riddles the fruit with so many tunnels that you can’t even eat around them.

Maggot & curculio scars

Maggot & curculio scars

Fortunately, non-chemical control of apple maggot is easy. In the 1980s, Dr. Ron Prokopy, at the University of Massachusetts, discovered that Ms. Maggot was attracted to the reddest apples, so he tried  hanging croquet balls painted Tartarian Red and coated with forever-sticky Tangletrap® in apple trees. Maggots tried to lay eggs in the ersartz apples, where they expired, their mission unfulfilled. The spheres offer as good control as do chemical sprays.

In the last few years, I’ve used Tangletrap® coated, real Red Delicious apples as traps. They are very red and very apple-like. Hung in the branches, one per dwarf apple tree, they last almost the whole season and, when the season ends, can be composted rather than scraped clean for use the following year.Red Delicious maggot trap

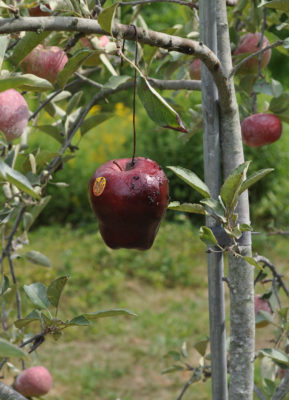
Apple maggot isn’t the only remaining threat to my apples. There’s also the codling moth (the classic worm in the apple), apple scab (that’s what it looks like), and various summer rots.

Once Upon A Time

Oh, for the good ol’ days when the grass was greener, the corn was sweeter, and apple trees took care of themselves. Mostly, the good ol’ days weren’t the various “-ers.” But one exception was the apple maggot. Two hundred years ago, Ms. Maggots didn’t look twice at apples. This native insect was happy to attack our native hawthorns, which are related to apples.

When apples were introduced to this part of the world, some apple maggot flies tried them out. Over time, some began to favor apples over hawthorns, so much so that the maggots evolved into two tribes, one favoring hawthorn and the other apples. Oh well.

Rice, Corn, & Barley Harvest

Something new (new for me, at least)! You can subscribe to my posts and get notified each time there’s a new one. See “SUBSCRIBE BY EMAIL,” to the right.


—————————————–

It’s been awhile since the grains have been harvested so it’s time to prepare them for consumption. Longest in preparation will be barley.

The barley is from last year’s harvest, and the grain-laden stalks have been bundled together and hanging from a kitchen rafter since then. I’ve procrastinated processing because of last year’s frustrations in trying to thresh wheat, also grown last year; the grains clung tenaciously to their stalks and no amount of battering would thoroughly separate them. I’ve also procrastinated because the bundle of barley’s tawny brown stems, with long, delicate, spiky awns emerging from the heads, look so decorative dangling upside down near the kitchen ceiling.

A bare spot now remains where the barley once hung. Earlier today, after being stuffed into a pillowcase and batted against a brick wall, the stalks easily released their plump grains. I separated the grain rom the chaff by pouring the grains back and forth between two buckets in a slight breeze, and soon had the whole crop cleaned.
As you’ve probably guessed by now, my barley crop wasn’t measured in tons or even bushels. I had planted a 3 foot by 3 foot area and reaped a quarter of a pound. Consulting my 1914 “Farmer’s Cyclopedia of Agriculture,” an acre of barley (back then and in Iowa) averaged 45 bushels of barley, or 1,800 pounds, which would translate to a bit over one-third of a pound for my 9 square foot plot. Respectable for my first try.
The end-product for my crop will be beer. More specifically, the goal was to find out how much barley to grow to make a 6-pack. My next step, then, is to malt the barley. More on that at a later date . . .
————————————————–
I “hauled in” the rice harvest back in early October, all 40 grams of it. That 40 grams was not a bad yield considering that I got the seedlings started late; that I only planted a 2 foot by 3 foot bed of it; that it was growing under dryland conditions, which yields less than wetland rice; and the variety I planted, Hayayuki, is a wetland variety. Still, it was fun.
The aforementioned limitations are nothing compared to the limitation in preparing the rice for consumption. Like most other grains, rice has a hull that needs to be removed before the grain can be eaten. (The hull is no impediment with barley for malting because what’s used for beer is maltose-laden water that is leached through the sprouted, cracked grain.) Hullers are available for small-scale grain processing, but are neither economical nor capable of handling nano-yields such as my 40 grams.
A conversation with Ben Falk (www.wholesystemsdesign.com), who had given me the seeds and has harvested over 100 pounds of rice in Vermont, did not leave me optimistic about getting off those hulls. (He has a small huller.) No need for me to try cracking them off with a rolling pin, boiling them and hoping they would float up to be skimmed off, or toasting — he’d already tried all that.
Years ago, I got a Solis coffee grinder that does an adjustable grind. How about setting the Solis to barely grind the rice, just enough to crack off the hulls? The problem is that the largest setting was a bit too small for the rice grains. Still, no other options presented themselves. What I now have is cracked rice. I cooked some; the flavor was very bland, even for rice.
————————————————-
It isn’t only a lot more growing experience that is responsible for my much more successful crop of a third grain: corn. Corn is easier to grow, to harvest, and to process than other grains on a home garden scale. I grow popcorn and polenta corn in addition to, of course, sweet corn, the latter considered a vegetable because it’s eaten “green,” that is, before full maturity.
It’s with good reason that corn has been such a success for so long here in the Americas. The grains are large, they come packed together in a single ear, and that ear is covered by one easily shucked husk. Corn is such a successful cultivated grain that it can’t even survive in the wild. An ear dropped to the ground would sprout too many seedlings so close together that they would be stunted fighting each other for water, light, and nutrients.
Processing popcorn and polenta corn entails nothing more than picking it, pulling back the husk, and hanging it from kitchen rafters until ready for use. Giving a ear an “indian burn” snaps off kernels for popping or grinding.
————————————————-
One more home-grown grain rounds out my larder. Chestnuts. They’re not actually a grain but are a uniquely starchy nut so fulfill much the same purpose as any grain in the diet. Chestnuts have the advantages of being perennial, borne on an attractive tree, and, because they bloom late and have few pests, bearing reliably.
Chestnut preparation is easy: One cut crosswise about half way through each nut, then roasting in a hot oven for about 30 minutes. Delicious.