
Watering — in the Rain?
Why Are Pots Thirsty?
With recent rains of more than 3 inches over the last couple of days, you’d think that the last thing on my mind would be having to water anything. But you’d be wrong. Plants in pots — and I have plenty of them, some ornamental and some tropical and subtropical fruits — don’t get the full benefit of all that water.
Potting soils are, and should be, more porous than any garden soil to maintain good aeration within the confines of a pot. About a one inch depth of water is needed if you’re going to thoroughly wet a 12 inch high column of potting soil. If a flower pot is, for example, only 6 inches high, only 1/2 inch depth of water would be needed; and so on.
A lot of my potted plants didn’t drink in that 3 inches of rain that fell over the past couple of days. Some of the plants are shielded from the sky by overhanging house eaves. And the leaves of other plants — excepting amaryllis and calla lily which have strappy, upright leaves — deflect water that could have fallen into the pot.
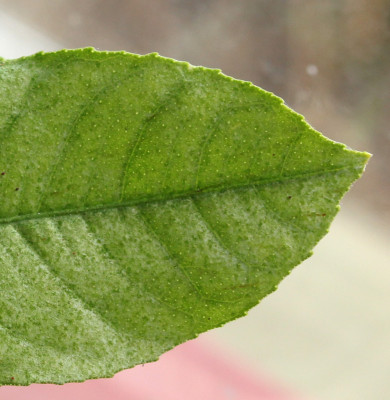
If you don’t believe me, tip a potted plant out of its pot following a heavy rain, and check how dry the soil is down deep within the pot. Even easier, purchase an inexpensive moisture meter whose metal probe, when slid into the soil, reports moisture deep down.
(Sort of) High Tech Solution
When I first started gardening, I knew I would eventually move from the cottage I was renting. My mini-orchard was in pots and travel-ready. I kept that “orchard” watered by hand, which wasn’t so bad. The problem was that in the heat of summer, some plants needed their thirst quenched twice a day, which kept me from leaving my home for more than a few hours.
These days, technology has come to the rescue.
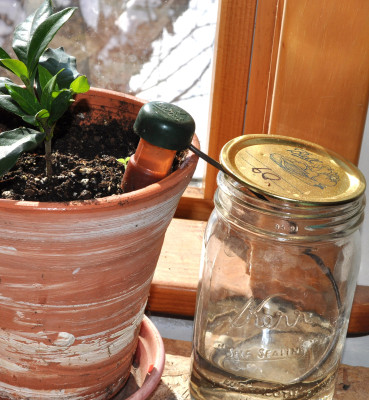
The first techno-solution has been drip irrigation. A simple, battery-operated timer at a spigot sends out water on a twice daily schedule to banks of potted plants. Also at the spigot, following the water line right after the timer, are a filter and a pressure reducer. 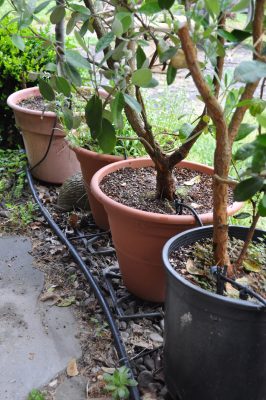 The fittings for wending water through tubes around corners and up into pots are low pressure fittings; the pressure lowers water pressure to a mere 20 psi.
Once the 1/2 inch main line makes its way to a group of potted plants, a 1/4 inch plastic line, plugged into the main line with, of course, a low pressure fitting, carries the water up to the ground surface of each pot.
If the water merely exited at this point, pots closer to the water source would be under higher pressure and so get more water than those more distant. And pots that were shorter or at lower elevation would likewise get more water. So I slid an emitter, that reliably puts out 1/2 gallon of water per hour, no matter what the incoming water pressure, on the end of each 1/4 inch line.
Capillarity to the Rescue
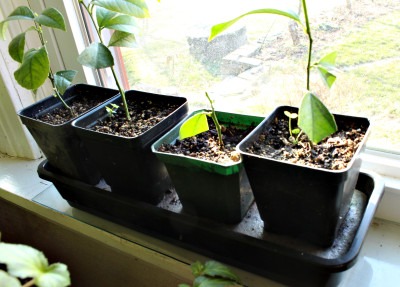
I have a number of lowbush blueberry, lingonberry, hollyhock, carnation, and blazing star plants growing in pots 4-inches and smaller. I’ll eventually plant them out in the garden. Until then, the plants need regular watering Snaking 1/4 inch tubes to all these pots would create a tangled nightmare.
Enter capillary mat watering. All these smaller pots sit on a mat of absorbent fabric spread over a tray held a couple of inches above a pan of water. 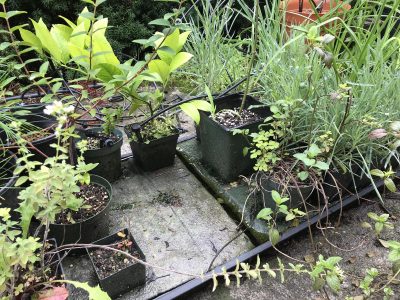 Part of the capillary mat dips into the reservoir of water, which gets sucked up into the mat and then sucked up into the potting soil through the drainage holes in each flat-bottomed plant pot.
I periodically have to remember to add water to the reservoirs. Or, rather, “had to” because I ran a few of those drip tubes into the reservoirs, enough to keep them topped up with water to keep pace with plant use.
And a Presentation of Interest
I’ll be doing a presentation on August 18th on THE SCIENCE, ART, FUN, AND TASTY FRUIT OF ESPALIER in Copake Falls, NY. The presentation will explore the theory and the practice behind the pruning and orienting of branches to create an espalier. This decorative, usually 2-dimensional form, offers high yields of high quality fruit on a plant or plants that can be free-standing, decorating a wall or fence, or even creating the fence itself! I’ll go over which fruit plants work best and the branch pruning and orienting techniques that create and maintain espaliers that look good and yield especially delectable fruit. For more information, go to https://awaytogarden.com/8-18-open-day-plant-sale-lee-reich-espalier-talk-drip-irrigation-workshop/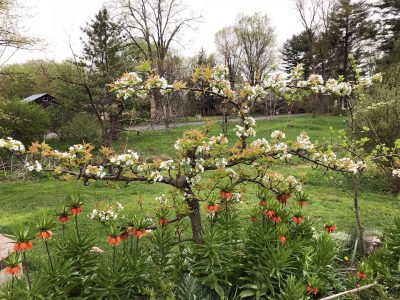
 For smaller pots, I use capillary mats, which are nothing more than water-absorbing mats (available from