Posts

The End of Chestnuts? No!

Blight Strikes

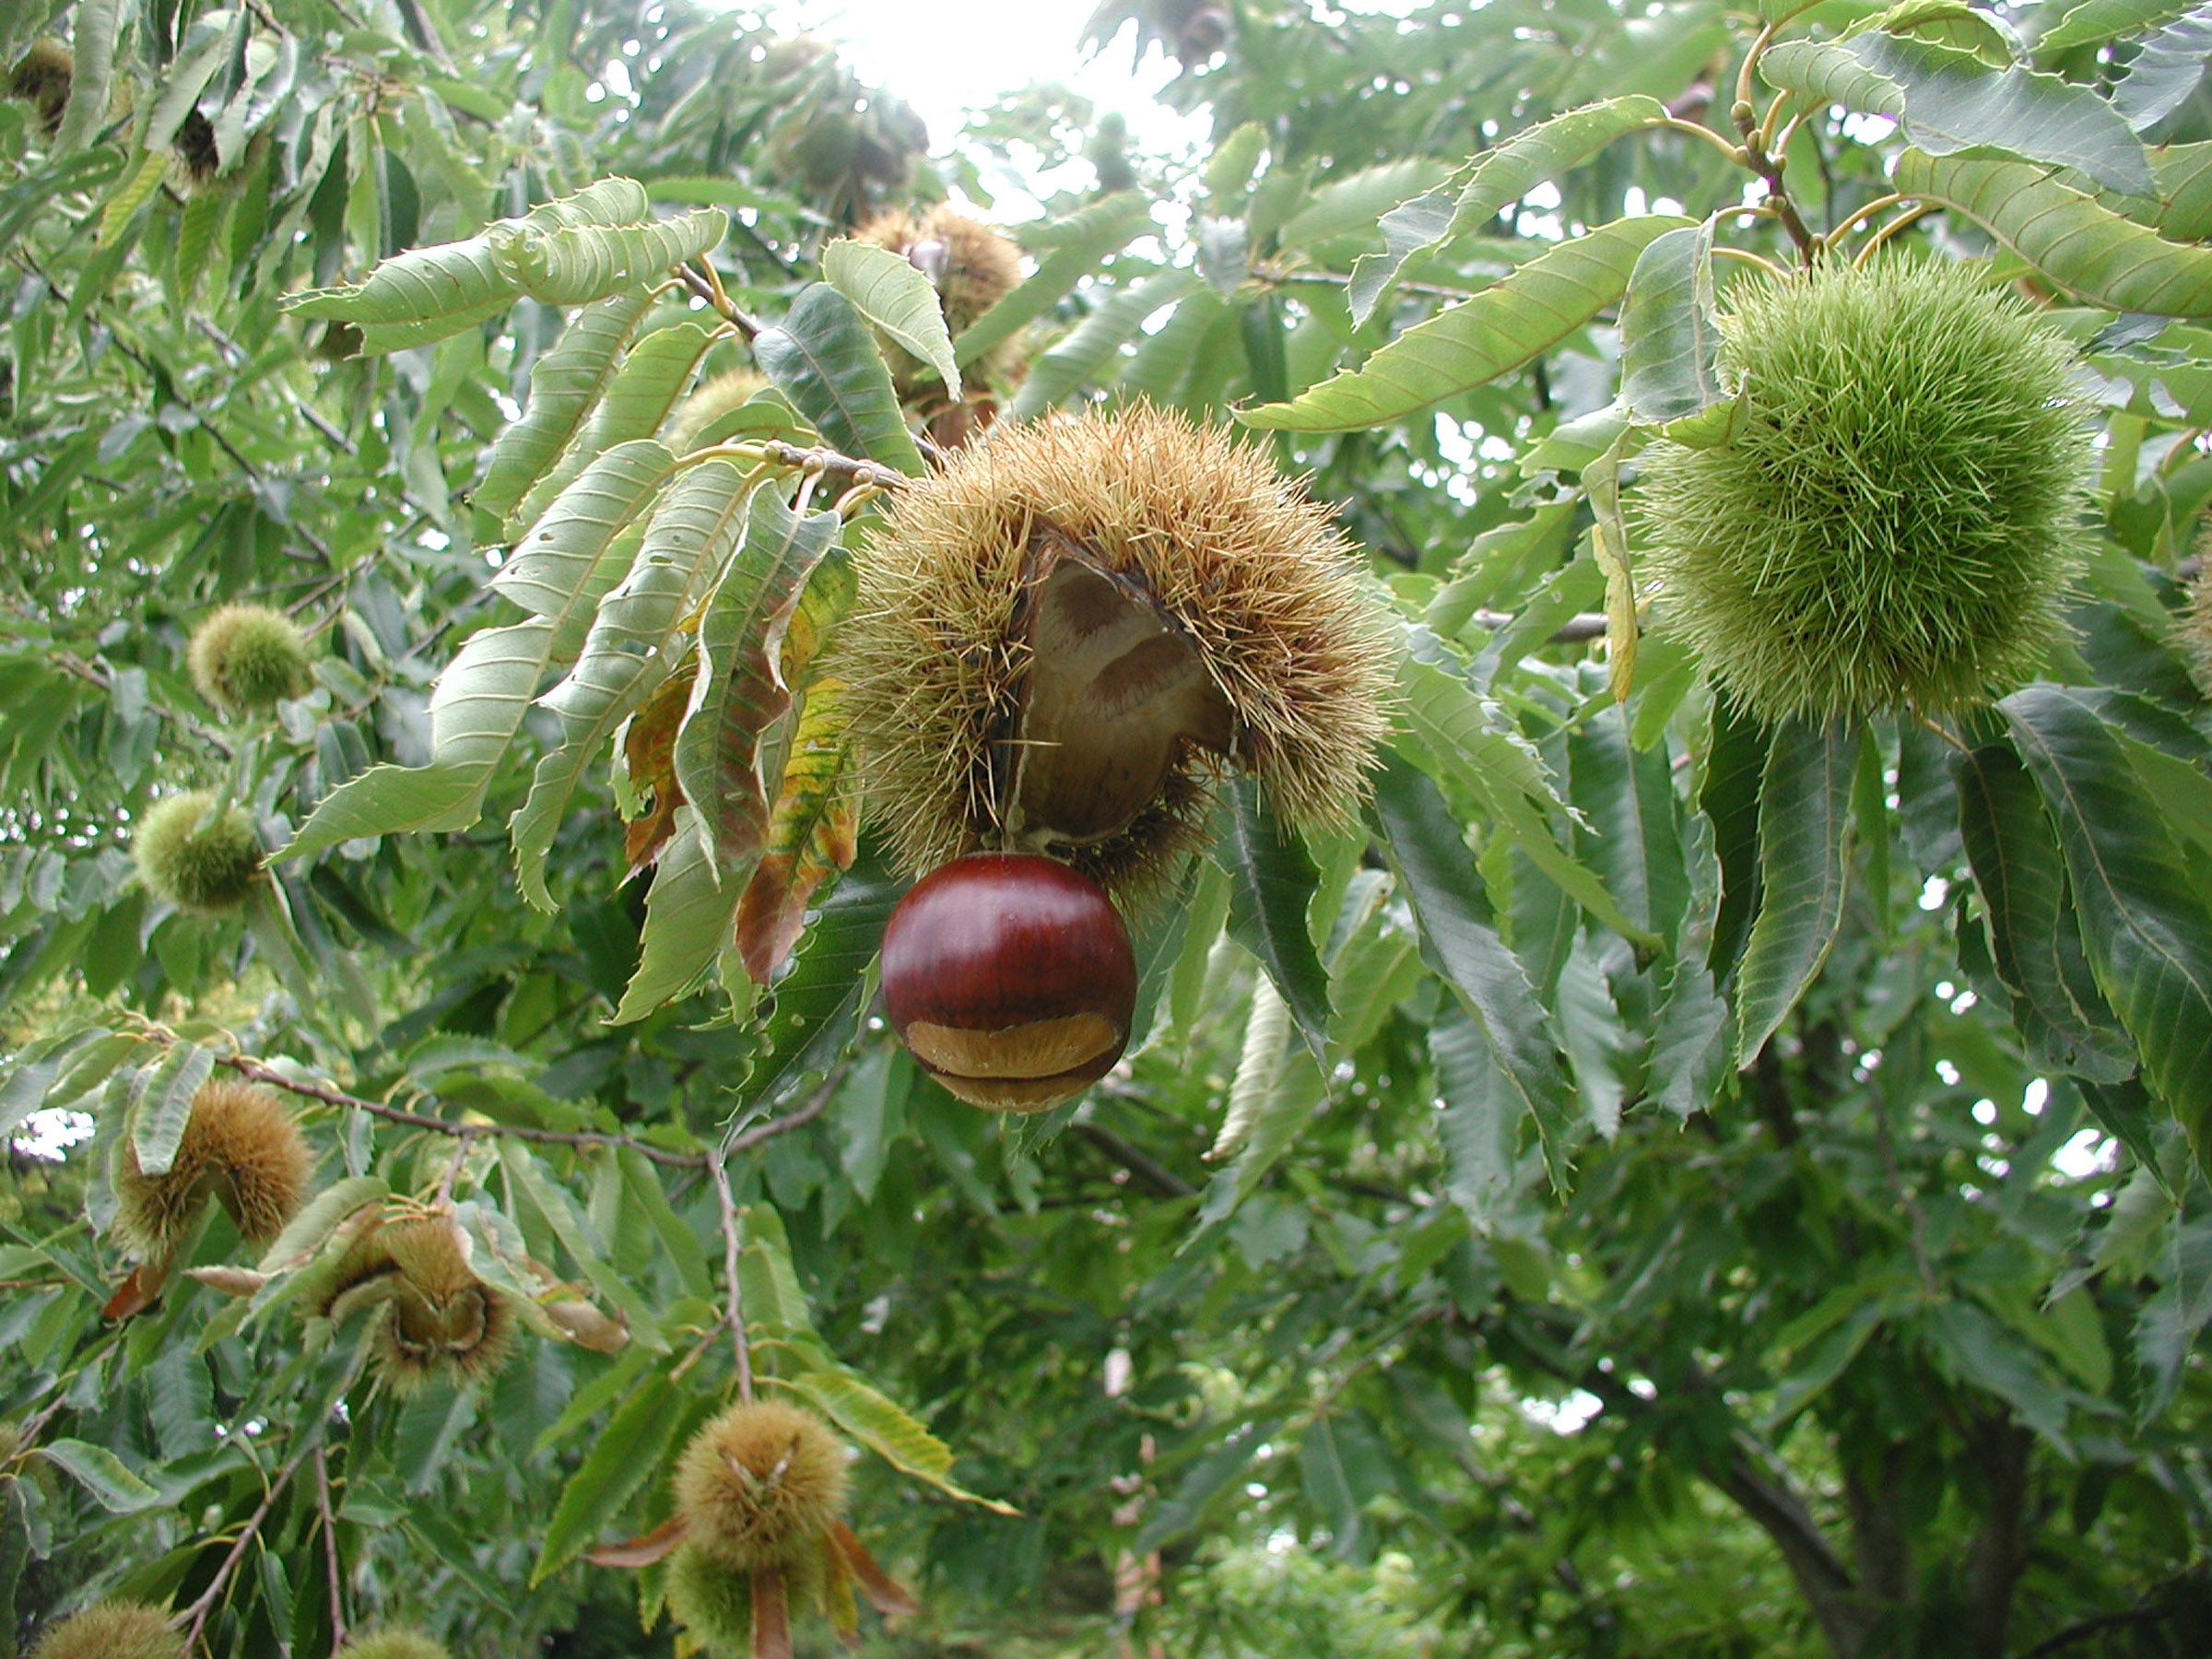
I looked up into the tree that I had planted 20 years ago and saw what I had long feared: two major limbs with sparse, undersized leaves. Blight had finally got a toehold on the Colossal chestnut tree, which, for the past 15 years, has supplied us with all the chestnuts we could eat. (“Colossal” is the variety name, apt for the size of the chestnuts it produces.)Chestnuts falling free from burrMy first inclination, before even identifying chestnut blight as the culprit, was to lop off the two limbs. Once I got up close and personal with the tree, the tell-tale orange areas within cracks in the bark stared me in the face.Blight on chestnut barkThere is no cure for chestnut blight. Removing infected wood does remove a source of inoculum to limit its spread. In Europe, the disease has been limited by hypovirulence, a virus (CHV1) that attacks the blight fungus. Some success has been achieved using a naturally occurring virus found on blighted trees in Michigan.
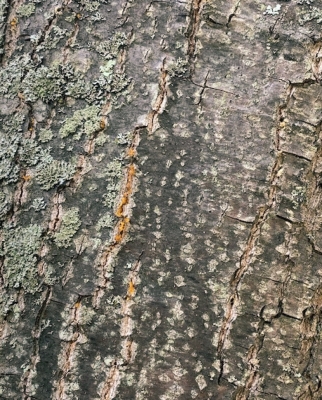
There is some evidence, although not confirmed with rigorous scientific testing, that mud packs made from soil taken from the base of a tree, can slow or halt spread of the disease. The mud packs need to be applied to each disease canker and then held in place with shrink wrap, or painted or sprayed on, followed by a layer of latex paint. Not an easy job as you move higher and higher up into the tree.
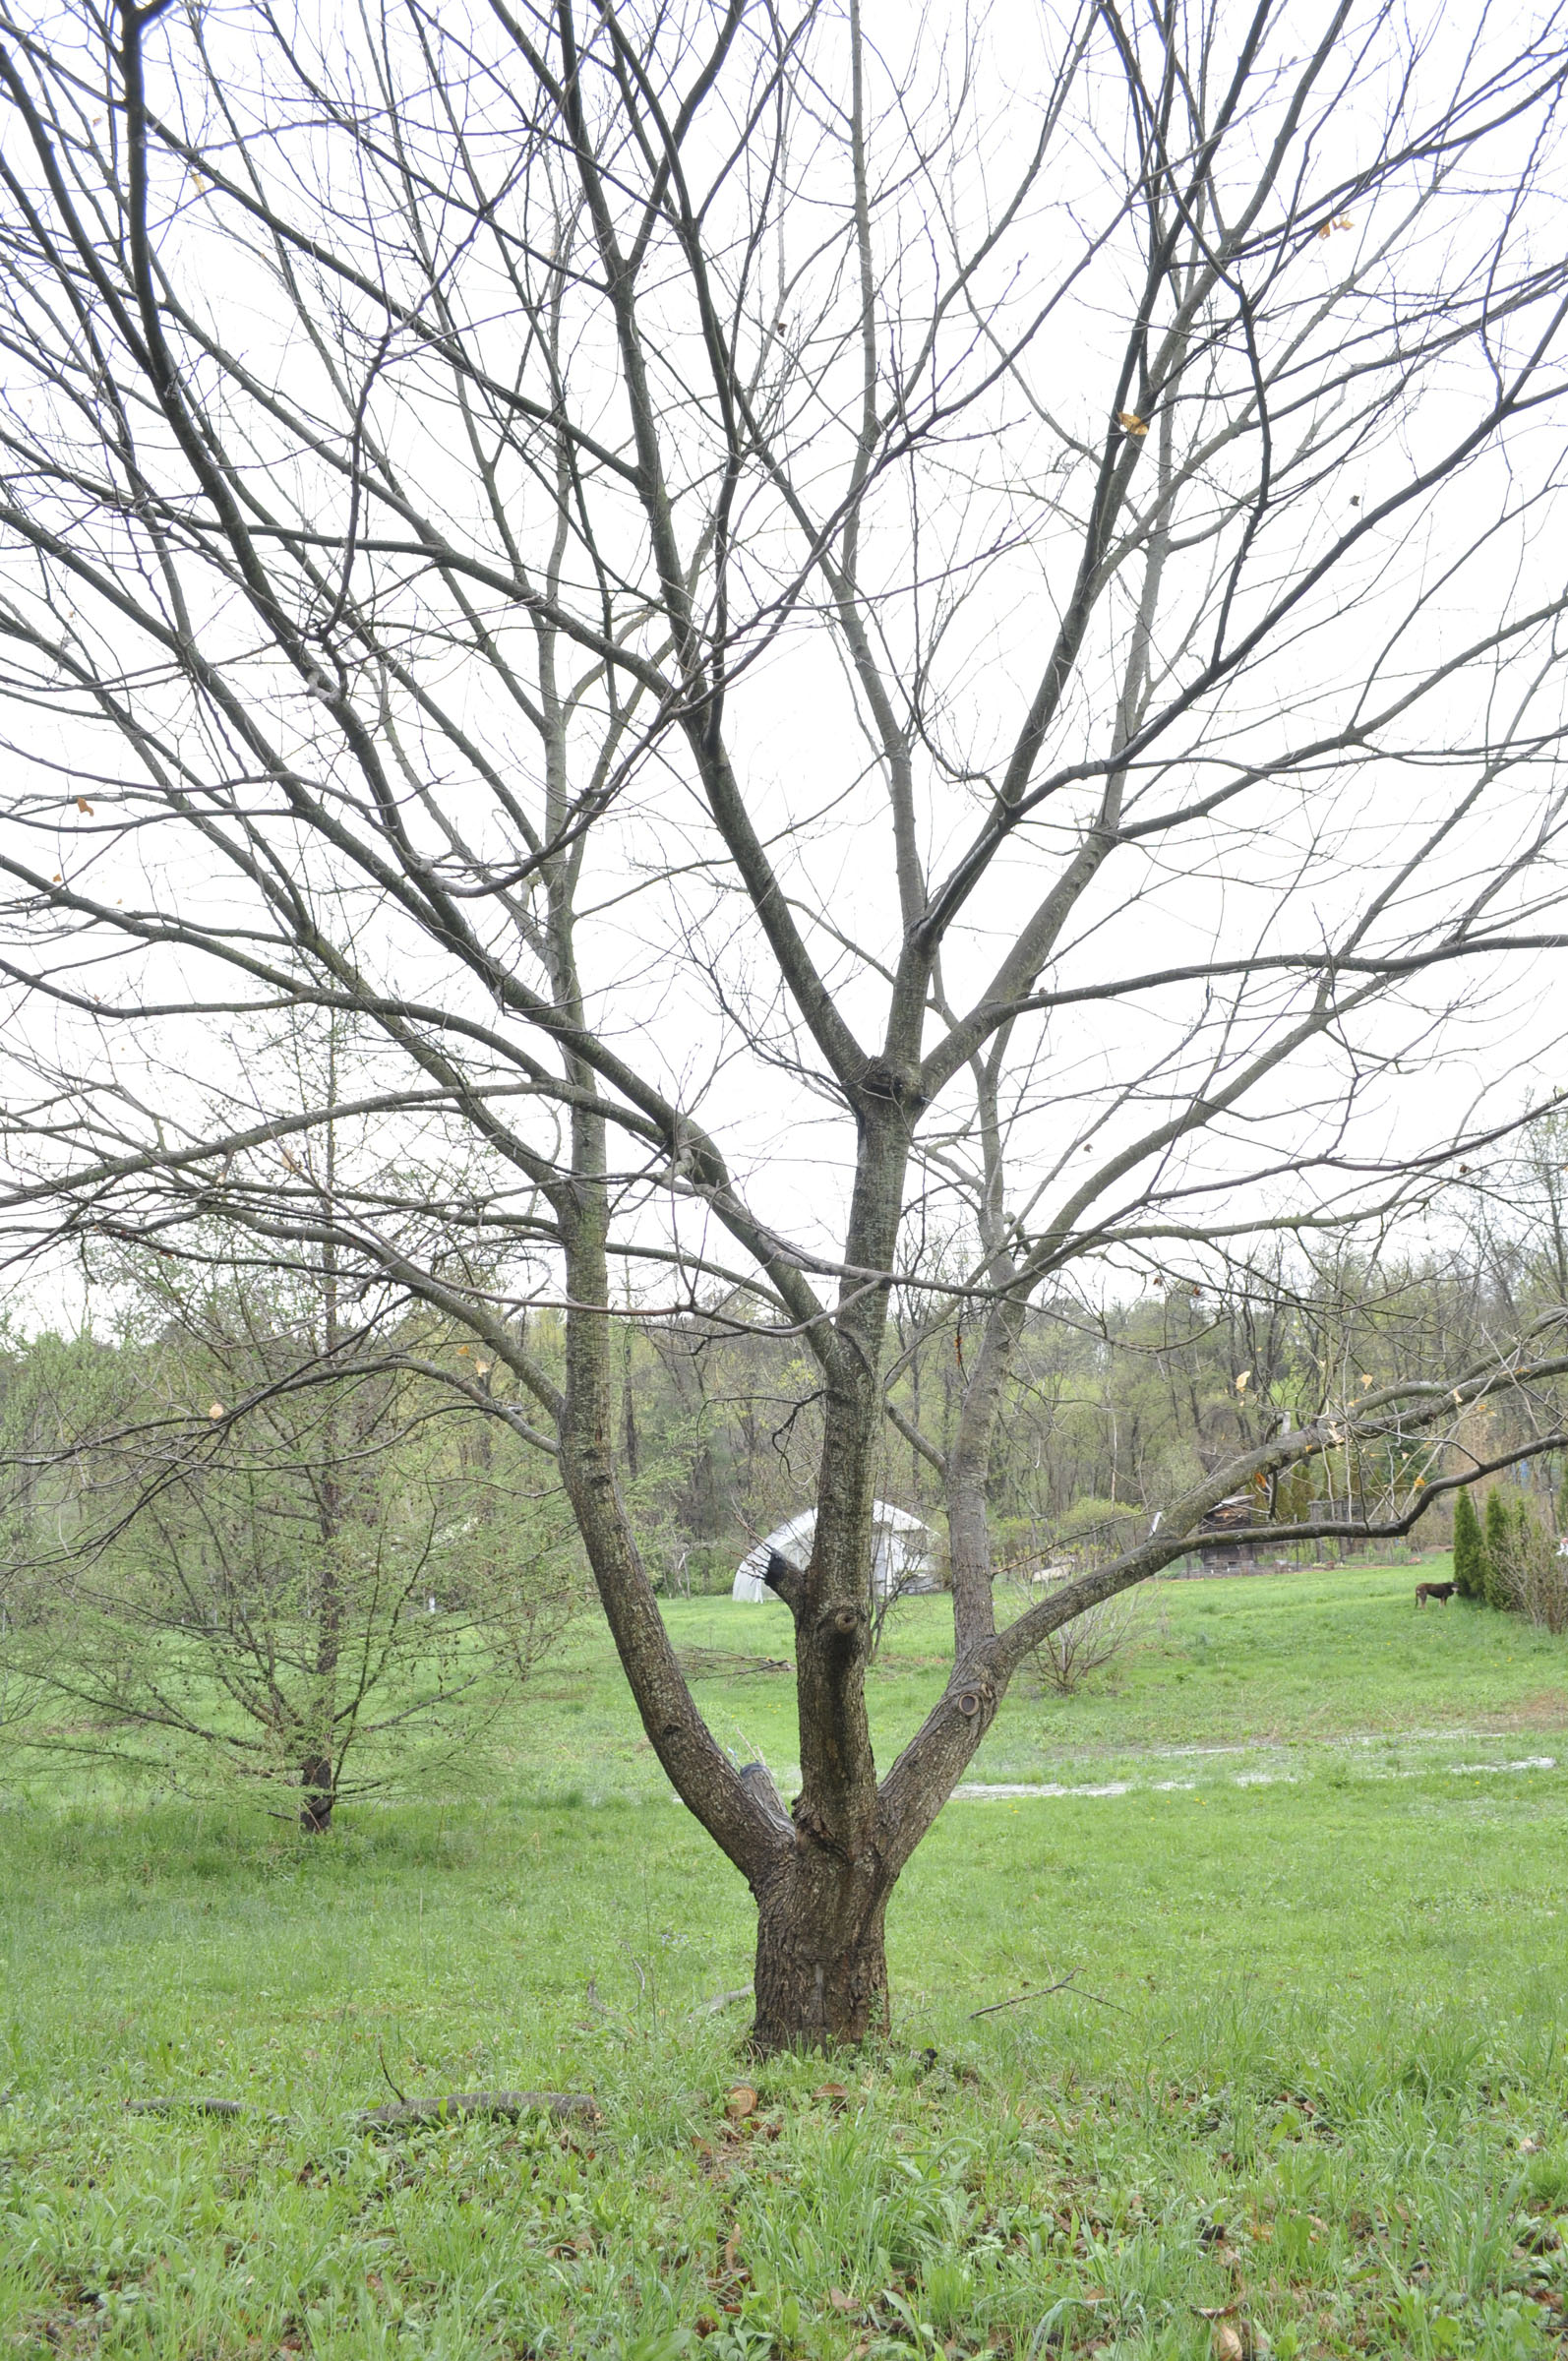
Pruned Colossal tree

Colossal, post surgery

Resistance

Chestnut species vary in their response to the blight fungus. American chestnut (Castanea dentata) is very susceptible; the fungus arrived here from Asia in the early 1900s, and within a half a century had killed billions of trees. European chestnut (C. sativa) was also susceptible, but was protected by the naturally spreading fungal virus.

Chinese chestnut (C.mollisima) and Japanese chestnut (C. crenata) both have some resistance — but not immunity — to the disease, and have contributed their genes to resistant varieties. Collosal, in fact, is a hybrid of European and Japanese chestnuts, and it has some resistance to blight. But, evidently, not enough. I am hoping that the previously extremely wet season contributed to the evidence of symptoms, and that some drier seasons will keep the tree alive longer.

I’m not planning to sit back and let my chestnut-eating days shrink away to nothing. For starters, keeping my tree vigorous with pruning and good fertility might keep small cracks, into which new infections could enter, from developing. Also, chestnut trees need cross-pollination, so I do have other varieties planted. Also planted 20 years ago was Marigoule, also yielding fairly large nuts. Some sources say “blight susceptible,” others saw “blight resistant;” my large tree shows no signs or symptoms of blight. Yet.

This spring I planted two more European x Japanese chestnut hybrids. I shouldn’t have felt so confident that MY trees wouldn’t get blighted. Precoce Migoule and Marsol, the two varieties I planted, are, like Marigoule, allegedly “blight resistant,” or not.

Generally, the Chinese varieties and their hybrids are the most blight resistance. And I have two of those, actually one tree on which I grafted two different varieties. Qing is pure Chinese with easy-to-peel nuts having excellent flavor. Peach, the other variety, is also pure Chinese, though the nuts are ho-hum in flavor. Both varieties have borne for me for a number of years, yet the nuts never seem ripe once they drop.

One More Thing . . .

Is your head spinning yet? One more wrinkle in this chestnut saga. It turns out that if a pure or hybrid Chinese variety pollinates a pure or hybrid Japanese variety, the latter gets dark staining of the nuts, with a loss in quality. So I was phasing out (with a chainsaw) some other Chinese varieties I had planted. Now, with blight lurking in the wings, I’m having second thoughts.

Enough negativity about chestnuts. On the positive side, Chestnut trees’ shiny, green leaves are attractive and turn a rich golden yellow color in fall. The nuts are tasty and nutritious. With their high starch and low fat content, they’ve been called “the bread tree.” Gluten-free bread tree, for those who care about gluten. 

So, do plant chestnuts. Two different varieties for cross-pollination. If I was planting again — and I might — I’d seek out trees from among Qing, Benton Harbor, Everfresh, Gideon, and Mossberger. Or, for Japanese varieties and their hybrids: Maraval, Marigoule, Labor Day, Precoce Migoule, and Marsol.
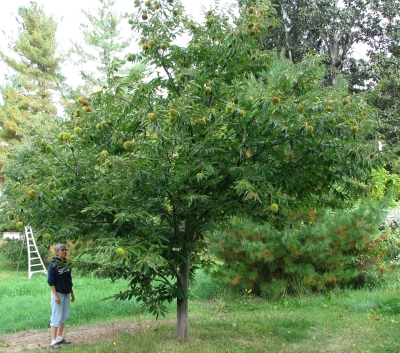
Colossal, at 10 years old
Colossal, at 10 years old

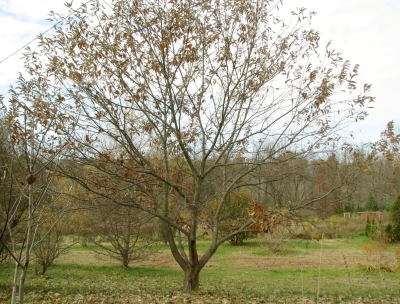
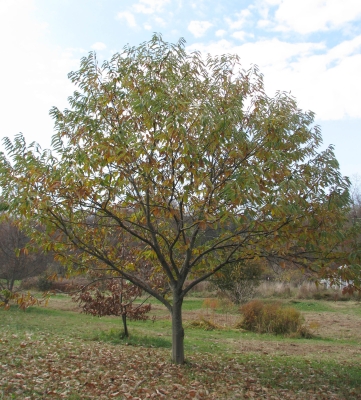
Colossal, in autumn, 12years old

Colossal, in autumn, 12 years old

Some You Win, Some You Lose. Why?

Mo’ Better Berries

Because I’ve grown a number of varieties of blueberries for a long time, I’m often asked what variety I would recommend planting. Or whether you need to plant two varieties for cross-pollination in order to get fruit.

The answers to both questions are intertwined. First of all, blueberries are partially self-fertile so one variety will bear fruit all by itself.
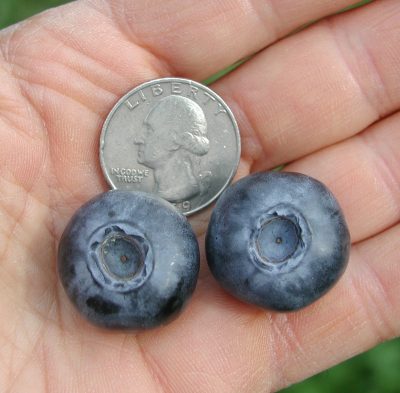
Large blueberries
But — and this is important — berries will be both more plentiful and larger if two different varieties cross-pollinate each other. (Apples, in contrast, are self-sterile so, with few exceptions, won’t bear any fruit at all without cross-pollination.)

Benefits of cross-pollination aside, why plant just one variety of blueberry? Different varieties ripen their fruits at different times during the blueberry harvest season. With a good selection of varieties, that season can be very long.

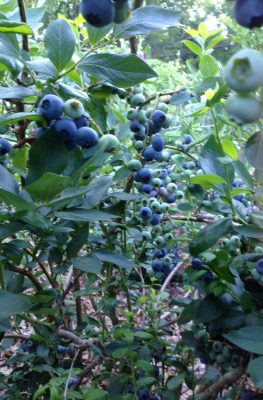
Here on the farmden, the season opens with Duke and Earliblue, both usually ready for picking (in Zone 5) at the end of June. The season moves on, with Blueray, Berkeley, and Bluecrop ripening in July, and Jersey, Toro, and Nelson in August.Blueberries galore As I write, in September, the variety Elliot is still bearing ripe berries.
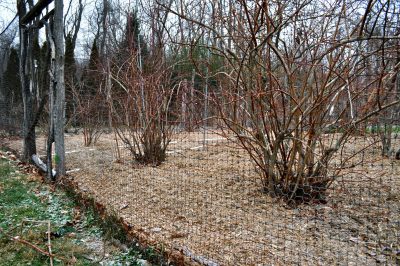
So if you’re going to plant blueberries, which I highly recommend doing, plant more than one variety, and choose the varieties that let you enjoy berries with your morning cereal or your after dinner ice cream over a long season.

Soil Matters

I pay special attention to the soil when I plant blueberries, and it pays off. Blueberries have rather unique soil requirements among cultivated plants, demanding those that are very acidic, high in organic matter, low in nutrients, and consistently moist and well-aerated. (Most cultivated plants like soils that are only slightly acidic and have moderate to high fertility.) No matter if a soil is not naturally to blueberry’s liking; it can be made so.

The soil where I planted my blueberries drains well. If it did not, I would either choose a better location or else create mounds on which to plant.

Next in importance is soil acidity; I test it before planting. If it’s not at the required pH of 4 to 5.5, I spread pelletized sulfur, a naturally mined mineral, over the ground. (Pelletizing the sulfur makes it less dusty to work with.) Mulched blueberry planting
The amount of sulfur, per 100 square feet, needed to lower the pH by one unit would be a pound in a sandy soil and three pounds in a clay soil. My clay loam’s initial pH was about 6.5, so I needed 3 pounds of sulfur per hundred square feet to lower that pH to 5.5, that upper limit enjoyed by blueberries.

Now, for planting. I mix a bucketful of peat moss with the soil in each planting hole and then tuck the plants and soil into the hole, setting the plants slightly deeper than they stood in the nursery. Peat moss is a long-lasting source of organic matter, unique among organic matters in also being low in nutrients.

Right after planting, I spread a 2 to 3 inch depth of some weed-free, fluffy organic material, such as wood shavings, wood chips, straw, pine needles, or autumn leaves, as mulch. The mulch snuffs out weeds, which are more adept than blueberry at soaking up water and nutrients, and keeps the soil cool and moist, just as it is in blueberry’s natural habitats.

With regular watering, as needed, pruning, and annual mulching and attention to soil acidity, blueberry leaves should maintain a healthy, green color, and stems should grow a couple of feet or so each year. My planting of 16 plants yields almost 200 quarts per year of delicious, organic blueberries.

Celeriac Failure, Again

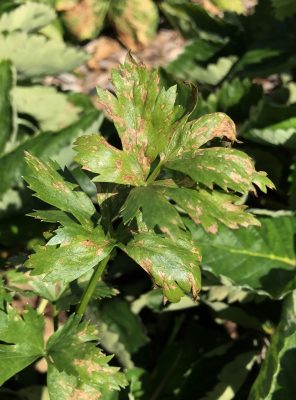
Blueberries have been a great success; now for a failure. Celeriac, a celery relative that puts that flavor  into its softball-sized, white root, isn’t well-known as a vegetable, but I’d like to grow it. I’ve tried, for the past couple of years, without success. The problem is some sort of celery blight that kills the top growth so there’s no greenery to feed the root.

Both early blight and late blight, fungal diseases, could cause problems. They arrived in gardens on infected celery seed and/or infected celery debris from the previous cropping season. Celery bacterial blightLast fall I thoroughly cleaned up diseased plants, even planted some celeriac this year in the greenhouse. Failure occurred both outdoors and in the greenhouse, although lots of rain and heat could have helped (the fungi or bacteria, not me).
I’m not giving up. Perhaps the seed is the problem. Seed can harbor the disease, but can be “cleaned” up with a heat treatment: 30 minutes at 118°F. As a last resort, I could spray an organic fungicide such as one of the organically approved materials based on copper or hydrogen peroxide. Perhaps this time next year I’ll be eating celeriac.

HOME GROWN GRAIN & GRAIN-ISH


Popcorn & Chestnuts, Bigger is Better But Not Always

   Orville Redenbacker’s popcorn may be an “exclusive kernel hybrid that pops up lighter and fluffier than ordinary popcorn,” but my popcorn — nonhybrids whose seeds I’ve saved for many years — tastes better. I grow two varieties, Pink Pearl and Pennsylvania Dutch Butter Flavored Popcorn.
    This winter my popcorns’ poppability was especially poor, probably because of the weather. Really! Popcorn pops when the small amount of water within each kernel, heated above the boiling point, builds up enough pressure to explode the kernel, turning it inside out. For good popping, a kernel needs an intact hull and moisture within. Not just any amount of moisture, though, but as close as possible to 13.5%.
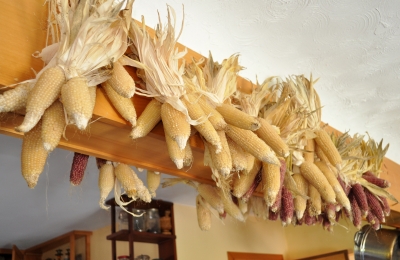
    (Other whole grains, such as wheat berries and rice, don’t pop with the same explosive force as popcorn because their hulls are porous.)Popcorn hanging from rafters for winter
    My popcorn spends winter, as ears, hanging from the kitchen rafters. I suspect the kernels are too dry because colder winter weather results in drier air indoors. Cold air holds less moisture than warm air so the colder the outdoor temperatures, the drier the air, once it is warmed.
    The kernels need moisture, but not more than 13.5%. Fortunately, for us popcorn lovers, back in 1950 a Mr. Stephen Dexter of Lansing, Michigan came up with an easy way to get the moisture just right, as spelled out in U.S. patent number 2497399. And for those of us who want to start eating our home-grown popcorn early in the season, when kernels may be too moist, his method also sucks excess moisture out of the kernels to bring the level down to 13.5%. Watch out Orville!
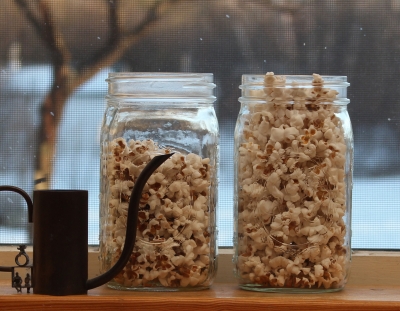
    Now for the method . . .  to quote, “I have discovered that popcorn can be maintained at the best popping condition or restored to that condition by storing it in a closed container in which the atmosphere is maintained at approximately 75% Popcorn being treated to pop betterrelative humidity. This relative humidity can be maintained throughout a wide range of temperatures by placing in the container a saturated solution of common table salt.” So the first step is to create a saturated solution of salt; I dissolved as much salt as possible (about 1.5 ounces) in a half a cup of water, and then added a little more to make sure that it was saturated.
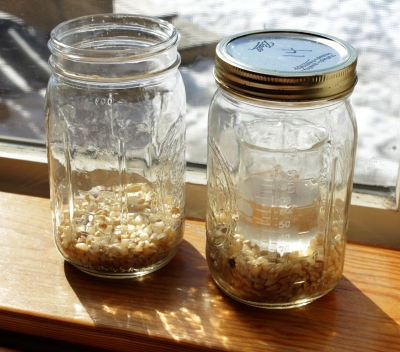
    It’s important that the popcorn kernels don’t make contact with the salt solution. Mr Dexter maintained the right atmosphere by putting blotting paper soaked in the solution in a sealed container with the kernels. I put the kernels into a Mason jar and then set a beaker with the solution on top of the kernels.

A Little Science, A Lot Better Poppability

    Not to doubt Mr. Dexter or the patent process, but the scientist in me had to test the method. A handful of shucked kernels went into each of two Mason jars. One jar was left open to the atmosphere. The other was sealed after I set the beaker of salt solution atop the kernels. Poppability tests came 3 days later. Pennsylvania Dutch Butter Flavored Popcorn, which normally pops pretty well, popped to 1/3 greater volume after the moisture treatment. Pink Pearl awaits testing.

Positive results of popcorn treatment

Positive results of popcorn treatment

    At their best, neither would compare in volume increase with Orville Redenbacher’s popcorn, which claims a 44:1 increase. My popcorn costs nothing except my time (pleasantly spent) and is an organically grown, wholesome, whole grain that hangs decoratively from my kitchen rafter and tastes better. Let Orville have his fluff.

Editing my Chestnut Planting

    On to another grain, chestnuts, called the “grain that grows on trees” because, unlike other nuts, it’s low in fat and protein but high in starch. My trees demand little more from me than daily harvest during their two-week ripening period. I have 4 trees but harvest all the nuts I need from one tree, aptly named Colossal for the truly colossal size of the nuts it yield.
    Colossal, a hybrid of Castanea sativa (European chestnut) and C. crenata (Japanese chestnut), has its Achilles heel. Make that Achilles heels, plural. The first is that it is susceptible to the chestnut blight that decimated chestnut trees from

My majestic seedling Chinese chestnut

My majestic seedling Chinese chestnut

Maine to Georgia in the 20th century. Colossal is probably not quite as susceptible to blight as are American chestnuts; my trees, knock on (chestnut) wood, are 17 years old and have never had blight.
    More serious is IKB, internal kernel breakdown, which turns the kernels dark and ruins their flavor. IKB occurs in a certain percentage of nuts of European x Japanese varieties when they are pollinated by a Chinese chestnut (C. mollissima) or hybrid. And vice versa. Most of my other trees are Chinese or Chinese hybrids.
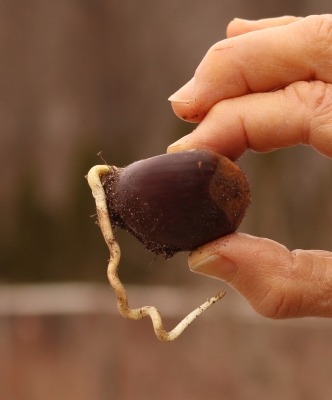
 Sprouting chestnut   I was going to plant some of my Colossal nuts to make more suitable pollinators for Colossal but, as chestnut researcher Dr. Dennis Fulbright of MSU pointed out to me, those seedlings would have some Chinese “blood” in them. Too bad; I wintered the nuts in a baggie with moist potting soil in my unheated basement. Those nuts now believe that winter is over, and are already sprouting roots.
    I’ll grit my teeth and put the chainsaw to my beautiful, large Chinese and Chinese hybrid chestnuts, and rely on my one, smaller Marigoule chestnut, a European x Japanese hybrid, to offer pollen to Colossal. Marigoule is blight susceptible, so I’m looking to plant another European x Japanese hybrid called Labor Day, which is blight resistant.

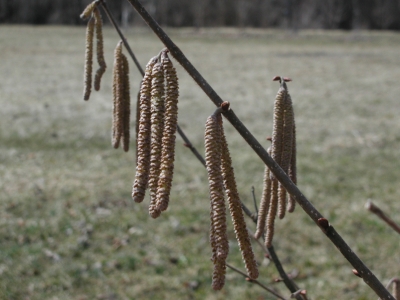
Filbert catkins

Filbert catkins

    At any rate, coming on the heels of winter, it’s nice to see something growing, even if it’s nothing more than a 2 inch root sprout that pushed its way out of a chestnut. Oh, and outside, filbert branches are now draped with catkins, chains of male flowers. And fuzzy, gray catkins have puffed out (indoors, on branches in a vase) on contorted stems of fantail pussy willow. And an abundance of tender green seedling are sprouting in the greenhouse. Happy spring!

No-Till & Compost, and Still Problems

One of the best things about no-till gardening is not having to till. The soil of my vegetable garden hasn’t been disturbed for over 2 decades. Besides avoiding the hassle of tilling, not having to till makes for quicker and easier planting.
Today, for instance, I planned to clear a bed of harvested edamame plants to make way for lettuce. Easy! I just pulled up each plant, coaxing it along, if necessary with a Hori Hori knife so that I had the tops and only the main roots in hand. Once plants were up and out, light use of a lawn rake gathered up dropped leaves, pods, and other debris, and brought what few weeds were still present into focus for removal. In 20 minutes, I had the double row of plants in a 20 foot by 3 foot wide bed cleared, and the bed cleaned up.
“Quicker and easier” are not the only benefits of no-till. Not tilling makes for less weeds because weed

seeds, buried within every soil, don’t get exposed to light, which they need to sprout. Untilled soils also make better use of water and maintain higher levels of organic matter.

I could have sown right into the clean surface but chose, instead to further enrich the ground for the months and year ahead. A garden line and sprinklings of ground limestone re-defined the edges of the beds, along which I laid two-by-fours. The two-by-fours, only temporary, were to contain the compost which I piled into the bed to a leveled depth of about an inch.
That one inch of compost provides all the fertility the bed needs for a year of vegetable production, even with multiple crops of vegetables in the bed. In addition to fertility, the compost helps the ground hold water and air, snuffs out small weed seedlings, and sustains beneficial soil organisms for healthier plants. Because the compost is made from “garbage,” fertility derived solely from compost is truly sustainable.
———————————————
Compost, as I wrote, makes for healthier plants. Thorough bed cleanup after each crop also makes for healthier plants by reducing sources of disease inoculum. (See my new compost video, www.youtube.com/leereichfarmden, for more about my compost making.)
That’s not to say that my garden has no pest problems. A pest problem arises when you have that perfect confluence of a susceptible plant, the presence of the pest, and a suitable environment. Susceptibility of a plant depends on the type of plant as well as how well it’s been nourished. 
———————————————
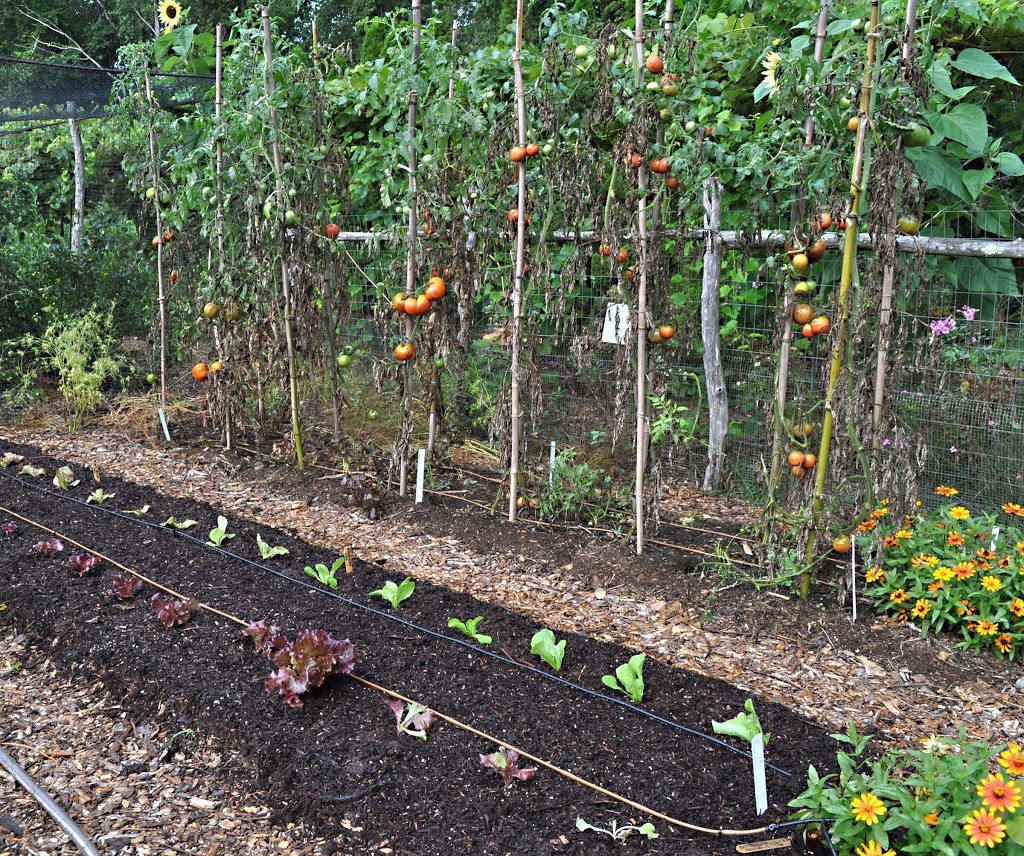
All of which leads up to the admission, despite compost, pruning, and careful siting, that my tomato plants are not the picture of health. The plants, each pruned to a single stem that climbs, with the help of string ties, to a bamboo pole, have lost many of their lowermost leaves.
“Blight” is the mantra I keep hearing from other gardeners. Not so fast. Not every tomato affliction is

“blight,” a buzzword that originated, no doubt, with the “late blight” epidemic of a few years ago that sensitized gardeners and farmers to this disease. Late blight is but one of tomato’s enemies, but it’s not the only one.

Tomato plants bereft of leaves could be due to the diseases septoria leaf spot, early blight, or, of course, late blight, or the insect tomato hornworm. The hornworm is easily identified because it’s a big, fat, hungry caterpillar that chomps off big portions of healthy, green leaves. The caterpillar itself is quite a sight, as big as your thumb and with white stripes and eye-like markings along its length. Control is easy: crush them (unless they have parasites, which look like rice grains, attached to their backs) or spray using some commercial form of the biological insecticide Bacillus thuringiensis (Bt).
The three diseases are easily distinguished. Early blight marks leaves with spots of tan and black,concentric rings and yellowing leaf tissue. Septoria spots are small, round and gray, each surrounded by a single, dark margin. Late blight marks leaves with greenish-black splotches, each surrounded by a pale, greenish-yellow band. In humid weather, a downy growth develops on the undersides of leaves. On fruits, symptoms are firm, dark, greasy looking lesions.
My thorough cleanup and compost mulch greatly reduces presence of early blight and septoria leaf spot spores in the beginning of the season, as does planting tomatoes in a different location each year in a 3 year

Tomato hornworm with parasite

rotation. Late blight needs living tissue to survive winter here, so returns by wintering over in infected potato tubers, by hopscotching up from the south on favorable winds with cool, moist weather, or, as happened a few years ago, by arriving on infected transplants sold by big box stores. I grow my own tomato seedlings and hope for the best as far as cooperative weather for my plants.


Taking a closer look at my tomato leaves, I see that the main causes for their defoliation are septoria leaf spot and — uh-oh — late blight. Weather in the next few weeks will determine how fast plants decline. I could spray (some formulation containing copper) but choose to avoid even mild pesticide, in this case. Upper portions of the plants still ook fine and, most importantly, I have been eating, canning, and drying plenty of tomatoes.