A Reel Mower, Potting Soils

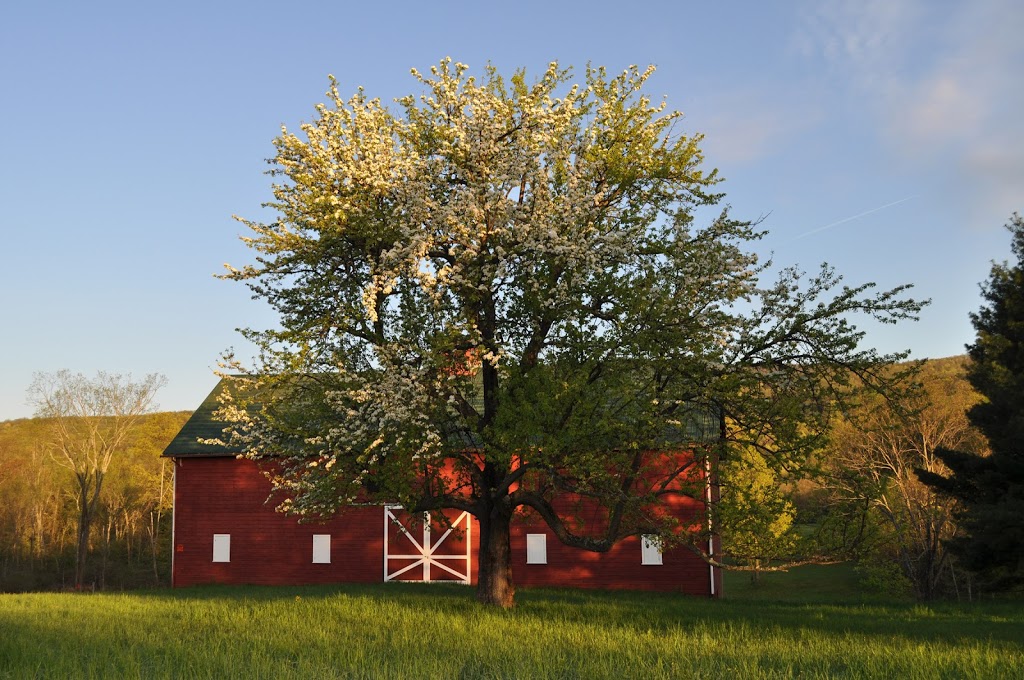
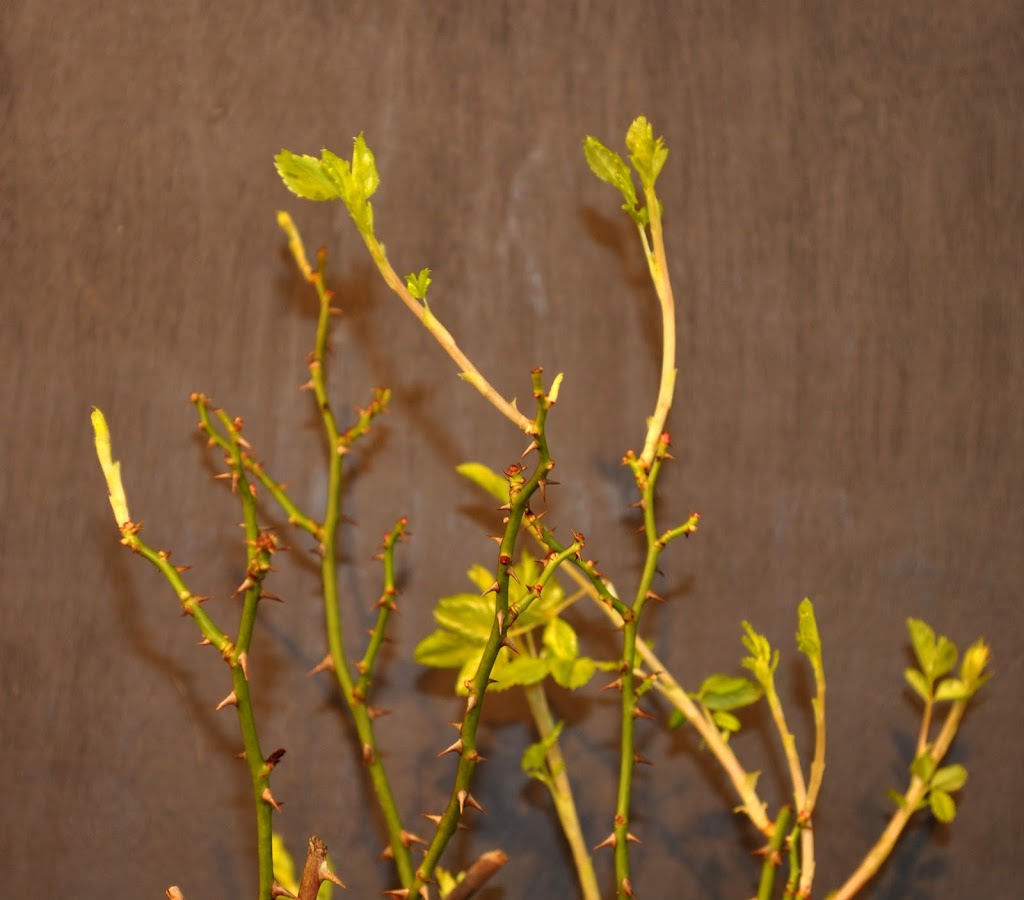
Coming out of the gate of the warmest and driest winter in decades, weather this spring has been a roller coaster ride. March had a spate of sunny days in the 70s, then temperatures plummeted to the low 20s, then the dry spell was ended with some rain, and recently temperatures have continued on the seasonably cool and cold side. Lawngrass has enjoyed the weather, and during one of the recent calms I finally got the opportunity to roll out the lawnmower.


The opportunity!? Mowing the lawn isn’t usually one of my favorite pastimes but this spring I was anxious to try out my new lawnmower. No need to clean and tighten the sparkplug, check the gas and oil, and pray for  the roar of exploding gasoline (within the engine) with this new mower. It’s a push mower, “push” as in your pushing gets it moving and turns the front reel that lops grass cleanly as the sharp blades rotate pass the fixed bar.


Push mowers have come a long way since those heavy, iron monsters of yore and my new Fiskars Reel Mower was a joy to use. So much s that I was able to do a “Tom Sawyer” on my visiting brother and his two daughters, letting them vie to see who gets to create that musical whirring of the gears accompanied by a broad fountain of grass blades flying up and out in front of the traveling mower. (He ordered one for himself when he got home.)


Using a push mower is more than just fun, of course. It’s good for the environment. A gasoline powered lawnmower pollutes as much in an hour as a car driving 250 miles; pollution from electric corded or battery powered mowers depends on how the electricity is generated. A push mower offers the opportunity for productive exercise. And reel mowers make cleaner cuts than rotary mowers so result in a healthier lawn. I highly recommend Fiskars Reel Mower.
——————————————–
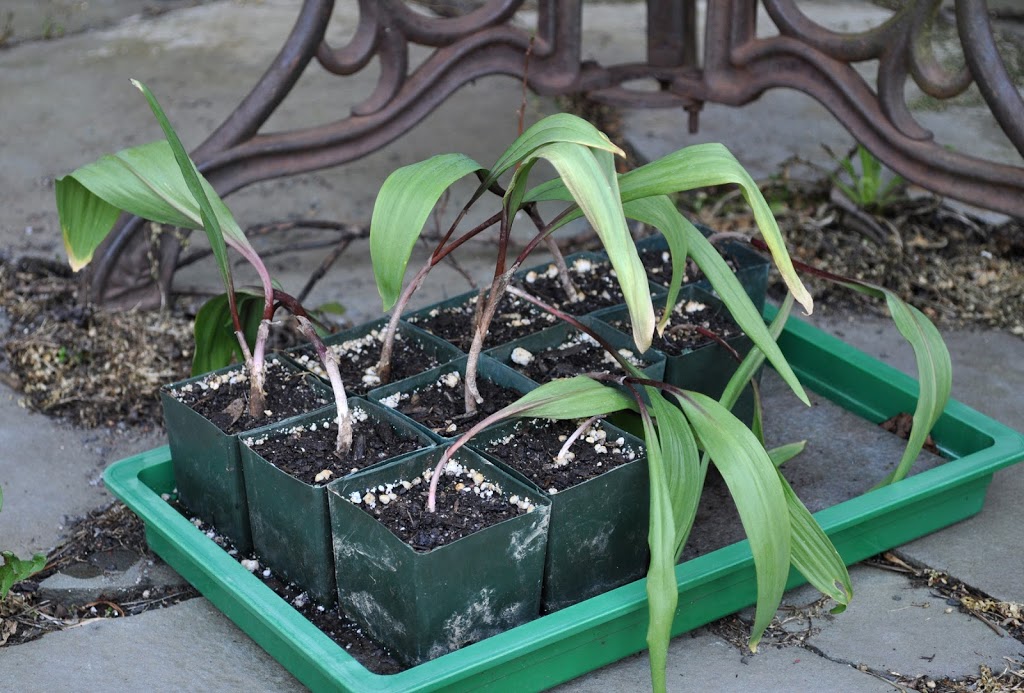
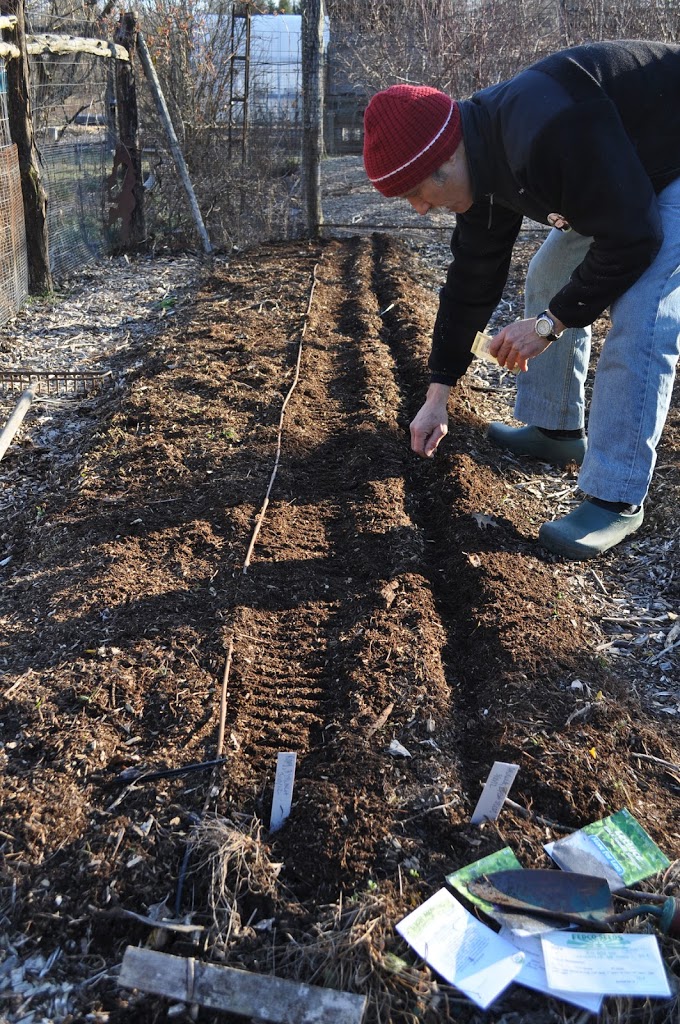
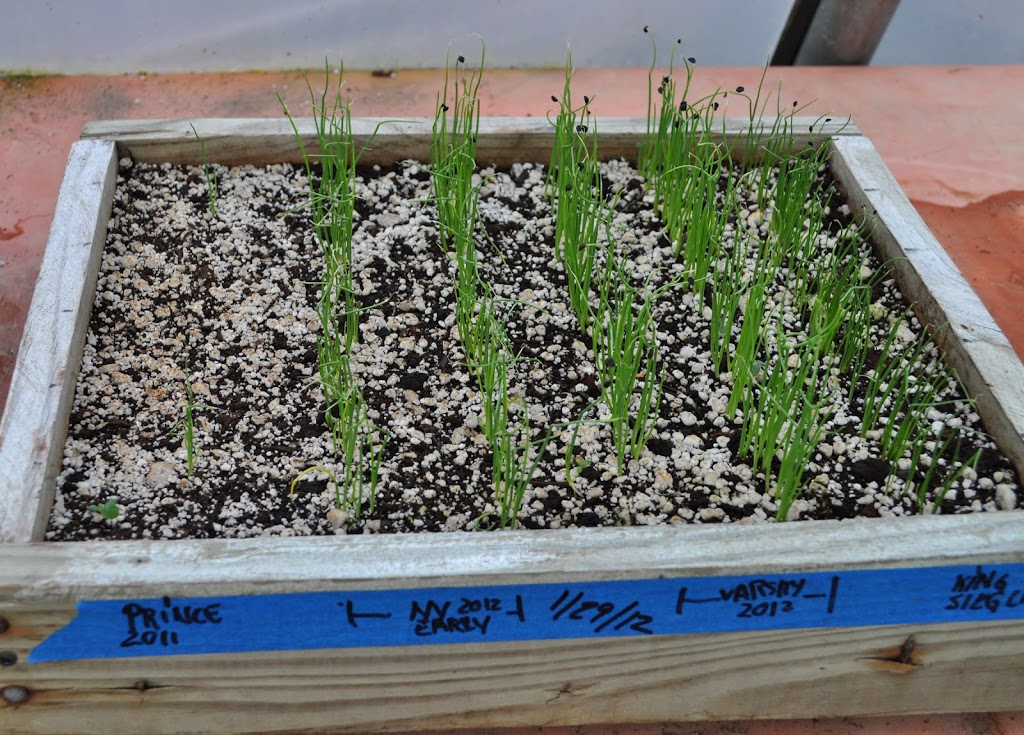
A few weeks ago I fingered possible blame for poor seed germination and poor seedling growth on my having substituted peat moss for coir in my potting mix. Coir is a sustainable byproduct of coconut processing; peat moss takes eons to form so is not sustainable.


I’m happy to report that I was wrong. My seeding failures, it turns out, were due to the heating pad that is meant to provide gentle bottom heat for seed germination in my cool temperature greenhouse. Instead of the desired 75°F., the thermostat for that heating pad had been inadvertently turned up to 100°F (probably by me)!


Gardening brings into play the interaction of all sorts of physical, chemical, and biological system; the interactions are complex and this complexity makes it hard to ascribe cause and effect. But gardeners too often do this, just as I did (with reservations) relating coir in my potting mix to poor seed germination and seedling growth. 


To really find out if “A” causes “B,” (for instance, that coir is bad for seed germination) you have to control as many variables as possible (same seeds, same light, same watering, etc.) and then apply “A” to only half of your plants. It’s often not all that easy to control other variables. And anyway, if you start out believing that something — compost tea, for example — is going to make your plants grow better, you’ll be wont to not use it on all your plants. And then, if the summer happens to be sunny and warm with timely rains, you still might be inclined to tout that something — the compost tea, in this example — for good growth.
———————————————————–


My coir blunder did have the benefit of making me more objective about what makes a good potting soil. Many years ago, after much research, I came up with my own not-secret potting soil recipe of equal parts compost, garden soil, peat, and perlite with some soybean meal and kelp thrown in for extra nitrogen and micronutrients. Coir, in my last mix, substituted for all the peat.
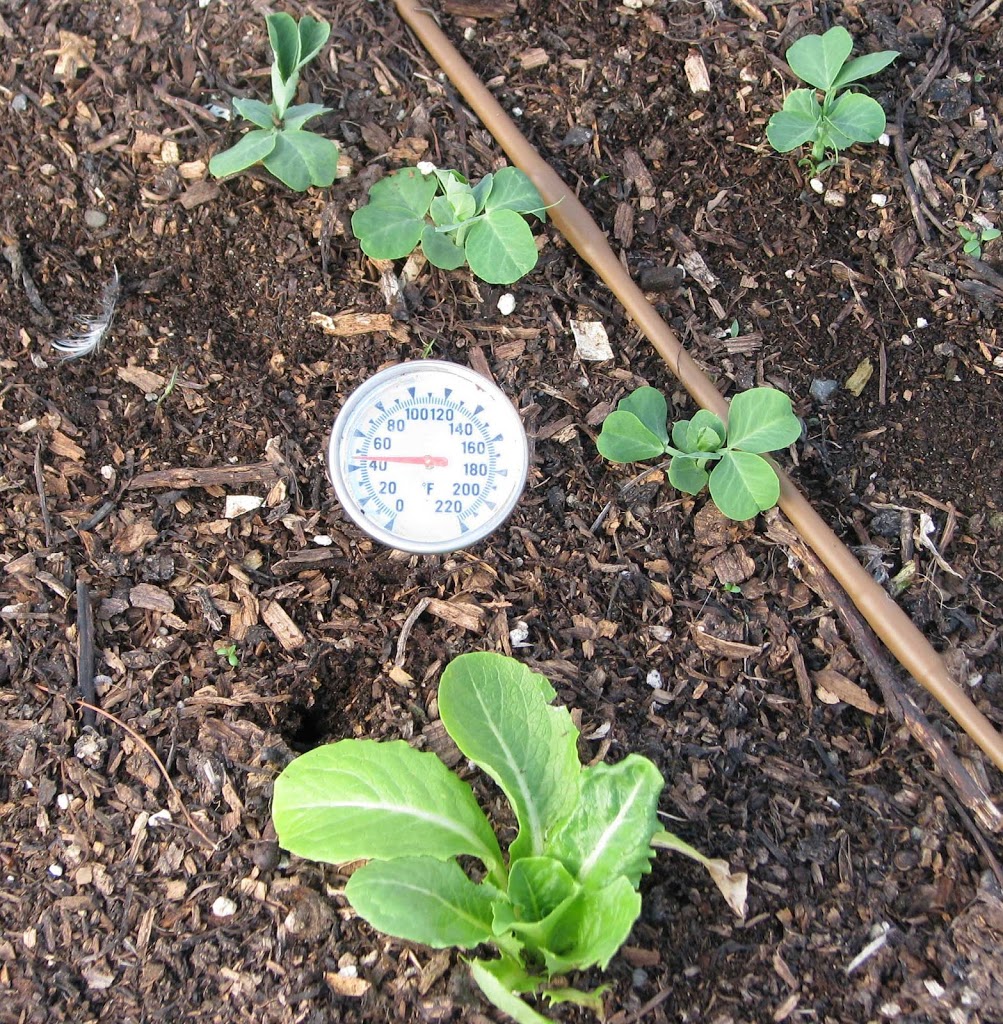
After thinking that coir ruined my mix, I made up a batch of potting soil using 3 parts leaf mold (thoroughly rotted leaves) with one part perlite, again with some soybean meal and kelp. And then I actually did an experiment, planting half my lettuce seedlings in the leaf mold mix and the other half in the coir mix. Once removed from the overheated heating pad, seedlings grew equally well in either potting mix.


Which is to say, with reference to religions or potting soils: Many roads lead to the mountaintop. A good potting mix needs to drain well, hold moisture, provide nutrients, and provide a biologically friendly environment for roots. Perlite, sand or vermiculite can provide good drainage. Compost, peat, coir, or leaf mold help hold moisture and provide a biologically friendly root environment. Soil, compost, leaf mold, soybean meal, and kelp can provide nutrients. Various combinations of these ingredients make equally good potting mixes.

Ramps, Colonial Williamsburg

A friend of a friend who was helping me turn compost stopped by the farmden and presented me with a fistful of greenery. Ramps. Although I’ve known of ramps and ramp festivals  for years, the plant never appealed to me. I foolishly figured it was one of those edibles whose main appeal was their wildness rather than their flavor.


But ramps right in your face demand attention, so I cooked and ate them that evening. The flavor was delicious, yes, onion-y but not with an overpowering aroma that’s often advertised as oozing from the bodies of attendees at ramps festivals; and they were sweet. As I have done with many other wild edibles — blueberries, pawpaws, and persimmons, to name a few — I right away wanted to cultivate ramps, both for the challenge and to have them available close at hand. The friend of the friend said she would bring me some rooted plants in a couple of days, which she kindly did.


The starting point in cultivating any wild plant is, of course, to look to its natural habitat. Ramps grow in moist, humus-y soil in the dappled shade of deciduous forests. To get my ramps off to a good start, I decided to grow them for a season in pots. There, soil, moisture, and light could be adjusted as needed. The potting mix was leaf mold (just like the forest floor) with some perlite for drainage (a necessity for roots in the confines of a pot). I set the pots on a capillary mat which, with one end dangling in a reservoir of water, would keep the potting mix consistently moist. For the couple of weeks that the roots are exploring new soil, moisture loss through the leaves will be minimized by keeping the plants in deep shade. After a couple of weeks, the plants should be ready for dappled sunlight.


Ramps have a short season. The green leaves emerge in spring, then die back as days grow longer and temperatures rise in June. After the leaves die back, seedstalks emerge.


Many wild plants that naturally grow in shade actually grow even better in full sun — as long as their roots have adequate moisture. This is true for pawpaw and blueberry, and perhaps is also the case with ramps. I have enough plants to, next year, try different exposures and see which gives best results.


The goal is to eventually plant out the ramps so they can multiply as the bulbs divide to form clumps and as the plants self-seed. The shaded, wet soil beneath my persimmon trees is one place I have in mind that might provide just right conditions for “ramp-ant” growth.
———————————–
Dateline Colonial Williamsburg: A magical place I first visited over 50 years ago, and here I am today for a lecture at their 66th Garden Symposium. (No lecture was involved at my first visit; I hadn’t even been talking for that long!) Strolling in and out of the many gardens — from the functional “four-square” kitchen garden behind Shield’s Tavern to the maze and clipped evergreens of the Governor’s Palace — Colonial Williamsburg is a reminder of America’s gardening heritage. 


What goes around comes around. Colonists, even those with small, village plots of land, grew at least some of their own vegetables and fruits. They had to. Today, even with the  panoply of fresh produce that lines our market shelves, more and more of us are planting at least some fruits and vegetables that we can reach for right outside our back doors. Now we’re doing it to avoid commercial food products too often tainted with pathogens or pesticides, to avoid the environment toll of a tomato or a head of lettuce shipped hundreds of miles, and because we want to eat fruits and vegetables with real flavor.
We’re now even using some gardening techniques of those colonial gardeners. Tunnels of wire draped with clear plastic have replaced wooden hoops of yore covered with oiled paper held in place with horsehide glue. Colonial gardeners covered other hoops with cheesecloth to screen out insects; I do likewise, using spun-bonded polyester, a more modern mesh material, to keep flea beetles off eggplants. Raising beds for better drainage and early soil warming were popular then and now.


The formality of Williamsburg’s symmetrical ornamental plantings have their place now also. Especially if today we keep those formal planting to a size that can be maintained with the same meticulousness as modern Williamsburg’s skilled gardeners. My only objection to all that symmetry and evergreens is that, along with the brick buildings, the formal plantings take on a certain sameness; it looks pretty but makes it easy to lose your way.


Okay, I’ll admit it; Williamsburg did make me jealous. Of their towering southern magnolia trees with large, leathery, glossy leaves. Such trees either don’t thrive or don’t survive this far north. (The cold limit for hardier varieties, such as Bracken’s Brown Beauty, is 5-10° F.) I also was envious of the many fig trees and pomegranate bushes growing freely outdoors in ornamental and vegetable gardens. I also grow these plants, but in the greenhouse or large pots.


Colonial Williamsburg is an enchanting place. The gardens. The quiet of car-less streets. The subdued light at night. The chirping birds on spring mornings, a prominent memory from my first visit and each visit since. With Spring’s early arrival throughout the East, an added plus was the heavy blooms of black locust trees that suffused the air with their intoxicatingly sweet fragrance. I should experience that pleasure again, back home at the farmden, within a couple of weeks.

Propagating Cuttings, Quackgrass

Ten weeks ago I wrote of the “pot in pot” propagator that I was using to root dormant fig and mulberry cuttings. The propagator is nothing more than a small, porous, clay pot filled with water and with its drainage hole plugged that I plunged into the mix of peat moss and perlite that filled the larger pot. Water drawn out of the small pot keeps the peat-perlite rooting mix consistently moist.
The cuttings have sprouted with enthusiasm. And when I lift out the small pot, I see roots running around in the moist rooting mix, so I separated the plants and potted them up individually.
No need to put the propagator away now that plants are no longer dormant. With a simple covering to maintain humidity, the propagator also works well for so-called softwood cuttings, that is, cuttings that start out with leafy shoots. Technically, today’s new cuttings aren’t “softwood” because they haven’t had time yet to begin much growth. They could more accurately be called “leafy.” Their first leaves have unfolded and shoots (the “softwood”) are soon to appear. Whether “leafy” or “softwood,” such cuttings need high humidity to keep leaves from wilting until roots develop.
The propagator conversion involves nothing more than poking four sticks into the rooting medium equally spaced around its outer edge, and then draping a plastic bag over the sticks. Bright light will keep the green leaves feeding the cuttings. Direct light is a no-no because it would cook the cuttings in their high humidity chamber.
—————————————————————
I suppose I could be nostalgic about the quackgrass (Elytrigia repens, and also commonly called witchgrass and couchgrass) stealthily making inroads into my various gardens. After all, quackgrass was my first serious weed problem in my first real garden, a vegetable plot of about 500 square feet in Madison, Wisconsin. At the time, the lakes in Madison were suffering their own weed problems, the result of “fertilization” of the water with runoff from over-fertilized, residential lawns surrounding the lakes. Giant beaters plied the lakes in those days, chopping the lake weeds which were then harvested onto boats and then trucks for disposal. “Weed-free mulch!,” thought I. 
I convinced a lake weed crew to dump a truckload of those water weeds onto my front lawn. I spread the mulch quickly — I had to because the soggy mass started rotting within a few hours to what was beginning to smell like a a pig farm. Laying pitchfork after pitchfork of the stuff between rows of vegetables spelled quick death to the quackgrass.
My gardens now are far more extensive, no straight expanses beckon easy mulching, and water weeds are not in the offing. So for now, I am attacking quackgrass mano a mano, digging and pulling out every last shoot that I can find along with attached, running roots — no easy task among perennial flowers. Where I can, I’ll spread a few sheets of newspaper and top that with mulch. Now is the time to attack because in about a month, new runners will begin to push further afield just beneath the soil surface. The pointed ends of these runners are sharp enough to push right through a potato.
Quackgrass is so widespread that you’d think it was native. Not so. But it has been here for a long time, coming over from Europe with the first colonists. And it’s not all bad: It is good forage for horses and cows, and has been used in herbal medicine especially for kidney ailments. “It openeth the stoppings of the liver,” according to 16th century herbalist John Gerard. Still, it’s not welcome in my garden.
—————————————————————
I’ve got one more deathly arrow in my quiver with which to fight off quackgrass, but it must wait until the weather warms. Vinegar. Household strength vinegar sprayed on the plants kills the leaves; repeatedly killing the leaves eventually kills the plants. I boost vinegar’s efficacy by pouring 1 tablespoon of Ivory dish detergent and 2 tablespoons of canola oil into each gallon of vinegar. Vinegar works best when temperatures rise above 70° F.

Worst Weed, Sugar Maple, and Lithops

Last week’s highlighting of quackgrass as this year’s worst weed was a passion judgement; the quackgrass seemed frighteningly abundant. But now that I’ve gotten the upper hand on it, I realize that quackgrass is lurking in the wings every year, ready to creep into any overlooked edge of the garden. So let’s glance down at two newbies vying for the worst-weed title this year: purple deadnettle (Lamium purpureum) and its cousin, henbit (L. amplexicaule).
Purple deadnettle or henbit, both with creeping stems, rounded leaves, and purplish flowers, could easily be mistaken for creeping Charlie (Glechoma hederaceae), a weed that’s been slinking around my place for years. Purple deadnettle’s upper leaves are purplish and more triangular than its cousin’s. 
Creeping Charlie is enjoyable to rip out of the ground. If you grab the stems just right and before they have rooted too strongly, you end up with a large mass of spreading stems in your fist. Not so for purple deadnettle or henbit. They don’t really creep along the ground; they grow just high enough to flop down without rooting where they touch down. But grab their stem and they break off, leaving the roots and lower pieces of stem intact and ready to start growing again. 
Creeping Charlie
Creeping Charlie seems mostly to creep into garden areas at the edges. Purple deadnettle and henbit spread very effectively by seeds, so clumps of the plants appear suddenly in the middle of the garden. They’re also sly in sprouting very late in the season, after everything has been harvested and cleaned up, at a time when I feel that the garden no longer needs my undivided attention.
———————————–
As long as we’re on weeds, I’m getting reports of another weed, one that’s not in my garden but is turning up in hordes in some other gardens. The weed: maple. Yes, “maple,” as in maple trees, albeit 2 inch high maple trees — for now, at least. 
These seedlings are probably, and hopefully, sugar maples (Acer saccharum). Another possibility is Norway maple (A. platinoides), generally disdained for creating shade too dense to allow grass or anything else to grow, for encroaching on and crowding out sugar maples, and for having ho-hum or downright unpleasant autumn leaf color. 
Yet another possibility is striped maple (A. pennsylvanicum), so-called for the prominent white stripes on its greenish bark. The seedlings are unlikely to be those of either Norway or striped maple unless some trees of either are nearby.
So what’s wrong with some sugar maple seedlings? Nothing, unless you don’t want maple trees there. The seedlings could be carefully transplanted to a more agreeable location. Or you could take a hoe, and hoe-hoe them out.
————————————–
With all the activity outdoors, it’s easy to overlook what might be happening, plantwise, indoors. Take, for instance, what looked like two stones sitting pressed together in a small flowerpot at one of my sunny windows. Those two stones have separated and another set of “stones” is pushing up through the widening cleft.
The plant is one of the appropriately called “living stones,” a translation of the genus name Lithops, which the plants are also called. The stone-like appearance of these plants — they also are gray in color — disguise them in their natural stony habitats in South Africa. Their cover is blown once a year when the plants flower.
The last time my plants flowered was in December. For now, it looks like the cleft will yield only more “stones.”

Winter cold, Winter chill, & Late frosts

I’ve tended the same plot of ground for about 30 years, and this is the oddest winter and spring yet. 
In almost every year past, the nearby Wallkill River has swelled its banks in early April, then overflowed for a few days to stop traffic on my road. This year, the water level is so low that I’m hoping for some rain. Well, almost hoping for rain. I’m still recovering from last August and September’s record rains that made waterfront property of my home and back gardens.
Apple buds in “tight cluster”
If rainfall hasn’t been whacky enough, just look at temperatures over the past few months and especially over the past few weeks. Here in the Hudson Valley — throughout the Northeast, in fact — winter temperatures have been the warmest in decades. In years past, temperatures plummeted each winter to minus 25 degrees F, less so in more recent years. This winter, temperatures here never went below a balmy pus 5 degrees F. Plants know it: Bamboo (Phyllostachys aureosculcata) stayed green all winter, Chester thornless blackberry was unscathed by cold, and trifoliate orange (a citrus relative!) seedlings did not die back at all. A few more winters like this and I’ll be tempted to try growing southern magnolia (‘Bracken’s Brown Beauty’ is one of the hardiest) and camelias (Sasanqua camellias, which bloom in autumn, are the hardiest), which are among the few plants for which I bemoan living this far north.
If the relatively balmy winter was not enough wackiness, how about early spring temperatures? March’s string of daily temperatures in the 70s coaxed blossoms from such plants as Nanking cherry, saucer magnolia (Magnolia soulangiana), and forsythia more than 3 weeks ahead of schedule. Towards the end of March, apple buds were swelling and pears almost popped open.
The average date of the last spring frost around here is May 15th. Which is to say is that I’m worried about my fruit crop this year, a worry that has just been propped up the the forecast for a low of 24 degrees F. for tonight (March 26).
—————————————-
Whether or not cold kills a fruit bud depends on the depth of cold as well as the speed and stage of bud development. Recent warm weather speeded up bud development, making buds more susceptible to cold.
Bud development on fruit plants is divided into self-descriptive stages: apples, for example, go from silver tip to green tip to half-inch green, tight cluster, first pink, full pink, first bloom, full bloom, and, finally, post bloom. Charts are available(http://www.hrt.msu.edu/faculty/langg/Fruit_Bud_Hardiness.html) that give approximate killing temperatures for each stage. For apples, the critical temperatures for the various stages are, respectively, about 15, 18, 23, 27, 28, 28, 28, 28, and 28 degrees F .
So fruit might still be in the offing even after tonight’s predicted freeze. But there’s still many weeks to go before mid-May! What to do?
—————————————–
The easiest course to follow now is to just relax and hope for the best. There’s always next year.
The green center of this cut bud shows that it’s still in good shape.
My trees, even my older ones, are mostly dwarf in size, made that way by special rootstocks. In year’s past, I’ve scurried outside to drape blankets and other coverings over my trees. Coverings add a few degrees of cold protection, mostly for the kinds of freezes (radiation freezes) that occur on still nights with clear skies, by bouncing back downwards the heat that’s being radiated from the earth skyward. I’ve got too many trees to cover.
Someone asked me about sprinkling water on their fruit plants to fend off cold. That works, and is sometimes done by commercial growers, if water is applied continuously until it finally melts. The water releases heat of fusion as it freezes. Of course, all that water and ice can lead to limb breakage and saturated soil.
Given my number of fruit plants, I’m going with option number one. Well, almost. I have one peach tree, now in full bloom. It’s growing in a pot. Into the garage it will go, protected from cold.
————————————————————–
The next morning: As predicted, temperatures dropped to 24 degrees F. All plant seem happy but there are still weeks of potential frost damage in the offing. 
‘Surround’ controls insects and delays bloom — I hope.
My new tack is to slow bud development. This afternoon I sprayed fruit trees, bushes, and vines with ‘Surround,’ which is nothing more than kaolin clay, an effective organic insecticide. The ghostly white coating on the stems should reflect sun’s rays, keeping branches and buds cooler to delay flower bud development.
—————————————————————
Two gardening workshops in the offing:
On April 22nd, I’ll be hold ing a pruning workshop, covering the why, when, with what, and how of pruning.
On April 28th, I’ll be holding a grafting workshop, covering the how, why, and when of grafting. In addition to a hands-on demonstration, participants will graft and take home their own pear tree.
Both workshops will be held at my “farmden,” run from 2-5:50 pm, and cost $55. Pre-registration is necessary. For information o registration, 845-255-0417 or 

A new book: Grow Fruit Naturally, pear excerpt

Now is a good time to plan and plant for some home-grown fruits — pears, for example. Here’s an excerpt from the pear section of my NEW book, Grow Fruit Naturally (Taunton Press, 2012, signed copies available from my website, listed at right):
My ‘Yoinashi’ Asian pear, now in bloom
Pears come in two “flavors:” European and Asian. European pears, which are most familiar in American markets, are typically buttery, sweet, and richly aromatic — and pear-shaped. Asian pears are typically round with crisp flesh that, when you take a bite, explode in your mouth with juice. Their flavors are sweet with a delicate, floral aroma and sometimes a hint of walnut or butterscotch. Both kinds of pears have been cultivated for thousands of years, and within each type exists thousands of varieties.
Pears of either “flavor” are easy to grow. But growing and ripening a European pear to its highest state of perfection is an art. The best one I ever tasted was at a horticultural conference at the venerable East Malling Research Station in England. At the conclusion of the conference we were led into an elegant, large, wood-paneled room, up the center of which ran a hulking, oak banquet table on which sat nothing more than a few bowls of perfectly ripened ‘Comice’ pears, ours for the tasting. I reached for a pear, took a bite, and quickly had to make my way to the conveniently opened French doors at the far end of the room to keep the ambrosial juice dripping with each bite from marring the staid surroundings.
———————————————————
Cultivation of European and Asian pears is essentially the same, with just a few subtle differences. Both need full sun and soil that is at least reasonably well-drained. Pears can tolerate wetter soils than many other tree fruits. Among my favorite varieties are ‘Magness’ and ‘Seckel’ European pears, and ‘Yoinashi’ and ‘Chojuro’ Asian pears.
A pear spur
Once a tree reaches bearing age, prune lightly every year. Completely remove some  of the overly vigorous stems, which mostly originate higher in the tree, and merely shorten weak twigs, which mostly arise lower in the tree. Fruits are borne on spurs, which are short stems elongating only a half-inch each year. Periodically, shorten old branches more aggressively to stimulate growth of new shoots and spurs. Asian pears need more aggressive pruning than European pears, although European pears, especially, are prone to growing many overly vigorous, vertical growing shoots, which shade the plant, are not fruitful, and are more prone to disease. Cut them back when pruning or, even better, grab them in your hand and rip them off with a quick downward jerk while they are still green and growing during summer.
Each flower bud on a pear tree opens to a cluster of flowers, so pear trees, left to their own devices, usually will overbear. Thin fruits to about 5 in. apart. Thinning Asian pears is very important, spelling the difference between a harvest of ho-hum pears and ones that elicit a “wow!”
—————————————————
In most yards, pears can be grown successfully without any attention to pest control. Occasionally, a few pests warrant attention and action.
The main bugaboo in pear growing is the bacterial disease fire blight, readily identified by stems whose ends curl in shepherd’s crooks with seemingly singed, blackened leaves still attached. Diligent pruning out of blighted stems, cutting a few inches below damage, keeps the disease in check. Fire blight has never appeared on any of my more than a dozen trees.
———————————————–
Now for the reward: harvest. Asian pears are precocious, sometimes fruiting in their third season, while European pears are slower to come into bearing. 
First, the easy harvest. Asian pears. Harvest them when they are fully colored and detach easily when you roll them upward with a twist. Taste is the final test: If flavor is not up to snuff, let the fruits hang longer.
European pears must be harvested underripe. Left to fully ripen on the tree, the flesh is brown mush. The fruit must, however, be mature before it is picked and the first clue to fruit maturity is a subtle lightening of the skin’s background color. Look more closely, at the lenticels, or raised pores on the skin; they will become brown and corky at harvest time. Lift and twist the fruit. If the stalk separates easily from the stem, the fruits are ready for harvest.
‘Magness’ pear – mmmm, one of the best!
You’re not yet in pear heaven. European pears need to be kept cool for awhile — a few days for early ripening varieties, a few weeks for late ripening varieties — before they can begin ripening. Keep them cool longer if you intend to store them.
Take some pears out of cold storage a few days before you want them for eating and put them in a cool room. They are ready to enjoy when they give slightly with pressure from your finger near the stem end. If you’ve mastered the art of pear growing, harvesting, and ripening, your reward is fruits that are neither “sleepy” nor the other extreme, “grassy,” but juicy and sweet with characteristic aromas that might include varying proportions of almond, rose, honey, and musk. Still, to quote Ralph Waldo Emerson, “There are only ten minutes in the life of a pear when it is perfect to eat.” But what sensuous ten minutes!
————————————————–
Perry is fermented pear juice, an old-fashioned beverage whose origin lies in France but reached its heyday in 16th and 17th century England. The juice was not your mother’s – or grandmother’s – pear juice. Pears for perry, a different species from European or Asian pears, are mostly too astringent for fresh eating. They’re also very long-lived: an avenue of perry pears planted in England in 1710 were reportedly still alive and fruitful in the mid-20th century. 
Perry is made like hard cider, except that perry pears need to sit for a few days after harvest for their flavors to develop. And again, after crushing, the pomace needs to sit for about a day to reduce the tannins. The end product is quite different from cider because perry pears have more fermentable and nonfermentable sugars, more citric acid, and different kinds of tannins. And because, of course, the raw material is pears.
Traditionally, perry has been a very variable product, reflecting what varieties of perry pears went into the mix, how the mix was fermented, how the fruits were grown, and the vagaries of a particular season. The drink was very much a home- or farm-made beverage, varying as much in alcohol concentration as in flavor. After experiencing a lapse in interest and various attempts to industrialize the product in the 20th century, perry is undergoing a renaissance.
Part of that renaissance lies in the re-discovery of some of the traditional perry pear varieties. ‘Arlingham Squash’, ‘Green Horse’, ‘Moorcroft’, ‘Rock’, and ‘Taynton Squash’ are among the varieties that have contributed to vintage quality perries for over three centuries. One problem with these old varieties is that their nomenclature is as muddled as the finished product can be in some years. Hundred of names exist for a much less number of varieties. Which isn’t all bad, because some of those names are worth having just because: ‘Mumblehead’, ‘Merrylegs’, ‘Devildrink’, ‘Lumberskull’, and, the longest one on record, ‘A drop of that which hangs over the wall’.
——————————————–
Two gardening workshops in the offing:
On April 22nd, I’ll be hold ing a pruning workshop, covering the why, when, with what, and how of pruning.
On April 28th, I’ll be holding a grafting workshop, covering the how, why, and when of grafting. In addition to a hands-on demonstration, participants will graft and take home their own pear tree.
Both workshops will be held at my “farmden,” run from 2-5:50 pm, and cost $55. Pre-registration is necessary. For information or registration, contact me at garden@leereich dot com.

Planting Dates

A few weeks ago I wrote of the earliness of the season, as evidenced by one of the earliest of the early bloomers, witchhazel. It was already in bloom at Longwood Gardens in Pennsylvania, and the large bush at the front corner of my house has also since come into bloom. A reader, writing from  where temperatures are colder than in my garden, wrote to tell me that he has a witchhazel that started blooming in January! I don’t doubt it.

Witchhazel can mean any one of a few species: Japanese witchhazel (Hamamelis japonica), Chinese witchhazel (H. mollis), vernal witchhazel (H. vernalis), and H. X intermedia, the last of which includes hybrids of the Japanese and Chinese species. Depending on site, species, and variety, the strappy petals might unfold sometime from late fall right into spring. The reader’s plant, the variety, Jelena, at his site probably bloomed earlier than usual this winter. I grow the variety Arnold’s Promise.
————————————————-


Quoting Alfred, Lord Tennyson, “In the Spring a young man’s fancy lightly turns to thoughts of” . . . planting, of course. This guy’s thoughts, at least. And especially this year, with spring sprung so early, for now at least. March is a capricious month, with a winter reminder of snow not an impossibility before the month is out.


It was over a week ago that I was visiting Guy Jones’ nearby Blooming Hill Farm and he innocently mentioned to me that he had already sown some lettuce, spinach, and other hardy greens in his fields. Already they were sprouting.


I usually plant by the calendar, with early April being my greens-sowing date. The 70 degree, sunny weather the day after my visit with Guy got the better of me. Out came packets of seeds, a trowel, and a garden rake. I carved four parallel, approximately equally spaced furrows down each of two beds, and into them sprinkled Buttercrunch, Black Seeded Simpson, and Majestic Red lettuce, arugula, and Joy Chen baby bok choy. Covered with soil then firmed with the garden rake, the seeds have all they need to begin sprouting and growing. 
Continued warmth and some water will make things happen. 
—————————————————-


I roll my eyes whenever someone tells me that the time to plant peas is on St. Patrick’s Day. Put simply, a gardener in Austin, Minnesota might need a pickaxe with which to plant peas on St. Patrick’s Day while a gardener Sarasota, Florida would need a time machine. Fall would have been the time for planting for the Floridian.


Peas enjoy — no, need — cool weather to thrive, which is one reason for planting them early. You want them up, bearing, and then cleared away before hot weather sets in. Heat is not a concern in very northern or coastal regions where summers never get very hot; in such places, peas can even be sown in summer for an autumn harvest.


But back to St. Patrick’s day: That partial myth probably got started because St. Patty’s is the perfect time for planting peas in Ireland. Except far enough south where peas are seeded in autumn for a winter harvest, the correct time to plant peas is when the ground has warmed enough so that the seeds sprout, rather than rot, when they hit the dirt. Pea seeds sprout at about 40 degrees F so if you really want to know when to plant them, stick a thermometer in the ground and wait for that temperature.


  Another way to know when to plant peas is by looking around at what’s blooming. Perennial woody and herbaceous plants are cued into seasonal temperature trends. I used to use forsythia bloom time as my prompt to sow peas but realized for the past few years that those blooms open at about the last, rather than the first, date for pea planting. Just about everybody grows crocus and this little flower is up and out of the ground, and spreading its pretty petals, about when the soil temperature hits that 40 degree mark.


Usually I just play the averages and plant peas on April 1st. But the climate has been a-changin’. I see that my crocuses are up. Hmmm. Just to make sure, I took the temperature of the soil and it’s almost 50 degrees F.  Breaking tradition (mine), I planted peas today. This year, peas on St. Patrick’s Day is the right time for pea planting both here and in Ireland.

Coir, A Substitute for Peat

My kitchen isn’t filled with the fragrance and beauty of blooming daffodils, and I have no one to blame but — no, not myself, but — the local store where I bought the bulb last autumn. How could I have resisted? Sitting right by the checkout counter of the store was a bucket full of bulbs, each bulb only one dollar and having the makings of fragrance and beauty already locked within.
Yes, “already locked within.” Spring bulbs’ flowers are initiated in the growing season before the flowers appear. The key to unlocking the pleasures lurking within most spring bulbs is cold temperatures. A period of cold weather lets these bulbs know that winter is over and it’s all right to awaken and blossom. Exposure to cold happens naturally outdoors, with the flowers appearing in spring. 
When “forcing” bulbs for early bloom, you trick the bulbs into thinking that winter is over by exposing them to the requisite amount of cold, which varies for different kinds of bulbs. Brought indoors in winter to warmer temperatures, they can then blossom out of season.
The bulb that I bought was a “paperwhite” daffodil, a species (Narcissus tazzeta) that originated in warmer regions of the western Asia. In those warm regions, paperwhites evolved to flower without needing to experience winter cold. So buy one of these bulbs in autumn, pot it up or put its base in water, and bingo, flowers soon appear.
Except for the paperwhite that I purchased. That bulb just kept growing leaves, an indication that last year’s growing conditions were not good enough — insufficient light, fertility, or water perhaps — for the bulb to divert energy into making a flower bud.
The present bulb is the second one I got from the same bin this past autumn. After the first one showed no sign of flowers, I went back to the store, explained why, as long as the bulb grows, it should make a flower, and received a second one free of charge. 
I figured the first bad bulb was an aberration. It wasn’t. I’ve been watching leaf after leaf unfurl on the second dud for weeks and weeks.
——————————————————-
In an effort to make my farmdening even more sustainable, I’m swearing off peat moss, or hoping to. Peat moss is the partially decomposed remains of plants, mostly sphagnum species. In the garden or farmden, peat moss is very useful for improving soil aeration, and water and nutrient retention. Mostly, these benefits are put to use in potting soils to help roots in their rather limited growing space. My home-made potting mix, which I’ve made for over 30 years, is 1/4 by volume peat moss (the other 1/4s comprised of garden soil, perlite, and compost, and a bit of soybean meal and kelp meal for added nutrients).
Use of peat is unsustainable because its mining outstrips its rate of formation. Peat accumulation can occur at a snail’s pace: an inch or so per thousand years. Peat develops under boggy conditions and to mine it, the bog must be first drained. Air replaces the water and the result is that some of the carbon stored in peat is oxidized to carbon dioxide. And we all know what that does. As a final blow to sustainability, draining and mining peat bogs upsets its unique ecological habitats.
So must gardening and farmdening, both potentially sustainable practices for providing local food that can to be grown with minimal environmental disruption, be wedded to the use of peat moss? Not necessarily.
Other organic materials, such as compost and leaf mold, can fulfill the same functions as peat moss in potting mixes. They have the further advantages of being local and richer in plant food than peat moss. They have the disadvantages that you have to make the stuff, that planning is needed because you have to gather the materials and wait for them to “cook,” and that the final product may not always be consistently the same.
—————————————————
A consistent, commercial peat substitute coming down the pike is coir, a renewable byproduct of coconut processing with characteristics very similar to peat moss. I’ve experimented occasionally with coir over the years and it seemed to work well enough. However, seedlings planted in a recent batch containing coir aren’t thriving.
Anytime a component of a potting mix is changed, changes might also be needed in watering regime or fertilization. My guess is that watering is the problem since my potting mix has plenty of nutrients from the compost and soybean meal, and the symptoms — poor growth and leaves wrinkly but not off-color — don’t indicate any nutrient deficiency. The symptoms seem more like those due to poor root growth, possibly from excessive moisture. Or perhaps the soil or compost had some weak root pathogen that’s getting the upper hand.
I need to sleuth out this problem soon because I’m about to make a large sowing of cabbage and its kin as well as peppers and eggplants. On the plus side, all this is some of what makes gardening so interesting.
————————————————————–
Any gardening questions? Email them to me at garden@leereich.com and I’ll try answering them directly or in this column. Come visit my garden at www.leereich.blogspot.com.

HINTS OF SPRING – IN MY BASEMENT!

Hints of spring are evident even in the dark corners of my barely heated basement. There, buds of potted roses and pomegranate plants are starting to sprout. Some gardeners — including me — overwinter potted figs in such places and their early sprouting also can cause concern. So far, only a couple of pomegranates and roses are all that have sprouted from among the 20 or so plants in my basement.

And what are all those plants doing sitting down in my basement? Some, including the pomegranates, figs, and black mulberries, would shrivel up and die from our usual winter cold. The plants are in pots that each autumn are I carry downstairs from outside after their leaves have dropped. Other plants in the basement menagerie are normally cold-hardy, except that they are in decorative pots within which roots, which are not nearly as cold hardy as plant stems, would freeze to death if left outdoors. Larger or better insulated pots would offer roots more protection from cold.

The problem with early sprouting in my basement is that there’s little light down there. New stems on the roses are pale, stretched out, and tender “etiolated). When the plants can finally be moved outdoors, those sprouts, unaccustomed to bright light and wind, will dry out and die. If the plant has not invested too much energy in the sprouts, new sprouts can develop. Ideal conditions, for now, would be cool temperatures and the brightest possible light — preferably before the new sprouts appeared.
The pomegranates are special varieties so they get first-class treatment: into the greenhouse they go, even though space there is at a premium. The pomegranate buds were just unfolding so the bright light should not burn them.

The roses are more cold-hardy and not so special; they went into the garage where there is some light and, more importantly, it’s a lot colder than the basement. The goal is to hold back growth as long as possible while letting some light fall on what sprouts slowly develop.
———————————————-
The figs in the basement aren’t yet acting like it’s spring. The buds are swelling slightly but are otherwise still folded closed. The goal is to keep them that way as long as possible with minimal watering. 

It’s still too cold in the garage for these plants, whose stems tolerate temperatures down in the ‘teens. Their roots, though, like those of other plants, would be less cold-hardy. I may end up moving the plants in and out of the garage, a sheltered nook of the terrace, and the mud room as temperatures fluctuate in coming weeks. Or perhaps I can find space for them in the greenhouse.

By April, everything in the basement should be fit to face the great outdoors.
————————————————-


Easiest to care for among the subtropical plants in the basement are the mulberries. Anyone who is familiar with mulberries might wonder why I would coddle them in pots in my basement. These mulberries aren’t the run-of-the-mill mulberries that sprout just about everywhere outdoors and bear good-enough tasting fruit that is a bit too cloying.

No, in my basement is a plant of the most delectable black mulberry, Morus nigra, a  species not cold-hardy outdoors here. To my taste, black mulberry — which the black-colored fruits you see around here are not — is perhaps the most flavorful of ALL fruits. Each fruit, although the size of a nickel, packs such a whollop of flavor, a congenial mix of sweetness and tartness, that you’d think it came from a fruit the size of an apple.

Two other mulberries down in the basement are there because I’m not yet sure just how cold-hardy they are and because, if cold-hardy, I still have to figure out where to plant them. Gerardi Dwarf is possibly a variety of white mulberry (M. alba), a very variable Asian species well-established in eastern U.S. and often bearing black-colored fruits also. (This variety is sometimes listed as Morus macroura.) Whitman Farms (www.whitmannfarms.com), where I got my plant, states that the fruit of this particular variety is almost as good as black mulberry, the species, and the plant grows only 6 feet high, which makes picking and protecting from birds easy.
The other plant, Kokuso mulberry (M. latifolia) is supposed to be very cold-hardy and, as rumored on the fruit “grapevine,” very tasty. The plant is semi-dwarf and the  fruit, like the others, is dark.

The thing that makes all these mulberries easy is that they are late to awaken in spring. Mulberry’s generic name, Morus, comes from the Latin word mora, meaning delay. This sluggish start in the spring usually saves mulberry flowers from being nipped by late spring frosts, which makes mulberries bear very reliably and, as described in Fruit and Its Cultivation (1919) by Thomas William Sanders, “the wisest of trees.”

SEED LONGEVITY

Watching tiny, green leaves push up through the soil never ceases to amaze me, even after watching it happen for decades. And it’s all the more amazing with certain seeds, such as onions. It must be that I was scarred years ago by having a difficult time getting them to germinate. Well, I sowed them in the greenhouse a couple of weeks ago and they’re up and growing strongly. Most of them, at least.
My failure with onions years ago was due to old seed, and old for onion seed means anything more than a year old. Lettuce seed, in contrast, is one of the longest-lived of vegetable seeds and keeps up to 6 years. Here’s the life expectancy for other common vegetable seeds: 5 years for cucumber, endive, muskmelon, and radish; 4 years for beet, Brussels sprouts, cabbage, chard, eggplant, kale, mustard, pumpkin, tomato, turnip, and watermelon; 3 years for bean, broccoli, carrot, Chinese cabbage, pea, and spinach; 2 years for sweet corn, leek, okra, and pepper; and, along with onion, 1 year for parsley and parsnip. Under poor storage conditions — moist and warm, like my garage in summer — longevity is decreased.
Still, it seemed like such a shame to throw away good onion seed only a year old. So, in the seed flat a couple of weeks ago, a sowed one row of one-year-old onion seed alongside the rows of fresh onion seeds (and one row of leeks).
Confirmed: onion seed isn’t worth sowing after one year. In the seed flat are five neat rows of narrow, green sprouts and one barren row.
——————————————————–
Few seeds have as short a life as onion. More astounding is the longevity of some seeds, such as the 10,000 year old lupine seed that germinated after being taken out of a leming burrow in the Yukon permafrost. Just think: This same species was up and growing when humans first crossed the Bering Land Bridge, and saber-toothed cats and woolly mammoths may have brushed up against its leaves. Except that the story of the 10,000 year old lupine seed turned out to be apocryphal, as confirmed by radiocarbon dating.
The record for seed longevity is, in fact, 2,000 years and held by a date palm grown from seed recovered from an ancient fortress in Israel. But a recent discovery, once confirmed, will break that record by a long shot.
A kind of campion seed (Silene stenophylla) found buried, this time in a squirrel burrow, in Siberian tundra could very well be 32,000 years old. The seed has been grown into a charming, white-flowered plant.
Some coaxing was needed to get that original, 32,000 year old seed to sprout. A few cells, removed from the placenta, were grown under sterile conditions on a specially concocted growth medium. Once cells had multiplied sufficiently, the growing medium was altered to induce leaves, stems, and roots, and eventually the plants were robust enough to be planted in soil. The plant flowered and set seed, which germinated readily to produce more seedlings.
I wonder what seed has the shortest longevity. It’s not onion. Seeds in the family Tillandsioideae, related to pineapple, probably hold the record, with a viability of 4-6 weeks.
————————————————————–