Payday Here, Beginning with Pears and Persimmons

Sept 6, 2012 #35
A GARDENER’S NOTEBOOK
by Lee Reich
 
It’s payday here on the farmden. The first Magness and Beurrée d’Amanlis pears dropped to the ground, signaling that it’s time to harvest those varieties. Immediately, before the chickens peck at the fallen fruit, which will then get hollowed out by this year’s abundant yellow jackets. The crop is pretty substantial considering last spring’s wide swings in the weather.
My Seckel pear, ready to harvest
 
Actually, the real payday — eating the pears — needs to wait a couple of weeks. European pears, such as Magness and Beurrée d’Amanlis, need to be picked underripe to finish ripening off the tree, or else their insides are mush. These two varieties are early ripening, and early ripening pears ripen best if chilled for a couple of weeks before being brought to room temperature for ripening. 
 
The pears must achieve a certain degree of maturity before they can ripen to perfection off the tree. The easiest way to tell when that magic moment has arrived is when the fruit stalk separates readily from the tree as the fruit is gently lifted and rotated. That’s after a few fallen fruits call attention to the tree. Not all fruits reach that lift-twist-separate stage simultaneously so I’ll go over the trees again 2 or 3 more times. (A refractometer, which measures sugars, also can indicate when to harvest, although the fruit must be cut so then can’t ripen for eating; most pears can be picked if sample fruits show refractometer readings greater than 10°Bx.)
Magness, one of the best of the European pears
 
Color on my Asian pears, the varieties Chojura and Yoinashi, is becoming more vibrant, which is their way of telling me that they’re near ripening. Unlike European pears, Asian pears don’t taste their best unless plucked from the tree dead ripe. When ready, they’re at that lift-twist-separate stage. They’ll need especially careful picking because as a result of last spring’s frost, less than a dozen of the golden gems hang from the branches, making each fruit all the more prized.
—————————————–
 
The tree fruits highlight what a strange growing season it has been. Besides the dramatic early warming last spring and the dramatic freezes that followed, the growing season got started early and has been unusually hot. The upshot is that everything, fruitwise, is advanced ahead of its usual schedule. Magness pears typically ripen for me around the middle of September, with Chojura beginning soon after. This year, all these fruits are ripening about 2 weeks early.
 
A hot season and early ripening could effect fruit quality, especially of pears. Some varieties taste best following warmer summers, others during cooler summers. Temperatures during ripening also have an effect on quality. It’s known that hot temperatures in the two months preceding harvest bring out the best flavors in Bartlett and Bosc pears, and that Anjou pears like it cool. The effect of temperature on the more obscure pear varieties, which are what I grow, is not well elucidated. Time, beginning in 2 weeks, when tasting begins, will tell.
—————————————–
 
This morning I was scything some tall grass and weeds beneath my persimmon trees in anticipation of their ripening. Mowing exposed a ripe, orange persimmon couched softly among stems and leaves on the ground. And then another one, and then another. I looked up and confirmed that Mohler persimmons are ripening.
Szukis persimmon
 
Mohler is one of a number of varieties of American persimmon that are cold hardy and will ripen their fruits this far north. My persimmons have survived winter lows below minus 20 degrees F.; Asian persimmons, which you find in the markets, are not nearly that cold hardy. The flavors differ also. American persimmons are drier, with richer flavor, the best varieties having taste and texture something like a dried apricot that’s been soaked in water, dipped in honey, and given a dash of spice.
 
 
Mohler is not available from nurseries. I made my tree by grafting a stem of Mohler, which I got from someone named Mohler in Pennsylvania, onto an American persimmon seedling. I was able to hook up with Mohler through North American Fruit Explorers (www.nafex.org), a fun organization of fruit nuts who write about their fruit adventures, home and afield, and exchange plants.
Mohler, as well as my Szukis, Dooley, and Yates, American persimmons (the others are available from specialty nurseries) are very reliable and easy to grow. Mine have never succumbed to late spring frosts and the mature trees require no spraying, pruning, or any other care. They’re among the fruits highlighted in my books Uncommon Fruits for Every Garden (Timber Press, 2004) and Grow Fruit Naturally (Taunton Press, 2012).
—————————————–


Do you want to grow fruit but think you don’t have room? I’ll be giving a workshop “Fruit for Small Gardens,” covering the fruits and growing techniques needed to reap delectable rewards from spaces as small as a balcony to as “large” as a small suburban yard. The venue is Stone Barns in Pocantico Hills, NY on September 22nd from 1-3 pm. For more information, see http://www.stonebarnscenter.org/products/backyard-fruit-for-small-gardens.html
—————————————–

To experience firsthand the possibilities in home-grown fruits, come to my workshop BACKYARD FRUITS: A TASTING AND A WORKSHOP, which will be held here at my farmden. Learn how to grow delicious fruits organically and then taste some that are in season, such as pears, grapes, pawpaws, persimmons, and kiwifruits. The workshop is Oct. 6th, 2-5 pm. Contact me for more information and registration.

Demise of Miss Kim, Sweet corn

Aug 30, 2012 #34
A GARDENER’S NOTEBOOK
by Lee Reich
I killed Miss Kim. Sure, she was pretty enough, with lilac purple flowers late each spring. In fact, she is  . . .  I mean “was” . . . a lilac, although she was Syringa patula, a different species from the common lilac (S. vulgaris). 
The very reason that I had planted Miss Kim was because she was different. She would blossom later than the common lilac, extending the season when lilac blossoms and their fragrance could be enjoyed. Later in summer, her leaves were never to be marred by the powdery, white coating — powdery mildew disease — that mars the leaves of common lilacs. And her expected stature, no more than 6 feet high, would be fitting for the bed of perennial flowers that she would call home. 
The relationship did not work out. Her later blossoms did not extend the fragrance of lilac blossoms, at least not the heavenly aroma of the common lilac. Miss Kim’s flowers were fragrant but not pleasantly so. Her growth was my oversight: I should have predicted that the rich soil here in the Wallkill River floodplain would coax Miss Kim to new and greater proportions, proportions that overpowered other plants in the flowerbed. 
So Miss Kim had to go. After an initial effort with shovels, I, along with helpers David and Jonathan, coaxed her root ball out of the ground by adding a tractor and chain to the tool mix. Unfortunately, this is not the ideal time of year to dig up a large shrub for replanting. Miss Kim is now in some kind of lilac heaven.
—————————————–  
Perennial bed, minus Miss Kim
The spot vacated by Miss Kim is thankfully open now to light and air. A bit too open, in fact, so a replacement shrub is waiting in the wings. My probable choice this time around: summersweet clethra (Clethra alnifolia), a native shrub that is adorned with fragrant, usually white bottlebrushes of blossoms in late July. 
Clethra usually grows to about 6 feet tall (uh-oh) but some varieties are more compact. I’ll be on the lookout for the variety Hummingbird (to 4 feet tall, heavy flowering, shiny leaves), Pink Spice (dwarf height unspecified, pink blossoms, dark, shiny leaves), or September Beauty (dwarf height unspecified, blossoms 2 weeks later than others). 
Clethra grows in sun or shade, in either case needing a moist, acidic soil. My site is in full sun; I’ll bank on plenty of mulch for keeping the soil moist. 
There’s time until fall to ponder which clethra to plant, or even whether to plant something else. Fall is particularly good for planting because the soil is just right for digging, warm and moist, not sodden, and because roots will grow in their new home but shoots won’t grow until after they’ve experienced sufficient cool weather between fall and spring. I like to plant on October 14th.
—————————————–
Not that Walmart is the go to place for good sweet corn but Walmart is, after all, the largest retailer of organic foods. Now there’s one more reason to grow your own sweet corn (in addition, of course, to at least some others of your own vegetables and fruits). Soon to be found on Walmart’s produce shelves: GMO sweet corn,”GMO” as in “genetically modified” sweet corn. 
Most corn grown in this country is, unfortunately, GMO corn. That corn is field corn, destined for animal feed, ethanol, and processed foods. Allergens, pesticide-resistant pests, adverse health effects to animals fed such crops, genetic contamination of wild plants and non-GMO crop plants, questionable economic advantages, increase pesticide use, and a host of unknowns are among the reasons that GMO crops should be banned. (For more, see GMO Myths and Truths at www.earthopensource.org.)
Golden Bantam corn, grown here on the farmden

Most aggregious is the fact that GMO foods and feeds are not required to be labeled as such. 
I find comfort in knowing that the sweet corn I’ve been harvesting for the past few weeks, and for a few more to come, is non-GMO (the variety Golden Bantam, the standard of excellence in sweet corn 100 years ago) and has not even been sprayed with pesticides. I plant in “hills” (clumps of 3 plants), 2 rows of hills spaced 2 feet apart in the row down each bed. With good soil and water as needed, a 20 foot long bed yields 90 plus ears of scrumptious, healthful sweet corn.
—————————————–
I will be giving a workshop “Grow Fruit Naturally” at Hawthorne Valley Farm in Ghent, NY on September 9th. For more information: http://hawthornevalleyfarm.org/event/grow-fruit-naturally-workshop.
—————————————–
Do you want to grow fruit but think you don’t have room? I’ll be giving a workshop “Fruit for Small Gardens,” covering the fruits and growing techniques needed to reap delectable rewards from spaces as small as a balcony to as “large” as a small suburban yard. The venue is Stone Barns inn Pocantico Hills, NY on September 22nd from 1-3 pm. For more information, see http://www.stonebarnscenter.org/products/backyard-fruit-for-small-gardens.html

Tomatoes! (And a Workshop)

Tomatoes! Tomatoes! Tomatoes! I’m awash in fresh tomatoes. Sparkling red jars of canned tomatoes are lined up on the kitchen counter. Thin discs of dried tomatoes fill other jars. And out in the garden, tomato leaves are dropping from disease. All things tomato are center stage in the garden.
Kellog’s Breakfast, strange name but beautiful and delicious

It’s been fun comparing flavors of fresh slices of tomatoes. Brandywine and Belgian Giant, for instance, are both scrumptious, with Belgian Giant being a little more tomato-y. Cherokee Purple is also delicious, this one with a rich, slightly smokey flavor. In addition to my usual favorites, one new variety (for me), Kellog’s Breakfast, will become a regular in my garden. This heirloom has an odd name and a flesh that is at the same time meaty and juicy. The skin of these large fruits have a beautiful orange color with occasional deep red blushes.

Not all heirloom tomatoes are delicious. The main thing the heirloom Stupice (pronounced stoo-PEECH-ka) has going for it is earliness.  The fruits are small and ripen in clusters. We’ve been eating these fruits for weeks. Of course, since the later, better-tasting varieties have been ripening, we’ve been ignoring Stupice, for fresh-eating, at least. It’s better than any other supermarket tomato but not as good as Belgian Giant, Cherokee Purple, Rose de Berne, Kellog’s Breakfast, Sungold, and the other topnotch varieties I grow.
—————————————–

One heirloom tomato garnering special attention this year is Blue Beech, a variety that reached Fedco (www.fedcoseeds.com) from someone in Vermont who got it from her neighbor’s niece’s uncle(??) who brought it to Vermont from Italy during World War II. I tasted sauce made from Blue Beech at the farm of that original “someone in Vermont” and right then and there decided to grow it for its unique flavor and orangish color.

I’ve grown Blue Beech for a few years now and this year finally decided to jar it up separately from my other varieties. (All my other tomatoes get thrown into one big pot for collective canning.) My Blue Beech sauce does not have that orangish color, but does have a distinctive, very rich flavor.
—————————————–

Blue Beech is elongated, so looks like a canning tomato. Besides being good for canning, this tomato also has excellent fresh flavor, something that’s true for a number of canning tomatoes. Other varieties that have excellent flavor either fresh or cooked are Amish Paste and Anna Russian.
A number of canning tomatoes are good only that way — canned. Most notable is San Marzano because it tastes so good after being cooked, and taste so awful fresh.

And then there are tomatoes with poor flavor “no matter how you slice them” — fresh or canned. Roma is a often used as a generic name for any canning tomato but is also the name for a specific and, unfortunately, widely grown variety of canning tomato. The variety with this name is bland cooked or fresh.
——————————————

Yes, all things tomato does include some tomato diseases, just as it does every year. Gardeners and farmers seem hypersensitive to tomato diseases ever since the late blight outbreak here in the Northeast a few years ago. It made everyone start looking more closely at their plants, a good thing, with even organic growers ready to spray at the first symptom of any disease problem, not a good thing. 

I’m not planning to spray my tomatoes for late blight or any other problem. Late blight, although dutifully reported present at various locales by the Cooperative Extension Service, needs cool temperatures, humid or rainy conditions, and wind to loft it from one site to the next in order to develop and spread. We had those conditions a few years ago, in addition to multiple sources of infection from tomatoes distributed from transplants sold at “big box” stores. We don’t have that weather or the sources of infection this year (at least not as of this writing).

Late blight notwithstanding, my tomatoes, trained to single stems, are pretty much defoliated for their first foot or two. The culprits are early blight, characterized by tan blotches with concentric, darker rings, and septoria leaf spot, characterized by small, round spots with tan centers. Both diseases overwinter on infected tomato debris and wild host plants such as jimson weed.

My approach to keep early blight and septoria, which rear their ugly heads here every year, in check are to clean up all tomato debris at the end of the season, to plant tomatoes each year where they have not grown for the previous 2 years, and to mulch to keep spores from splattering up to the plants. And one more thing: not to worry. Every year, my tomatoes lose some leaves to these two diseases, and every year I harvest plenty of pesticide-free, juicy tomatoes bursting with flavor.
—————————————–
I will be giving a workshop “Grow Fruit Naturally” at Hawthorne Valley Farm in Ghent, NY on September 9th. For more information: http://hawthornevalleyfarm.org/event/grow-fruit-naturally-workshop.
—————————————–
Planted "forest"

Deferred Gratification

UPCOMING WORKSHOPS WITH LEE:
Hawthorne Valley Farm, Ghent, NY, 9/9, http://hawthornevalleyfarm.org/event/grow-fruit-naturally-workshopGrow Fruit Naturally
Stone Barns, Pocantico Hills, NY, 9/22,  http://www.stonebarnscenter.org/products/backyard-fruit-for-small-gardens.htmlFruits for Small Gardens

————————————————————————————-

One of the things I like least about gardening is its deferred gratification. I planted a Beurée d’Amanlis pear tree a couple of years ago and don’t expect to sink my teeth into one of its fruits until next year. I planted Indian Summer rudbeckia seeds a couple of weeks ago so that I can enjoy swaths of orange-tinged, yellow blossoms this time next year. Yesterday I transplanted endive seedlings, from seeds sown back in early July, into a garden bed to provide succulent, green leaves for salads, soups, and stews beginning this October.

My mini forest, 15 years old: sugar maple, river birch, buartnut

Not that deferred gratification is all that bad. After all, except for when I began my first garden many decades ago (Madison, Wisconsin on August 1st, and I did reap some beans and tomatoes), all the while that I’m planning for the future I am reaping other rewards of past efforts. This week for instance, I’ve harvested onions, seeds of which I sprinkled into furrows in a seed flat in a cool greenhouse back in February. I’m also enjoying tomatoes of all stripes, the result of seeds planted in early April. And I see a reasonable crop of Magness, the best-tasting of all my pears, getting ready with their final stages of ripening for harvest in a few weeks.


Now that I think of it, though, I do enjoy sowing seeds, planting trees, and other gardening activities that are ostensibly for some future reward. Not to mention the pleasure of watching and coaxing along plants as they develop, everything from a radish seedling, sown last week, to a maple seedling, planted 15 years ago and now about 20 feet high.

I’m reminded of a name I saw on a sign hanging over the entrance to a primitive cabin in the woods of Maine: Quitchyerbitchin. It was not a native American name.
—————————————–

There’s a flurry of deferred gratification in process: planting vegetables for the autumn garden. It’s like a whole new garden, one that begins around mid-September and continues, even here in hardiness Zone 5, into December. 

In between each of the above-mentioned endive seedlings went lettuce plants. Like the endive, the lettuce was sown in a seed flat about a month ago so, like the endive, required no garden space until it became available. That space was donated by my first planting of Golden Bantam sweet corn, sown out in the garden the first week of May and now either eaten or steamed, sliced from cobs, cooled, and packed away in the freezer. The lettuce will be harvested and out of the way by the time the heads of endive  start to spread and fill the bed solid with greenery.

How about another bed, this one just cleared of onions? Into that bed I just planted a row of turnips and a row of Black Spanish winter radishes. You might snicker at my heaping praise upon the lowly turnip, but if you’ve ever had them sown in late summer, grown quickly, and picked during the cool days of autumn, you’re in for a real treat, roasted, stewed, or sliced raw. Hakurei is one of the best for flavor; I also like the old Purple Top White Globe.

Conditions that bring out the best in turnips also do so for winter radishes, the pumped up counterparts of small spring radishes that offer the same spicy flavor but also can be stored through winter. You have to be careful not to plant winter radishes too early or they grow frighteningly large. One summer I did just that with a long, white variety of daikon radish. Very long, it turns out, given enough time. The radishes grew to look like baseball bats, their upper portions rising up out of the soil as if there was not enough room underground to house them. The experience sort of killed my taste for winter radishes for a while.

Just this morning, another batch of seeds — Chinese cabbage and cilantro — went into seed flats. Like winter radishes, Chinese cabbage should not be sown too early in summer, in this case because long days and hot weather cause the plants to make flower stalks instead of fleshy leaves. Tatsoi and Fun Jen, the two varieties I planted, each need about 45 days from seed to maturity, but no reason to rush harvest during the cool, short days of autumn. The plants just sit there waiting to be eaten.
—————————————–

Besides suitable soil fertility, the main requirement of all these autumn vegetables is water. Fast, succulent growth brings out the best in them. With drip irrigation, I don’t have to worry about watering established plants. But until their roots can forage out into wetting front a few inches below the surface, new transplants and seeds need regular watering from a watering can or hose.

You or I might be tempted to also quench our own thirst with water from that hose. In general, don’t! Consumer Reports magazine recently reported that some hoses can leach lead  (used to stabilize polyvinyl chloride in hoses) into the water at 10 to 100 times the level allowable by the EPA for drinking water. The workaround is, if you’re buying a new hose, to buy one specifically labelled safe for drinking water, to let the water run before taking a drink, or — best idea — walk to your kitchen to slake your thirst.

Blackberries Galore!

UPCOMING WORKSHOP WITH LEE:
Philadelphia Orchard Project, 8/22, 
http://www.phillyorchards.org/volunteer/schedule
Fruit Growing Simplified

The following is adapted from my new book GROW FRUIT NATURALLY:

If your fingers aren’t stained after you’ve picked blackberries, you’re not eating them at their very best. And this is the year — my year, at least — for blackberries. Spring weather threw a curve ball that pretty much wiped out my developing apples, hardy kiwifruits, and pears, but blackberries are among a number of other fruits that waited patiently in spring, and whose branches are now bowed to the ground under a heavy load of fruit. An especially heavy load due to a mild winter? abundant rain (to say the least, from hurricane Irene and tropical storm Lee) late last summer? my green thumb? Who knows?

After succumbing to temptation and plucking a few of the first blackberries of the season underripe, I can wait for finger-staining ripeness. Coming upon a fully colored blackberry, I give it a gentle pull. A dead ripe berry should drop into your hand with only the slightest coaxing. Eat.
Chester blackberry ripening

In the wild, blackberries are found growing almost everywhere. Some of these wild plants creep along the ground, while others grow upright like small trees. These growth habits have been bred into cultivated blackberries, so you can choose from erect varieties, which are the most cold-hardy and heat tolerant, as well as semi-trailing and trailing varieties. Trailing varieties, with lanky, flexible canes, are sometimes called “dewberries.” Western trailing blackberries yield large, wine-colored to black fruits having distinctive flavors. Varieties also have even been selected or developed that lack those ominous thorns. 

Blackberries have perennial roots and biennial canes. With most varieties, a cane bears fruits in its second season, then dies. In any growing season, as older canes are fruiting, then dying, new ones are making their first season of growth. Any planting, then, has both one and two-year old canes, so offers an annual harvest. The plants spread by tip layering, that is, by hopscotching along as arching or trailing canes root at their tips and make whole new plants which go on to tip layer and make more plants, as so on. Unfettered, blackberries grow to become a tangled patch of canes.
—————————————————

Although wild blackberries often grow along the partially shaded edges of woods, the plants fruit best and are healthiest in full sunlight. As with most cultivated plants, well-drained soil rich in organic matter is the ideal.

Spacing, which may be as close as 3 ft. apart to more than 6 ft. apart, depends on the type of blackberry and the training system. Erect blackberries are self-supporting, but other types are easier to manage if trained by being tied up to a sturdy pole, on a trellis of wires strung between sturdy posts, or on a fence. 

Blackberrys’ biennial canes and their aggressive spread make a case for annual pruning. On all but the trailing or trellised semi-erect types, prune twice each year. The first pruning takes place during summer; the tip of each new cane needs to be nipped off just as it reaches a height of 3 ft. Pinching causes branching and helps keep plants upright.

The second round of pruning, for all types of blackberries, takes place in late winter, just before growth begins. Any cane that bore fruit the previous season is cut down to the ground and the number of new canes is reduced to about 6 per clump. Finally, those lateral induced by summer nipping: They are shortened to about 18 in.

A convenient way to manage the long canes of trailing types is to let new canes trail on the ground, which they are anyway wont to do, lifting the second year canes, which will fruit, up to the wire of a trellis. If winter cold is a potential problem, those reclining canes can be left on the ground where they are easily protected for winter with a blanket of straw or leaves. Late the following winter, the old canes that fruited are cut away, the younger canes are lifted up onto the trellis, for fruiting, and new canes that season are allowed to trail on the ground. And so on year after year – all much more fun if canes are thornless.
 —————————————

The nice thing about blackberries is that they have few debilitating pest or disease problems. Start with healthy plants from a nursery; neighbors’ plants could harbor latent diseases, especially with age (the plants’, not the neighbors’). Prune regularly so branches can bathe in light and air, and remove any canes harboring insects or diseases. And pick berries when fully ripe.
————————————-

In the cold pocket, where I live and garden, I’m somewhat restricted in the spectrum of blackberry varieties I can grow. I also have an aversion to blackberries’ intimidating thorns, which arm even the leaves, all with reverse barbs to really grab you. Years ago, I traded in the delectable, but thorny, Darrow plants for my present Chester blackberries, which are the most cold-hardy of the thornless varieties. I also grow Doyle thornless, which makes long, trailing canes that I can sometimes lay on the ground to be covered by mulch or snow for winter protection.
The thornlessness of thornless blackberries is, in my opinion, beauty in of itself. It’s not just that these plants are non-intimidating; the smooth, greenish stems and lush green leaves really are quite ornamental, and made more so as a background for spring’s large white blossoms.

See my book GROW FRUIT NATURALLY for more detail on varieties and cultivation of blackberries, which can be grown just about everywhere with appropriate choice of varieties.

Upcoming Workshops & Cracking, Red Tomatoes

UPCOMING WORKSHOPS WITH LEE:

NOFA Summer Conference, Amherst, MA, 8/10-12,http://www.nofasummerconference.orgGrow Fruit Naturally, Fruits for Small Spaces, Multidimensional Vegetable Gardening
Philadelphia Orchard Project, 8/22, http://www.phillyorchards.org/volunteer/scheduleFruit Growing Simplified
Hawthorne Valley Farm, Ghent, NY, 9/9, http://hawthornevalleyfarm.org/event/grow-fruit-naturally-workshopGrow Fruit Naturally
Stone Barns, Pocantico Hills, NY, 9/22,  http://www.stonebarnscenter.org/products/backyard-fruit-for-small-gardens.htmlFruits for Small Gardens

————————————————————————————-

Not that I needed explanations, but now I have two more as to why my tomatoes taste so good. A green thumb is not one of them.
Actually, the explanation is not why tomatoes plucked from my vines taste so good but, rather, why the perfect, red orbs — called “tomatoes” — dumped onto supermarket shelves don’t taste so good. For this study, agricultural scientist Harry Klee, at the University of Florida, gathered together a whole lot of heirloom and modern tomato varieties and enlisted a whole lot of people to taste and rate them. 
Followup chemical and statistical analysis pointed the finger at the balance of sugars and acids as one important component of flavor. Modern tomatoes bear so heavily that there’s less sugars to go around, so flavor suffers. For a similar reason, I avoid growing “determinate” tomatoes (listed on the seed packet or in the variety description), which are varieties that make flowers and fruits at the ends of, rather than along, their stems. The determinate growth habit results in fewer leaves per fruit; leaves, along with sunlight, are what puts sweetness and other aromas into tomato fruits.
Dr. Klee also found that, besides sugars and acids, heirloom tomato varieties have certain flavor components lacking in modern tomatoes, some of which enhance any sweetness. Geranial, which has a lemony aroma and is used in perfumery, is just one such component; it’s also present in a wild basil (Ocimum gratissimum), orange, lemongrass, and, of course, lemon. 
——————————————–
The other bit of pertinent tomato research has to do with color. Nice, on those commercial tomatoes, eh? If you eat with your eyes, the color will make your mouth water. If you eat with your mouth, probably not.
In recent decades, tomatoes have been bred to color up uniformly to a nice, red color. Recent research shows that the gene that makes for that uniform coloring was a mutation of a gene that helped make tomatoes flavorful. Before ripening, the uniform ripening tomatoes are pale green rather than the deep green of tomatoes without the mutated gene. Dark green fruits harvest more of the sun’s energy than light green fruits; more green means more photosynthesis and more sugars and other flavor components. That ripening mutation, stumbled upon by breeders about 70 years ago, was widely adopted and has resulted in those beautiful orbs that have lined supermarket shelves and have even been often offered at some farmers’ markets for many years.
Using genetic engineering, researchers confirmed their findings by creating tomatoes that stayed dark green before ripening and then ripened uniformly red. As expected, laboratory analysis showed that the fruits had more sugars and other flavor components than fruits with only the uniform ripening gene mutation. Nobody ate the “Frankentomatoes.”
So beauty is not only skin deep in tomatoes. 
The best heirloom varieties also seem to share some superficial characteristics. Potato-leafed (with smooth leaf edges) tomatoes, such as Brandywine and Prudens Purple, generally make tasty fruits. So-called oxheart varieties (pinkish skins and heart-shaped fruits), such as Oxheart, Orange Russian, and Hungarian Heart, also are rich and flavorful. The same can be said for dark varieties, such as Black Krim, Black Crimson, and Black Prince.
——————————————–
Hybrid tomatoes don’t have to be less flavorful than heirloom varieties. They don’t have to be bred for maximum production at the expense of flavor and/or to ripen uniformly red. But they usually are.
The familiar Sungold and the less familiar Carmello are two flavorful hybrid varieties in my garden. In my opinion, Sungold is far and away the best tasting cherry tomato (and also a beautiful persimmon orange color). Carmello is quite tasty and actually does ripen into perfectly red orbs.
Nonetheless, for unabashed flavor whether sliced with onions and olives in salad, laid in slivers on dark bread with cheese, or cooked into a sauce, heirloom tomatoes are my number one choice. 
Which brings me to Cherokee Purple, the first one of which ripened today. It was very tasty and not at all pretty.

UPDATED WORKSHOP SCHEDULE

Here’s an update of my previously posted workshop schedule:
NOFA Summer Conference, Amherst, MA, 8/10-12, http://www.nofasummerconference.org, Grow Fruit Naturally, Fruits for Small Spaces, Multidimensional Vegetable Gardening
Philadelphia Orchard Project, 8/22, http://www.phillyorchards.org/volunteer/schedule, Fruit Growing Simplified
Hawthorne Valley Farm, Ghent, NY, 9/9, http://hawthornevalleyfarm.org/event/grow-fruit-naturally-workshop, Grow Fruit Naturally
Stone Barns, Pocantico Hills, NY, 9/27,  http://www.stonebarnscenter.org/products/backyard-fruit-for-small-gardens.html, Fruits for Small Gardens

Seedy Visions, Some Hard, Some Eeasy

What a perfect time of year to plant seeds. Yes, seeds! There’s no rush as to timing, with flower seeds, at least; there’s no worry about the soil being warm enough for germination; there’s no need to squeeze seed flats together near sunny windows; and there are plenty of empty seed flats. 
Right now I have seedlings of endive, lettuce, kale, cauliflower, and cabbage growing in seed flats. The seedlings call the flats “home” for a month or more before they’re transplanted into beds now housing early corn, early bush beans, and other vegetables soon to be cleared away. Timing for these plants is critical if they’re going to be ready for harvest during the cool days from late September on into November. Cabbage and cauliflower were sown in early June, endive in early July, and lettuce, for a continued harvest through summer and fall, every two weeks or so all summer.
 
I’ve also sowed seeds with next year in mind. Flower seeds, in this case. Perennial flowers usually don’t flower their first year from seed. Ones that I sow this summer should make enough growth to put on a good show next year.
 
The flower bed undergoing renovation is crying out for black-eyed Susan plants (Rudbeckia hirta ‘Indian Summer), oodles of them. I could buy the plants but almost as easy and a lot cheaper and more satisfying is to buy a packet of seeds. One packet is going to provide many times the number of plants I need. Another bed needs more oriental poppies. Again, a packet of seeds is the more satisfying and economical way to go.
 
I have visions of blue spires of delphiniums rising up in the space between black currant plants and the fence to my south vegetable garden. A packet of ‘Pacific Giant’ delphinium seeds fills the bill, although these seeds are more difficult to germinate and the plants more difficult to grow than the poppies and black-eyed Susans. Delphinium seeds germinate best if fresh and some sources suggest chilling them awhile before or right after sowing. My plan is to plant them in a seed flat and set the covered flat on a bench that sits along the north side of my house — along with all the other seeds I am germinating. Another secret to germinating most seeds is patience.
——————————–
 
Patience surely has been the secret to my success with cyclamen seeds. Many years ago I purchased seeds of hardy cyclamens. Besides hardiness, these plants offer dainty blossoms that hover above the ground like small, pink butterflies. And when the plants aren’t in bloom, the speckled leaves earn the plants’ keep.
 
With the original batch of seeds came exacting instructions of temperature and time requirements for germination. I ended up with two seedlings from the whole packet of seeds, but those two seedlings have given rise to many more plants. A couple of weeks ago, the seed capsules, which are attached to a squiggly stalk, flared open to offer their ripe seeds, which I collected and sowed. 
 
The flat of cyclamen seeds now sit on that same bench on the north side of my house. My only jobs now are to make sure the flat never dries out, which is unlikely, given the pane of glass that covers it, and to have patience.
———————————–
 
The most challenging seed of those I planned to sow this summer was chamomile, not because it’s at all hard to grow but because it’s hard to figure out just what is “chamomile.” Mostly, what people grow for tea is annual chamomile, but there’s also a perennial chamomile that’s been used medicinally. But just what is “annual” or “perennial” chamomile?
 
Usually, we garden nuts can fall back on botanical names to help out with such confusions. The fallback is not so easy with chamomile. Chamaemelum  would seem an appropriate genus for chamomile and, in fact, C. nobile is a botanical name for perennial chamomile, which has also gone under the monikers of garden chamomile, Russian chamomile, and Roman chamomile. Not to confuse things, but this plant has also paraded under the botanical name Anthemis nobilis. Anthemis plants generally are referred to as dog fennels and, of course, chamomiles. Not to further confuse things, but I must mention A. tinctoria, golden marguerite, a wonderful ornamental in this genus, especially nice trained as a small tree with a head of white, daisy flowers.
 
Getting back to my tea, with annual chamomile . . . that’s Matricaria recutita, which, oddly, has the common name “sweet false chamomile.” It’s also gone under the botanical name of Tripleurospermum maritimum subsp. inordorum. And not to be confused with Matricaria matricarioides, pineapple weed, which grows all over the place and differs from any of the other chamomiles in that the flowers lack prominent, white petals. It has a pineapple-y aroma.
 
Bottom line: For my tea, I need annual chamomile, Matricaria recutita. Because it’s an annual, I’m going to wait until next year to sow it.

Homegrown Rice & Good Gates

Whoops, I don’t know how this post from May jumped up to today. There are some new comments but its otherwise an older post. The newest post is the next one down. Farmdening is easier to figure out than blogging . . .


——————————————————

Here I am swimming in seedlings and small, potted plants sitting on shelves or the ground in the greenhouse, on my picnic table, and on the terrace. Each plant is waiting for the right time to be planted outdoors or to be moved to a bigger pot. So why would I add to the crowd by planting something as absurd as rice? Because rice tastes good and might be fun to grow.

Interest in commercial and home rice cultivation has been on the rise here in the northeast, as attested to by last year’s Second Annual Northeast Rice Conference, held in  — of all places! — Vermont. No paddies in the works here; I’m parting ways with most of my fellow growers in planning to grow rice under dryland conditions. Growing rice in flooded fields is a useful way to snuff out weeds — dryland weeds, at least — and, more importantly, in northern regions, to moderate temperatures. My planting is going to be very small, measured in square feet, so I can weed by hand, and my site is considerably warmer than anywhere in Vermont.
My planting has to be small because I’m starting with very few seeds: the variety Hayayuki, generally recommended for northern conditions and kindly shared with me by Ben Falk (www.wholesystemsdesign.com). Ben has grown rice successfully in paddies he constructed at his homestead in central Vermont.
So today I planted seeds in a seedling tray with inch square cells in each of which I planted one or two seeds. If everything goes as planned, I’ll be transplanting in a few weeks (rice does not tolerate any frost, doesn’t even like cold weather). Recommended spacing is 12 x 8” for groups of 2 to 3 plants. My garden soil is very rich so I’ll plant closer than recommended. Harvest, with a grass shear, should come in September, followed by threshing by smacking pillowcase-filled seed heads against the floor. As for dehulling the rice, that is, removing the hard coat around each kernel . . . I’ll cross that bridge when I get to it. Plans for a small-scale dehuller are available at http://www.savingourseeds.org/pdf/grain_dehuller.pdf
———————————————
Moving on to more practical matters: gates. If good fences make good neighbors, good gates make good invitations to pass through fences. The gate to my south vegetable garden is not good. It was when I built it, the sturdy frame of natural locust wood swinging either open or closed with the mere touch of a finger.
But locust wood is heavy, and that weight was the gate’s downfall, literally. For the past few years, the bottom scraped along the ground so that lifting the handle was necessary to open and close it. A five-foot span hinged at one end put too much stress on the wood.
I realized recently that the extra trouble of opening the gate and the possibility of it breaking was was limiting trips into the garden. And there’s little worse for a vegetable garden than a disincentive — be it distance, too many weeds, or a gate that’s too hard to open — to enter it.

That full five foot breadth was only necessary to let pass the occasional garden cart full of compost to spread over the beds. So why not, methinks, rebuild the gate with two half gates, one of which would be plenty wide for passing through for the almost daily planting, weeding, and/or harvesting. With less leverage, a half-width gate would experience little stress.
The locust branches of the old gate made it charming but slow to build. I built the new gate — a temporary one — out of 2 by 4s. A pintle sticking up into a hole in the bottom and a bolt sliding down through two parallel eye bolts and then into a hole in the top together make a sturdy, effective, and adjustable hinge, so each gate swings easily and, with a spring closure, shuts automatically.
Already, the garden beckons me. Beds have been layered with compost, weeds have been pulled, and today I’ll sow popcorn seeds. The only problem is that “temporary” building projects too often morph into things more permanent. Two compliments on the new gate have already started it down that road. 
———————————————–

Three Fermentations

Here it is, 9:10 am in the morning, and I already feel very accomplished. Three fermentations are well under way. It’s fun and tasty working with our microbial friends.


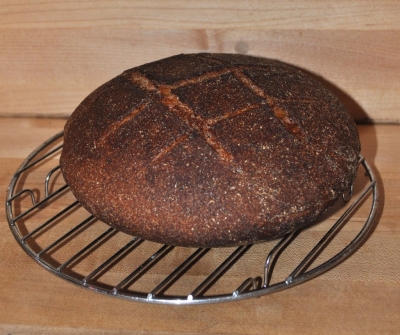
The fun began last night when I scooped out a half a soup spoon’s worth of sourdough starter from a jar in the refrigerator to add to a mix of 3 cups of whole wheat flour, one and a quarter cups of water, and 1/8 cup of maple syrup. That sourdough starter is in its third year — here, at least. I carried it, dried, on a paper towel, back from Alaska, a gift from a friend there who said its caretaker’s ancestry traces back at least 100 years to . . .  was it governor or captain someone? I’ve kept the starter refreshed by stirring a teaspoonful of it every week or two with an eighth cup each of flour and water, and incubating it. The microbial population, a mix of various species of Lactobacillus bacteria and Saccharomyces yeast fungi, has no doubt shifted under my care; whatever the present population, it makes fine loaves of bread.


Back to the bread . . . I mix it in a breadmaker or by hand for a minute or so, incubate it 12 to 18 hours (depending on the temperature), dust it with flour and give it two light folds, let it rise again for a couple of hours, and then throw it (almost literally, and the hardest part) into a pre-heated baking dish from a 450° oven. Into the oven it goes: thirty minutes covered, 15 minutes uncovered, and voilá. Delicious, hearty, fragrant bread.


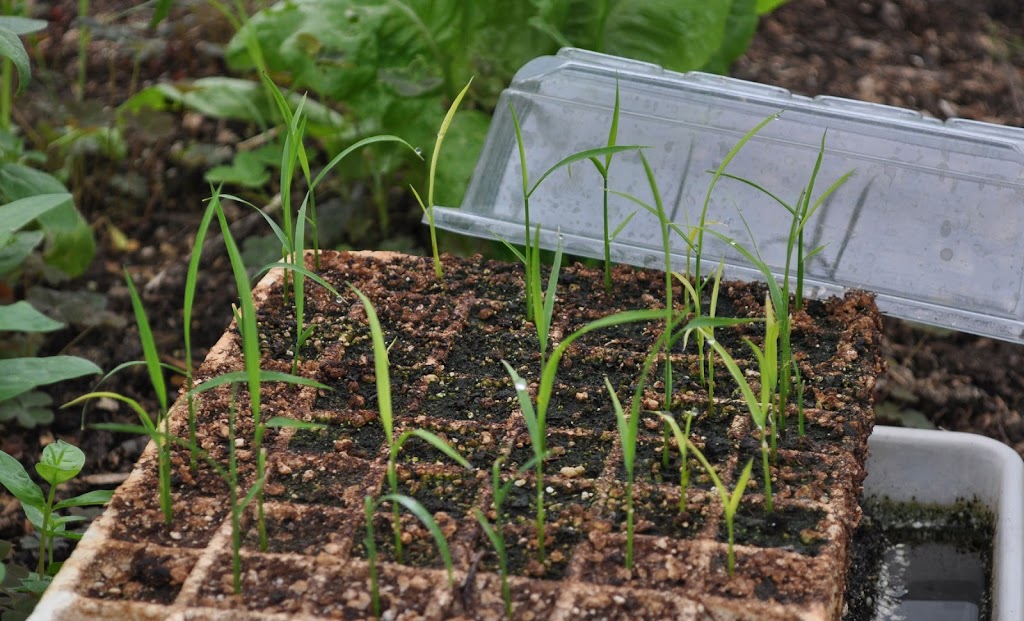
What’s this got to do with gardening? I wish I could report that I grew the wheat. I tried, last summer. Yields were lower than expected, exacerbated in part by difficulty in threshing it. Kernels were reluctant to part with seedheads despite severe batting of the heads in a pillowcase. I’ll try again, and hope to grow at least enough for one loaf of bread.
————————————————–
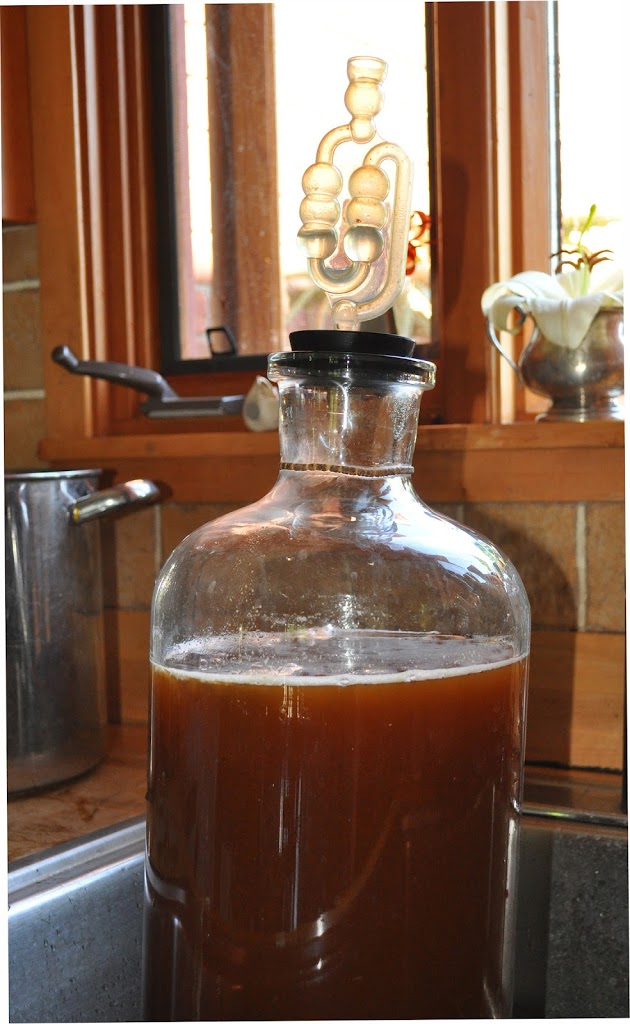
One of my sourdough yeasts, Saccharomyces cerevisiae, was invited to my second fermentation, the preparations for which began much earlier this morning. Actually, this second yeast was more probably a relative of the sourdough yeast, a different strain or species, one best suited to fermenting malt syrup into alcohol. The finished product, in this case, will be beer. Saccharomyces cerevisiae came in a sealed packet from a store although beers have been made by mere capture of wild yeasts floating around in the air.


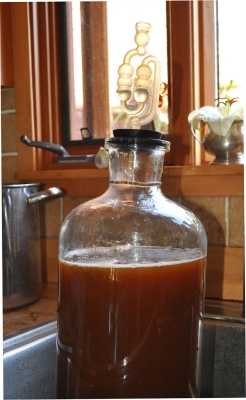
The first step in my brewing was to boil malt extract with hops. I have grown barley, from which malt can be made. Note the “can be;” my barley crop of last year is still hanging, stems and all, from a kitchen rafter. I bought the malt extract rather than go through the threshing, sprouting, toasting, cracking, and sparging steps needed to extract malt from barley. Hops is easier; all you need is the dried seed heads. I grow hops, a decorative and fragrant plant, which is all my young plant is thus far. I also bought hops.


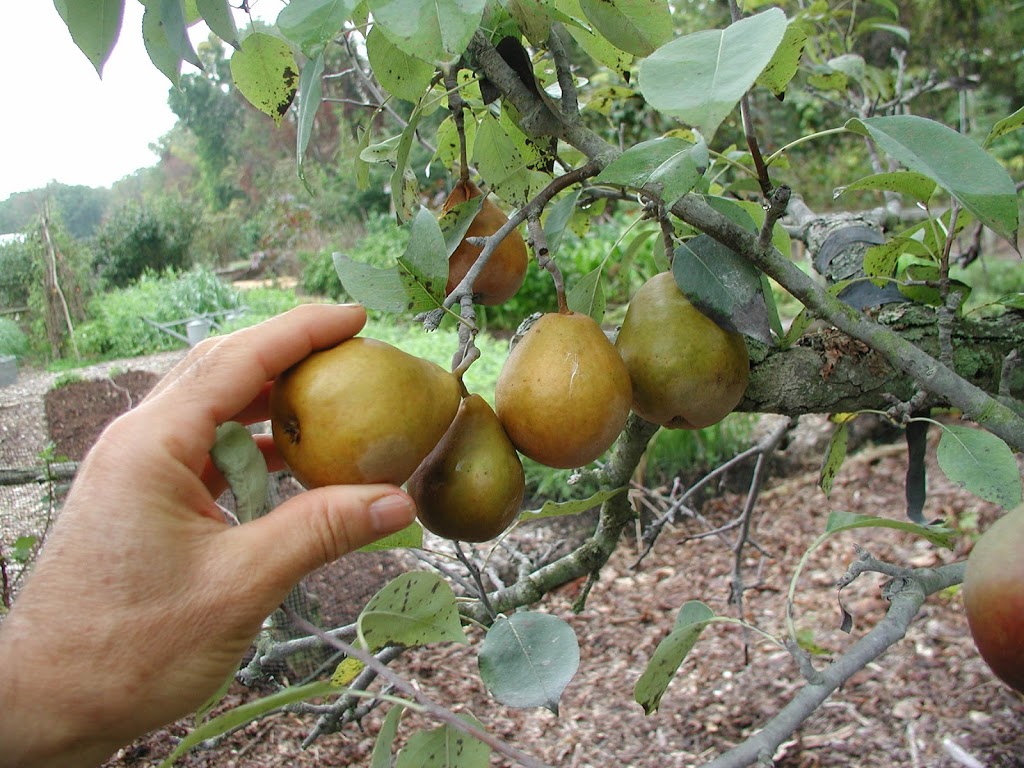
I did go out to the garden after the 45 minute boil to gather black currant leaves and clove currant fruits. These two aromatic plants, steeped along with more hops in the cooling malt-hop mix, will add a subtle and unique flavor to the batch of beer. 


Once diluted to 2 gallons, poured into a glass carboy, and cooled, the mix was spiked with the yeast. An airlock tube with water in it lets carbon dioxide exit without letting air in.


It’s now 1:30 pm in the afternoon, and already bubbling noises from the airlock offer evidence that the Saccharomyces are happily at work. Well, not working, just eating. In two weeks, they will have digested all they can and the brew will be ready for bottling.
———————————————-


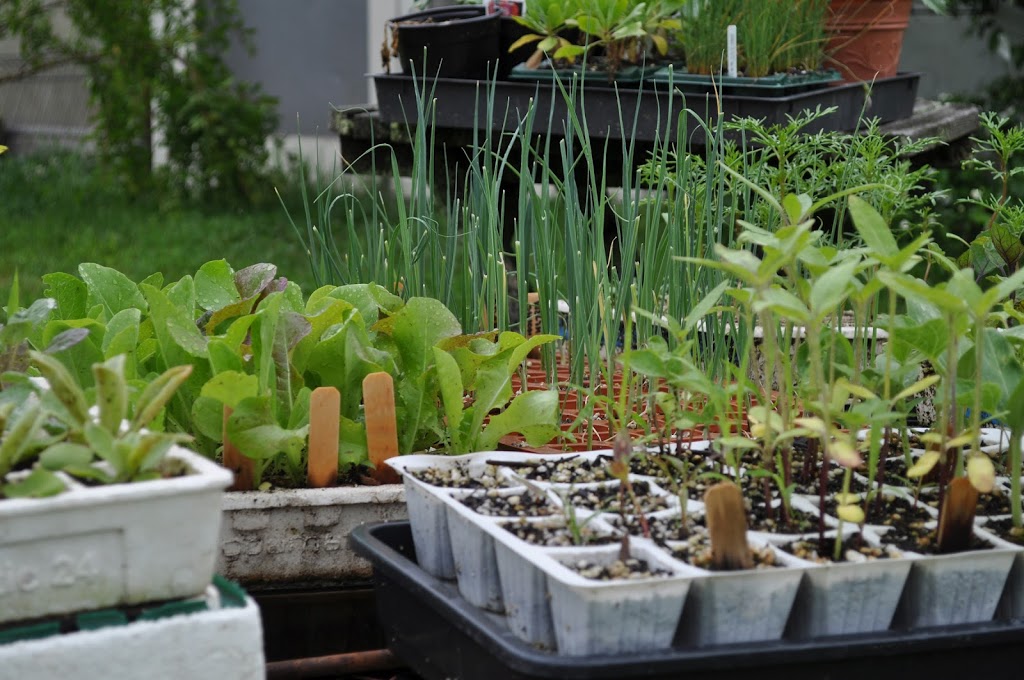
Around here, compost-making — the third fermentation du jour, is always in progress. Composting is perhaps the most complicated and the easiest of all the fermentations.


This evening, I plan to get some manure to feed the panoply of microbes that call the compost piles home. Not that manure is necessary for making good compost. Basically, all that’s needed is any organic material, which is anything that is or was living. Microbes in my piles have been eating old lettuce plants, pulled weeds, banana and orange peels from the kitchen, some coarse, weedy hay I cut with my scythe, and occasional sprinklings of ground limestone, kelp, and soil.


Fermentation in the compost differs from that in sourdough bread and beer in that conditions and foodstuffs are always changing. If I add a bunch of material at once, temperatures within the pile rise rapidly, up to about 150° F. Different kinds of fungi, bacteria, and actinomycetes become prominent within different temperature ranges. Also, different microbes become dominant depending on what foods I add to the pile and their stages of decomposition. For instance, old cornstalks are rich in lignin, which only certain fungi can use as food; once the fungi have gone to work on that lignin, certain bacteria might move in to work on byproducts, which include dead fungi.


Compost happens quickest when just the right balance of food, moisture, and air exist within a pile. The nice thing about making compost, though, is that whatever goes into the pile eventually becomes compost no matter what the foodstuffs or conditions. Sooner or later, compost happens


Compost is not, of course, for eating, but spread on the soil makes for some mighty tasty fruits and vegetables.
————————————–


The fun part of working with these microbes is not only the tasty products that result, but the congenial blend of art and science that get you there.