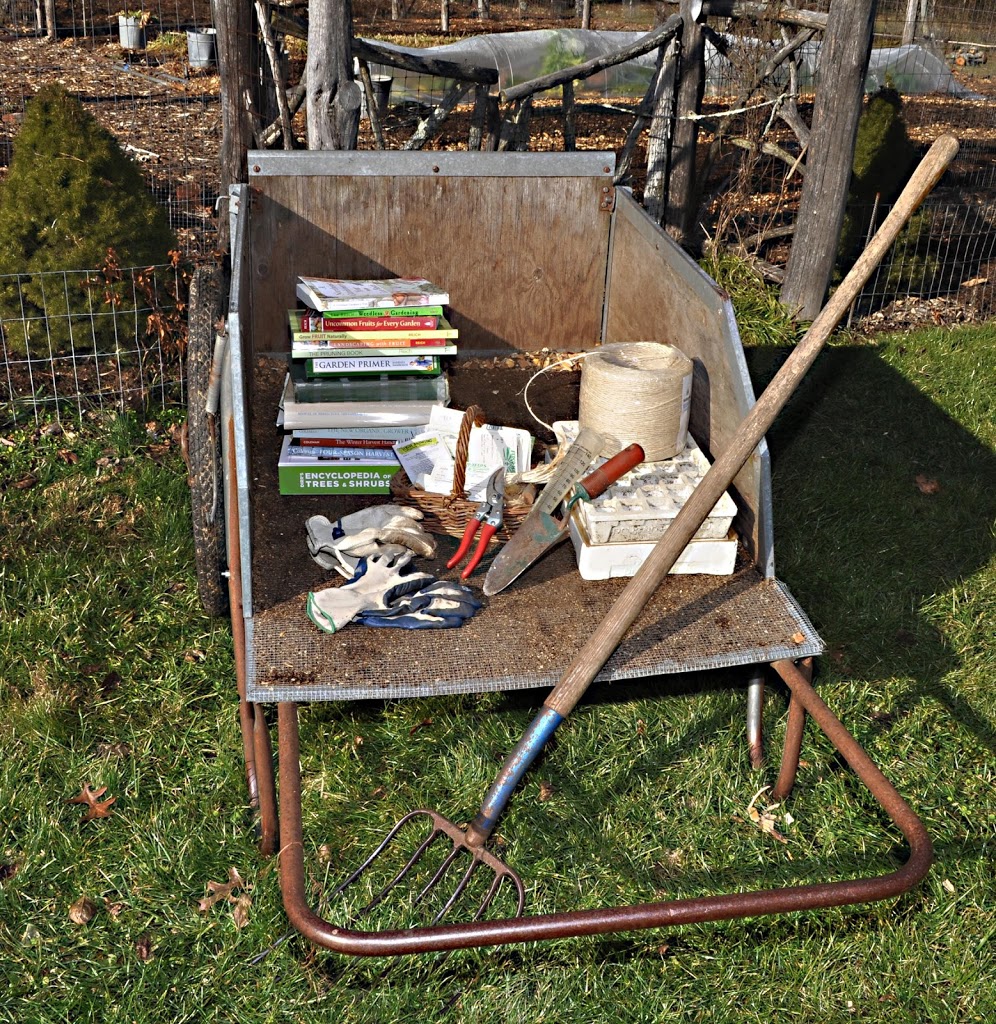
Pruning Begins

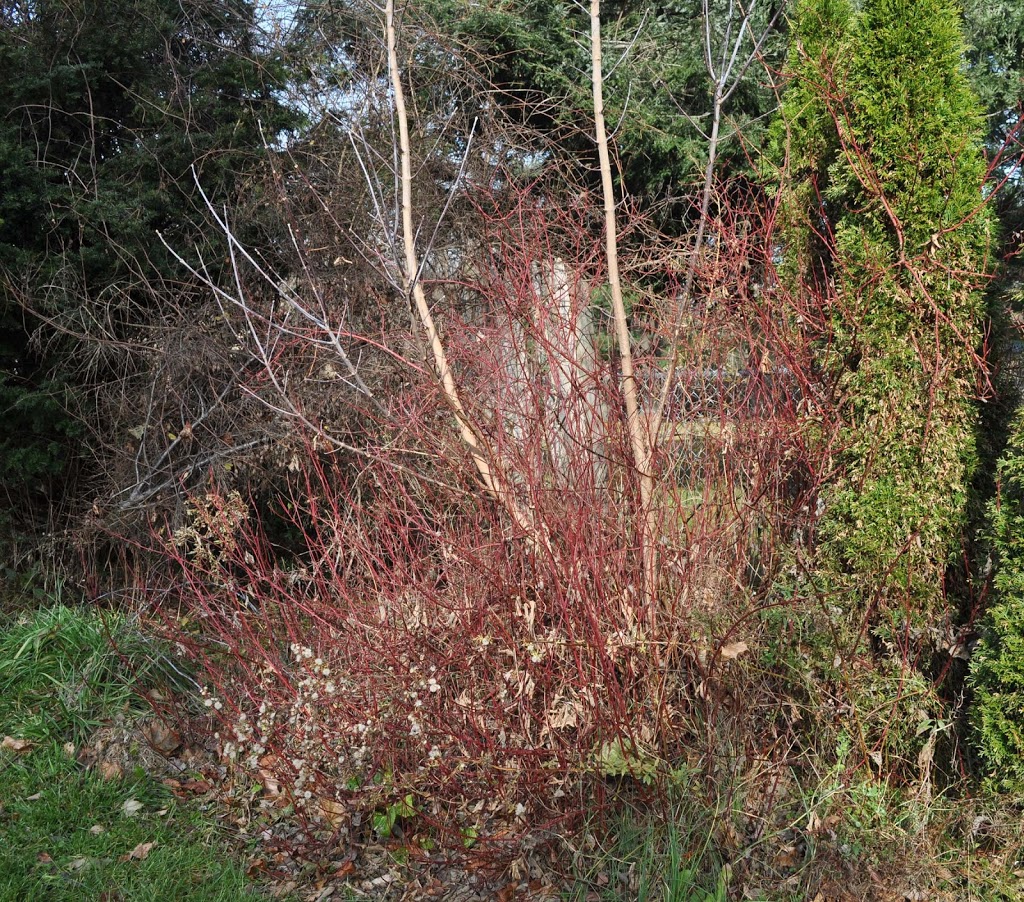
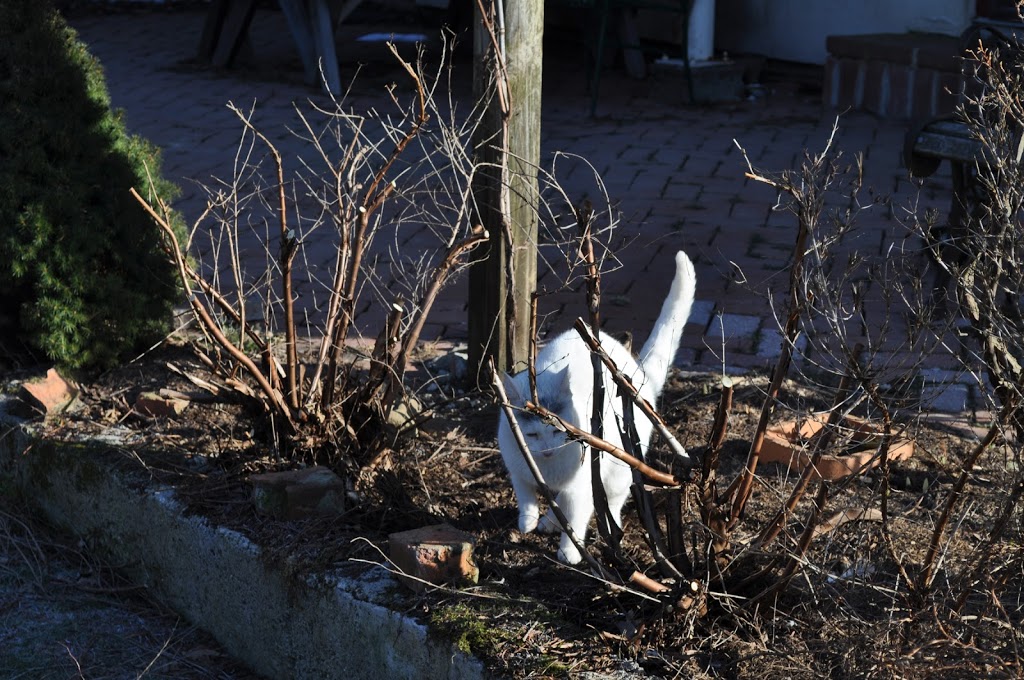
Just because I wrote The Pruning Book doesn’t mean that I always go forth boldly, pruning shears in hand, to prune with speed and with total confidence. This realization hit me right between the eyes as I was staring at and trying to figure out what to do with a row of St. Johnswort shrubs billowing like a wave over the edge of my terrace. Any more billowing and that mass of stems would become a tsunami; the hedge had to be reduced — attractively.
The problem is that the plants are a bit big for the site. I have excuses. There are 400 species of St. Johnswort, varying in stature, and I lost the tag to my original plant from which I propagated all the others in the hedge. The soil in the planting strip used to be weedy and poor. After enclosing the strip in a wall of hypertufa (a mix of cement, peat, and perlite that ends up like volcanic rock) and topping the bed with compost, plants grew better than expected. And the St. Johnsworts were supposed to mingle and compete with potentilla plants in the bed, each showing off its sunny, yellow flowers at various times through summer and keeping the other in check. The St. Johnsworts overgrew and snuffed out the potentillas, so, lacking competition from weeds or potentilla, grew too well.
——————————————–
Lopping all St. Johnswort stems back by half or more would not be a good idea. For the rest of winter, the hedge would look hacked back (which it would have been). Hardly the graceful, if oversized, tapering, arching branches presented now. Come spring, new shoots would burst forth mostly near the pruning cuts, the ungainly result, year after year, being wild, new growth sitting atop increasingly, fat stems.
After some chin scratching, I chose a different tack. First, I shortened everything to about 18 inches. Then I shortened some of those already shortened stems to various lengths, some to as short as a couple of inches long. Simple.
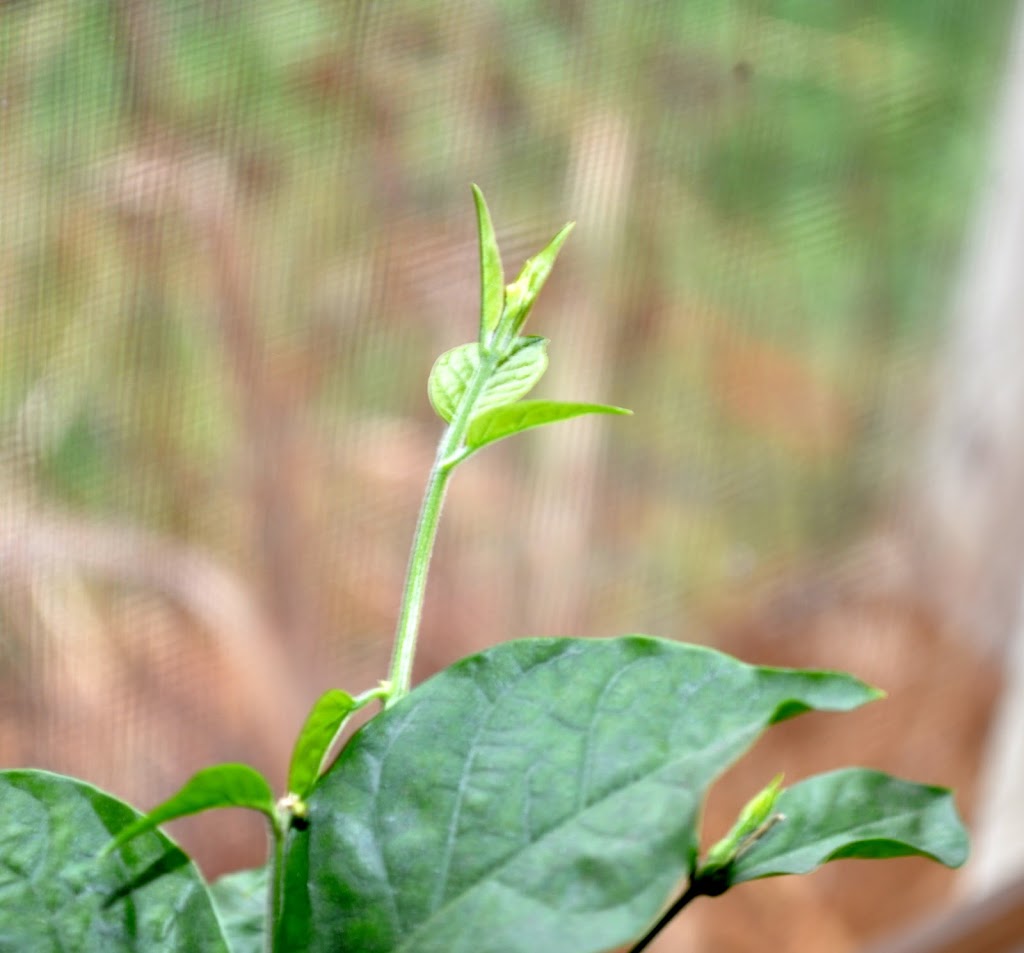
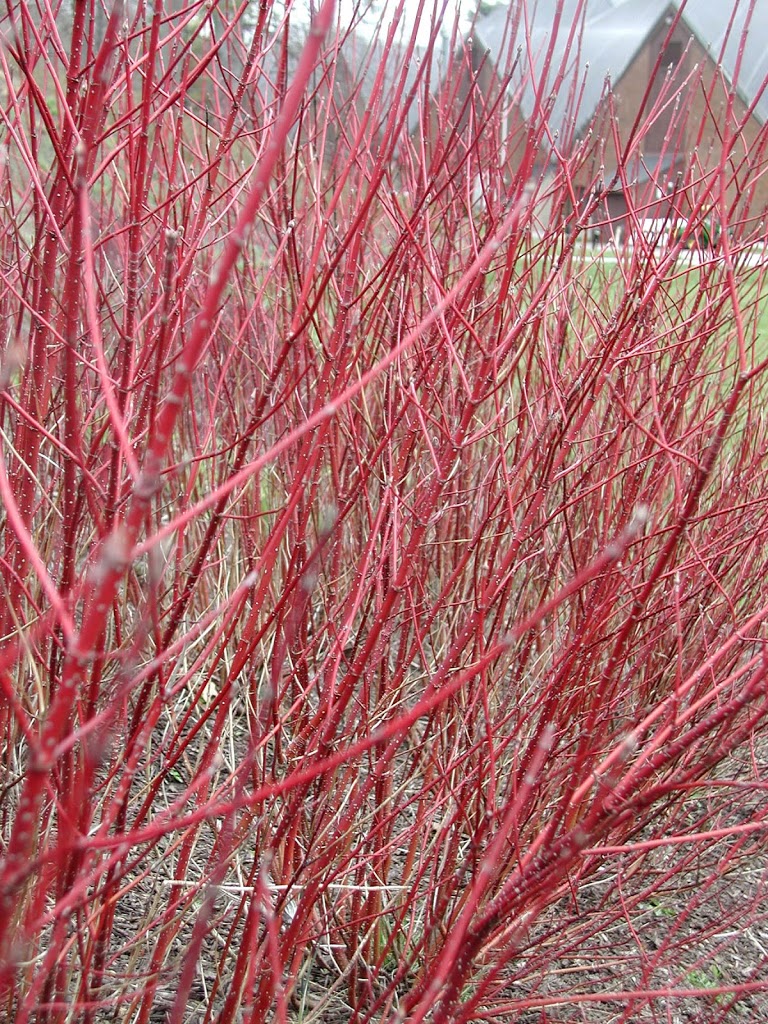
For now, largish wounds do stare out from the hedge, but next year, and in years to come, such wounds will be less plentiful and less evident. This pruning’s most dramatically shortened stems will sprout just a few, lanky shoots. A greater number, but each less vigorous, shoots will sprout from stems I shorten least severely. Moderately shortened stems will sprout a moderate number of new shoots of moderate vigor, how many and how vigorous related to how much the stem was shortened.
The end result — I’m hoping — will be a hedge with shoots of various size and vigor originating at various heights within each shrub. Just like a naturally growing plant. Pruning in subsequent years should be easier.
Although this pruning sounds formulaic, it was fraught with decision-making: whether or not to cut and how much to cut, both to achieve aesthetic results now and for the future. Shrubs readily sprout new shoots naturally and following pruning, so I at least am consoled that pruning rarely harms the plant and that mistakes are soon overgrown.
————————————————————–
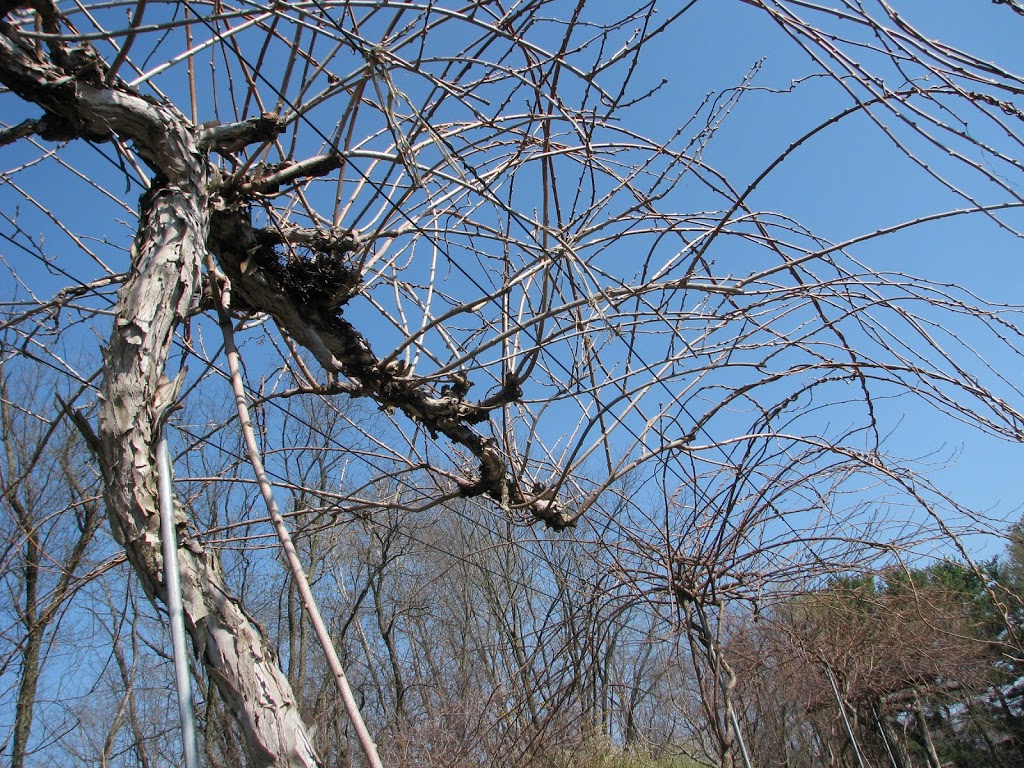
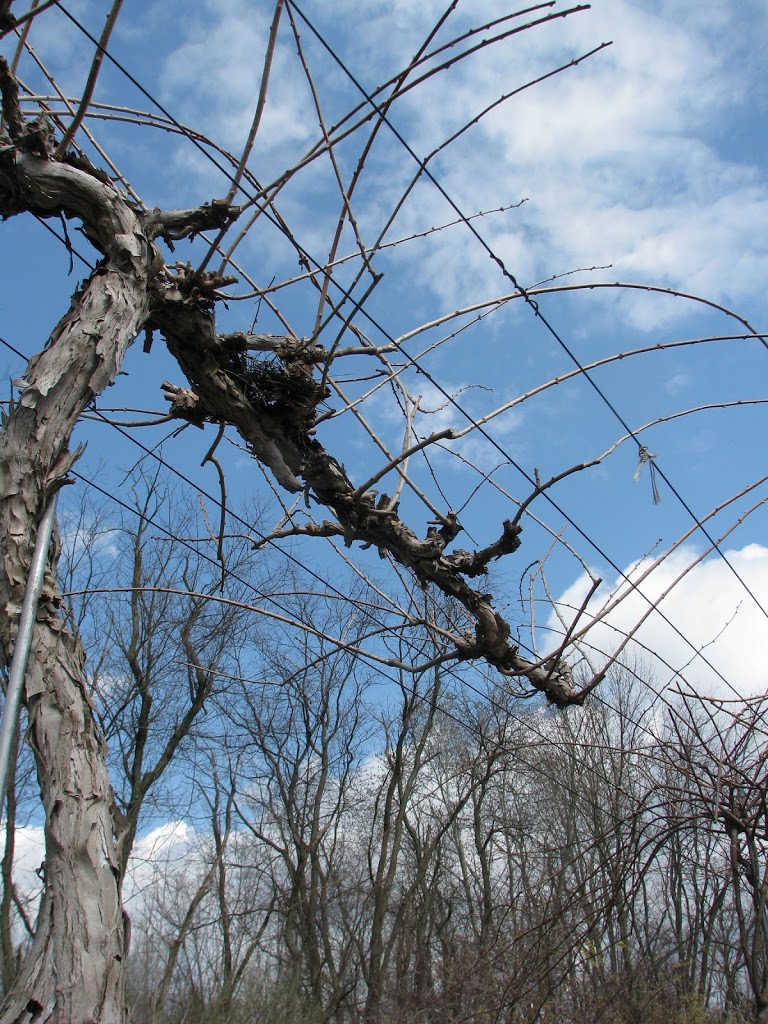
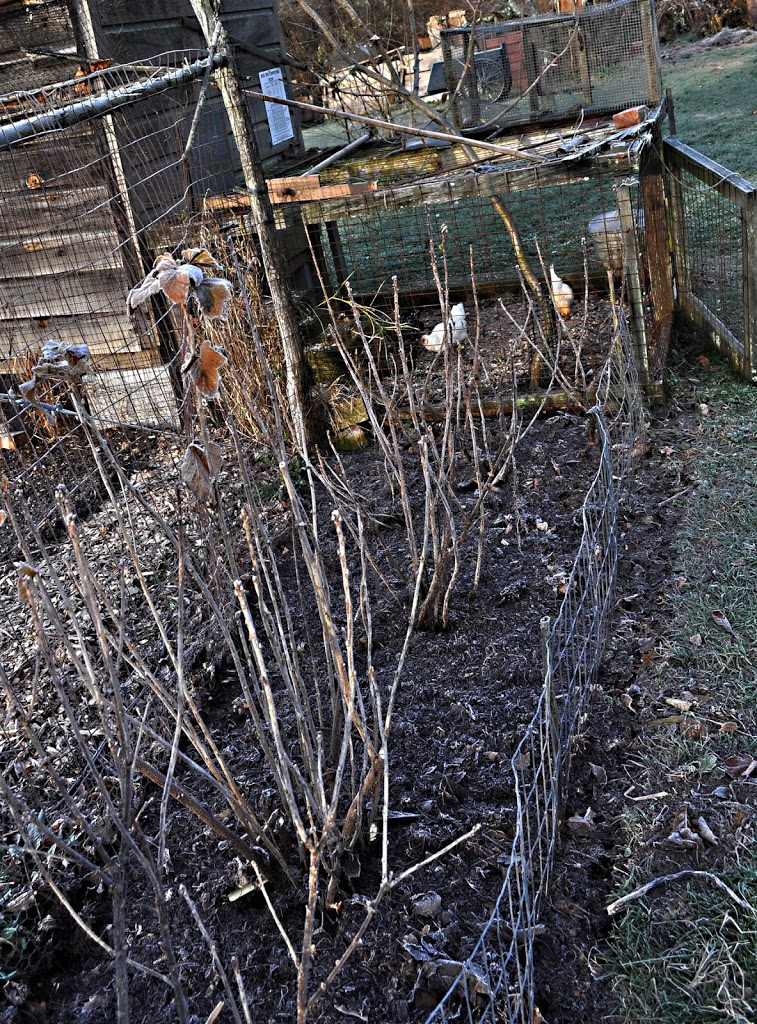
In contrast to pruning St. Johnswort, pruning red raspberries is a no-brainer. All you have to do is follow a 3 step recipe.
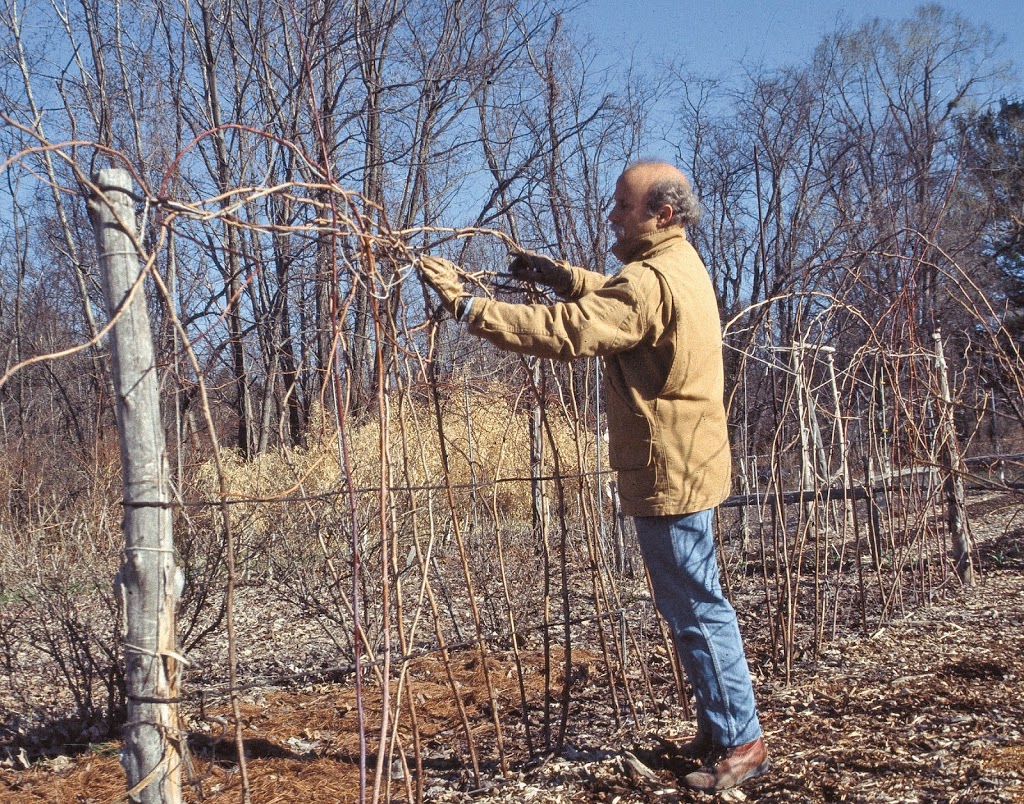
Step 1: Cut to the ground any stem that bore last summer. These stems look old, with peeling bark, and still hang on to a few remnants of fruit stalks.
Step 2: Cut down selected remaining canes. If the swathe of plants is wider than 1 foot, berries are harder to pick and, because of congestion, disease is more likely. I cut down any stems attempting escape beyond that swathe and then, within the swathe, remove enough canes so that none are closer than about 6 inches apart. Sturdiest stems are those most worth saving.
Step 3: Shorten remaining canes to about 5 feet in height. This pruning is just to keep stems from flopping around. The height could be more or less, depending on how and if plants are trellised. I leave mine longer and weave the canes together onto a trellis wire about 4 feet from the ground.
Citrus, Flying Dragon

Citrus in New York?

Winters have been warmer here for the past few years and, so far at least, this winter is playing out to be the warmest ever. But even the “global warming” cloud has its silver lining. Snow is great fun and cold is invigorating but one of my regrets in living in a cold winter region has been not being able to harvest fresh citrus fruits from outdoor trees. If things keep progressing in their present direction, as predicted, that situation may change.
The coldest temperature so far this winter has been down around 9° F, and three of my citrus plants still look fine. In the ground, outdoors! Technically, they are a citrus relative, Poncirus trifoliata, also known as trifoliate orange. The leaves resemble citrus leaves, the white flowers resemble and have the fragrance of citrus flowers, and the fruits, orange and an inch-and-a-half across, resemble citrus fruits inside and out. Too bad poncirus is barely edible, although it can be squeezed for juice that is diluted and sweetened to make an -ade.
Flying Dragon poncirus
Even if poncirus was not edible, it would be worth growing for its beauty, especially the Flying Dragon variety with its contorted, green (and thorny) stems and leaves.
My three poncirus plants started out as seeds plucked from a fruit on a plant growing against a brick wall in northern New Jersey. The seeds sprout and grow easily. After growing one year in pots, into the ground they went. The first couple of years, winter lows of -10° and -19° killed them back to the snow line. They’re allegedly cold-hardy below zero degrees F., but that hardiness comes with age. Also, the pattern of cold development and its duration affects cold-hardiness. This year, so far, the plants look fine from top to bottom.
Poncirus is close enough to citrus botanically that its been hybridized with citrus to make more edible, albeit less cold-hardy, hybrids. Like the citrange, from the mating with sweet orange, hardy to 5 to 10°F. A few varieties of citrange have been developed, all billed as “approaching edibility” but, like poncirus, making a good -ade.
——————————————————-
Not to give up on true citrus — yet. Probably the hardiest is yuzu, a hybrid of a sour mandarin and the barely edible Ichang papeda (C. ichangensis). Ichang papeda is the hardiest evergreen citrus. (Poncirus sheds its leaves in winter.) So yuzu is a true citrus and it is quite cold-hardy, down to about 10°F. And it is eaten. The great plant explorer, Frank N. Meyer described it, in 1914, “rind full of oil glands, smelling like a fine lemon; segments separating easily; fairly juicy and of an agreeable sharp sour taste.”

Mandarins (tangerines, C. reticulata) are also among the hardiest of citrus, and they taste very good straight up. The deep orange fruits of the variety Changsha are sweet and juicy, and I actually have a potted plant from which I’ve been trying to coax fruit for more than 5 years — or so I thought.
Today I checked the original bag in which I received cuttings of the alleged Changsha. Turns out the name scrawled on the bag is Changshou, not Changsha. Bummer, I was looking forward to Changsha. Changshou is another hardy citrus-type fruit, actually a kumquat, from the closely related genus Fortunella. Kumquats are cold-hardy to between 10 and 20°F., and are a fruit I’ve grown — indoors in winter, outdoors in summer — for many years. 

Meiwa kumquat
Kumquats, like poncirus, hybridize readily with citrus species. Hmmm, why not combine the hardy kumquat with the hardy mandarin? It’s been done, the result of the mating being the Nippon orangequat, hardy to 10°F. and with a mild flavor, if left to hang on the plant long enough, and, like a kumquat, having an edible skin.
——————————————————–
Except for poncirus, I’m not really hoping to harvest any citrus-type fruits from outdoor plants anytime soon, perhaps ever. Surviving the depths of winter cold is one thing. The plant also has to be able to ripen its fruit within the growing season. My Meiwa kumquats, for instance, ripen in February, and I expect even a few nights in the 20s would turn the fruit to mush.
For now, then, I continue growing the more edible citrus-type fruits in pots that winter indoors. Still, poncirus, that citrus look-alike will look cool out in the landscape.

OCCULT PRACTICES, WINTER COLD

Do occult practices contribute to the health of my pear trees? After all, there I was, clomping through lily-white snow in boots tossing what looked like puffs of smoke at each tree. As I moved from tree to tree, a gray halo settled to the ground arround each tree’s base.
Yes, those puffs of smoke would be contributing to my pear trees’ well-being. No, all that puffing was not occult, not even really smoke, in fact.
The stuff was wood ashes, and I had three reasons for what I was doing with it. First and foremost, I was disposing of it. Wood ash is rich in potassium and alkalinity. Potassium is an essential nutrient for plants, and alkalinity is good to counteract the increasing acidity of our soils, where rainfall constantly washes out its alkalinity.
But too much of a good thing is a bad thing. My woodstove generates a panful of ashes every couple of days or so, and too much wood ashes on the ground causes an imbalance of nutrients in soil and plants, especially of magnesium, another essential nutrient. Too much wood ashes in one place would also make the soil too alkaline, which brings on deficiencies of yet more essential plant nutrients, such as iron and phosphorus, lessens the soil’s ability to hold onto nutrients for later use by plants, and can increase plant susceptibility to certain diseases, such as potatoes, to scab. So I spread my wood ashes far and wide, at a rate where their goodness does good.
The minerals in wood ashes, and its dark color, have another use under my pear trees. It melts snow. I like snow as much as any child but mice, free from the gaze of predators, run amok beneath that white blanket, stopping to gnaw on bark. A few inches of snow also give rabbits a leg up to reach higher into young trees to do similar work on what were low branches. That gray halo eats away at snow near the base of each tree.
In throwing that ring of wood ashes at the base of each tree, some inevitably clings to bark and branches. If I were a rabbit, a dusting of wood ashes would make a meal of bark or branches less appetizing. Perhaps they feel that way, too. Anyway, that’s my third, neither occult nor particularly well-founded, reason for those puffs of “smoke” and halos of gray around each of my pear trees.
——————————————
Winter has finally come. Besides all the beautiful, white snow, we finally have some cold. I’m keeping a close eye on how cold it gets, as should any good gardener, farmdener, or farmer, because the depth of cold is one determinant of what plants I can grow and how those I do grow might fare in the coming season.
Noting the temperature at 9 o’clock in the morning from a thermometer suction-cupped to the kitchen window or hanging on a post on the back porch will not do. Temperatures usually plummet to their lows around 4 or 5 in the morning, and by 9 a.m. have already risen a few degrees, especially on sunny days as days grow longer. Also, a thermometer sheltered beneath the roof of the front porch or house wall catches some indoor heat radiating out a window or wall so reads warmer than one hanging out in the garden near plants.
I’m not recommending anyone padding out on the snow to the garden in their slippers at 4 a.m. each morning to get an accurate temperature reading for the next few weeks. (Coldest temperatures usually arrive within a month on either side of the end of January.) Modern technology comes to the rescue in the form of minimum/maximum thermometers.
Minimum/maximum thermometers come in two “flavors”: mechanical and digital. Mechanical min/max thermometers have two sliding indicators that are pushed by either the temperature-reading needle of a dial thermometer or by the expanding fluid in a liquid in glass thermometer. One indicator stays where it is pushed to its high point, the other at its low point. High and low temperatures are indicated for the period since the sliders were last reset by being slid back against the needle or fluid.
Digital min/max thermometers work by . . . who knows? They do essentially the same thing as the mechanical min/max thermometers, except are reset with a push of a button. One advantage of digital thermometers is that some can transmit readings wirelessly indoors. I read the minimum, maximum, and present temperatures from the warmth of my bedroom while still in my pajamas. Still, mechanical thermometers are reassuringly simple and reliable. I have both kinds.
No need to reset a minimum/maximum thermometer every single day. Once, at the beginning of winter, suffices for knowing the ultimate depth of cold for the season.
————————————————————–

The Tipping Point, Passed

We’re now at the tipping point. No, not the global climate one after which our climate permanently veers off in a new direction. Nor a sociological tipping point that describes, for example, how many instigators are needed to create a mob action. Nor the biodiversity tipping point, the threshold after which biodiversity irreversibly plummets. This tipping point is more down-to-earth and not open to debate: buds on houseplant stems are poised to grow, seeds are ordered, and the sun is slowly rising higher in the sky and lingering longer each day.
I feel it and act accordingly. As soon as buds start to open on indoor plants, I’ll put a little fertilizer in with the water when I water them. Not the tablespoon per gallon per week that’s recommended on the packet label. The plants can’t use that much yet; any extra is wasted and contributes to salt buildup in the potting soil. I’ll start with only a teaspoon per gallon and offer it every other week, gradually increasing it commensurate with growth.
Generally, I don’t use soluble fertilizers. Outside, nutrients locked up within the compost and other organic materials I add to the soil is gradually solubilized by soil microorganisms. But compost and other organic materials are bulky so there’s no room to keep adding them in sufficient amounts for feeding plants growing within the confines of flower pots. Compost added to my potting soils provides sufficient food for seedlings and small plants that spend little time in pots, but houseplants spend their life in pots. Hence the soluble fertilizers that I’ll soon start adding to their water.
—————————-
As we’ve crossed the threshold to having longer days and brighter sunshine, some potted plants need more than just nutrients. Their roots have run out of space in which to grow. They need either to be moved to bigger pots or to have their roots hacked back to make room for fresh potting soil in the space that’s been freed up in their existing pots.
My weeping fig is the first candidate for re-potting. In its native, tropical haunts this tree grows a hundred feet high. As a familiar houseplant, it’s easily held in check at six feet high. My bonsai weeping fig tops out at only six inches high, and grows in an index-card sized, shallow pot an inch deep.
Every year the weeping fig gets its soil refreshed. Once I ease the plant out of its pot, taking care not to disturb the mossy mat that now covers the soil surface, I tease soil out from among the roots at the bottom of the root ball. After snipping back some roots and laying some new potting soil at the bottom of the pot, I return the plant to its home.
Larger, potted plants get more brutal treatment, especially my potted, edible figs, now in twelve to eighteen inch diameter pots. I’ll slice a couple of inches of soil from all around their root balls. But no need to do that yet; those plants are still dormant in the cold, dark basement
——————————
New seeds on their way by mail to welcome in the New Year provide an incentive to discard old seeds. Seeds are living entities, albeit quiescent, and eventually peter out. How long a seed stays viable depends on the kind of seed and the storage conditions, the ideal conditions being cool and dry (around 45°F. and 10% humidity). Consistent temperatures are better for storage than variable temperatures.
I used to store my seeds with a silica dessicant in airtight, plastic tubs in the refrigerator — perfect, but no longer feasible. These days, I have too many seeds so they have to make do in rodent-proof tubs in the garage.
Today I’m checking the date on each packet of seed, either written there by me or already stamped on the packet. The onion family has least longevity; I order new onion and leek seeds every year. Next in longevity comes the carrot family, which includes parsley, celery, fennel, parsnip, and, of course, carrot. Because my storage conditions are less than ideal, I also replenish these seeds every year. Under good conditions, these seeds, along with non-family members okra, beet, chard, pepper, and corn, would stay viable for 2 or 3 years. Seeds of tomato and eggplant, and cabbage and its kin, keep well for about 4 years, as do lettuce and legumes (beans and peas).
If there’s ever a doubt about seed viability, it’s easy to test germination by counting out, say, 20 seeds to put between the folds of a moist, paper towel. If the towel is kept moist on a plate covered with an upturned plate, any viable seeds should germinate within a week or so.
————————————–
Seeds readied and plants re-potted or fertilized, as needed, take advantage of the change in our planet’s orientation. We’re off to another year of gardening. This season’s tipping point is thankfully repeated every year. 

Let It Be?

“Let it be, let it be” went the old Beatles’ lyric, and this could very well be a mantra in gardening. Sometimes, sometimes a little, and sometimes not at all.
Take, for instance, the climbing hydrangea cloaking the north wall of my brick house. Even now, bereft of leaves and flowers, the finger-thick vines, with their papery peeling, tan bark are a pretty sight weaving their way across and up the russet red wall. Come spring and through summer, bricks peek out from behind a cloak of heart-shaped, glossy green leaves. In summer, white flowers open on short, horizontal stems that reach out from the wall, the whole effect, with the leafy background, like twinkling stars against a dark sky.
I planted the vine about 7 years ago, knowing that it’s slow to get started and that it can coexist with trees or brick walls, damaging neither. My plan with this vine has been to “let it be” although I did wonder what might happen once stems reached roof eaves and corners of the wall. Now I know: A couple of years ago, stems began to reach around the two corners to start their journey to the other house walls and initially thin stems also began to work their way beneath roof fascia.
The house would look cool thoroughly enveloped in this beautiful, ever-expanding vine, but could the structure handle it? I drew the line, with pruning shears, loppers, extension shears, and ladder, at roof eaves, wall corners, and windows (also threatened), lopping or breaking off errant stems. Climbing hydrangea is just too pretty to remove completely. I can “let it be,” but not too freely.
————————————————————–
For the past few weeks, Whenever I sit down to eat I also give an occasional, worried glance at the bare bulb sitting on a plate at the far end of the table. A pointy shoot a couple of inches long pokes out its top. Has it grown longer?
I’m wary because I had this plant once before, decades ago. I knew I could “let it be.” The bulb doesn’t need to be planted! Even without soil, the shoot will stretch upward and then an eerie purple “flower” will unfurl, much like an upside down skirt. Up the center of the flower will rise a long, pointed, purple stalk (which is actually a spadix on which are the true flowers). So far, so good.
The problem is that Amorphophallus, the botanical genus of this plant, is pollinated by carrion insects, and the fully open flower attracts its pollinators by reeking of dead flesh. To spare my very sensitive nose, I have to stand ready to cover the plant’s head in a plastic bag and whisk it down to the basement at the first hint of carrion-ness, just like I did with the plant I had decades ago. Or just lop the head off.
I accepted a recent offer of this plant, which multiplies readily, because it’s so interesting and so attractive, sort of. Once the bulb calms down from flowering, it does need soil, either in the ground in spring or in a pot. Then comes a leaf stalk, pale, olive-green with dark-brown splotches. When the snake-like stalk reaches a couple of feet in height, a single leaf unfurls into three leaflets that spread out like spokes of a wheel. At this stage, the plant is quite attractive and still eerie. 
————————————————————–
Last night at dinner, as I was eyeing Amorphophallus, I was enjoying a fresh, very, very local salad; the ingredients travelled 75 feet, from my greenhouse. A welcome crunch to these fall and winter salads is fresh celery.
Celery is not the easiest vegetable to grow. The tiny seeds germinate slowly and take a long time to mature into succulent, crunchy stalks. And then, for best eating the plant topnotch growing conditions: cool, moist soil rich in nutrients and organic matter.
Celery may be difficult, but I can just “let it be.” I don’t even have to plant celery anymore. This winter’s stalks, seedlings from last winter’s stalks, will go to seed as summer approaches. The four to five foot seedstalks will mature in midsummer, then bow their seed-laden heads over and drop seeds to continue the cycle. Seeds sprout late each summer, seedlings thrive in cooling temperatures of autumn, and by early winter — that is, now — I have plenty of mature celery that will grow slowly to keep me in stalks until spring. “Let it be, let it be.”
————————————————————–

Good Gifts for Gardeners

What would be a good gift for a gardener at this gift-giving time of year? Every gardener has his or her special inclinations, gardenwise, so each of us warrants a special set of gift possibilities.
Still, certain expendable items are sure to please any and every gardener. Tops on my list would be a big ball of twine. Twine is useful for everything from lashing blue spires of delphinium and floppy tomato vines to stakes to tying pea vines to a trellis or grape vines to support wires. Not just any twine will do; best is twine made of natural fibre, such as hemp or sisal, so that it can be gathered up to be composted along with the plants it supported at season’s end.
Gloves are another expendable item great for gifts. Gloves made from leather and some synthetics last for years. Among my favorite gloves for everything from detail work like transplanting small seedlings to grabbing a pitchfork to pitch manure onto the compost pile are knit gloves with nitrile or latex coated palms and fingers. With rough use, the gloves only last a couple of seasons, if that, but they’re worth it for their grippiness, comfort, and hand protection. I save my leather gloves for colder weather or for rougher work such as pruning thorny rose and gooseberry bushes and grabbing firewood.
Organic gardening (a good idea and the essence of good gardening in general) conjures up its own special gifts. Straw, manure, hay, leaves, wood chips, and other organic (that is, living or once-living) materials are what put the “organic” into organic gardening. A pitchfork is the perfect tool for moving organic materials to the compost pile or on top of the soil. But choosing a pitchfork is not all that straightforward. I am the proud owner and frequent user of 4-, 5-, 6-, and 10-tine pitchforks. Each has its special use but if I were to own just one pitchfork, it would be the  6-tine fork.
If you’re going to use a pitchfork, you’re probably going to need something with which to move around all those bulky organic materials. A garden cart. Stoked full, a sturdy cart with high wooden sides and two large-diameter tires can move over 10 cubic feet or 1/3 cubic yard of material, up to about 400 pounds of weight. Please don’t buy me one; I own three.
A few other essential, welcome tools are a trowel, which any but a beginning gardener is sure to have, and hand pruning shears (my favorite is ARS although Felco and Pica are also very, very good). A rain gauge is also essential to know whether what sounded like an earth-drenching downpour really contributed to the one inch per week needed for best plant growth. Good sources for tools are Gemplers, A. M. Leonard, Charleys Greenhouse, Orchard Equipment Supply Co., and Gardener’s Supply Co.
Beginning gardeners will appreciate packets of basic seeds such as Black Seeded Simpson and Buttercrunch lettuce, Bush Blue Lake and Romano beans, French Breakfast radishes, and Green Arrow peas. More advanced gardeners start their own transplants so might appreciate especially good, but hard to find as transplants, varieties of tomatoes, such as Blue Beech, Belgian Giant, San Marzano, and Black Krim. Johnny’s Selected Seeds, Fedco Seeds, High Mowing, Pinetree Garden Seeds, Tomato Growers Supply Company, and Totally Tomatoes are among my favorite seed companies. For growing transplants, I recommend Gardener’s Supply APS, which waters seedlings automatically and gives each seedling its own home so they hardly realize when they’ve been transplanted. I already own about a dozen of them so don’t buy one for me, thanks. 
How about a gift of some of the above catalogues? How about including some good nursery catalogues also? Some of my favorite nurseries are Hartmann’s, Raintree, One Green World, Cummins, Burnt Ridge, and Nourse. 
————————————–
The best gift for the beginning gardener or for the seasoned gardener who wants to grow better is, in my opinion, a good book. Among my favorites are any of Elliot Coleman’s books about vegetable gardening, any of Michael Dirr’s books about trees and shrubs, Steven Still’s Manual of Herbaceous Plants, Hartmann & Kester’s Plant Propagation: Principles and Practices, my bible on plant propagation, and, for general gardening, Roy Biles’ The Complete Book of Garden Magic and Barbara Damrosch’s The Garden Primer. For entertaining and informative essays, there’s Green Thoughts: A Writer in the Garden by Eleanor Perenyi and The Principles of Gardening: A Guide to the Art, History, Science, and Practice of Gardening by Hugh Johnson.
Oh, and did I mention my books?: A Northeast Gardener’s Year (the what, when, and how for a wide range of gardening topics arranged, as appropriate, through the year), Weedless Gardening (especially good for vegetable gardening), Uncommon Fruits for Every Garden, Landscaping with Fruit, and Grow Fruit Naturally.
————————————————————–

A Jump on Spring

I got a jump on spring yesterday and started pruning hardy kiwifruit vines. The fruit is a kissing cousin of fuzzy, market kiwis, except, with smooth skins and small size, they can be popped whole in your mouth like grapes. Hardy kiwis are also cold-hardy, which their cousins are not.
The vines need yearly pruning to let light and air in among the stems for productivity and plant health, to keep fruiting stems within easy reach, and to stimulate new stem growth each year off which grow fruiting shoots the following year.
My plants are trained on 5 wires strung between T-trellises, one wire down the middle of the trellis flanked by 2 wires on either side of that central wire. Each plant’s trunk rises up to the middle wire and then divides into two cordons, or permanent arms, that run in opposite directions along the middle wire. Fruiting arms, which are 1-year-old stems, grow off perpendicularly to the cordon to drape down over the outside wires.
As I approached the vines with shears, lopper, and small saw in hand, the vines looked back at me like an intimidating, tangled mess. Three steps in pruning brought everything in order. I first cut back all fruiting arms to within a foot or so of the outside wire and shortened each cordon back to where it began growth last year. Arms bear fruiting shoots near their bases so don’t need the whole of their lanky stems. As to the cordons, if they were allowed to grow longer and longer, one plant would tangle into the next plant down the row.
Next, the hardest part: I reached into the remaining tangle to cut back fruiting arms that have, over the years, begun to originate further and further off the cordons. These got shortened so that new shoots, for fruit 2 years hence, would originate closer in to the cordons. Left to their own devices, as they are in the wild on the edges of Asian forests, the vines would be climbing 100 ft. high on anything on which they could grab hold.
Finally, I thinned out most of the remaining fruiting arms so that they are about a foot apart. I’ll do a final pruning in spring, thinning more where needed and shortening all fruiting arms to their final length of about 18 inches long.
I’m left now with a pile of prunings. Their intertwining stems make nice decoration. I could also save some for my cat. Kiwi stems have a pleasing effect on the cats, similar to catnip. In Asian zoos, they have been used to calm “large cats.”
————————————————-
What joy a mere sprout can foreshadow! Late last summer a gardening friend gave me some sprouts from her Maid of Orléans jasmine (Jasminum sambac). By the end of summer, a few of the cuttings had rooted and even flowered.  The plant or its flower wouldn’t win (or lose) any beauty contests, but is well worth growing for its unabashed fragrance. The aroma is sweet and rich and not at all cloying, even after the flowers fade.
What’s more, this jasmine flowers freely. As a matter of fact, it just finished its second round of flowering. Contrast this behavior with my two plants of common jasmine (Jasminium officinale). These latter plants occasionally cough forth a few flowers in late winter but nothing like the profusion of white blossoms they once did. I’ve tried everything, from starting new plants from cuttings to pinching shoots all summer until August to keeping them cool in until late winter to keeping them dryish until late winter to keeping them cool and dryish until late winter to keeping them in the greenhouse to . . .  you get the picture.
The only dark cloud hovering over my Maid of Orleans was the potting mix. Something seemed not quite right with it, having me worried that the plant might not grow or, worse, expire (as did the plant from the gardening friend from whom I got the cuttings). Not that this is a time of year to expect growth from any plant.
But now, that cloud has moved on. The new sprout looks happy and healthy and foretells of a fragrant future.
————————————————-
I mixed up a new batch of potting soil, which I’ll need anyway in a couple of months for indoor sowing of the first seeds of next season. Into a 5 gallon bucket went finished compost and soil, equal parts, sifted. Into another 5 gallon bucket went peat moss and perlite, equal parts, sifted. I tipped the contents of both buckets together into the garden cart, sprinkled on 1 cup of soybean meal and a handful of kelp, and repeatedly slid a flat-bladed shovel under the pile and turned it over and over. Once everything was thoroughly mixed, I shook and forced it again through the 1/2-inch sieve and packed it away into buckets.
This potting mix will be home to the roots of seedlings and houseplants, as well as large, potted fig trees, roses, and pomegranates. Also, to Maid of Orleans, as soon as she outgrows her present quarters.

Simplify, Simplify

People are funny. Take, for instance, a fellow gardener who, a couple of months ago, shared with me her excitement about a biochar workshop she had attended. “I can’t wait to get back into my garden and start making and using biochar,” she said. Biochar, one of gardening’s new wunderkind, is what remains after you burn wood with insufficient air — charcoal, that is. Stirred into the soil, its myriad nooks and crannies provide an expansive adsorptive surface for microbes and chemicals, natural and otherwise. Biochar, being black, darkens the soil, and dark soil is generally associated with fertility, although that’s not always the case. Because biochar is mostly elementary carbon, it resists microbial decomposition, so it’s carbon is less apt to end up in the atmosphere as carbon dioxide.
But raw wood, as opposed to biochar, added to soil feeds microbes and then plants as it decomposes, eventually turning to organic matter, or humus, which is a witch’s brew of compounds with positive effect on soil’s nutritional, biological, and physical properties. So is cooking up a batch of biochar and digging it into your soil really worth the effort? The same might be asked of aerated compost tea, another “rare and wondrous” product touted for everything from preventing plant diseases to breaking up impermeable soil layers. Or “nutrient dense farming,” which, with its questionable assessments of plants’ nutrient status and even more questionable soil additives, aims to reverse the drop in mineral concentrations noted in our vegetables over the past few decades. (Even though the drop has been shown to be simply a dilution effect from increased yields due to breeding, fertilizers, and water.)
Thoreau wrote, “Simplify, simplify.” But people are funny; they want to complicate, complicate. Something about using some apparatus, whether it’s a biochar burner or a compost tea aerator, or a measuring device, such as the refractometers used by nutrient dense farmers, that draws people in. People are wowed by numbers, dials, and other bells and whistles of science.
Bells and whistles do not science make. Or good gardening. Some of the most elegant experiments in the science of gardening involved not much more than a human mind and some pea seeds: the 19th century discoveries of heritable traits by Gregor Mendel, which became the foundation of modern genetics, and the elucidation of why plants bend towards light by Charles Darwin, as examples.
Ninety percent of good gardening could be summed up in two words: organic matter. Enrich your soil with plenty of compost, the Cadillac of organic matter, and/or other organic materials, such as leaves, straw, and wood chips, and you’re well on the way to plants that are healthy, healthful, and productive. I wish I could offer some gimmick or catch-phrase. No need.
———————————————–
I finally cut enough hay to snuggle down along my row of dwarf apple trees. Right now, it looks like a billowing, beige blanket. By spring, snow and rain will have compressed it to ground level. By this time next year, it will be mostly gone. That’s okay.
During it’s tenure, the mulch will smother weeds and insulate the soil against winter cold and summer heat. Bacteria, fungi, and other soil organisms are what will make it vanish, but in so doing nutrients within those stems and leaves will move into the soil for plant use and what’ll be left behind is humus, which makes the soil dark and, in this case, is an indicator of good soil.
Some garden faddists would fault me for using hay beneath my apple trees, alleging that the trees would prefer a mulch of wood chips. And not just any old wood chips, but those from branches less than two and a half inches across (“ramial” wood chips). Devotees cite Laval University Publication N 83, “Regenerating Soils with Ramial Wood Chips” as providing evidence for the benefits of ramial wood chips but this publication is actually very weak on evidence and very strong on boosterism. Perhaps they are correct, although there’s no evidence for benefits one way or another. Depending on availability, I’ll sometimes use wood chips, any kind. Simplify, simplify.

Rice, Corn, & Barley Harvest

Something new (new for me, at least)! You can subscribe to my posts and get notified each time there’s a new one. See “SUBSCRIBE BY EMAIL,” to the right.


—————————————–

It’s been awhile since the grains have been harvested so it’s time to prepare them for consumption. Longest in preparation will be barley.

The barley is from last year’s harvest, and the grain-laden stalks have been bundled together and hanging from a kitchen rafter since then. I’ve procrastinated processing because of last year’s frustrations in trying to thresh wheat, also grown last year; the grains clung tenaciously to their stalks and no amount of battering would thoroughly separate them. I’ve also procrastinated because the bundle of barley’s tawny brown stems, with long, delicate, spiky awns emerging from the heads, look so decorative dangling upside down near the kitchen ceiling.

A bare spot now remains where the barley once hung. Earlier today, after being stuffed into a pillowcase and batted against a brick wall, the stalks easily released their plump grains. I separated the grain rom the chaff by pouring the grains back and forth between two buckets in a slight breeze, and soon had the whole crop cleaned.
As you’ve probably guessed by now, my barley crop wasn’t measured in tons or even bushels. I had planted a 3 foot by 3 foot area and reaped a quarter of a pound. Consulting my 1914 “Farmer’s Cyclopedia of Agriculture,” an acre of barley (back then and in Iowa) averaged 45 bushels of barley, or 1,800 pounds, which would translate to a bit over one-third of a pound for my 9 square foot plot. Respectable for my first try.
The end-product for my crop will be beer. More specifically, the goal was to find out how much barley to grow to make a 6-pack. My next step, then, is to malt the barley. More on that at a later date . . .
————————————————–
I “hauled in” the rice harvest back in early October, all 40 grams of it. That 40 grams was not a bad yield considering that I got the seedlings started late; that I only planted a 2 foot by 3 foot bed of it; that it was growing under dryland conditions, which yields less than wetland rice; and the variety I planted, Hayayuki, is a wetland variety. Still, it was fun.
The aforementioned limitations are nothing compared to the limitation in preparing the rice for consumption. Like most other grains, rice has a hull that needs to be removed before the grain can be eaten. (The hull is no impediment with barley for malting because what’s used for beer is maltose-laden water that is leached through the sprouted, cracked grain.) Hullers are available for small-scale grain processing, but are neither economical nor capable of handling nano-yields such as my 40 grams.
A conversation with Ben Falk (www.wholesystemsdesign.com), who had given me the seeds and has harvested over 100 pounds of rice in Vermont, did not leave me optimistic about getting off those hulls. (He has a small huller.) No need for me to try cracking them off with a rolling pin, boiling them and hoping they would float up to be skimmed off, or toasting — he’d already tried all that.
Years ago, I got a Solis coffee grinder that does an adjustable grind. How about setting the Solis to barely grind the rice, just enough to crack off the hulls? The problem is that the largest setting was a bit too small for the rice grains. Still, no other options presented themselves. What I now have is cracked rice. I cooked some; the flavor was very bland, even for rice.
————————————————-
It isn’t only a lot more growing experience that is responsible for my much more successful crop of a third grain: corn. Corn is easier to grow, to harvest, and to process than other grains on a home garden scale. I grow popcorn and polenta corn in addition to, of course, sweet corn, the latter considered a vegetable because it’s eaten “green,” that is, before full maturity.
It’s with good reason that corn has been such a success for so long here in the Americas. The grains are large, they come packed together in a single ear, and that ear is covered by one easily shucked husk. Corn is such a successful cultivated grain that it can’t even survive in the wild. An ear dropped to the ground would sprout too many seedlings so close together that they would be stunted fighting each other for water, light, and nutrients.
Processing popcorn and polenta corn entails nothing more than picking it, pulling back the husk, and hanging it from kitchen rafters until ready for use. Giving a ear an “indian burn” snaps off kernels for popping or grinding.
————————————————-
One more home-grown grain rounds out my larder. Chestnuts. They’re not actually a grain but are a uniquely starchy nut so fulfill much the same purpose as any grain in the diet. Chestnuts have the advantages of being perennial, borne on an attractive tree, and, because they bloom late and have few pests, bearing reliably.
Chestnut preparation is easy: One cut crosswise about half way through each nut, then roasting in a hot oven for about 30 minutes. Delicious.

PRUNING, I CAN’T RESIST

Now is generally not a good time for pruning outdoor plants. Too bad. With the lawn nicely trimmed and vegetable and flower beds tidied up, it’s all the more difficult to resist the urge to lop back at least some misplaced or congested stems on trees, shrubs, and vines.
Redosier dogwood, neglected
I can’t resist. I figure little or no harm should come as long as I choose carefully what to cut. One reason not to prune now is that any wounding — and pruning does wound — stimulates a certain amount of cellular activity near the cut at a time when plants should be hunkering down for winter. Resulting cold injury can be minimized or nonexistent if pruning is restricted to the most cold-hardy plants. Also, gaping wounds won’t heal until spring so are open to pests. Here I rationalize that problems will be, again, minimal or nonexistent if only naturally tough plants are pruned now.
I’ve been eyeing an ungainly redosier dogwood since leaves have dropped. Redosiers are super-hardy, shrubby plants that liven up the winter scene with their bright red or yellow stems. The time to prune these plants is in early spring, after enjoying the plant’s colorful stems all winter.
The problem is that my redosier dogwood has been neglected for years. Only the one-year old stems are colorful and, with years of neglect, few are evident amongst the older wood. The right way to prune this plant is to lop the whole shebang to the ground every year or two in spring. Doing so coaxes a slew of vigorous, new sprouts near or just below ground level. Come autumn, these sprouts are officially one-year old (that is, they’ve completed a whole season of growth) and need only crisp weather to bring out their brightest color.
I’m lopping my whole plant to the ground this week (in addition to the boxelder and other weedy plants that have sprouted up among it). The plant is very hardy, has nothing to show for winter, and pruning now leaves one less thing to do in spring.
Black & red currants, pruned
Likewise very cold-hardy and likewise soon to feel the steel of my pruning shears are my currant and gooseberry plants. Gooseberries and red currants bear fruit on one-, two-, and three-year-old stems so I’ll be cutting down any stems older than three-years-old and thinning out the youngest stems so that they don’t crowd as they age. Black currants fruit best on one-year-old stems so I’ll cut down any stems that bore fruit this past summer and thin out young stems if they crowd too much. All these plants start growth very early in spring, which is one more reason to prune them now.
————————————————
Redosier dogwood, pruned & very red
Stems don’t speak to me or bear age labels, so how do I know which ones are one- or two-years-old, or older? I look at them. With some plants, it’s very easy to tell. As I wrote, only the very youngest redosier dogwood stems turn red or yellow, with the help of cold weather. Kerria, also known as Japanese rose, blooms best on one-year-old wood, which broadcasts its age with its bright, green color; older stems are brown.
Other plants’ stems offer hints of their age even if they don’t colorfully broadcast it. Oldest stems generally are those that are the thickest. Stems also show their age in bark that starts to peel or gets bumpy or warty; that is, it looks old.
————————————————-
I’m not yet finished cutting. Lanky stems lash out and grab me as I pass across my terrace beneath the grape arbor, or walk down the field near the trellised kiwi vines. I’d like to prune them now, and I will, to some degree at least.
Kiwi expert Dave Jackson, who grows some of the best hardy kiwifruits I’ve ever tasted (www.kiwiberry.com), has 20 acres of the plants. He tells me that he prunes in autumn with no ill effect, so I’m tempted to do so also. Kiwis require more pruning that most plants and one reason he prunes in autumn could be because he wouldn’t have time to prune everything if he waited until spring.
Temperatures and airflow here at my farmden are not nearly as congenial for the plants as at Dave’s farm, which makes me wary of pruning my vines now. So I’ll prune a couple of my kiwi vines now and see how they fare. The rest will get pruned in spring. 

But I’m going to shorten lanky stems on all the kiwi plants, as well as those on my grapes. Plants pack away food for winter in stems, so cutting stems does remove some winter stores; still, many stems, trunks, and roots will be left intact. Right near pruning cuts is where plants are most susceptible to damage. Shortening stems partially, rather than to their full length, avoids  problems near the cuts. Final cuts can wait until spring.
————————————————-
Some plants needn’t feel even slightly threatened by my pruning shears — now, at least. Pruning butterfly bush in autumn, in my experience and that of many other gardeners, results in increased winter cold injury. Come spring, though, all their stems get lopped to the ground. I also won’t touch spring bloomers, such as lilac, forsythia, and mockorange bushes. Pruning would remove stems slated to bloom this spring. The time to prune these plants is right after they finish their flowery shows.
Want more on pruning? See my book, The Pruning Book (Taunton Press, 2010).