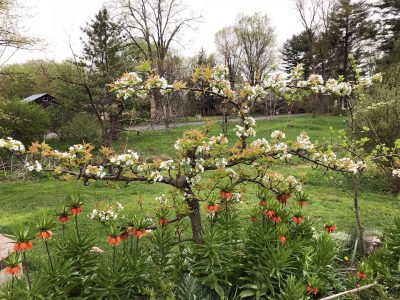
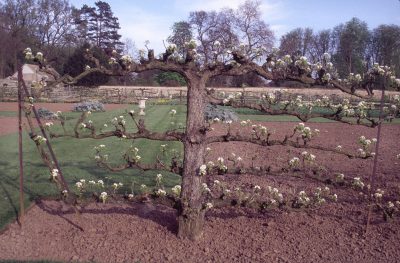
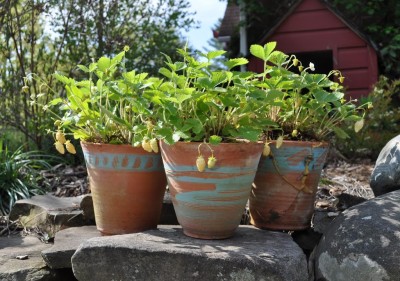
Some You Win, Some You Lose. Why?

Mo’ Better Berries

Because I’ve grown a number of varieties of blueberries for a long time, I’m often asked what variety I would recommend planting. Or whether you need to plant two varieties for cross-pollination in order to get fruit.

The answers to both questions are intertwined. First of all, blueberries are partially self-fertile so one variety will bear fruit all by itself.
Large blueberries
But — and this is important — berries will be both more plentiful and larger if two different varieties cross-pollinate each other. (Apples, in contrast, are self-sterile so, with few exceptions, won’t bear any fruit at all without cross-pollination.)

Benefits of cross-pollination aside, why plant just one variety of blueberry? Different varieties ripen their fruits at different times during the blueberry harvest season. With a good selection of varieties, that season can be very long.

Here on the farmden, the season opens with Duke and Earliblue, both usually ready for picking (in Zone 5) at the end of June. The season moves on, with Blueray, Berkeley, and Bluecrop ripening in July, and Jersey, Toro, and Nelson in August.Blueberries galore 
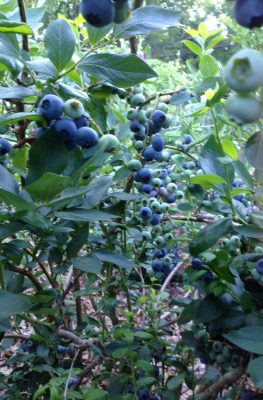
As I write, in September, the variety Elliot is still bearing ripe berries.

So if you’re going to plant blueberries, which I highly recommend doing, plant more than one variety, and choose the varieties that let you enjoy berries with your morning cereal or your after dinner ice cream over a long season.

Soil Matters

I pay special attention to the soil when I plant blueberries, and it pays off. Blueberries have rather unique soil requirements among cultivated plants, demanding those that are very acidic, high in organic matter, low in nutrients, and consistently moist and well-aerated. (Most cultivated plants like soils that are only slightly acidic and have moderate to high fertility.) No matter if a soil is not naturally to blueberry’s liking; it can be made so.

The soil where I planted my blueberries drains well. If it did not, I would either choose a better location or else create mounds on which to plant.

Next in importance is soil acidity; I test it before planting. If it’s not at the required pH of 4 to 5.5, I spread pelletized sulfur, a naturally mined mineral, over the ground. (Pelletizing the sulfur makes it less dusty to work with.) Mulched blueberry planting
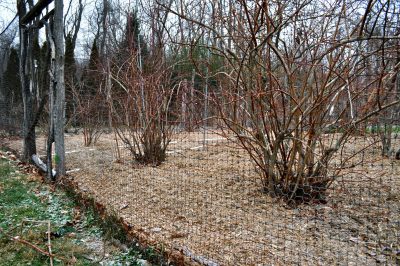
The amount of sulfur, per 100 square feet, needed to lower the pH by one unit would be a pound in a sandy soil and three pounds in a clay soil. My clay loam’s initial pH was about 6.5, so I needed 3 pounds of sulfur per hundred square feet to lower that pH to 5.5, that upper limit enjoyed by blueberries.

Now, for planting. I mix a bucketful of peat moss with the soil in each planting hole and then tuck the plants and soil into the hole, setting the plants slightly deeper than they stood in the nursery. Peat moss is a long-lasting source of organic matter, unique among organic matters in also being low in nutrients.

Right after planting, I spread a 2 to 3 inch depth of some weed-free, fluffy organic material, such as wood shavings, wood chips, straw, pine needles, or autumn leaves, as mulch. The mulch snuffs out weeds, which are more adept than blueberry at soaking up water and nutrients, and keeps the soil cool and moist, just as it is in blueberry’s natural habitats.

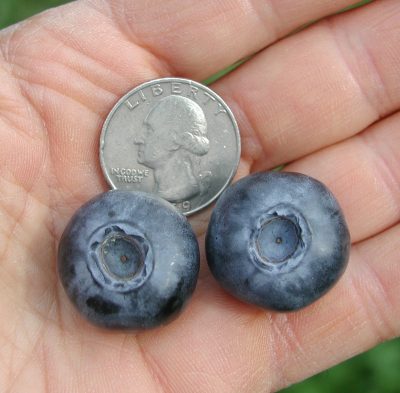
With regular watering, as needed, pruning, and annual mulching and attention to soil acidity, blueberry leaves should maintain a healthy, green color, and stems should grow a couple of feet or so each year. My planting of 16 plants yields almost 200 quarts per year of delicious, organic blueberries.

Celeriac Failure, Again

Blueberries have been a great success; now for a failure. Celeriac, a celery relative that puts that flavor  into its softball-sized, white root, isn’t well-known as a vegetable, but I’d like to grow it. I’ve tried, for the past couple of years, without success. The problem is some sort of celery blight that kills the top growth so there’s no greenery to feed the root.

Both early blight and late blight, fungal diseases, could cause problems. They arrived in gardens on infected celery seed and/or infected celery debris from the previous cropping season. Celery bacterial blight
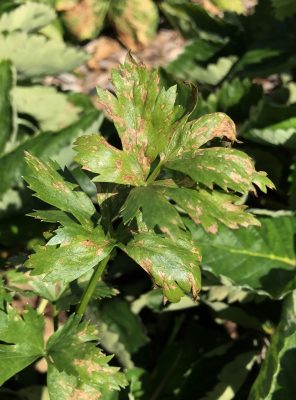
Last fall I thoroughly cleaned up diseased plants, even planted some celeriac this year in the greenhouse. Failure occurred both outdoors and in the greenhouse, although lots of rain and heat could have helped (the fungi or bacteria, not me).

I’m not giving up. Perhaps the seed is the problem. Seed can harbor the disease, but can be “cleaned” up with a heat treatment: 30 minutes at 118°F. As a last resort, I could spray an organic fungicide such as one of the organically approved materials based on copper or hydrogen peroxide. Perhaps this time next year I’ll be eating celeriac.

Figs and Peppers and . . .

Fig Frustrations and Joys

Over the years I’ve shared the joys and frustrations of growing figs in my minimally heated greenhouse. The joys, of course, have been in sinking my teeth into fruits of the various varieties. Also, more recently, the neat appearance of the plants which are trained as espaliers. Fig espalier
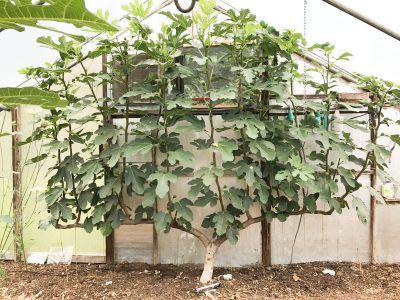
Left to its own devices, a fig can grow into a tangled mess. In part, that’s because fig trees can’t decide if they want to be small trees, with single or a few trunks, or large shrubs, with sprouts and side branches popping out all over the place.

A major frustration in my greenhouse fig journey has been insects, both scale insects and mealybugs. These pests never attack my potted figs which summer outdoors and winter indoors in my barely heated basement. In the greenhouse the problem each year became more and more severe, eventually rendering many of the ripe fruits inedible.More fig espaliers All that despite my attempts at control by going over plants with a toothbrush dipped in alcohol, oil sprays, and sticky barriers to keep ants, which “farm” these pests, from climbing up the trunks.

Scale and mealybugs are hard to control, let alone eradicate. Yet I am now secure enough in my victory to have claimed success in the battle.

Success began last year, when research pointed me to two predators of these pests, Chrysoperla rufilabris and Cryptolaemus montrouzieri, both of which I ordered online and released into the greenhouse. They were expensive, bringing the cost of my fresh figs to about one dollar each. Still worth it, though.

I got to thinking, “Perhaps I could perennialize these predators in the greenhouse so that additional annual purchases would be unnecessary.” As a first step to creating a home (or a jail, depending on your perspective) for them, I covered all greenhouse openings to the outdoors with window screening. These predators also like moisture, so I periodically spritzed the greenhouse and laid some absorbent wads of paper here and there on the branches.


I further thought, “How does the greenhouse environment differ from the great outdoors, where my figs are pest-free?” Rainfall! Although the greenhouse environment is humid, water never falls on the plants’ leaves and stems. So rather than period spritzing, almost every day since early spring I have blasted leaves, stems, and developing fruits with water.

The result: I haven’t seen one mealybug or scale insect all season!

Success, Who Knows Why?

I have to restrain myself from the usual gardener’s hubris in thinking that what I did cured the problem. Perhaps the “rainfall” favored the predators, of which there’s been nary a sign, by knocking the pest insects off the plant, or by creating a moist environment inimical to the pests, or . . .  Perhaps my screening the greenhouse cured the problem. Perhaps the pest problem disappeared for none of these reasons. Or from some combination of these reasons.

If I had a full-blown experimental station and was willing to sacrifice some fresh figs to science, I could possible sleuth out the answer with control plants to what happened. But I don’t, so I’ll just keep enjoying and be thankful for the fresh figs — and keep a close eye on what’s going on.

Dondé Está la Salsa?

I have a lot of faith in natural systems (aka Mother Nature), but sometimes she gets things mixed up. Case in point relates to peppers. The pepper crop this year is excellent, mostly because I staked each plant, weeded well, and grew varieties that do well here (Escamillo, Carmen, Perperoncini, and, best of all for flavor and production, Sweet Italia). 

What can be done with excess peppers? Salsa, of course. 

But a key ingredient for salsa is cilantro, which enjoys cool weather both for germination and growth. Self-seeded cilantro plants were sprouting and growing all over the place a few months ago. The dried stems topped by BB-sized seeds is all that remains of them. Cilantro seedsThose seeds will drop and germinate in the cooler temperature a few weeks hence. But I need cilantro now.

With foresight, I could have collected and sown these seeds a few weeks ago. The plants would have bolted (put energy into flowers rather than leaves) rather quickly but repeated sowings would have kept me in fresh new plants.

Belatedly, I have sown those seeds. To speed germination, I soaked them, then planted them in seed flats I kept in the refrigerator for a day and then moved to a cool, shaded area. Optimum temperatures for germination and growing of cilantro is 50-85° F. As I write, the temperature is in the mid-90s.
 

Fig Redux, One Week Later, A Bummer

Yes, mealybugs are still not to be seen. But now I see closely related scale insects. And plenty of them. Fig scale
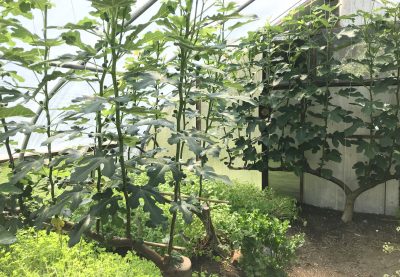
So I started the water sprays again, which have the potential problem of creating so much humidity and moisture that ripening figs rot. On the other hand, it might set back the scale, perhaps by knocking off ants, who “farm” scale. I also ordered a new predator, one for scale, Aphytis melinus.
 

Mulberries and an (a?) Herb

Mulberries, Still

I finally am getting to eat some ripe mulberries this year, and they were — and are — very, very good. The wait wasn’t because the tree was too young. And anyway, mulberries are very quick to bear fruit, often the year after planting. 

I got to eat fruit from my tree this year because resident birds have been kind enough to share some with me. Of course, it was not really kindness on their part. Illinois Everbearing mulberry fruit
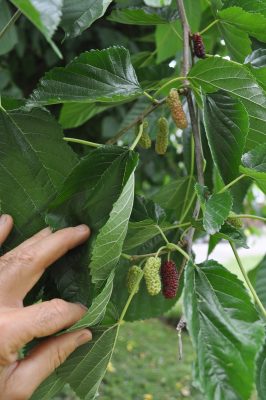
Birds also eat fruit for their juiciness, and the past weeks and weeks of abundant rainfall probably satisfied some of that need. The only other year I had plenty of mulberries — much more than this year — was a few years ago when 17-year cicadas descended upon here. All summer I awoke to their grating cacophony, but did feast on mulberries as birds feasted on the cicadas.

You might think it late in the season for mulberry fruits, which started ripening back in early July, to still be ripening. The variety name of my tree says it all: Illinois Everbearing. Not only is this variety everbearing, but it also has a very fine flavor, much better than the run-of-the-mill and ubiquitous wild mulberries whose fruit is usually too cloying. Illinois Everbearing’s sweetness is balanced with a bit of refreshing tartness.

Good as it is, Illinois Everbearing’s fruits cannot compare with that of black mulberry. The “black” refers to the species, Morus nigra. Illinois Everbearing is a hybrid of our native red mulberry, M. rubra, and white mulberry, M. alba, an Asian species that was introduced into our country about 200 years ago, liked it here, and mated with the native species. Black mulberry can only be grown in Mediterranean climates, so mine, in a large pot, bears only a handful of berries each year.

Some people contend that black mulberries adaptability is more widespread than mild winter climates. I have my doubts but I am going to graft a branch from my little tree onto some stems of some wild mulberries and see what happens. (The wild mulberries might either be white or red mulberries, or natural hybrids of the two; the color designations have nothing to do with the color of fruit a tree bears.)Illinois Everbearing tree

I’m happy enough with the long season, good flavor, and occasional harvest of Illinois Everbearing. Plus, it’s a pretty tree, and large, so the branches are now beyond reach of deer, who love to eat mulberry leaves.

I devote a whole chapter to mulberries, white, red, and black, in my book Uncommon Fruits for Every Garden.

Basil, Uh Oh

Bringing my eyes down from the dark mulberries to ground level, and walking over to the vegetable garden, I take a close look at this year’s basil. Hmm. Very slight yellowing of some of the leaves. Could it be  . . . ? Yes, turning over one of those slightly chlorotic leaves I see tell-tale purplish brown spores, indicating downy mildew disease.Basil downy mildew, lf upper

A relative newcomer to the garden scene, basil downy mildew (a different pathogen than cucumber downy mildew, grape downy mildew, etc.) arrived on the East Coast in 2007, made it to the West Coast by 2009, and to Hawaii by 2011. It hitchhike around on infected seed, infected plants, and infected leaves.

Basil downy mildew, leaf underside

Basil downy mildew, leaf underside

Some organic fungicides are allowed for controlling the scourge, but my basil mingles so intimately with other plants in the vegetable garden that I don’t consider that an option. Fortunately, other controls are feasible.

One thing would be to not mingle my basil so intimately with other plants. Sunlight is one nemesis of the mildew, as with most fungi. Better air circulation would also lower the humidity around the plants and speed drying of the foliage, also not to the liking of the mildew fungi.

Going one step further, Dr. Meg McGrath of Cornell University suggests growing basil in pots. Plants can be whisked under cover on cool nights, when dew threatens, or during rain or cloudy conditions.

Starting off with clean seed or plants would also limit infection. Not totally, though. Although the fungus does not overwinter in cold regions, given good (for the fungus) conditions, it can hitchhike up here over hundreds of miles.

Breeders are hard at work developing resistant varieties of basil, with some success. Among the resistant varieties are Amazel (shouldn’t the name be Amasil or Amazil?), Eleanor, Emma, Everleaf (Basil Pesto Party), Devotion, Obsession, and Thunderstruck. I’m growing Amazel and Everleaf this year. No sign of mildew on Amazel. Everleaf, this year, at least, has it as bad as my standard varieties.

None of the resistant mentioned varieties are immune to basil downy mildew, just resistant. So it pays to also give the plants a lot of sunlight and good air circulation, and consider pitted plants, for their mobility.

And Some Entomo . . . No, Etymology

Fun herb fact: The word “herb” was borrowed from the old French word erbe, which is why we don’t — and the British didn’t, initially — pronounce the h. Scribes in the 15th century, influenced by their knowledge of Latin, started using the Latin word herba. But still, no one spoke the h. Fast forward to the mid-19th-century and, all of a sudden, dropping h’s became a marker of low social class among the Brits, so they dropped them.

Summer Love

How Do I  . . .  er, Can Thee?

With apologies to E. B. Browning: “How do I store [as in ‘preserve’] thee? Let me count the ways. I store thee to the depth and breadth and height a Mason jar can reach . . . “ And in other ways.

Red, ripe tomatoes, the essence of summer. How to capture that essence for a dark, snowy winter day? A few ways: Let me count the ways.

Canning tomatoes can be a  complicated, drawn out process, or something quick and easy. In the heat of summer, I choose the latter, merely filling a large pot a half-inch of water and then whole tomatoes from which any diseased or unripened areas have been excised. Boiling down tomatoes
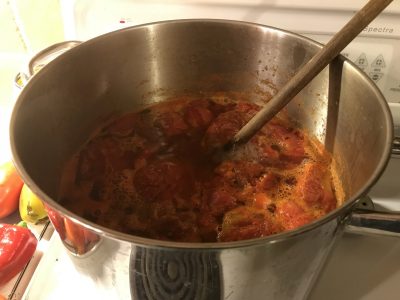
No de-skinning, de-seeding, or chopping. The pot is allowed to cool a bit after its volume has been reduced to one-half to two-thirds of the original volume.

Less than a minute with my immersion blender then homogenizes the works, readying the mix for canning jars that have been scrubbed clean — except for one more critical addition to each jar: 2 tablespoons of bottled lemon juice or 1⁄2 teaspoon of citric acid per quart of tomatoes. The reason for the lemon juice or citric acid is to make the mix more acidic. And the reason to make the mix more acidic is to prevent growth of the bacterium Clostridium botulinum which, you might guess from the name, causes botulism.

Tomatoes vary in their acidity. I actually bought a pH tester to test the acidity before adding the lemon juice or citric acid. The tomatoes tested at pH of 4.2. But tomatoes differ in their acidity, depending on variety (paste tomatoes are generally less acidic) and growing conditions; perhaps the next batch would not make the cut. So, just to make sure . . . 

Next, canning lids are put in a small pot and covered with water which was just brought to a boil. I fish out a lid with a pair of tongs and lay it in place atop a jar, then screw it down secure with the jar’s metal ring. The rings need to be tightened just enough to seat each lid against the glass but not so tight as to prevent escape of gases when the jar is heated, the next step.

I use a pressure canner, which speeds processing because less time is needed at the higher temperatures that can be achieved under pressure. Fifteen minutes at 10 pounds (which puts the temperature at 240°F) does the job. Forty-five minutes would be needed when canning with a boiling water bath, and that doesn’t include the time needed to get enough water boiling to be able to submerge all the jars.

I carefully remove jars after their allotted time and let them cool. Canned tomatoes
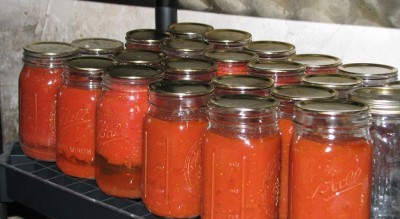
Once cool, pressing down on the the center of each lid lets me know whether that jar has sealed well. The lid should not move down when pressed.

Rich and Saucy

I failed to mention one more step early in my canning process, and that is the sorting out the San Marzano tomatoes. This variety makes the best-tasting sauce so we segregate it for single variety canning. In Italy, tomatoes canned with San Marzano variety tomatoes are specifically labelled as such. So are ours.

How Do I . . . er, Dry Thee?

As I wrote, with the help of E. B. Browning, “Let me count the ways,” plural. 

Years ago I pooh-poohed a friend’s suggestion to dry tomatoes, probably because he said eating them was “fun.” Then I tried drying some. They weren’t fun too eat but they sure taste good in winter, their intense flavor released as they are crumbled on salads or soaked in water and cooked with other vegetables. Not good on pizza, though; they burn.

Slices a quarter of an inch thick are good for drying. Layed on stacked trays in my dehydrator, with the temperature set at 130°F, the slices dry to leathery or brittle, depending on the ambient humidity, overnight.Drying tomatoes

Once dry, the slices are packed into canning jars with the lids screwed down tightly to prevent air from entering.

How Do I . . . er, Freeze Thee?

I haven’t yet finished “counting the ways.” One more way: freezing. All that’s needed is to cut any bad spots from the fruit and put them into a freezer bag.

The frozen tomatoes add yet another tomato-y flavor and texture for winter. To me, they’re more like fresh tomatoes than either the canned or the dried ones. Fresh-cooked, of course, not fresh raw. Fresh cooked or frozen fresh, cooked, lends a different flavor and texture than canned.

Just popping the fresh fruit into the freezer is also a way to preserve peppers. To me, though, the taste of frozen peppers are a far cry from the fresh summer ones no matter how they are used. But then, ripe, red peppers are one of my favorite garden vegetables, so the bar is high for them in any other form.

Plants I Like

From Ancient Egypt

King Tut is alive and well, very well in fact. I’ll cut to the chase: This particular King Tut is a variety of papyrus (Cyperus papyrus) that I planted a year ago in spring. Papyrus doesn’t tolerate temperatures down to freezing, so this far north King Tut is billed as an annual. But rather than let the King die in winter, I was so smitten by him that in autumn I moved him in his pot indoors to a sunny window. There he clung to life and, with warm, sunny weather, got growing again this past spring.

In contrast to regular papyrus, which grows 5 to 9 feet tall, King Tut’s claim to fame is that he’s a dwarf, billed as rising 4 to 6 feet high. My King Tut only gets about 3 feet high. King Tut papyrusAll papyrus have a very distinctive and attractive appearance. The base of the plant is a clump of grassy leaves from which rise tall, leafless stalks which are capped by grassy-leaved mopheads looking something like the ribs of an umbrella. A houseplant relative of papyrus, Cyperus alternifolius, is commonly called umbrella plant.

Many, if not most, problems with plants in general can be attributed to too much or too little water. King Tut (and umbrella plant) are very easy to grow because they love water up around their ankles. All the plant needs is a deep saucer in which the pot can sit, with the saucer kept full of water. Not that King Tut demands water around his ankles. It’s just that consistently moist soil is needed, which means close attention to watering or standing in a water-filled saucer.

King Tut grows very rapidly, so this spring I divided the one King Tut plant into two and potted each one up separately. I also cut back all the old stalks. Although I tossed them in the compost pile, I could have made them into sandals, a boat, paper, or any one of the other papyrus products of ancient Egypt.

A Nice Weed

A few weeds garner my respect and my affection. Over the past few weeks, spotted spurge (Euphorbia maculate) has become one such weed. Spotted spurge has mouse-ear sized leaves, each with a reddish blotch along part of its main vein, and the leaves line up in a very orderly manner along the stems. Euphorbia maculate, spotted spurge2
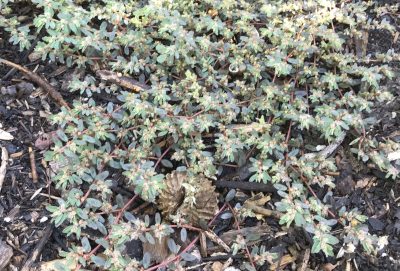
The definitive identifier for this weed is the way the stems spread out, flat, on top of the ground. In sun, no part of the plant rises more than a half an inch above ground level.

Mostly, I see spotted spurge growing in the wood-chip mulched paths in my vegetable garden. The amazing thing about this plant is the way it keeps sprouting in the paths. Even during the dry weeks of last June, spotted spurge kept sprouting. Not that it doesn’t also turn up following recent rains and in the irrigated, planted beds. I can’t help but respect a plant that can keep showing up under such adverse conditions.

Whenever I see the flattened stems, I reach down and pull it out, roots and all. My affection for this plant comes from the ease with which it is removed. The stems don’t form roots where they touch ground, as many other plants do, so grabbing the center of the clump gets rid of a square foot of weeds in one fell swoop. How satisfying.

Removing the plants is important. Spotted spurge is a summer annual that thrives in heat. Left alone, tiny flowers in each leaf axil give rise to tiny seeds that germinate through summer or, when weather warms, next year. It’s important not to dawdle in removing the plants because only a couple of weeks of growth are needed before young plants are old enough to flower and make seeds.

From Cosmos

I’m not usually a big fan of flower breeders’ new and wondrous creations, such as blue roses or tulips that look like peonies or peonies that look like tulips. That said, I’m quite enthralled with some cosmos I planted this spring that have been bred to look not very cosmo-ish.

What I’ve always liked about cosmos is their lack of pretension. The flowers are simple and sit singly atop tall stalks of sparse but feathery leaves. So along comes cosmos Rose Bon Bon. Cosmos, Rose Bon Bon
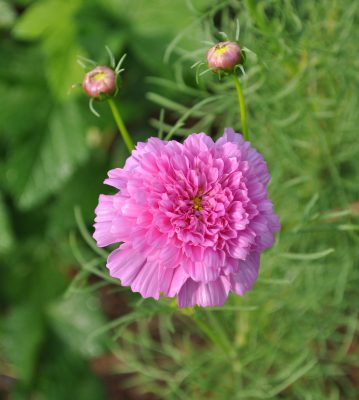
As a cosmos fan, I figured I’d try Rose Bon Bon in spite of the fact that the flowers are double, which means they have multiple rows of petals. More complex and, hence, less cosmo-ish.

Rose Bon Bon flowers, all of them soft pink, are beautiful. They’re still cheery, just like regular cosmos, frilly and cheery in this case. The name Rose Bon Bon notwithstanding, they do NOT look like roses.

In the Wild

Row, Row, Row My Boat, and Then!

Paddling down a creek — Black Creek in Ulster County, New York — yesterday evening, I was again awed at Mother Nature’s skillful hand with plants. The narrow channel through high grasses bordered along water’s edge was pretty enough. The visual transition from spiky grasses to the placid water surface was softened by pickerelweeds’ (Pontederia cordata) wider foliage up through which rose stalks of blue flowers. Where the channel broadened, flat, green pads of yellow water lotus (Nelumbo lutea) floated on the surface. Night’s approach closed the blossoms, held above the pads on half-foot high stalks, but the flowers’ buttery yellow petals still managed to peek out.

Soon I came upon the real show, as far as I was concerned: fire engine red blossoms of cardinal flower (Lobelia cardinalis). Coming upon this flower in the wild is startling. Such a red flower in such shade?

So many shade plants bear white flowers which, after all, are most easily seen in reduced light. Only twice before had I come upon cardinal flower in the wild, and both times the blooming plant was in deep, deep shade; it was a rare treat to see such a lively color in the shade.

Though the stream bank was not in deep shade, the cardinal flower was still a treat. And not just one cardinal flower but groups of them here and there along the way. Cardinal flower Black Creek
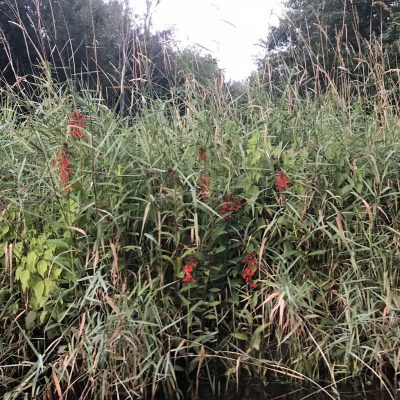
More than I have ever seen in the wild. (In Chanticleer Garden outside Philadelphia is a wet meadow planted thickly with cardinal flowers.)

Nature’s Hand

Two other landscape vignettes come quickly to mind when I marvel at natural beauty. 

The first are the rocky outcroppings in New Hampshire’s White Mountains; placement of these rocks always looks just right. In addition, the flat areas against the rocks and in rock crevices in which leaves have accumulated to rot down into a humus-y soil provide niches for plants. Among the low growing plants are lowbush blueberries and lingonberries.

Lingonberry in White Mountains

Lingonberry in White Mountains

Good job at “edible landscaping” Ms. Nature!

The other vignette was (one of many) in the Adirondack Mountains. Picture a clump of trees and a large boulder. Now picture those trees on top of the boulder, their roots wrapping around and down the bare boulder until finally reaching the ground on which the boulder sat. A scene both pretty and amazing.Tree roots and rock

But My Fruits and Vegetables are Better(?)

Mother Nature might have it in the landscape design department; not when it comes to growing fruits and vegetables though. There may be some disagreement here: I contend that garden-grown stuff generally tastes better. And for a number of obvious reasons.

In the garden, most of what we grow are named varieties, derived from clones or strains that have been selected from among wild plants, or have been bred. Named varieties generally are less bitter, sweeter, and/or more tender. Perhaps also high-yielding and pest-resistant.

In some cases, “cultivated” plants offer too much of a good thing. Humans long sought to sink their teeth into the sweetest sweet corn, harvesting ears at their peak of perfection and then whisking them into already boiling water to quickly stop the enzymatic conversion of sugars to starches. In the 1950s, a “supersweet” gene was discovered that quadrupled the sugar content of sweet corn — too sweet for me and and lacking the richness of an old-fashioned sweet corn variety such as Golden Bantam.

A nutritional case can be made against cultivated varieties of plants. Studies by the US Department of Agriculture have shown modern fruits and vegetables to be lower in nutrients than those tested 50 or so years ago. Have we excessively mined our soils of minerals? No. Breeding for bulk, along with pushing plant growth along with plenty of water and nitrogen fertilizer, has diluted the goodness in plants.

In Eating on the Wild Side Jo Robinson contends that breeding for sweeter and less bitter plants inadvertently selects for plants lower in many nutrients and phytochemicals.

All this makes a good case for growing more “old-fashioned” varieties, such as heirloom tomatoes and paying closer attention to how plants are fed.Heirloom tomatoes (Compost is all my vegetables get.) And perhaps focussing more on what food really tastes like. Does Sugarbuns supersweet really taste like corn. Or a candy bar?

And eat some wild things. Purslane is abundant and, to some (not me) tasty now. As is pigweed, despite its name, a delicious cooked “green.” I mix it in with kale and chard for a mix of cultivated and wild on the dinner plate.

Watering — in the Rain?

Why Are Pots Thirsty?

With recent rains of more than 3 inches over the last couple of days, you’d think that the last thing on my mind would be having to water anything. But you’d be wrong. Plants in pots — and I have plenty of them, some ornamental and some tropical and subtropical fruits — don’t get the full benefit of all that water.

Potting soils are, and should be, more porous than any garden soil to maintain good aeration within the confines of a pot. About a one inch depth of water is needed if you’re going to thoroughly wet a 12 inch high column of potting soil. If a flower pot is, for example, only 6 inches high, only 1/2 inch depth of water would be needed; and so on.

A lot of my potted plants didn’t drink in that 3 inches of rain that fell over the past couple of days. Some of the plants are shielded from the sky by overhanging house eaves. And the leaves of other plants — excepting amaryllis and calla lily which have strappy, upright leaves — deflect water that could have fallen into the pot.

If you don’t believe me, tip a potted plant out of its pot following a heavy rain, and check how dry the soil is down deep within the pot. Even easier, purchase an inexpensive moisture meter whose metal probe, when slid into the soil, reports moisture deep down.

(Sort of) High Tech Solution

When I first started gardening, I knew I would eventually move from the cottage I was renting. My mini-orchard was in pots and travel-ready. I kept that “orchard” watered by hand, which wasn’t so bad. The problem was that in the heat of summer, some plants needed their thirst quenched twice a day, which kept me from leaving my home for more than a few hours.

These days, technology has come to the rescue.

The first techno-solution has been drip irrigation. A simple, battery-operated timer at a spigot sends out water on a twice daily schedule to banks of potted plants. Also at the spigot, following the water line right after the timer, are a filter and a pressure reducer. automatic watering, pots
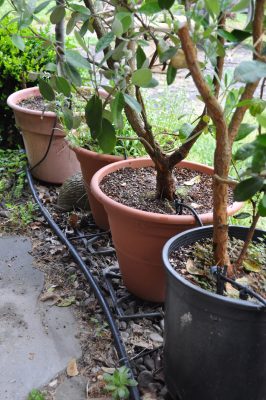
The fittings for wending water through tubes around corners and up into pots are low pressure fittings; the pressure lowers water pressure to a mere 20 psi.

Once the 1/2 inch main line makes its way to a group of potted plants, a 1/4 inch plastic line, plugged into the main line with, of course, a low pressure fitting, carries the water up to the ground surface of each pot.

If the water merely exited at this point, pots closer to the water source would be under higher pressure and so get more water than those more distant. And pots that were shorter or at lower elevation would likewise get more water. So I slid an emitter, that reliably puts out 1/2 gallon of water per hour, no matter what the incoming water pressure, on the end of each 1/4 inch line.

Capillarity to the Rescue

I have a number of lowbush blueberry, lingonberry, hollyhock, carnation, and blazing star plants growing in pots 4-inches and smaller. I’ll eventually plant them out in the garden. Until then, the plants need regular watering Snaking 1/4 inch tubes to all these pots would create a tangled nightmare.

Enter capillary mat watering. All these smaller pots sit on a mat of absorbent fabric spread over a tray held a couple of inches above a pan of water. Irrigation, capillary mat
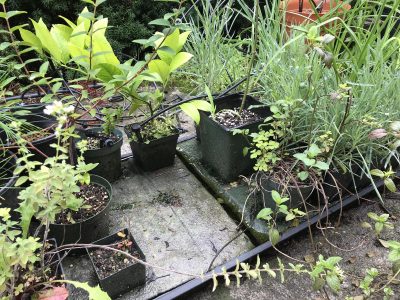
Part of the capillary mat dips into the reservoir of water, which gets sucked up into the mat and then sucked up into the potting soil through the drainage holes in each flat-bottomed plant pot.

I periodically have to remember to add water to the reservoirs. Or, rather, “had to” because I ran a few of those drip tubes into the reservoirs, enough to keep them topped up with water to keep pace with plant use.

And a Presentation of Interest

I’ll be doing a presentation on August 18th on THE SCIENCE, ART, FUN, AND TASTY FRUIT OF ESPALIER in Copake Falls, NY. The presentation will explore the theory and the practice behind the pruning and orienting of branches to create an espalier. This decorative, usually 2-dimensional form, offers high yields of high quality fruit on a plant or plants that can be free-standing, decorating a wall or fence, or even creating the fence itself! I’ll go over which fruit plants work best and the branch pruning and orienting techniques that create and maintain espaliers that look good and yield especially delectable fruit. For more information, go to https://awaytogarden.com/8-18-open-day-plant-sale-lee-reich-espalier-talk-drip-irrigation-workshop/Asian pear espalier flowering

For when the weather turns dry, this season, next season, and on.. .

Drip workshop ad, 2018

Also on that same date, at the same location, in the morning . . . a presentation on:

THE SCIENCE, ART, FUN, AND TASTY FRUIT OF ESPALIER

Come and explore the theory and the practice behind the pruning and orienting of branches to create an espalier. This decorative form offers high yields of high quality fruit on a plant or plants that can be free-standing, decorating a wall or fence, or even creating the fence itself! Learn which fruit plants work best and the techniques to create and maintain an espalier.

Pear espalier


Uncommon But Uncommonly Delicious

Some (Only) Like It Cooked

Before the black currant (Ribes nigrum) season totally winds down, I suggest you try to get a taste of the fresh berries. Do so if you’ve never tasted them. And do so even if you have tasted them and found them bad tasting.

Why taste them if you haven’t? Because if you end up liking them, they’re easy to grow and nutritious — super-rich in vitamin C (2 to 3 times as much as oranges) and other goodies.

Belaruskaja black currants

Belaruskaja black currants

Deer don’t particularly like the very aromatic stems and leaves, and birds — even my ducks — ignore the berries. They are among the few berries that thrive and bear well even in some shade. They have few insect or disease problems.

And the berries taste good, very good, some varieties better than others. My “currant” favorites are the varieties Belaruskaja and Titania, either of which I recommend tasting if you’ve previously had a bad gustatory experience with black currants.

Then again, black currants have a strong flavor. Not everyone has to like them. What Liberty Hyde Bailey, the “father of American horticulture,” wrote about apples in 1922 would apply equally well to kinds and varieties of fruits, including black currants: “Why do we need so many kinds of apples? Because there are so many folks. A person has a right to gratify his legitimate tastes.“

Then again — again — just about everybody likes black currants concocted into a jam, a pie, a syrup, or an alcoholic drink (as in casis). I like mine straight up, fresh in summer, frozen and defrosted in winter.

They Were Against the Law!!

You may have heard of some disease to which black currants, and red currants and gooseberries, are prone, and was responsible for their being illegal to grow. The disease is white pine blister rust, a fungal disease that needs two different plant hosts to survive. One host is white pine, a common forest tree. And the other is a susceptible species of Ribes, which includes currants and gooseberries.

White pine blister rust disease entered the U.S. from Europe in the early 20th century. Because white pine was such an important timber crop, a federal ban was enacted to control the disease that not only made it illegal to plant currants and gooseberries, but also sent crews scouring forests and gardens from which to rip plants out of the ground.

Alas, the ban was not very effective. Wild plants were everywhere; when conditions were suitable, disease spores could be carried hundreds of miles. And cultivated varieties of gooseberries and currants proved not to be very susceptible to the disease. The federal ban was lifted in the 1960s.

Black currants were definitely a culprit, but in the latter half of the 20th century, three varieties were bred in Canada that were immune to the disease. I grew one of them, the variety Consort, and thought it tasted good. Other people disagreed. 

A number of other varieties have since been developed that are resistant to the disease. The previously mentioned Belaruskaja and Titania are among them. I dug up my Consort plants years ago and put in Belaruskaja and Titania, and now have to share my berries.

Small Berry, Powerfully Good Flavor

I hope everyone else is enjoying at least some home-grown berries this time of year as much as I am. Berries generally are easy to grow and taste much, much, much better backyard grown than purchased because you can grow the best of them and pick them when dead ripe.

Perhaps the most perishable — and one of the most delicious — berry is the alpine strawberry. They’re a different species from common strawberries (Fragaria vesca rather than F. X ananassa).

White and red alpine strawberries

White and red alpine strawberries

They’re also quite small, with big ones about the size of a nickel. But they pack a lot of flavor and fragrance into that small package, and do so all summer long.

Problem is that birds eat the berries as soon as they’re just beginning to blush. If picked then, the flavor is akin to cotton soaked in lemon juice. Flavor and aroma don’t develop until they’re dead ripe.

So I grow WHITE alpine strawberries. Birds don’t see them and I can wait until they turn a creamy white color and the seeds darken.

3 pots of white alpine strawberries

Alpine strawberries also fruit well in pots

At that point of ripeness, the berries are very, very soft, not something that could be picked for later sale, let alone shipping. Everybody who has tastes them exclaims “wow,” or something similar.

(If you’re hungry for more growing and historical details, alpine strawberries and black currants each get a chapter in my book Uncommon Fruits for Every Garden.)

Upcoming workshop


Drip workshop ad, 2018