GOOD LOOKS, GOOD TASTES

Kale’s Delights

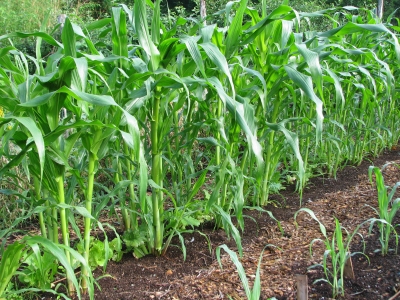
I’m lucky enough to have a French window of two big, inward swinging panels out of which I can look over my vegetable garden every morning. Oddly enough, the garden bed that is catching my eyes these mornings for its beauty is the bed of kale plants.
Kale plants
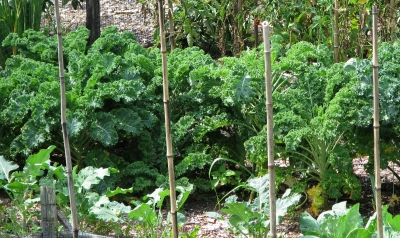
No, it’s not a bed of one of the so-called colorful, ornamental kales, not even a reddish kale such as Russian Red. I mostly grow just plain old Blue Curled Scotch kale, which is no more bluish than any other kale, or any other member of the whole cabbage family for that matter. What catches my eye each morning is the frilliness of the leaves and how neatly they line up along the stalk. It’s pretty.

My vision could be swayed by the fact that kale is such a healthful vegetable, being especially rich in calcium and vitamin A. Or the fact that it’s so easy to grow. I sowed the seeds in March, put out transplants in early May, have been harvesting it since the end of May, and will continue to do so probably well into December. (Another bed of kale, which I seeded right out in the ground at the end of May, is also looking good.)

Kale is unlike other members of the cabbage family. Broccoli is past its prime once buds open into flowers. Cauliflower is over the hill once the florets sidle apart from each other. Cabbage splits if left too long. Brussels sprouts needs sowing in early spring but aren’t ready for eating until touched by frost at the other end of the growing season.

Kale doesn’t have a small window of time for optimum harvest; actually, no window. It just keeps growing taller, with more leaves, still tasting good at all stages.

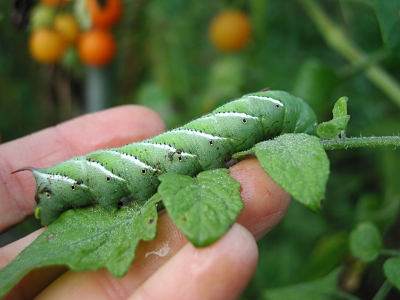
The only thing kale needs protection from is rabbits and woodchucks, like most vegetables, and from the various cabbage worms. One or two sprays of the biological pesticide Bacillus thurengiensis (sold under such trade names as Thuricide and Dipel) is all that’s needed for the worms, or nothing, especially in a year like this when worms were pretty much absent.

What more could I ask for from a plant: flavor, health, and beauty?

Free Kisses

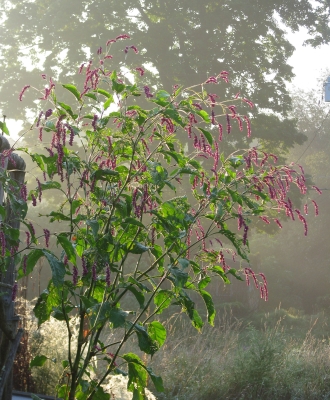
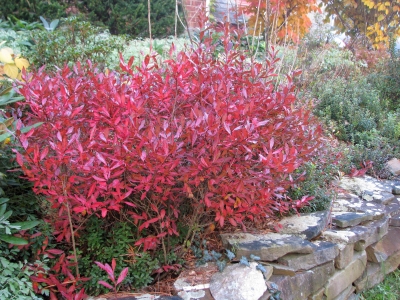
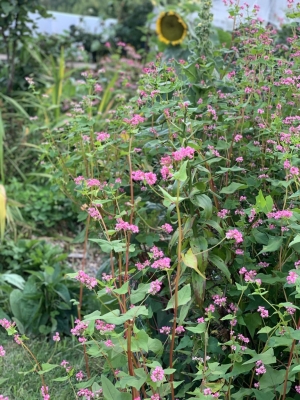
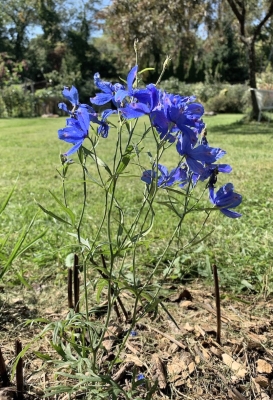
I take it upon myself to personally promote the revival of an old-fashioned flower: kiss-me-over-the-garden-gate (Polygonum orientale). It’s big, it’s beautiful, and it’s distinctly old-fashioned.

If you know the weed called smartweed, you have a hint of what kiss-me-over-the-garden-gate looks like. Smartweed is a trailing weed whose flowers look like small droplets of pink dew at the ends of its stems. Kiss-me-over-the-garden-gate looks like smartweed on steroids, with “droplets” the size of bb’s. Rather than trailing, the plant rises with robust arching stems to more than seven feet high. It’s just the height and form for growing next to a garden gate, which is where my plants grow.
Kiss me  over the garden gate
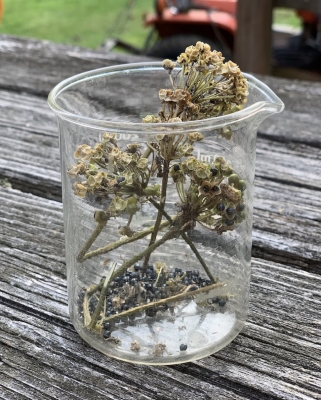
Kiss-me-over-the-garden-gate is a little hard to get started because the seeds germinate slowly and erratically. My plants thankfully lived up to their reputation of being self-seeding annuals, and those self-seeding plants come up more robustly than the few coddled seedlings I used to plant out each spring.

It’s self-seeding habit is sufficiently restrained for me. All I do each spring now is to weed out the few extra plants, as well as those that stray too far from the garden gate.

Ever Green Onions

For many years, in addition to starting onions from seed (sown in February!), I also went the more conventional route and bought a few “sets” for planting. Sets are those small bulbs that grow first to become scallions, which are mostly leaf, then go on to fatten into bulbs that can be harvested and stored.
Vegetable face
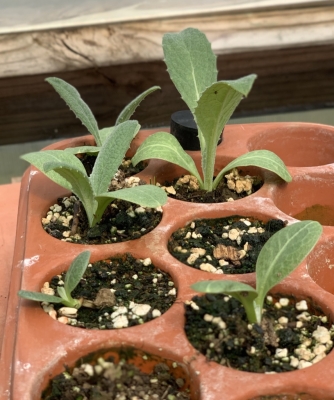
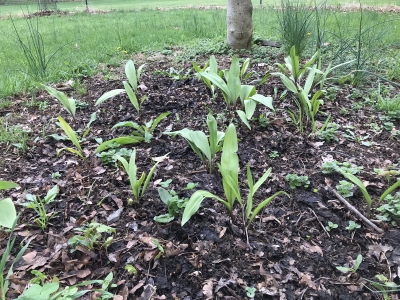
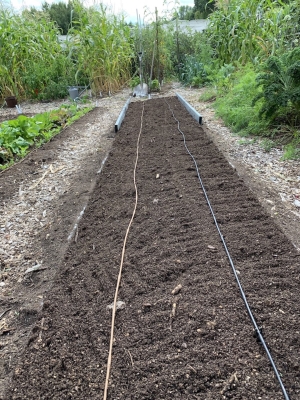
This year, instead of planting sets for scallions, I grew bunching onions, yet another type of onion, one that never ever makes fat bulbs. During the growing season, slender new scallions are produced around the bases of older ones. Left outdoors, they will perennialize and multiply by offsets year after year. 

I set out transplants back in early summer grown from seeds sown in spring. Even now, these scallions still look like scallions, some larger, some smaller, depending on how crowded they are to each other. No matter their size, they’ve all been flavorful right through summer and on into fall, maintaining all the time their scallion character.

SOW NOW?

Next Year’s ‘Chokes

Ahh, such a leisurely time of year to sow seeds. And for some of them, I don’t care if they don’t sprout for months. You might wonder: Why sow now; why so laid back?

I’ll start with artichoke, from whose seeds I did want to see sprouts soon. And I did. The seeds germinate readily. Right now, a few small seedlings are growing, each in its own “cell” of a seed flat, enjoying the cool, sunny weather.
Cynara, artichoke seedlings
Artichoke is a perennial whose natural life cycle is (usually) to grow leaves its first year, then edible buds its second year and for a few years hence. Especially in colder regions, artichokes can sometimes grown from seed like annuals, with a wrinkle.

To make that transition from growing only leaves to growing flower buds, the plants need to get vernalized, that is, to experience some winter cold. Except that winter cold here in the Hudson Valley (and everywhere else colder than Hardiness Zone 7) will do the plants in. So we cold-climate gardeners need to trick the plants into feeling like they experienced winter cold, just not our winters’ depth of cold.

When growing artichokes like annuals, from seed sown in spring, you make “winter” by exposing the young, growing seedlings to cool, but not frigid, temperatures (32-50°F) for a couple of weeks. The problem with this method is that the plants are fairly small when they get this signal that “winter” is over. In my experience, these small plants make commensurately small buds for harvest.

I’m lucky enough to have a greenhouse that gets very cool in winter, but not below freezing. My young artichoke plants will continue to grow very large though the very extended “autumn” weather in the greenhouse. In midwinter, they should get plenty of chilling. Come spring, after frost danger is past, I’ll plant out the large plants to, I hope, make large, fat buds.

I got this idea from growing cardoon, which is essentially the same as artichoke, except it’s grown for its large leaf stalks.
Large cardoon plant
Or it’s grown as a flower, in which case it would require the same conditions as artichoke to make flowers. I don’t like cardoon as a vegetable but do like it as a flower, so last year, around now, I sowed cardoon seeds and grew the seedlings in the greenhouse just as I’ve described for artichoke. The result was big, fat, beautiful, blue flowers. I expect the same, except I’ll harvest the artichoke buds before they open.

Actually, I grew two cardoon plants, and for some reason one of them grew only leaves all summer, and is still growing them, the olive-green leaves each rising from ground level in a four-foot-high-whorl.

More Hucks’

A couple of months ago I collected huckleberry seeds from my huckleberry plant and sowed them. As expected, they still haven’t sprouted. They weren’t expected to sprout, at least not until they were “stratified.”

Like artichoke, huckleberry (Gaylussaccia baccata) needs to feel that winter is over, in this case before its seeds will sprout. Stratification, as this cold exposure is called, prevents small seedlings from being killed by winter cold after sprouting in late summer or autumn.

My huckleberry plant in fall

My huckleberry plant in fall

Again, it’s a certain duration of cool (32-50°F) temperatures that do the trick. Under natural conditions, these chilling requirements are fulfilled in late autumn and/or in spring. In this case, colder temperatures would do no harm, but would not put any hours into the “chilling bank.” Once the “chilling bank” has been filled, the seeds await warm enough temperatures to sprout.

(For more details and wrinkles about seed germination, see my latest book, The Ever Curious Gardener: Using a Little Natural Science for a Much Better Garden.)

The pot of huckleberry seeds has been sitting outdoors, covered, since they were sown. If I want earlier sprouting, I’ll bring the pot into the greenhouse in winter. 

Ramping Up

I collected seeds from my ramp plants about a month ago with an eye to increasing my holdings. You guessed it: Ramps also need cold. But given mere stratification, the seed will not germinate. The behavior of ramp seeds is a little different from huckleberry seeds in that ramp seeds have a double dormancy.
Ramps seed heads
Roots need to grow before the shoots will sprout. That first stage requires a couple of months or so of warmth. Only after then can the second stage, shoot growth, begin, except that won’t occur until after a stratification period, with cool temperatures, again between 32-50°F. 

Under natural conditions, ripe ramp seeds get their warm period before winter sets in and then are ready to sprout in spring. But further north, where seeds ripen later, that first stage, to get root growth underway, is delayed until the summer after the seeds drop. In that case, sprouts don’t poke above ground until their second spring.

I don’t want to wait that long so I sowed my ramp seeds in a seed flat which I’m keeping in a warm place for a couple of months. After that, I’ll move the flat to cooler temperatures. And then, come spring, sprouts — I hope.

My ramps planting

My ramps mother plants

TWENTY-TWENTY FORESIGHT

North Vegetable Garden

I’m stepping outside this sunny afternoon for a walk around the farmden, pad and pen in hand to evaluate some of this season’s goings on to make notes for next season. Not that the season is anywhere near over yet. I expect to be out and about with pitchfork, harvest basket, and garden cart at least into December. But no surprises are expected at this point.

Starting in the north vegetable garden: tomatoes. Over the years I’ve honed the number of varieties here from too many to our half-dozen or so favorites.

Valencia tomato

Valencia tomato

The goal is top-notch flavor and reasonable productivity. San Marzano, which is very productive, might taste like cotton fresh but it’s a must for the best-tasting cooked tomatoes. The San Marzanos get their dedicated canning jars, but also good canned is Blue Beech and, great for fresh eating also, are Amish Paste and Anna Russian.

Three more, mostly for fresh eating next year, are Paul Robeson, Belgian Giant, and Valencia. Valencia has year after year proven to be a very good, very beautiful, and productive tomato. Pretty also, round, smooth, and pale orange. Cherokee Purple hardly produced this year, and hasn’t in years past, so it’s scrapped from the list for next year.

I consider Sungold to be the best-tasting cherry tomato, and it’s still bearing a daily abundance of persimmon-orange fruits. I put in 8 plants; next year, I’ll plant a few more.

That makes a total of only seven tomato varieties — unless someone twists my arm into trying any other variety.

I’ll try for a repeat abundance of peppers next year by again growing Carmen and Sweet Italia.

Italian Sweet peppers

Sweet Italia peppers

Sweet Italia tastes better but Carmen bears a little better, especially now. The non-hot hot pepper Habenada, is billed as having hot pepper flavor minus the hotness. More like no hotness and no flavor, a no-go for next year.

South Vegetable Garden

Walking over to the “south garden,” the highlights this year were cauliflower, beans, and squash. Cauliflower is allegedly a challenge to grow. I don’t like it so grew it just for the challenge, and because Deb likes it. I was successful, and she can eat it all.

Blue Lake and Kentucky Wonder pole beans keep pumping tender new beans, as pole beans are wont to do. Or is it Blue Lake and Romano? Or Kentucky Wonder and Romano? The row label is buried deep in a wall of foliage so I won’t know until the end of the season. Pole beans
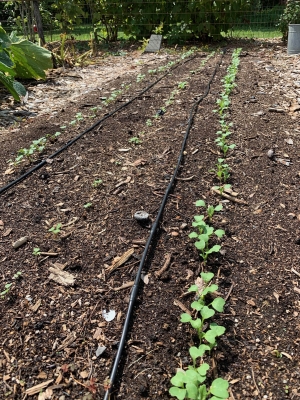
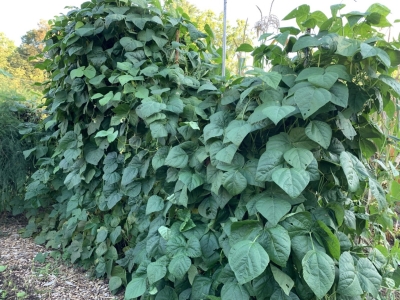
I guess two plants per pole, with poles about a foot apart, is too crowded. Next year: one plant per pole.

Pole beans begin bearing late so I also grow bush beans (bush Blue Lake and bush Romano), which peter out after a couple of weeks but yield an early crop for the freezer. I usually put in a second planting also, which is — note for next year — not needed. We didn’t have to harvest any of them because the pole beans kicked in soon enough.

It’s been a banner year for winter squash. I usually plant squash out in the meadow in the cleared strip of land between the dwarf apple trees. And usually, deer or my poultry eat the vines or the fruit so the harvest is usually nil. This year I planted squash in the rich soil along and inside the back fence of the south garden, which backs up to the poultry run. The squash climbed up and over the fence and onto the fenced roof of the run; now there’s plenty to harvest, perhaps too many!Winter squash on poultry run

South Vegetable Garden

Two flowers were standouts this year: On a whim I purchased red buckwheat seed from Baker’s Creek (www.rareseeds.com). With no place special in mind about where to plant it, I ended up sprinkling the seed in a bed just outside the north vegetable garden.
Red buckwheat
For the past couple of months it’s been a 4-foot high cloud of pale red beauty, which, along with how easy it is to grow, earns it a place in next year’s garden. But where?

One other flower stood out also, delphinium. Not a five foot spire of pale blue — I also have them, the Pacific Giant hybrids — but a spire less than two feet tall with dark blue flowers.
Delphinium, Blue Mirror
It’s Blue Mirror Chinese delphinium (www.reneesgarden.com) and it surprised me by blooming its first year from seed. Let’s see how perennial this perennial turns out to be. Around here, its giant cousins typically die out after a  couple of years.

All in all, it’s been an excellent growing season. Spring frost hazard was minor for tree fruits. Rainfall and sunshine were balanced well. Pest problems were minor. Pears are still challenging to harvest at just the right moment so that they can ripen indoors to that delectable window between underripe grassy and overripe sleepy. I did get Concorde at the right moment this year. The ripe fruits are delectable, combining some of the smooth buttery sweetness of Magness pear along with a dash of vanilla.

SOME THINGS FOR SOME SENSES

Visual Delight, and some Aroma

I once grew a rose, Bibi Maizoon, that I considered to be as close to perfection as any rose could be. Its blooms, that is. They were cup-shaped and filled with loosely defined row upon row of pastel pink petals, nothing like the pointed, stiff blossoms of hybrid tea roses. Completing the old-fashioned feel of Bibi Maizoon blossoms is the flowers’ strong, fruity fragrance.
Bibi Maizoon rose
(In case you don’t know who Bibi Maizoon was, she was a member of the royal family of Oman. The Bibi Maizoon rose was bred by British rose breeder David Austin.)

The bush itself was as imperfect as the blossom were perfect. Where to begin? For starters, the thin stems could hardly support the corpulent blossoms. Couldn’t, in fact, so the blossoms usually dangle upside down. Upside down blossoms were not that bad because I considered Bibi best when cut for vases indoors to better appreciate her rare appearances and fragrance.

Top those deficiencies with the fact that Bibi Maizoon was also only borderline cold hardy in my garden and you would rightly guess that I no longer grow this rose.

I haven’t abandoned David Austin roses. I generally like them for their old-fashioned look: the bushes are, well, bushy and full; the blossoms have softer colors than those of traffic-stopping hybrid tea roses; and they are disease resistan and strong-growing.

I’ve previously praised the variety L. D. Braithwaite for its almost nonstop, dark red blossoms, red tinted leaves, and ability to laugh off any amount of cold. Three other varieties — Golden Celebration, Lady of Shallot, and Dame Judi Dench — came into my garden in the last year, their blossoms with varying degrees of yellow, the first a pure golden yellow, the second apricot-yellow, and the third apricot orange. Delicious. They all seem, so far, near-perfect.

Golden Celebration rose

Golden Celebration rose

Lady of Shallot rose

Lady of Shallot rose

Organoleptic Delight, and also Beautiful

Ellison’s Orange is as unknown to most people as is Bibi Maizoon. It’s an apple, an old and very delicious apple, and, oddly enough, ripening right now. Everywhere else I read that this apple is supposed to ripen later in September and on into October, yet every year my Ellison’s Orange fruits ripen about this time of year.

Like Bibi Maizoon, Ellison’s Orange has its good and bad sides. On the plus side, it bears very well and at a young age. It also seems to be somewhat resistant to scab and cedar apple rust diseases, contradicting other sources on this point also. And what a beauty the fruit is, with its orange blush over a yellow background.

For me, the downside of this variety is the absolute necessity to pick it at just the right moment. One day an apple seems puckery underripe; the next day it might be sleepy and soft. If I harvest very carefully, I catch an apple at its delectable best, which is sprightly with an intense flavor that hints of anise seed.
Ellison's Orange apple
I made my tree from a piece of stem whose cells trace back over a hundred years, to the garden of a Reverend Ellison in Lincolnshire in the east of England. The parents of the reverend’s new apple weren’t lightweights. One parent, Cox’s Orange Pippin, the king of British apples, has an intense flavor that sometimes hints of anise seed. The other parent, Calville Blanc, an old French apple popular in the court of King Louis XIII, has a spicy flavor with just a hint of banana. No wonder Ellison’s Orange tastes so good – as long as I catch it at the right moment.

Another Tasty Delight

If you buy corn at a farmstand or market these days, no need to have boiling water ready, as gardeners did in the past to stop enzymes from starting the conversion of kernels from sugary sweet to starchy bland. Two genes incorporated into modern corn varieties dramatically slow this flavor decline. They also ratchet up the sugars, making modern corns supersweet to begin with.

Call me old-fashioned, but my favorite variety of sweet corn, the only variety that I grow, is the old variety Golden Bantam, which lacks those modern corn genes. Although not nearly as sweet as modern hybrids, Golden Bantam has a very rich corny flavor with – to some tastes — just the right amount of sweetness.

 Golden Bantam, a hit since 1906

Golden Bantam, a hit since 1906

Golden Bantam was introduced into the seed trade in 1902 by W. Atlee Burpee Company, who got their original 2 quarts of seed from New York farmer William Coy, who had tasted and enjoyed eating some ears at his cousin’s house in Massachusetts. Long story short: Everyone fell in love with Golden Bantam and it became the most popular corn of its day. An article in The Boston Transcript of 1926 states that “In the twenty-four years since [1902] it has made more friends than anyone else could make outside the movies. Which proves that popularity does sometimes follow real merit.” It’s an odd way to compliment but you get the picture.

Golden Bantam pre-dates hybrid varieties, the latter of which, in addition to other characteristics, ripen very uniformly. In a backyard garden, a whole bed of corn ripening at once isn’t necessarily a plus. I want to eat some corn every day, with a little extra each day for freezing.
Corn hills
My four beds of corn, the first planted in mid-May (around the date of our last-killing frost of spring)  and the subsequent beds staggered every two weeks, provides just that. We’ve eaten corn almost every day since each mid-August and Golden Bantam shows no signs of slowing down or boring us.

Interesting and Fun

Interesting, But I Could Do Without It

Out doing stuff in the garden, I sometimes wonder: What’s fun about gardening? What’s interesting about gardening?

European hornets are interesting. My first encounter with them — large, intimidating looking hornets with fat, yellow and black striped bodies, was a few years ago when I saw it feeding on kitchen trimmings as I was about to add more to the compost pile.  
European hornet in compost pile
The thought of a sting from this brute seemed horrendous; I learned, though, that they’re not particularly aggressive and their sting belies their ferocious look. The menacing-looking brute that entered the schoolyard turned out to be a pretty nice guy.

My next significant encounter with European hornets was this week, as I was gazing up into the branches of my plum tree admiring the ripe, red plums, ready for harvest. Reaching up and picking a fruit left me in hand with hardly more than the shell of a fruit that had been eaten out from the inside via a large hole chewed on the far side. In another fruit, I saw the culprit — a European hornet — at work. Lots of plums were being destroyed, as well as near-ripe apples.
Apple being damaged by European hornet
How interesting (and unfortunate). Now, what to do. Deb immediately suggested bagging the remaining fruits. I had a stock of “Japanese fruit bags” purchased many years ago and within the hour, all remaining apples a plums were harvested, if sufficiently ripe, or bagged.
Apples in Japanese bags
As for next year, perhaps European hornets will, as in past years, no longer be troublesome. Perhaps I’ll try trapping them; a research paper showed that they were attracted to funnel traps baited with a mix of equal parts glacial acetic acid and isobutanol. I’ll watch and wait.

Interesting, and Good

Also interesting (and this time fortunate) was the activity of local squirrels this year. Squirrels are particularly fond of peaches and plums, especially early in the season when fruits are dime-size. Not ever here, though. Good. But they are also particularly fond of my hazelnuts. Left to their own devices, they will strip the plants clean.

Over the years I’ve developed a multipronged approach to keeping squirrels at bay, usually, but not always, with success. This year, the hazelnuts were totally spared. Why? Was it my deterrents?

Now that I think of it, birds also acted out of character here this year. They usually strip every fruit from the Illinois Everbearing mulberry tree and the gumi bush. (My blueberry bushes sit within the Blueberry Temple, protected by bird netting.) This year birds again got most of the mulberries but left plenty of gumis for me.

The only time birds left all the gumis and mulberries for me was the back in 2013, the summer of the 17-year cicadas.  Birds evidently relish cicadas more than my fruits. 

Compost Fun

So what is predictably fun about gardening? Yesterday’s spreading of compost, that’s what. 

The first of four beds of sweet corn had been harvested so I prepared the bed for an autumn harvest of “greens.” For starters, I chopped corn stalks off a couple of feet above ground level, then chopped them into smaller pieces in the garden cart. Digging around the base of each hill of plants was enough to sever the largest roots and allow the stalks to be tugged out of the ground and then also to the cart. I lightly raked off any remaining debris from the bed, pulled weeds, and then they went to  . . . guess where? All this was added to a bin containing a growing compost pile.

Near that bin was another bin, a “finished” bin of dark, crumbly, and sweet-smelling (well, not sweet, but pleasantly fragrant) compost. Into the cleaned out cart it went.

Back in the garden, I demarcated the edges of the old corn bed with a line of limestone and laid a metal 2 by 4 along each edge as a guide. Into the bed went enough compost for a leveled 1-inch depth. That amount of compost, in addition to smothering small weeds, letting rainfall percolate gently into the soil, maintaining moisture in the soil, and providing food and lodging for beneficial soil life, will provide all the nourishment vegetables in that bed will need for a whole year hence.
Corn bed, composted
I firmed the compost by patting it with the back of my 6-pronged pitchfork creating what I, at least, thought was a nice pattern on the surface, perhaps inspired by a photo I’ve seen of a zen monk raking the gravel garden at the Ryōan-ji monastery in Japan. Final dressing on the bed was lettuce transplants, started about a month ago and ready to pop into the compost-dressed ground.
Corn bed composted and planted

Toad in new bed

The toad liked my bed also.

Finally, I stood back and admired my work. What fun, and that bed is (to me) a thing of beauty.

Mmmmmmmm

Genetics, Timely Harvest, and ?

As I led my nephew Jeff, his wife, and their two kids around the garden a couple of days ago, I plucked fruits and vegetables here and there for them to sample. They could compare them with what New York City, where they live, has to offer. They were blown away by the flavors here.
Delectable fruits & vegetables
Okay, I cheated a little. They got to sample some of the best of the best: figs so soft they were drooping from their stems, white alpine strawberries, Sungold cherry tomatoes, Golden Bantam sweet corn, and Kentucky Wonder green beans, all picked on the spot and at their peak of perfection. The Golden Bantam corn, you won’t find that offered for sale pretty much anywhere these days although it was the standard of excellence in sweet corn 100 years ago. The white alpine strawberries (Pineapple Crush) are too small and too soft for anyone to market commercially.

But genetics isn’t the whole story. Timely harvest is as important. Commercial considerations aside, it takes a certain skill to know just the right moment to do the deed.

With some plants, especially vegetables, timely harvest is easy. You pick such vegetables as lettuce, beans, and okra as soon as they’re big enough to suit you. You pick tomatoes when they’re red, which is also when I pick sweet peppers; red peppers taste quite different and, to me, a lot better than green peppers.

I haven’t grown eggplants that much over the years. This year they are particularly abundant and I’m still learning how to pick them. Full size? Glossy?

Sweet corn can also be tricky. It took me a few years to get the knack of picking it at its best. I first look for dried up silks and then, taking a tip the vegetable extension specialist at the University of Wisconsin passed on to me many years ago, I wrap my fingers around the ear and feel for fullness. That’s when it’s time to snap the ear down and off the stalk. Gauging that fulness does take practice.
Golden Bantam sweet corn, non-hybrid

Test for Ripeness

Fruits are a little trickier than vegetables, especially some fruits. Easiest of all are raspberries and blackberries. Tickle the clusters and let the truly ripe ones drop off, as they are wont to do, into the palm of your hand. Too many people tug at blackberries to get them off the plants; flavor suffers. Blueberries are similar to blackberries in that color doesn’t tell of full ripeness; the tickling method does.
Black raspberry fruit
I grow a number of varieties of two vining fruits: grapes, of course, and hardy kiwifruits. The kiwifruits, which will begin ripening in a couple of weeks, retain their fresh, green color right through ripeness. What they do do when ripe is to soften. But not all together. Fortunately, when sufficiently mature on the plant, these fruits can finish ripening after harvest. As soon as the first kiwis ripen, I pick them all. They ripen to perfection in a few days at room temperature, longer under refrigeration.
Hardy kiwifruit
Blue or red grapes seem ripe when they turn their final color. Ripe for commercial purposes perhaps, but not perfectly so. When truly ripe the whole bunch will snap easily from the cane to which it is attached. I sometimes leave the bunches (the ones I enclosed in paper bags in early summer) even longer and, to a point, their flavor just gets better and better.
Edelweiss grape
Most fruits, in fact, taste best if harvested when ready to part with the plant. That’s why for fresh eating, not storage, I sometimes harvest my apples from the ground, daily, the morning they drop. This might not be the best method for all varieties but makes for the very best Macoun apples.
Hudson Golden Gem apple
Generally, with tree fruits, I look for a change in color, especially background color, before considering harvesting a fruit. If there’s any green, I let it be. If color tells me that a fruit is potentially ready to be picked, I cup the fruit in hand, then lift and twist. If ripe, the fruit stalk readily separates from the plant. If that doesn’t happen, the fruit needs more time on the plant.

Tricky, for Me at Least

Two fruits whose harvest moment I’m still honing are watermelon and European pears.

I’ve tried all the methods with watermelon: thumping for a sound not too hollow and not to dull (the sound of knocking your knuckles against your chest as opposed to your forehead or stomach); a dried tendril opposite the fruit; a yellow-bellied fruit. They’re all guides but none are the end-all to timely harvest. I never had that problem with my large watermelon crop from my garden in southern Delaware.

Magness pear

Magness pear

European pears ripen from the inside out so become mush if left on the plant to thoroughly ripen. They need to be harvested mature but not yet ripe as indicated by some fruits dropping, a slight change in skin color, and readiness of the fruit stem to part from the branch. Fruits brought indoors to finish ripening are ready to eat when the flesh at the stem end gives with slight finger pressure.

Still, it takes a certain je ne sais quoi. And again, I’m adept at timely harvest of those varieties I’ve grown the longest and of which I have the most.

Climacterics

One reason pears and kiwifruits can ripen to perfection after harvest is because they are climacteric fruits, which undergo a burst of respiration and ethylene (a plant hormone) production as ripening begins. Some of these fruits, which also which include banana, apple, tomato, and avocado can, if sufficiently mature, ripen following harvest. Soon after their climacteric peak, these fruits start their decline.

Citrus, fig, strawberry, plum, and raspberry are examples of non-climacteric fruits, whose ripening proceeds more calmly. Non-climacteric fruits will not ripen at all after they’ve been harvested. They might soften and sweeten as complex carbohydrates break down into simple sugars, but such changes are indicative of incipient rot rather than ripening or flavor enhancement.

For more about flavor, ripening, and climacteric, see my latest book The Ever Curious Gardener: Using a Little Natural Science for a Much Better Garden.

Pests Pesky and Not So

Memories

The tumbled over Red Russian kale seedling brought back old memories. It was like seeing the work of an old friend — or, rather, an old enemy. It’s been so long since I’ve seen a cutworm at work in my garden that I couldn’t even get angry at it.

Cutworm and friend's broccoli

Cutworm and friend’s broccoli

I scratched around at the base of the plant to try and find the bugger. Too late, fortunately for him or her because its fate would then have been a two-finger crush. The cutworm in a friend’s garden I visited last spring was not so lucky.

The bad thing about cutworms are that they chop down young, tender seedlings. At that age, seedlings’ roots lack the energy to grow new leaves; the plants die. (I wonder how the cutworm benefits from lopping back the seedling; the felled plant usually doesn’t get eaten.)

Cutworm damage

My kale plant

The good thing about cutworms is that, in my experience, they are few and far between — just one or two every few years.

Also, on a garden scale, they’re easy to control, if needed. They prepare for their meal by wrapping their bodies around the plant stems. When I feared them more, I would cut cardboard rolls at the center of paper towels or toilet tissue into lengths of about 1-1/2 inches long, slit one site, fit it around the seedling, press it into the ground, and tape it back closed. A bit tedious, I must admit.

Then I read that cutworms can be fooled. They only attack soft, young seedlings. A thin stick or toothpick slid partway into the ground next to a seedling makes a cutworm think the plant is a woody plant and, hence, out of its league. Since I didn’t find the culprit in my garden, I slid thin sticks next to nearby seedlings. For my friend’s garden, I returned from her kitchen with a handful of toothpicks and instructed her teenage son what to do with them.
Cutworm protection with stick
Except for today, I haven’t taken precautionary measures against cutworms for many years. Especially every morning, robins, catbirds, and mourning doves are pecking around the ground in my garden; I suspect that’s one explanation for the lack of cutworms.

A Good Parasite

A week or so ago, I saw another old “friend” in the vegetable garden. I noticed that leaflets had been thoroughly stripped from one region of one tomato plant. Obviously, a tomato hornworm, a voracious and rapid diner, was lurking somewhere amongst the existing foliage. A cause for panic? No!

The culprit, a green, velvety caterpillar with widely spaced, thin white stripes and some rows of black dots, is undoubtedly intimidating.
Tomato hornworm
Besides its voracious appetite — you can hear it chomping away — it is the size of an adult pinky.

Still, not to worry. Like cutworms, tomato hornworms turn up in my garden only every few years. And again, like hornworms, they seem to arrive, or show evidence, solo.

I did not reach out to crush the hornworm when I saw her because her back was riddled with what looked like grains of white rice standing on end. Those “rice kernels” are actually the eggs of a parasite that in short order turns that beautiful body to an ugly mush. It’s a dog eat dog world out there.
Parasitized hornworm

A Call for Action with This One

I can’t be so complacent about all pests that can turn up in my vegetable garden. Probably the worst one that causes problems every year is one or more of the caterpillars now, as I write, chewing away on the leaves of cabbage and its kin. The symptoms are quite evident: holy . . .  whoops, holey . . . leaves upon which is deposited dark green caterpillar poop.
Cabbageworm damage
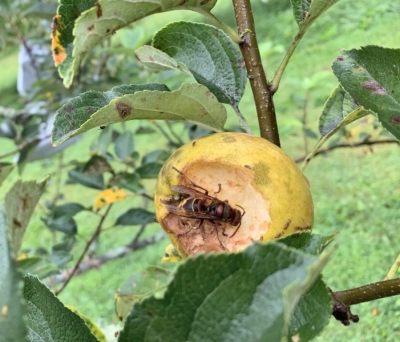
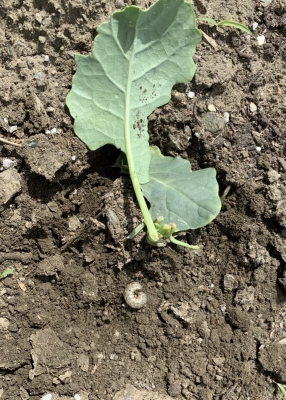
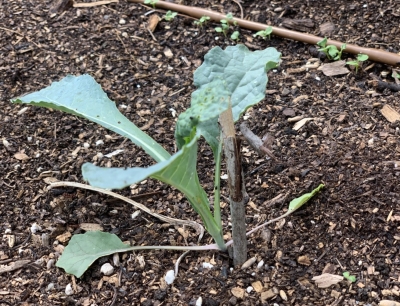
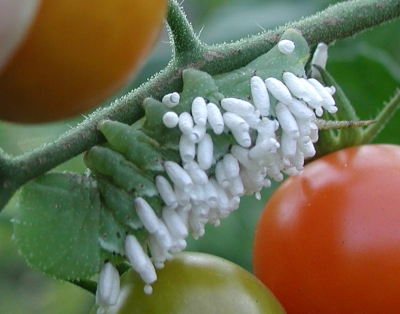
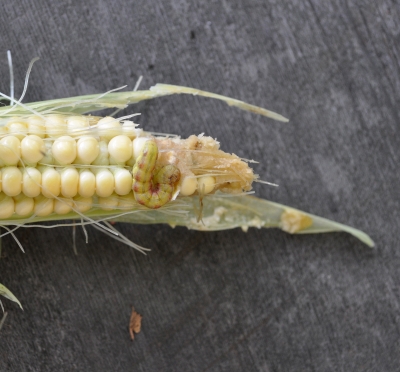
A close eye is needed on cabbage and its kin because one day there’ll be no damage and next time you look, leaves are riddled with holes and poop.

And then, action is necessary. Hand-picking is one option. I choose to use the biological insecticide B.t., short for Bacillus thurengiensis and commonly sold under such names a Dipel or Thuricide. It should be used with restraint because the insects can — and, in some cases, have — developed resistance to this useful pesticide which is very specific in what it harms and what it leaves alone.

Now that I mention it, excuse me for 10 minutes while I mix up a batch of spray for my cabbages, Brussels sprouts, and kale plants . . .

I’m back. The caterpillars seem to prefer cabbage, Brussels sprouts, and cauliflower over kale, which is fine with me because kale is my favorite of the lot.

Many predators, including certain wasps and beetles, diseases, birds, and bats, keep these caterpillar pests under control. Evidently not enough, though, in my garden.

Seeds Want to Grow

Yes, They Want To, But . . . 

Today, as I was carefully planting a bed with turnip, arugula, and mustard seeds, I got to thinking how easy it is to grow plants from seeds. It’s not surprising. After all, seed plants evolved millions of years ago and over the years have further evolved to germinate and grow under varied conditions. This would be especially true of those plants we call weeds.
Cynara, cardoon, in bud

So, with all that evolution backing me up, why the great care in planting those seeds today? Seeds do want to grow, but extra care increases the chances for success. The threats to germination and growth are competition from weeds, temperatures that are too warm or not warm enough, old seed, and insufficient soil fertility, air, or moisture. That’s not all, of course; there’s too many salts in a soil (and not just NaCl “salt”), seed-eating animals, and infections from pathogenic fungi. 

Whew! That list makes growing from seed seems fraught with roadblocks. But it’s not.

Steps to Improved Germination and Growth

My extra care in planting began back last autumn when I spread an inch depth of compost on top of the bed right after clearing it of garden plants and weeds. That compost provides nutrients, beneficial microbes, and increases aeration and water retention.

Earlier this season, the bed had been home to bush beans. Bean roots, left in the soil to rot, will provide further fertility — mostly nitrogen — for today’s planting.

The bean plants, and a few weeds, were cleared from the bed a couple of weeks ago, still too early for today’s planting of fall crops. While the ground was waiting, I covered it with a black tarp. The tarp, an old billboard sign (from www.billboardtarps.com and reusable for years) that is black on its back side, stimulated growth of ever present weed seeds in the soil. The seeds germinated, then died from lack of light beneath the tarp.

After year upon year of compost applications, the soil has very good tilth, so all it needed, once I removed the tarp, was a light raking to present a loose seedbed. Into it, with a trowel, I carved the first furrow the length of the bed. 

Depth of planting is important. An oft-repeated rule of thumb is that the depth to sow seeds is twice their thickness. Not true! Correct planting depth needs to also take into account the looseness of the soil; looser soil, more depth. And anyway, the seeds that I planted are only about 1/32” in diameter, making it well nigh impossible to make a furrow 1/16” deep. In my loose soil, that depth would dry out too quickly. I went with the less precise “sow shallowly.”
Radish seedlings

Garden plants grown from seed can suffer from competition not only from weeds, but also from each other. True, the young seedlings could be thinned out if too crowded after germination. With seed less than two years old and care in planting, I was confident about germination, so sowed the seed thinly.

After sowing the seeds and covering them came the all-important firming of the soil. The removal of the bean plants and the pre-plant raking to smooth the surface left plenty of large pores, through which water would run right through. 

Tamping down the soil with a garden rake over the covered furrow tightened up the pores so that they can hold capillary water. Remember high school chemistry class (or was it biology class) when water was shown to be drawn up into a capillary tube against the force of gravity? Firming the soil keeps moisture around the newly sown seeds; plus, water can be drawn upwards or sideways to that area. Weed seeds, sitting in still loose soil beyond the tamped area, won’t have such an easy time of it.

Finally, I watered — thoroughly enough for the water to penetrate but, to avoid washing away the seeds, not too fast. My vegetable garden has drip irrigation; I moved the drip line up right next to where the furrow was. Frequent watering is needed until seeds germinate and their new roots reach the wetting from down in the soil. An electronic moisture probe can indicate how deep moisture lies beneath the surface.

And Now for a Flower, or Is It a Vegetable?

Many years ago I grew cardoon, a vegetable whose 3-foot-high stalks are something like celery on steroids. Cardoon stalks growing in garden
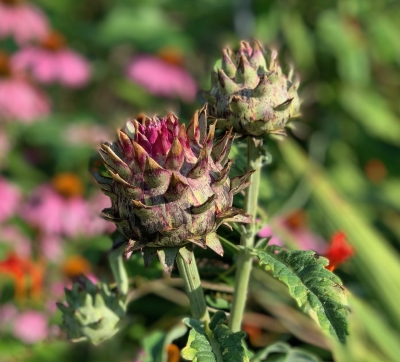
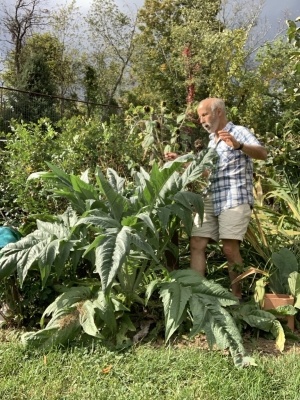
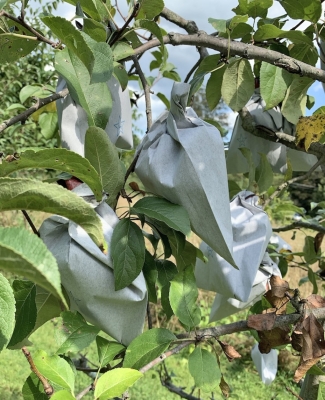
The flavor hints of artichoke, a close relative. None the less, for me the flavor was awful and the stalks were tough. (Cardoon is usually covered to blanche them a few weeks before harvest. Blanching did not make mine more edible.)

Yet I am now enamored with this plant — not for eating but for its thistle-like flower. Cardoon is a perennial that begins to bloom in its second year, after experiencing a period of cool temperatures in winter. Cool, not frigid; cardoon is not cold hardy here in the Hudson Valley.

Last summer I planted seed and grew the plant in pots. Those pots spent the winter in my greenhouse, where temperatures never dipping below 35° F. reminded them of their Mediterranean origin. Once warm weather settled in this spring, I planted them out in my flower garden.Cardoon in flower

The bud on one plant that has been slowly unfurling is well worth the care I put into the plants.

Of Corn and Compost

Bed Transformation

In an hour and a half this morning, a 20’ long by 3’ wide bed of spired, aging corn stalks morphed into a bed of succulent, young greenery in the form of endive and Chinese cabbage transplants.

Before beginning this job I harvested what ears were still ripe on the stalks. The yield from this first corn planting was small, both in quantity and size of ears. Old fashioned Golden Bantam, as told by its name, normally yields small ears — but not usually as small as the 3 to 5 inch long ears I harvested. Golden Bantam sweet corn, non-hybrid
Planting in “hills” (clusters of 4 plants) usually provides for adequate pollination, but poor weather at a critical developmental stage might have thrown pollination awry.

At any rate, with ears harvested, I lopped each stalk in half with my Hori-Hori knife, then dug straight down right around the base of each hill to sever the main roots so I could jerk the cluster of stalks up out of the ground. I also cleared away from the bed any weeds, and then carted everything over to a compost pile.

For the return trip from the compost pile, I loaded the cart with finished compost from another pile. An inch depth of compost slathered on top of the old corn bed had it ready to receive the endive and Chinese cabbage transplants I had waiting in the wings. The 40 transplants had grown up during the month of July in a seedling flat and were just ready to outgrow their individual cells. Each went into a quickly made hole jabbed into the ground, the holes 15” apart in each of the two rows running down that bed.

The refurbished bed will provide good eating beginning in early October and, with some covering for protection, on into December.

Compost Discoveries

Besides merely compost, the compost pile often yields some interesting and forgotten objects. (Some annoying things as well, such as those fruit labels glued to the skin of almost every piece of commercial fruit.)

For years now I’ve had trouble bringing myself to tossing anything compostable into the garbage for eventual burial in a landfill. It seems so wasteful of materials and disrespectful to the soil to use it as a dumping ground for cast-offs. Soil is a limited resource so eventually there will be no more acreage to bury trash.

Much of my clothing is cotton, wool, or leather — natural products that would eventually decompose to enrich a finished compost. So I sometimes compost such garments, forgetting that I did so until an uncomposted piece of the garment makes an appearance as I turn the compost pile or shovel out the finished material.

Partially composted Levi jeans

Partially composted Levi jeans

The distinctive zipper and fly snap from my Levi jeans, for example. After three compost cycles, except for the zipper and fly snap, those jeans are surprisingly intact but look more like sheer polyester slacks than Levi’s jeans. In contrast, my daughter’s non-Levi jeans were threadbare after merely one cycle.

Composted (almost) non-Levi jeans

Composted (almost) non-Levi jeans

I came upon a not immediately identifiable object today as I shoveled out finished compost for spreading on the endive/Chinese cabbage bed. It was about a half inch thick, almost flat except for some bends, and spongy. What could it be? Aha! The cushioning from my sheep skin booties. Most of the leather portion had decomposed.

My guess is that the bootie was transformed as far as it would go in the near future so I’m not returning it to the new pile for another cycle.

Worms in My Ears (Some of Them)

My ears, now, are relatively large. Corn ears, that is.

Since writing about the diminutive ears from my first planting of sweet corn, I’ve harvested a few ears from my second planting. That second planting went in 2 weeks after the first planting but is ripening close on its heels. Warmer weather earlier in the season compressed those ripening dates.

Just about every ear in this second batch of ears is large (for the variety Golden Bantam) and well filled with kernels. I occasionally find a corn earworm feasting on some of the kernels at the tip of the ear. Corn earworm
That’s the nice thing about home-grown sweet corn — it’s not nice having the earworms but it is nice not being bothered by them. Corn farmers don’t have that luxury. I just break off the tip with the worm and enjoy the rest of the ear.

The earworms got inside the husks by eating their way down the corn silks. Spraying the corn with the benign biological pesticide Bacillus thurengiensis (sold under such friendlier names as Thuricide), or cutting off or squirting some of mineral oil into the silks right after pollination is complete (3 to 7 days after silks appear) could control this pest. But why bother for an occasional pest that is so easily ignored or removed?

Hazels, Filberts, Cobnuts; Good by any Name

Nuts are Good

Let’s talk about nuts. No, not about nutty politics, but about real nuts such as fall from trees and shrubs. (Peanuts are borne on a small, annual plant, but despite their name, are legumes, not true nuts.) Nuts are an overlooked food. For all you protein people, nuts are high in protein, and, for all you heart-healthy people, they’re high in the good kinds of fatty acids. I eat them because, unadulterated, they’re good-tasting and generally good for you.

Ripe filbert nuts

Ripe filbert nuts

Nuts are not difficult to grow, and can make attractive dual-purpose plants as both edibles and as ornamentals.

Black walnuts are especially easy. Squirrels do the planting for me; my job is to get rid of excess trees, of which there are plenty sprouting all over the place. The next job with walnuts, after gathering them up, is getting at the nutmeat. Well worth the effort, in my opinion, but that’s a story for another time.

Filbert in Variety

Filberts are easy to grow and easy to shell. Because of a disease known as eastern filbert blight, the trick in growing them here in the Northeast is selecting an appropriate variety. (“Hazelnut” is another name for filberts, as is, In Britain, “cobnut.“) Filbert blight is an indigenous disease east of the Rocky Mountains. First symptoms are elliptical black stromata along stems.

Pustules of filbert blight

Pustules of filbert blight

The disease kills individual branches, even whole plants. I first planted filberts many years ago and was told it could take 10 years for the disease to show up; disappointingly, that was true.

Susceptibility to filbert blight varies. Our native American filbert (Coryllus americana) evolved with the disease so is resistant. Unfortunately, it generally bears nuts that are very small and not very tasty. European filberts (C. avellana), the filberts of commerce, bear large, tasty nuts, but are susceptible to filbert blight. 

Decades of breeding at universities and by individual nut enthusiasts sought the holy grail: Filbert plants that bear large, tasty nuts and that fend off filbert blight. Filbert blight’s inroads into the Pacific northwest, where filberts are grown commercially spurred development of a number of blight resistant varieties at Oregon State University (OSU). I’ve tried a number of them, including Jefferson, Lewis, Clark, Santiam, Yamhill, Dorris, and Theta. Problem is that the filbert blight fungus has a nasty habit of appearing in more than one strain so that a variety resistant in one place can be susceptible elsewhere. All those OSU varieties, with the exception of Dorris and Yamhill succumbed to blight here.

Over the years, I’ve also planted other varieties. Gellatly, Halls Giant, and Tonda di Giffoni were promising, and bore large, tasty nuts for a few years before succumbing to blight. Almost ripe filberts
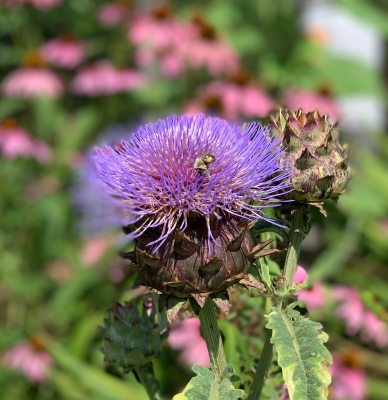
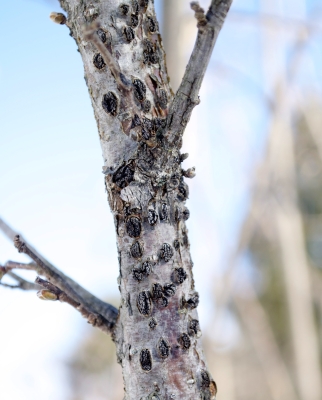
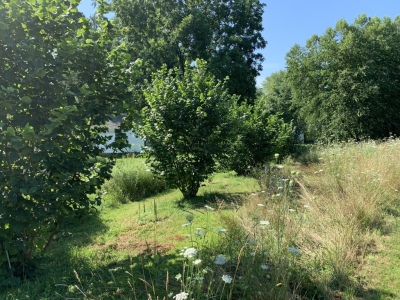
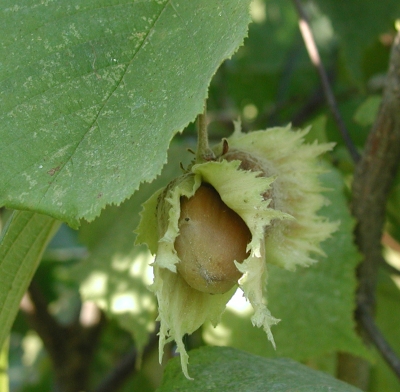
Five years ago, I had the opportunity to test some of the varieties from Dr. Tom Molnar’s filbert breeding program at Rutgers University; these plants are now old enough to bear. Being test plants, they have unappetizing names like CR x R11P07 and CR x RO3P26. Mmmm. I’m sure they mean something to Tom.

All of which is to say that I have a good reservoir of blight fungus floating around here as well as a number of varieties to evaluate for yield, nut quality (which, at this point, is mostly about size), and resistance to filbert blight. Drum roll . . . The winners, so far, are CR x R11P10, CR x RO3P26, CR x R06P56, Yamhill, and Graham. None of the “CR” varieties show any blight and all have good nut size. The heaviest yield is from  CR x RO3P26. 

Filbert nuts in summer
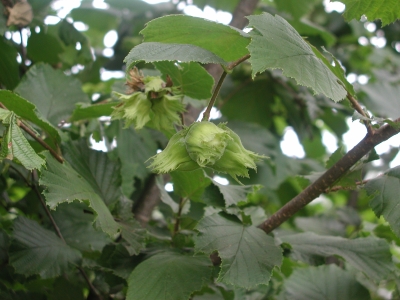
Yamhill always has some blight but still manages to bear nuts, small to medium-sized ones.

The last one named, Graham, is from my original planting of 20 years ago. Its suckering growth habit evokes its American filbert parentage. (European filberts hardly spread by suckers, growing instead as large bushes or medium-sized trees.) Graham always has a number of blighted branches yet always bears good crops of large, tasty nuts.

Also in the pipeline are MacDonald (from OSU), Truxton, and Geneva (also known as Gene, and from www.grimonut.com and www.znutty.com). Filberts typically bear in their third or fourth year so I won’t be waiting long before seeing if any of these varieties are keepers.

Enter: Squirrels

Filberts are delicious, and growing and cracking them is easy; the fly in the ointment is squirrels. They will strip a bush clean. Besides, or in addition to, the usual methods for thwarting squirrels — dogs, cats, guns, and traps — are other options.

Sufficiently isolated plants, if grown as single-trunked trees and trained so that no branches droop or originate lower than 6 to 8 ft. from ground level, can be protected. Either a 2 ft. cylinder or an inverted cone of sheet metal wrapped around the trunk 6 to 8 feet above ground level does the trick.

Hot pepper spray?

Harvesting the almost-ripe nuts before squirrels get to them?

I’ve found that squirrels avoid running in high grass, probably because it slows them down, and they need all the speed they can get with my dogs present. Then again, maybe they’re just hidden from me in the high grass. Still, thus far squirrels have avoided my filberts in my once-a-year mowed meadow.Filbert plants in a row