A Vine or a Bush?
Here’s a blast from the past, from my November 20, 2009 blog post, with current commentaries on how things have changed — and not changed — over the past 11 years.
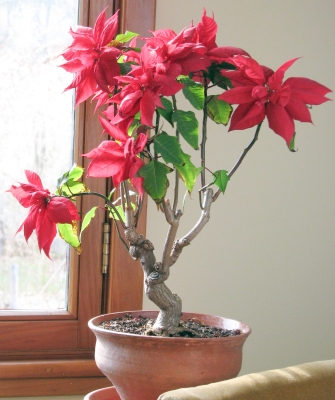
Dateline: New Paltz, NY, November 20, 2009, 5:30 am. New models of plants, like cars, are deemed necessary to keep consumers interested and spending money. My cars (actually trucks . . . you know, manure and all that) stay with me for as long as they keep rolling along, so it was with equal skepticism I looked upon a new “model” of mandevilla, called Crimson, that arrived at my doorstep early last summer.
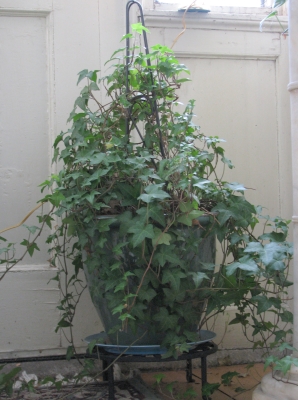
I was first attracted and introduced to mandevilla about 20 years ago. The glossy leaves and the bright red, funnel shaped flowers, were part of the attraction. The 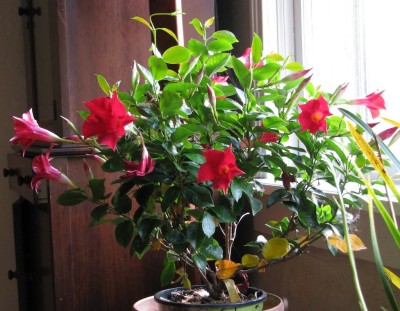 vining habit was also a big part of the draw, making the plant a stand-in for morning glory, but with prettier leaves and brighter flowers. Mandevilla is a perennial, tropical vine, so must winter indoors rather than be seeded outdoors each spring like morning glory. My vine’s leaves yellowed so much in winter that I tired of looking at it; one winter day I walked it over to the compost pile.
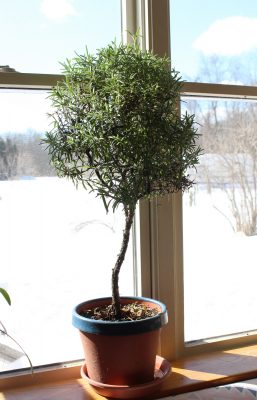
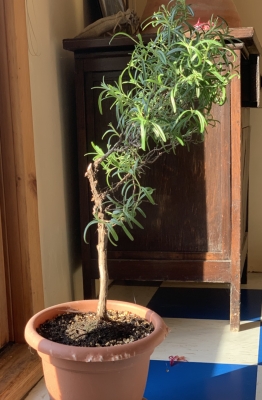
The variety Crimson is a new kind of mandevilla whose main selling point is its bushy growth habit. So yes, it is different and new, but wasn’t that vining habit one of the things I always liked about mandevilla?
Still, I have grown very fond of Crimson. It flowered continuously all summer and, since coming indoors in September, continues to do so, with new buds on the way (at every third leaf bud, according to the “manufacturer.”) I’m going to think of Crimson mandevilla as a very pretty, long blooming, bushy plant. Yes, it’s a worthy new model.
Dateline: New Paltz, NY, November 19, 2020: Well, Crimson evidently was not that worthy; it’s no longer with me. As I remember, that sickly look that eventually came on in winter didn’t justify its tenancy here.
With that said, someday I may still grow mandevilla again. But not Crimson or any other bushy variety. As I wrote 11 years ago, that vining habit was one of its main attractions. If I do grow it again, I’ll put it in the basement or somewhere where I’ll hardly see it, for it to sit out winter.
Are They Really Sickly?
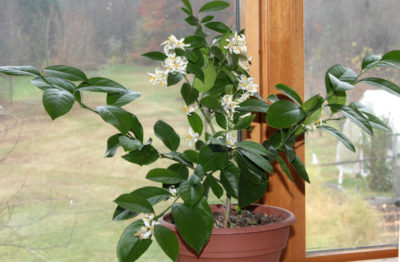
(2009) Sickly-looking leaves of houseplants – such as my mandevilla of yore – can be traced to a number of causes. Already I’m seeing this yellow transformation creeping up on my gardenia, which just finished one of its many fragrant shows.

Both mandevilla and gardenia need soils that are quite acidic (pH 4-5.5) in order to thrive. Not enough acidity makes it hard for the plant to imbibe iron, resulting in iron deficiency and yellow leaves.
But wait! It’s not time yet for the “iron pills.” Looking more closely at my gardenia, I see that it is the OLDEST leaves that are yellowing. Hunger for iron causes the YOUNGEST leaves to yellow (and for their veins to remain green). Yellowing of older leaves most commonly means that the plant isn’t getting enough nitrogen. The nitrogen is being robbed from older leaves (which turn yellow because nitrogen is an important component of green chlorophyll) to feed the younger leaves.
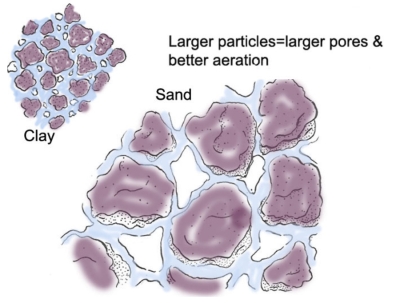
The prescription? Add some soluble nitrogen fertilizer and pay more attention to watering. Too much water drives air out of the soil, and roots gasping for air have trouble doing their work to take up sufficient nutrients.
(2020) I mostly agree with my past diagnosis of and cure for yellowing leaves. But two other considerations are worthy of attention.
First, temperatures in my home are on the cool side and roots are less functional as temperatures cool, especially the roots of warm climate plants. So roots might not be able to make efficient use of nitrogen even if it’s added to the soil.
And second, even evergreen plants go through periods of shedding their oldest leaves. Before these leaves drop, they lose their chlorophyll and turn yellow.
So under natural and under less than perfect conditions, mandevilla and gardenia are unavoidably going to look sickly in late fall and early winter.
Oh, the gardenia is also no longer a resident here. Too prone to scale insects.
Asparagus’ Leaves, Their Work Finished
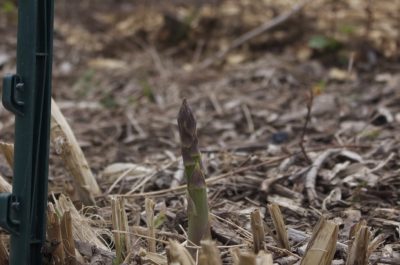
(2009) Yellowing leaves are not always a bad thing. (Think of birch leaves a few weeks ago, or aspen leaves.) I’m happy that my asparagus’ leaves have yellowed. The plants have been growing vigorously all season, feeding their roots to fuel next year’s growth of the delicious young spears that I’ll be snapping off at ground level from late April to early July.
With this year’s work finished, the shoots and leaves, left to grow unfettered since early July, are yellowing and dying back. My short-bladed brush scythe was the perfect tool to make quick work of the plants, a fluffy addition to the compost pile.
With the asparagus shoots and leaves cleared away, I could get into that bed and weed it. The bed was pretty much weed-free until July, but then wet summer weather kept 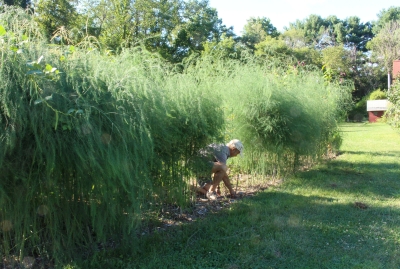 weeds germinating and growing, and hard to reach among the 6-foot-high forest of feathery stalks. The bed is now weeded and soon to be fertilized (2#/100 square feet of soybean meal) and mulched (wood chips 2 inches deep).
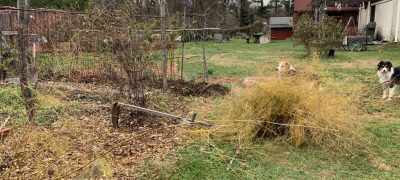
(2020) Wow! Right on schedule, on the same date as 11 years ago, asparagus leaves have yellowed. They’ve pumped nutrients and fuel down to their roots to provide for next spring’s growth, and are no longer functional and could harbor pests. So, like 11 years ago, I’m going to cut them down and add them to the compost pile.
This year I did treat the ground differently from the past 11+ years. Right after this year’s harvest, at the end of June, when the whole bed was cut to the ground, I did a little weeding. And then, instead of soybean meal as a fertilizer, I spread an inch of compost. Compost adds organic matter to the soil, and supplies a wider slew of nutrients and is more sustainable than soybean meal, among other benefits. The compost would also smother some weeds that would try to emerge.
Then, just to further smother weeds, I topped the compost with a one inch layer of wood chips.
I’m proud to report that the asparagus bed has never been so weed-free. No doubt, the very dry summer weather also played a part in keeping weeds at bay.

At any rate, I’m getting out the scythe now to cut down the stalks. And I look forward to a good crop of asparagus beginning at the end of April. I highly recommend growing asparagus: it’s perennial and is one of those vegetable whose flavor is markedly different, and much, much better, when eaten fresh-picked.


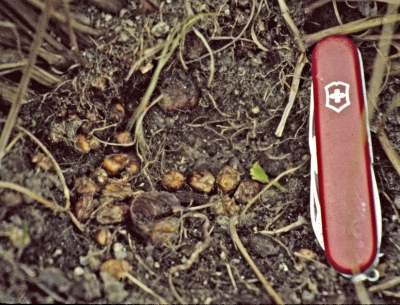 The main challenge with this plant is clearing and separating the almond-sized tubers from soil and small stones.
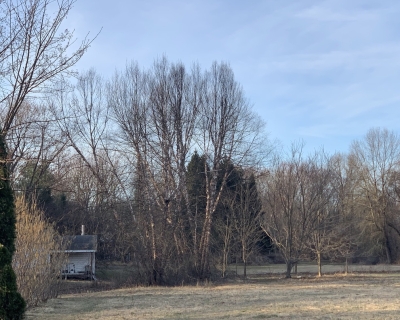
 “Maple decline” is a disease complex brought on by some combination of drought, soil compaction, road salt, root damage, and air pollution. Upper branches are usually the first to go, and once decline begins, secondary fungi and insects speed the process along.


 (The cooler is an insulated room cooled with an air conditioner that has been tricked, with a device called