PESTS, INCLUDING ME(?)

Watch Out, for Black Walnuts

Citizen scientists (that could be you and me), look up! At black walnut’s leaves. At the recent meeting of the New York Nut Growers Association (www.nynga.org), Karen Snover-Clift of Cornell University went over the ins and outs of “thousand cankers disease of walnut.”
    Like Dutch elm disease — it pretty much wiped out American elms, once valued for creating a cathedral effect as their branches arched over tree-line streets — thousand cankers disease is spread by an insect. But the walnut twig beetle is only part of the problem. When it bores into the bark, it spreads a fungus that clogs up a tree’s “tubes.”
    With Dutch elm disease, once a tree is infected, the fungal culprit spreads within the tree to kill it. Not so with thousand cankers disease. With this disease, death comes from fungal infection that follows thousands of dark, dead cankers of insect feeding.
    Who cares about black walnuts? I do. Each fall the trees bear an abundance of nutritious and delicious nuts. (Not delicious to everyone; the strong flavor does not appeal to everyone. But no reason any food should appeal to everyone unless you’re MacDonald’s.) And, quoting from The Tree Book, written in 1914 by Julia Rogers, “The black walnut is majestic as a shade tree — a noble ornament to parks and pleasure grounds. It needs room and distance to show its luxuriant crown and stately trunk to advantage. Then no tree excels it.”

Walnut twig beetle

Walnut twig beetle

    And finally, black walnut yields among the most beautiful of woods for furniture and gun stocks. Again quoting Ms. Rogers, the wood has “silvery grain, rich violet-purple tones in the brown heart wood [and] exquisite shading of its curly veinings.”
    Thousand cankers disease moved into southwestern U.S. from Mexico (would a wall keep them out? will Mexico pay for it?) and has remained mostly in that region. Black walnut is native to eastern U.S., but the tree has occasionally been planted out west. More importantly, the disease has recently reared its ugly head at a few locations in the east. If infected trees can be identified, the disease can be contained to check its spread.

Thousand cankers

Thousand cankers

    Any tree with an infected branch is usually dead by the end of the season!
    So look up, scan the tops of any black walnut trees for limbs that are dead or show flagging foliage. Your job, and my job, is to look for these trees and then report them.
    For a more thorough treatment of thousand cankers disease, as well as reporting guidelines, see www.thousandcankers.com. A good start in confirming the disease would be to take some good digital photos and send them to the state diagnostic laboratory, the county Cooperative Extension office, or department of environmental conservation.

Chipmunks, Still Cute Here

    I find chipmunks cute, as I’m sure everybody would — except for anyone for whom chipmunk is a garden pest. This year, for some reason, an especially good crop of chipmunks are scurrying about. I see them everywhere, except on my farmden. Their absence here could be attributed to my dog friends Sammy and Scooter, and my cat friend Gracie.
    I would not tolerate chipmunks if they were to eat my blueberries, my filbert nuts, my . . . pretty much anything I’ve painstakingly planted and nurtured. Besides dogs and cats, traps also are effective.

No, I’m Not a Strawberry Pest

    As if plants didn’t have enough pest problems. I recently attacked my strawberry bed with my scythe, swinging the sharp blade low enough to cut off every last leaf from the plants. No, I’m not just another plant pest, trying to kill plants; I was “renovating” the bed, preparing it for next spring.
    Shearing off the leaves not only removes leaves, but also disease spores on the leaves that inevitably find their way into any strawberry bed. Obviously, I raked up the old leaves and carted them over to the compost pile.
    The next step in renovation was to pull out any weeds in the bed. The major weed in the bed was  . . . strawberries. Strawberries spread by creeping stems along which grow new plants that take root, making them usually their own worst weed. Each plant needs about a square foot of elbow room to realize its full potential of one quart of berries per plant.
    So I ruthlessly ripped out enough plants so that my 3-foot-wide bed was left with a double row of plants spaced a foot apart. Older plants get decrepit with age, so those were the first to go.Spreading compost in strawberry bed
    Finally, icing on the cake. I laid a 1 inch depth of compost all over the bed and tucked up to each of the remaining, leafless strawberry crowns. A little fertilizer and straw, pine needle, wood shavings, or any other weed-free organic material would be almost as good.
    It’s been a few weeks and already new leaves are sprouting. The plants are on their way to a healthful and healthy crop of sweet, juicy berries next spring.Strawberry plants, a few weeks after renovation

GOOD FRUITS, ONE A VEGETABLE

World’s Best Fruit?

    Finally, I reap the fruits of one of my labors. Literally. The fruit is black mulberry, the species, that is Morus nigra, rather than any of the black-colored mulberries that grow all over the place around here. The latter are species and natural hybrids of white and red mulberries (M. alba and M. rubra).
    Black mulberry, native to the Mediterranean climate of western Asia, is not cold-hardy below temperatures in the ‘teens (Fahrenheit) so definitely not cold-hardy here. I first tasted it at a fruit conference in Davis, California and it wowed me even from among bowls heaped high with fresh-picked apricots, peaches, and other seasonal fruits.
    I had to get a tree to grow, which I did (from www.whitmanfarms.com). The tree went into a pot with potting soil. As it grew, I moved it on into larger and larger pots, stopping at an 18-inch diameter pot. I figured that would be the largest pot I could muscle down the basement steps for cool, winter storage along with my figs and pomegranates.
    The tree bore quickly, and the “east coast” black mulberries were delicious, what few of them I harvested. Problem was that birds also found them delicious, a problem compounded by the fact that the berries are not at their best until matte black and ready to be released from the plant at the slightest touch. The birds don’t wait that long.
    Dead ripe, the fruits are so soft that they can’t help but stain your fingers. (The stain was once used as a dye, called “murry.”)

A Cagey Solution

    My first solution to the bird issue was to plant the mulberry in the ground in my cool (as in temperature cool) greenhouse, which is also home to some in-ground fig trees. Since mulberry seedlings pop up all over the place around here, I just dug up a seedling, grafted onto it a stem from my black mulberry, and planted it in the greenhouse.Fruit cage
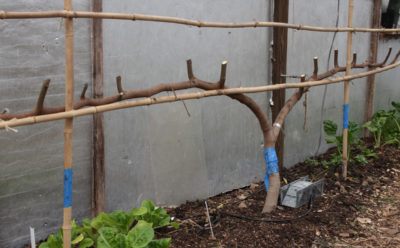
    Mulberry trees can grow big, bigger than my greenhouse. My plan was to espalier the branches against the west wall of the greenhouse. The espalier worked as far as training the branches in an ornamental candelabra. The birds were kept at bay. The espalier did not work as far as bearing fruit, the reason for which I have no idea why. I dug up the tree.
    My original mulberry still grows in a pot and, despite its small stature, still bears good crops of fruit. A few weeks ago I saw advertised a walk-in, temporary cage for protecting plants from birds (available from Gardeners Supply Co.).
    The cage arrived just as the first black mulberries were ripening. Within 20 minutes I had the various pole pieces joined to each other and to the corner brackets, and the net attached over the top and sides. At 4 feet by 4 feet and 6 feet high, the cage easily accommodates my mulberry. Even another plant or two.
    Every couple of days, now, I unzip the door, enter mulberry paradise, and carefully peruse the plant for dead-ripe berries. I exit with purple-stained fingers. Success.

Eggplant + Oil, A Good Combo

    Another success this year has been eggplant. I’ve gardened for many, many years, and for many, many years wasn’t able to grow eggplants well. Beginning gardeners are the ones who usually have greatest success with eggplant. Not exactly beginning gardeners, but beginning gardens.Eggplant plantEggplant, flea beetle damage
    Flea beetles love to eat eggplant (leaves). They pock the leaves with enough small holes so that only vigorously growing plants survive. But flea beetles rarely show up in a garden in its first year but by the second year they descend in hoards. Hence the successes of beginning gardeners in their beginning gardens.
    This year I tried controlling the beetles by spraying the plants weekly with “horticultural oil,” also called “summer oil,” which is a more refined and lighter version of “dormant oil.” I was mixing it up anyway to keep scale insects at bay on the greenhouse figs (more on that some other time). Long story short: The plants are only slight hole-y and I have a fine crop of eggplants on the way.   

TWO DELICIOUS ORBS, ONE BLUE & ONE WHITE

Soil is Key

    Last week I described my foray into the New Jersey Pine Barrens, culminating in a visit to the USDA research station there to experience many new, interesting, and tasty varieties of blueberry. The soils of the Pine Barrens, as I wrote provide ideal conditions for the rather specific and unique requirements of this fruit.
    That’s not to say that blueberries can’t be grown successfully beyond the Pine Barrens. In fact, they can be grown just about everywhere — if the right varieties are chosen and the soil is amended to suit the plants. The soil here at my farmden, for instance, is very different from that of the Pine Barrens. Mine is a naturally rich silt loam that is slightly acidic; the Pine Barrens are naturally poor sands that are very acidic.
    Both soils are well-drained, which is the first requirement for a blueberry soil. The way to make soils that are less than perfectly drained suitable is to plant the bushes atop mounds or carry water away in ditches or in buried, perforated pipes.
    Next, acidity. The pH for blueberries needs to be between 4 and 5.5, which is very acidic (and is what blueberry relatives such as rhododendrons and mountain laurels also demand). I acidifed my soil with elemental sulfur, a naturally mined mineral, before planting and do so periodically over the years, as needed. Many gardeners pile oak leaves or pine needles on their ground, or dig these materials into soil, to make a soil more acidic — that doesn’t do the trick; sulfur is what’s needed, 3/4 to 2 pounds per hundred square feet for sandy and clay soils, respectively, for each unit of pH change needed.Netted, healthy blueberries
    Blueberries like their roots coursing through soils that are high in organic materials, not rich organic materials such as manure or compost, though. Peat moss is good; I mixed a bucket full of peat with the soil in each planting hole when I planted. To maintain, even increase, levels of organic matter over the years, the ground beneath my bushes, every year, gets blanketed with a 3 inch depth of some weed-free organic material, such as autumn leaves, wood chips, wood shavings, sawdust, pine needles . . . whatever I can get my hands on.
    And finally, blueberries need water, especially when young. That initial dose of peat moss along with yearly, organic mulches, helps the soil hold moisture (in addition to many other benefits).
    Oh, one more thing: Ninety percent of blueberry roots are in the top 6 inches of soil. Hence their need for moisture. Those shallow roots also compete poorly with weeds. My 900 square foot of 16 blueberry plants is, essentially, a “no weed” zone, thanks to the mulch and occasional weeding.

Tastiest Turnips

    Pushing open the gate to exit the blueberry planting, I walk over and pull open the gate to the vegetable garden. There lies a beautiful (to me) row of sweet, succulent turnips. Not just any old turnip, but the variety Hakurei, the best (to me, and many others gardeners and farmers).
    Turnips are an underrated vegetable, perhaps because most that you can buy just don’t taste that good and because most that are grown in home gardens are not the best-flavored. The highest praise I know of for turnips is in the novel Tobacco Road, when Lov Bensey walks seven and a half miles to get a sack of winter turnips for fifty cents, which is half of his daily wage. (Admittedly, he was starving.)
    So here’s at least the second written accolade for the turnip. When a good variety is planted and it is well grown, it is a sweet, flavorful vegetable excellent raw, pickled, or cooked. The variety to grow is Hakurei and the way to grow them is in rich, well-drained soil with a steady supply of moisture, the latter of which mine get automatically via drip irrigation.

Hakurei turnip

Hakurei turnip

    In the past I planted turnips only in late summer for a crop that ripened during the cool weather of autumn. This year I planted an early crop in the greenhouse; that crop was harvested and eaten by mid-June. I had plenty of seed and space in later in spring, so I planted some outdoors then. We’re still harvesting that crop and, despite the hot days, the flavor is excellent. (Cool nights might be helping to maintain flavor.)
    Sometime in the next two weeks, I plan to sow seeds for fall harvest. Last year, that crop, harvested before the weather turned too bitterly cold and the soil froze, went into wooden boxes for cold storage, first just sitting outdoors, then carried into the garage, and, finally, carried down to the cool basement. The last of them, still tasty, were eaten March.

HEAVEN AND(?) SOME HELL

The Blueberry Capital

    A few turns after Exit 38 on New Jersey’s Garden State Parkway and I, a blueberry nut, soon entered what a visit to Bristol, Virginia would be to a country music nut, what Tupelo, Mississippi would be to an Elvis Presley nut, what Springfield, Massachusetts would be to a basketball nut, what . . .  A big, blue sign declares Hammonton, New Jersey the self-proclaimed “Blueberry Capital of the World.” Literally millions of pounds of blueberries are picked and then shipped from this region of New Jersey each summer.
    A few more miles and a few more twist and turns through the New Jersey Pine Barrens brings you to Whitesbog, New Jersey, “the birthplace of the domesticated, highbush blueberry.”
    Let’s parse that last accolade.
    “Domesticated:” Blueberries are a native American fruit that up until the early part of the last century were harvested only from the wild. No one cultivated them! Then Elizabeth White, a cranberry grower in Whitesbog, teamed up with Dr. F. V. Coville of the USDA to study and improve the blueberry. Ms. White instructed her pickers to search out the best wild blueberry bushes, which were moved to her farm. Dr. Coville investigated the rather specific soils (such as those of the Pine Barrens) enjoyed by blueberries (such as those of the Pine Barrens), and further evaluated and bred Ms. White’s selections. And the rest is, as they say, history.
    “Highbush:” A number of blueberry species exist but the large berries for fresh eating that you see on market shelves are highbush blueberries, botanically Vaccinium corymbosum. Canned blueberries are usually another species, lowbush, botanically V. angustifolium. Dr. Coville and subsequent breeders have mated these two species as well as a number of other species with the goal of producing the elusive perfect blueberry. (Elusive to blueberry breeders, not to me; I like just about all of them.)

New Blues

    After passing field after field of cultivated blueberries alternating with dense woodland, I turned into the parking area of the Marucci Center for Blueberry and Cranberry Research & Extension to meet with USDA research geneticist Dr. Mark Ehlenfeldt.Blueberry field at USDA
    We looked at the fields of sandy soils formed into caterpillar-like, mulched mounds atop which were planted the bushes. We talked about the various species — V. constablaei, V. darrowii, V. ashei,  in addition to the previously mentioned highbush and lowbush — that parented the various bushes.
    Best of all, we plucked fruit to taste from many different varieties, some of which I grow and others of which are new to me. A few new ones that really stood out for me were:
•Sweetheart, for its medium-size that ripen early with excellent flavor

Sweetheart blueberry

Sweetheart blueberry

•Cara’s Choice, also with excellent flavor, in addition to pinkish flowers; ripening mid-season
•Razz, a soft berry with a hint of raspberry flavor, and
•ARS 00-26, a small blueberry with a sweet, wild blueberry flavor.
    Another blueberry variety that was very interesting, and perhaps tasty, was Nocturne, whose fruits, as they ripen, go from pink to bright red to blue black, making them very ornamental.

Pink Champagne

Pink Champagne

Nocturne blueberry

Nocturne blueberry

Nocturne fruits are supposed to have a unique flavor, sweet and somewhere between that of highbush and rabbiteye (V. ashei); they weren’t yet ripe so I wasn’t able to taste them. I did get a plant last year that is now ripening fruits so I can soon vouch, or not, for their flavor.
    Two hours and many blueberries eaten later, I was on my way home.
    Note: Not all the varieties mentioned are currently commercially available.

Beatlemania — I Hope Not

    On a negative note, I saw here today (June 29th) the first Japanese beetles of the season, three on some grape leaves and four on some black raspberry fruits. I could just throw up my hands and brace myself for the few weeks of attack. Spraying pesticides is not an option; the beetles feed on hundreds of species. I’d have to spray just about everything here, including fruits ready to harvest, which is a no-no.Japanese beetles
    I’m hoping the beetles take the same tack they have for the past two years, a few showing up, and then, shortly thereafter, doing about faces and leaving for the season. I have no idea why.
    Worst case scenario is that they descend in hordes, in which case I’ll remind myself that plants can tolerate a certain amount of damage, with remaining leaf area working harder to compensate for leaf area chewed away. Also, the beetles make their exit in August.
    I pulled the seven beetles I saw off their respective plants, threw them on the ground, and stomped on them. Not out of anger or meanness, though. Beetle feeding attracts more beetles. I didn’t want any invitations for their friends and relatives.

EDEN’S GARDENS

Eden’s Start with Good Soil

    G, as I’ll refer to him, has a blank canvas, about 10 acres of mostly open field. His vision is, essentially, for a Garden of Eden, with fruit trees, bushes, and vines, vegetables, nut trees, and flowers. Before he even thought about digging his first planting hole, I suggested he learn something about the soil beneath his blank canvas.
    Your and my tax dollars have contributed to a most useful soil resource for G (and you and me), the Soil Web Survey, put out by the Natural Resource Conservation Service (NRCS) of the USDA. This survey provides soils maps of more than 95% of the counties in the U.S., each map delineating what lurks beneath the surface.

Web Soil Survey, opening page

Web Soil Survey, opening page

    Soils are distinctive, as different from one another as robins are from blue jays. These differences are harder to appreciate, of course, because soil is mostly underground, hidden from view. But if you were to dig some holes a few feet deep and then look carefully at their inside surfaces, you would find that soils are made up of layers of varying thicknesses — called horizons. And one soil might differ from the next not only in the thicknesses of its various horizons, but also in just how the various horizons look and feel. There might be horizons as white as chalk, as red as rust, or as dark brown as chocolate. A horizon might be cement hard, gritty with sand, or stuff for sculpture. And if you were to tease the dirt along one edge of the hole so it falls away naturally — wow! — each horizon would reveal its particles clumped together in such arrangements as plates, blocks, or prisms. Such information, and more, has allowed soils to be classified, much as birds, flowers, and living things are.
    Armed with this information, G can know what will thrive in his future paradise and what might need to be done to better accommodate what he wants to grow.

Tax Dollars at Work

    The Web Soil Survey is an easy-to-use online resource. Either google it or go directly to http://websoilsurvey.sc.egov.usda.gov/App/HomePage.htm. The big green button labelled “START WSS” gets you started.
    The first step is to define your “Area of Interest (AOI)”, that is, your own back forty. Reading down from the AOI tab, you come to the “Address” line, in which, after clicking, you can fill in your own street address. Hit “Return” and, to the right, you’re zoomed into an aerial photo centered on the specified address. Click on one of the two boxes labelled “AOI” (which one depends on whether your AOI is going to be a rectangle or a random polygon) just above the map to delineate, in red, your AOI. Double click the last point and the map enlarges around the defined area.

Area of Interest defined

Area of Interest defined

    Back to the tabs at the top of the screen, and click on “Soil Map.” Now you know what to call your soil. Yes, its name. If more that one soil exists within the AOI, squiggly lines will delineate their names and extent.
    From there, all sorts of useful and not so useful (for you) information are at your fingertips. Click on the soil name and you get a slew of information on that soil, including the all-important drainage class, depth to a restrictive layer, depth to water table, and its ability to hold onto water. Other clicks get you to the soil’s potential use for recreation, construction materials, building site, even military operations.
    Most important is soil depth and drainage. G’s is fine, facilitating his first step towards Eden.

A Tree of Eden

    Speaking of Gardens of Eden reminds me of fruit and western Asia. Which brings us to a mulberry now ripening in a pot sitting on my front terrace. This mulberry is quite different from those trees now ripening their fruit practically every few hundred feet around here.

Pakistan mulberry fruit

Pakistan mulberry fruit

    For one thing, this mulberry comes from western Asia, Islamabad, Pakistan, so is not cold-hardy here in New York’s Hudson Valley. Hence the pot, in which the plant resides during winter in my basement, along with figs, pomegranates, and other subtropicals.
    The hardy mulberry trees that pop up here and there throughout most cold regions of the U.S. include Asian white mulberries (Morus alba) and out native red mulberries (M. rubra), and their natural hybrids. Note that fruit color has nothing to do with the species. White mulberry is a very variable species, in hardiness, fruit color and flavor, even leaf shape.
    Pakistan mulberry is also unique for the size of the berries. Each is a couple of inches long. In warmer climates, the berry can elongate to over 3 inches.
 

Pakistan mulberry tree in pot

Pakistan mulberry tree in pot

   I wouldn’t trouble myself with a potted fruit tree just because it’s exotic and large-fruited; the flavor makes the effort worthwhile. They have a heavenly flavor, among the most delicious of all mulberries, on a par with the world’s best fruits: a rich berry flavor fronting a congenial background of sweetness offset with just the right amount of tartness.
    Pakistan is sometimes listed as a variety of white mulberry, other times as a variety of yet another mulberry species, M. macroura. Outdoors, it can grow to 60 feet. In my Garden of Eden, the potted tree will be restrained to 5 or 6 feet.

SMALLER IS BETTER

Small Plants

Weeding. Planting. Harvesting. Making compost. Spreading compost. Staking. Pruning. Mowing. These are some of the activities I share with my plants this time of year. But, as Charles Dudley Warner wrote in his 1870 classic, My Summer in a Garden, “Blessed be agriculture! If one does not have too much of it.” Which prompts me to weed, plant, harvest, etc. most efficiently.

Bush cherry, 1 month after planting

Bush cherry, 1 month after planting

    Let’s take a look at some of the trees and shrubs I’ve planted this spring: Romeo and Carmen Jewel bush cherries, aronia, Grainger shellbark hickory, Great Wall Asian persimmon, Rosa canina, and Hidcote St. Johnswort. Just getting all those plants through their first season could entail lugging around many buckets of water. But it doesn’t.
    Large plants of any of these could possibly be sourced but I chose small plants. And that was the first step to making sure that, paraphrasing C. W., I wasn’t overburdened with my agriculture.
    With smaller root systems, small plants establish more quickly than large plants. In fact, establishing more quickly, smaller plants usually outgrow their larger counterparts after a few years.
    A tree or shrub with a two-foot diameter root ball might require 3 gallons of water weekly until enough roots foraged out into surrounding soil to make the plant self-sufficient water-wise. Two cups of water weekly is enough to keep my newly planted Romeo bush cherry alive since its move from the 4-inch-diameter pot it previously called home.
    By the end of this growing season, all these small plants will be firmly established and pretty much water independent. They’ll get supplemental water only if there’s any extended dry spells in their second season.

Small Planting Holes

    Water for these young plants isn’t all about watering per se.
    Site preparation is also important. Not that, as older gardening books used to suggest, it’s “better to dig a $50 hole for a $5 tree than a $5 hole for a $50 tree,” the dollar amounts reflecting the size of the tree and the hole. No need for such heroic measures. Digging that large a hole breaks up the capillary channels in a large volume of soil, leaving large air gaps in the soil through which water just runs down and out. Capillary channels can move water, down, up, and sideways.
 

Shellbark hickory, 1 mo. after planting

Shellbark hickory, 1 mo. after planting

   Better — and easier — is to dig a hole only twice as wide as the spread of the roots or root ball (if potted), and only as deep as needed so a plants sits at the same depth as it did its pot or the nursery.
    With few exceptions, no need to add compost, peat moss, fertilizer, or anything else to the soil in the planting hole. After all, the expectation is for roots to eventually extend well beyond the planting hole. Create excessively posh conditions in the hole and roots have no incentive to leave. Then roots grow only in their planting hole, not beyond.
    All soil goodies are best lathered on top of the ground. My first choice is for compost. Nutrients and beneficial soil organisms within the compost, over time, meld with the soil below. Compost also softens impact of raindrops so that water can percolate down into the ground rather than running off in rivulets — lessening my need for watering.
    A mulch is the final icing on this layer cake. I’ll top the compost with wood chips, leaves, straw — any weed-free, organic material. This top layer further softens the impact of raindrops, keeps compost moist and vibrant, and slowly decomposes to nourish soil microorganisms and then  the tree or shrub.
    Yesternight’s rain or 1.25” did a week’s watering for me. A good rule of thumb is to apply one-inch of water once a week, or, equivalently, three-quarters of a gallon per estimated square foot spread of the roots. Potted trees and shrubs need that one-inch of water spread over 2 or 3 days of the week for a couple of weeks after being planted, until their roots begin to spread into surrounding soil. Larger tree and shrub transplants need more water, more frequently, for a longer period of time.

Followup on Drastic, and Less Drastic Pruning

    I recently wrote of “renovating” my old lilac shrub, a no-brainer as far as pruning. You just lop each and every part of the plant right to the ground. My fears that such drastic pruning might also kill the plant were unfounded. Already, new sprouts are growing from the sawed off remains of the plant as well as from some distance away. All that’s needed now is to choose which sprouts to keep to grow into a whole new shrub.

Lilac regrowth from stump

Lilac regrowth from stump

    My blueberry shrubs also received more drastic pruning than usual. To lower their height and to encourage and make space for younger, more fruitful stems, I lopped a few of the oldest stems of each bush right to ground level. Like the lilac, new sprouts soon rose from ground level.

Blueberry, new sprouts

Blueberry, new sprouts

    Late next winter, I’ll save the most vigorous of these new sprouts and lop the rest of them all the way to the ground. And, of course, again lop to ground level some of next year’s oldest stems.
    Such pruning (covered in my book The Pruning Book) keeps blueberry and lilacs perennially renewed, without any stems that are too old to flower or fruit well as well as plenty, but not too many, young replacement stems for the future.

SUMMER WEATHER, PLANT THE GREENHOUSE

 Ginger on the Way

   Now that summer-y weather has blown in and is here to stay, it’s time to plant the greenhouse. Plant the greenhouse?! This time of year? Yes. No reason to let all that real estate go to waste through summer.
    Ginger plants that I started from supermarket tubers a couple of months ago were crying out to be released from the confines of their 4-inch pots. Warming their bottoms on the seed-starting heating mat pushed them along even when early spring skies were overcast and the greenhouse relatively cool. Ginger is a tropical plant that shivers even when temperatures drop below 55°F.Planting ginger
    I never could see the rationale for the current interest in growing ginger in northern regions. That is, until I tasted freshly harvested, baby ginger. This far north, ginger rarely has time to develop the mature, tan-skinned roots you see in supermarkets. No matter, because immature, or “baby,” ginger, which is ginger harvested before it matures, is better — a white, tender, tasty tuber. It doesn’t keep or ship as well as mature ginger, which is no problem for backyard growing or local sales.
    So 4 ginger plants went into two greenhouse beds. I’ll dig up the ginger in September, freeing up space for lettuce, celery, kale, and other cool weather salad makings that will inhabit the winter greenhouse.

Early Curcurbits

    One can eat only just so much ginger. (We’re still using last year’s harvest which, for long term storage, was sliced thin and put into jars with vinegar.) What about other greenhouse beds that are being vacated as the last of winter’s lettuce, celery, kale, and chard get harvested and cleared away?
 Greenhouse in June   Cucumbers and melons love heat, so a few extra plants that I started back in early May went into beds.
    The permanent fixtures in the greenhouse, the plants that really help the greenhouse earn its keep, are the four fig trees — Bethlehem Black, San Piero, Brown Turkey, and Rabbi Samuel — planted right in the ground. The largest of these has a trunk 7 inches in diameter. All yield bountiful crops daily in August and September, and less bountiful ones going into October.Figs growing, last of greenhouse lettuces

Tropicals and Subtropicals Summer Vacation

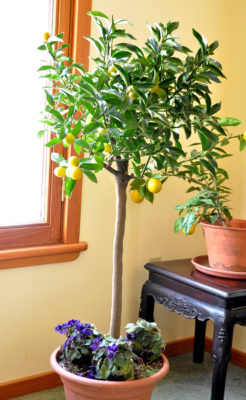
    In a reversal of fall, tropical and subtropical plants that had been moved into the greenhouse and house are now lined up outdoors, ready to offer fresh black mulberries, Pakistan mulberries, pineapple guavas, pomegranates, Golden Nugget mandarins, olives, dwarf Cavendish bananas (probably no fruit from this one, just a very tropical look), and a few other varieties of figs, in pots.
    (My black mulberry is the species Morus nigra, one of the best-tasting of all fruits, but is not cold hardy here. Black-colored mulberries that grow all over the place outdoors here are, despite black fruits, species of red or white mulberries, or their hybrids.)
    Any of my tropical and subtropical plants, given their druthers, would reach 8 feet, 10 feet, or even more feet skyward, and spread their roots many feet in all directions. Here, they can’t do that or they would be too big to move or to house in winter.
    So I mixed up a batch of potting soil, and started root pruning. It sounds brutal, and it is, but plants recover nicely and then happily have new soil to explore. Basically, I slide a plant out of its pot, stand it upright, and then start slicing off the outer edges of the root ball. Pruning shears take care of any roots too large to slice with a knife.
    The finished root ball is an inch or two smaller in diameter than it started out. How much to remove depends on the initial size of the root ball — larger plants get more removed — and, to a lesser degree, the kind of plant. Figs, for instance, tolerate especially brutal treatment.
 Root pruning   So much for the roots. To keep it manageable, the plant also needs stem reduction. Some stems get shortened, some are removed in toto, and some are left untouched. Who gets what treatment depends, for fruiting plants, on their fruiting habit — just where and how they bear fruit. Figs that bear on new shoots can be pruned rather severely; pineapple guavas bear on new shoots growing off older stems, so only moderate pruning is tolerated so that some older stems are preserved, etc.
    After root and shoot pruning a thorough watering, plants are ready for a year or two of good growth before they will again feel constrained.

WINTER’S LEGACY, STILL

Half a Pear, Tree

   Perhaps last winter’s weather — extended cold, but not frigid temperatures, and hardly any snow — is still playing games with us. Perhaps it is mischief from the early, extended, very warm weather in early spring that was followed by plummeting temperatures and our biggest snowfall (4 inches) of the year. Whatever the reason, some weird things are going on this growing season.Half dead pear tree
    Look at one of my old pear trees, for instance. This tree might be called my “sample” or my “first cut” pear tree. When I hear tell of a pear variety that might be worth growing, I get a scion and graft it onto this tree. The scion bears quickly, in theory, at least, and, if it passes the “first cut,” perhaps it will warrant its own tree. There’s not enough time or space to put every Tom, Dick, and Harry of a pear variety on its own tree.
    The tree now has about a dozen varieties of pear growing off various branches. That’s not weird, though. What is weird is that, right now, the top half of the tree is fully leafed out while limbs on the bottom half of the tree are leafless.
    A disease? Doubtful. A disease killing that much of a tree at once would probably originate in the trunk or roots, in which case the whole tree or only the upper portion would be leafless. And anyway, those leafless limbs are not dead. Cutting beneath the bark reveals living, green tissue.
    My hypothesis — a weak one — is that the cold snap in spring, where temperatures in the ‘teens followed a spate of temperatures in the 70’s, is the culprit. Warm temperatures in late winter and spring cause plants to rapidly awaken and lose the cold-hardiness they maintained through the coldest parts of winter. The pears seemed quite awake when that cold spell struck.
    But why was only the bottom portion of the tree affected? (Here’s the weakness in my hypothesis.) Windless, clear nights, such as during spring’s cold snap, bring a temperature inversion. Under such conditions, denser cold air can settle down near ground level. Even a few feet of elevation can make a difference, one that’s evident when riding a bicycle or motorcycle on a clear summer night on rolling terrain.
    So maybe the bottom half of the pear tree experienced temperatures just below the tipping point where enough damage occurred to delay leafing out.

Other Pear Trees, Still Whole

    No other plants, including other pear trees, experienced this bifurcation. Then again, the “sample” pear is all by itself where the microclimate might be slightly different.
    During that cold snap, the other pears were quite awake, seemingly just about ready to spread their blossoms. I was braced for a total crop loss. Weirdly, the trees went on to blossom just fine and now have what’s shaping up to be a decent load of fruit on them.

Seedling Troubles

    More weirdness: Every season I sow vegetable seeds according to a schedule I’ve developed over the years. I sow the seeds in mini-furrows in flats of potting soil or potting soil topped with a mix of peat moss and perlite. Every season I make my own potting soil from a mix of equal parts peat moss, perlite, compost, and garden soil, with everything sifted together through half-inch mesh hardware cloth.
 Sickly tomato seedlings   And every season I’ve had sturdy, lush green transplants to set out over the past few weeks. Not this season. Too many of the transplants are stunted, with flaccid leaves that are not uniformly lush green. Some have slight, interveinal yellowing of oldest leaves, some have slight reddening of veins, hinting, respectively, at insufficient nitrogen and phosphorus uptake .
    As usual, the weather could be blamed. Those auspicious, sunny days of late winter gave way to a long period of overcast days. Rain or not is not the issue because seedlings were in the greenhouse, watered as needed. Overwatered? Underwatered? Cool greenhouse temperatures could limit root growth, in turn limiting uptake of nutrients even if they are in the soil.
    The potting soil could be the culprit. Although ingredients of my mix are always proportionately the same, the compost isn’t exactly the same from year to year. Same goes for the “garden soil” that goes into the mix. I scrape it up from various places around the yard: the bottom of a finished compost bin, from my catch-all extra soil bin, from top layers of a pond I’m occasionally hand-digging.
    A couple of other gardeners and farmers have concurred with their seedlings’ poor growth this year. Perhaps it was the weather? Do you want to weigh in?

And the Winner Is . . .

    Very few people offered hypotheses on why only one limb of my plum tree was in bloom. Neither the weather nor any other environmental condition was to blame. In fact, I had grafted the tree a few years ago to four different varieties in order to spread out the harvest date and offer a greater variety of plum flavors.Plum, blossoming branch
    The bulk of the tree had already flowered.The one blooming branch was that of beach plum, the least reliable, smallest, and, to my taste, least flavorful of the lot. Perhaps I’ll graft that limb over to yet another variety.
    Congratulations to Tom, tkjazzer@gmail.com, on winning a copy of my book Grow Fruit Naturally.

MAKING SCENTS (AND A BOOK GIVE AWAY!)

Reader Alert: Invasive Plant

    The sweet scent practically bowled me over. My friend, walking with me along the nearby rail trail, characterized the aroma as citrus-y rather than sweet. Either way, the aroma was delicious and welcome. Too bad the source of the scent, autumn olive (Elaeagnus umbellata), is a plant so reviled.Autumn olive blossoms
    “Too bad” because the plant also has other qualities. The olive-green leaves lend a Mediterranean feel to any setting. Microorganisms associated with the shrub’s roots garner nitrogen from the air to enrich the soil. And come early fall, the plants are loaded with delicious and nutritious, small, red (sometimes yellow) berries.
    Alas, this non-native plant grows too easily, frequenting fields and waysides. It’s deemed invasive, which it is . . .  but?
  Autumn olive fruit  (Autumn olive is often confused with Russian olive, E. angustifolium, a close relative that is more tree-like, less invasive, and with sweet, olive-green fruits. Another equally attractive, fragrant, tasty, and soil-building plant is gumi, E. multiflora, not well known but closely related to the other “olives.”)

And Yet Another Invasive

    Soon, by the time you read this, the rail trail and elsewhere will be suffused by another pleasant aroma, that of honeysuckle. These flowers are also followed by red berries, but they’re not edible. (Other honeysuckle species do yield edible berries, an up and coming fruit called haskaps.)Honeysuckle flower
    How could anyone not like a plant with a name like “honeysuckle?” A lot of people don’t like honeysuckle because it too, despite its qualities, is invasive.

You Call This Renovation

    Before anyone attacks me for heaping praise on invasive plants, let’s sidle off the rail trail and back to the home front, where yet another delicious scent fills the air. This one wafts from a plant that, unlike autumn olive, Russian olive, and gumi, is not invasive and is truly in the olive family: lilac (Syringa vulgaris).
    Actually, for years now, my lilac bush has not been perfuming the air as much as it should. The plant is old, my guess is over 50 years old. Not that age alone is responsible for its poor showing. Lilac, like other shrubs, have long-lived root systems. No stem ever develops into a permanent, long-lived trunk and — important for all flowering and fruiting shrubs — after a certain age stems can’t keep up the flower production of its youth.
    The way to prune any flowering or fruiting shrub is by a renewal method. You cut down some of the oldest stems that are no longer performing well. And then you thin out — that is, reduce the number of — some of the youngest stems so that each can develop to its fullest potential without being crowded.
    How long an old stem is worth keeping and how many new stems spring up each year from ground level depends on the kind of shrub and the growing conditions. A highbush blueberry stem, for example, retains its youthful fecundity for about 6 years; a raspberry, for two years.
Young lilac, old lilac, renovated lilac

Young lilac, old lilac, renovated lilac

    I’ve pruned my lilac over the years, but — I have to admit — never cut the old stems close enough to the ground nor thinned out the many young stems sufficiently. (My excuse is that the dense crowding of 5-inch-diameter stems made cutting difficult, the difficulty made more so by the haven they provided for poison ivy vines.)
    A non-blooming lilac shrub isn’t worth keeping, so drastic renovation was in order. This treatment can be applied to any old, decrepit shrub. It’s easy. All that’s needed is to cut everything to the ground. Which I did.
    My lilac’s stumps gave evidence to the shrub’s poor showings over the years with their many thick yet half-rotten, old stubs. Shrubby stems, as I wrote, just aren’t meant to live that long, and over time can’t support good flowering.
    If all goes well, new sprouts should soon poke up from ground level, vigorous new sprouts because they’ll be fueled by a large, old root system. It’ll be a few years before any of those sprouts get old enough to start flowering. But I’ll make sure to thin them out so each has room to develop. I promise.

Win a Copy of My Book

A few weeks ago my plum tree was in full bloom, actually only part of it was in full bloom. Winter’s wacky weather? Spring’s wacky weather? Plum, blossoming branchOffer an explanation and, if correct, you’ll be in the pool of readers, one of whom, randomly selected, gets sent a free copy of my book Grow Fruit Naturally. Respond by midnight, May 31st.
GFN Front Cover

RATIONALITY CHALLENGED

New York Avocadoes!?!?

    I make no claim to be rational in my gardening — especially this time of year. This thought comes to mind as I look closely at two avocado plants sitting in a sunny window. “Nothing irrational about growing avocado plants in New York,” you might say. After all, the large seeds are fun and easy to sprout, and the resulting plant adds some tropical greenery indoors.
    My two plants were run-of-the-mill avocado houseplants until I took knife to them.
    Let’s backtrack . . . Among my regrets of not living 1,000 miles or so south of here is not being able to harvest my own citrus and avocados. (Also, no outdoor gardenia shrubs or southern magnolia trees here.) A few indoor citrus plants do call mi casa sus casa. But no avocados.Avocado grafts
    From seed, an avocado would take a long time before it bore its first fruit. And especially long under less-that-ideal northern conditions, including indoors in winter.
    And worse, when the plant does finally flower, it might not bear fruit. Avocados generally need cross-pollination because the pollen isn’t ripe at the same time that the female stigma is receptive. Avocado pollinators need to be fairly specific, so that one plant’s pollen is in synch with another plant’s stigmas.
    And even worse, after all that time and hoping for appropriate mates, fruits that do form might not taste good. They wouldn’t be selected clones, such as the delectable Haas or Mexicola, but seedlings. (Plant a seed from a good tasting apple and the resulting tree has only one in 10,000 chance of bearing a good-tasting fruit.)
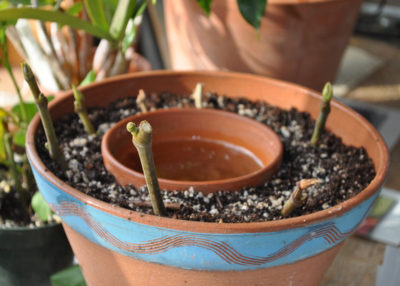
    Which is why I took a knife to my two avocado seedlings, to graft them to known, good-tasting varieties that are pollination compatible. A friend in Florida overnighted me scions — pencil-thick stems, with leaves stripped — cut from his Marcus Pinkham and Lula avocado trees. One of my seedlings got a whip graft of Marcus Pinkham; the other got a side-veneer graft of Lulu.
    I coverWithed both grafts with plastic to maintain humidity, and every day peer at the scions hoping to see some swelling in preparation for growth.
    Rational gardening? No. After all, even if all goes as planned, how many avocados could I expect to harvest from two small trees? Still, it’s fun.

Warm. Plant.

    Outdoors, it’s the weather that toys with my rationality. A spate of warm days and great restraint is needed not to plant vegetables. I keep referring to my notes (and the chart I made in my book Weedless Gardening) that tell me when to plant what.
  Planting onions  With yesterday’s 75 degree temperatures, urges to plant were satisfied — for that day, at least — by my poking holes into the ground into which I dropped onion plants sown indoors on February 1st. Three-hundred of them in a 20 foot long by 36 inch wide bed. (This was later than the April 21st onion planting date specified in my book, but the weather was cold so I forgot to look at my book.)

Planting Break. Turn Compost.

    When I get tired of planting, I can always turn to turning my compost piles.
    Not that compost piles have to be turned. In contrast to other fermentations, such as bread-making and wine-making, compost always comes out right. Pile up any mix of organic (living or once-living) materials, and eventually you get compost.
    I turn my compost piles so that materials on the outside of the pile get to be on the inside of the pile, second time around. This makes for a more homogeneous finished product.Turning compost
    I turn my compost piles to better monitor their progress, so adjustments can be made, as needed, and to get some idea when they’ll be ready for use. Occasionally, a pile will have a dry region; it gets watered. Occasionally, a mass of material needs to be broken up to better expose it to moisture and microorganisms.
    I also turn my compost piles because it’s good exercise and it’s interesting. But, like I wrote, turning a compost pile is not a must.