
EDEN’S GARDENS
Eden’s Start with Good Soil
G, as I’ll refer to him, has a blank canvas, about 10 acres of mostly open field. His vision is, essentially, for a Garden of Eden, with fruit trees, bushes, and vines, vegetables, nut trees, and flowers. Before he even thought about digging his first planting hole, I suggested he learn something about the soil beneath his blank canvas.
Your and my tax dollars have contributed to a most useful soil resource for G (and you and me), the Soil Web Survey, put out by the Natural Resource Conservation Service (NRCS) of the USDA. This survey provides soils maps of more than 95% of the counties in the U.S., each map delineating what lurks beneath the surface.
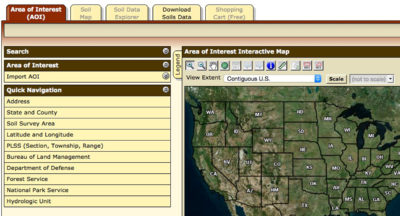
Web Soil Survey, opening page
Soils are distinctive, as different from one another as robins are from blue jays. These differences are harder to appreciate, of course, because soil is mostly underground, hidden from view. But if you were to dig some holes a few feet deep and then look carefully at their inside surfaces, you would find that soils are made up of layers of varying thicknesses — called horizons. And one soil might differ from the next not only in the thicknesses of its various horizons, but also in just how the various horizons look and feel. There might be horizons as white as chalk, as red as rust, or as dark brown as chocolate. A horizon might be cement hard, gritty with sand, or stuff for sculpture. And if you were to tease the dirt along one edge of the hole so it falls away naturally — wow! — each horizon would reveal its particles clumped together in such arrangements as plates, blocks, or prisms. Such information, and more, has allowed soils to be classified, much as birds, flowers, and living things are.
Armed with this information, G can know what will thrive in his future paradise and what might need to be done to better accommodate what he wants to grow.
Tax Dollars at Work
The Web Soil Survey is an easy-to-use online resource. Either google it or go directly to http://websoilsurvey.sc.egov.usda.gov/App/HomePage.htm. The big green button labelled “START WSS” gets you started.
The first step is to define your “Area of Interest (AOI)”, that is, your own back forty. Reading down from the AOI tab, you come to the “Address” line, in which, after clicking, you can fill in your own street address. Hit “Return” and, to the right, you’re zoomed into an aerial photo centered on the specified address. Click on one of the two boxes labelled “AOI” (which one depends on whether your AOI is going to be a rectangle or a random polygon) just above the map to delineate, in red, your AOI. Double click the last point and the map enlarges around the defined area.
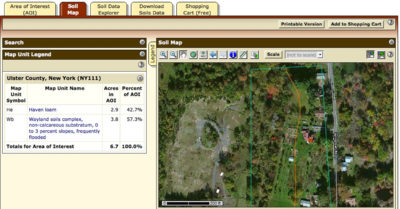
Area of Interest defined
Back to the tabs at the top of the screen, and click on “Soil Map.” Now you know what to call your soil. Yes, its name. If more that one soil exists within the AOI, squiggly lines will delineate their names and extent.
From there, all sorts of useful and not so useful (for you) information are at your fingertips. Click on the soil name and you get a slew of information on that soil, including the all-important drainage class, depth to a restrictive layer, depth to water table, and its ability to hold onto water. Other clicks get you to the soil’s potential use for recreation, construction materials, building site, even military operations.
Most important is soil depth and drainage. G’s is fine, facilitating his first step towards Eden.
A Tree of Eden
Speaking of Gardens of Eden reminds me of fruit and western Asia. Which brings us to a mulberry now ripening in a pot sitting on my front terrace. This mulberry is quite different from those trees now ripening their fruit practically every few hundred feet around here.
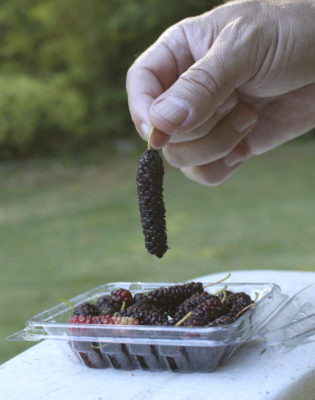
Pakistan mulberry fruit
For one thing, this mulberry comes from western Asia, Islamabad, Pakistan, so is not cold-hardy here in New York’s Hudson Valley. Hence the pot, in which the plant resides during winter in my basement, along with figs, pomegranates, and other subtropicals.
The hardy mulberry trees that pop up here and there throughout most cold regions of the U.S. include Asian white mulberries (Morus alba) and out native red mulberries (M. rubra), and their natural hybrids. Note that fruit color has nothing to do with the species. White mulberry is a very variable species, in hardiness, fruit color and flavor, even leaf shape.
Pakistan mulberry is also unique for the size of the berries. Each is a couple of inches long. In warmer climates, the berry can elongate to over 3 inches.
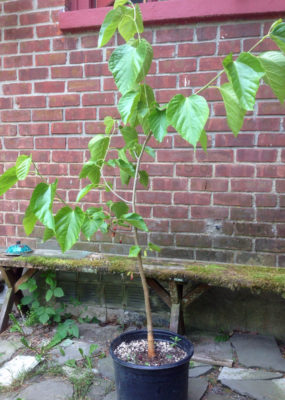
Pakistan mulberry tree in pot
I wouldn’t trouble myself with a potted fruit tree just because it’s exotic and large-fruited; the flavor makes the effort worthwhile. They have a heavenly flavor, among the most delicious of all mulberries, on a par with the world’s best fruits: a rich berry flavor fronting a congenial background of sweetness offset with just the right amount of tartness.
Pakistan is sometimes listed as a variety of white mulberry, other times as a variety of yet another mulberry species, M. macroura. Outdoors, it can grow to 60 feet. In my Garden of Eden, the potted tree will be restrained to 5 or 6 feet.
SMALLER IS BETTER
Small Plants
Weeding. Planting. Harvesting. Making compost. Spreading compost. Staking. Pruning. Mowing. These are some of the activities I share with my plants this time of year. But, as Charles Dudley Warner wrote in his 1870 classic, My Summer in a Garden, “Blessed be agriculture! If one does not have too much of it.” Which prompts me to weed, plant, harvest, etc. most efficiently.
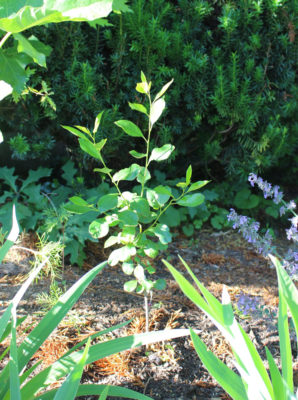
Bush cherry, 1 month after planting
Let’s take a look at some of the trees and shrubs I’ve planted this spring: Romeo and Carmen Jewel bush cherries, aronia, Grainger shellbark hickory, Great Wall Asian persimmon, Rosa canina, and Hidcote St. Johnswort. Just getting all those plants through their first season could entail lugging around many buckets of water. But it doesn’t.
Large plants of any of these could possibly be sourced but I chose small plants. And that was the first step to making sure that, paraphrasing C. W., I wasn’t overburdened with my agriculture.
With smaller root systems, small plants establish more quickly than large plants. In fact, establishing more quickly, smaller plants usually outgrow their larger counterparts after a few years.
A tree or shrub with a two-foot diameter root ball might require 3 gallons of water weekly until enough roots foraged out into surrounding soil to make the plant self-sufficient water-wise. Two cups of water weekly is enough to keep my newly planted Romeo bush cherry alive since its move from the 4-inch-diameter pot it previously called home.
By the end of this growing season, all these small plants will be firmly established and pretty much water independent. They’ll get supplemental water only if there’s any extended dry spells in their second season.
Small Planting Holes
Water for these young plants isn’t all about watering per se.
Site preparation is also important. Not that, as older gardening books used to suggest, it’s “better to dig a $50 hole for a $5 tree than a $5 hole for a $50 tree,” the dollar amounts reflecting the size of the tree and the hole. No need for such heroic measures. Digging that large a hole breaks up the capillary channels in a large volume of soil, leaving large air gaps in the soil through which water just runs down and out. Capillary channels can move water, down, up, and sideways.
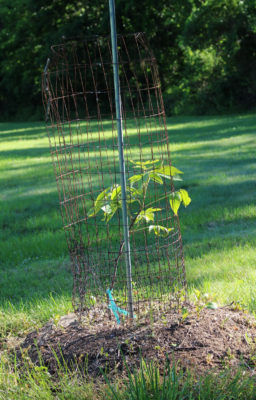
Shellbark hickory, 1 mo. after planting
Better — and easier — is to dig a hole only twice as wide as the spread of the roots or root ball (if potted), and only as deep as needed so a plants sits at the same depth as it did its pot or the nursery.
With few exceptions, no need to add compost, peat moss, fertilizer, or anything else to the soil in the planting hole. After all, the expectation is for roots to eventually extend well beyond the planting hole. Create excessively posh conditions in the hole and roots have no incentive to leave. Then roots grow only in their planting hole, not beyond.
All soil goodies are best lathered on top of the ground. My first choice is for compost. Nutrients and beneficial soil organisms within the compost, over time, meld with the soil below. Compost also softens impact of raindrops so that water can percolate down into the ground rather than running off in rivulets — lessening my need for watering.
A mulch is the final icing on this layer cake. I’ll top the compost with wood chips, leaves, straw — any weed-free, organic material. This top layer further softens the impact of raindrops, keeps compost moist and vibrant, and slowly decomposes to nourish soil microorganisms and then the tree or shrub.
Yesternight’s rain or 1.25” did a week’s watering for me. A good rule of thumb is to apply one-inch of water once a week, or, equivalently, three-quarters of a gallon per estimated square foot spread of the roots. Potted trees and shrubs need that one-inch of water spread over 2 or 3 days of the week for a couple of weeks after being planted, until their roots begin to spread into surrounding soil. Larger tree and shrub transplants need more water, more frequently, for a longer period of time.
Followup on Drastic, and Less Drastic Pruning
I recently wrote of “renovating” my old lilac shrub, a no-brainer as far as pruning. You just lop each and every part of the plant right to the ground. My fears that such drastic pruning might also kill the plant were unfounded. Already, new sprouts are growing from the sawed off remains of the plant as well as from some distance away. All that’s needed now is to choose which sprouts to keep to grow into a whole new shrub.
Lilac regrowth from stump
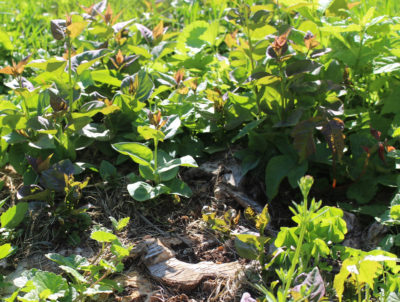
My blueberry shrubs also received more drastic pruning than usual. To lower their height and to encourage and make space for younger, more fruitful stems, I lopped a few of the oldest stems of each bush right to ground level. Like the lilac, new sprouts soon rose from ground level.
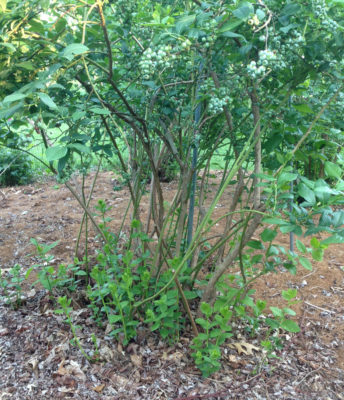
Blueberry, new sprouts
Late next winter, I’ll save the most vigorous of these new sprouts and lop the rest of them all the way to the ground. And, of course, again lop to ground level some of next year’s oldest stems.
Such pruning (covered in my book The Pruning Book) keeps blueberry and lilacs perennially renewed, without any stems that are too old to flower or fruit well as well as plenty, but not too many, young replacement stems for the future.
MIX POTTING MIX
Coconutty Coir
For a couple of years, a block of coir has sat atop my bale of peat moss.
Peat moss, the product of slow, anaerobic decomposition of organic materials, accumulates, at a snail’s pace, in bogs: an inch or so depth per thousand years. To mine peat, the bog must be first drained. Besides upsetting bogs’ unique ecological habitats, draining the bogs aerates them, sending some of the carbon wafting into the air.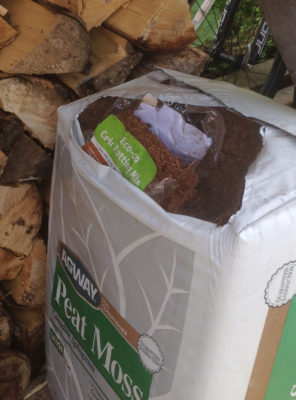
But peat is good stuff for potting mixes. My mixes are made up of equal parts peat moss, soil, compost, and perlite, along with sprinklings of soybean meal (for nitrogen) and kelp (for insurance against lack of any trace elements). Peat’s contribution to the mix is a long-lasting source of organic matter that helps cling to moisture and to nutrients, important in the relative confines of a flower pot.
Coir is marketed as a substitute for peat in potting mixes. A sustainable substitute, made from the fibre left around coconut husks after they’ve been cracked open to remove their meat.
This spring it was time to put that block of coir to the test, with a head to head comparison to peat. (I’ve tried this comparison before, but more casually.) The block, after slurping up a large volume of warm water, was ready to mix with the same ingredients as I mixed with the peat moss.
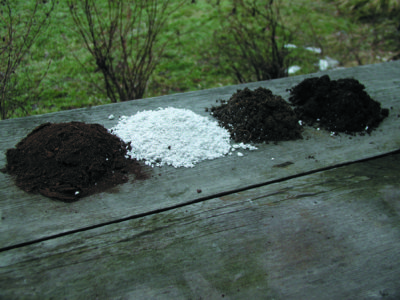
Some potting soil components
Both mixes went into their separately labelled , 5 gallon buckets. Each mix then was used to fill one-half of a few GrowEase Seed Starter Kits. Into one of the kits went lettuce seedlings, another got tomato seedlings, and a third got pepper seedlings. The 24 cells of each kit are automatically watered via a capillary mat that sits atop a water reservoir, providing very uniform moisture to all cells within a kit and from one kit to the next.
Peat, Coir Standoff
Drum roll . . . and the winner is . . . well, as I recently wrote, some of this year’s seedlings grew very poorly, perhaps, I’ve hypothesized, due to the soil I used, or the compost, both of which vary some from batch to batch. The overcast, cool conditions in the greenhouse during critical growth periods also could be to blame.
Differences in growth between coir and peat based mixes were not great, but tipped slightly in favor of the peat based mix. This, incidentally, jives with my previous, more casual observations. It also jives with more rigorously planned and executed, published research.
Coir Still in the Ring
The results of all this testing don’t spell continued destruction of peat bogs. Coir might still be a viable alternative.
Peat and coir are not the same material. I perhaps should not have used the same ratio for coir as I’ve long used for peat in my mix. There’s some evidence that coir, as it slowly decomposes in a potting mix, can suck up nitrogen at the expense of plants. If so, more soybean meal in my mix could solve that problem. Other nutrients, or lack thereof, could also come into play, as could anti-growth factors, such as phenolics, known to be present in coir.
More playing around is needed with coir.
Peat and Coir Substitutes
No need to put all our eggs in one coir basket. Other organic materials can and have fulfilled the niche of peat (and coir). And our culture has no lack of organic “waste” products. Composted bark has been used in commercial mixes for many years, as has sawdust. More exotic, around here, at least, would be rice hulls.
Home-grown and readily available “organics” for a potting mixes would be compost and leaf mold, both of which I’ve used in rougher mixes, such as for temporarily repotting small trees.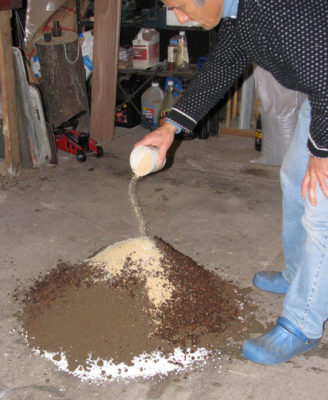
The point is that any of these organic materials, including coir, could make a good potting mix if ratios and amounts of other materials are adjusted accordingly.
Gardening (and farming) should be, and could be, sustainable; even the potting mixes used to raise seedling or grow potted plants.
Now Perlite, Hmmmm
The other major component of any potting mix is some aggregate, for providing good drainage. My mixes use perlite. Not sustainable. More on that another time.
