My Compost for a Bin
/50 Comments/in Gardening, Planning, Soil/by Lee ReichCompost, All Good, In Time
One problem with gardening, as I see it, is that much of it is about delayed gratification. Even a radish makes you wait 3 weeks after sowing the seed before you get to chomp on it. With a pear tree, that wait is a few years.
Which brings me to compost. Now that the flurry of spring pruning and planting have subsided, I’m starting this year’s compost cycle again — that’s compost for use next year. Delayed gratification again.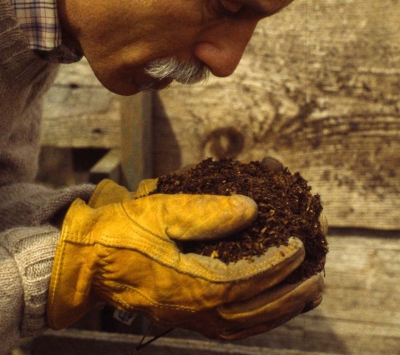
Food waste, yard waste, and compostable paper make up 31% of an average household’s waste which, if landfilled, ties up land and contributes to global warming. Composted, it feeds the soil life and, in turn, plants, and maintains soil tilth, that crumbly feel of a soil that holds on to moisture yet has plenty of space for air. You don’t get all this from a bag of 10-10-10 fertilizer or even a bag of any concentrated organic fertilizer.
The key to good composting is to have a good bin. Any pile of old vegetables, leaves, grass clippings, old cotton clothes, straw, or wood chips will turn to compost eventually. A bin keeps everything neat, fends off scavengers, and maintains heat and moisture within.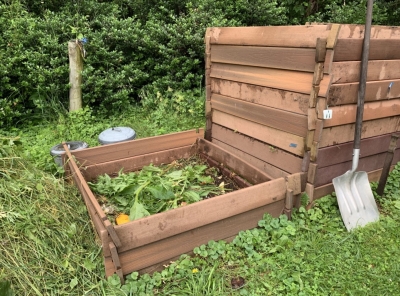
Buying a compost bin is one option. Consider whether you’re making compost for your garden or just as an environmentally sound way to recycle what used to be called “trash.” You need a larger bin for the former use because you’ll be importing materials, such as leaves, wood chips, and manure, to bulk up the compost.
The Perfect Compost Bin?
Over the years, my home made compost bins have gone through several incarnations. Four wooden panels filled in with chickenwire made my first bin. Once a pile was made and settled a little, I removed the panels, pinned black plastic onto the compost cubes to keep in moisture, and set up the panel in the next location for a new “compost cube.”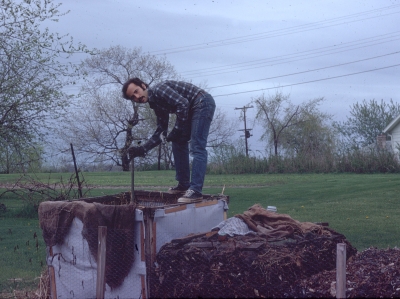 The next bins weren’t bins but just carefully stacked layers of ingredients, mostly horse manure, hay, and garden and kitchen gleanings. And then there was my three-sided bin made of slabwood.
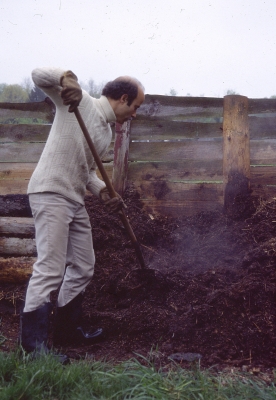
A dramatic jump in functionality came with my bin made from 1 x 12 hemlock boards from a sawmill, notched to stack together on edge like Lincoln logs. The only problem with this system was that I had to periodically purchase and notch new boards as older ones rotted away.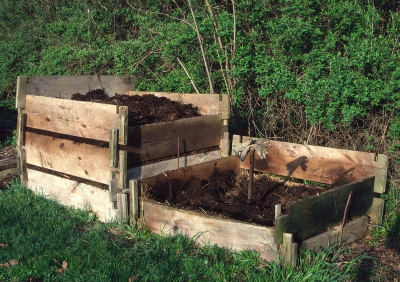 Which brings me to my current bin which, now, after many years of use, I consider nearly perfect. Instead of hemlock boards, these bins are made from “composite lumber.” Manufactured mostly from recycled materials, such as scrap wood, sawdust, and old plastic bags, composite lumber is used for decking so should last a long, long time.
The boards I used were 5-1/2 inches wide and 1 inch thick. A couple of inches from either end of each 5-foot-long board, I cut a notch on each side to a depth one-quarter the width of the board and about 1/8” wider than the their thickness.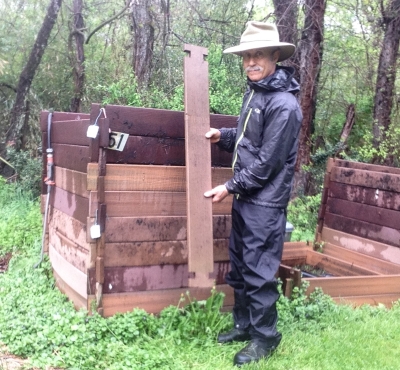 When finished, I ripped one board of the bin full length down its center to provide two bottom boards so that the bottom edges of all 4 sides of the bin would sit right against on the ground.
 Before setting up a bin, I lay 1/2” hardware cloth on the ground to help keep at bay rodents that might try to crawl in from below.
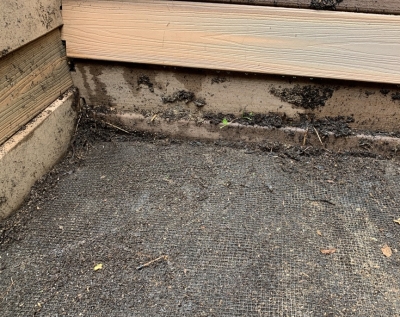 With the Lincoln-log style design, the bin need be only as high as the material within while the pile is being built, and then “unbuilt” gradually as I removed the finished compost.
June 2024 update: As you might note from the photos in this post, I made lots of compost bins, actually too many. What was I thinking? I’ve now decided to sell off some of these bins. About 28 boards, each 4′ long, are needed for a completed bin. I’m selling each board for $5, so a complete bin of 28 boards would cost you $140, more or less, depending on the bin height you want. I do make lots of compost so only have a few bins to sell. Contact me if you’re interested (845-616-0710 or through my website, but not Messenger).
Feed the Beast(s)
Okay, time to feed my compost “pets.” Nothing fancy, just any spent plant from the garden, kitchen trimmings, old clothes made from natural materials, hay scythed from my meadow, horse manure from a local stable, and occasional sprinklings of soil and powdered limestone.
For interest, I’ll sometimes throw old shoes or gloves into a pile to see what’s left once the organic portion of the shoe or glove has been stripped off.By paying attention to the textures of the materials as I add them to the pile, it generally stays well aerated. If I have a load of manure and will be building up many layers of the pile at once, I water the layers as I go; it takes too long to get sufficient water down into the pile after it has been built. Once a pile is completed, I cover it with a layer of EPDM rubber roofing material, cut to fit, to seal in moisture and keep out rain.
Piles built this summer get turned once next spring so I can monitor progress and make sure they’re moist — but not too wet — throughout. The compost is used throughout next year’s growing season.
So yes, there is delayed gratification before I get to use the “black gold.” Then again, making compost is enjoyable; I get some exercise and enjoy feeding the various fungi, bacteria, and other microorganisms at work in the compost pile.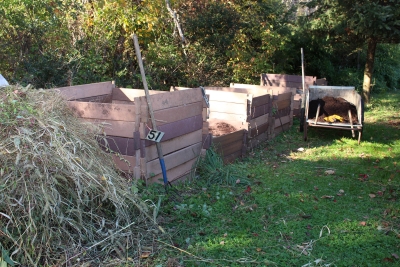
The End of Chestnuts? No!
/15 Comments/in Gardening/by Lee ReichBlight Strikes
I looked up into the tree that I had planted 20 years ago and saw what I had long feared: two major limbs with sparse, undersized leaves. Blight had finally got a toehold on the Colossal chestnut tree, which, for the past 15 years, has supplied us with all the chestnuts we could eat. (“Colossal” is the variety name, apt for the size of the chestnuts it produces.)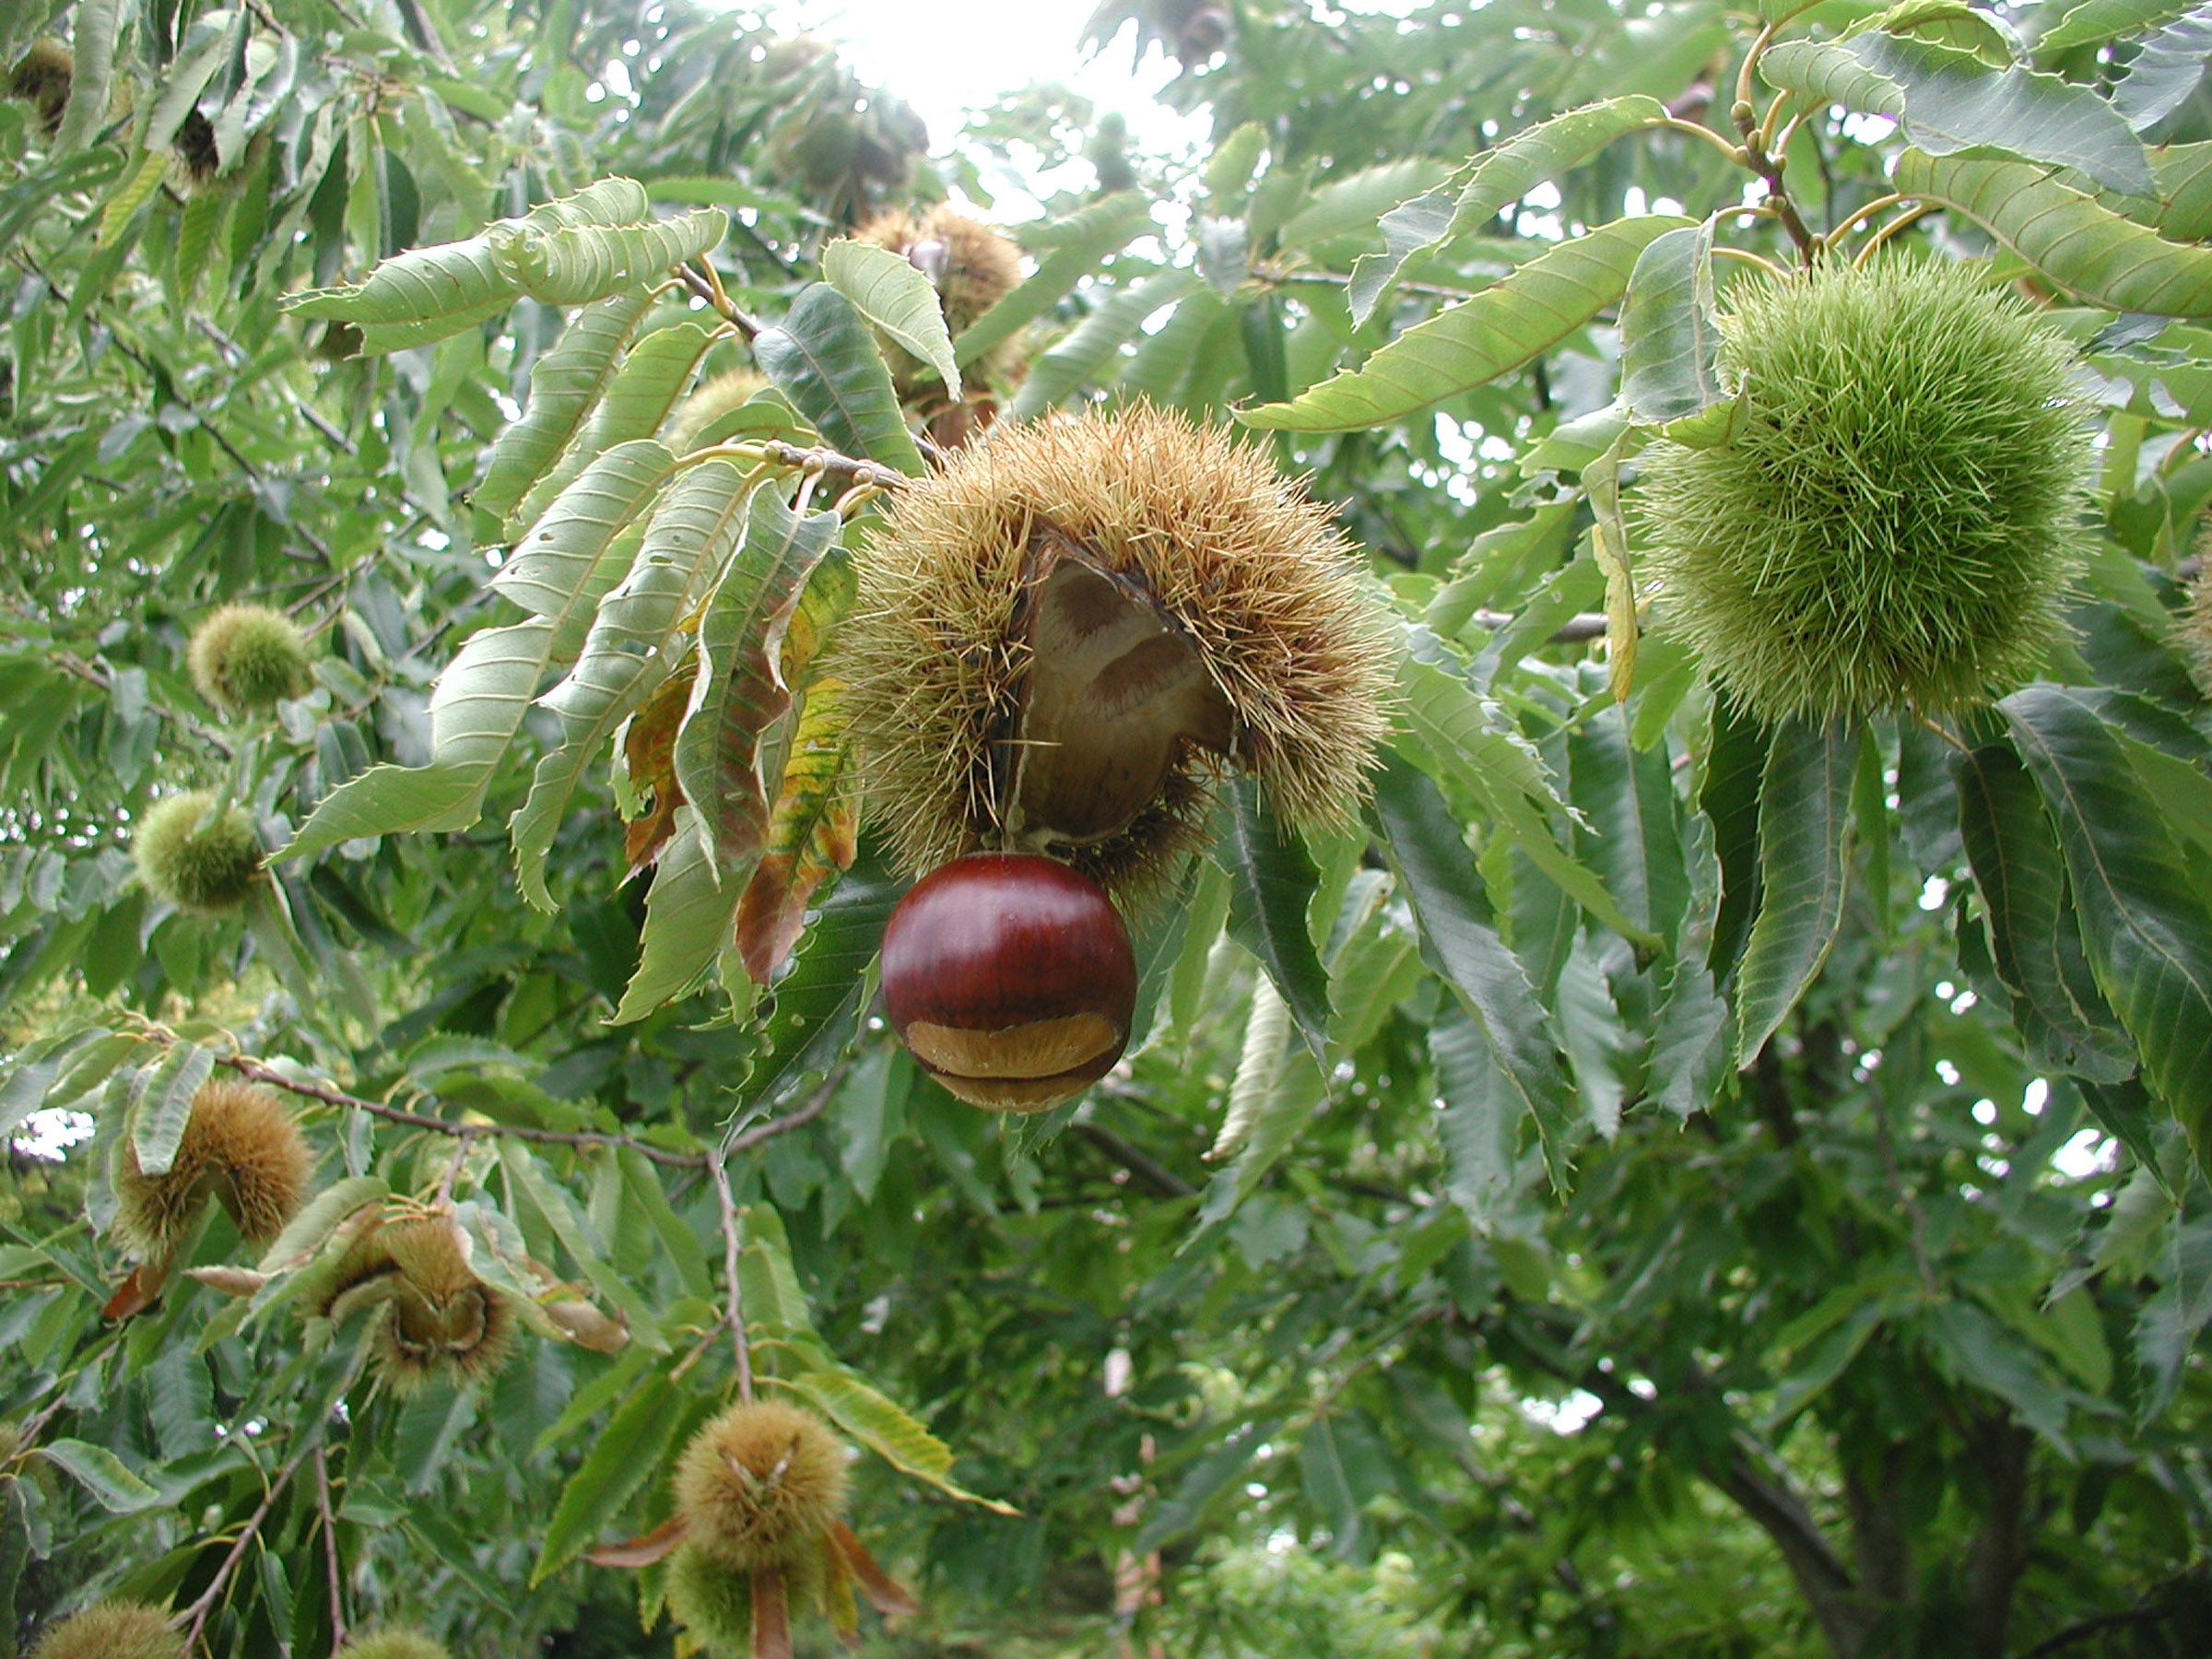 My first inclination, before even identifying chestnut blight as the culprit, was to lop off the two limbs. Once I got up close and personal with the tree, the tell-tale orange areas within cracks in the bark stared me in the face.
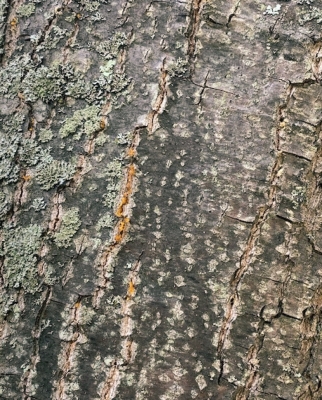 There is no cure for chestnut blight. Removing infected wood does remove a source of inoculum to limit its spread. In Europe, the disease has been limited by hypovirulence, a virus (CHV1) that attacks the blight fungus. Some success has been achieved using a naturally occurring virus found on blighted trees in Michigan.
There is some evidence, although not confirmed with rigorous scientific testing, that mud packs made from soil taken from the base of a tree, can slow or halt spread of the disease. The mud packs need to be applied to each disease canker and then held in place with shrink wrap, or painted or sprayed on, followed by a layer of latex paint. Not an easy job as you move higher and higher up into the tree.
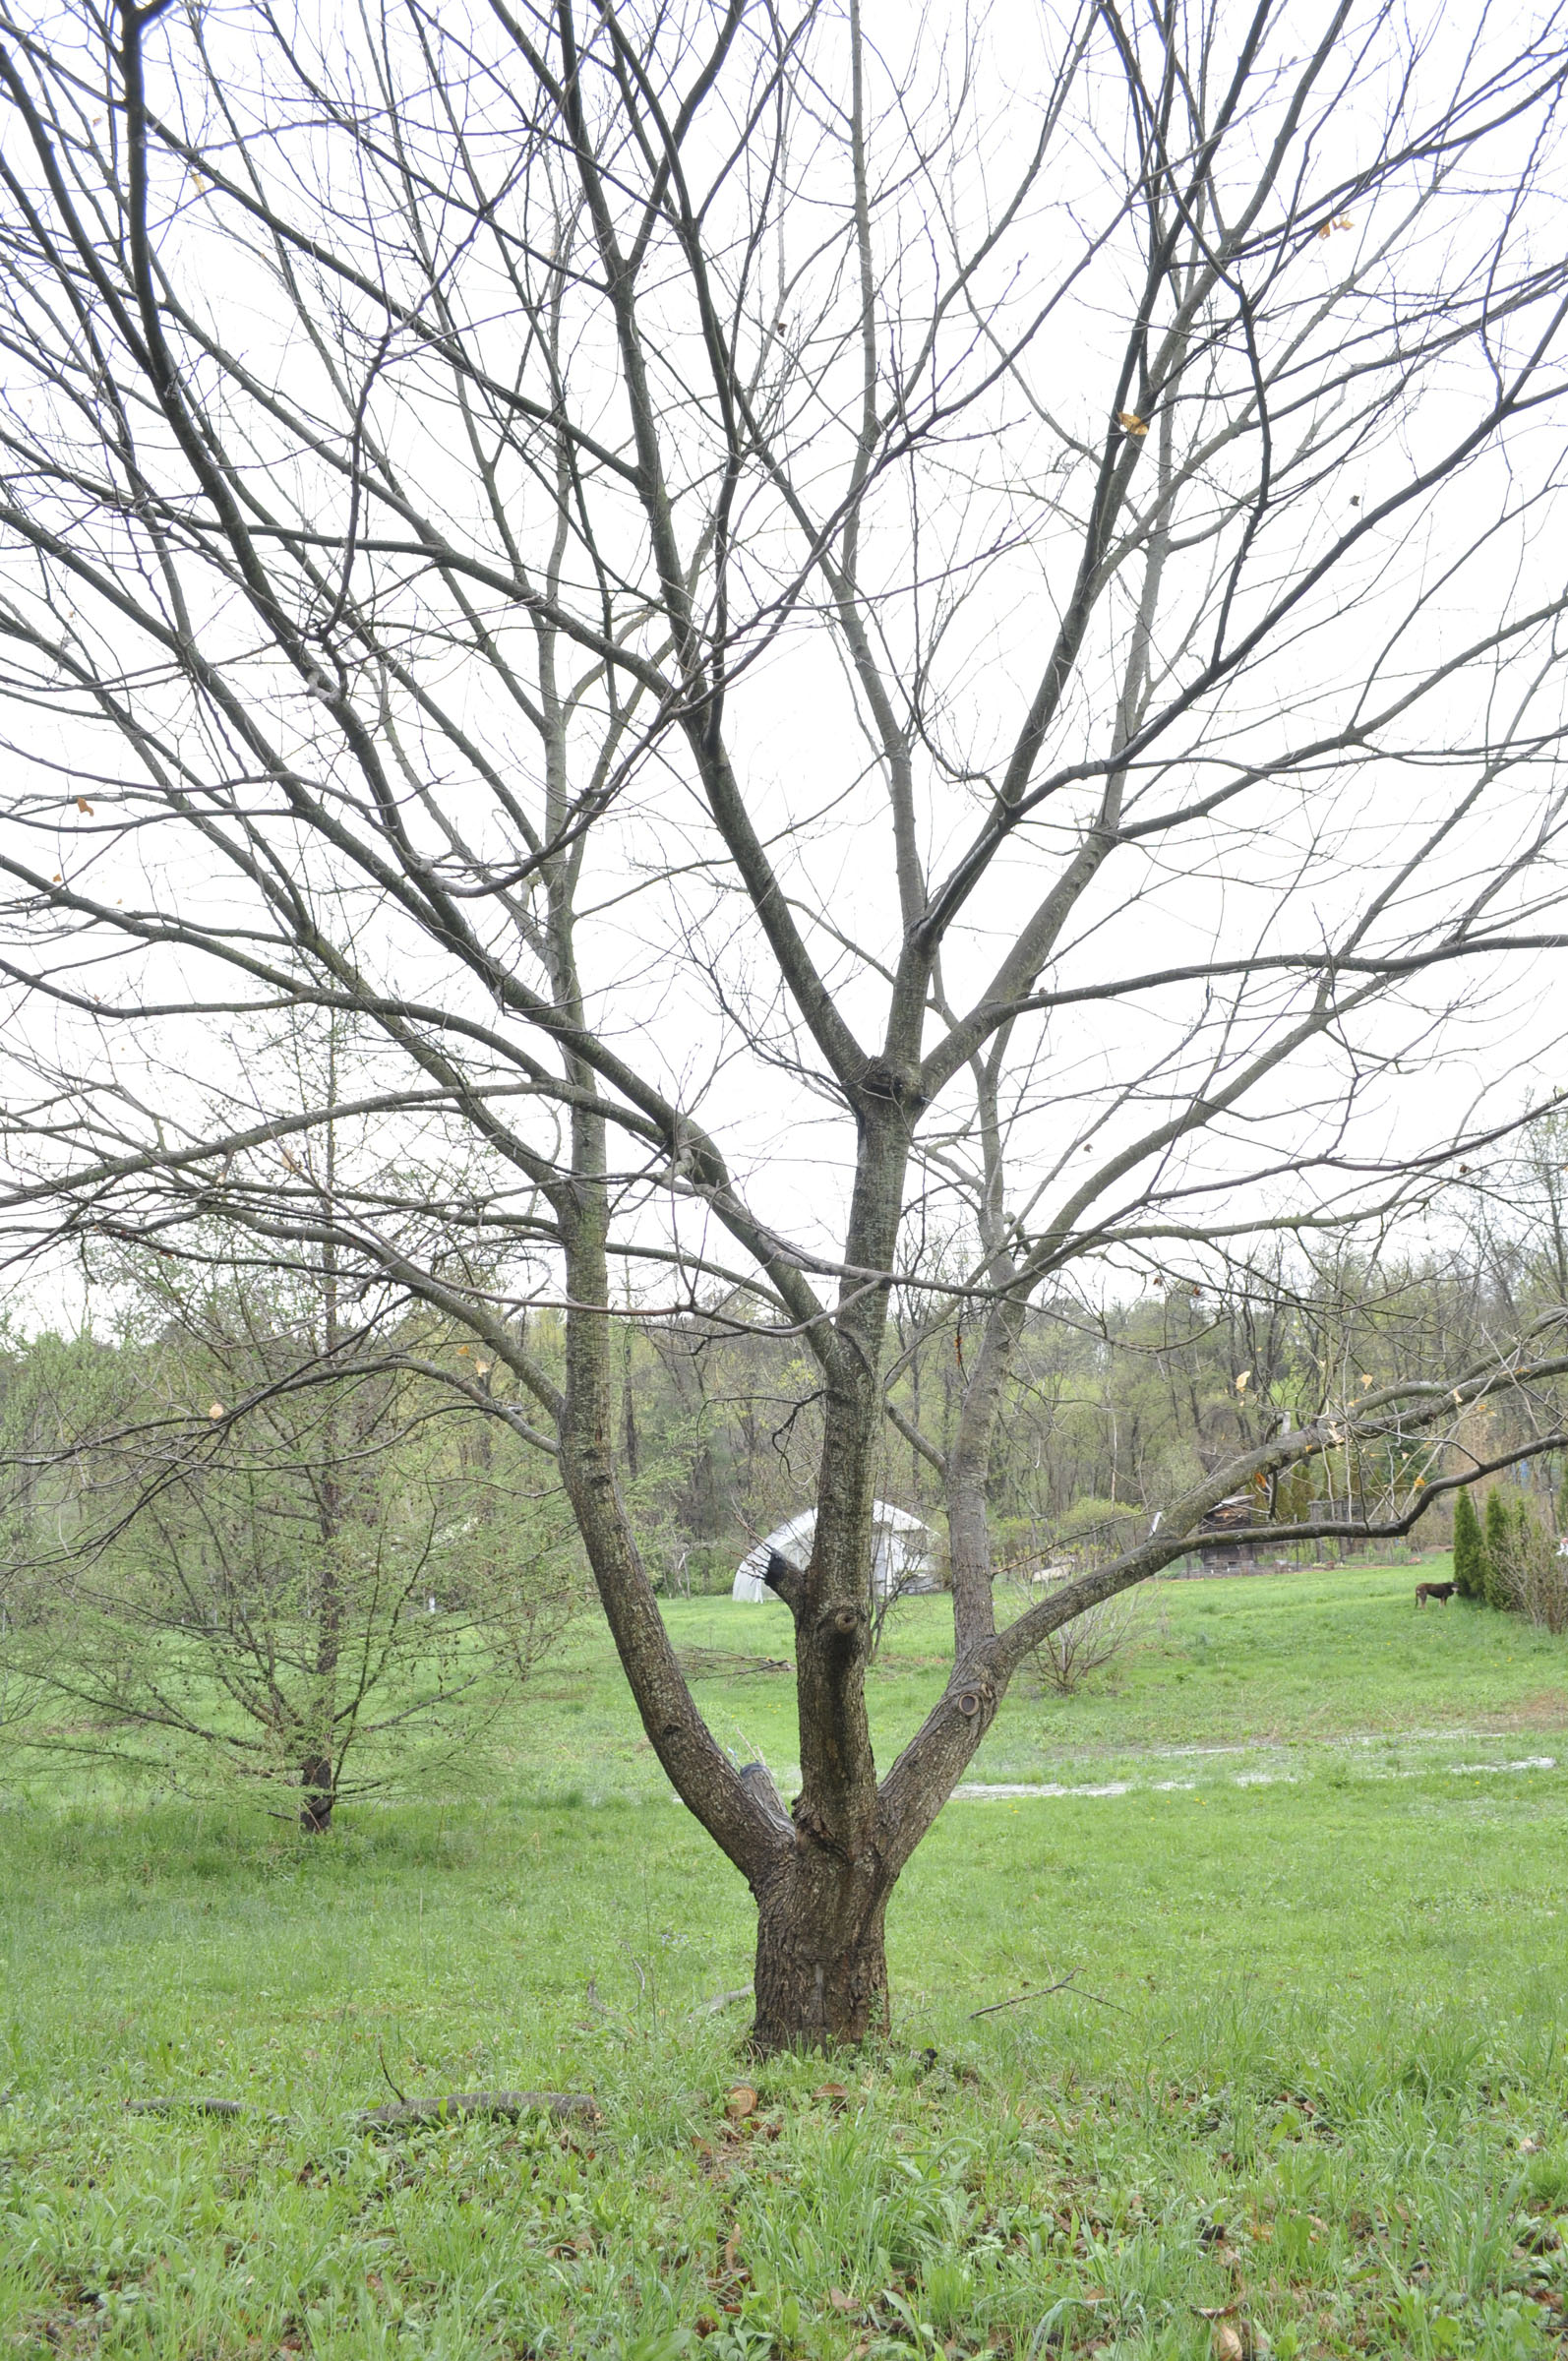
One of my seedling Chinese chestnuts
Resistance
Chestnut species vary in their response to the blight fungus. American chestnut (Castanea dentata) is very susceptible; the fungus arrived here from Asia in the early 1900s, and within a half a century had killed billions of trees. European chestnut (C. sativa) was also susceptible, but was protected by the naturally spreading fungal virus.
Chinese chestnut (C.mollisima) and Japanese chestnut (C. crenata) both have some resistance — but not immunity — to the disease, and have contributed their genes to resistant varieties. Collosal, in fact, is a hybrid of European and Japanese chestnuts, and it has some resistance to blight. But, evidently, not enough. I am hoping that the previously extremely wet season contributed to the evidence of symptoms, and that some drier seasons will keep the tree alive longer.
I’m not planning to sit back and let my chestnut-eating days shrink away to nothing. For starters, keeping my tree vigorous with pruning and good fertility might keep small cracks, into which new infections could enter, from developing. Also, chestnut trees need cross-pollination, so I do have other varieties planted. Also planted 20 years ago was Marigoule, also yielding fairly large nuts. Some sources say “blight susceptible,” others saw “blight resistant;” my large tree shows no signs or symptoms of blight. Yet.
This spring I planted two more European x Japanese chestnut hybrids. I shouldn’t have felt so confident that MY trees wouldn’t get blighted. Precoce Migoule and Marsol, the two varieties I planted, are, like Marigoule, allegedly “blight resistant,” or not.
Generally, the Chinese varieties and their hybrids are the most blight resistance. And I have two of those, actually one tree on which I grafted two different varieties. Qing is pure Chinese with easy-to-peel nuts having excellent flavor. Peach, the other variety, is also pure Chinese, though the nuts are ho-hum in flavor. Both varieties have borne for me for a number of years, yet the nuts never seem ripe once they drop.
One More Thing . . .
Is your head spinning yet? One more wrinkle in this chestnut saga. It turns out that if a pure or hybrid Chinese variety pollinates a pure or hybrid Japanese variety, the latter gets dark staining of the nuts, with a loss in quality. So I was phasing out (with a chainsaw) some other Chinese varieties I had planted. Now, with blight lurking in the wings, I’m having second thoughts.
Enough negativity about chestnuts. On the positive side, Chestnut trees’ shiny, green leaves are attractive and turn a rich golden yellow color in fall. The nuts are tasty and nutritious. With their high starch and low fat content, they’ve been called “the bread tree.” Gluten-free bread tree, for those who care about gluten.
So, do plant chestnuts. Two different varieties for cross-pollination. If I was planting again — and I might — I’d seek out trees from among Qing, Benton Harbor, Everfresh, Gideon, and Mossberger. Or, for Japanese varieties and their hybrids: Maraval, Marigoule, Labor Day, Precoce Migoule, and Marsol.
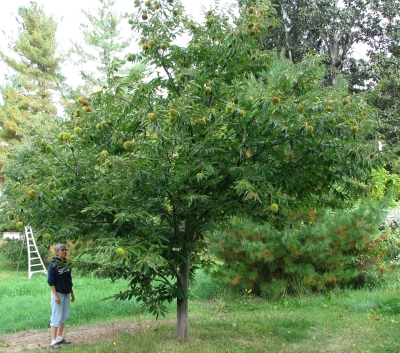
Colossal, at 10 years old
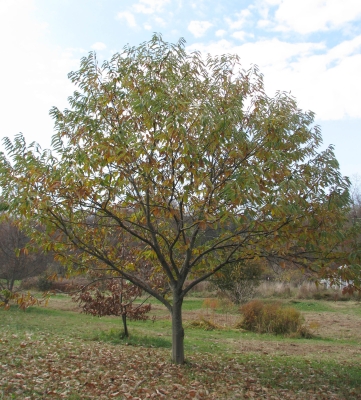
Colossal, in autumn, 12 years old
AH-CHOO!
/1 Comment/in Gardening/by Lee ReichA Dark Cloud Hovers
The end of May and early June is such a glorious time of year in the garden, with plants thoroughly leafed out yet still showing the exuberance of spring growth. (Those of you to the north of me, Zone 5 in New York’s Hudson Valley: your time will come. Y’all to the south: enjoy your camellias, southern magnolias, muscadine grapes, figs, and . . . all the plants I wish I could grow this far north.)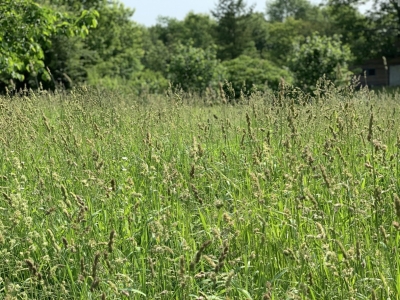 Yet even on the clearest, sunny day — and especially on that kind of day — a dark cloud hangs overhead. Hay fever, literally from hay that is, grasses; and nonliterally, from tree pollen.
Every year the small white blossoms opening on multiflora roses signal that a sneeze season is on. That’s why this late spring allergy season is sometimes called “rose fever.” Rose is not the culprit; is just an easy to note phenological indicator of the progress of the season. Each plant awakens and starts its growth cycle in spring in response to a set accumulation of warm weather. Multiflora rose sends out a signal that the culprits are at work.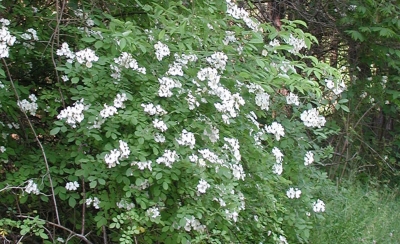 Multiflora rose puts on its show to attract pollinators, such as bees, which transfer pollen from one plant to the next. Hay fever is from airborne pollen blown about by wind, so the flowers of these allergen plants have no need to attract insect pollinators. The non-showy culprits this time of year are grasses and oaks.
As with many other plant-related events, climate change is also leaving its mark on allergy seasons. Here in the northeast, the effect has been for the season to start earlier with a more intense peak. You would think that my multiflora rose indicator plants would keep apace with climate changes but my records, dating back for decades, indicates otherwise. (Daylength, which doesn’t change from year to year, is also sometimes a driver of plant or animal development through the season, and it can interact with temperature.)
No matter: I didn’t have to see a blooming multiflora rose the other day to know that my hay fever season was in full swing.
And the Culprits Are . . .
To at least make this allergy season more interesting, I thought I would look more closely at nearby flora and try to identify the specific culprit or culprits.
I can start by looking no further than the grassy meadow which comes to an abrupt stop at the close shorn lawn only about fifty feet to the south of my home.
With their small, nonshowy flowers, grass species are generally not easily identified. But I can narrow the field, figuratively, by species that are common in the Northeast and that I see now blooming in the meadow. The lineup, then, includes Kentucky bluegrass (Poa pratensis), sweet vernal grass (Anthoxanthum odoratum), and orchard grass (Dactylis glomerata).
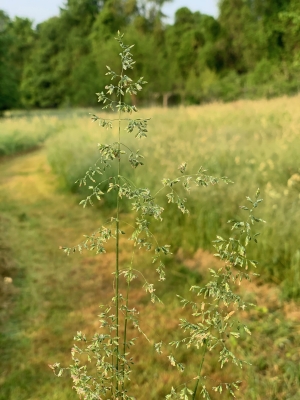
Kentucky bluegrass
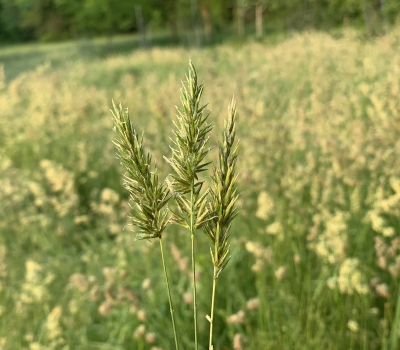
Sweet vernal grass
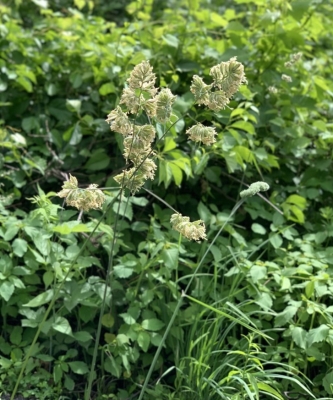
Orchard grass
According to the 1937 USDA Yearbook of Agriculture, most grasses bloom “most abundantly in early morning,” with a secondary flowering period for many of them in the afternoon. The bloom period might be delayed and prolonged in cloudy weather.
Although rain washes pollen out of the air, thunderstorms are another story. Thunderstorms are usually accompanied by winds, which lifts and blows pollen about, and the electrical charges induced by lightning throw add yet another layer of discomfort to the mix.
I just went out to the meadow to jiggle some seedheads of the culpable grasses. The pollen is heavy enough to travel only a few feet, even in a breeze.
Tree pollen is lighter than grass pollen and launches from greater heights. So I’m adding oak to the lineup. The two oaks most common around here are red oak (Quercus rubra) and pin oak (Q. palustris), with red oak, because of its bloom time being most culpable.
So there you have it: 3 grasses and an oak. They’re all nice plants, attractive and decorative. And, in the case of sweet vernal grass, also fragrant. If only they . . . or if only I . . .
I have my eye out for the flowering of catalpa trees and mountain laurel shrubs this time of year. Flowering of either of these plants are a signal that that relief is in sight that my hay fever season is over for the year. Again, these plants aren’t spilling any magical anti-hay fever concoctions into the air; they are merely phenological indicators of what’s happening with other, less conspicuous, flora and fauna.
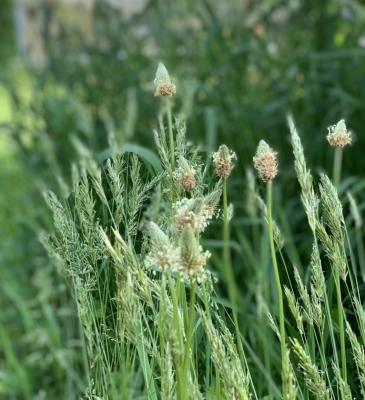
Plaintain, not a sneeze-inducer
DRIP WORKSHOP
See www.leereich.com/workshops for information about the upcoming drip irrigation workshop on June 30th.

