Monday, March 29, 2021, learn about FEARLESS PRUNING
/0 Comments/in Gardening/by Lee Reich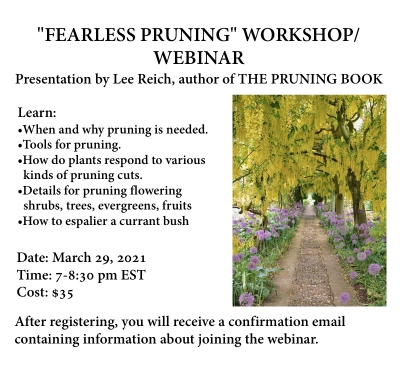
Registration link:
https://us02web.zoom.us/webinar/register/WN_RfkO-_nJT8S-LximcfG24Q
BEE GLORY, GONE (FOR NOW)
/5 Comments/in Flowers/by Lee ReichArnold’s Promise?
I miss the bees. No, they’re not gone from here because of Colony Collapse Disorder (CCD), widely responsible for the loss of bees. Most years, they would have been here and perhaps gone on to greener pastures by now.

The bees come for my witchhazel, and the reason for their absence this year is because my witchhazel didn’t bloom. It usually blooms in late winter or very early spring. And it won’t bloom this season at all. The reason is because it bloomed last fall.
It’s not uncommon for an early spring bloomer such as witchhazel to jump the gun and bloom in fall. And the cause for this behavior is growing conditions through summer that send the plant into a kind of sleep, then fall conditions that all of a sudden shake the plant awake. My guess is that the plant considered the very dry weather last summer an ersatz winter, and cooler and moister conditions in fall were an ersatz spring.
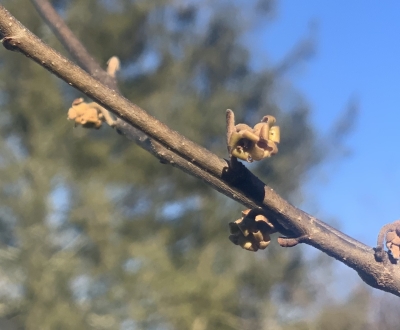
Witchhazel, spent blooms from past autumn
I’d prefer, and the bees also might prefer, for the plant — Arnold’s Promise variety of witchhazel — to bloom on its usual, this side, of the calendar. We’re all much hungrier now for all that visual and aromatic glory. The bees seem happiest with the spring blooms, making the bush all a-buzz with their frenzied flitting moving from flower to flower. These early blossoms provide the nectar and the pollen they need to get going in spring.
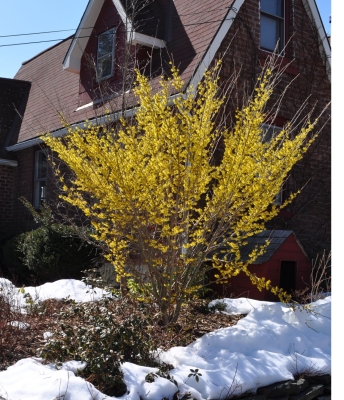
Witchhazel in full bloom in past years
What’s So Good About Honeybees?
Honeybees are much more valuable for their pollination services than for the honey and beeswax we sneak from them. Many crops – almost all those with showy flowers – need the pollination services of bees in order to set seeds or make fruits.
I once kept bees, so can attest to the fact that they make very interesting pets. Their social organization rivals that of any other creature. (Humans are not even in this running.) Each bee knows and does his or her job. The hive’s sole queen leaves the hive but once in her life to get fertilized by males, after which the latter, their genitals ripped from their bodies, die. Guard bees protect the entrance from interlopers.
On calm, balmy days, workers spend their days seeking out and gathering nectar and pollen from flowers. A worker, upon finding a good source of nectar and pollen, returns to the hive and does a dance that communicates to other workers the location of that bounty. This bee “language” is so evolved that different varieties of bees have different “dialects.”
For a fascinating description of the experiments that led to the discovery of those “bee dances,” take a look at the book The Dancing Bees by Karl Von Frisch, who, in 1973, received the Nobel Prize for his work with bees.
Luckily, There are Other Bees
Looking at those ecstatic bees on my witch hazel bush years ago, it struck me that perhaps what I was looking at were not, in fact, honeybees. My personal observations here on the farmden notwithstanding, honeybees are, in fact, on the decline. But they’re not the only bees on the block. Honeybees weren’t even “on the block” a few hundred years ago because they’re not native to North America.
North America has plenty of wild bees, though, almost 4000 species of them! Our wild bees – including, for example, carpenter bees, bumblebees, orchard mason bees, and hornfaced bees — are very efficient pollinators, going outside to work during weather in which honeybees remain huddled in their hives. These native bees get up earlier in spring and earlier each day, and don’t need the calm weather (wind less than 15 mph) and warm temperatures (greater than 55 degrees F) demanded by honeybees. Native bees also are more gentle than honeybees, rarely stinging. They don’t, however, make honey or beeswax.
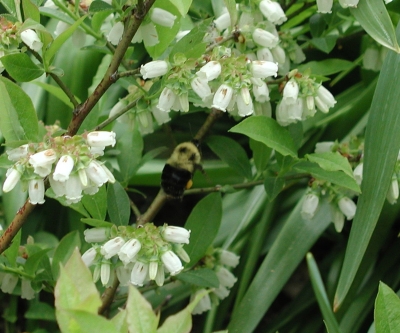
Bumblebee on blueberry plant
Unfortunately, native bee populations are also on the decline these days, due mostly to habitat destruction and pesticide poisoning. Some people build special nestboxes for these helpful insects, which require nothing more than tubes in which to lay eggs, anything from bundles of straws to wooden blocks into which holes have been drilled.
Whatever I’m doing that has kept those bees on my witchhazel happy will have similar effect whether the bees are honeybees or native bees. Because some native bees nest in the ground, our gardening practices can influence their well-being. The website of the Xerces Society details the effects of a number of gardening practices on native bees. Tillage, for example, can be detrimental, as are the pesticides copper sulfate, sulfur, and rotenone. Maintaining wild habitats is also important to their survival.
I’m hoping next winter or spring to see my Arnold’s Promise awash in fragrant, yellow blossoms and all abuzz with bees, whether honeybees or native bees.
SWEET POSSIBILITIES
/8 Comments/in Gardening/by Lee ReichIt’s time to prune, and to help you, I’ll be holding a PRUNING WEBINAR on March 29, 7-8:30 EST. Learn the tools of the trade, how plants respond to pruning, details for pruning various plants, and enjoy a fun finale on an easy espalier. There’ll be time for questions also. Cost is $35 and you can register with Paypal or credit card here.
Choice Syrups
I’ve given up on maple syrup this year. The tree I tapped was too small to yield anything significant.
I’d almost given up on river birch syrup. I thought perhaps it was the timing — and, have since learned, that it is! Sap from any one of a number of birch species doesn’t begin to flow until temperatures are consistently 50°F or higher, which arrives near the end of the maple tapping season and continues until about the time the trees leaf out.
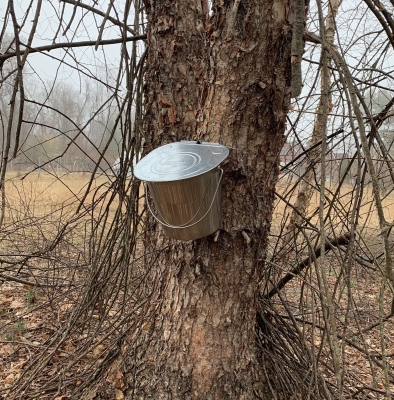
River birch, tapped
Black walnut was another possibility for tapping. I previously had pooh-poohed it because, much as I love this tree’s nuts, I imagined the aroma of the leaves or the hulls oozing its way into the sap. Ugh!
Another reader reported that walnut syrup is delicious and I should try it, so I did. Sap started dripping as soon as I drilled the holes. The first batch is boiled down, and it is delicious. Not that different from maple syrup, with just a slightly different, smoother flavor. Nothing reminiscent of the nuts, leaves, or husks, though.
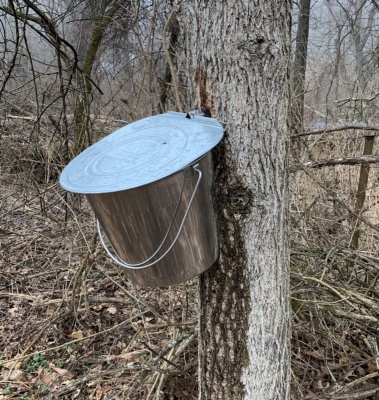
Black walnut tree, tapped
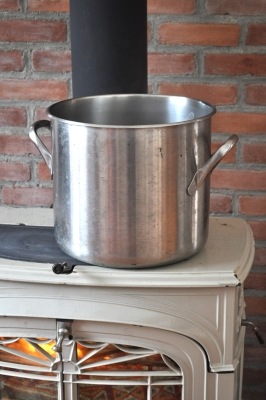
Processing was via the same low-tech approach I’ve used for maple syrup, merely adding each day’s “catch” to a big stock pot sitting on the wood stove. The woodstove is stoked pretty much continuously this time of year, so the sap is always evaporating, with the added bonus of humidifying the house.
I see a few eyebrows going up. Sticky walls and ceiling are what comes to some minds upon the mention of cooking down maple sap indoors. Well, that’s usually myth. Sticky walls and ceiling only result when the sap is in an active boil and bubbles bursting on the surface of the liquid send little droplets of sugar water into the air and onto walls and ceilings.
Until the final stage of my sap-making, the sap is just slowly evaporating. The vapor given off by slowly evaporating, simmering, or boiling a solution of any sugar and water is nothing more than water vapor. That’s why the maple (or black walnut) sugars become concentrated in the remaining liquid. They stay in the pot.
In those final stages of concentration, with much reduced liquid volume, the liquid can indeed reach an active boil. The pot of liquid announces that it’s nearing that stage by starting to gurgle like a baby, at which point it needs to be watched closely, mostly so that the syrup doesn’t get too concentrated or burn. The finish point is when the temperature of the liquid reaches about 219 degrees F.
I discovered a big difference from maple syruping when I attempted to strain off schmutz in the boiled down black walnut sap. The schmutz was a jelly that quickly clogged up the strainer. The amount of schmutz can vary from tree to tree, with time of year, and who knows what else. Turns out that black walnut sap is high in pectin, aka schmutz. Perhaps calling it “black walnut jelly” would make it more appetizing. 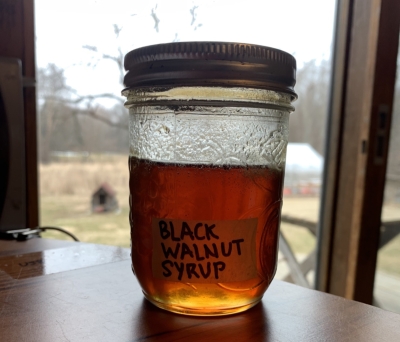
Too Late to Prune, Say the Squirrels?
Someone wrote me that squirrels were chewing on a Norway maple last week and the sap was seen dripping down, then went on to ask if that meant it was too late to prune. Perhaps the squirrels were enjoying some of the sweet sap.
Yes, you can tap and boil into syrup the sap of all kinds of maples; I’ve tapped and made syrup from silver maple, red maple, boxelder, and, of course, sugar maple. And each tastes slightly different from the other.
Getting back the pruning… It’s not at all too late. It’s fine to “dormant” prune any plants up until the time when they unfurl their leaves in spring. Actually, peach trees are best pruned when they are blooming.
Another good question might be: Why not just cut the Norway maple down to the ground? The trees are invasive and displacing our sugar maples, they have poor fall color, and they create lugubrious shade beneath which grass and much else can’t grow. Mostly, people keep these trees because they are already in place and full grown.

