Posts

WEEDS (SOME GOOD)

Anti-Weed Tools

    Recently sown vegetable seeds that have sprouted are growing slowly; weeds and lawn are growing fast. Give weeds an inch, and they’ll take a mile. Ignore growing lawngrass, and soon you’ll need a tractor or a scythe to cut it down to size.Wire weeder and winged weeder
    But few people ignore their lawns. Dealing with the growing grass is straightforward: You get out the lawnmower and go back and forth or round and round until every grass blade has been sheared.
    Weeding demands more thought, technique, and intimacy with vegetation. Different weeds and different settings call for different approaches. In a vegetable garden, a hoe might be the tool of choice. My choices for hoes are the winged weeder, with a sharp blade that runs parallel to the ground surface and just slightly below ground in use, and the wire weeder, whose wire performs similarly.
    Mostly, though, I don’t need or use a hoe in my “weedless” (actually, “weed-less”) vegetable garden. Weeds are few enough and the soil is soft enough so that all that’s necessary is to bend over and pull out a weed, tops and all. Tap-rooted weeds, such as dandelion, need coaxing out with the aid of a trowel or hori-hori knife. That coaxing also helps lift a quackgrass plant gently enough to allow following its subterranean runner as far as possible until it breaks.Quackgrass with runner
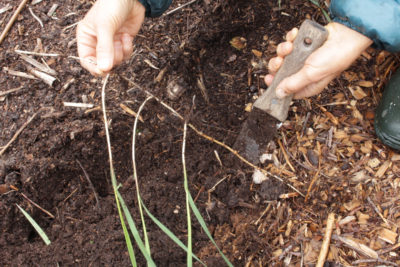
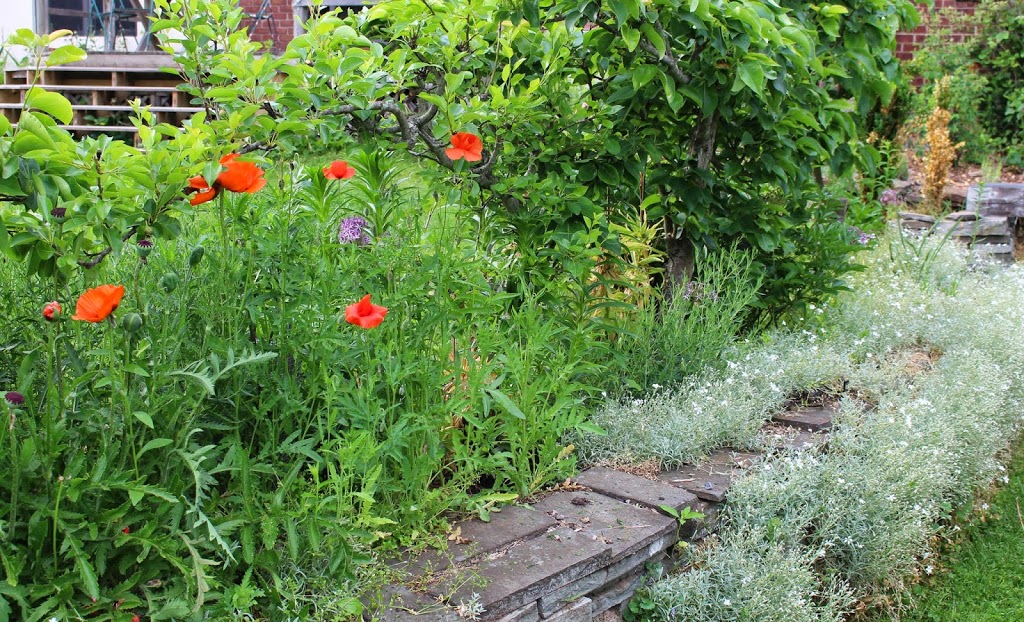
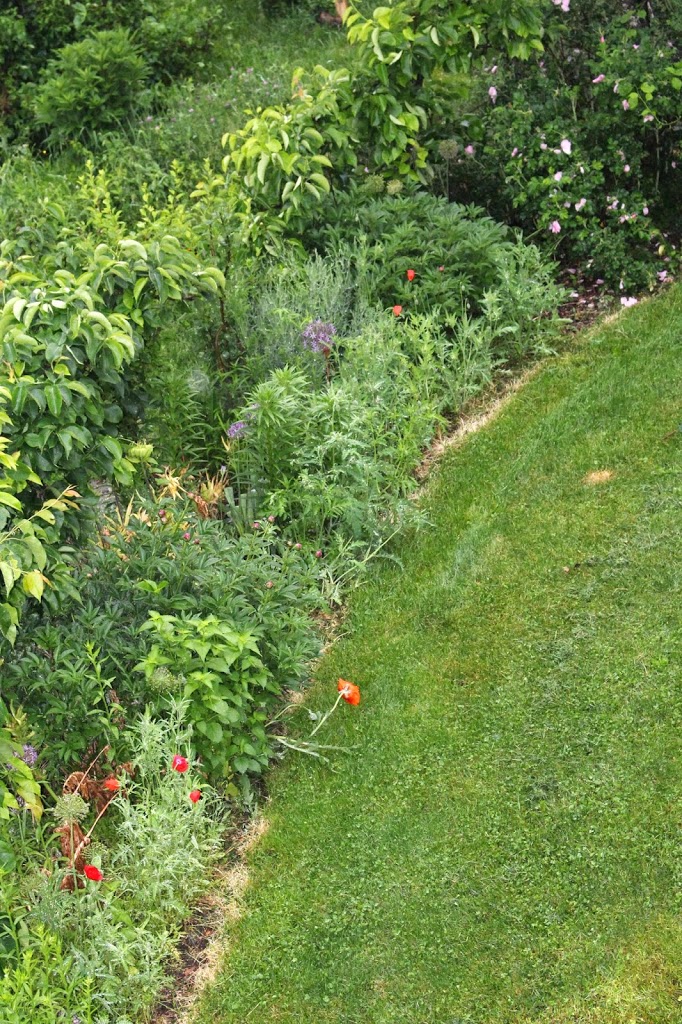
    Along garden edges, my half-moon edger is very good at scouring out a dry moat that stops weed. Problem is that my garden has a lot of edges. And furthering the problem, any edges neglected for more than a couple of weeks during a spell of good growing conditions puts that edge back to square one.

Fire and Acid

    Just outside the glass sliding doors of my living room is a brick terrace that makes a nice take-off point to a short expanse of lawn and then, through an arbor, into the main vegetable garden. Or, turning, south, towards the greenhouse and meadow. You’d think that the brick surface of the terrace would be maintenance- and weed-free. Not so.
 Flame weeding   It’s a tribute to the tenacity of weeds how they manage to take root or sprout, and then thrive, in the small openings between adjacent bricks. Even in the small cracks between the bricks and the masonry wall of the house. Some of those “weeds” are actually welcome there — such as the wild columbines that send up thin stalks at the ends of which hover orange and yellow blossoms whose rear-pointing spurs gives the flowers the appearance of flaming rockets.
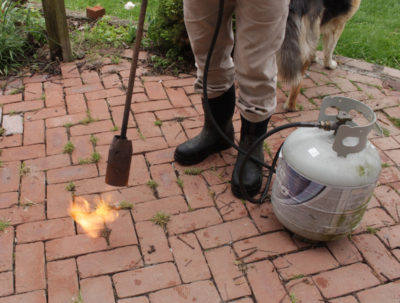
    Still, most of those weeds have to go. Pulling them out individually would be too tedious, and takes with them what little dirt or rock dust lies between the bricks. So I torch them, instead. A small, hand-held torch would be effective, but slow. I use the appropriately named Dragon Weeder, whose 3-inch diameter nozzle attaches, via a 10-foot long hose, to a 20 gallon propane tank. Fire roars out of this dragon’s mouth like a jet engine, and all that’s needed is a quick pass. No need to set plants on fire; just heat them enough to burst their cells. And this wet day is ideal to reduce the risk of fire spreading.
    Equally effective for an expanse like my terrace is to burn foliage with vinegar. Household vinegar, straight up (5 or 6% acetic acid), does the trick as long as the temperatures are above 70°F. Effectiveness is increased if 2 tablespoons per gallon of canola oil and 1 tablespoon per gallon of liquid soap is added to the vinegar, and if vegetation is not so large as to cause “shadows” where lower vegetation gets bypassed.
    Either fire or vinegar kills only the tops of plants. Roots might have sufficient stored energy to send up new sprouts, so treatments must be repeated until roots have used up all their energy.

Weed Food

    Corn salad is considered a weed in Europe. It’s borderline weedy in my garden, with its tufts of greenery clustering near the foot of some of my vegetable beds and occasionally elsewhere.
    No need to hoe it, hori-hori it, torch it, or vinegar corn salad. I let it be, even coax it along, in some areas, and weed it out in others. Corn salad and I can maintain this congenial relationship because I like to eat it.
    The same can be said for Good King Henry, another European import that could take over my garden if given free rein. It’s a relatively unknown relative of more familiar edibles like lamb’s-quarters (Cheno­pod­­­ium album), epazote (C. ambrosioides), and quinoa (C. quinoa), and, to me, the best-tasting of the lot. Even if you didn’t like the flavor of Good King Henry, you couldn’t help loving its botanical name, C. bonus-henricus. Eat it and weed.

Of Poppies, Snow, & Herbicides

Oriental poppies, now in bloom with large, floppy, flaming red blossoms, are worth ooh-ing and ah-ing about. Likewise for Snow in Summer (Cerastium tomentosum), with small gray-green leaves and small white flowers, except that too few people know or grow this plant.  Here, the two plants look especially congenial together with Snow in Summer hugging the ground at the feet of the poppies and spilling over the rock wall that supports the bed in which these plants grow.
 No skill is needed to grow Snow in Summer, or to propagate it. Plant it and it will spread, rooting as it creeps but never with frightening speed.

Alas, the show from either plant is all too transient. Poppy foliage is soon to yellow and melt slowly back into the ground. And by the time you read this, blossoms of Snow in Summer will have tapered off and its leaves will have lost their exuberance of spring. The show’s transience makes it all the more appreciated.


A narrow, yellow strip of vegetation — dead vegetation —  sits at the bottom of the rock wall supporting the poppy and Snow in Summer bed (also home to espaliered pears, rugose rose, alliums, and other perennials) and at the its upper border with lawn. I can’t say that I’m proud of the yellowing strips of lawn and weeds, but the weedkiller I applied is very effective at keeping errant weeds and grass out of beds, paths, from climbing the rock wall and growing in between bricks of my terrace, and away from the bases of young trees. Weedkiller??!!
Yes, I am spraying weedkiller . . . but the weedkiller I’m spraying is very benign. I take straight household vinegar, which is 5 to 6 percent acetic acid, and add to it, per gallon, 2 tablespoons of canola oil and 1 tablespoon of dish detergent. The detergent and oil help the vinegar spread out on and stick to the leaves.

The USDA also has been researching the use of acetic acid as an organic spray to control weeds. They found 20 percent acetic acid to be very effective, which is not surprising. Twenty percent acetic acid, though, is neither very safe to use nor readily available.

My vinegar concoction, at 5 to 6 percent acetic acid, is, of course, not as effective as the USDA’s 20 percent. Nor is it nearly as effective as the widely used chemical weedkiller Roundup. My mix only kills green leaves; Roundup is translocated throughout a plant to kill roots, stems, and leaves. Plants store energy in roots and stems so can recover from my spray to grow new leaves. Eventually, with repeated spraying, vinegar-sprayed weeds run out of energy and die. Plus, my mix is not much different from salad dressing (except that it would need more oil, some herbs, and no detergent).

My aim is to spray frequently enough to kill each emerging round of greenery while it’s still drawing on energy reserves, before the leaves start socking away excess energy in roots and stems. Early in the season weekly sprays are needed; later, every two weeks or so.

Because vinegar only kills greenery by direct hit, it is most effective on smaller weeds where there is no “shadow effect.” The vinegar spray’s effectiveness drops at temperatures below 70° F.


My farmden necessitates the application of about 8 gallons of vinegar mix per session, most easily applied using a backpack sprayer. Mixing up and spraying the mix is no fun but has become less unenjoyable with my new Jatco sprayer.
Anyone who has used a backpack sprayer will appreciate Jatco’s rather unique qualities: a carrying handle, clips for holding the pumping lever and spray wand during storage or carrying, a large mouth for easy filling and cleaning, a mixing paddle that moves with each pump of the handle, and the totally internal pump that eliminates that awful sensation of spray material dripping down your lower back (even if it is just vinegar). The sprayer is almost perfect, two very minor shortcomings being the difficult-to-read volume indicator embossed on the tank and the lack of a bottom handle to grab when inverting the sprayer when cleaning it.

The best thing about the Jatco sprayer is the good leverage afforded by the way the pump handle is connected to the pump. Less pumping means less work. Carrying 3 or 4 gallons of liquid on your back in the hot sun is work enough.

Propagating Cuttings, Quackgrass

Ten weeks ago I wrote of the “pot in pot” propagator that I was using to root dormant fig and mulberry cuttings. The propagator is nothing more than a small, porous, clay pot filled with water and with its drainage hole plugged that I plunged into the mix of peat moss and perlite that filled the larger pot. Water drawn out of the small pot keeps the peat-perlite rooting mix consistently moist.
The cuttings have sprouted with enthusiasm. And when I lift out the small pot, I see roots running around in the moist rooting mix, so I separated the plants and potted them up individually.
No need to put the propagator away now that plants are no longer dormant. With a simple covering to maintain humidity, the propagator also works well for so-called softwood cuttings, that is, cuttings that start out with leafy shoots. Technically, today’s new cuttings aren’t “softwood” because they haven’t had time yet to begin much growth. They could more accurately be called “leafy.” Their first leaves have unfolded and shoots (the “softwood”) are soon to appear. Whether “leafy” or “softwood,” such cuttings need high humidity to keep leaves from wilting until roots develop.
The propagator conversion involves nothing more than poking four sticks into the rooting medium equally spaced around its outer edge, and then draping a plastic bag over the sticks. Bright light will keep the green leaves feeding the cuttings. Direct light is a no-no because it would cook the cuttings in their high humidity chamber.
—————————————————————
I suppose I could be nostalgic about the quackgrass (Elytrigia repens, and also commonly called witchgrass and couchgrass) stealthily making inroads into my various gardens. After all, quackgrass was my first serious weed problem in my first real garden, a vegetable plot of about 500 square feet in Madison, Wisconsin. At the time, the lakes in Madison were suffering their own weed problems, the result of “fertilization” of the water with runoff from over-fertilized, residential lawns surrounding the lakes. Giant beaters plied the lakes in those days, chopping the lake weeds which were then harvested onto boats and then trucks for disposal. “Weed-free mulch!,” thought I. 
I convinced a lake weed crew to dump a truckload of those water weeds onto my front lawn. I spread the mulch quickly — I had to because the soggy mass started rotting within a few hours to what was beginning to smell like a a pig farm. Laying pitchfork after pitchfork of the stuff between rows of vegetables spelled quick death to the quackgrass.
My gardens now are far more extensive, no straight expanses beckon easy mulching, and water weeds are not in the offing. So for now, I am attacking quackgrass mano a mano, digging and pulling out every last shoot that I can find along with attached, running roots — no easy task among perennial flowers. Where I can, I’ll spread a few sheets of newspaper and top that with mulch. Now is the time to attack because in about a month, new runners will begin to push further afield just beneath the soil surface. The pointed ends of these runners are sharp enough to push right through a potato.
Quackgrass is so widespread that you’d think it was native. Not so. But it has been here for a long time, coming over from Europe with the first colonists. And it’s not all bad: It is good forage for horses and cows, and has been used in herbal medicine especially for kidney ailments. “It openeth the stoppings of the liver,” according to 16th century herbalist John Gerard. Still, it’s not welcome in my garden.
—————————————————————
I’ve got one more deathly arrow in my quiver with which to fight off quackgrass, but it must wait until the weather warms. Vinegar. Household strength vinegar sprayed on the plants kills the leaves; repeatedly killing the leaves eventually kills the plants. I boost vinegar’s efficacy by pouring 1 tablespoon of Ivory dish detergent and 2 tablespoons of canola oil into each gallon of vinegar. Vinegar works best when temperatures rise above 70° F.

May 21, 2009


For a day every week or so, my yard smells like salad dressing. No, I’m not getting the lettuce dressed while it’s still out in the garden. Yes, that smell is vinegar. For the past few years, regular strength vinegar, straight up, has provided nontoxic (except to sprayed weeds), sustainable, “green” weed control on the edges of beds, in paths, and on my brick terrace.

I specify “regular strength” vinegar because our USDA has also been looking into vinegar as weedkiller. On the theory that if a little of something is good, a lot must be better, USDA research focuses on using more concentrated solutions of vinegar – even 20%. Those more concentrated solutions are more effective but you have to be very careful using that stuff. It burns. I’ll stick with salad dressing strength 6% solution.

A couple of benign additions increase the power of my “regular strength” vinegar. First comes vegetable oil – no, not salad dressing again, but to helps the vinegar stick to weeds’ leaves. I use 2 tablespoons of canola oil per gallon of vinegar. Then comes soap, specifically Ivory liquid detergent, 1 tablespoon per gallon, to better spread the vinegar and oil over the leaves.

This mix only kills greenery so needs to be applied regularly to starve roots. Hence my repeated applications.

*****************************************

It’s amazing how many seedlings you can grow in a small space using a Speedling or some other multi-cell plastic (or “plug”) tray. These trays are re-usable, with tapered cells each about an inch square. For example, a 1 foot by 8 inches area was home to my 54 zinnia seedlings. The tapered design allows for good root development and, if the trays are elevated on a screen, the roots stay in bounds by being air-pruned as they try to exit the bottom hole.

I had 54 zinnias, 54 Signet marigolds (ferny, lemon-scented foliage and small, yellow flowers), and a slew of other flowers that I had sowed a month and a half ago in the enthusiasm of spring. A few days ago, the time came to figure out just where to plant all those seedlings. Flowers generally look best when planted out in large masses rather in isolation or anemic strips, so with this many plants, it’s hard to go wrong.

Planting is quick with plug trays. The seedlings were at just the right stage for transplanting, so all I had to do was yank on each stem to pop out a whole plant, root and all. A quick poke of my trowel into the ground was all that was needed to make a home for each seedling. Firming the soil around each plant after dropping it into its waiting home completed the planting . . . except for watering. That watering was thankfully supplied by the inch-and-a-half of rain that followed my planting.

Small plants establish more quickly than large plants, and with less care, so I’m finished with these plants except to enjoy their flowers.

*********************************************

I must have a built-in temperature sensor in my head. Last night (May 18th) my eyes sprung wide open at 1:38 a.m., I walked over to my remote thermometer, and saw that the temperature had just reached that magic number of 32 degrees Fahrenheit. The sky was clear and the morning was, to say the least, early, so I guessed that the mercury would dip even lower.

Preparations had already been made for a light frost, but who knew just how cold temperatures might plummet? After all, last year at about this time, a sunny morning greeted me with leaves blackened by a severe freeze. So I got dressed and threw any coverings I could find over any plants that could be protected and needed to be. Key lime, pomegranates, lemon trees, and other potted, tender plants went into the garage. Nothing could be done about the blossoming hardy kiwifruit vines, the soon to blossom grapes, and the fruitlets already developing on apples, pears, and pawpaws.

I went back to sleep.

Morning saw the thermometer reading 28 degrees, hoary frost on the lawn, and a sunny day in the offing. Damage assessment would have to wait until the sun melted frost off everything. And the damage, assessed this morning at 9:30, was  . . . . zip, nil, nein, nada, rien, nothing. It’s amazing the way even tender plants, like those marigolds and zinnias I had planted (and had not protected because there were too many of them), toughen up after a few days outside. It looks like a good year for fruit – unless we get another, more serious, freeze.

**********************************************