Posts

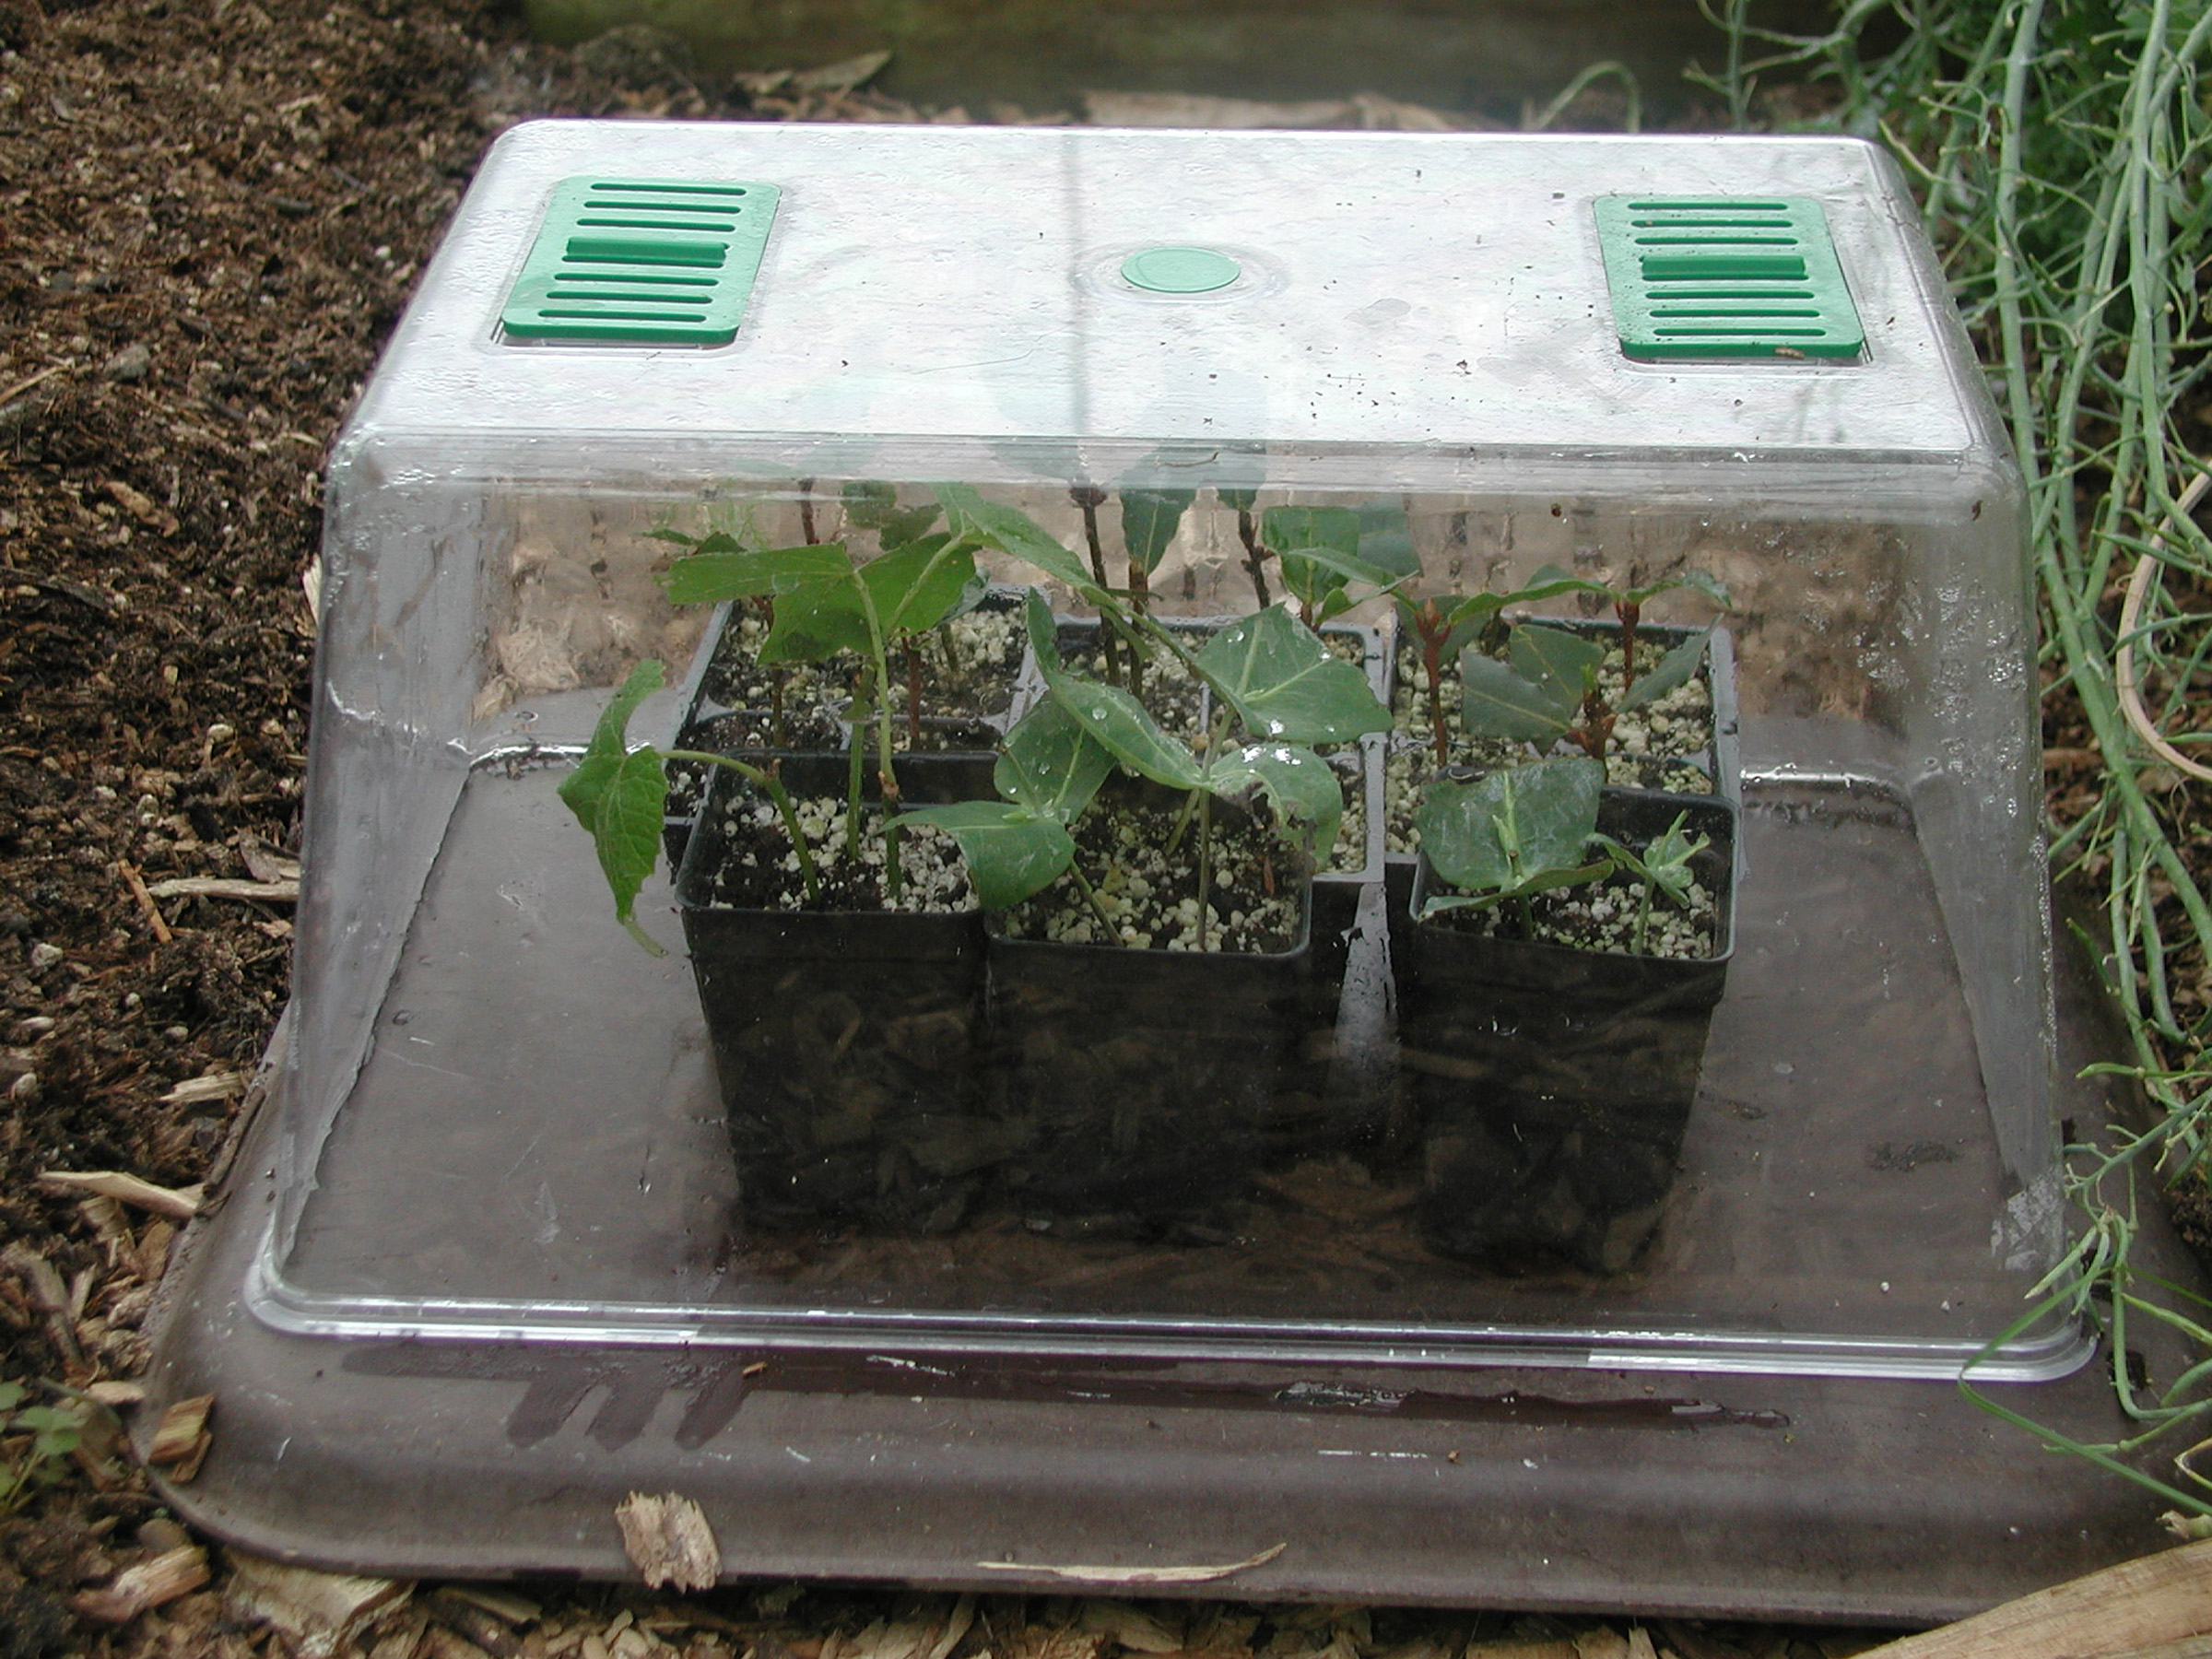
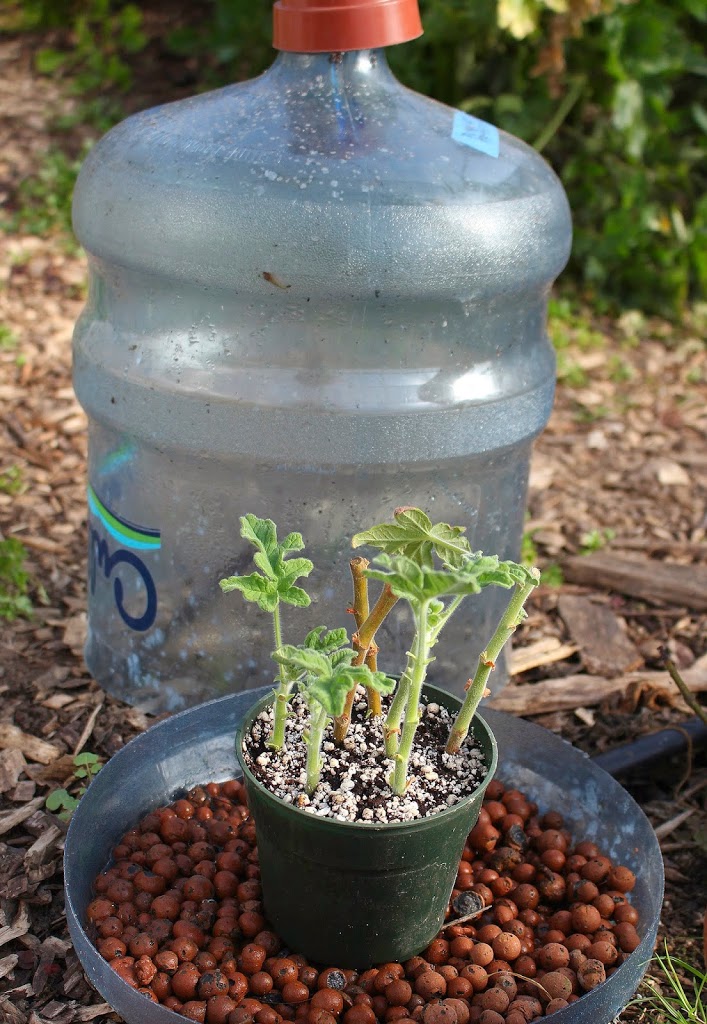
Clear dome maintains humidity in the propagator

FINDING MY ROOTS

FINDING MY ROOTS

Totipotent Cells

Take a look at new shoots growing on a favorite shrub or vine and you’ll see that the bases of these shoots may be beginning to toughen up, becoming woody. Such shoots, snipped from the mother plant as so-called half-woody cuttings, can be rooted to make new plants. Two other types of stem cuttings are softwood cuttings, taken while shoots are still green and succulent, and hardwood cuttings, taken from thoroughly woody, often leafless, shoots.

You can make whole, new plants from any of these cuttings; I’ve done it for years. But be careful because rooting cuttings to make new plants can become addictive. And then you have to figure out what to do with all your new plants. (Hence, my annual plant sales.)Propagator for softwood cuttings

Cuttings are one of many ways to clone plants, that is, produce new plants that are genetically identical to the mother plant from which the stems were taken. Read more

I GET MY KICKS

Roots Do It

Some people get their kicks from hang gliding; some from racing cars. Call me mundane, but I get a similar thrill, minus the fear, from seeing cuttings of some new varieties of figs that I am propagating take root. The cool thing about hang gliding, racing cars, and rooting cuttings is also the sense of satisfaction you get from doing it well.

The current batch of cuttings provides special satisfaction because the method I used, gleaned from the web (see, for instance, what turns up with a search for “fig pops”), permit me to check and observe progress frequently. Usually, I stick a cutting into a rooting mix and learn that rooting has taken place by the resistance of the stick to an upward tug or by roots escaping through the drainage hole in the bottom of the pot. With fig pops, I get to see each cuttings wiry, white roots wending their way through the rooting mix soon after they first start to develop. Fig pops are also a way to root lots of cuttings in a small space.
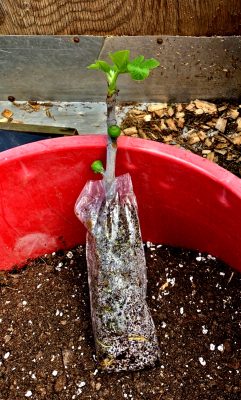
A fig pop
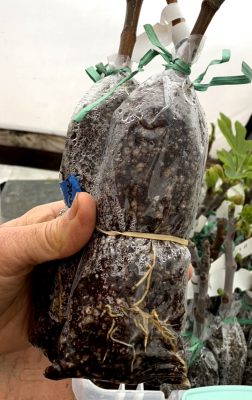
The current figs are rooting in 3” by 8” clear, thin plastic bags filled with my usual 1:1 mix of moist peat moss and perlite.  I pushed the cuttings, fig “sticks” of last year’s growth 1/4 to 1/2 inch thick, into the mix almost to the bottom, then sealed the top closed with a twist-tie. One cutting per bag. Roots need to breathe, so I poked each bag full of holes with a toothpick. That’s it, except when the bags seemed too dry I stood them in a pan with a couple of inches of water for awhile.

(Dipping the cuttings in a commercially available rooting hormone would probably improve rooting, but I don’t use them. To me, the health precautions needed when dealing with them takes the fun out of gardening.)

All that, and time, would have been enough. But to speed things up, I moved the cuttings to a place where they’d get some warmth on their bottoms. That could have been atop a refrigerator, above, but not on a radiator, or, in the case of my cuttings, on a seedling heating mat.
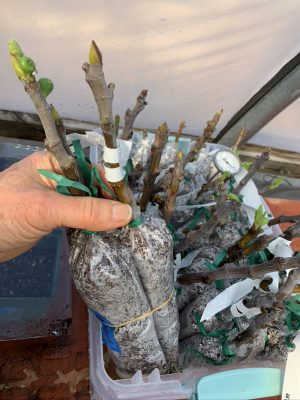
Fig pops
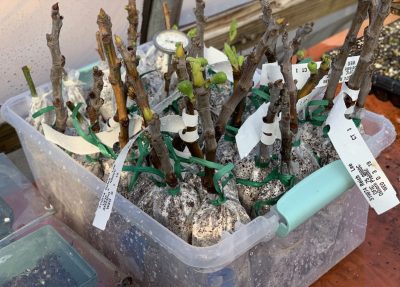
Fig pops together in tubNo light is needed until cuttings start to leaf out. Which is an exciting moment, because roots might — or might not — begin to show about then. All that’s needed is to lift a fig pop and take a look. Some of mine showed roots after only 3 weeks! But it’s good to let them get well rooted before disturbing them.
Rooted figs
When the time came to move a well rooted cutting, I sliced the plastic on the bottom and up along one side of its bag and put the whole root ball in a bona fide pot, filling in with bona fide potting soil around it.

That’s it. Growth will pick up with increasing warmth and sunlight. And then fruit, which could arrive on the branches even this growing season. Figs are admittedly easy to root by any method. As with any cutting, an important ingredient for success is patience.

Graft (Nonpolitical) is Good

Moving on, next week, to another perennial source of excitement here in the garden: grafting. I do this every year about now? Why every year? Because I’m always getting scions (1-year-old stems for grafting) of new varieties of fruits, mostly pears, to try out or to replace existing varieties. Or I might want another tree or two of a variety particularly worth growing here.

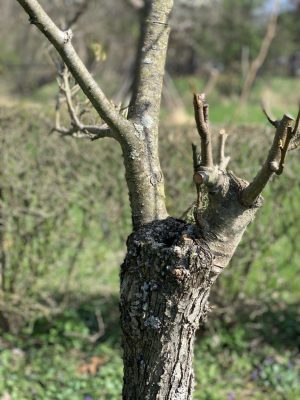
If I’m replacing an existing variety, I do a Henry the Eighth on the tree, lopping off its head, low, to graft a new variety onto the remaining stump. With the established root system underfoot, these grafts grow very vigorously and bear relatively quickly — sometimes the year after grafting. 

Alternatively, I make a whole new tree by grafting a scion onto a one-year-old rootstock that I purchase or grow. These small trees will take longer to come into bearing, how long depending on the kind and variety of fruit, and the rootstock.

Stump of older graft

Stump of older graft

A rootstock, whether the remaining stump of a lopped back mature tree or a pencil-thick young plant, has to be closely related to the scion that will be grafted atop it for the graft to be successful. Rootstock and scion in the same genus generally do well together, so pear on pear, apple on apple, even peach on plum are compatible. Occasionally, plants in the same family but different genus, such as pear and quince, also join well.

Whip graft close up

Whip graft

One way to create a rootstock would be to just plant a seed, giving rise to the appropriately named “seedling” rootstock. A seedling rootstock’s main claims to fame might be its general toughness and its genetic diversity from other seedlings. That genetic diversity is a downside if you want to plant an orchard of uniform trees; it’s an asset if you don’t want some pest all of a sudden wiping out all your plants with genetically the same rootstocks.

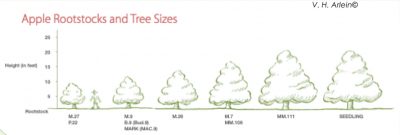
Rootstocks have been selected or bred that impart special qualities to a tree, and these rootstocks are propagated not by seed, but by any one of a number of methods of cloning (cuttings, tissue culture, mound layering, etc). Most dramatic might be the effect on plant size. The Malling 27 variety of apple rootstock, for instance results in a tree that matures at about 7 feet high. As with many dwarfing rootstocks, the tree also yields its first harvest quickly with, although less fruit per tree than a larger tree, more fruit per sure foot of space. And you can plant many dwarf trees in the same space as one full-size tree.
Apple rootstocks
Dwarf trees also have the advantage that pruning, harvesting, and other needs can be met with your feet planted on terra firma. Any disadvantages? Yes: more finicky about growing conditions, much shorter lifespan, and often needing staking throughout their lives. But there are many rootstocks from which to choose, especially with apples and pears, so you can choose what suits you from a fully dwarfing tree on up to full-size tree. A rootstock might also be selected for its tolerance for certain soil conditions, hardiness, and other environmental hazards.

Most important: The rootstock, for all its effects, has little or no influence on the flavor of fruit grafted upon it.

I’ll be grafting next week. Stay tuned for the 2 or 3 easy grafts I use to make trees.

STILL SOME FRESH FRUIT, and GENDER STEREOTYPING

Fruit for My Mouth, Flowers for My Eyes

As I write this, on December 1st, the Rabbi — that’s the Rabbi Samuel fig — is still ripening fruit in my barely heated greenhouse. That’s commendable. Not so commendable, however, is the flavor; cooler temperatures and sparse sunlight have taken their toll. The drooping fruits look ripe and ready to eat, inside and out, but they are no longer worth eating.

End of the fruiting season for Rabbi Samuel fig.

End of the fruiting season for Rabbi Samuel fig.

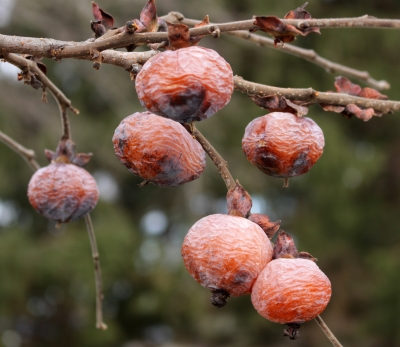
On the other hand, another fruit, Szukis American persimmons, hardly look edible but still have rich, sweet flavor. Outdoors, fruits of this variety of American persimmon cling to bare branches. Their orange skins once stretched almost to the point of breaking over the soft flesh within. Now, alternate freezing and thawing temperatures and drier air have sucked moisture and temper from the flesh, so the skins have shriveled and barely cling. Their darkening does nothing to increase the fruits’ visual appeal.

Szukis persimmons, starting to look ugly, but still honey sweet

Szukis persimmons, starting to look ugly, but still honey sweet

The ripe fruits are hard to distinguish, by eye, from the almost ripe fruits. The latter still retain some mouth-puckering astringency which has given American persimmons a bad name. An unripe persimmon “will draw a man’s mouth awrie with much torment” wrote Captain John Smith 400 years ago. I give Szukis’ branches a slight shake and only ripe fruits come raining to the ground, at which point the Captain’s further words ring true: “When [persimmon] is ripe, it is as delicious as an apricot.”

Can’t Help Wanting African Violets

New leaf cuttings

New leaf cuttings

Man can’t live by bread alone; a feast for the eyes is also in order. Well, maybe not a feast, but an appetizer, some winter flowers. Probably the easiest and most longlasting of winter blossoms are those of African violet. Okay, okay, I know that African violets have been mostly associated with doilies, lace curtains, and other appurtenances of old ladies (nothing against old ladies).

Generally, I don’t even like the color violet. But African violet’s flowers do brighten up a windowsill that looks out upon a gray and brown landscape.

Plantlets forming at bases of leaf cuttings

Plantlets forming at bases of leaf cuttings

Now that I’ve gotten my secret attraction to African violets off my chest, let’s talk horticulture. African violet’s whorl of leaves, like those of many low-growing perennial flowers, is actually a compressed stem, one that has been telescoped down so that each leaf and associated node originates just a fraction of an inch above the next lower leaf. But there is some distance between those nodes, so over time the stem does slowly elongate, rising higher and higher out of the ground. And side branches occasionally sprout forth from the leaf axils. The result of all this is that the potted plant becomes, over time, so overgrown with layer upon layer of leaves that the plant no longer can gather enough energy to flower well.

African Violet in all its glory.

African Violet in all its glory.

The solution to this problem is to make new plants and then chuck the old ones. All that’s needed to make a new plant is a leaf from an old plant and patience. So a few weeks ago I plucked a few leaves (a few, for insurance) from my old, overgrown African violet and plunged their stalks into a moist mix of peat moss and perlite. A plastic bag covering and held above the leaf cuttings by some twigs provided the needed humidity until roots could develop to keep the leaves turgid. Bright but indirect sunlight fueled, via photosynthesis, new root growth, and within a few weeks, resistance to a gentle tug on the leaves told me that roots had developed.

I removed the cover and now little plants are poking up through the ground alongside the leaf stalks. I’m going to transplant my rooted cuttings into larger pots and should, in a few weeks, be enjoying flowers. By then, I’ll have my knitting also ready.

11th Hour Apple Tree Planting

On to less gender stereotyped gardening: tree planting. Picture the day before Thanksgiving, November 26th. A wet snow is falling and beginning to whiten the ground. In my garage are two sturdy, bare root apple trees, a Hudson’s Golden Gem and an Ashmead’s Kernel, recently arrived from Cummins Nursery and needing planting.

Fortunately, I prepared the plantings site a couple of weeks previously with a 4-inch-deep, broad circle of leaf compost, the most immediate purpose of which was to keep the ground from freezing. Rushing to beat out the snow, I pulled enough compost aside to make space to dig holes, spread tree roots out in each hole, backfilled the soil, sifting it around the roots by pressing with my fingers and bouncing the tree up and down, and then settled all into place with a couple of gallons of water per plant.

I like autumn for tree planting. Roots have opportunity to grow in still warm soil (especially if mulched) while stems won’t grow and need water until spring. The soil is crumbly and soft, in good condition for digging and planting. And autumn planting leaves one less thing to do in the flurry of spring gardening.

However, winter temperatures and furry creatures can be a hazard to autumn-planted trees. The first line of defense, to fend off  mice and rabbits and moderate temperatures on the trunk, is a spiral plastic tree guard. An 18” high cylinder of 1/2” hardware cloth provides further defense against mice and rabbits. Beyond that, a higher and wider cylinder of 2×4 fencing should fend off deer and my puppy Sammy. (Past puppies considered newly planted trees as playthings, fun to tug out of the ground.) And finally, the well-furnished, new tree goes into winter with some perfume, a deer-repellant spray, any of which is effective if applied before the plant gets nibbled and renewed monthly.

I expect to harvest the first apples from the new apple trees expected in 3 years.

Propagation Mania

And the winner of my book giveaway from last week is  . . . (drum roll) . . . reader Meg Webb. Hey Megg, send me an email with your mailing information and I’ll get the book to you. Thanks to everyone else for their feedback.

————————————————–
I have to admit a certain addiction for propagating plants. You would think that, what with sowing cabbage and Brussels sprouts seeds for transplants last week, starting tomato transplants in early April, grafting to make new Korean mountainash and apple trees and . . . ., any appreciation for propagation would be fulfilled.
But no. The seeds within a freshly eaten kumquat; why not plant them? Some of the seeds within a just eaten hardy passionfruit (Passiflora incarnata); plant them also. Not that every seed gets planted. Just some of the more unusual ones or just a few of those that are more usual. Without any restraints, a forest of apple and pear trees would have long ago inundated me.
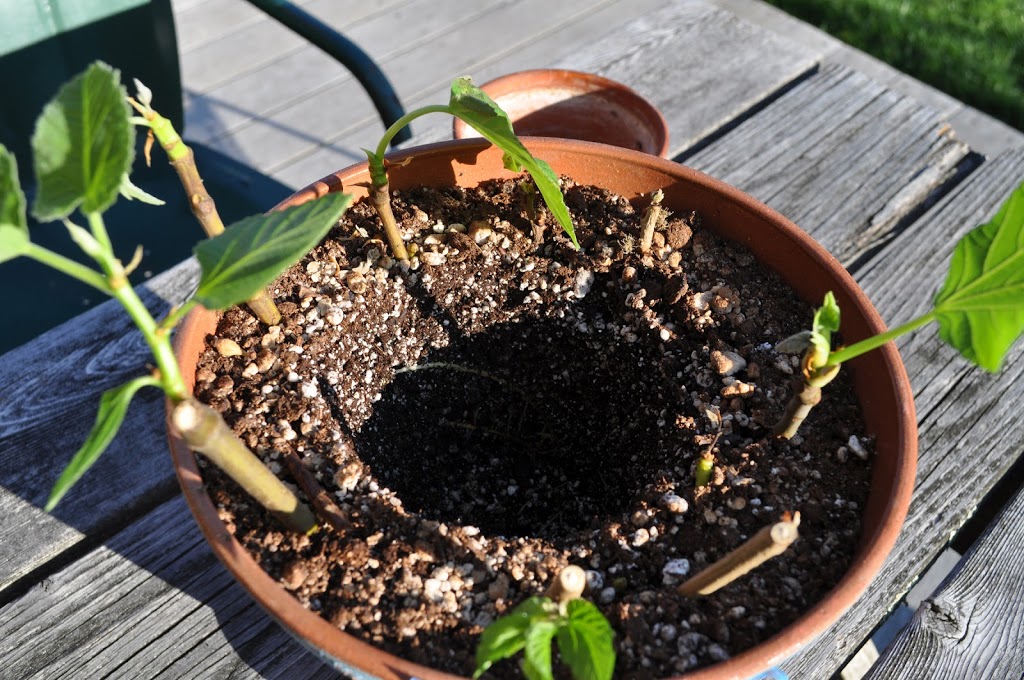
My mania came to the fore again yesterday as I was neatening up some houseplants. The rose geranium had grown very leggy, with three or four lanky shoots, almost leafless except near their ends,

stretched out to a very unattractive 2 foot length. All that was needed to bring the plant back to its visual glory was to cut everything back to some tufts of leaves sprouting near its base. Which I did.

But those pruned stems; could I really just toss them into the compost pile? No. “Make new plants,” whispered the devil on my left shoulder. Which I did.
All that was needed to make more of this relatively easy-to-propagate plant was to cut the pruned stems into 4 inch lengths, with each bottom cut just below a node and each top cut just above a node. Best wound healing is at nodes, so such cuts avoid dead stubs with poor healing.
All but 2 or 3 leaves were removed from the 4 inch stem segments at the ends of the stems in order to strike a balance between cutting down water loss from the as yet unrooted stem pieces and allowing for some photosynthesis to feed the stem. To grow new leaves and roots, the leafless stems segments will have to rely on their stored energy reserves. To save space, I filled a flowerpot with potting soil and poked each stem segment about two-thirds of its length deep into the soil, then watered.
A clear plastic cover over the planted pot increases humidity to further reduce transpiration of water from leaves until roots form.
————————————————
Pruning shrubs, which generates a lot of stems, could be a real test of my restraint.
Shrubs are shrubs because they generally don’t have long-lived permanent trunks, like trees. Every year, new stems arise from at or near ground level. The way to prune shrubs, then, is to capitalize on this characteristic, by so-called renewal pruning, each year removing some oldest stems and excess youngest stems (suckers). Pruning is done near or at ground level. In so doing, the roots get older and older but no stem ever gets very old, and youngest stems have room to develop.
Easy enough. The wrinkle in renewal pruning is knowing when a stem has overstayed its welcome. If you know the plant, you can just look up the information — in my book, THE PRUNING BOOK, for instance, in which I group all shrubs into one of four pruning categories.
Easiest of all is to prune is the category of shrubs that includes witch hazel and tree peony. These shrubs perform well on old stems and make few suckers so no annual pruning is necessary to keep them looking prim and proper.
Lilac and forsythia are in the category of shrubs that flower on one-year-old stems originating up in the plant off older stems. So individual stems need not be cut back until they are a few years old. Each year, though, many new sprouts originate at ground level, too many. Their numbers need to be reduced enough so that those that remain have sufficient elbow room as they age to replace older stems that will be cut away.
Kerria is in the category of shrubs, along with snowberry, abelia, and rambling roses, that blossom best on one-year-old wood growing up right from ground level. Prune them by cutting away all stems 2 years old (and older, if a shrub has not been or is not being pruned annually).
The final category, counting butterfly bush and Hills-of-Snow hydrangea among its members, perform best on each season’s new, growing shoots. They’re also very easy to prune: Just cut the whole shrub down in spring. That’s a lot of stems for propagating. Still, restraint is easy with butterfly bush because the stems anyway are typically dead here by the end of winter. The roots survive, though, giving rise each spring to shoots that flower in summer.
————————————————
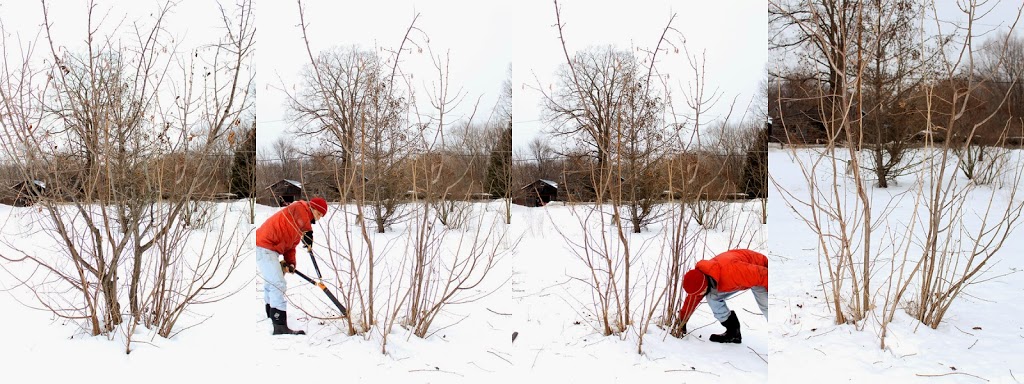
Pruning one of my filbert bushes

My filberts present one more wrinkle in shrub pruning. Filbert can be trained as a tree or as a shrub. But consider: filberts are susceptible to a disease, filbert blight, which can eventually kill a stem. This makes a good case for renewal pruning, i.e. growing them as shrubs. On the other hand, squirrels love filbert nuts, and one way to keep them at bay is with metal squirrel guards, feasible only on filberts trained as trees.
For now, dogs, cats, traps, and high grass have kept squirrels at bay, so I’m opting for filbert shrubs. The stems are very difficult to root so today’s prunings don’t even tempt me.
Propagating Cuttings, Quackgrass

Ten weeks ago I wrote of the “pot in pot” propagator that I was using to root dormant fig and mulberry cuttings. The propagator is nothing more than a small, porous, clay pot filled with water and with its drainage hole plugged that I plunged into the mix of peat moss and perlite that filled the larger pot. Water drawn out of the small pot keeps the peat-perlite rooting mix consistently moist.
The cuttings have sprouted with enthusiasm. And when I lift out the small pot, I see roots running around in the moist rooting mix, so I separated the plants and potted them up individually.
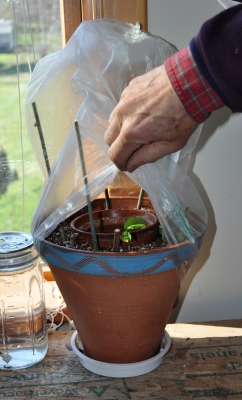
No need to put the propagator away now that plants are no longer dormant. With a simple covering to maintain humidity, the propagator also works well for so-called softwood cuttings, that is, cuttings that start out with leafy shoots. Technically, today’s new cuttings aren’t “softwood” because they haven’t had time yet to begin much growth. They could more accurately be called “leafy.” Their first leaves have unfolded and shoots (the “softwood”) are soon to appear. Whether “leafy” or “softwood,” such cuttings need high humidity to keep leaves from wilting until roots develop.
The propagator conversion involves nothing more than poking four sticks into the rooting medium equally spaced around its outer edge, and then draping a plastic bag over the sticks. Bright light will keep the green leaves feeding the cuttings. Direct light is a no-no because it would cook the cuttings in their high humidity chamber.
—————————————————————
I suppose I could be nostalgic about the quackgrass (Elytrigia repens, and also commonly called witchgrass and couchgrass) stealthily making inroads into my various gardens. After all, quackgrass was my first serious weed problem in my first real garden, a vegetable plot of about 500 square feet in Madison, Wisconsin. At the time, the lakes in Madison were suffering their own weed problems, the result of “fertilization” of the water with runoff from over-fertilized, residential lawns surrounding the lakes. Giant beaters plied the lakes in those days, chopping the lake weeds which were then harvested onto boats and then trucks for disposal. “Weed-free mulch!,” thought I. 
I convinced a lake weed crew to dump a truckload of those water weeds onto my front lawn. I spread the mulch quickly — I had to because the soggy mass started rotting within a few hours to what was beginning to smell like a a pig farm. Laying pitchfork after pitchfork of the stuff between rows of vegetables spelled quick death to the quackgrass.
My gardens now are far more extensive, no straight expanses beckon easy mulching, and water weeds are not in the offing. So for now, I am attacking quackgrass mano a mano, digging and pulling out every last shoot that I can find along with attached, running roots — no easy task among perennial flowers. Where I can, I’ll spread a few sheets of newspaper and top that with mulch. Now is the time to attack because in about a month, new runners will begin to push further afield just beneath the soil surface. The pointed ends of these runners are sharp enough to push right through a potato.
Quackgrass is so widespread that you’d think it was native. Not so. But it has been here for a long time, coming over from Europe with the first colonists. And it’s not all bad: It is good forage for horses and cows, and has been used in herbal medicine especially for kidney ailments. “It openeth the stoppings of the liver,” according to 16th century herbalist John Gerard. Still, it’s not welcome in my garden.
—————————————————————
I’ve got one more deathly arrow in my quiver with which to fight off quackgrass, but it must wait until the weather warms. Vinegar. Household strength vinegar sprayed on the plants kills the leaves; repeatedly killing the leaves eventually kills the plants. I boost vinegar’s efficacy by pouring 1 tablespoon of Ivory dish detergent and 2 tablespoons of canola oil into each gallon of vinegar. Vinegar works best when temperatures rise above 70° F.