WELCOMING IN SPRING & ODD HOUSEPLANT

The first sign that spring is around the corner — well, perhaps around the block — is the aphids clustering on lettuce leaves in the greenhouse. For organically-grown lettuce, eradication of these pests isn’t reasonably feasible or probably even possible. So I try to strike a balance: As long as aphid populations don’t get too high, plants suffer but little. It’s also a balance between my tolerance for having to wash lettuce leaves to rid them of aphids and the number of aphids  I would tolerate eating. (They’re really not that noticeable or bad to eat; sort of tasty, in fact.)
You know those ladybugs that appear on the insides of south-facing windows this time of year? They used to be my first line of defense against aphids. I would vacuum them up with my Dustbuster, which made the ladybugs dizzy but otherwise caused little harm, and then sprinkle the stunned bugs around the greenhouse in late afternoon or early evening. Next morning, as temperatures warmed in the greenhouse, the ladybugs would go to work like little tractors, methodically crawling up and down leaves gobbling up aphids.
The problem is that the ladybugs can’t get past the new windows I installed a year ago in my house. But no need to resort to pesticides. 
A blast of water from the hose in the greenhouse is sufficient to knock many aphids off the leaves. It’s important to get both sides of the leaves. And it is important to keep up with burgeoning populations. Aphids are amazingly fecund, under ideal conditions their populations doubling every couple of days. They reproduce by mating, like most other animals, and also by parthenocarpy, that is, without mating. Sometimes they lay eggs and sometimes they give birth to live young. I’ll also keep an eye on other greenery in the greenhouse because a single aphid species can attack many different host plants.
Natural controls, including other insects, rain, and cold, help keep aphid problems in check. But natural controls are not as effective in the greenhouse as outdoors, where I rarely encounter aphid problems worth bothering about. So I’ll be regularly blasting the greenhouse plants with water in the coming months. And, no doubt, eating some aphids.
————————————————
Staghorn fern is among my weirdest houseplants, especially as it grows larger and larger. About 1990, I bought the plant, a cute little thing in a 3 inch flowerpot. I also bought a softball-sized chunk of tree fern fibre on which to grow this normally epiphytic plants. The plant went into a hole gouged into the fibre, then was held in place with wrappings of fishing line. An eyebolt screwed into the fibre offered a convenient way to hang the plant.
Staghorn fern grows two kinds of fronds. The fertile fronds are green and are the ones that resemble stag horns in shape. Infertile fronds are tan and hug the soil, tree fern fibre, or — the usual support for an epiphyte — organic duff accumulated in the crotch of a tree.
Over the course of the 20 some odd years the plant has called that fibre block home, it’s grown many fertile and infertile fronds. The infertile fronds have totally enveloped the fibre block  to hide it, and the fertile fronds now appear at various places around the tawny mass. 
Most growth is in summer, when seedlings of other plants, including cedar trees and other kinds of ferns, sometimes take root in the moist mass. In winter, when the plant is indoors and hardly ever watered, these interlopers usually die off. The staghorn fern tolerates some drying out in winter, which is a good thing because watering it entails putting it in the bathtub and then giving it a shower long enough to let the water penetrate through all the layers of sterile fronds to wet the tree fern fibre. I let the plant set a couple of hours to let excess water drain away, then return it, now weighing about 10 pounds, to its east-facing window.
The wild fern interloper that established itself in some crevice in the sterile staghorn ferns last summer seems to be thriving along with the staghorn fern this winter, which should make for an even more interesting hanging plant in years to come.
—————————————————–
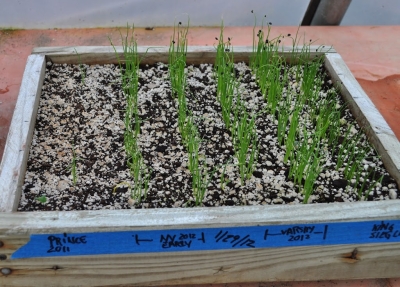
Today is a big day, the first seed sowing of the 2012 gardening season. Lettuce and onions. The lettuce for the greenhouse. The onions for eventual transplanting outdoors.
Some of the lettuce seeds will go right into the ground in the greenhouse and some of the seeds will be sown in seed flats for later transplanting in the greenhouse. The seeds sprout sooner in seed flats but the plants are more resilient, less apt to dry out or go to seed, when started right in the ground.
The plan is for these new lettuce plants to come into their own just as the last of last autumn’s lettuce plantings are harvested.

BONSAI GOOD, JASMINE BAD

At almost a year old, my bonsai is looking, if not wizened, at least tree-like and a welcome sight in winter. This bonsai began life in a big box store, a weeping fig in a 4 inch pot. Weeping figs are so easy to root from cuttings that the propagators of these plants evidently don’t even bother with individual cuttings, instead just sticking clumps of them together. Or maybe they’re sold in clumps to make the plants look bushier. At any rate, I divided the clump as soon as I got home and then had 4 weeping figs.
In the tropics, I’ve seen weeping figs as large as our sugar maples. In large pots indoors, I’ve seen — and once had — weeping figs 6 feet high. I planned for one of my new weeping figs to call home a rectangular pot 1 inch deep by 6 by 4 inches long and wide — for its whole life! Another of the weeping figs was destined for a round pot just a bit over 2 inches wide and deep, also for life.
To fit these small plants into even smaller pots, each got its roots and tops clipped back, the roots for a good fit into its future pot and the tops to balance root loss and to give the “tree” an attractive form. All this began last summer, and the plants spent a few weeks in light shade to recover from the butchering.
Once recovered, the plants began to grow, which is good and bad. Growth is needed to keep any plant alive but the goal was, and is, to keep the plants small and in proportion to the dimensions of their pots, all the time maintaining good form, of course. One way to keep a plant small is to periodically cut back shoots. Another way to keep a plant small is to periodically cut off its leaves. As I wrote in my book, The Pruning Book, “Timed correctly . . . leaf pruning forces a second flush of leaves that are smaller and hence better proportioned to the size of the plant.” 
I also wrote that “leaf pruning is not for every bonsai. Do not do it to evergreens . . .” Weeping fig is evergreen. Oh well, I’m going to try it anyway.
This is the bonsai last summer, after I snipped off all its leaves.
As the plants age and their trunks thicken, I’ll help them along on their way to wizened gnarliness, creating dead stubs, gouging out wood where branches are removed, and, if necessary, using temporary wires to direct branches.
Plants need to be healthy to tolerate such treatments. In a few weeks, and every late winter or spring thereafter, I’ll tip the plants out of their pots, cut back some roots, and then snuggle the roots back into the pot refreshed with new potting soil. Branches also will get pruned at least yearly for health and beauty. 
I hope these trees thrive not only for my viewing pleasure but also because I devoted a whole chapter to bonsai in The Pruning Book. (This book also covers other special pruning techniques, such as espalier and pollarding, as well as standard pruning techniques for all kinds of plants.)
————————————————————–
It doesn’t seem premature to state that I’ve failed again: Three jasmine plants are, once again, all leaf and no flowers. Jasmine (Jasminium polyanthum) is a plant that is easy to grow and easy to propagate; hence all the greenery and the number of plants I’ve had over the years.
The main reason to grow jasmine, though, is for the sweet perfume with which it fills the air when in bloom. At least I think it’s a sweet perfume because I can hardly remember the aroma. I got the original plant 11 years ago and remember how proud I was getting it to rebloom for the first couple of winters.
So what makes your typical tropical or subtropical winter blooming plants — Christmas cactii, poinsettias, amaryllises, and the like —  bloom when they do, or at all? A period of cool temperatures, short days (long nights, actually), or dryish conditions. Any or all of these changes for a period of time in autumn triggers flower buds for winter. 
My three jasmine plants have received the requisite treatments yet, as I stare at the plants, I see no hint of a flower. Just lanky stems grabbing at other plants or sprawling on the floor.
A friend suggested that my jasmines have grown old. They did all originate as cuttings from my original plant of 11 years ago. It’s not a good explanation but the only one left. I’m buying a new plant.
———————————————————–
No, I’ve decided not to buy a new jasmine plant. I’ll give my plants one more chance (as I have every year for the past 9 years). White Flower Farm nursery, which has sold jasmines for years, offers some more exacting instructions on growing the plants: “Prune as necessary to control size or to maintain shape, but stop pruning by August 1, because the plant sets flower buds in late summer. To encourage the formation of flower buds for next winter, be sure your plant experiences the cooler temperatures and shorter days of early autumn. The plant needs 4-5 weeks of nighttime temperatures between 40° and 50°F, plenty of sunlight, and the complete absence of artificial light after sundown. Bring the plant indoors before frost. Then give it cool temperatures [below 65°] and indirect [but bright] light until it blooms again in late winter.”  I will follow these instructions to the letter. Wish me luck.
——————————————————–
Last post I mentioned battling scale insects on house plants with sprays of horticultural oil in autumn. A reader wrote to offer another remedy: soap sprays. I’ve also used soap at various times, and it is effective, especially specially formulated “insecticidal soaps.” You do have to be a little careful because some soaps at some concentrations can damage some plants. (That’s a lot of “somes.”) The reader mentioned the especially environmentally friendly tack of saving shower water in a bucket, which, the reader wrote, results in a perfect soap concentration for insect control. Whatever works.

KEEPING MULCH SIMPLE

Dryish and cold, but not frigid, weather: What else is there to do outdoors, gardenwise, but mulch? (Pruning is best left until after the coldest nights of winter have passed, in late February.) Arborists dumped a large pile of wood chips near my neighbor’s garden and he spread all he could in paths and among berry bushes. What’s left is for me.
 
Not that I hadn’t myself been spreading mulches all through autumn. Compost went on the vegetable beds, wood chips from my own pile (long gone) beneath my berry bushes and around trees, and horse manure mixed with wood shavings beneath the young row of dwarf apple trees.
 
Mulch is one of those things in life that you can’t have too much of — if you’re a gardener — so I forked the neighbor’s wood chips into my garden cart and hauled five loads over to my apple trees. The apples would be thankful because, as dwarf trees, they need the best possible soil conditions to keep them growing vigorously, vigorously for dwarfs, that is. Also, manure left on top of the ground in winter, especially manure left exposed to the elements, loses some its goodness as its nitrogen evaporates into thin air. Barring snow, not in the offing as of this writing, the wood chips blanket should minimize that loss.
 
One other benefit of wood chips are that they look nice. They are dark brown, similar to dirt. Unfortunately, the five cart loads was enough to cover only half of the 150 foot row of apples.
————————————–
 
I like to get on top of any gardening fad as it comes down the pike, although not necessarily to embrace it. One such fad concerns wood chips, not any old wood chips, but “ramial wood chips,” defined as wood chips made from wood no larger than about 3 inches in diameter.
 
Is there anything magical about ramial wood chips? These chips are surely better than the chunks of bark or wood mulch, some of it dyed red, sold in plastic bags. Ramial wood chips are cheaper, often free and, having smaller pieces, are more biologically active and better at smothering weeds and maintaining soil moisture than chunks. As compared with local, arborists’ chips that would include chips from from larger diameter wood, ramial wood chips, with their  higher proportion of bark and living tissue, would be higher in nutrients.
 
Still, no reason to snub your nose at any and all wood chips (except for those bagged chunks). When used as mulch, a dynamic interface of decomposition develops where the bottom layer of raw chips meets the top layer of decomposed material. Nutrients are concentrated as microbes gobble up the materials and carbon, hydrogen, and oxygen are breathed away as carbon dioxide and water, so the nutritional advantage of ramial wood chips over run-of-the-mill arborists’ chips is lost.
 
Some people tout ramial wood chips as promoting beneficial fungi in soils, allegedly to the liking of trees — such as apples — naturally found in forests. But when any old kind of wood chips — any organic materials, for that matter — is laid atop the ground, it is worked upon by a naturally orchestrated sequence of microorganisms, fungi included. Yes, fungi are promoted, but so are bacteria and other organisms, standing ready to gobble up the more readily accessible foodstuffs after fungi have finished with them. No need to use special kinds of woods chips for special effect.
 
So, enough about ramial wood chips! Wood chips of every stripe are available free or cheap as a waste product. They’re all beneficial. I use any and all that are offered, and that’s what went on the ground beneath my apple trees.
To quote Thoreau: “Simplify, simplify.”
 

SALAD TUNNELS & COLDFRAMES, AND INDOOR “PINE”

Cold has yet to throw a wrench into salads fresh from the garden — even though December 16th saw a night-time low of 12°F. Yes, the lettuce would be mush if unprotected but under the sheltering clear plastic and wooden sides of my 5 foot square cold frame, the plants are barely scathed. Just a few leaves wilted at their edges. Spinach that I sowed between the lettuce plants, for harvest after the lettuce is finished is still looking spry.
Plastic tunnels supported by wire hoops are offering almost as much cold protection over 3 garden beds. Beneath them, mustard greens, endive, and arugula don’t exactly thrive, but do survive.
A few fresh greens are even surviving out in the garden without any sort of protection whatsoever. That would include some arugula that was never covered as well as kale, what’s left of it, and mâche, the most cold-hardy of all salad greens.
Once temperatures plummet or the ground is blanketed with snow, fresh salads will come from the greenhouse, which, with night temperatures never allowed to drop below 37°F., is packed with lush greenery as if it were May.
———————————–
Update: Lettuce in the cold frame is flagging after a night-time low of 8° a few days after that 12° low. Unprotected out in the garden, only mâche and kale survive.
————————————
The holiday tree, only a half a foot tall and ornamented with 3 silver balls, is cute as a button. It’s a Norfolk Island pine (Araucaria heterophylla), a free gift I received a couple of weeks ago from a mail-order nursery. This tree will green up the darkest days of the year for year after year because it’s a tropical species that does well in the eternal warmth and somewhat dry air, in winter at least, of any home.
Over the years, the tree will lose its impishness and develop a straight, upright trunk off of which will grow relatively widely spaced, whorled tiers of horizontal branches, all clothed in green needles. With age, the plant becomes quite majestic. Too majestic, in fact, for any home. I have seen the spreading branches of this tree towering 40 feet or more over the tiled roofs of homes in tropical climates.
So what’s a gardener to do with such a plant, after years of nurturing it and watching it grow? One option, of course, is to bite the bullet and walk it over to the compost pile. Or it could be gifted to a friend with a higher ceiling, but that just shifts responsibility and puts off the inevitable. How about giving it to grandma for her front lawn in Florida?
A natural inclination for any real gardener in this situation would be to try to keep the plant going, not as its original self but in the form of a cutting. The rooted cutting, then, is genetically the same as the original plant, only a smaller version. Norfolk Island pine does root from cuttings especially, as with many conifers, if the cuttings are taken from young growth.
This plan has one problem: fixed plagiotropism. This botanical mouthful signifies the tendency for a horizontal shoot of certain plants to always retain its horizontal growth habit. Put more simply, if a cutting is rooted from one of Norfolk Island pine’s horizontal stems, that stem will always grow sideways to creep along a windowsill or wherever else the plant is growing. 
The solution to this problem is to take a cutting from the leading, upright stem. It the mother plant isn’t destined for composting, though, cutting out that leading stem does ruin its form. Also, because young cuttings root best, you might end up with only one cutting, perhaps two, from that short length of young, leading stem. Not much insurance for a plant that doesn’t root all that easily.
The leading, upright stem, of a plant can have the opposite inclination: fixed orthotropism, a permanent, upright growth habit. With other plants, their plagiotropism or orthotropism may be temporary.
Not so for Norfolk Island pine’s plagiotropism. I’ll figure out how to cross that plagiotropic bridge, or not, when I come to it.
(For further discussion of topophysis, which encompasses plagiotropism an orthotropism, and related topics on plant growth, see Plant Form: An Illustrated Guide to Flowering Plant Morphology by Adrian Bell and Alan Bryan.)

WHOSE NUTS?

Nuts are underrated as a food and in the garden. After all, how many gardeners plant nuts? In the landscape, nut plants range from majestic trees to graceful shrubs. As a food, nuts are an excellent source of protein, heart-friendly fats, and all sorts of other nutritional goodies known and unknown. Did you ever see a fat or tired squirrel? (True, we wouldn’t see those couch potato squirrels as they lounged in their den.)
Right now, I am enjoying the fruits of my nutty labors. Some nuts — most nuts that grow around here, in fact — need to be cured before they taste their best. Hazelnuts, ready in September, were good as soon as harvested but even better after resting a couple of weeks. Chestnuts, likewise ready in September, were likewise pretty good immediately, but sweetened after a few weeks in storage. The hazelnuts grow on arching shrubs that could instead be trained to small trees. The chestnuts are picturesque, spreading trees. Both hazelnuts and chestnuts are fast-growing and begin to bear within 5 years or less after planting.
The improvement in flavor from curing is dramatic when it comes to black walnuts and their kin. They were harvested (from the ground) in October, hulled (a messy job), and left outdoors in the sun a few days to dry before being moved to a loft area above the garage. The loft area was cool, airy, and — very important — squirrel-proof. Now they are ready to crack and eat.
—————————————-
Black walnuts are, in my opinion, the best-tasting of the nutty lot. And the trees grow wild throughout much of eastern U.S. This is one nut that I have not planted because I inherited a large tree right on my property. Over the years, new trees have also sprung up to bear nuts. Growth is fast and the trees become quite large. The downside to growing black walnuts for eating is that they are a hard nut to crack. After years of banged thumbs from cracking black walnuts on a concrete floor with a hammer, I purchased the Master Nutcracker, which is elegantly designed, somewhat pricey, but very effective. Separating the nutmeats and picking them out from their cracked shells makes for a convivial accompaniment to after-dinner conversation in winter.
Butternuts, also native to eastern U.S., but not as widespread and currently threatened with a blight, need the same treatment as black walnut and are equally tough nuts to crack. I don’t bother with them because the trees, in contrast to black walnut, are hard to find. Their flavor also has less appeal.
Butternut has naturally and been deliberately hybridized with heartnut, a Japanese-type walnut, to yield what’s known as a buartnut. Many trees thought to be butternuts are actually buartnuts, such as the gigantic, spreading tree I “discovered” in Rosendale a couple of years ago. My young tree, only a few years old, is very fast growing and already shows inklings of future grandeur — and nuts, in the form a few flowers last spring (that, unfortunately, failed to develop into nuts).
Here’s the Rosendale tree in summer.
I did revisit the Rosendale buartnut in September and rushed to gather up as many nuts as I could ahead of squirrels, who were also working the tree. Those nuts are now cured. Heartnuts are known for their ease of cracking, a trait also borne out in the buartnut offspring. With the Master Nutcracker, the shells popped open to reveal whole nutmeats. The flavor was mild and a little dry, good for variety and ease of access but not nearly as tasty as black walnuts.
The nut menu needn’t end there. The season here is too short to ripen pecan nuts, although the trees will survive. Enter hicans, hybrids of hickory and pecan with a shorter ripening season. I’ll report back in a few years. Hickories are a native nut that is delicious although small, hard to crack, and yielding little nutmeat. Still, there are some named varieties that improve in all respects. I planted two in the spring of 2011 and hope for some nuts to try within five years.  I also have some young Persian walnut trees, the one nut among this bowl of nuts for which I am not hopeful. Persian walnuts blossom early, so the flowers often succumb to subsequent spring frosts, are susceptible to some serious diseases, and — mine, at least — are on a squirrel highway (beneath power lines).
—————————————————-
Have I been mentioning squirrels? Ah, squirrels, once the bane of my nutty endeavors. In years past, these “tree rats,” as they are sometimes nonaffectionately referred to by gardeners, have stripped my hazelnut shrubs bare. 
For now, I have the creatures under control. They won’t wander into the high grass that I let rise up through the summer around the hazelnuts. Chestnut burrs are too spiny for them — until the nuts drop out, by which time I’ve gathered them up. My hickories and buartnuts have not yet begun to bear, but the trees are isolated so a temporary squirrel guard of a cylinder of sheet metal should keep the squirrels from climbing. And black walnuts? There are plenty for everyone. The squirrels and I gather them and I still see plenty left on the ground.
Wreath materials

HOMEGROWN WREATH

The dark green wreath was tied with red ribbons and gliding towards me, in its progress stirring up snowflakes gently floating out of the grey sky. No, the wreath was not hanging from a horse-drawn sled, but was plowing through the frigid air affixed to the chrome grille of a gleaming white Cadillac! Here we are in the twenty-first century, still infusing a breath of life into our winters with cut evergreen boughs, just as did the ancient Egyptians, Persians, Jews, Christians, and Druids.
And it’s true: a few evergreen boughs tied together and accented with a red ribbon do make a doorway more inviting, or a room more cozy in winter. (I’m still undecided about what greenery does for a Cadillac grill.) But going one step further with the greenery, to a bona fide wreath, creates something special. And the actual making of a wreath can be an end in itself this time of year, particularly to the accompaniment of a warm fire and friends and children.
To make a wreath, start with a base. The base might be a sturdy ring of wire (from a coat hanger, for example), or straw that has been bound into a bulky circle with string. Either of these bases can be made from scratch or purchased. For a more natural base, one which might be part of the final design, use a vine such as grape, honeysuckle, wisteria, or bower actinidia. Weave the vine into a circle of triple thickness, tucking in a new piece of vine as an old one ends.
The base might be all, or just about all, that is needed for a simple wreath. I have seen a very attractive wreath that was nothing more than a thick ring of wild rose sprigs showing off a profusion of pastel red fruits. Carefully overlapped sprigs of lavender or rosemary, bound with thin wire to a heavier wire frame, make a dainty, fragrant, blue-green wreath. Thyme is another good plant for this purpose, also fragrant. Keep thyme’s wiry stems somewhat loose, though, because they are as important in adding body to the wreath as are the tiny leaves.
This time of year my penchant is for wreaths that are rich green in color, and almost gaudy with ornamentation. The base for such wreaths is some evergreen plant. Not all evergreens are suitable, because some drop their leaves too readily indoors (and in the brisk wind riding on the front of a car!). Amongst needle-leaf evergreens, juniper, white pine, mugho pine, red pine, and spruce are good choices. Or, for something brighter, needled evergreens with yellow-tipped leaves, such as Gold Star and Kuriwao Sunburst junipers. Mahonia, holly, leucothoe, rhododendron, boxwood, lingonberry, and English ivy are suitable broad-leaf evergreens for a wreath, but none of the broadleaf evergreens will hold their leaves indoors as long as the needle-leaved evergreens.
Wire, glue or tuck small bunches of evergreens onto the base, with all the bunches facing the same direction. Don’t be stingy, because this mass of green color is what is going to calm down and visually hold together the whole wreath.
Next, add accent. Ornaments that are darker shades, and blue or green, make a quieter wreath than ornaments that are lighter shades, and red or yellow. As I said, this time of year I prefer spirited ornamentation, perhaps due to the impending dead of winter. Lively ornaments might include chains of shiny red cranberries or popcorn threaded together, bunches of bright red peppers and garlic clove.
Fruits, like evergreen leaves, flaunt winter’s cold darkness to celebrate the continuity of life from one year to the next. Some brightly colored fruits still clinging to vines and shrubs include mountainash, bittersweet, winterberry, barberry, and, of course, holly. Deck the halls.

XMAS TREE PLANTATION ON MINI-PLOT

A living Christmas tree seems the “right” thing to do: You get a holiday tree decorating your living room for a couple weeks; the planet gets a tree to soak up carbon dioxide, provide a playground for wildlife, and contribute to the landscape greenery. The problem is that yearly planting out of living Christmas trees in most yards pretty soon leads to a small-scale version of the Black Forest. A lugubrious and mysterious landscape is not for everyone.
But there is a way to enjoy living Christmas trees, and keep the scene sunny and winsome: Plant very young trees, then harvest them when they reach the size to cut for Christmas. Essentially, have your own tree farm. The tree lives — and you enjoy it as such — until you cut it.
You may imagine that a tree farm big enough to supply you with one tree a year would take up too much space. Not so. A Christmas tree needs about eight years to grow to a harvestable size of about six feet tall. If you have enough space for eight trees, you can cut one and plant a new one every year, for an endless supply. At five foot spacing, all you need is about 200 square feet of area — perhaps a forty foot row, perhaps a rectangular plot ten by twenty feet. This spacing gives each plant enough sun to grow into a well-shaped tree, and allows you plenty of room to mow around each tree. If you prefer smaller Christmas trees, you can plant even closer.
Your tree farm need not be in an out-of-the-way place. A row of trees might make a nice, evergreen hedge. With the wide spacing and variation in tree sizes, the hedge will be somewhat informal. But at least you do not have to worry about the hedge becoming too tall, because trees get removed as soon as they are about head height. The trees also might make a nice screen for your compost bin or dog’s house. How about a miniature forest for your child?
Growing your own trees gives you the option of choosing whatever type of  Christmas tree you want. Most commonly cut nowadays for Christmas trees is Scotch pine, a tree that is very cold-hardy, fast growing, and tolerant of many different soil types. And, the plant holds its needles very well indoors.
———————————————-
Scotch pine has been popular only since the 1930s, and over the years many other species have been in favor. In the middle of the 19th century, cedar was a favorite. But it dropped its needles too easily indoors. Then hemlock, one of the fastest growing evergreens, became popular. Its main defect is that its flexible branches bow too far to the ground under the weight of ornaments. Nowadays it’s also beset by a serious insect pest, the woolly adelgid. By the end of the 19th century, balsam fir became popular. This tree, still popular for Christmas in New England, makes up for its deficiencies — slow growth, less than ideal shape, and some needle drop — with its woodsy aroma that is rightly reminiscent of northern or mountaintop forests.
If you grow balsam fir — and I planted a half-dozen of them almost 20 years ago — make sure to give it a cool, moist soil. The climate around here is warmer than usually enjoyed by balsam fir, but I figured that the fragrance made balsam fir worth a try. My dog Stick, then a leashed puppy, soon chewed up 5 of my young trees, which were all that he could reach when he was young and leashed. One survived, and the survivor is now a towering, fragrant beauty about 25 feet tall and so wide that I had to cut an opening in its lower limbs to allow passage past it along the back portion of the garden.
I never could bring myself to cut that sole survivor to bring indoors for the holidays. The tree is so kind as to keep making two leading stems. Cutting one of them lets the other grow and gives me a manageable holiday tree that leaves the remaining tree healthier. If both leading stems were allowed to grow, they would be apt to split apart at their origin.
———————————————————–
Nowadays, besides Scotch pine, other popular Christmas trees include eastern white pine, Norway spruce, white and Colorado spruces, Douglas fir, and Fraser fir. White pine is fast growing, with an open form that you may or may not prefer in a Christmas tree. This native plant tolerates almost any soil, and even a bit of shade. Norway spruce is almost as fast growing, and is a graceful tree with arching limbs along the bottoms of which dangle short, needled branchlets. Norway spruce needs well-drained soil and full sun.
White and Colorado spruce, and Douglas and Fraser firs, are slow-growing trees. (The two firs are unrelated: Douglas is Pseudotsuga menziesii; Fraser is Abies fraserii.) The two spruces require moist, yet well-drained soil, in full sun. Douglas fir needs full sunlight, but cannot tolerate a windy site or dry soil. Douglas fir holds its needles indoors almost as well as does Scotch pine. Fraser fir needs wet soils in full sun or part shade.
A miniature tree farm requires very little time for maintenance. A thick mulch of straw or leaves will conserve soil moisture and smother weeds. Grow grass between the trees and mow it regularly to prevent competition for nutrients and moisture, especially when the trees are very small. If you prefer a tighter growth habit to your trees, and have the time and inclination, prune them once a year, shortening by half the “candles” of new growth before they expand in early summer. And finally, keep teething, playful puppies at bay from any trees for their first couple of years.
 

Thanks(soil)giving, Chokes, & Rosemary

As part of my Thanksgiving celebration, I’m thanking the soil. Soil, after all, is where it all starts. We’re thankful for the plants, but the plants got where they got because of the soil, offering plants support, water, air (which roots need), a friendly microbial environment, and nourishment.
Basically, I thank the soil with organic materials, that is, stuff that is or was living. Stuff like wood chips (dead), straw (dead), compost (living and dead), manure (living and dead), and autumn leaves (dead). Organic materials are what put the “organic” in organic gardening and farming. Organic materials are bulky, and are what chemical fertilizers have too often replaced. Compost, for instance, is about one percent nitrogen, so to supply the average 2 pounds per 1000 square feet of actual nitrogen needed would require 200 pounds of compost. Opt for 10-10-10 chemical fertilizer and a mere 20 pounds per 1000 square feet would do the trick.
Oh, but that 180 pound difference between compost and 10-10-10 offers so much more than just nitrogen. Compost serves up a smorgasboard of nutrients reflecting the diversity of what went into the compost pile. Just about everything goes into mine, including orange peels from California, olive pits from Peru, even my old Levi’s in addition to garden and kitchen waste, hay, and manure. 
That’s not all: Compost and, as they decompose, other organic materials, offer a witch’s brew of natural compounds that improve plant nutrition by unleashing nutrients from the soil’s rocky matrix and rendering nutrients already in the soil even more available to plants. As important, these organic materials help soils hold both water and air, and provide a congenial, nutritive environment for beneficial organisms that help plants fend off diseases and further abet plant growth. Whew! That’s a lot of goodness.
So I’m hauling cart after cart of organic materials. Vegetable beds get an inch depth of crumbly, dark, pleasantly fragrant compost from piles built last year. Paths in vegetable gardens get wood chips. I am mulching berry plantings with wood chips or leaves, according to what’s available and my whims. Leaves that drop from the chestnut trees will be supplemented with leaves that neighbors with leafier yards need to discard. Other trees get wood chips. Fruit trees get rotted leaves, which are very similar in composition to compost in addition to wood chips and, possibly, horse manure with wood shavings.
I hope to finish soil Thanksgiving before the first snow that stays.
————————————————————-
My gut reaction is to shy away from eating any plant with “choke” in its name. Chokecherries (Prunus virginiana) are not for me. I did once grow chokeberry (Aronia spp.), which lived up to its name; the plant is long gone. Chokeberry is said to make a tasty jam or juice, which I realized, anything can if given enough sweetener, dilution, and addition of other flavors. 
Artichoke is one “choke” worth growing; its “choke” comes not from the throat but from the Arab name for the plant, al-qarshuf. The problem is that artichoke is one choke that isn’t very happy here. It needs mild winters and summers not searing, which are conditions you  might find right along the coast in California or the Mediterranean. So, of course, I am growing it here in New York’s Hudson Valley.
I grew artichoke years ago and did harvest a few small buds; this year I was hoping for at least larger buds. Imperial Star is the variety recommended for northern gardens because it forms buds the first year so can be grown as an annual. Not mine. I sowed seeds early this spring after giving this perennial the cold treatment necessary to fool it into thinking it’s gone through a mild winter and can begin flowering. Imperial Star is more easily fooled than other varieties. Plants given to a friend did make a few small buds but my plants just grew. (Northern Star is another, newer possibility for northern gardens because it allegedly survives winter temperatures below zero degrees F.)
No need to throw in the towel in growing artichokes, though. Among my last activities in the vegetable garden is to dig up one artichoke plant, pot it up, and overwinter it in a bright window in my cool basement. I’ll give it a head start in the greenhouse in spring, then plant it outdoors again when the the weather warms. If the harvest is nonexistent or unreasonably small, I’ll abandon artichoke growing for another 15 years.
————————————————————–
Increasingly, my attention is turning indoors. It has to, with all the thirsty plants now sitting in sunny windows. One of the thirstiest, oddly enough, is rosemary. Too many rosemary plants towards the end of too many winters have surprised me by all of a sudden, when brushed against, shedding leaves, dried and dead, as were the plants.
As a Mediterranean plant, you’d assume it likes dryish condition. It does like its head dry, at least in summer. Stiff leaves make it hard to tell when rosemary is thirsty. They don’t wilt, they just dry up and die.
So now I err on the side of too much rather than too little water. With extra perlite, my potting mix is well-drained, making too much water hardly a problem as long as the saucer beneath the plant isn’t filling with water. The best way to tell whether or not a rosemary plant is thirsty is to feel the weight of the pot.
Except for one rosemary plant conveniently growing in the kitchen, the others are spending winter in the basement, along with the artichoke.

UNCOMMON FRUIT, COMMON FRUIT, CATERPILLAR HEDGE

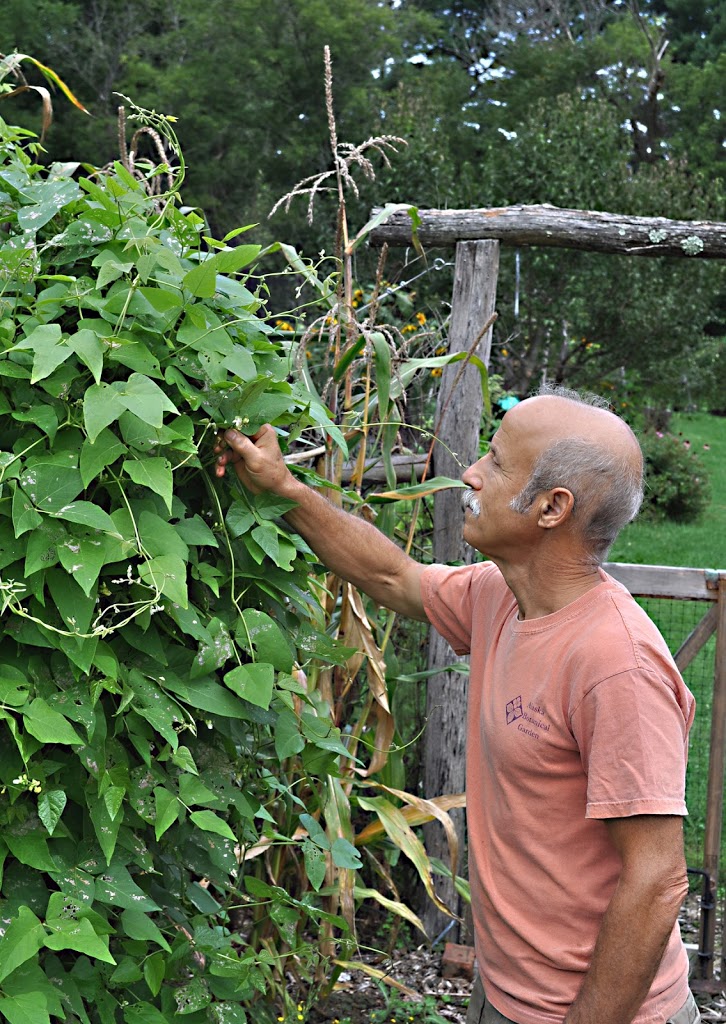
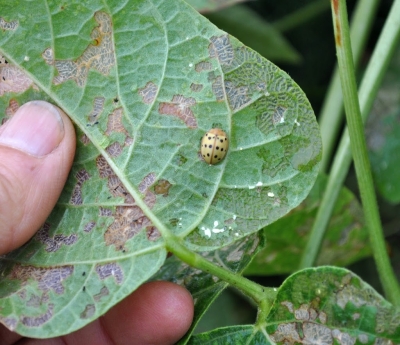
With the economy the way it is, forget about any hedges against inflation. Anyway, I’m more concerned about hedges against poor harvests, and that hedge is to grow a diversity fruits and vegetables. I’ve never had a year of poor harvests of everything. Cabbage and broccoli will revel in a cool summer during which peppers or melons hardly ripen. Bean beetles that might ravage green beans won’t touch tomatoes, okra, and other vegetables; they won’t even nibble soybeans.
Besides offering a hedge, that diversity also usually presents me with a spectrum of flavors and nutrition.
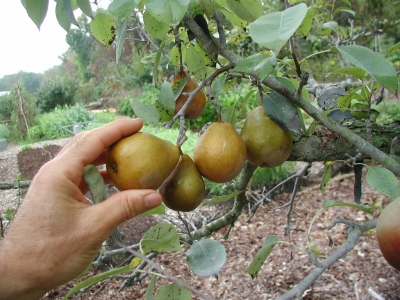
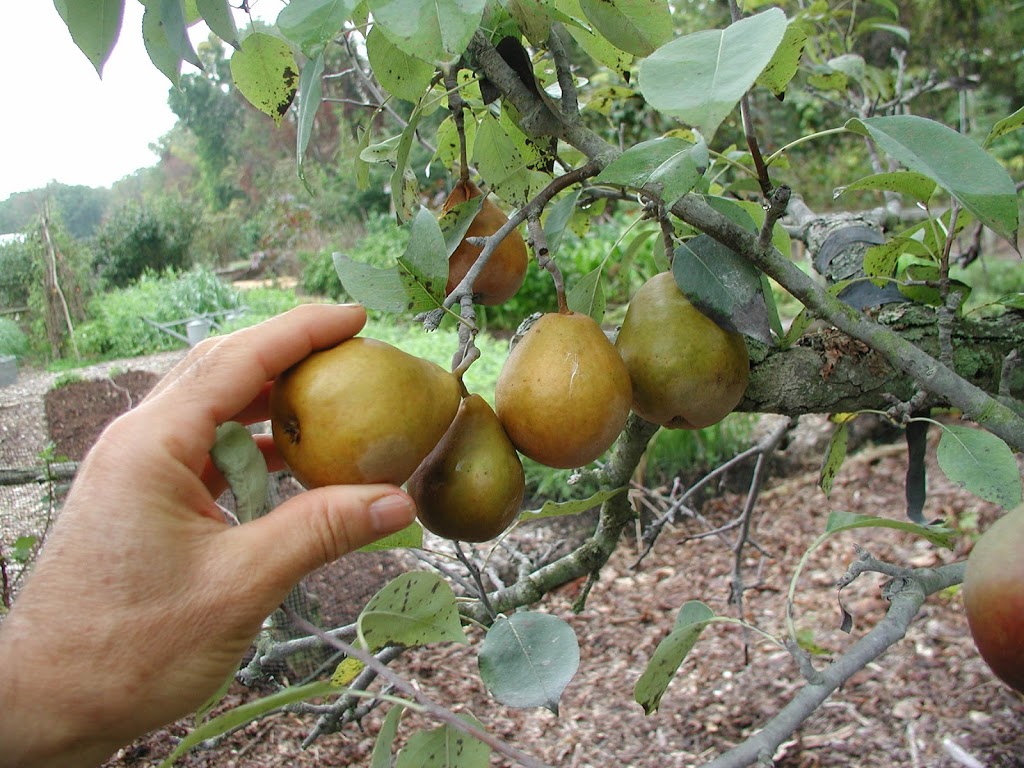
In fruits, 2011 was a particularly good year for pears and hardy and super-hardy kiwifruit. These kiwifruis are grape-sized, smooth-skinned cousins to the fuzzy kiwifruit of our markets. The flavor is similar, but better, and you pop the whole fruit into your mouth, skin and all. The plants are strong-growing vines, so pretty that they were for decades planted strictly as ornamentals, their gustatory treasures lying hidden behind leaves and ignored. In contrast to fuzzy kiwifruits, hardy and super-hardy kiwifruits can be grown just about everywhere.
Super-hardy kiwifruits, Actinidia kolomikta (“super-hardy” because they tolerate cold to minus 40°), ripened back in early August and hardy kiwifruit, A. arguta (hardy to minus 25°F.), started ripening in mid September. You know these fruits are ripe for picking when the first berries just begin to soften.
I harvested all my hardy kiwifruits once the first ones ripened. Some were firm and some were ready to eat. Kept under refrigeration, the firm ones slowly ripen; at room temperature, they ripen faster. Ripened berries have been, and will be, for a few more weeks, a colorful, sweet-tart, flavorful addition to morning cereal.
———————————-
Apple trees have never borne well here. The reason is because I am trying to grow them “organically.” That means giving special care to the soil, keeping it nourished with compost, leaf mold, wood chips, and seaweed. That means maintaining a diversity of flowering plants to attract beneficial insects. And it means minimum or no spraying of pesticides which, if needed have minimum impact on everything but the target pest(s).
Admittedly, my farmden is not ideal for apple growing. Six-thousand acres of woods (not mine, Mohonk’s), overwintering home to many pests, lie within 50 feet of my trees. And cold air settles into this floodplain of the Wallkill River, so morning fogs and dews linger longer than on higher ground to fester disease problems. So I do spray my trees, many times each season, with Surround (a commercial formulation of kaolin clay) and sulfur (a naturally mined mineral).
The apple trees looked so hopeful in the spring. No late frosts. Exuberant, new growth. Pea-sized fruitlets rapidly swelling to marble-size, then golfball-size, and larger. 
But something, some things, happened between those halcyon days of June and harvest. Fruits disappeared, dropped, became ugly with blotches and dimples. My farmden isn’t the only one to suffer such affronts. Basically, if you wanted to pick the hardest fruit to grow in eastern U.S., what fruit would that be? Apple! Why? Because of a  very few, but very serious insect and disease problems. Plum curculio, codling moth, apple maggot, apple scab, fire blight, cedar-apple rust, and powdery mildew are the culprits.)
Still, I haven’t thrown in the towel yet with apples. I noted this year that more attention is needed to late summer diseases, such as black rot and bitter rot. And the apples I do harvest might be few, but their flavors are supreme, in large part because of variety selection and perhaps due to terroir.
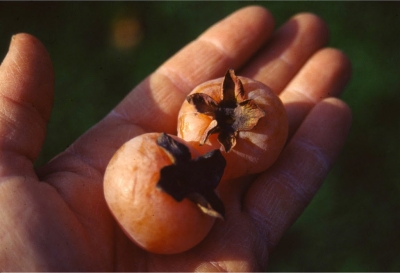
Apples are not the only fruit worth growing around here. Even if the apple crop is poor, this year I had and have plenty of, in addition to pears and kiwifruits, medlars, raspberries, and grapes. And every year seems to be a good one for pawpaws, persimmons, and blueberries. I’ll be digging into the 40 quarts of blueberries in the freezer just as soon as the last of the kiwifruits are finished.
——————————-
And speaking of hedges, green ones, my yew caterpillar is going into winter looking better than ever. This hedge started out as 4 boring yew bushes planted about 25 years ago and needing multiple prunings each growing season to prevent their overwhelming nearby windows, or even the whole house.
Inspired by Keith Buesing’s (of Gardiner, NY) fabulous green sculptures, a couple of years ago I began re-forming the yews. Yew is an adaptable plant, amenable to pretty much all manners of pruning, and the reformation is now pretty much complete. (The smiling mouth is still under construction.)
Multiple prunings are still needed each growing season, but they are mostly light cuts to polish and maintain the form.
 

With the economy the way it is, forget about any hedges against inflation. Anyway, I’m more concerned about hedges against poor harvests, and that hedge is to grow a diversity fruits and vegetables. I’ve never had a year of poor harvests of everything. Cabbage and broccoli will revel in a cool summer during which peppers or melons hardly ripen. Bean beetles that might ravage green beans won’t touch tomatoes, okra, and other vegetables; they won’t even nibble soybeans.
One thing I like about my kiwis, besides great flavor, is that
they don’t have those obnoxious plastictags on them.


Besides offering a hedge, that diversity also usually presents me with a spectrum of flavors and nutrition.

In fruits, 2011 was a particularly good year for pears and hardy and super-hardy kiwifruit. These kiwifruis are grape-sized, smooth-skinned cousins to the fuzzy kiwifruit of our markets. The flavor is similar, but better, and you pop the whole fruit into your mouth, skin and all. The plants are strong-growing vines, so pretty that they were for decades planted strictly as ornamentals, their gustatory treasures lying hidden behind leaves and ignored. In contrast to fuzzy kiwifruits, hardy and super-hardy kiwifruits can be grown just about everywhere.

Super-hardy kiwifruits, Actinidia kolomikta (“super-hardy” because they tolerate cold to minus 40°), ripened back in early August and hardy kiwifruit, A. arguta (hardy to minus 25°F.), started ripening in mid September. You know these fruits are ripe for picking when the first berries just begin to soften.

I harvested all my hardy kiwifruits once the first ones ripened. Some were firm and some were ready to eat. Kept under refrigeration, the firm ones slowly ripen; at room temperature, they ripen faster. Ripened berries have been, and will be, for a few more weeks, a colorful, sweet-tart, flavorful addition to morning cereal.
———————————-

Apple trees have never borne well here. The reason is because I am trying to grow them “organically.” That means giving special care to the soil, keeping it nourished with compost, leaf mold, wood chips, and seaweed. That means maintaining a diversity of flowering plants to attract beneficial insects. And it means minimum or no spraying of pesticides which, if needed have minimum impact on everything but the target pest(s).

Admittedly, my farmden is not ideal for apple growing. Six-thousand acres of woods (not mine, Mohonk Preserve’s), overwintering home to many pests, lie within 50 feet of my trees. And cold air settles into this floodplain of the Wallkill River, so morning fogs and dews linger longer than on higher ground to fester disease problems. So I do spray my trees, many times each season, with Surround (a commercial formulation of kaolin clay) and sulfur (a naturally mined mineral).

The apple trees looked so hopeful in the spring. No late frosts. Exuberant, new growth. Pea-sized fruitlets rapidly swelling to marble-size, then golfball-size, and larger. 
But something, some things, happened between those halcyon days of June and harvest. Fruits disappeared, dropped, became ugly with blotches and dimples. My farmden isn’t the only one to suffer such affronts. Basically, if you wanted to pick the hardest fruit to grow in eastern U.S., what fruit would that be? Apple! Why? Because of a  very few, but very serious insect and disease problems. Plum curculio, codling moth, apple maggot, apple scab, fire blight, cedar-apple rust, and powdery mildew are the culprits.)

Still, I haven’t thrown in the towel yet with apples. I noted this year that more attention is needed to late summer diseases, such as black rot and bitter rot. And the apples I do harvest might be few, but their flavors are supreme, in large part because of variety selection and perhaps due to terroir.

Apples are not the only fruit worth growing around here. Even if the apple crop is poor, this year I had and have plenty of, in addition to pears and kiwifruits, medlars, raspberries, and grapes. And every year seems to be a good one for pawpaws, persimmons, and blueberries. I’ll be digging into the 40 quarts of blueberries in the freezer just as soon as the last of the kiwifruits are finished.
——————————-

And speaking of hedges, green ones, my yew caterpillar is going into winter looking better than ever. This hedge started out as 4 boring yew bushes planted about 25 years ago and needing multiple prunings each growing season to prevent their overwhelming nearby windows, or even the whole house.

Inspired by Keith Buesing’s (of Gardiner, NY) fabulous green sculptures, a couple of years ago I began re-forming the yews. Yew is an adaptable plant, amenable to pretty much all manners of pruning, and the reformation is now pretty much complete. (The smiling mouth is still under construction.)

Multiple prunings are still needed each growing season, but they are mostly light cuts to polish and maintain the form.