I’M NO MICHELANGELO, BUT . . .
/5 Comments/in Design, Pruning/by Lee ReichLawn Nouveau
I’m taking up sculpture. Not in bronze, Carrara marble, or granite, but with plants.
My easiest sculpture is one I’ve been doing for years. I can’t really say “working on for years” because every year it vanishes, to be started anew each spring. It’s “lawn nouveau,” as I call it in my book, The Pruning Book, and then go on to describe the technique as “two tiers of grassy growth . . . the low grass is just like any other lawn, and kept that way with a lawnmower. The taller portions are mowed infrequently – one to three times a year, depending on the desired look (and my need for hay) — with a scythe or tractor.” The sharp, defining line between the high grass and the low grass is integral to the design.
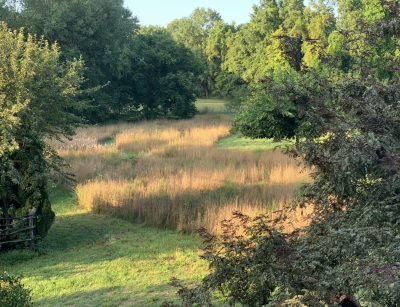
I’m lucky to have a meadow bathed in sunlight bordering the south side of my property. But even a small yard might be able to accommodate lawn nouveau. My three-quarter of an acre yard did before the meadow shifted to my care. (Previous owners had maintained it as very large lawn with weekly or biweekly mowing.)
This sculpture has many pieces to it.
One is how I manage it with mowing the whole meadow either at the end or the beginning of the growing season, a necessary task or the meadow will naturally revert over time to forest. Even a once a year mowing might be insufficient, as I realized a couple of years ago with the increasing encroachment of woody shrubs and vines such as poison ivy, grape, and multiflora rose.
Repeated mowing during one season brought the meadow back in order, mostly with grasses. Over time I expect and hope for a resurgence also of more goldenrods, bee balms, and other herbaceous, flowering plants.

The look of the meadow is also influenced by a season’s weather. And by the progress of the season, the meadow’s appearance being very different as grasses morph from succulent green leaves in spring to late summer’s tawny shoots and seed heads. Late summer also brings on showy flowers.
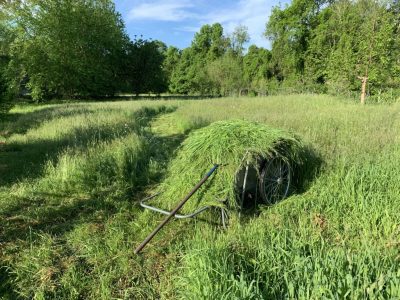
Even the time of day; it’s early morning appearance is quite different than its appearance at various times throughout the day, all dependent also, of course, on what’s happening up in the sky. All this making for a very interesting sight of varying beauty.
A lot of this is either beyond my control or very unpredictable. What is neither is my mowing during the growing season. Each spring I lay out a path, maintained by mowing with my tractor, that wends its way through the meadow.
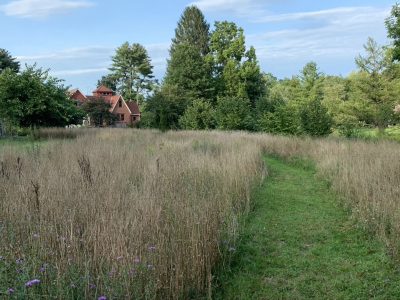
The goal is to make it inviting and practical. Practical because it carries you to the end of the meadow into a bosk of maples, river birches, and one large buartnut tree, and then on to a studio building.
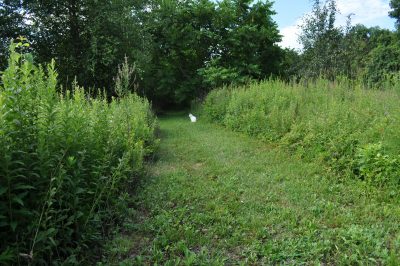
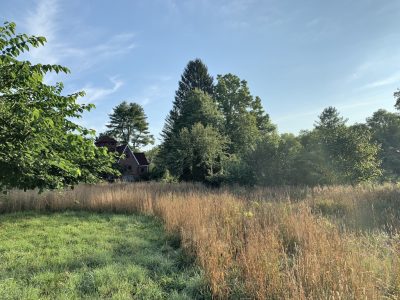
This year I decided to also sculpt more edges of the meadow, cutting the high grass with a scythe to a pattern that matches the flow of the path within. One of my favorite views of the meadow is from an upstairs window, its height allowing me to visually swallow the whole view.
A Head for Yew
Another plant sculpture here is a large yew that I’m carving to become a fifteen foot high head. This one is easy enough because I’m merely copying one of a series of such heads living in a public garden in Britain.
The bush is old, 40 years at least, and has always been pruned to a cone shape with slightly rounded rather than straight sides.
Creating the facial features has involved some deep pruning down into the center of the bush. Yew is a forgiving plant, readily resprouting from even old wood. Problem is that some of those interior stems are old and dead.
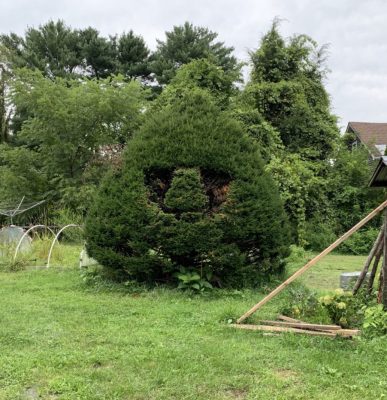
The challenge, then, is time, to be patient for sprouts to grow where light now is penetrating. And then to trim those sprouts so that all levels of the sculpture present green surfaces.
Cloudy Aspirations
And finally, my most difficult sculpture, one for which I each year claim improvement, but not success. The plants: yews again. In this case, there are four of them, all maintained four to five feet high so as not to block the windows of the wall they front.
Originally, they were pruned as a standard yew-along-house-foundation hedge. A few years ago, I morphed them into something more interesting and humorous, a giant caterpillar, with some success. (My inspiration here was the work of Keith Buesing, topiarist extraordinaire of Gardiner, New York.)
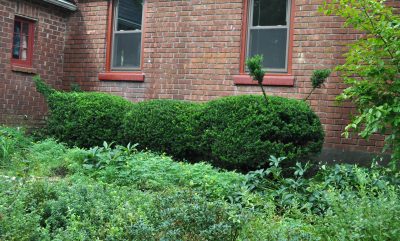
More recently for these plants, I decided to try a method of pruning known as okarikomi, a technique that originated in Japan. In this case, a group of shrubs, rather than maintaining their individual identity, are pruned to flow together to create a scene reminiscent of billowing clouds or a distant, rolling landscape.
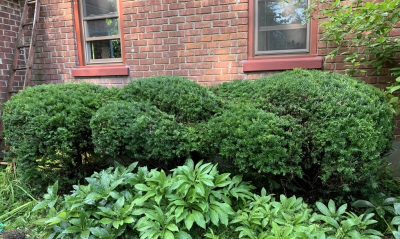
Thus far, I’m not pleased with my pruning. But every year I make some changes and it looks better than it did the previous year.
Plants are very forgiving. Every year, even during each growing season, I have opportunity to change my sculptures according to my whims or what looks nicer to me. What will the meadow, the yew head, and the okarikomi yews look like next year?
And Composting
In case you didn’t notice my previous post, I will be holding a composting workshop/webinar Wednesday, September 23, 2020 at 7 PM. For more information, go to www.leereich.com/workshops.
COMPOSTING WORKSHOP/WEBINAR
/2 Comments/in Gardening/by Lee ReichCOMPOSTING WORKSHOP/WEBINAR
Presentation by Lee Reich (MS, PhD, researcher in soil and plants for the USDA and Cornell University, decades-long composter, and farmdener*):
Learn the why and the how of making a compost that grows healthy and nutritious plants, everything from designing an enclosure to what to add (and what not to add) to what can go wrong (and how to right it). Don’t bother stuffing old tomato stalks, grass clippings, and leaves into plastic bags; just compost them! The same goes for kitchen waste. Learn what free materials are available for composting. “Bring” your questions about this important topic.
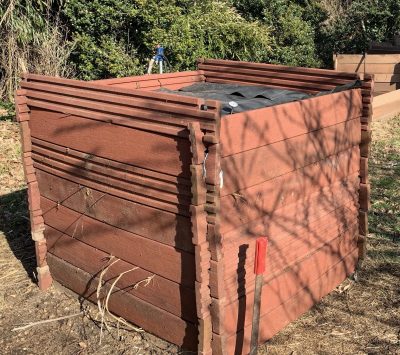
Also covered will be the best ways to use your gourmet compost. Good compost is fundamental to good gardening; it put the “organic” into organic gardening, making healthy soil and healthy plants.
Whether your interest is to produce a material that’s good for your garden or to recycle kitchen and garden waste, this workshop will teach you all you need to know to make good compost.
Space for this workshop/webinar is limited so registration is necessary. Sign up soon to assure yourself a space.
Date: September 23, 2020
Time: 7-8:30 pm EST
Cost: $35
Register for this webinar at:
https://us02web.zoom.us/webinar/register/WN_XmctJm_9QLWlKmW4hK1Lhg
After registering, you will receive a confirmation email containing information about joining the webinar.
*A farmdener is more than a gardener and less than a farmer.
DAILY GRAPES
/17 Comments/in Fruit, Pests/by Lee ReichAs The World Turns…
Over the years, gardening has made me more and more aware of our planet’s annual track around the sun. How quaint. It gives me a certain kinship with the peasants at work in the 15th century painting for the month of September of Les Très Riches Heures de Duc de Berry.

Picking grapes, 15th and 21st century
As with those peasants, September is a month when I have abundant fruits for harvest. Like the peasants, I’m harvesting grapes; it’s been a bumper year. Unlike the peasants, my grapes are destined for fresh eating rather than being sullied by fermentation into wine. (Okay, okay, just kidding, although I am not a fan of drinking wine.)
First to ripen here were the varieties Somerset Seedless and Alden. With an abundance of varieties and fruits, I can afford to be picky, so this will be the last season here for Somerset Seedless. It’s too prone to pest problems and the fruit never loses enough of its tannin-y taste for my palate.
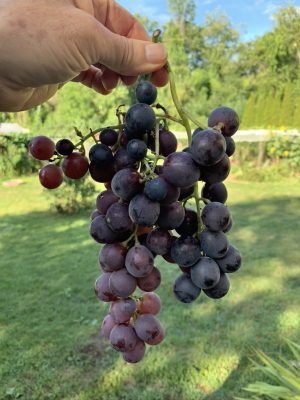
Alden grape
Alden is also threatened with my saw and shovel because it bears lightly and is also plagued with pest problems. But excellent taste and texture make it worth keeping.
Following on the heals of those earlier varieties are Swenson Red, Lorelei, Glenora, and Vanessa. The latter two are very good but would not be worth keeping if they weren’t seedless. In my experience, the most flavorful grapes are those with seeds. Swenson’s Red is a variety that pretty much everyone loves. They’d also love Lorelei if they got to taste this not very common variety.
Finally come Edelweiss, Wapanuka, Brianna, and, bearing for the first time, Cayuga White. The first three are not yet quite ripe. Even at this stage, they are delectable. Cayuga White is still proving itself, or not.
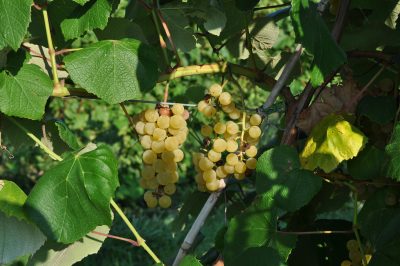
Edelweiss
Looking to the future, newly planted Bluebell, Alpenglow, and Dr. Goode should yield a few berries next year. Also an unknown variety that I propagated from an old vine growing at a friend’s Orchard.
With their bold flavors, you’re not likely to find any of the varieties I mentioned at a supermarket, possibly even a farmer’s market. Plant them!
Variety Choices
A few caveats: The Wallkill River Valley, site of my farmden, is far from ideal for fruit growing. As a valley, it’s colder than surrounding land (zone 5) and is laden with damper air that encourages disease. An abundance of wild grapevines in the bordering 6000 acres of forest provides a place for insects and disease to get their start.
Nonetheless, I get good crops without resorting to sprays. This is possible by providing a sunny site with good air circulation and making the best of it with trellises, and — very important — annual pruning. Also by choosing varieties to plant based on pest, disease, and cold resistance.
Many grape varieties are hybrids of European and American species, the Europeans chosen for their flavor (flavor, that is, from a Eurocentric perspective), the Americans for their toughness to pests and more rigorous growing conditions. American varieties have a unique flavor, called foxiness and typified by that of Concord, as well as a slip skin. European varieties are sweet with a crunchy texture.
As far as flavor and texture, varieties span the spectrum from those that are more like European grapes to those more like American grapes. My final, but very important, consideration in choosing a variety is flavor, and I mostly prefer the flavors of varieties toward the American end of the spectrum.
Of course, the choice widens for grape enthusiasts in more Mediterranean climates, where European varieties can also be grown, and in the Southeast, where the native muscadine grapes grow wild and are cultivated.
Bagging, for Pests
Many birds and insects, especially yellow jackets and European hornets, also enjoy my grapes. They leave plenty for me, but crucial to harvesting the best of the best tasting grapes here is bagging.
Years ago I figured that the longer a bunch of grapes hangs on the plant, the tastier it gets (to a point), but also the more chance of attack by insects and birds. So I bought 1000 bakery bags that happened to have “Wholesome Fresh Delicious Baked Goods” printed on them. 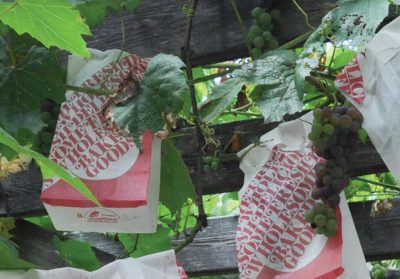 Perhaps the label made the bags even less attractive to grape-hungry birds and insects; at any rate, they worked very well, usually yielding almost 100 late harvest, delectably sweet and flavorful, perfect bunches of bagged grapes each year.
This year, I thought organza bags might work well. 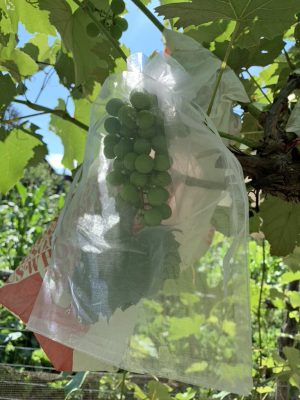 Organza is an open weave fabric often made from synthetic fiber. Small organza bags typically enclose wedding favors; the bags come in many sizes. Organza bags have the advantage over paper bags of letting in more light. A mere pull of the two drawstrings makes bagging the fruit very easy; paper bags involve cutting, folding, and stapling. Organza bags also re-usable. (The bags also work well with apples which, in contrast to grapes, require sunlight to color up.)
In the15th century painting, peasants just pile bunches of their grapes into large, wooden tubs. I gently set only enough bunches for immediate consumption into a woven basket. Different methods, but we’re all tuned to the progress of our planet around its sun.
More details about growing grapes — and lots of other fruits — in my book Grow Fruit Naturally.