PLANT SALE NOW LIVE
/0 Comments/in Gardening/by Lee ReichLee Reich’s 13TH (?) ANNUAL PLANT SALE
(of mostly lesser grown but delectable fruits)

Because of covid, the sale is now online, with scheduled pickups here at the farmden in New Paltz, NY.
Note that there are limited quantities of al plants, each available to the first taker. So order soon.
To see plant list, order, pay, and — VERY IMPORTANT — schedule a pickup time (May 29-31 and June 2), go to https://leesannualplantsale.squarespace.com
MICHELANGELIC ASPIRATIONS
/1 Comment/in Pruning/by Lee ReichI Start with the Easiest
I spent an hour or so today working on my sculptures. Yes, they were out in the garden. No, they were not stone renderings of fish spouting water into a pond or of ethereal females sprinkling the ground with flower petals. These sculptures are quite large and, as you might guess, the are green, with leaves.
Some of the sculptures have been completed; some are works in progress. The easiest of these sculptures are nothing more than short hedges, one of boxwood and the the other of yew. Each makes a cozy enclosure, the yew for my front stoop and the boxwood for a bed of Smooth (Hills-of-Snow) hydrangea, a hop vine climbing a trellis, and a Sweet Autumn clematis climbing a brick wall.
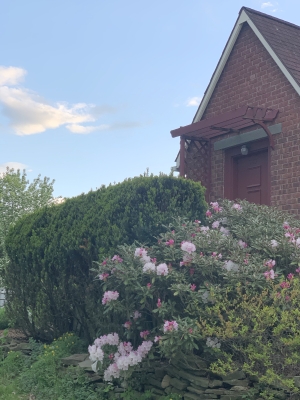 With flat tops and nearly vertical sides, both hedges are quick and easy to prune. They both widen slightly from head to toe because, quoting from the “hedging” section of my book, The Pruning Book, “If the top is wider than the bottom, the bottom will become shaded. Over time, the shaded portions will die out, leaving gaps in the hedge.”
(Could these two hedges hardly qualify as “sculpture?” I contend that creating any three-dimensional object requiring aesthetic decisions as to shape and size qualifies as “sculpting.”)
A hedge out in back of my home takes longer to prune because the hedge itself is longer as well as, in some parts, higher. This 50 foot row of privet bushes is waist height through most of its length except for the gentle upward sweep it takes as it approaches either end. After climbing 8 feet, the sweeps level out, continuing on to create the top of an arch beneath which is an opening through which I can walk, even drive my tractor.
Catty-corner to the swooping hedge (which, in its earlier stages, I was going to sculpt into a two-headed dragon) is another hedge with a pass-through. This hedge forms a high wall a few feet off the back wall of my workshop, and it’s pass-through iswide enough and, with its slight bump up above it, also high enough so that anything that fits through the barn door can also fit through the pass-through.
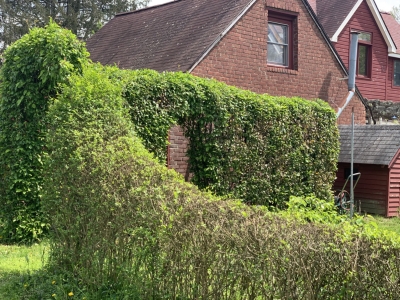
The plant that makes up this hedge is Tea crabapple (Malus hupihensis), an interesting plant not usually hedged. It produces seeds that are apomictic, a botanical quirk where, to quote from another of my books, The Ever Curious Gardener, the plant produces “seeds that are not the result of pollination, but that develop from the same kind of cells that make up the rest of the plant.” (All seedlings and the mother plant are clones of each other. These were extra seedlings from those I had grown for research use when I worked for Cornell University.)
Left to its own devices, a Tea crabapple would grow up to 40 feet high and produce fragrant, white blossoms and cherry-size crabapples. For decades, I’ve kept the row of seven of them only 15 feet long, 3 feet wide, and 9 feet high. They don’t mind except with all that pruning, flowers or fruit are rare.
Heads and Clouds
Now we come to the more difficult hedges, ones that are more sculptural. Both are yews, a plant that tolerates just about any kind of pruning. I have written about both hedges previously. Since I revisited them today with pruning and hedge shears, I thought it was time to revisit them on the page also.
The first is not a hedge, but a solitary, giant old yew bush that, at more than 40 years old, predates my tenure here. For most of that time, it was pruned to the shape of a 15 foot high and wide cone. More recently I’ve pared away at it to try to morph that cone into a giant head.
Problem is that the interior of a plant cone that size is dark, so the stems within lose their leaves. Some of them dry out and die back. As a result the yew head’s eye sockets and mouth, both of which were supposed to be green recesses are dark — and a bit foreboding.
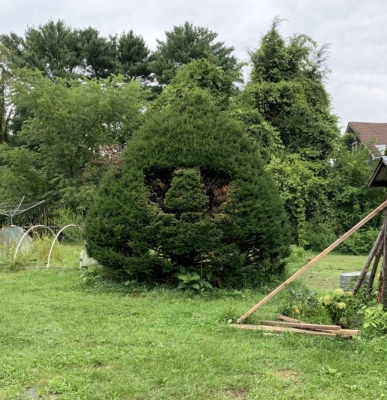
Today’s pruning was geared to shearing the whole bush to keep it from growing too large, and shortening all the dead wood deep within the eye and mouth sockets. New sprouts should then appear within those once-shaded gaps.
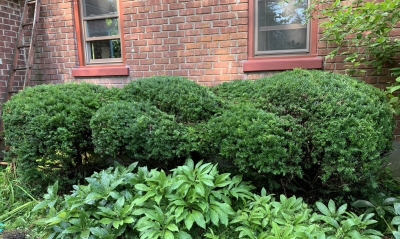
The other sculpting challenge started life very conventionally, as four yew hedges planted along the house wall. It was your typical “foundation” plants and planting. Years ago, for fun, I sculpted the hedge into a giant whale and, a few years later, a giant caterpillar. Easy.
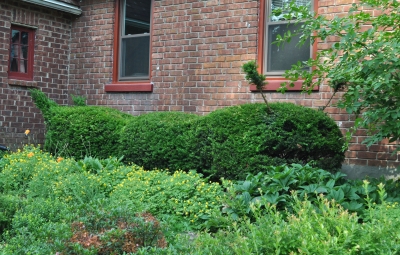
More recently, I decided to go more abstract and artistic, with “cloud pruning.” Or, as Jake Hobson more accurately terms it, in his informative and visually inspiring book The Art of Creative Pruning, “organic topiary.” He describes this pruning as creating forms that take “on a decidedly organic character, as though they were made of wax and exposed to the sun too long. Definition is lost, in favour of natural, flowing lines.” That’s my goal, thus far hinted at but unachieved. I find it difficult to unshackle the hedge from the three individual bushes that comprise it.
If Only Michelangelo…
So much in gardening involves taking time to step back and admire your finished work. With these sculptures, even the simplest ones, it’s important to do so periodically while sculpting.
It’s all fun and very satisfying. If I make a mistake, I can just wait for the plant to grow back. Just think if Michelangelo could have stepped aside for a few weeks while his marble grew back for another round of being chipped away.
On the other hand, he would not have to chip away at the finished piece every few months through summer to keep it in shape. These sculptures need multiple prunings through the growing season to keep their shape.
CALLING ALL VOLUNTEERS
/6 Comments/in Gardening/by Lee ReichA Returning Beauty
I have some of the nicest volunteers in my garden. Some of them have been people, many of them are plants, and one of my favorites – among the plants, that is – is columbine. Years ago, I planted some native columbines, those dainty plants whose orange and yellow flowers hover on thin stalks above their ferny foliage. Since being planted, these wildings self-seed – volunteer, that is — every year in various nooks and crannies around my yard, such as in the thin crevice of soil between my bluestone front path and the adjacent stone wall.
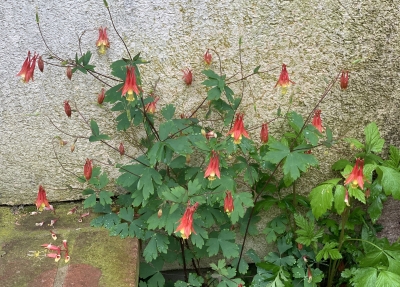
I once also planted cultivated columbines, the common McKana Giants, and their offspring have been volunteering around the yard as well. Flowers and foliage of these more cultivated sorts are similar to the natives, just bigger in all respects, which is not necessarily better. Or worse. Just different.
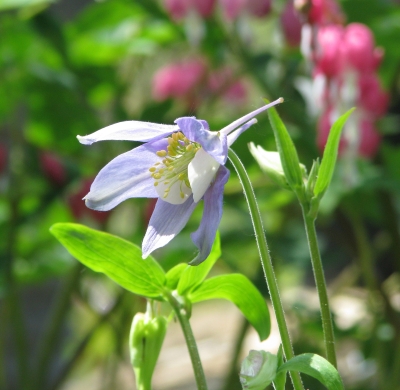
Colors of these larger columbines are different from that of the natives. My original McKana Giants sported various colored bracts and petals. Seedlings of these plants, 20 years later, have segregated out into just a few solid colors, and the cool thing is that each year’s colors are a bit different from the previous years’.
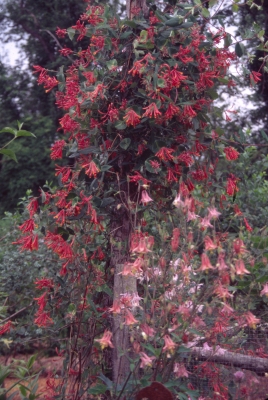
The once “high-bred” columbines back by my vegetable garden have mostly soft pinks flowers, a color that marries well with the scarlet of the trumpet honeysuckles behind them.
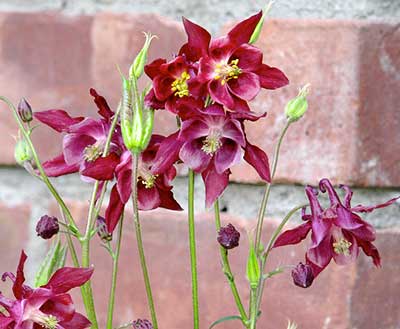
Right near my front door, poking through cracks between the bluestone patio and my home’s brick wall, is a big, beautiful columbine with dusky, purple flowers.
I do help out these volunteers by weeding out those in excess or interloping where they shouldn’t.
Greenhouse Volunteers
Not all my volunteers are beauties. Some are only practical.
For instance, in the greenhouse, I once planted claytonia, also known as miner’s lettuce. It’s one of many lesser known “greens” that thrive in cool weather so are good for adding variety to salads once fresh cucumbers and tomatoes are just a memory.
Since that first planting, late every fall claytonia shows up all over the place in the greenhouse with no help from me. “All over the place” usually applies to a weed, but when I grab a whorl of claytonia leaves and lift gently, the plant gives in and lifts, hardly disturbing the soil.
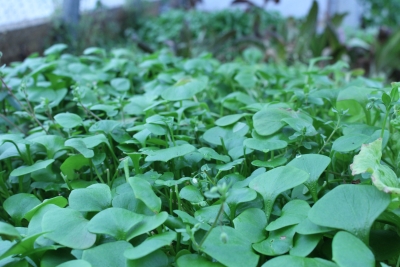
This past winter was relatively mild and, for the first time, I see a few claytonia plants out in the garden. Uh-oh.
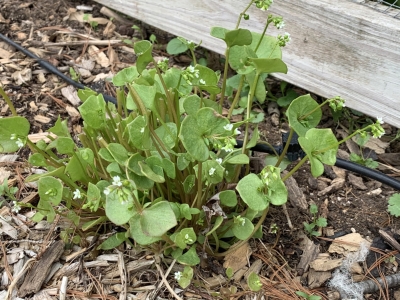
Years ago, I would sow celery seeds in flats in February for transplanting in May; the seeds take a long time to sprout and then the seedlings grow very slowly. No more. I once grew celery for winter in the greenhouse and, in spring, when seed stalks started pushing up from the plants’ middles, I decided to let the plants do their thing. They self-seeded, so all I need to do these days is weed out excess. Some of those excess can also be potted up for transplanting into the garden.
Some greenhouse volunteers — mâche and cilantro — help out both in the greenhouse and in the garden. That’s nice of them because then I get the early crop in the greenhouse and the later crop outdoors.
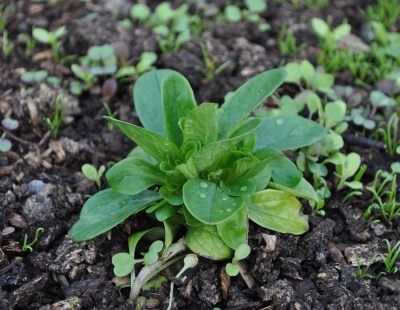
Mâche show up in winter in the greenhouse, again in early spring and then again in late summer. The early spring crop is from plants that overwintered; mâche, though delicate in texture and flavor, is perhaps the most cold-hardy and among my favorite of all fresh salad greens. In spring, plants go to seed and the seeds slumber in the ground until cool weather coaxes them to sprout.
Mache
Cilantro, in contrast, only sprouts in late winter in the greenhouse and mid-spring out in the garden. It does so profusely. Like claytonia it never segues over into the category of “weed” because any excess is easily removed.
Sacrilege and Hope
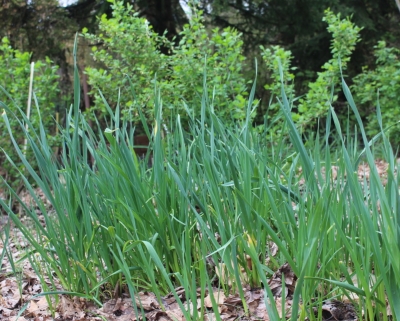
One volunteer that shows up only outside, in the garden, is garlic. This may sound like sacrilege, but I don’t grow garlic. Many years ago I did, and then decided to devote the garden space to vegetables whose garden-fresh flavor is truly better than anything I could buy. And anyway, I don’t use that much garlic. So I stopped planting it.
Garlic did not go away, though. It’s been propagating by the little offsets it produces atop its flower stalk to the point where it’s everywhere among the leaf-mulched berry plants adjacent to my garden. (It’s not allowed in my garden.) The mostly grassy plants hardly ever yield bulbs worth saving but the tender, grassy stalks are useful. If I call this a weed in my garden, the parts of my garden where I grow it are indeed very weedy.
At the other extreme is one volunteer that once liked it here, but evidently no longer does. That’s dill, which used to self-seed in just the right amount, and usually would confine itself to the same corner of my vegetable garden.
A couple of years ago, only one or two plants showed up, and last year none. I’m not sure why. I want it to come back so I bought some seeds for this year. I’m hoping it comes back as a volunteer again in future years.

