
Upcoming GROWING FIGS IN COLD CLIMATES webinar
 Last reminder for GROWING FIGS IN COLD CLIMATES webinar.
Monday, June 6, 2022, 7-9 pm Eastern Time
Cost: $35
Registration is necessary; register and pay (credit card or Paypal) at:
https://us02web.zoom.us/webinar/register/WN_4hqKduDNSyiuRGPBlmBObg
Contact me if you prefer to pay by check.
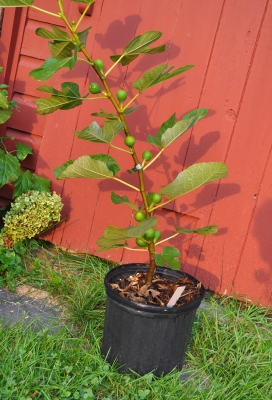
Learn what makes this subtropical plant so adaptable that you can harvest fresh fruit from it even in cold climates, and practical applications of this information. I’ll cover a few of the methods for being on your way to fig-dom, including winter care, pruning, varieties, and speeding up ripening. There’ll be plenty of time for questions.

San Piero fig, ripe
NO MO’ NO MOW MAY(?)
What and Why?
The Month of May has ended, as has “No Mow May.” If you’ve never heard of “No Mow May,” it’s the rallying cry of a movement that began in the UK, suggesting that all of us who nurture greenswards abandon our efforts for the month of May. In so doing, habitat and food, in the form of early blooming wildflowers such as dandelions, clover, creeping Charlie, and violets, would become more available to early season pollinating insects.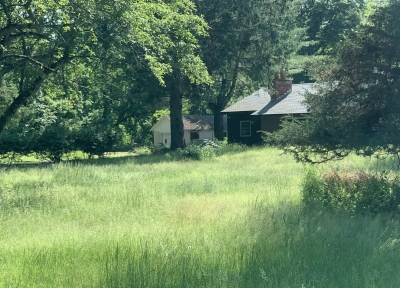
Let’s dive deeper into what “No Mow May” accomplishes, whether this movement has any drawbacks, and, finally, possible alternatives.
A lawn is typically a monoculture, or nearly so. Not mowing during this month when heat and rainfall spur rapid plant growth encourages more diversity, which makes environments more resilient.
Gasoline-powered mowers spew out great quantities of carbon dioxide and pollutants. Over the course of a year, one such machine pollutes the same amount as 43 new cars, each driven 12,000 miles! And all that noise. Not to also mention toxic pollutants entering the environment (13 billion pounds per year from lawns) and our collective lawns thirst for copious amount of water.
“No Mow May” puts a hold on all these environmental affronts, at least for the month.
Does It Fill The Bill?
Take a closer look at what this deliberate neglect has fostered. Peer at a no mow lawn, perhaps yours, and you’ll see some of the aforementioned wildflowers. Wait, though. Plants such as dandelion and creeping Charlie, are not native. 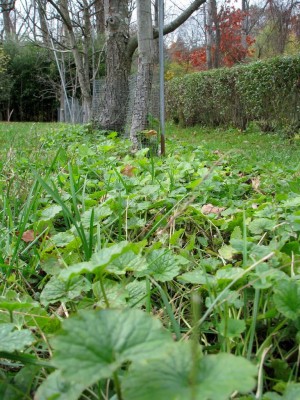 And dandelion, for one, can negatively impact animals and even other plants. Its pollen is nutritionally poor for bees, low in valine, isoleucine, leucine and arginine, all essential amino acids for honey bees. Problem is that bees can become faithful to one plant, so might fail to sufficiently pollinate other plants or ignore more nutritious pollen sources if they get started on dandelions. And dandelion’s allelopathic pollen inhibits seed development of some other plants.
Leaving the mower parked in the garage or barn for May will, of course, change the appearance of your lawn, a look that has been part of our collective aesthetic from the past. Local ordinances might even prohibit “No Mow May.”
Despite certain drawbacks, mown lawn is functional, providing a soft, inviting surface for lounging, for playing, for picnicking, and other civilized activities.

Manet’s “Luncheon on the Grass”
Tall grass is not nearly so inviting, especially as mice and other rodents feel more secure from predators scampering beneath the cover of long grass. Ticks enjoy such habitat, and are carried around by the mice, increasing threat of Lyme disease and other tick-borne illnesses.
Okay, so it’s the end of the month and you’re ready to mow. It’s not going to be easy to plow through all that vegetation. And all those clumps of grass clippings? You’ll probably have to rake them up so the lawn doesn’t get smothered.
The grass itself isn’t going to fair well with the drastic end-of-the-month pruning. Grasses are healthiest if blades are cut back by no more than one-third their length. So two mowings may be in order to bring grass down to mown height. If you wait a few days between mowings , then clippings from the first cut have time to dry out, so you may be able to forgo having to rake them up.
When all is said and done, does one month of not mowing an established lawn really encourage a burst of wildflowers or other biological changes? Probably not. The “No Mow May” lawns that I see look mostly just like unmown grass.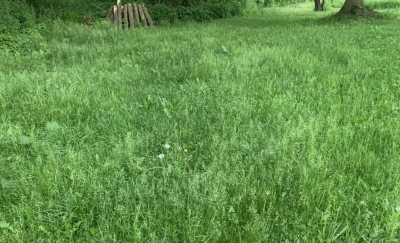
Alternatives
Probably the easiest way to get the best of both worlds, or at least some of both worlds, would be with “One Mow May” or “Less Mow May” rather than “No Mow May.”
Or, replace part of the lawn with a garden, perhaps a wildflower garden, or even just areas with groundcovers rather than lawn.
My top alternative to “No Mow May” is what I’ve called Lawn Nouveau, an idea I had years ago that reflected my lack of time and enthusiasm for mowing the lawn. Here’s an adaptation of Lawn Nouveau, as I described it in the mowing chapter — yes, mowing is a type of pruning — of my book The Pruning Book (available here, signed, or from the usual sources):
The low grass is just like any other lawn, and kept that way with a lawnmower. Other portions are allowed to grow, and are mowed infrequently –- one to three times a year, depending on the desired look. Mowings from the tall grass portions must be raked up after mowing or else they’d leave unsightly clumps and smother regrowth, but they are good material for mulch or compost.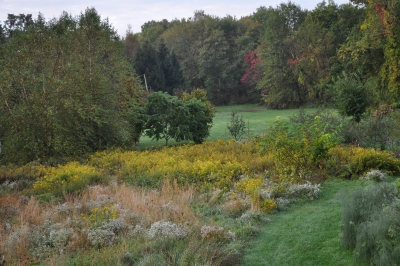
A crisp boundary between tall and low grass keeps everything neat and avoids the appearance of an unmown lawn. Tall and short grass can help define areas. Rather than straight edges and 90° corners, curves in bold sweeps can carry you along, then pull you forward and push you backward, as you look upon them. Avenues of low grass cut into the tall grass invite exploration, and, like the broad sweeps, can be altered throughout the season.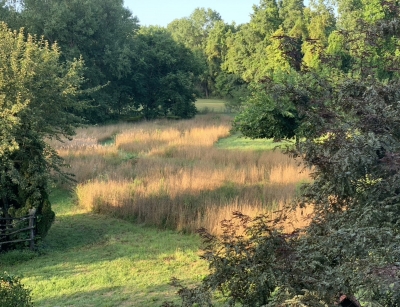
The “tall grass” becomes more than just grass as other plant species gradually elbow their way in. Which ones gain foothold depends on the weather and frequency of mowing.  An attractive mix of Queen Anne’s lace, goldenrod, chicory, and red clover might mingle with the grasses in a dry, sunny area, with ferns, sedges, and buttercups mixing with the grasses in a wetter portion.
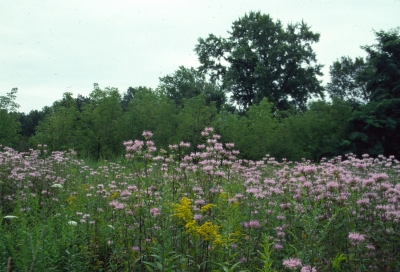
I now have a one-and-a half acre meadow which, along with some lawn around my home, constitutes Lawn Nouveau here. No need for large property, though; my original property was 3/4 acre, and that’s where Lawn Nouveau began way back when.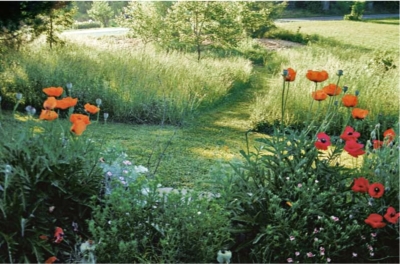
In Praise of the (Austrian) Scythe
My preferred implement for mowing the tall grass is a scythe. Not the so-called American type scythe, with a curved handle and stamped blade, which is put to best use decorating the wall of a barn. I use a so-called Austrian type scythe (purchased from www.scythesupply.com), which usually has a straight handle and is lightweight with a razor sharp, hammered-thin blade.
Much of my one acre meadow gets a once-a-year mowing with my tractor, but you’ll still find me out there early summer mornings with my scythe. 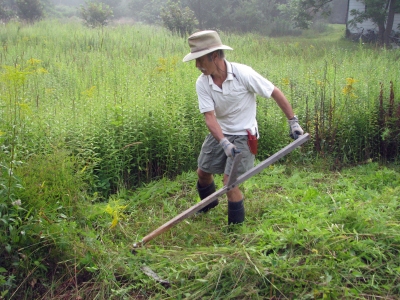 It’s a joy to step out in the dewy coolness and swing my scythe, the only sounds being that of birds singing and the scythe blade whooshing through the turgid, green stalks of meadow plants.
(For a short scything video, see https://leereich.com/video.)
KEEPING THE FAITH
Transplant Shock
A recent telephone call to my sister caught her setting zucchini transplants in her garden. “Transplanting zucchini?” I queried. “Have some faith in nature.” Transplants on sale this time of year too often entice gardeners to set out set them out in the garden rather than drop seeds into furrows.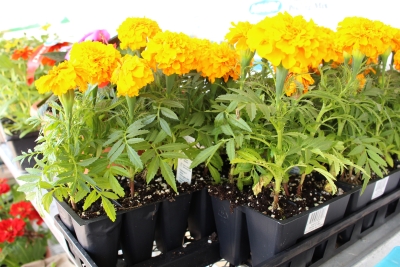
I pointed out that not every plant likes to be transplanted. Tomato plants yanked out of the soil will resume growth in a few days if their roots are covered with moist dirt. Roots will sprout even if just a stem is in moist soil. But the roots of plants like corn, poppies, melons, cucumbers, and squashes (zucchini included) resent disturbance. Carrots, parsnips, and many other root crops also transplant poorly. Their taproots become the harvested roots. If bent or broken while young, forked, rather than straight, smooth carrots and parsnips result.
This is not to say that it is impossible to successfully transplant squash, poppies, and the like. Any plant can be transplanted if enough care is taken not to damage the roots. A plant doesn’t even know it has been moved when a large enough ball of soil is carried along with the roots. (To paraphrase Archimedes, “Give me a big enough shovel and I can transplant any plant.”) Enormous trees can be, and are, relocated if taken with sufficient roots (and money).
My sister told me that her zucchini plants were growing in plastic cell packs. If the roots were not yet crowding each other against the plastic, and if the plants were gently slid out of their containers, the transplants will survive. I’ve even heard of gardeners even transplanting carrots — very carefully, no doubt.
Is It Worth It?
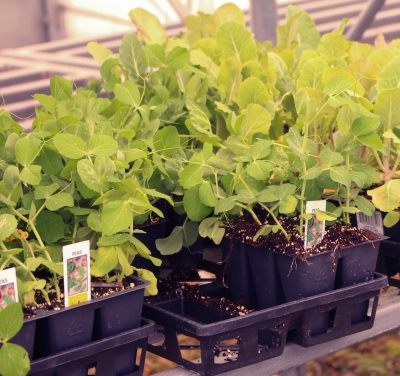
Pea transplants for sale
Many vegetables could be easily transplanted, yet aren’t worth the effort. A friend transplanted peas one year. Granted, his peas were a foot high indoors when mine were just breaking through the ground out in the garden. But how many pea transplants can a gardener care for? I grow about sixty feet of double rows of peas in my garden, from which I expect about twelve pounds of peas. Each pea plant, though, yields only about a quarter of an ounce of peas. Who has enough space and time to sow, water, then transplant even two dozen pea plants for the paltry six ounces of peas those plants would yield?
Generally, plants whose seeds are sown closely spaced in the garden are not worth transplanting. In the flower garden, this would include alyssum, portulaca, and pot marigolds (though I admit to starting a few alyssum plants indoors so they would spread and flower sooner).
In addition to peas, some other vegetables not worth growing as transplants include spinach, mustard, and beans. Black Seeded Simpson and other leaf lettuces (sometimes referred to as “cutting lettuces”) are generally sown directly in the ground. While the plants are still small, I’ll run a knife near ground level every couple of feet or so slicing off their tops. For the next salad, I’ll choose new groups of plants to cut. Within a couple of weeks, plants are again ready for harvest.
Bibb lettuce transplants
Heading lettuces such as iceberg, bibb, and romaine are worth transplanting because each plant needs space in order to head up well. Alternatively, heading lettuce could be sown directly in the garden, then thinned to the appropriate spacing.
(I list dates for sowing and transplanting various vegetables, according to your region, in my book Weedless Gardening, available from the usual sources or directly from me here.)
Exceptions to Prove the Rule
“Trust nature,” I told my sister. “Sow seeds on the correct planting date in good garden soil, and they’ll germinate. Save transplanting efforts for vegetables like tomatoes and peppers, which need to be started early indoors in order to ripen their fruits in a reasonable amount of time. Or broccoli and cabbage, because individual plants yield a substantial amount to eat. Tomato, broccoli, and cabbage plants don’t object to being transplanted, and not too many transplants are required since they are set a couple of feet or more apart in the garden.”
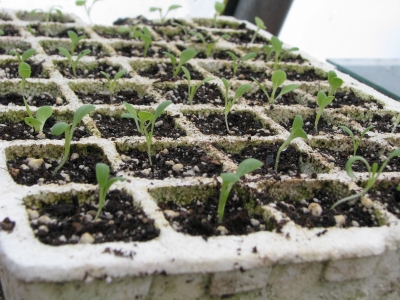
Seeds which are particularly finicky or valuable (due either to scarcity or cost) also are worth growing initially in pots. Although hardy cyclamens (Cyclamen heredifolium) do self-seed under ideal conditions, I wanted to greatly increase my holdings. 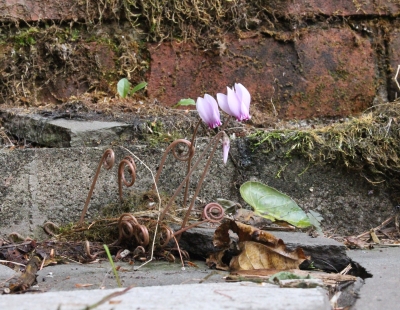 They’re a little finicky to sprout, so I collected seeds from one of my plants and planted them in a seed flat, where I could watch and nurture them individually, then transplant them to individual pots. Here it is, three years later, and later this summer, delicate pink flowers will hover like small butterflies above each of the ten fat tubers.
Sure, it may be worthwhile to start a few corn plants indoors, because fresh sweet corn is one of the ultimate gustatory pleasures of the vegetable garden. But is zucchini that toothsome?
