GARDENING “HANDWORK”
/6 Comments/in Soil/by Lee ReichTo Haul or Not to Haul
Hauling manure hardly seems to make sense these days, considering that lugging 500 pounds of horse manure gives plants about the same amount of food as a 50 pound bag of 10-10-10. And the latter for only about ten bucks!
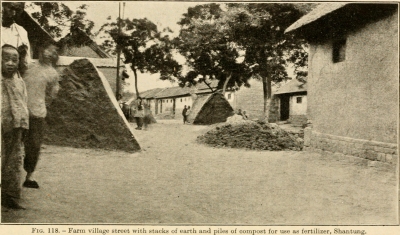
Human manure piles, China, 1900
But whereas 10-10-10 supplies only food (and only three of the sixteen needed nutrients at that), manure has other benefits: it aerates the soil; it helps soil capture and cling to water; and it renders nutrients already in the soil more available to plants. Nutrients from synthetic fertilizers are used up or washed out of the soil by the end of a season, yet benefits from each application of manure last for years. Even ingredients of a concentrated organic fertilizer have little benefit as far as soil aeration and water retention are concerned.
Manure is a traditional way of feeding plants, to the extent that applying synthetic (chemical) fertilizers once was referred to as a form of “manuring,” and certain plants grown specifically to improve the soil are called “green manures.”
When we talk of manure, though, we really mean animal excrement plus bedding. The bedding itself –- usually hay, straw, or wood shavings -– is itself responsible for some of the benefits of manure. The amount of nourishment manure supplies to a plant the first season depends on the ratio of bedding to excrement. More bedding means less nourishment to plants the first season, but greater residual effect for subsequent seasons. Unfortunately, bedding also can be a source of weed seeds.
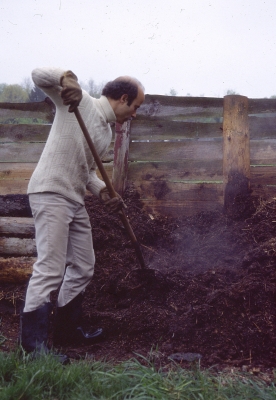
Long ago my compost piles were mostly manure
“Hot manures” are so called because they readily heat up when stacked in a pile. The heat comes from the burst of microbial activity stimulated by these manures’ relatively high concentrations of nitrogen and low concentrations of water. Horse and poultry manures are “hot;” cow and pig manures are “cold.”
How to Handle It, Generally
Okay, so you have manure in hand, or rather in pitchfork (a five-tined pitchfork is my preference for manure handling). What next?
Most gardeners dig it into the soil immediately. If the manure is well rotted -– meaning bits of hay, etc. no longer are recognizable –- planting can proceed as soon as the soil is smoothed.
If the manure is relatively raw, wait at least 2 weeks for things to settle down, microbially speaking, before planting. Especially if this raw manure has a high proportion of bedding, a much longer wait is needed before planting. Microbial decomposition of that extra carbon-rich bedding requires nitrogen which, if in sufficient amounts are not in the associated manure, must come from soil reserves. Microbes are more adept at getting at that nitrogen than are plants, so plants are starved — at least until the extra carbon is digested (and the carbon/nitrogen ratio in the ground is about 20/1). One advantage to digging manure into the garden in autumn is that it avoids any delay in planting in spring.
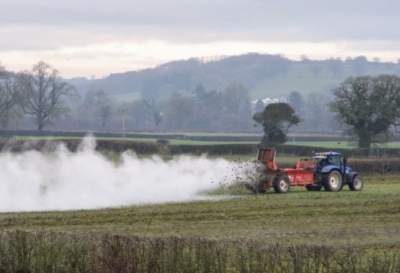
Spreading manure on a farm
In lieu of digging, just lay manure on top of the ground as mulch. This is fine if the manure is rotted, but nitrogen volatilizes from fresh manure exposed to sun and wind. The nitrogen loss is wasteful, but may be worth the sacrifice considering the benefits of the mulch. And the nitrogen starvation mentioned previously doesn’t occur because decomposition is very slow, at the interface of the mulch and the soil.
And More Specifically
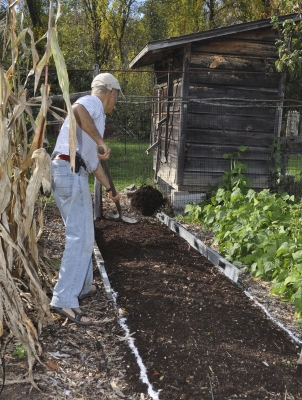
I have access to more horse manure than I could ever possibly want, and the way I usually handle the manure is to compost it before putting it on or in the soil. In a compost pile, manure is mixed with other ingredients (garden residues, vegetable scraps, leaves, soil, etc.), so the result is a better-balanced fertilizer. Also, the heat of composting kills most weed seeds present in either the excrement or the bedding.
The amount of manure to add to soil depends on whether the manure is rotted or fresh, and what kind of animal provided the manure. You can add too much manure to soil: I once had a chicken farming neighbor who killed his asparagus bed by blanketing it under 6 inches of chicken manure (very hot stuff!). Twenty-five to 50 pounds per hundred square feet is about the right amount.
(Manure is the only bulky, beneficial source of organic nitrogen. Some other sources are kitchen scraps, young plants, cultivated and wild — as in “weeds” — and especially, legumes.)
The word “manure” comes from the old French word manoevrer, meaning “to cultivate by hand” (in turn from the Latin words for “hand” and “work”). All this manure handling is a lot of physical work, but isn’t exercise another benefit of gardening?
Plant Sale in Progress (mostly fruits, many uncommon, and uncommonly delicious ones)
A reminder: my plant sale, online with live pickup, is in progress for another few days. To view the plant list, to order, to pay, and — VERY IMPORTANT — to schedule a pickup time (May 29-31 and June 2), go to https://leesannualplantsale.squarespace.com
PLANT SALE NOW LIVE
/0 Comments/in Gardening/by Lee ReichLee Reich’s 13TH (?) ANNUAL PLANT SALE
(of mostly lesser grown but delectable fruits)

Because of covid, the sale is now online, with scheduled pickups here at the farmden in New Paltz, NY.
Note that there are limited quantities of al plants, each available to the first taker. So order soon.
To see plant list, order, pay, and — VERY IMPORTANT — schedule a pickup time (May 29-31 and June 2), go to https://leesannualplantsale.squarespace.com
MICHELANGELIC ASPIRATIONS
/1 Comment/in Pruning/by Lee ReichI Start with the Easiest
I spent an hour or so today working on my sculptures. Yes, they were out in the garden. No, they were not stone renderings of fish spouting water into a pond or of ethereal females sprinkling the ground with flower petals. These sculptures are quite large and, as you might guess, the are green, with leaves.
Some of the sculptures have been completed; some are works in progress. The easiest of these sculptures are nothing more than short hedges, one of boxwood and the the other of yew. Each makes a cozy enclosure, the yew for my front stoop and the boxwood for a bed of Smooth (Hills-of-Snow) hydrangea, a hop vine climbing a trellis, and a Sweet Autumn clematis climbing a brick wall.
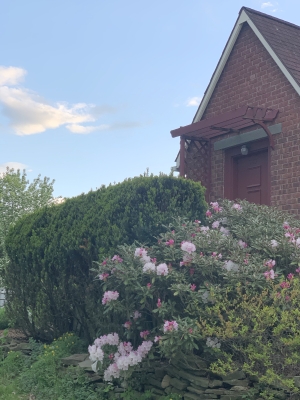 With flat tops and nearly vertical sides, both hedges are quick and easy to prune. They both widen slightly from head to toe because, quoting from the “hedging” section of my book, The Pruning Book, “If the top is wider than the bottom, the bottom will become shaded. Over time, the shaded portions will die out, leaving gaps in the hedge.”
(Could these two hedges hardly qualify as “sculpture?” I contend that creating any three-dimensional object requiring aesthetic decisions as to shape and size qualifies as “sculpting.”)
A hedge out in back of my home takes longer to prune because the hedge itself is longer as well as, in some parts, higher. This 50 foot row of privet bushes is waist height through most of its length except for the gentle upward sweep it takes as it approaches either end. After climbing 8 feet, the sweeps level out, continuing on to create the top of an arch beneath which is an opening through which I can walk, even drive my tractor.
Catty-corner to the swooping hedge (which, in its earlier stages, I was going to sculpt into a two-headed dragon) is another hedge with a pass-through. This hedge forms a high wall a few feet off the back wall of my workshop, and it’s pass-through iswide enough and, with its slight bump up above it, also high enough so that anything that fits through the barn door can also fit through the pass-through.
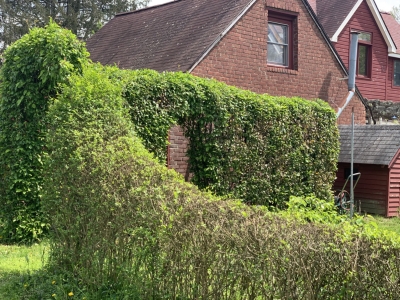
The plant that makes up this hedge is Tea crabapple (Malus hupihensis), an interesting plant not usually hedged. It produces seeds that are apomictic, a botanical quirk where, to quote from another of my books, The Ever Curious Gardener, the plant produces “seeds that are not the result of pollination, but that develop from the same kind of cells that make up the rest of the plant.” (All seedlings and the mother plant are clones of each other. These were extra seedlings from those I had grown for research use when I worked for Cornell University.)
Left to its own devices, a Tea crabapple would grow up to 40 feet high and produce fragrant, white blossoms and cherry-size crabapples. For decades, I’ve kept the row of seven of them only 15 feet long, 3 feet wide, and 9 feet high. They don’t mind except with all that pruning, flowers or fruit are rare.
Heads and Clouds
Now we come to the more difficult hedges, ones that are more sculptural. Both are yews, a plant that tolerates just about any kind of pruning. I have written about both hedges previously. Since I revisited them today with pruning and hedge shears, I thought it was time to revisit them on the page also.
The first is not a hedge, but a solitary, giant old yew bush that, at more than 40 years old, predates my tenure here. For most of that time, it was pruned to the shape of a 15 foot high and wide cone. More recently I’ve pared away at it to try to morph that cone into a giant head.
Problem is that the interior of a plant cone that size is dark, so the stems within lose their leaves. Some of them dry out and die back. As a result the yew head’s eye sockets and mouth, both of which were supposed to be green recesses are dark — and a bit foreboding.

Today’s pruning was geared to shearing the whole bush to keep it from growing too large, and shortening all the dead wood deep within the eye and mouth sockets. New sprouts should then appear within those once-shaded gaps.
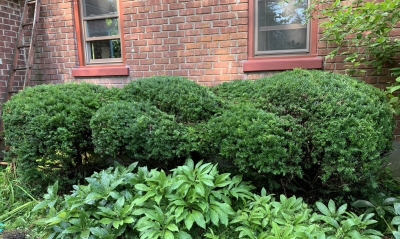
The other sculpting challenge started life very conventionally, as four yew hedges planted along the house wall. It was your typical “foundation” plants and planting. Years ago, for fun, I sculpted the hedge into a giant whale and, a few years later, a giant caterpillar. Easy.
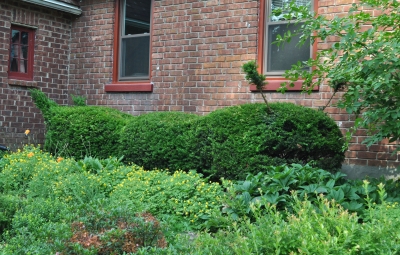
More recently, I decided to go more abstract and artistic, with “cloud pruning.” Or, as Jake Hobson more accurately terms it, in his informative and visually inspiring book The Art of Creative Pruning, “organic topiary.” He describes this pruning as creating forms that take “on a decidedly organic character, as though they were made of wax and exposed to the sun too long. Definition is lost, in favour of natural, flowing lines.” That’s my goal, thus far hinted at but unachieved. I find it difficult to unshackle the hedge from the three individual bushes that comprise it.
If Only Michelangelo…
So much in gardening involves taking time to step back and admire your finished work. With these sculptures, even the simplest ones, it’s important to do so periodically while sculpting.
It’s all fun and very satisfying. If I make a mistake, I can just wait for the plant to grow back. Just think if Michelangelo could have stepped aside for a few weeks while his marble grew back for another round of being chipped away.
On the other hand, he would not have to chip away at the finished piece every few months through summer to keep it in shape. These sculptures need multiple prunings through the growing season to keep their shape.

