
BLUEBERRIES GALORE, COMPOST TEA REDUX
On My Knees for Blueberries
For the last few years, my blueberries have had a problem. Perhaps yours also. Rather than grow upright, the stems arch downward, some so drastically that they actually rest on the ground.
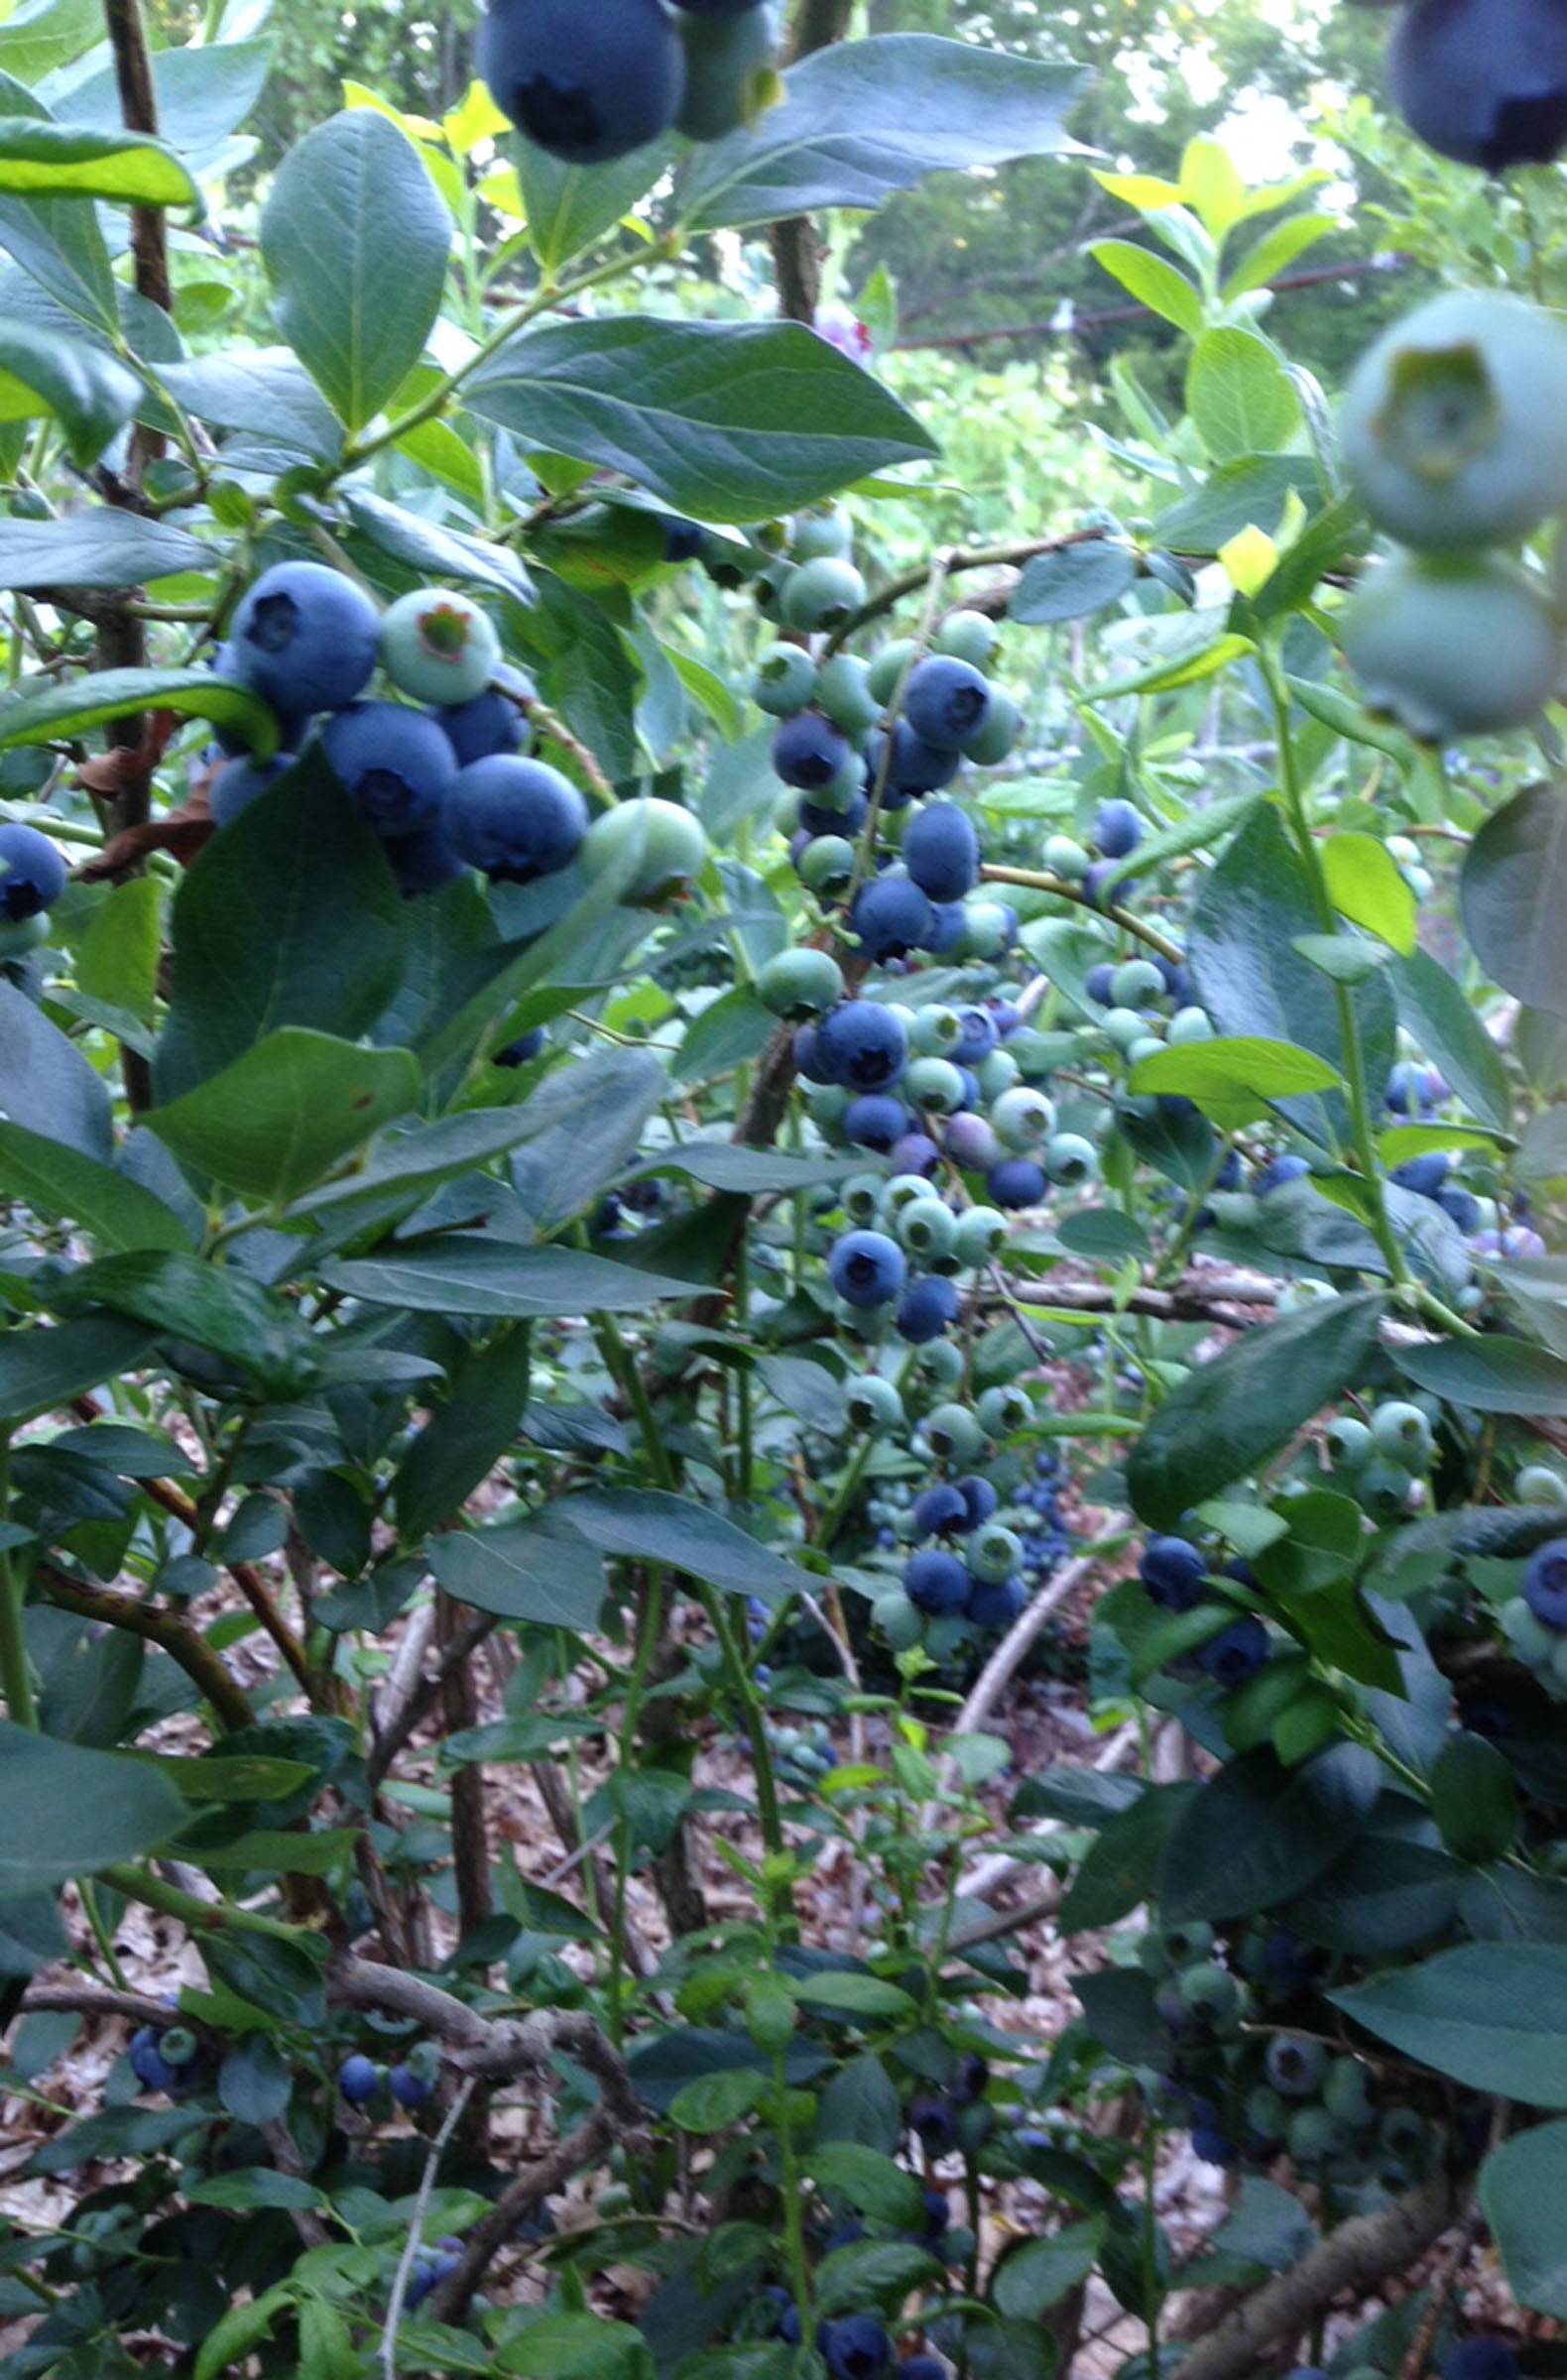
Blueberries galore
A few years ago, I pinned blame on the weather. Not that it was evident just how the weather could be responsible, but it’s always convenient, in gardening, to blame things on the weather. But this explanation is hardly convincing. Spring and summer weather have not been consistent enough over the years to be able point my finger at too much rain and/or not enough sunlight (the combination of which could lead to those bowing branches).
How about pruning or fertilization? Too much of either could promote lush growth that couldn’t support itself. Except that my pruning has been consistent over many years. And Dr. Marvin Pritts, berry specialist at Cornell, confirmed that he and others saw the same problem, without definitive explanation, a couple of years ago.
I like the green thumb explanation best: That is, that I’m such a good blueberry grower that the branches can hardly support the prodigious crops I’ve coaxed from them. So I’m not really complaining. Just curious. And having to get on my knees to harvest low hanging fruit.
Remember Fruit Flies?
There is one fly in the green thumb ointment. A fly, literately. A tiny fruit fly called the spotted wing drosophila or, quicker to say, which is necessary for this fly that’s getting a lot of buzz lately, SWD. The fly attacks many small fruit, starting the season with honeysuckle berries, then moving on to raspberries, blackberries, and . . . blueberries.
Most fruit flies lay their eggs in overripe, or at least ripe fruit. Not SWD. She lays her eggs in unripe fruit. The eggs are small and what hatches from them are small; their being “maggots” sort of takes the appeal from the berries.
SWD is a new pest, so new ways of thwarting them are being tried. Covering the plants with fine netting very early in the season is effective but would be very bothersome, for my planting, at least. Various organic sprays are another possibility: Entrust, which is derived from a soil bacterium, is effective if used STRICTLY according to directions; horticultural oil might prove effective. Traps are also under test.
One way to bypass the problem is to grow only earlier varieties of blueberries. SWD has not showed up here and at many other sites until early August. Plenty of varieties — Duke, Earliblue, Toro, and Blueray, for example — are finished before then.
But I want fresh blueberries on into September. Harvesting blueberries (or raspberries or other berries) and whisking them into a refrigerator at 34 degrees for 72 hours will kill eggs and larvae. Freezing, the destiny of about half our harvest, also kills the eggs and any hatched larvae. A little egg and meat boosts the protein content of the berries.
I Backpedal, Sort Of
It may be time for me to eat pie. Not blueberry pie, but humble pie. Regular readers of my words probably realize that I take a certain amount of pleasure in iconoclasm. And one recipient of my eye-rolling has been compost tea, something that many gardeners and farmers love to love even though there’s little theoretical or empirical support for its efficacy.

Compost tea, quick mix
“Little” but not “none.” A number of peer-reviewed articles describe benefits from using NON-AERATED compost tea to thwart root diseases. (The relatively recent interest in compost tea is for AERATED compost tea, often sprayed on leaves. Aerated compost tea, the brainchild and business of Dr. Elaine Ingham, is compost tea that’s bubbled with air for en extended period, often with molasses or other additions. Generally, experiments have not supported touted benefits of aerated compost tea.)
For the past number of years, my pea crops have been failures, the plants yellowing and dying soon after harvest begins. Fusarium or some other root disease is the probable cause.
In desperation, five times this spring, at about weekly intervals, I put a shovelful of compost into a 5 gallon bucket and filled the bucket with water. After one day of steeping, the tea was strained, put it into a watering can, and drenched on the soil beneath of my thirty foot, double rows of peas.
Lo and behold: The peas look healthy and have been yielding good crops!

A healthy row of peas
I won’t say for sure it was the compost tea or what in the tea, if it was the tea, did the trick. But nothing else jumps out this year as the savior of my peas. For a more definitive tea endorsement, next year I should grow a row or two without the tea, and a row or two with the tea. I might try that, although it presents the possibility of my ending up with a row or two of unproductive vines.
For now, I’ll just have humble pie. And tea.
UNTRADITIONAL ROSES AND HOEING
Rose Fan: No, Yes?
I’ve said it before and I’ll say it again: I’m not a big fan of roses. But I can’t help myself. The garden is awash in golden yellow, crimson red, soft pink, apricot pink, and plain old pink blossoms. Almost all of this is thanks to David Austin, breeder of roses.
My father was a big fan of roses, so I was exposed to them at an early age. Pre-dating Mr. Austin’s creations, my father’s roses were the ever popular — except with me — hybrid tea roses which everyone — except me — liked and likes for their pointy, formal blossoms, their bold colors, and their repeat bloom. Nobody mentions their gawky stature, general lack of strong or interesting fragrance, and attraction to pests.
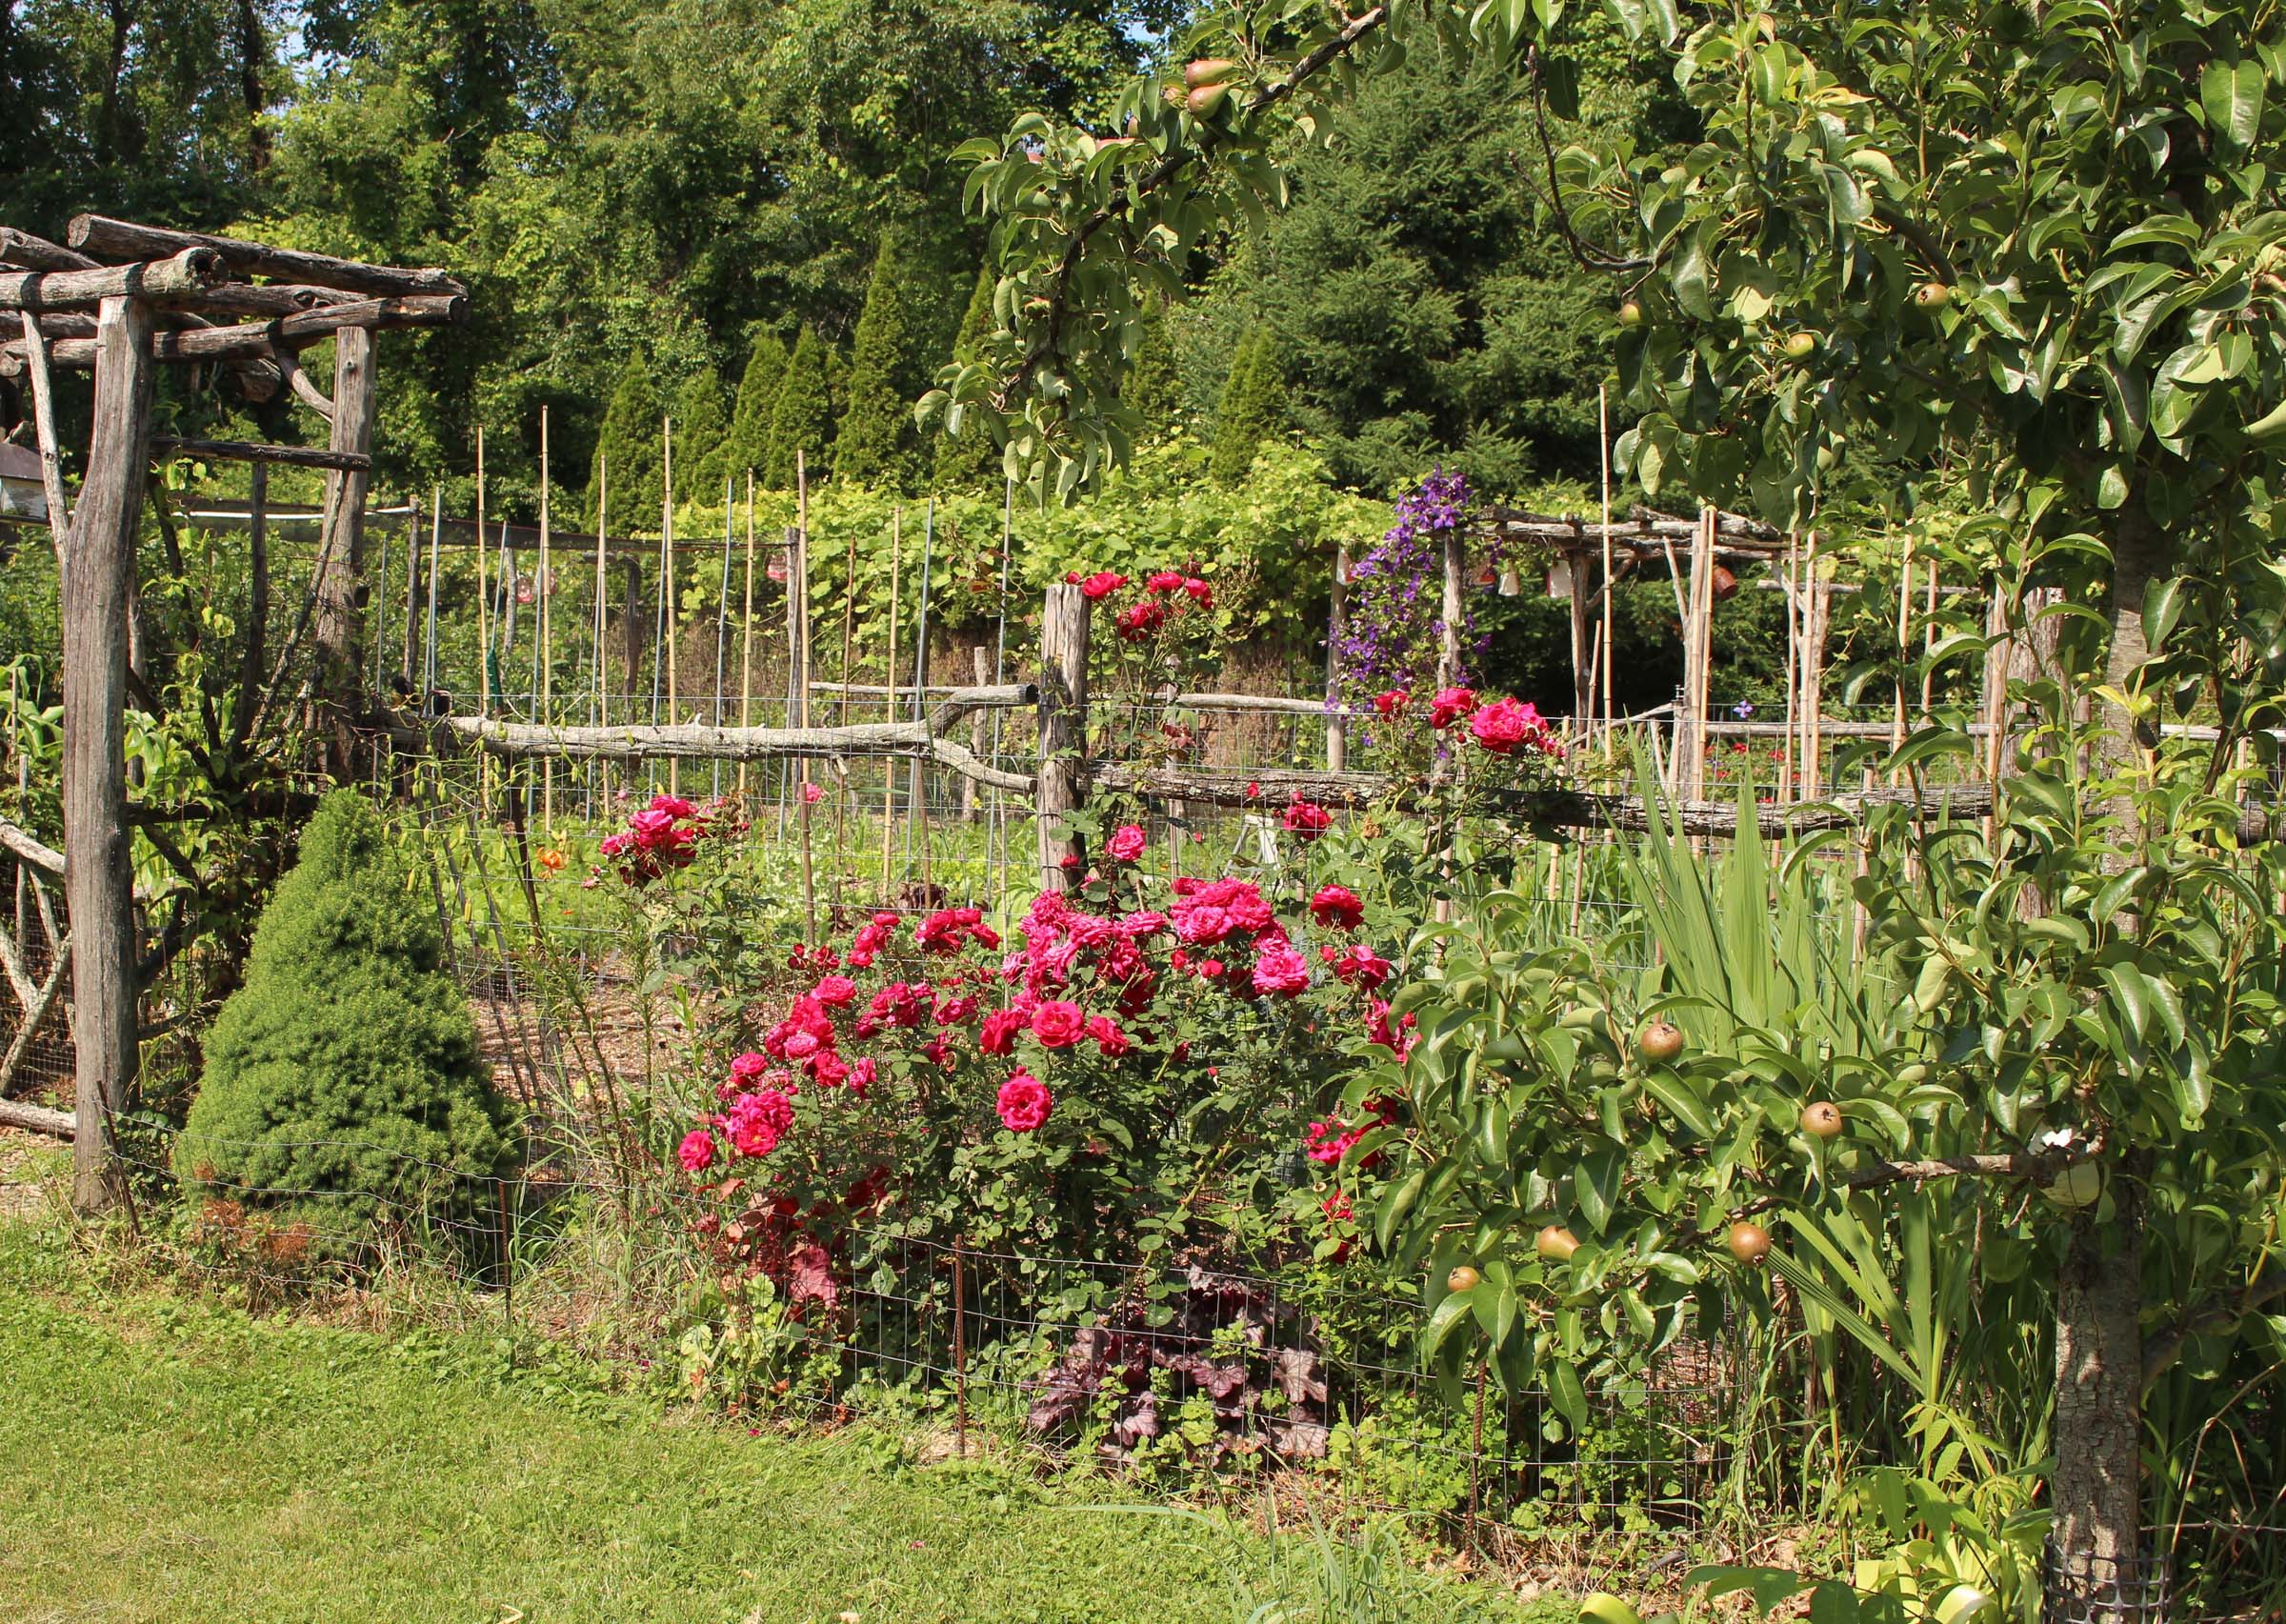
L. D. Braithewaite rose, cold-hardy and just keeps blooming
David Austin roses won me over with their softer colors, fuller blossoms borne on more full-bodied bushes, delicious fragrance, disease resistance, and repeat bloom. Not all have all of these qualities, of course.
L. D. Braithewaite has been the most florific of my David Austin roses, even weathering two very cold winters unscathed. The crimson, red petals made their first appearance a few weeks ago, and are still going strong. They’re not my favorite color, though. Least successful of my roses has been Bibi Mazoon, which is my favorite of the David Austin roses, in its blossoms, at least. Cup-shaped and apricot pink, the blossoms are admittedly few and far between, and can hardly be held up by the weak stalks. The rich yellow color of Golden Celebration is another of my favorites; this variety blooms fairly well and also pulled through winter unscathed.
I grow a few pink David Austin roses, including Charlotte, Brother Cadfael, Sharifa Asma, and they’re all looking pretty and growing well.
Of all the roses I grow, my favorite is . . . well, I’m not one hundred percent sure of its name. It started life here many years ago as a cutting of Rose de Rescht, given to me by local herbalist Anne Solomon. Except that, reading descriptions of Rose de Rescht, I came to realize that mine wasn’t it. Whatever the name (after all, “a rose is a rose is a rose . . .”), the attractive crumpled, crêpe-paper blossoms fill the air with a delectable, heady fragrance, more than that of any of the roses I grow. The bush, robust, armed with prickles and clothed in leaves having having a bluish cast, has never been fazed by pests or cold.
With the help of some rosarians (especially those at www.heirloomroses.com), Rose de Rescht was assigned its probable proper name: Ispahan. The alluring name, the blossoms, and the toughness of the plant more than offset the plant’s one deficiency, that of blossoming only in spring.
Hoe, Hoe, Hoe, But It’s Not Xmas
I can’t just stop and smell the roses all day long; there’s work to be done. Time to grab a hoe and hoe, hoe, hoe. How retro, you may think. What with all sorts of mulches and tillers and tilthers available, the hoe is an under appreciated and underused garden tool these days.
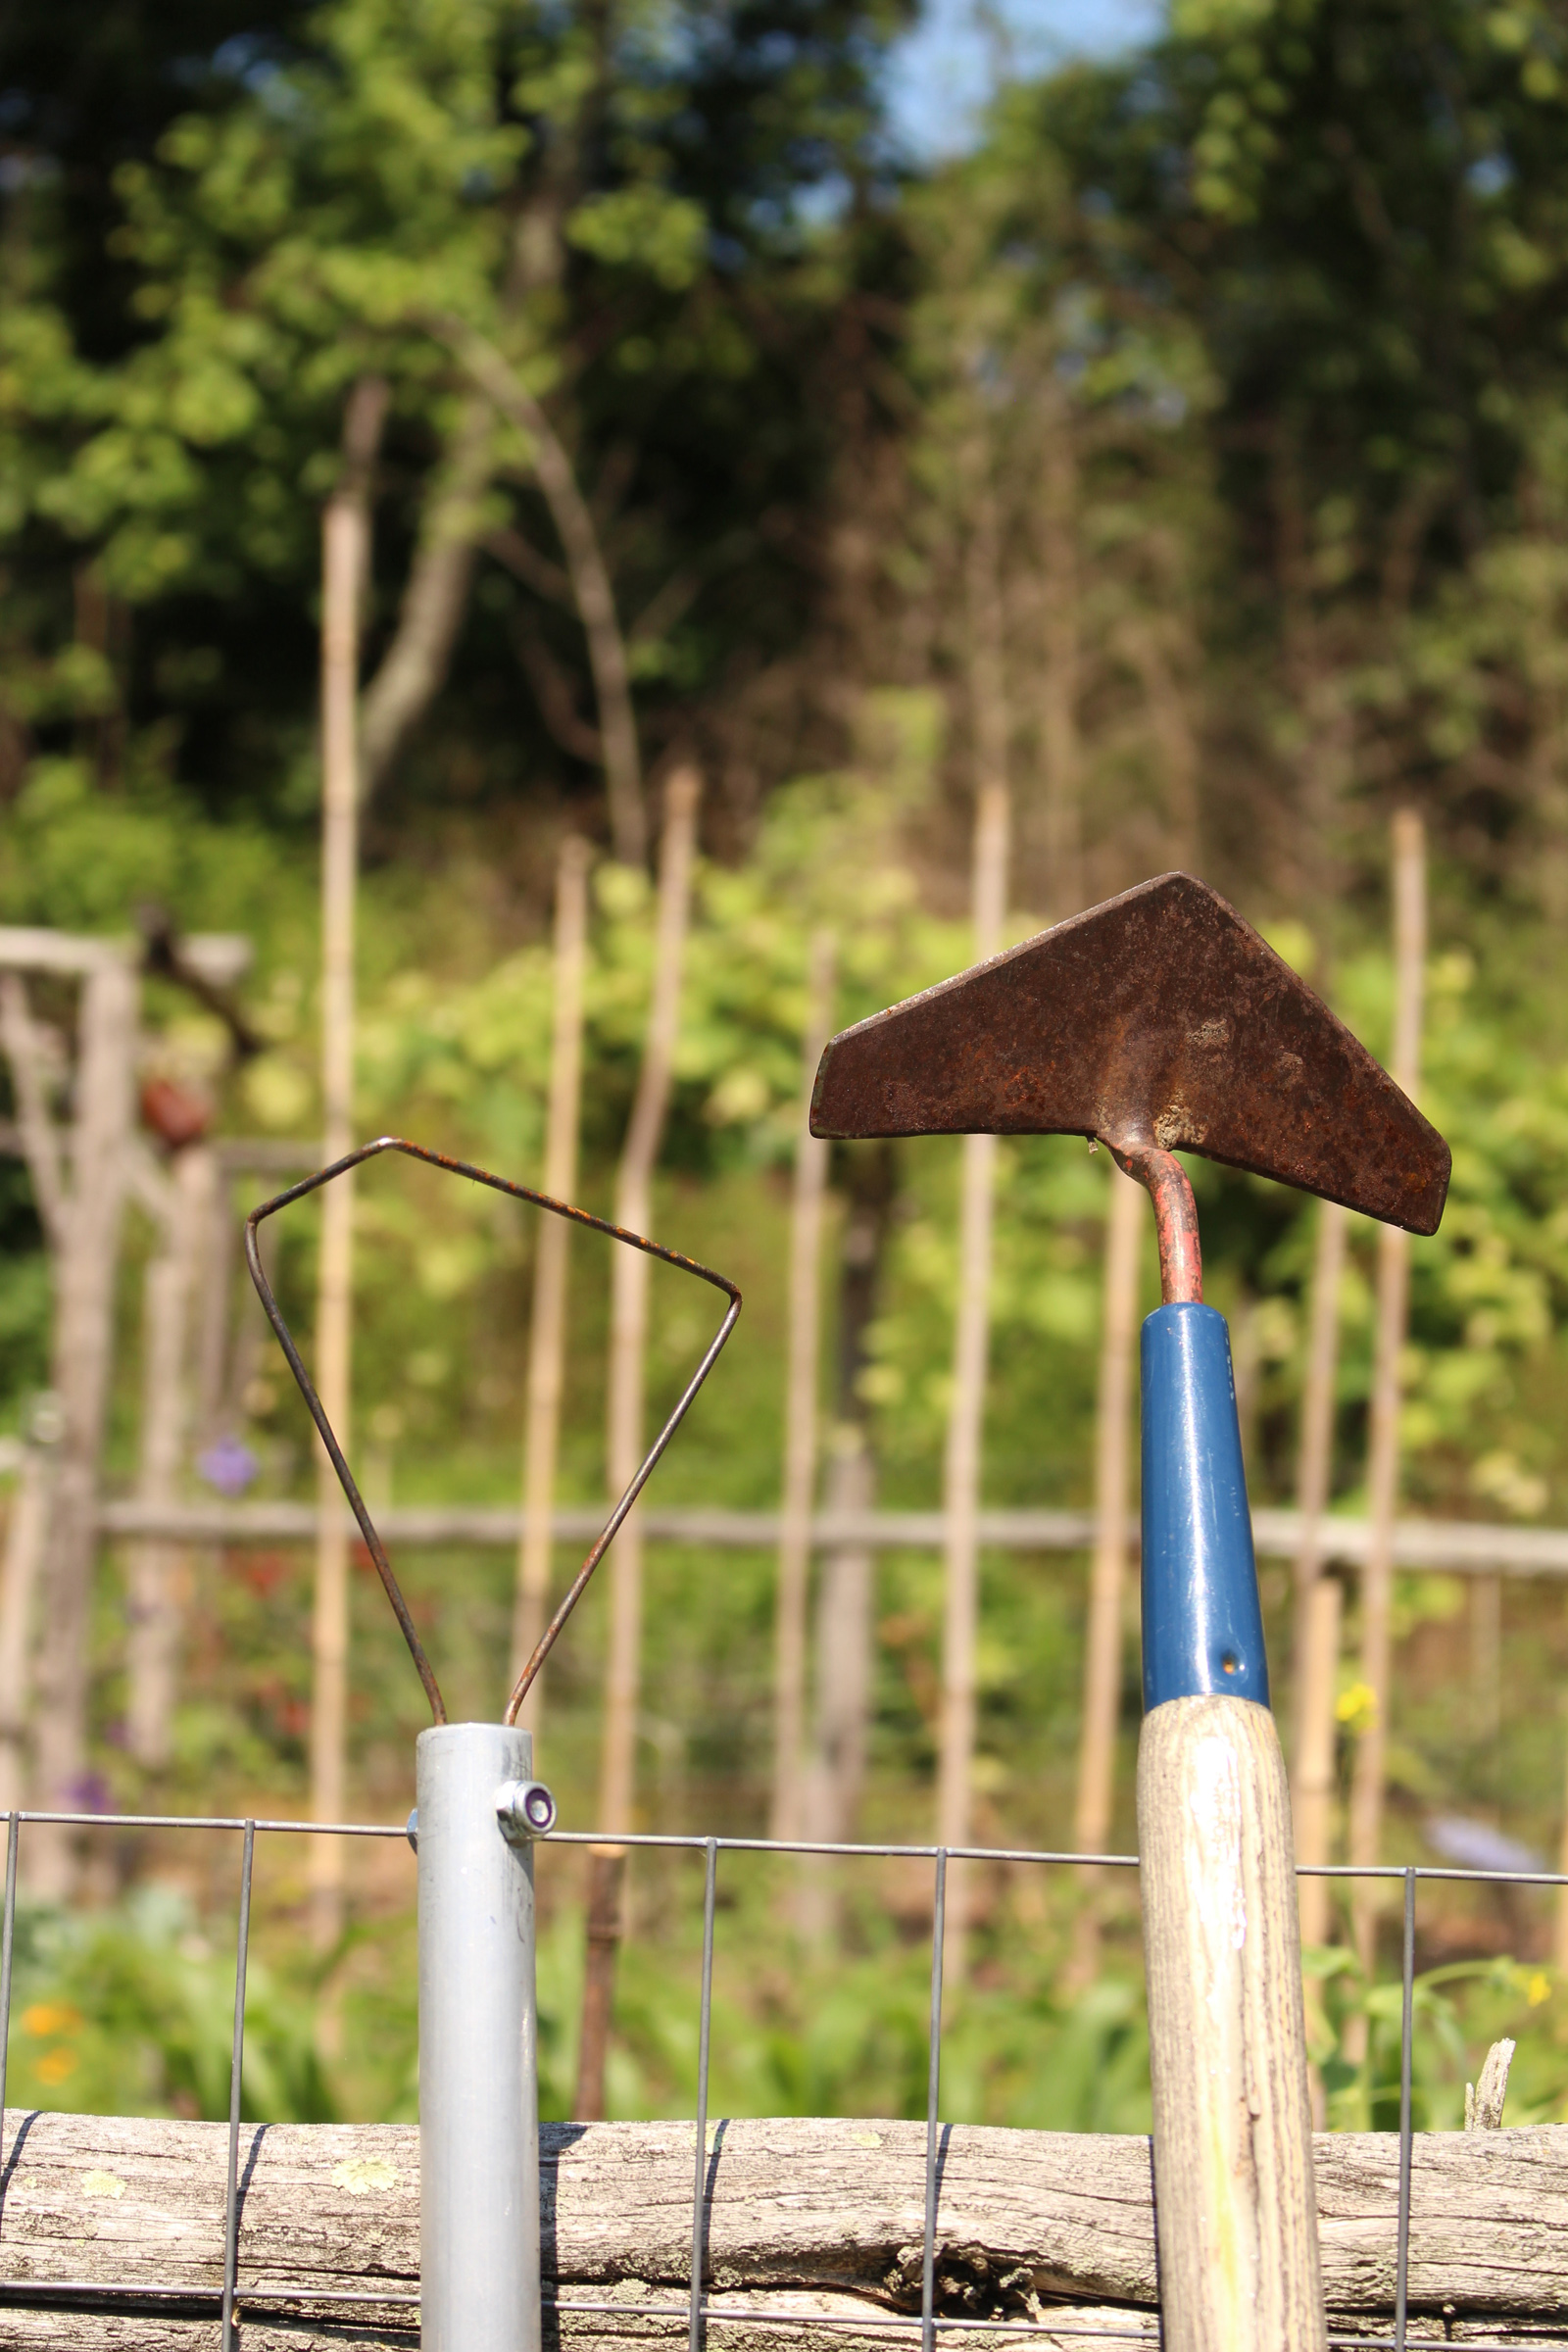
My favorite hoes: wire weeder and winged weeder
But a hoe does good work — if you use the right hoe in the right manner. The best hoes, which include the scuffle hoe, the stirrup hoe, and the colinear hoe, have sharp blades that, in use, run parallel to the surface of the ground. Among these types of hoes, my personal preference has always been for the winged weeder, which looks like an airplane wing, sharpened fore and aft, attached at an angle to a long handle.
I’ve recently taken up with another hoe, the wire weeder (from http://twobadcatsllc.com), whose head is a stiff wire cleverly bent to be easily worked amongst plants. Rotated 90 degrees puts its short edge to work, which is very useful for wending the head in amongst closely spaced plants. The lightweight aluminum handle doesn’t look traditional but makes the tool very light and spry in use.
Ideally, I’m out in the garden with my winged weeder or wire hoe on sunny mornings following rains. (I’m not sure which hoe I like better, so I alternate between them.) The goal is to loosen the soil, uprooting weed seedlings before they establish, and leaving a rough surface to welcome in the next bit of rain. The work, if it could be called that, is quick and easy if done before weeds grow large.
Only when weeds get out of hand is it necessary to get out the tool that most people associate with the word “hoe,” the traditional garden hoe with the large blade at 90 degrees to the handle. This hoe is also the one Charles Dudley Warner was referencing when he stated (My Summer in a Garden, 1870), “what a [gardener] needs is a cast-iron back, with a hinge in it.” I reserve mine for mixing concrete.
Hoe or Mulch
Not that mulching doesn’t also have its place in the battle with weeds`. Mostly, though, you have to do one or the other — mulching or hoeing — thoroughly. It’s impossible to hoe even thinly mulched ground.

Vegetable garden, kept “weed-free” and fed by compost mulch
Unless, that is, the mulch is compost. Given that mulch is anything that covers the ground, compost qualifies as mulch, except that you can plant right in, or hoe, a compost mulch just as if it was soil.
Weeds occasionally poke up through or sprout within the inch of compost with which I blanket my vegetable garden beds each year. I pull large weeds individually. Periodically, or where small weeds are starting to show, I’m out in the garden, sliding the business end of either my winged weeder or wire hoe back and forth, or just pulling it along, just beneath the surface of the ground.
SECRET BERRIES, CHERRIES FOR ALL, & WEEDS
Shad, Service, June: All The Same Berry
I’m not saying where my juneberries — now ripe — are, except to say that they are not here on my farmden. If you don’t know juneberries (Amelanchier spp.), you’ll wish you did. Imagine, if you will, a blueberry look-alike with the sweetness and richness of a sweet cherry along with a hint of almond. The plant is also known as shadbush, shadblow, serviceberry, and, in the case of one of the species, saskatoon.
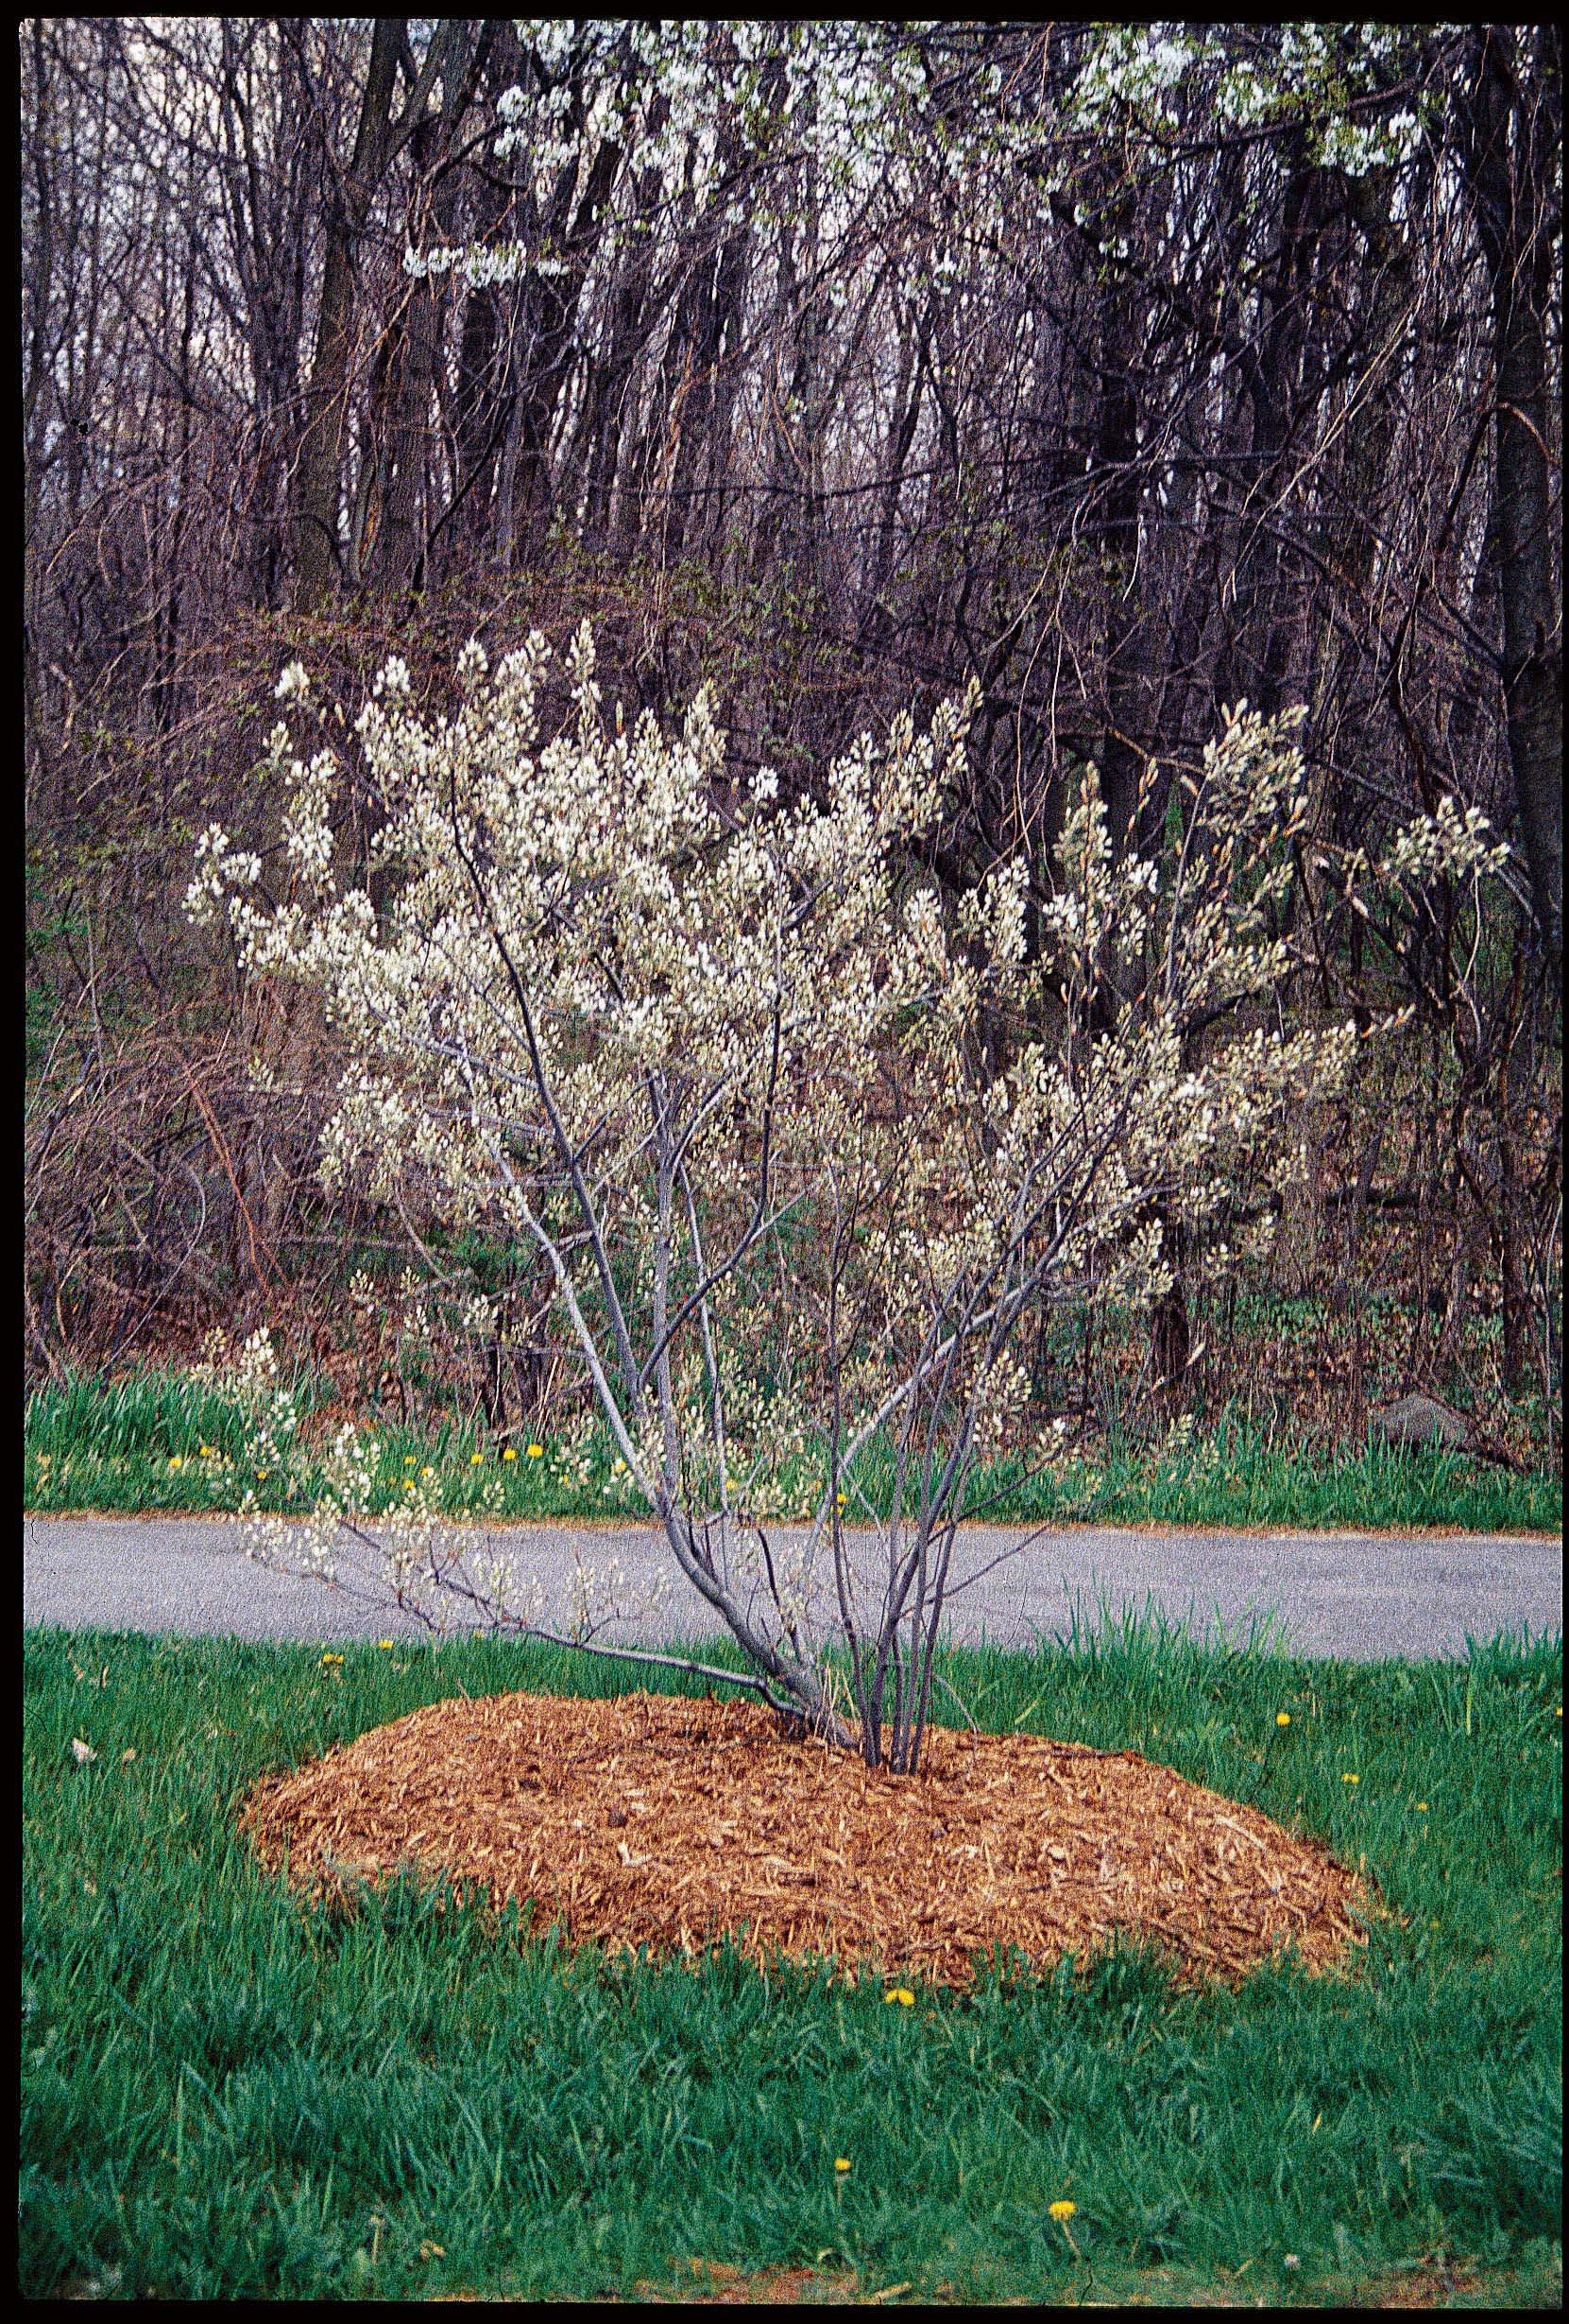
One bush of my “secret” juneberries, in bloom in April.
I’ve planted and grown juneberries, but no longer do so. In the 15 years during which I had 6 plants, I harvested only a handful of berries. Juneberries, although look-alikes for blueberries, are pome fruits, related to apple and sharing many of the same pest problems. Here, apple has many problems, including plum curculio, apple maggot, cedar-apple rust, and black rot.
But other sites are more friendly to apple and especially to juneberry. Juneberry is commonly planted as an ornamental; I’ve seen it doing well with the sun beating down on a strip of soil between a vertical wall of concrete and a concrete sidewalk near the entrance to a shopping mall, with passing shoppers unaware of the tasty berries dangling from the branches. (“My” secret juneberries are closer than the nearest shopping mall. Here’s a hint: Mine are within 4 miles of my farmden.)

Part of the juneberry harvest.
Juneberry is also a native plant (in every state, in fact) that, in good years, is laden with fruit. Except, as I said, here on my farmden. It’s well worth planting on the chance that it will thrive. I should have given up on mine sooner.
As an ornamental, juneberry is valued for it’s neat form in winter, that of a shrub or a small tree, for it’s white or pink blossoms, and, with a variety such as Autumn Blaze, for the crimson color its leaves turn in fall.
It would be nice to be able to just wander out my back door to pick juneberries, but I won’t complain. A 4-mile bike ride on an early summer morning isn’t too much to pay for the berries.
Nanking, The Easiest Cherry of All
Right now, I can walk out my FRONT door to enjoy another now-ripe, uncommon fruit. Years ago, I had planted forsythia along my driveway. The yellow blossoms fairly glowed with heat in April, but after that the row of bushes was just a blob of greenery. Not unattractive, but not necessarily attractive either.
I ripped out the forsythia and planted instead a row of Nanking cherries (Prunus tomentosa), a species of cherry from Manchuria that first made it to American shores — to great enthusiasm — at the end of the 18th century. Gardeners were not sure whether to praise it more highly as an ornamental or as a fruiting plants. When my plants are awash in white blossoms, bicyclists have stopped and asked for the identity of the plants.
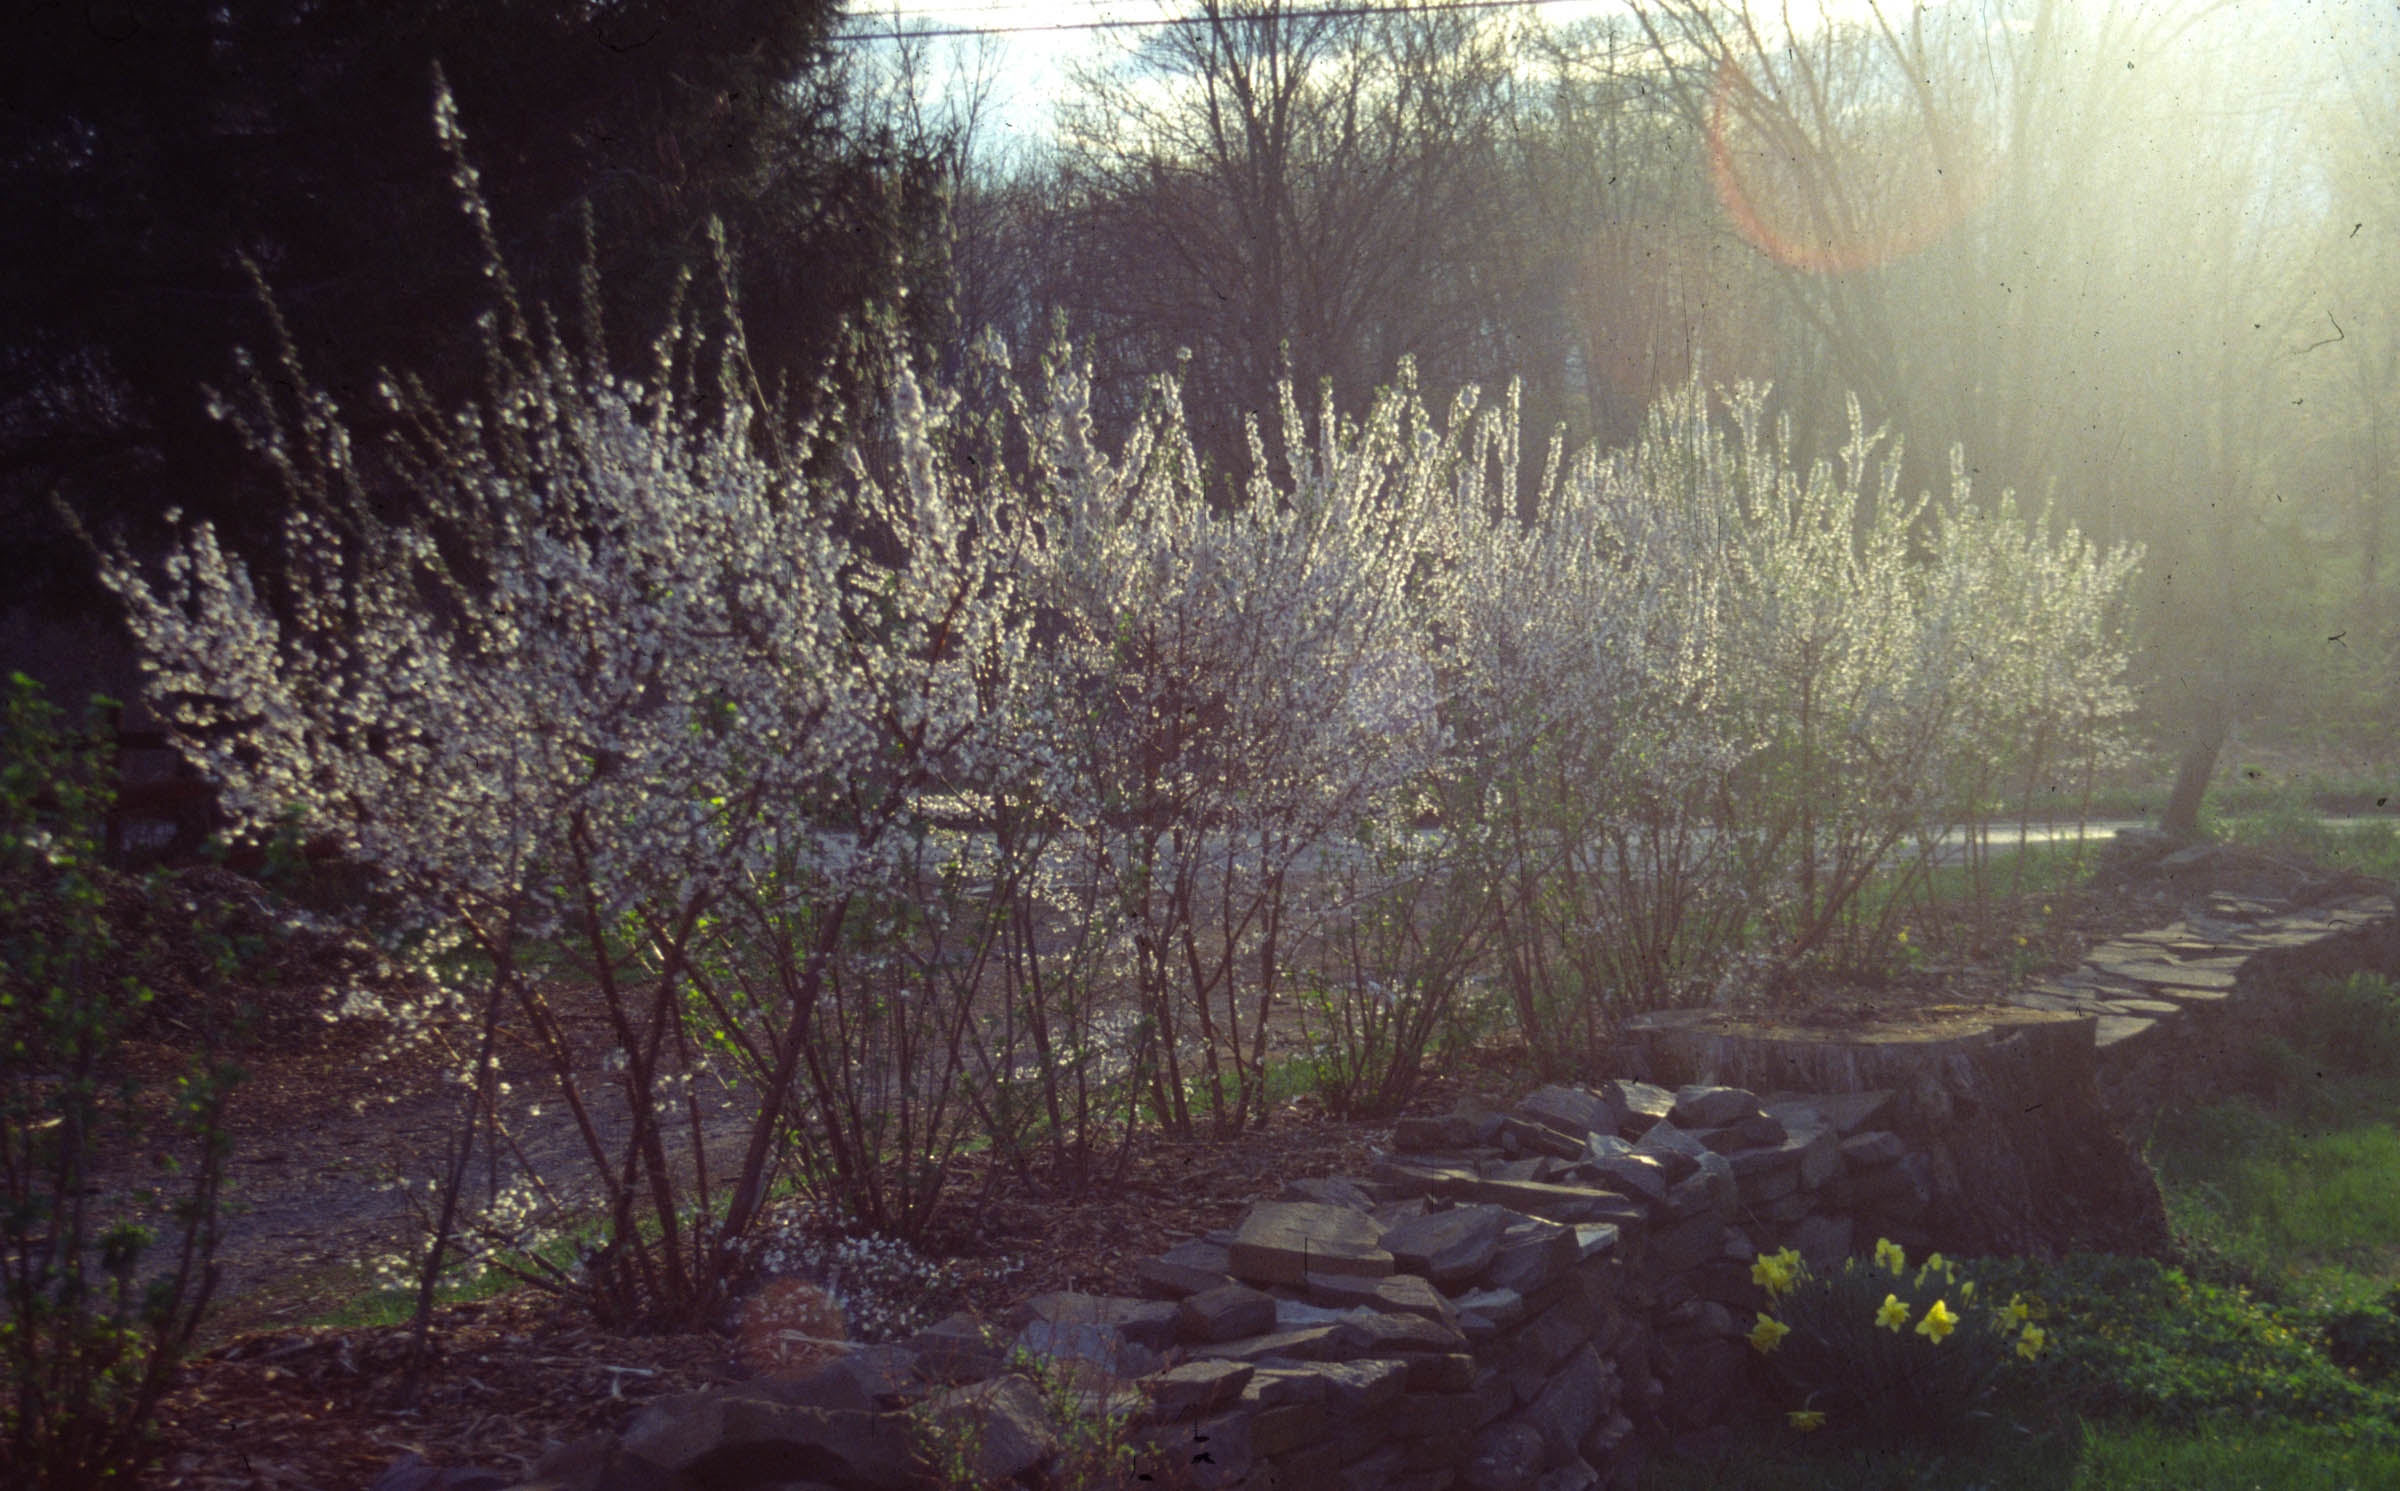
Nanking cherry in bloom in April
Nanking cherry blossoms at about the same time as forsythia but does not subsequently recede into obscurity. Right now the greenery is punctuated by bright red cherries, their small (1/2 inch or slightly larger) size offset by their abundance. Enough to almost hide the branches. Enough so that birds can eat them, chipmunks can eat them, my ducks can eat them, and still there’s more than enough for us humans. The flavor varies from bush to bush, but they’re all good, tasting somewhere on the spectrum between sweet and tart cherry.
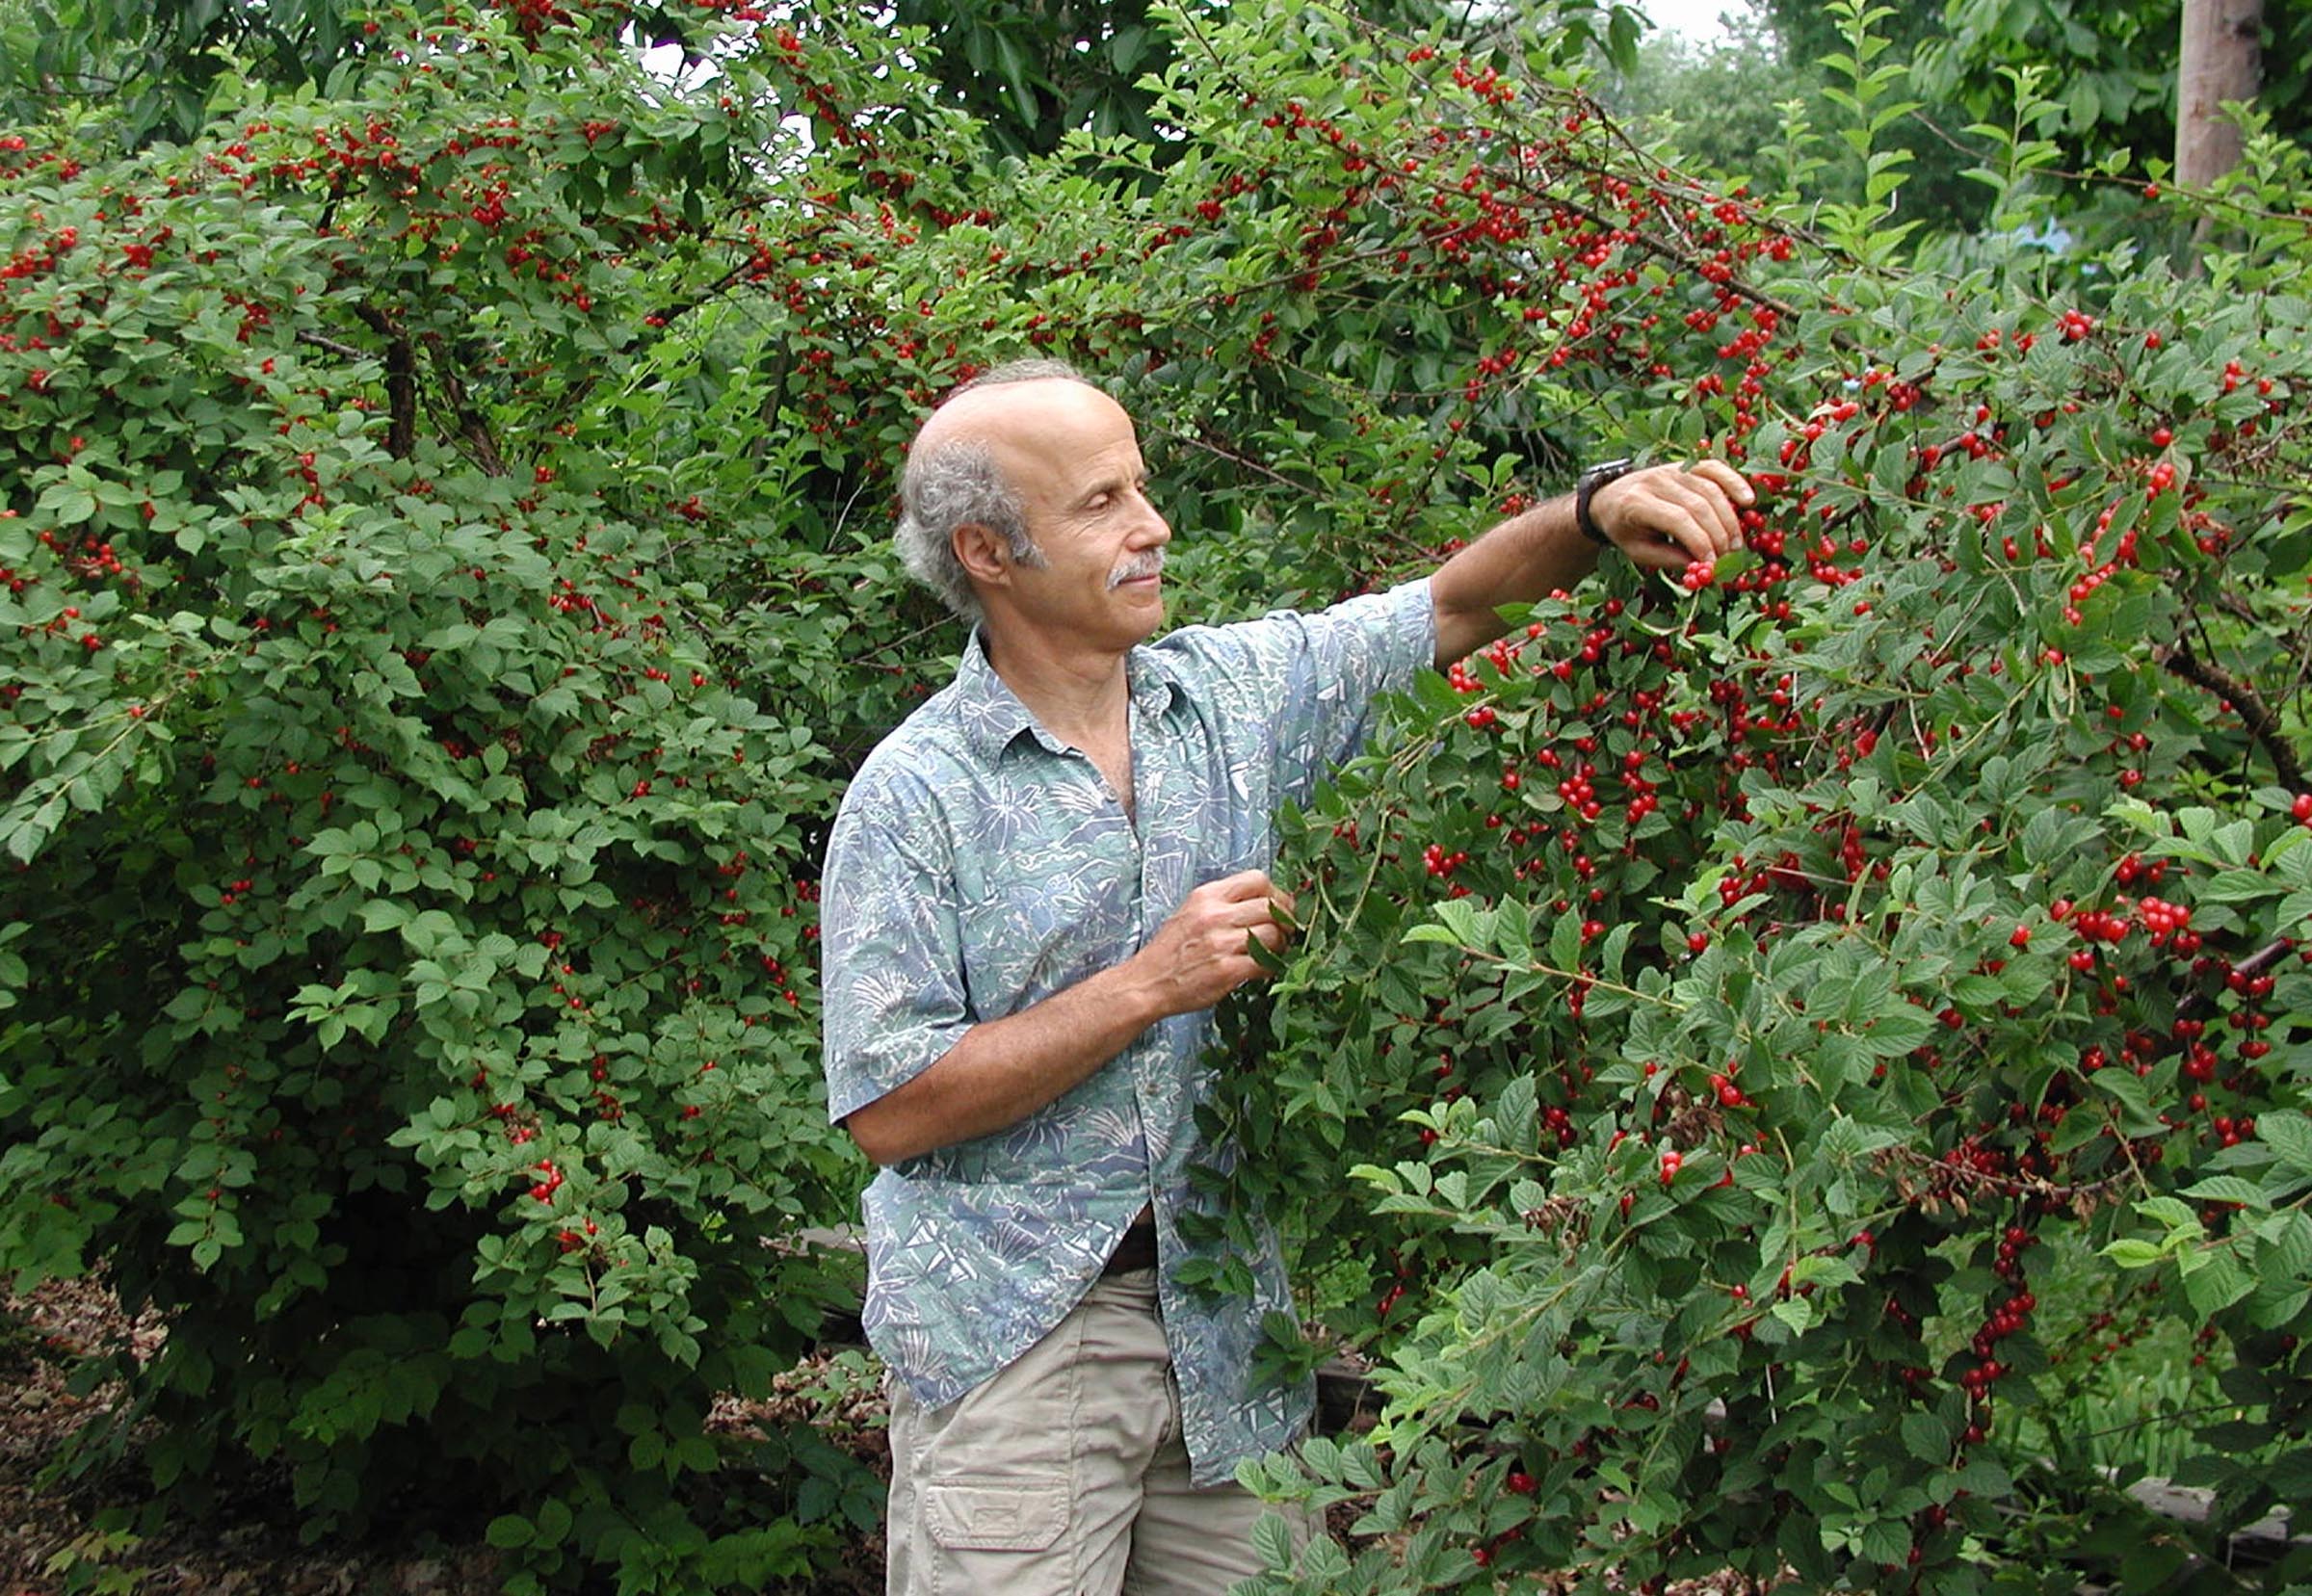
Note the profusion of cherries!
In contrast to juneberry, which once joined Nanking cherry in that row along the driveway, Nanking cherries have no significant pest problems. Sometimes branches die back a little but overall production is rarely impacted. In its native haunts, the plants tolerate winter lows of minus 50 degrees F. and summer temperatures soaring to 110 degrees F.
Mostly I just graze the fruits as I walk up or down my driveway. Last year I harvested enough at once to juice by squeezing them through a strainer. Straight up, one of the most refreshing and delicious juices I’ve ever had.
Pretty Weeds, But They’ve Got to Go
Warm temperatures and abundant rainfall are giving weeds a heyday. The row of Nanking cherries has become home to two prominent weeds, both ornamental in their own right, but not enough to justify their crowded presence.

A sedate, cultivated variety of Japanese knotweed
Japanese knotweed (Fallopia japonica), sometimes called Mexican bamboo, has migrated from a solid stand across the road to the foot of the hedge. The arching stems, heart-shaped leaves, and foaming white flowers, the latter due at the end of summer, explain why the plant was introduced from Asia in the late 1800’s.
The plants are either male or female, and female plants rarely set seed, making me wonder how the plant got across the street.
The other weed, bindweed (Convulvulus arvensis), would be as welcome as its well-behaved cousin, morning glory, if, like morning glory, it was an annual, or at least a well-behaved perennial. The flowers look like pale morning glories. Beneath the ground is where bindweed shows its dark side. The perennial roots spread far far and wide, sending up new shoots likewise far and wide from the mother plant, and the plant seeds abundantly.
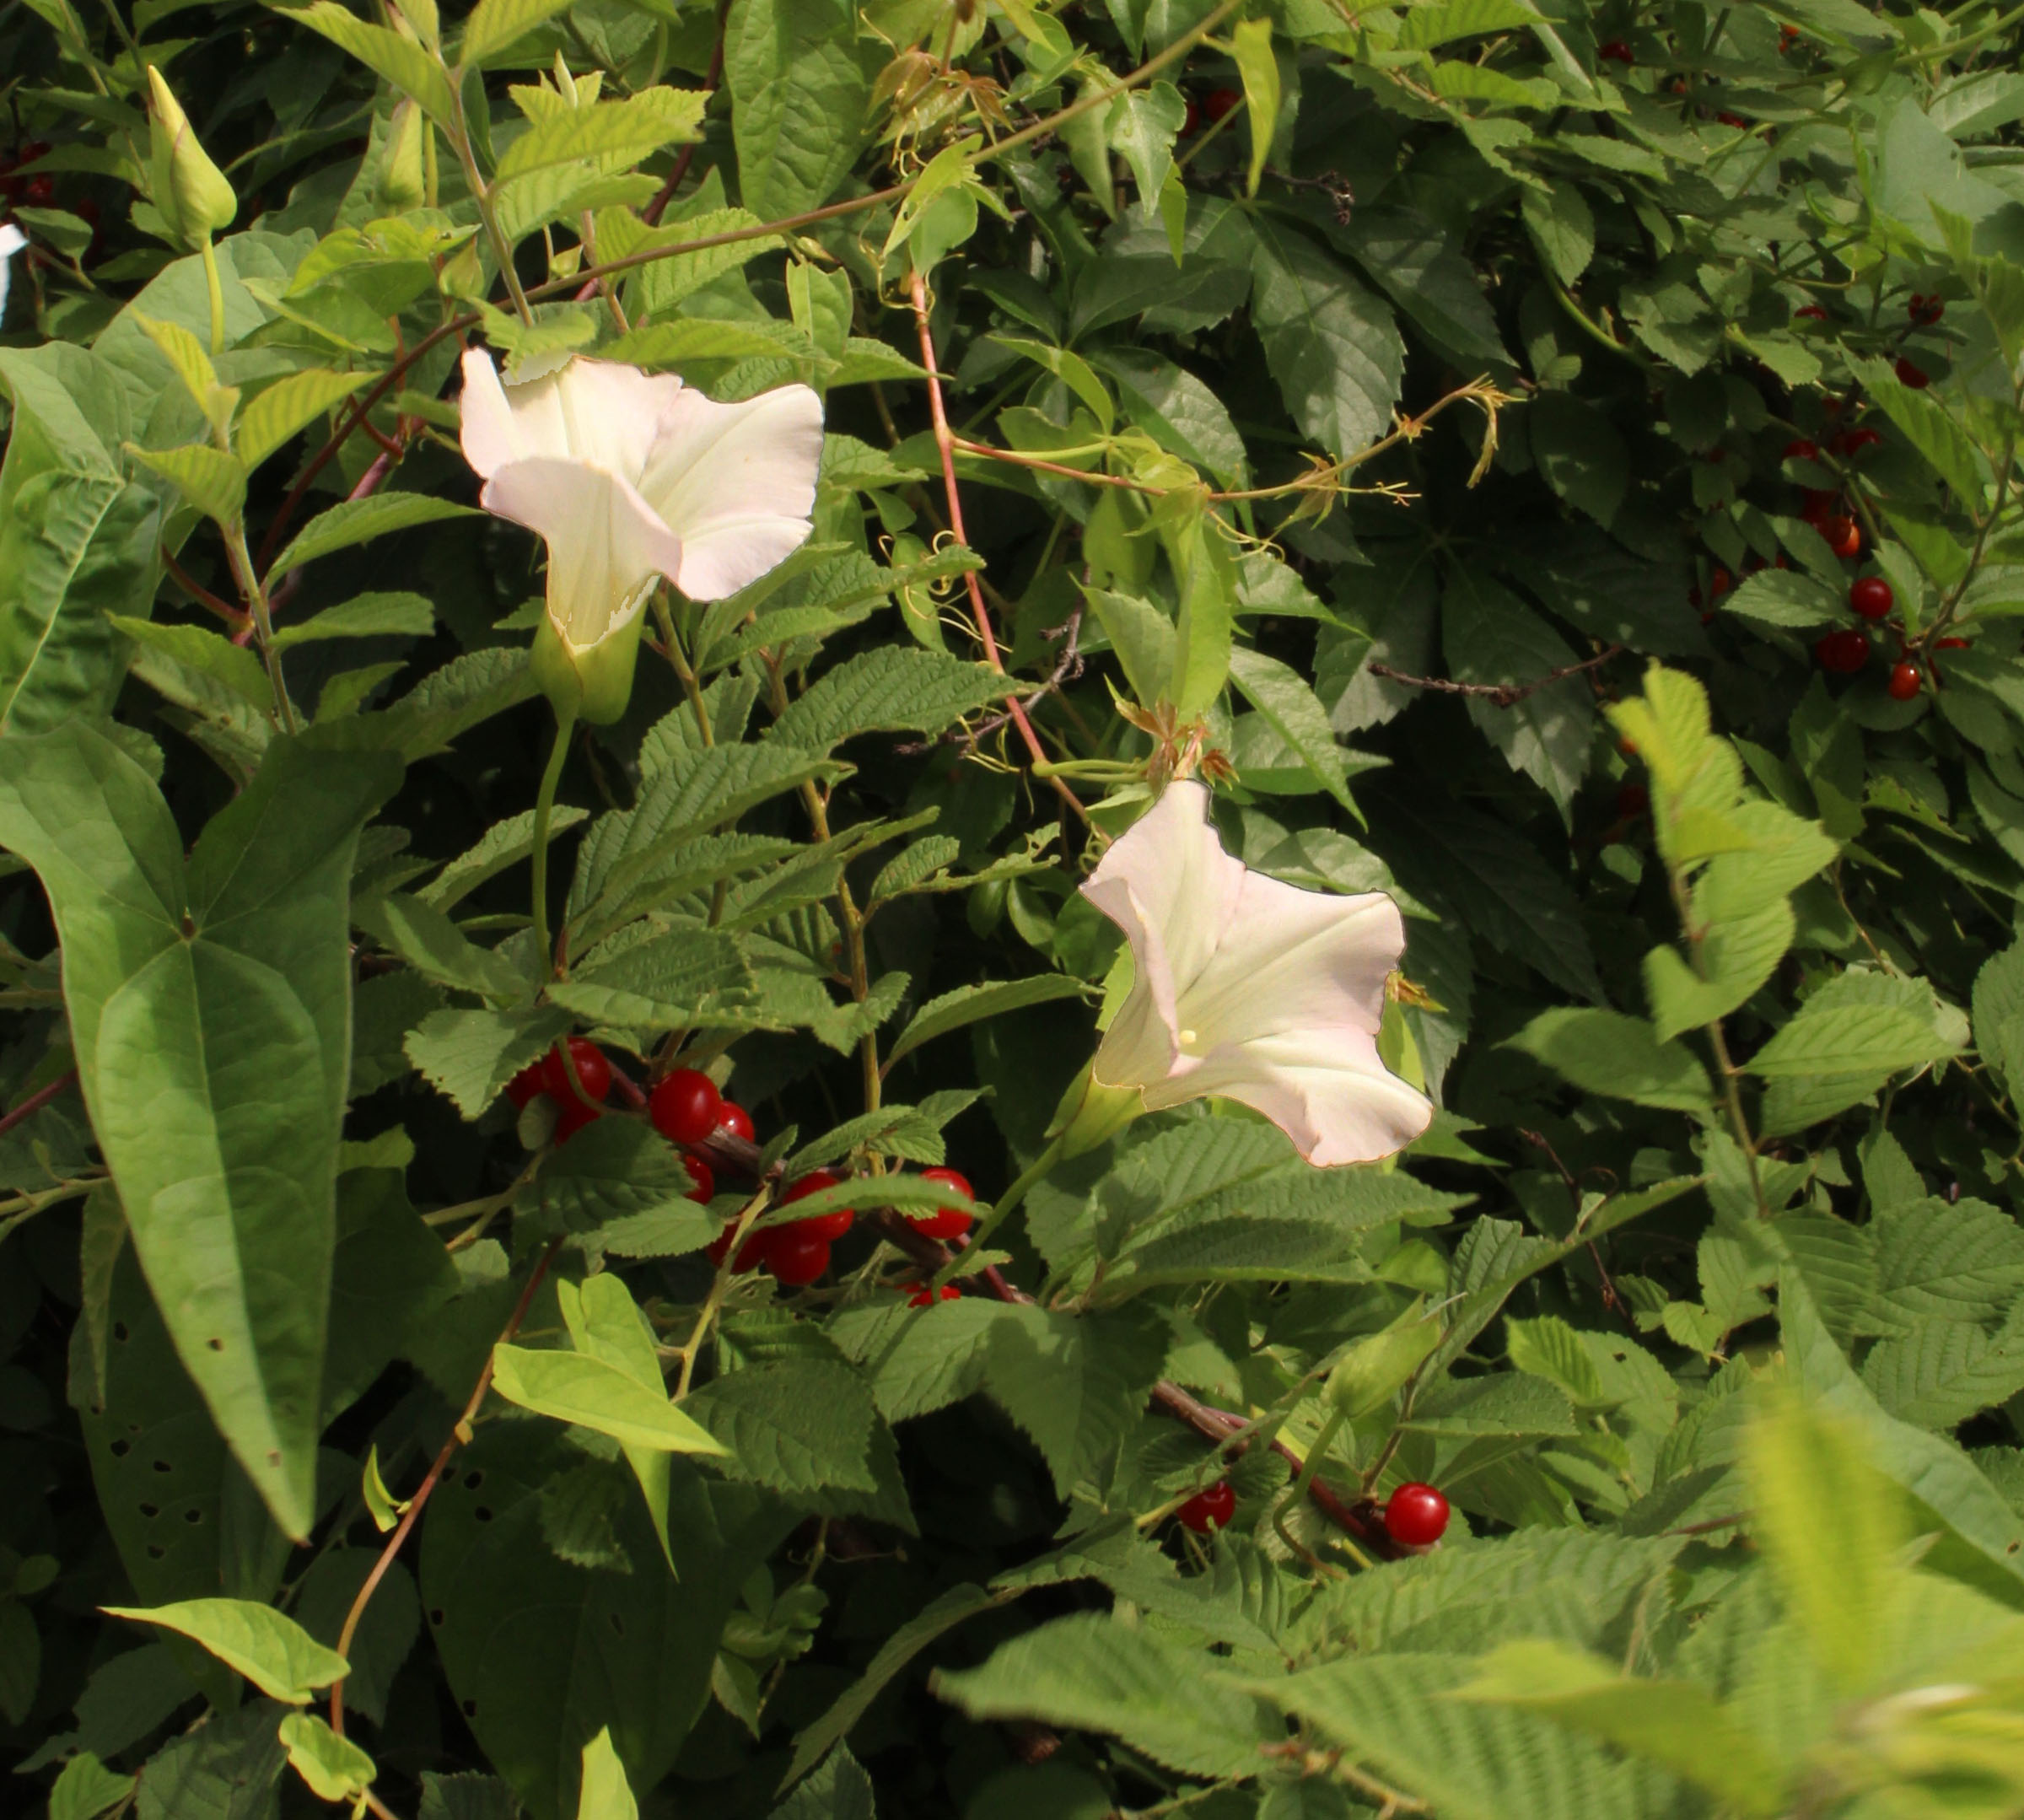
Bindweed flowers among Nanking cherries
Repeatedly cutting back or pulling either weed should eventually starve the roots of either plant, if not eliminating them at least keeping then from smothering the Nanking cherry bushes. That’s pretty much all the care the Nanking cherry hedge needs beyond some pruning every few years to encourage some young growth and keep the shrubs from growing too large.
