HARDWOOD CUTTINGS: NOT HARD (TO DO SUCCESSFULLY)
Pros for Hardwood Cuttings
Years ago, I had just one plant of Belaruskaja black currant. Now I have about a dozen plants of this delicious variety, and plenty of black currants for eating. Do you have a favorite tree, shrub, or vine that you would like more of.
Hardwood cuttings are a simple way to multiply plants. This type of cutting is nothing more than a woody shoot that is cut from a plant and stuck into the soil some time after the shoot has dropped its leaves in the fall, but before it grows a new set of leaves in the spring. In the weeks that follow planting, if all goes well, some roots may develop and, come spring, this apparently lifeless piece of stem grows shoots and more roots, and is well on its way to bona fide plantdom.
(Be very careful, though. Multiplying plants can become an addiction. I speak from experience.)
Easy to root
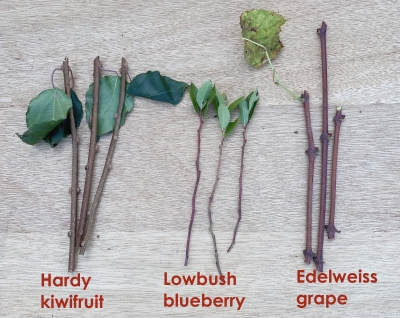
Success with hardwood cuttings depends on both your skills and the plant chosen. Not every woody plant is amenable to increase by hardwood cuttings. You can expect close to one hundred percent “take” with plants such as grape, currant, gooseberry, privet, spiraea, mulberry, honeysuckle, and willow. But this method generally is unsuccessful in making new apple, pear, maple, or oak trees.
Because they lack leaves, hardwood cuttings are less perishable than “softwood cuttings,” the leafy stem cuttings that are taken while plants are in active growth.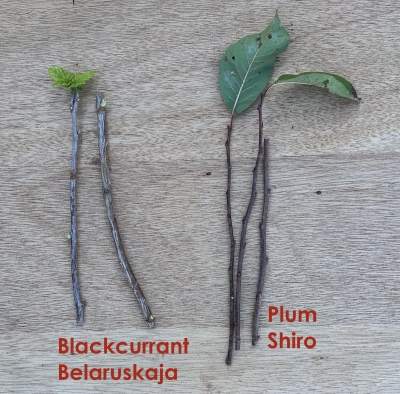
If you’re a novice and want to make your thumbs feel greener early on, try your hand with hardwood cuttings of willow, a plant I have seen take root from branches inadvertently left on top of the ground through the winter. Most other plants demand a little more finesse to ensure success with hardwood cuttings.
Gathering Wood
All right, so you have a woody plant you want to multiply by hardwood cuttings. Step back and look at the plant before you take wood for cuttings. Look for some young shoots, those that grew this past season; snip them off for cuttings. The shoots most likely to root are those of moderate vigor, not too fat and not too thin for the particular species.
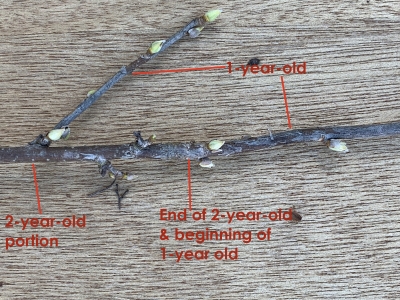
Black currant, 1 and 2-year old stems
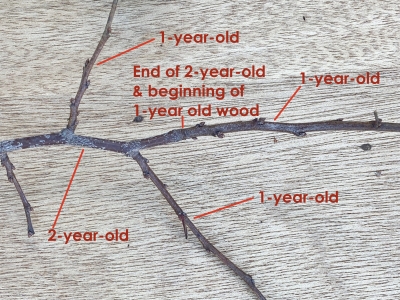
Plum, 2 and 1-year old wood
Once you have one or more shoots “of moderate vigor” in hand, cut them down to a manageable length of eight inches or so. Look for the nodes on each branch; these are the points where leaves were attached. Make the cut for the top of each cutting just above a node, and the cut for the bottom of each cutting just below a different node.
Make sure the upper end of the cutting, which is the point that was furthest from the root, is planted pointing upwards. The plant “remembers” this orientation and responds accordingly, growing roots from the bottom and shoots from the top of each cutting. (Although it’s not impossible to root upside down cuttings, there’s just less chance of success.) Professional propagators cut the bottoms off squarely and the tops at an angle so that the ends don’t get mixed up during planting.
Success Comes With . . .
Plant the cuttings in your garden where the soil is not sodden. Without good drainage the cuttings will rot, rather than root. Make a slit with your shovel, slide in a cutting until only the top bud is exposed, then firm the soil. The rooted plants should be ready for transplanting to their permanent homes by next fall.
Cuttings can be set in the ground for rooting either immediately or stored through the winter for setting out in early spring. I’ve had better success with fall, rather than spring, planting. In the spring, the cuttings often are overanxious to begin growth and the top growth is well underway before the roots have begun. The shoots soon realize that there are no roots to sustain them, then flop over and die.
With cuttings planted in the fall, roots have the opportunity to develop from now until the soil freezes. In the fall, soil temperatures drop more slowly than air temperatures so there’s still some time, depending on your location, before the soil freezes solid. New shoots, on the other hand, won’t grow until next spring, after they feel they have been exposed to a winter’s worth of cold. (This is a natural protection mechanism that prevents plants from resuming growth during a warm spell in January.) Come spring, the shoots that grow from the tops of the cuttings will already have at least the beginnings of roots to bring sustenance.
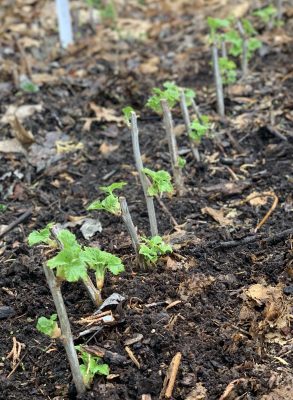
Blackcurrant cuttings in spring
Mulch fall-planted cutting so that alternate freezing and thawing of the soil doesn’t heave them out of the ground.
Cuttings could even be planted in pots with a well-drained potting soil, as long as the pots are kept cool (30-45°F) long enough for the shoots to “feel” winter, so they can grow shoots in spring.
If you’d rather plant in the spring, the cuttings need to be kept cool and moist through the winter. The traditional method of storage is to bundle the cuttings together and bury them upside down in a well drained soil. Why upside down? Because the bottoms of the cuttings then will be first to feel the warming effects of spring sunlight beating upon the ground, while the shoot buds are held in check buried deeper in cold ground.
A refrigerator can substitute for the traditional burying. Seal the cuttings in a plastic bag, wrap the bag in a wet paper towel, and then seal the whole thing in yet another plastic bag. Plant as early in spring as soil conditions permit.
Pay attention to what works and what doesn’t, figure out why, and you’re on your way to propagation addiction. Next worry is what to do with all your plants.

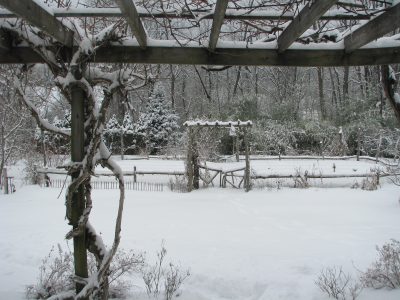
 Both kinds of plants are probably cold-hardy to about zero degrees Fahrenheit, but here winter temperatures, except last winter, typically drop to about minus 20 decrees Fahrenheit. That snowy blanket provides extra protection that the plants might need — especially after last Saturday’s unseasonal low of minus 8 degrees.