My Compost for a Bin

Compost, All Good, In Time

One problem with gardening, as I see it, is that much of it is about delayed gratification. Even a radish makes you wait 3 weeks after sowing the seed before you get to chomp on it. With a pear tree, that wait is a few years.

Which brings me to compost. Now that the flurry of spring pruning and planting have subsided, I’m starting this year’s compost cycle again — that’s compost for use next year. Delayed gratification again.
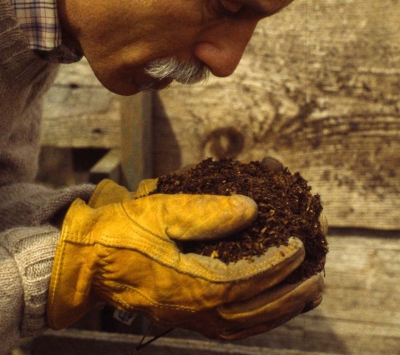
Food waste, yard waste, and compostable paper make up 31% of an average household’s waste which, if landfilled, ties up land and contributes to global warming. Composted, it feeds the soil life and, in turn, plants, and maintains soil tilth, that crumbly feel of a soil that holds on to moisture yet has plenty of space for air. You don’t get all this from a bag of 10-10-10 fertilizer or even a bag of any concentrated organic fertilizer.

The key to good composting is to have a good bin. Any pile of old vegetables, leaves, grass clippings, old cotton clothes, straw, or wood chips will turn to compost eventually. A bin keeps everything neat, fends off scavengers, and maintains heat and moisture within.

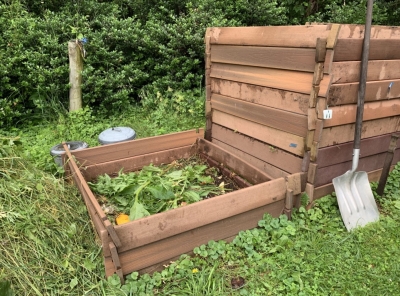
Buying a compost bin is one option. Consider whether you’re making compost for your garden or just as an environmentally sound way to recycle what used to be called “trash.” You need a larger bin for the former use because you’ll be importing materials, such as leaves, wood chips, and manure, to bulk up the compost.

The Perfect Compost Bin?

Over the years, my home made compost bins have gone through several incarnations. Four wooden panels filled in with chickenwire made my first bin. Once a pile was made and settled a little, I removed the panels, pinned black plastic onto the compost cubes to keep in moisture, and set up the panel in the next location for a new “compost cube.”
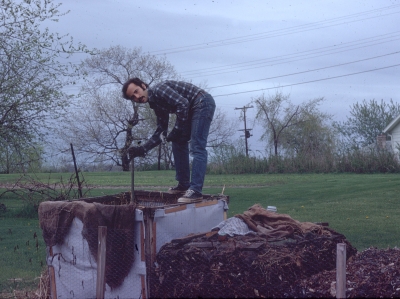
The next bins weren’t bins but just carefully stacked layers of ingredients, mostly horse manure, hay, and garden and kitchen gleanings. And then there was my three-sided bin made of slabwood.

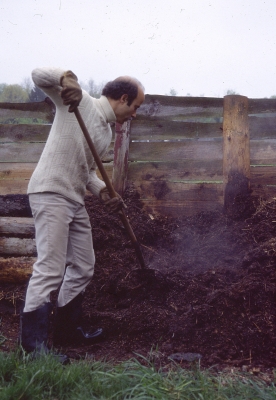
A dramatic jump in functionality came with my bin made from 1 x 12 hemlock boards from a sawmill, notched to stack together on edge like Lincoln logs. The only problem with this system was that I had to periodically purchase and notch new boards as older ones rotted away.
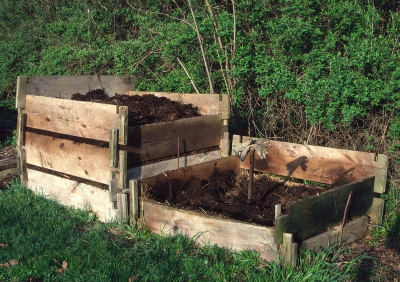
Which brings me to my current bin which, now, after many years of use, I consider nearly perfect. Instead of hemlock boards, these bins are made from “composite lumber.” Manufactured mostly from recycled materials, such as scrap wood, sawdust, and old plastic bags, composite lumber is used for decking so should last a long, long time.

The boards I used were 5-1/2 inches wide and 1 inch thick. A couple of inches from either end of each 5-foot-long board, I cut a notch on each side to a depth one-quarter the width of the board and about 1/8” wider than the their thickness.
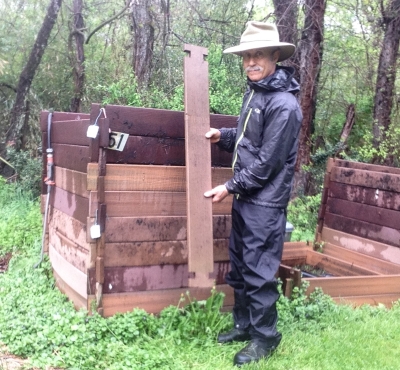
When finished, I ripped one board of the bin full length down its center to provide two bottom boards so that the bottom edges of all 4 sides of the bin would sit right against on the ground.Before setting up a bin, I lay 1/2” hardware cloth on the ground to help keep at bay rodents that might try to crawl in from below.Compost bin, hardware cloth
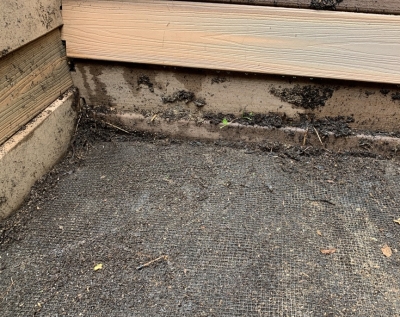
With the Lincoln-log style design, the bin need be only as high as the material within while the pile is being built, and then “unbuilt” gradually as I removed the finished compost.

June 2024 update: As you might note from the photos in this post, I made lots of compost bins, actually too many. What was I thinking? I’ve now decided to sell off some of these bins. About 28 boards, each 4′ long, are needed for a completed bin. I’m selling each board for $5, so a complete bin of 28 boards would cost you $140, more or less, depending on the bin height you want. I do make lots of compost so only have a few bins to sell. Contact me if you’re interested (845-616-0710 or through my website, but not Messenger).

Feed the Beast(s)

Okay, time to feed my compost “pets.” Nothing fancy, just any spent plant from the garden, kitchen trimmings, old clothes made from natural materials, hay scythed from my meadow, horse manure from a local stable, and occasional sprinklings of soil and powdered limestone.

For interest, I’ll sometimes throw old shoes or gloves into a pile to see what’s left once the organic portion of the shoe or glove has been stripped off.By paying attention to the textures of the materials as I add them to the pile, it generally stays well aerated. If I have a load of manure and will be building up many layers of the pile at once, I water the layers as I go; it takes too long to get sufficient water down into the pile after it has been built. Once a pile is completed, I cover it with a layer of EPDM rubber roofing material, cut to fit, to seal in moisture and keep out rain.

Piles built this summer get turned once next spring so I can monitor progress and make sure they’re moist — but not too wet — throughout. The compost is used throughout next year’s growing season.

So yes, there is delayed gratification before I get to use the “black gold.” Then again, making compost is enjoyable; I get some exercise and enjoy feeding the various fungi, bacteria, and other microorganisms at work in the compost pile.

The End of Chestnuts? No!

Blight Strikes

I looked up into the tree that I had planted 20 years ago and saw what I had long feared: two major limbs with sparse, undersized leaves. Blight had finally got a toehold on the Colossal chestnut tree, which, for the past 15 years, has supplied us with all the chestnuts we could eat. (“Colossal” is the variety name, apt for the size of the chestnuts it produces.)Chestnuts falling free from burr
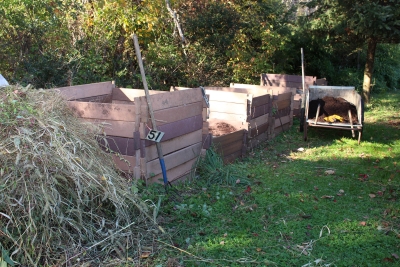
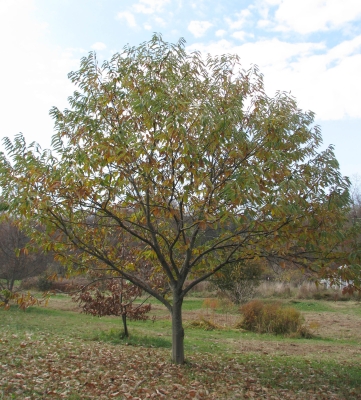
My first inclination, before even identifying chestnut blight as the culprit, was to lop off the two limbs. Once I got up close and personal with the tree, the tell-tale orange areas within cracks in the bark stared me in the face.Blight on chestnut bark
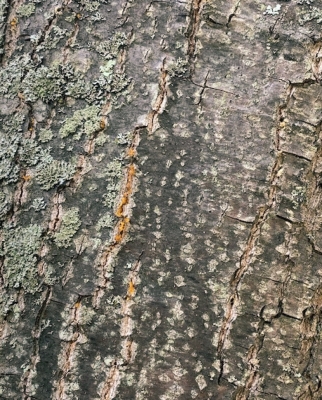
There is no cure for chestnut blight. Removing infected wood does remove a source of inoculum to limit its spread. In Europe, the disease has been limited by hypovirulence, a virus (CHV1) that attacks the blight fungus. Some success has been achieved using a naturally occurring virus found on blighted trees in Michigan.

There is some evidence, although not confirmed with rigorous scientific testing, that mud packs made from soil taken from the base of a tree, can slow or halt spread of the disease. The mud packs need to be applied to each disease canker and then held in place with shrink wrap, or painted or sprayed on, followed by a layer of latex paint. Not an easy job as you move higher and higher up into the tree.

Pruned Colossal tree

Colossal, post surgery

Resistance

Chestnut species vary in their response to the blight fungus. American chestnut (Castanea dentata) is very susceptible; the fungus arrived here from Asia in the early 1900s, and within a half a century had killed billions of trees. European chestnut (C. sativa) was also susceptible, but was protected by the naturally spreading fungal virus.

Chinese chestnut (C.mollisima) and Japanese chestnut (C. crenata) both have some resistance — but not immunity — to the disease, and have contributed their genes to resistant varieties. Collosal, in fact, is a hybrid of European and Japanese chestnuts, and it has some resistance to blight. But, evidently, not enough. I am hoping that the previously extremely wet season contributed to the evidence of symptoms, and that some drier seasons will keep the tree alive longer.

I’m not planning to sit back and let my chestnut-eating days shrink away to nothing. For starters, keeping my tree vigorous with pruning and good fertility might keep small cracks, into which new infections could enter, from developing. Also, chestnut trees need cross-pollination, so I do have other varieties planted. Also planted 20 years ago was Marigoule, also yielding fairly large nuts. Some sources say “blight susceptible,” others saw “blight resistant;” my large tree shows no signs or symptoms of blight. Yet.

This spring I planted two more European x Japanese chestnut hybrids. I shouldn’t have felt so confident that MY trees wouldn’t get blighted. Precoce Migoule and Marsol, the two varieties I planted, are, like Marigoule, allegedly “blight resistant,” or not.

Generally, the Chinese varieties and their hybrids are the most blight resistance. And I have two of those, actually one tree on which I grafted two different varieties. Qing is pure Chinese with easy-to-peel nuts having excellent flavor. Peach, the other variety, is also pure Chinese, though the nuts are ho-hum in flavor. Both varieties have borne for me for a number of years, yet the nuts never seem ripe once they drop.

One More Thing . . .

Is your head spinning yet? One more wrinkle in this chestnut saga. It turns out that if a pure or hybrid Chinese variety pollinates a pure or hybrid Japanese variety, the latter gets dark staining of the nuts, with a loss in quality. So I was phasing out (with a chainsaw) some other Chinese varieties I had planted. Now, with blight lurking in the wings, I’m having second thoughts.

Enough negativity about chestnuts. On the positive side, Chestnut trees’ shiny, green leaves are attractive and turn a rich golden yellow color in fall. The nuts are tasty and nutritious. With their high starch and low fat content, they’ve been called “the bread tree.” Gluten-free bread tree, for those who care about gluten. 

So, do plant chestnuts. Two different varieties for cross-pollination. If I was planting again — and I might — I’d seek out trees from among Qing, Benton Harbor, Everfresh, Gideon, and Mossberger. Or, for Japanese varieties and their hybrids: Maraval, Marigoule, Labor Day, Precoce Migoule, and Marsol.

Colossal, at 10 years old

Colossal, at 10 years old

Colossal, in autumn, 12years old

Colossal, in autumn, 12 years old

AH-CHOO!

A Dark Cloud Hovers

The end of May and early June is such a glorious time of year in the garden, with plants thoroughly leafed out yet still showing the exuberance of spring growth. (Those of you to the north of me, Zone 5 in New York’s Hudson Valley: your time will come. Y’all to the south: enjoy your camellias, southern magnolias, muscadine grapes, figs, and . . . all the plants I wish I could grow this far north.)Meadow with grasses
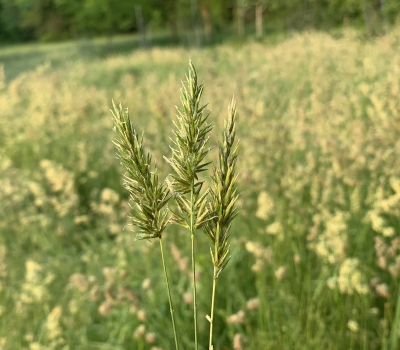
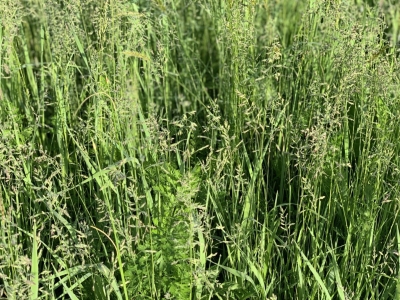
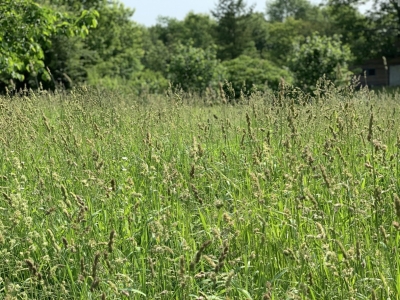
Yet even on the clearest, sunny day — and especially on that kind of day — a dark cloud hangs overhead. Hay fever, literally from hay that is, grasses; and nonliterally, from tree pollen.

Every year the small white blossoms opening on multiflora roses signal that a sneeze season is on. That’s why this late spring allergy season is sometimes called “rose fever.” Rose is not the culprit; is just an easy to note phenological indicator of the progress of the season. Each plant awakens and starts its growth cycle in spring in response to a set accumulation of warm weather. Multiflora rose sends out a signal that the culprits are at work.Multiflora rose
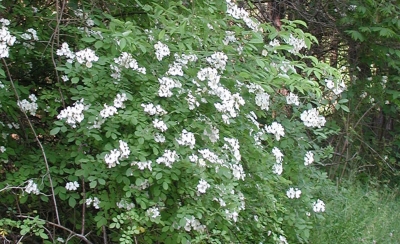
Multiflora rose puts on its show to attract pollinators, such as bees, which transfer pollen from one plant to the next. Hay fever is from airborne pollen blown about by wind, so the flowers of these allergen plants have no need to attract insect pollinators. The non-showy culprits this time of year are grasses and oaks.

As with many other plant-related events, climate change is also leaving its mark on allergy seasons. Here in the northeast, the effect has been for the season to start earlier with a more intense peak. You would think that my multiflora rose indicator plants would keep apace with climate changes but my records, dating back for decades, indicates otherwise. (Daylength, which doesn’t change from year to year, is also sometimes a driver of plant or animal development through the season, and it can interact with temperature.)

No matter: I didn’t have to see a blooming multiflora rose the other day to know that my hay fever season was in full swing.

And the Culprits Are . . .

To at least make this allergy season more interesting, I thought I would look more closely at nearby flora and try to identify the specific culprit or culprits.

I can start by looking no further than the grassy meadow which comes to an abrupt stop at the close shorn lawn only about fifty feet to the south of my home.

With their small, nonshowy flowers, grass species are generally not easily identified. But I can narrow the field, figuratively, by species that are common in the Northeast and that I see now blooming in the meadow. The lineup, then, includes Kentucky bluegrass (Poa pratensis), sweet vernal grass (Anthoxanthum odoratum), and orchard grass (Dactylis glomerata).

Kentucky bluegrass

Kentucky bluegrass

Sweet vernal grass

Sweet vernal grass

Orchard grass

Orchard grass

According to the 1937 USDA Yearbook of Agriculture, most grasses bloom “most abundantly in early morning,” with a secondary flowering period for many of them in the afternoon. The bloom period might be delayed and prolonged in cloudy weather.

Although rain washes pollen out of the air, thunderstorms are another story. Thunderstorms are usually accompanied by winds, which lifts and blows pollen about, and the electrical charges induced by lightning throw add yet another layer of discomfort to the mix.

I just went out to the meadow to jiggle some seedheads of the culpable grasses. The pollen is heavy enough to travel only a few feet, even in a breeze.

Tree pollen is lighter  than grass pollen and launches from greater heights. So I’m adding oak to the lineup. The two oaks most common around here are red oak (Quercus rubra) and pin oak (Q. palustris), with red oak, because of its bloom time being most culpable.

So there you have it: 3 grasses and an oak. They’re all nice plants, attractive and decorative. And, in the case of sweet vernal grass, also fragrant. If only they . . .  or if only I . . . 

I have my eye out for the flowering of catalpa trees and mountain laurel shrubs this time of year. Flowering of either of these plants are a signal that that relief is in sight that my hay fever season is over for the year. Again, these plants aren’t spilling any magical anti-hay fever concoctions into the air; they are merely phenological indicators of what’s happening with other, less conspicuous, flora and fauna.

Plaintain, not a sneeze-inducer

Plaintain, not a sneeze-inducer

DRIP WORKSHOP
See www.leereich.com/workshops for information about the upcoming drip irrigation workshop on June 30th.

Upcoming Drip Irrigation Workshop

Drip workshop announcemenrt 2109

A Changing Landscape

Wormy Matters

Charles Darwin did some of his best work lying on his belly in a grassy meadow. Not daydreaming, but closely observing the lives and work of earthworms. All this lying about eventually lead to the publication of his final book, The Formation of Vegetable Mould through the Action of Worms. Darwin calculated that earthworms brought 18 tons of nutrient-rich castings to the surface per acre per year, in so doing tilling and aerating the soil while rendering the nutrients more accessible for plant use.
I wouldn’t find that many earthworms at work in my own grassy meadow. The last glacier, which receded about 12,000 years ago from the northern parts of the U.S., including here in the Hudson Valley, wiped out all the earthworms. Darwin’s meadow was spared because glaciation didn’t reach as far south as where Darwin’s home eventually stood.

Not that there aren’t now any earthworms here. Mostly, these are non-native species that arrived over the past couple of hundred years and continue to arrive as fishing bait, ship ballast, and in soil clinging to the roots of transported plants. Some native earthworms may also have made it up here from New Jersey. Not many, though, with their estimated top travel speed of less than 6 yards per year.
A crazy snake worm
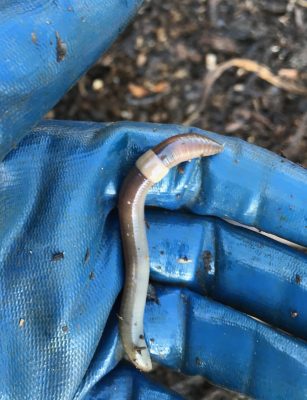
These non-native earthworms are of concern because of the rapidity with which they gobble up organic matter. Their voracious appetites threaten the mountain laurels, rhododendrons, and blueberries that thrive in the organic matter — the leafy mulch — that blankets the forest floors in our nearby Catskill and Shawangunk Mountains.

Those invasive species could effect a change in the landscape we view as we drive along mountain roads and hike the trails.

Grassy Matters

Back to my meadow, which I have also spent a lot of time observing, but from a standing position, usually with a scythe.

Most years the meadow receives a once a year mowing, usually in late autumn, with a tractor. (Early on, I mowed it all summer long with a scythe but the rich soil encouraged lush growth that resulted in tennis elbow. I still scythe parts of the meadow, in moderation.) That once a year mowing is meant to forestall the encroachment of woody plants. In this part of the world, open land typically reverts to forest.

At its best, my meadow presents a lush sea of green that contrasts nicely with the close-cropped areas of lawn near my home. A sinuous path mowed through the meadow, tracing out a different route each season, invites walking through it for more intimate exploration. (I refer to this as “Lawn Nouveau” in the grass mowing chapter of my book, The Pruning Book.)
Path through my meadow
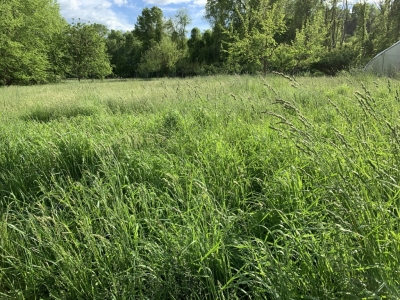
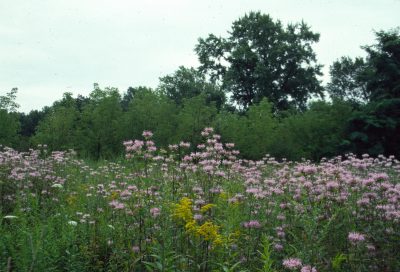
Through summer, pale pink milkweed blossoms dot the meadow. Come late summer, purple flowers of bee balm cap the sea of green grass like ocean whitecaps. And then, later and on into autumn, various species of yellow goldenrod bloom in succession. In the cool of the morning, dew and morning sunlight bring sparkle to the show.
Meadow with goldenrodMeadow with monarda

Grasses Return

A couple of seasons ago I noticed that bee balm and goldenrod were getting increasingly sparse, as were the grasses. Each year increasing amounts of multiflora rose, wild blackberries, poison ivy, even an occasional staghorn sumac were honing in, paving the way to a forest.

Last summer I decided to tip the balance back to meadow. My plan was simple; all I did was mow the field regularly to lawn height. Grasses, which are monocotyledonous plants with their growing point just below ground height, are pretty much the only plants that tolerate regular mowing (or, in the case of prairies, burning). Mow, and grass will come.

This year, meadow grasses are already growing thickly and a couple of feet high. Looking closely, I see very little poison ivy and friends. I will be interested whether  or not bee balm and goldenrod appear onstage later, in summer. Another season or two may be needed before they make their appearance.Close up of meadow plantsMeadow of wet grass, with dogs

Inevitable Changes

Our forest flora are dynamic. The nearby mountain laurels, rhododendrons, and blueberries, meadows, all landscapes, in fact, are not forever, even without human encroachment. I’m not trying to maintain my meadow in a romanticized primordial state; I just like the look of the grasses, bee balm, and goldenrods.

The meadow also has a practical side. My scything provides hay for compost  (along with some horse manure, a waste product of a local stable) and mulch. Taking the hay from limited and different areas each season allows time for the soil to regenerate itself.Meadow with cartful of scythed hay

GARDEN & PLANT SALE, June 1, 2019

Plant sale annoucement for June 1st 2019

Aquatic Matters

Rain, Rain Go Away; And It Did

Now that this spring’s incessant rains have stopped, we can settle in for dry weather. I hope.

Yes, I should be careful about what I hope for, but plants and people generally enjoy clear, blue, skies. For plants, those days mean plenty of light — actually, more than enough, but no harm done — for photosynthesis, which translates to better flavored fruits and vegetables, and conditions inimical to fungal diseases.

Watering can, copper craftA plant only benefits under these conditions, of course, if it also has enough water at its roots. To that effect, yesterday, in celebration of the second clear, sunny day, I turned on and checked out the drip irrigation system that provides that water to my vegetable plants and blueberry bushes. (With mulches and choice of appropriate plants, all other plants are on their own.)

Despite the drip irrigation and self-sufficiency of other plants, some hand watering is called for. Trees and shrubs, their first year in the ground, for instance. Also, newly set out vegetable or flower transplants need assistance until their new roots reach a wetting front. The wetting front gets deeper and deeper as a soil dries out. Even with drip irrigation, the wetting front recedes from the ground’s surface with distance from each drip emitter, taking on the shape of overlapping ice cream cones in the soil with their high points right at the surface where an emitter is dripping water. Newly planted seeds likewise need aquatic assistance until they sprout and their roots dip into the wetting front.

A Good Can Is . . . 

A hose and a hose wand is one way to get water to needy plants, but for places where it’s not worth the trouble of dragging a hose, a good watering can is just the ticket. You think that a watering can is a watering can? Not so. A quick browse through the web reveals a slew of watering cans differing in style and, hence, ease of use. I’ve tried out a few over the years and, of course, have my favorites. 

Size matters. I want a watering can that’s large enough so incessant re-filling isn’t needed for its typical jobs, but not so large as to be unwieldy when filled with water, which weighs in at over 8 pounds per gallon. For houseplants and occasional light jobs, 1.5 gallons works well for me. For more extensive watering, 2 or 3 gallons. The self-serving recommendation in the ad copy for a 3 gallon watering can suggests, “Buy two for a balanced load.” Actually, not a bad idea.

Next, I look at where water exits. Some, usually houseplant watering cans, have merely a spout. Other eater cans have a rose, with little holes for the exiting water. Watering can, rose watering up
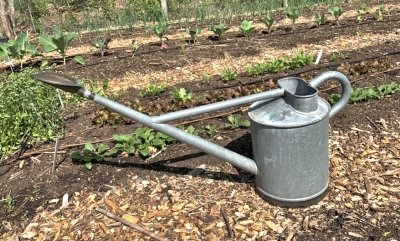
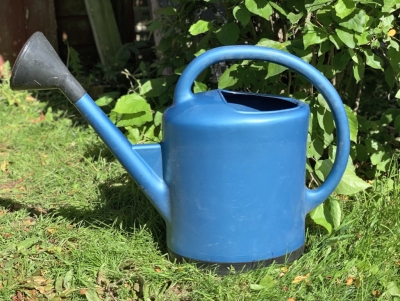
Especially for watering seed flats and small seedlings, a rose needs to be gentle enough to release water sufficiently fast without washing soil around or crushing small plants. Watering can, rose watering down
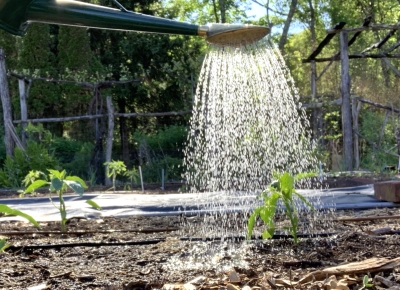
Some debris is bound to find its way into any watering can and thence to the rose, which needs to be removable and easily cleared. Watch out for thin, plastic roses, which are bound to crack after a few cleanings.

Speaking of cleaning, I like a can with an opening large enough for me to reach into. Then I’m able to just scoop out a leaf or a twig that found its way inside without waiting for its journey to the rose. Too big an opening, though, and water splashes all over when the can is carries; one watering can that I saw on the web — an open metal can with a spout — takes this to the extreme!

The attachment of a watering can’s handle affects its balance when carried or used. Ideally, you’re not struggling to counterbalance the can in either case.

Finally, there’s the material out of which the can is made. I’m wary of any plastic watering can. Haws has been manufacturing quality watering cans since 1886 but even their plastic watering cans are not worth the plastic they’re made from; I’ve had two that either cracked or leaked. A copper watering can is expensive but will last just about forever. 

And the Winners Are (in My Opinion) . . .

As stated, I have some favorite watering cans. Despite what I wrote in the previous paragraph, three of my four favorites are made by Haws. One is the 1.3 gallon, metal can, more specifically the “Bosmere Haws Slimcan Metal Watering Can, Green”. What to say? Nothing more. It has all the characteristics I seek in a watering can of this volume.Watering can, green Haws

My other two favorites, also Haws, are the same, each with 2 gallon capacity and the same long-reach style and look as the 1.3 gallon Haws. The 2 gallon cans are galvanized, not painted, on their outsides.Watering can, 2 gal Haws

(Galvanized steel does eventually rust. A few years ago, one of my 2 gallon Haws developed pinhole leaks. I’m not complaining; the cans are 30+ years old. I reached inside and dripped some Gorilla Glue, which is waterproof and spreads as it dries, over the holes. That repair is still good after 5+ years!)

Up above, I dissed plastic watering cans — yet another of my favorites is a plastic can, a 3 gallon “French Blue Watering Can”. This one is a thick plastic that seems very crack resistant. It also fills the bill in other ways, especially its balance, which is especially important when I’m wielding a can that can hold 24  pounds of water.Watering can, French blue

One More

Oh, there’s one more watering can that I really like. It’s more like a watering jar than a watering can, with a capacity of about 1/2 cup. It was purchased at a craft fair. And it is copper. I use it to water my bonsai.  Mostly, though, I like to look at it.Watering can, copper craft

A New, Old Twist on Strawberries

Strawberries White and Early

Awhile ago I plucked some ripe strawberries and handed them to Rachel for a taste. Her ho-hum reaction told me that I hadn’t picked carefully enough. Yes, the berries were white, but that’s their color when ripe — and also when not ripe.
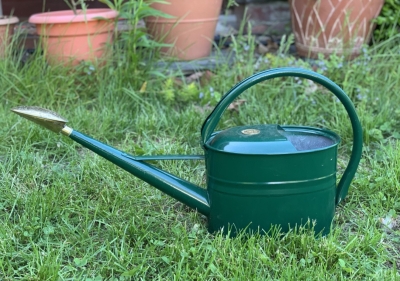
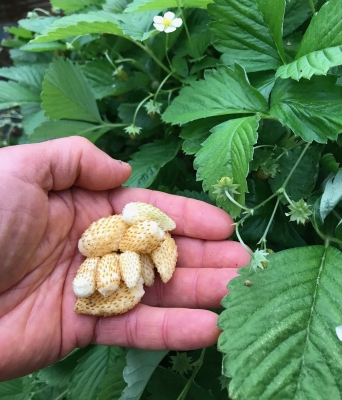
You should be scratching your head by now. Strawberries that are white when ripe? Strawberries perhaps ready for harvest in early May here in the Hudson Valley?

The berries I handed Rachel were alpine strawberries (Fragaria vesca), a different species from our usual garden strawberries (F. X ananassa). They are a kind of “wood strawberry” (often going under their more upscale-sounding French moniker fraises de bois) first encountered about 300 years ago near Grenoble, France. These strawberries are different from garden strawberries in many ways.

For one thing, alpine strawberries are everbearing. They’ll pump out fresh berries as long as given sufficient warmth, water, and nutrients. Mine are bearing now because they’re planted in the ground in my greenhouse. In my pre-greenhouse life they fruited for me in early spring in 3” diameter pots in a sunny window.
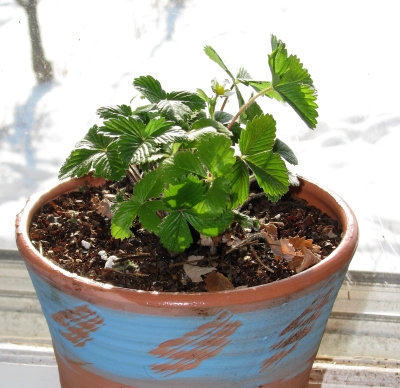
And no, the plants hadn’t resided in my home and aren’t now in my greenhouse to protect them from winter cold. I wanted an earlier crop. I also grow them outdoors.

'Pineapple Crush' strawberries

‘Pineapple Crush’ strawberries

Alpine strawberry plants are adapted from where winter temperatures plummet below minus 30°F. to regions that hardly experience winter.

These strawberries also part ways with garden strawberries in not producing any runners. I consider this a plus because the worst weeds in a garden strawberry bed are often the plants themselves. As runners strew about and take root, they crowd each other out. The resulting shade and higher humidity make for lower yields and plants more prone to disease.

About 40 years ago, alpine strawberries were hybridized with garden strawberries, with the resulting plants showing typical hybrid vigor with larger fruits and more robust growth. The variety Florika was one of those hybrids, billed as having very good flavor and sufficient vigor and disease resistance so that it can be planted to create a fruiting meadow. Sara and Rebecka are two other hybrids. (Unfortunately, all are red-fruited.)

I’ve never grown any of these hybrids, but will — very soon. Stay tuned.

Small, But Very Easy to Grow

Alpine strawberries are not the strawberries to grow to fill your freezer for winter. Unless you have a lot of patience, that is, because the berries are small, typically about the size of a dime. (The hybrids bear larger fruits, measuring over an inch long.)

You also will rarely, if ever, find the ripe fruits for sale. If they are truly ripe, they are very, very soft, and very, very perishable. The only way to truly experience these berries them is to grow them yourself (easy) and then harvest them dead ripe (pretty easy).

The plants thrive in moderately rich, well-drained soil in full sun or partial shade. In pots, any basic potting mixture will suffice. Potted alpine strawberriesA planting can be started from plants or seeds, the latter started just as are tomatoes. Plants grown from seeds planted in spring will begin bearing their first season.

New plants can also be made by dividing old plants, cutting the crown into pieces along with their attached roots. As with many herbaceous perennials, division or starting new plants is a necessity as plants age and their centers become woody and decrepit.

As far as timely harvest, one way is to follow your nose; the berries are extremely fragrant when ripe. Look at the berries: Ripe ones turn from white to creamy yellow, and their seeds darken to brown. Just the gentlest coaxing removes a ripe fruit from its stem.

Scrumptious!!

A number of gardeners grow alpine strawberries, the red-fruited kinds, which come in a number of varieties. There are, likewise, many varieties of white-fruited alpine strawberries. One year I decided to see just how different these varieties are from one another.Red and white-fruited alpine strawberriesIt turned out that all the red-fruited ones were similar, as were the white-fruited ones. For me, the white ones definitely had better flavor. And the flavor could be enjoyed. Why? Because until they are dead ripe, alpine strawberries have taste somewhat akin to cotton soaked in lemon juice. Problem is that birds are very attracted to, and eat, the red fruits no care as to whether or not the berries are dead ripe.

Birds don’t notice the white fruits when they are ripe so leave them alone for our enjoyment.

A few days ago, when I again saw Rachel, I offered her some more carefully picked fruit. She put them in her mouth, blinked and then open her eyes wide, and exclaimed, “Wow!” That’s the usual reaction to the fruit. Ripe, the white fruits are sweet and richly aromatic with a commingling of scrumptious flavors of strawberry and pineapple.

———————————————

Any gardening questions? Email them to me at garden@leereich.com and I’ll try answering them directly or in this column. Come visit my garden at www.leereich.com/blog.

Grape Futures

My Rationale for Pruning so Late

Today I put the finishing touches on pruning my grapevines. Yes, it’s late: The buds have already swollen and expanded into clusters of small leaves. But there’s “method in my madness,” or, at least, my tardiness.

Vanessa grapes

Vanessa grapes

My vines often experience some winter damage, some varieties — New York Muscat, Reliance, and Vanessa, for instance — more than others. Waiting to prune until I see some green saves me from cutting off too many living canes and saving too many dead canes. In winter it’s not so easy to tell them apart.

So I do mostly rough pruning in winter, lopping back canes that have to go whether they’re living or dead. Canes also need to be shortened, even those that are to be eventually saved.

Which brings me to another reason I left the final pruning until today. Plants generally make their earliest growth in the season starting at the tips of shoots or canes. So when I shortened the remaining canes in winter, I didn’t cut them all the way back to their final length. Then if a late frost nips or kills early growth, it’s no problem. The canes are going to be shortened even further — today — to where buds were not as fully awake and susceptible to cold.

But waiting too, too long to prune can be problematic because those swollen buds flick off their resident canes with very little coaxing. Leave too much to prune this time of year and a lot of buds fly off as pruned canes are pulled down off the plant.

Why Prune? How?

A grapevine bears fruit near the bases of shoots that grow off one-year-old canes. Left to its own devices, the vine might grow 50 feet up into a tree, bear so heavily that it can’t provide sufficient energy to pump optimum flavor into each berry, and become a dark, dank, tangled mess of stems — perfect conditions for fungal diseases.
The goal of various methods of training and pruning grapes are the same: to leave a suitable number of canes conveniently positioned for harvest; to provide buds to grow into new, well-placed shoots for fruiting the following season; and to create a form that allows for good light and air circulation. As might be expected of a plant that’s been cultivated for thousands of years, many ways have been devised for training grapes.

The Four-arm Kniffin System is a kind of “cane pruning,” a traditional method of training in eastern U.S.. For support, a two-wire trellis, with one wire 6 feet and the other wire 3 feet above ground, is needed. The mature plant consists of a trunk with four canes growing from it, two trained in opposite directions along the upper wire and two similarly trained along the lower wire.

Pruning begins as four canes to carry the season’s fruits are selected. These canes should be moderately vigorous and originate close to the trunk and near the wires. With this year’s fruiting canes selected, plans for the following season’s crop are made by cutting back some stems to two buds each; these renewal spurs, as they are called, provide points of origin for new shoots (which will become fruiting canes in a year) near the two wires and on either side of the trunk.

Next, lop away all growth except for the four renewal spurs and the four saved canes. Finally, shorten each of the canes to about 6 ft. in length, leaving about 10 buds per cane (not counting bud clusters near the bases of the canes). This leaves ten times four, or 40, fruiting buds on the plant.

Many Methods with the Same Goal 

At the other extreme in pruning is “spur pruning,” where all that’s left is many 2-bud canes (now called “spurs”) from which grow fruiting shoots. “Head training” would be the most basic spur pruning, with the pruned vine left with nothing more than a trunk capped by a number of spurs.
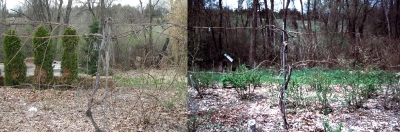
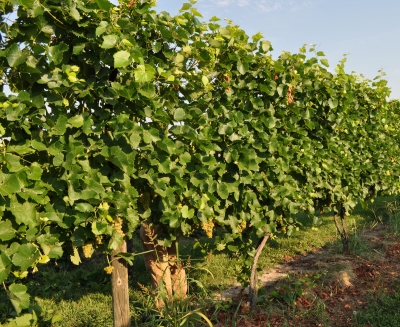
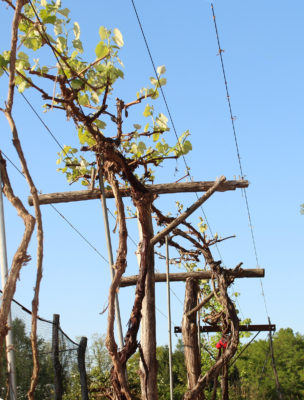
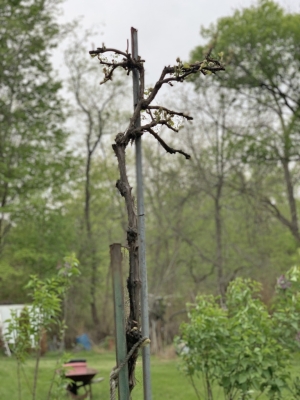
A spur-pruned vine might instead sport a permanent trunk topped by two arms — permanent arms, called “cordons,” in this case — that run in opposite directions along a trellis wire.

Instead of leaving 4 long canes on which to bear fruit, many short, 2-bud canes are left along the cordons. To get the same number, 40, of fruiting shoots on a spur-pruned vine as on a Kniffen-pruned vine, twenty 2-bud spurs are left. All excess are cut away so that those that remain are 6 to 12 inches from their neighbors. Over time, some spurs will stretch, even after being shorted to 2 buds of one-year-old shoots, further away from the cordon. Lopping these back nearer the cordon puts them back in order.

Where to put all those fruiting shoots growing from the spurs? With “midwire” cordon training, cordons are trained along a wire at 3 foot height, and new shoots are trained upward by weaving them into 3 rows of wires strung at one foot above the cordon wire.
With “high-cordon” training, a trunk rising to about 6 feet is capped by two cordons trained in opposite directions along a wire. Fruiting shoots droop downward.High wire double cordon spur pruned grape
My grapes grow as high cordons, with a wrinkle; their fruiting shoots spread horizontally, rather than droop down. Wooden cross pieces provide this support on my arbor. Although this rigorous pruning puts off how soon the arbor offers relief from early summer sun, the arbor never becomes a tangled mess of stems and disease-ridden berries characteristic of many helter-skelter pruned grape arbors.

The trellis for my other high-cordons have two sets of wires running parallel on either side and one and three feet from the cordon’s wire. These wires provide a ledge on which fruiting shoots can rest, with clusters of grapes dangling just high enough for me to reach for easy harvest.

Plant Sale reminder

Plant sale annoucement for June 1st 2019