EVOLUTION AT WORK
Green Thumb Not Needed
Anybody out there now sprinkling seeds into mini-furrows in seed flats, flowerpots, or repurposed yogurt cups? How many of us are then disappointed when, a few days later, there’s no sign of green sprouts poking up through the brown soil? Or not enough of them.
A green thumb isn’t a prerequisite for growing seedlings indoors to give plants a head start for earlier ripening of tomatoes and peppers or earlier blooms of zinnias or marigolds. Backing up every seed is 350 million years of trial and error; seeds have evolved to sprout. So why, sometimes, don’t they, and how do to right any wrongs?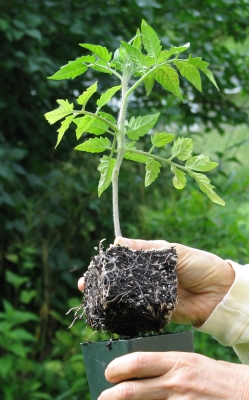
Good Seeds and Good (Potting) Soil a Must
Seeds are living, breathing creatures, and don’t live forever. How long a seed remains viable depends on the kind of seed. Longevity of vegetable seeds under good storage conditions goes from just a year for onion, parsnip, and parsley seed to more than four years for seeds of cucumber, lettuce, and cabbage and its kin. Most annual flower seeds are good for one to three years, most perennials two to four years.
But don’t take any reports of seed longevities too much at face value. Storage conditions play an important role, with the best conditions being cold and dry. I store my seeds in an airtight tub along with packets of silica gel that I weigh and refresh, if needed, in a microwave oven. The tub winters in my unheated garage and summers in my cool basement, or freezer.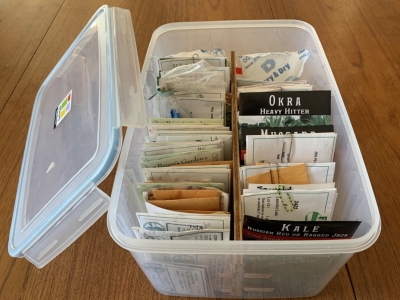
Next, turn to the soil or, more correctly, the potting mix or potting soil. Don’t sow seeds in garden soil, even good garden soil. Garden soil becomes too sodden in the confines of a container. Purchase or make your own mix (both of which I wrote about my March 15, 2022 blog post).
Gather up some bona fide or makeshift containers, and you’re ready to plant. Any container that’s a couple of inches deep with drainage hole in its bottom is suitable. Fill it with the potting mix and gently firm it.
What Next?
A guideline that I don’t follow rigorously is to plant seeds at a depth approximately four times their thickness. A lighter, airier mix warrants deeper planting or seeds will dry out too quickly. Still, bigger seeds do warrant deeper planting than smaller seeds. With really tiny seeds, like foxglove or portulaca, I just sprinkle them on the surface, perhaps with a smidgen of potting mix for a very light cover. Tiny seeds have tiny energy reserves, and if planted too deep, they burn up all their energy before peering aboveground to drink in energy-giving light. No matter the depth, right after sowing I firm the seedbed for good contact between seeds and mix.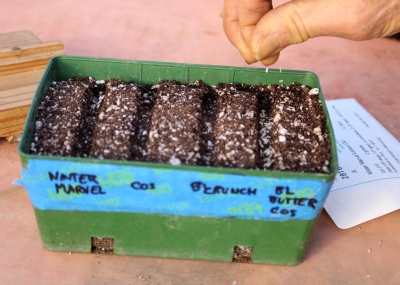
And then I water. I could water from above with a gentle “rain” from the fine rose of my watering can or hose wand, but prefer to minimize washing around the potting mix and seeds, especially small seeds, by watering from below. I set the seed flat or container in a pan with an inch or so of water and let it sit for a few hours. By then the potting mix is saturated with water; lifting the container out of the water and then tipping it at an angle drains excess (gravitational water) from the mix. A pane of glass over the top of the container prevents evaporation to lock in moisture.
All the seeds now need to coax them out of the slumber is warmth. Each kind of seed has a minimum, a maximum, and an optimum temperature for germination. Unfortunately, it’s not the same for all seeds. Between 70 and 80 degrees Fahrenheit (21-27° C.) strikes a nice balance for all of them.
Armed with a thermometer, check out warm spots around your home: perhaps it’s a warm room, the top of a refrigerator, an insulated container along with a periodically refreshed hot water bottle, or near a furnace. Electric seed heating mats are available, some raising the temperature 10° F above ambient, more expensive ones raising the temperature to whatever amount you dial in.
I made my own germination chamber from a styrofoam cooler along the bottom of which I wired two sockets each with a 15 watt lightbulb. Above the bulbs sits a rack for the seed flats. The bulbs are wired into a thermostat on which I can dial the desired temperature set, always, in my case, set to 80° F.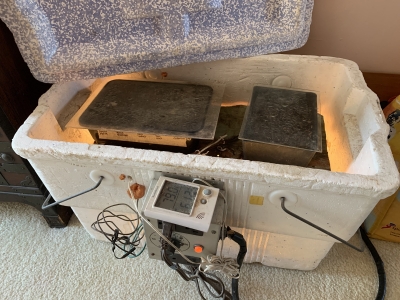
One Final Ingredient and You’re Good to Grow
That’s it, except for one final ingredient: patience. Even with ideal conditions, seeds vary in how long they take to germinate.
I check the containers every day and as soon as sprouts appear, I uncover and whisk the container to bright light. From then on, cooler temperatures — about 10° F. less than germination temperatures — and bright light are ideal.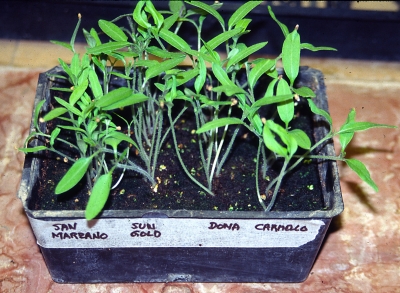


I’m not finding your 3/15/22 article about making your own starting soil? Can you help?
Jane Rainey
It’s March 16, 2022.
The nurseryman who taught me to root cuttings & many other things.
He told me a Green thumb was just someone who learned & followed the rules.
It was not magic, just rule for life of a plant.
I was eight year old & every time I succeed with plant life or animals for that matter,
I have followed the rules. When I fail, it is plain that I missed a step/rule.
Thanks, good article.
I’ve had great success pregerminating seeds in smalls tubs of dampened vermiculite, covered with a humidity dome. No worries about fungal growth since the substrate is sterile. Then once the 1st leaves appear I just pop the seedling out and transplant into a fertile potting mix. Germination is fast since there are no fertilizer salts. And I get a very high germination rate. An excellent method for seed conservation.
Off topic, but since my currants and gooseberry bushes are starting to leaf out, I wanted to ask how you deal with gooseberry sawfly and currant aphids. Thanks
Any insecticide, even insecticidal soap, should control them if you get them early. Look for the little, green “worms,” and at first sighting spray the plant, especially down into the center of the plant. Keep an eye out for a possible second generation later in the season.