Back to the Future

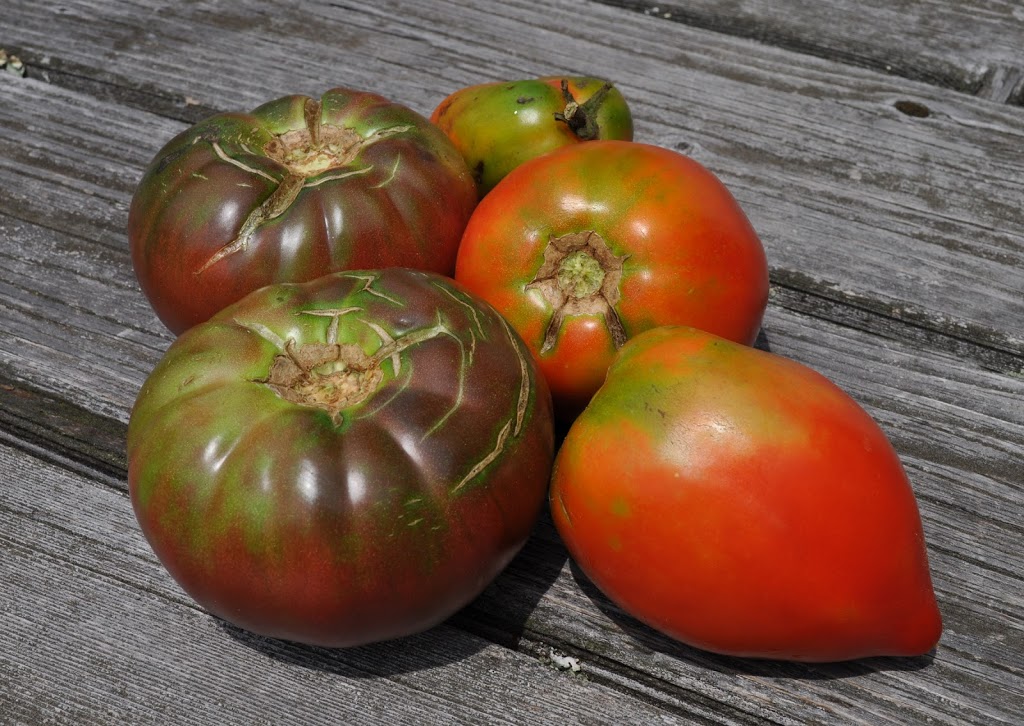
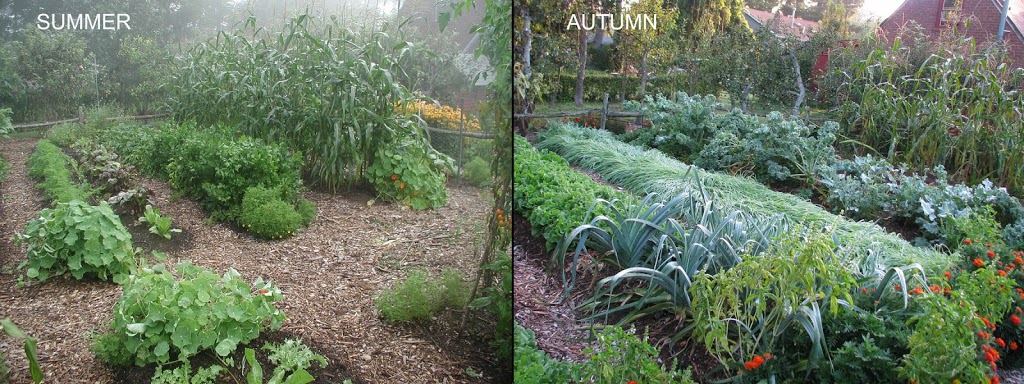
Time to jump into the future, again. It’s autumn of this year and tomatoes, peppers, cucumbers and other summer delicacies are on the wane. Does the vegetable garden appear melancholy and forlorn? No! It’s lush with savory greens that thrive in that cool, moist weather to come, vegetables such as kale, broccoli, cabbage, radishes, turnips, lettuce, and endive. (Right now I hunker more for tomatoes and peppers than cabbages and turnips but nippy temperatures and shorter days will, I know from experience, bring on the appeal of autumn vegetables.)
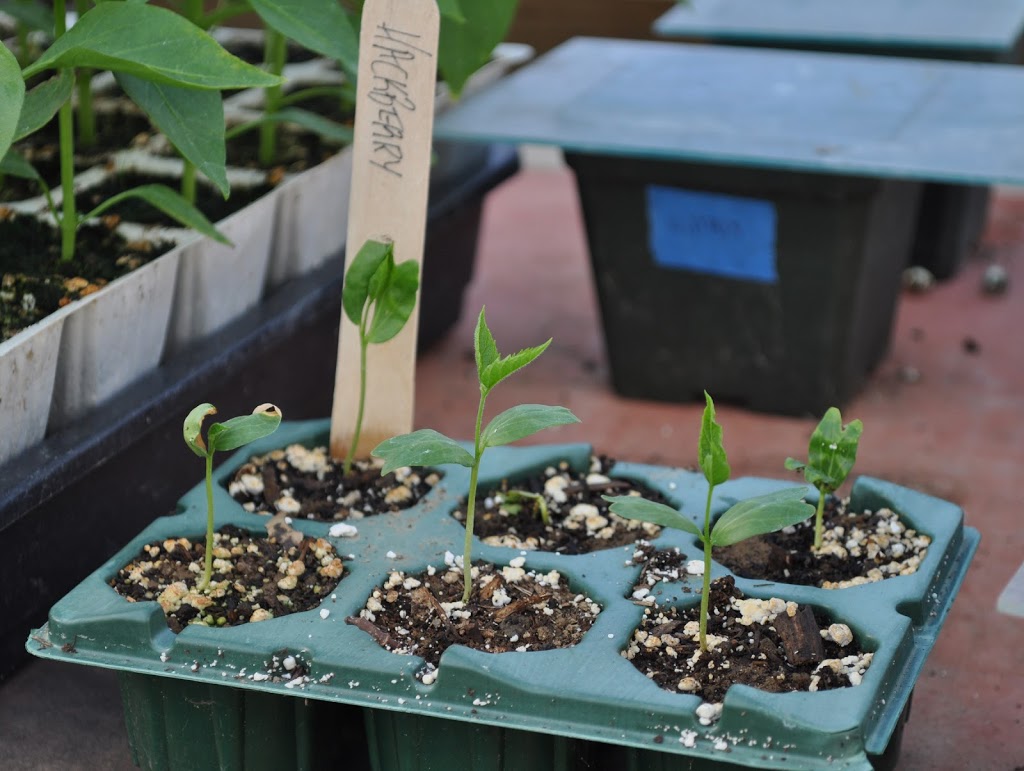
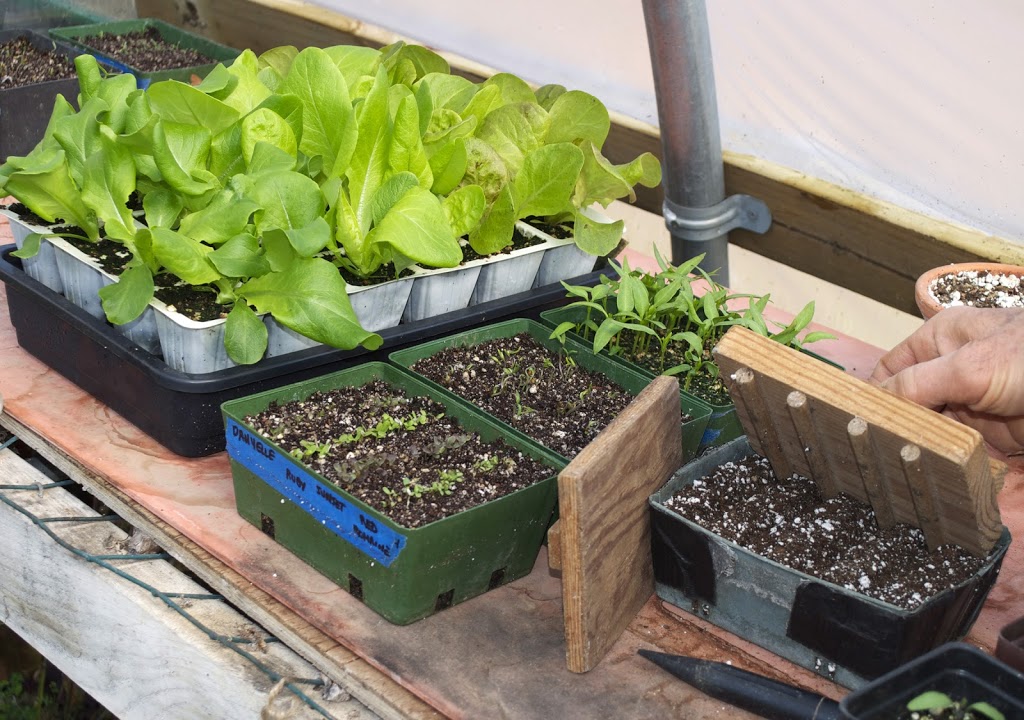
Planning and planting need to take place right now in order to realize my autumnal vision. First on the agenda will be sowing seeds of cabbage and broccoli, in early June, not right out in the garden but in seed flats from which, after about a week they’ll be pricked out into individual cells in plastic trays. A little more

than a month after that, the plants will be ready for their permanent home in the garden. That might be where early bush beans or summer squashes had been sown, harvested, and cleared out of the way. The point is that autumn’s broccoli and cabbage plants, although sown in early June, need not take up space in the garden until late in July.

—————————————-
As I wrote a few weeks ago, information on frost dates, both the last spring frost  and the first autumn frost dates — can be gleaned by choosing a state from the website http://cdo.ncdc.noaa.gov/climatenormals/clim20supp1/states/ and then finding weather data for a nearby location. That nearby location for me is Poughkeepsie, NY, for which there is a 50% chance of the temperature dropping to 32°F on October 9th.
I figure when to plant broccoli and cabbage by counting back the number of days these plants need to reach maturity from the average date for the first killing frost. And then I add more days because I don’t want to necessarily wait until that first frost date before I can start harvest.
Not that 32°F. would spell the death knell for broccoli and company. But growth slows dramatically as weather cools and days grow shorter so I like to have my plants pretty much fully grown and ready for harvest before the first frost date. With cooler temperatures, vegetables can sit out in the garden patiently awaiting harvest in good condition. (In warmer regions of the country, vegetable plants will actually grow through winter, making autumn a fine time to sow peas or set out cabbage transplants.)
——————————————
Other vegetables, with different numbers of days needed to reach maturity, need sowing on various dates through summer. Here’s the planting schedule for my zone 5 autumn garden having an early October first frost date (as well as additional planting dates for vegetables of summer); where frost dates occur earlier, push sowing and planting dates the same amount of time earlier, and vice versa for regions with later frost dates:
•June 1: sow broccoli and cabbage in seed flats; sow small amount of lettuce and cilantro in seed flats or in garden;
•June 7: 3rd sowing of corn and 2nd sowing of bush beans in garden;
•June 14: 2nd sowing of cucumbers in seed flats; sow small amount of lettuce and cilantro in seed flats or in garden;
•June 21: 4th sowing of sweet corn in garden; 2nd sowing of summer squash out in the garden; sow small amount of lettuce and cilantro in seed flats or in garden;
•July 1: sow endive and parsley in seed flats; 3rd sowing of beans in garden;
•July 15: sow beets, chard, turnips, kale, and winter radishes in garden; sow Napa-type Chinese cabbage in seed flats;
•August 1 – September 1: multiple sowings of spinach, small radish varieties, mâche, arugula, mustard greens, and pac choi type Chinese cabbage in garden (early sowing will likely bolt but later sowings will press on late into autumn); keep planting lettuce.
All plants growing in seed flats are transplanted out to the garden as soon as they begin to grow too big for the flats, which is typically four to six weeks after seeds are sown.
——————————————
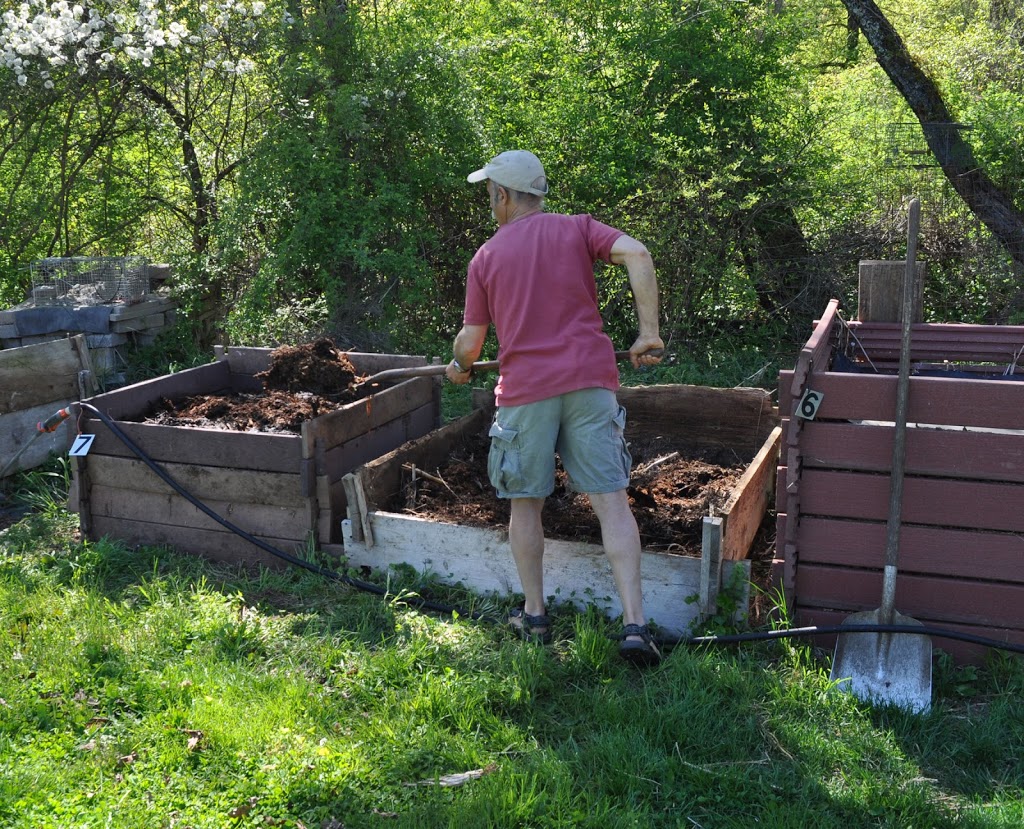
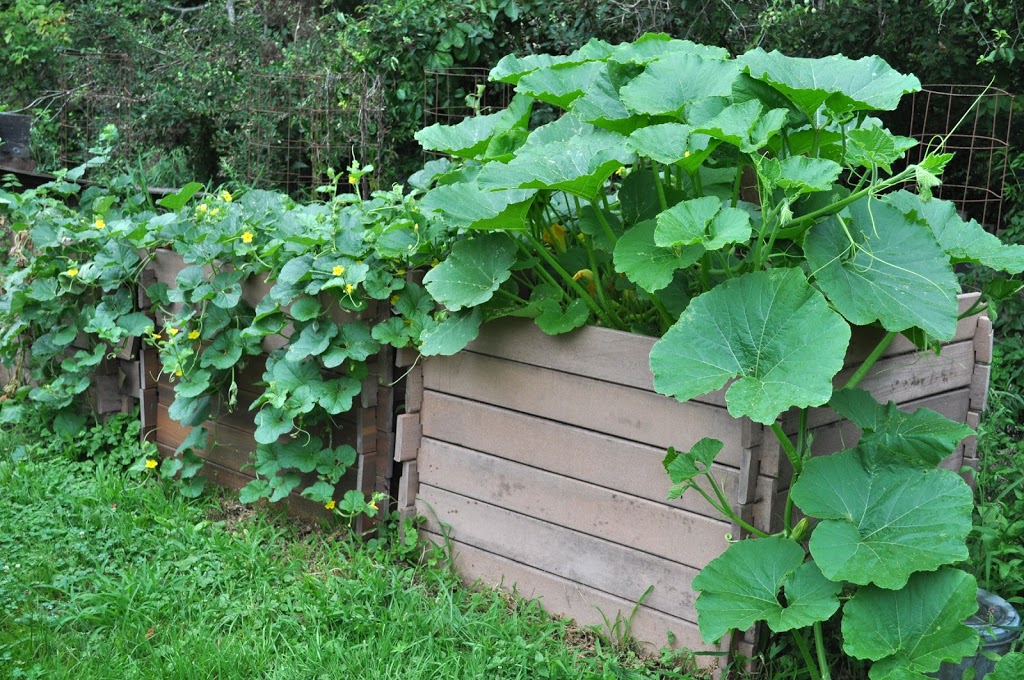
Multiple plantings of bush beans and cucumbers are ways to keep ahead of bean beetles (yellow, with dark spots) on the beans and striped cucumber beetles (yellow, with dark stripes) on the cukes. It takes awhile for new plantings to get attacked, and that attack is mitigated by whisking the old plants, with potential attackers still feasting, out of the garden to the innards of the compost pile. Multiple plantings also help with summer squashes’ squash vine borers, evident from wilting leaves and a sawdust-like frass that oozes out of stem, although I’m usually glad to be rescued from excess-squash-syndrome by the time the borers take plants down.
The above schedule omits a few vegetables. Carrots: I don’t grow them, but if you do, July 15th is the date to plant them around here. Some people have luck with autumn peas. I don’t because first it’s too hot for them and then it’s too cold for them. Still, if you want to take a chance, sow them August 1st.
And what about rutabaga, parsnip, and kohlrabi? All I can say is, “Yuk!”

It (Could Be) Cold

I see a lot of gardens under wraps this morning, plants covered with upturned buckets or flowerpots, or blanketed under . . . well . . . blankets. Day after day of balmy temperatures have made it hard to hold back finally getting vegetable and flower transplants out of their pots and into the ground.
But temperatures just below freezing were predicted for last night (May 13th) and everyone got a wakeup call: Freezing temperatures, which could kill tomato, marigold, and other tender plants, are still possible. It’s all about averages; around here, there’s about a 10 percent chance of a frost the middle of May.
The likelihood of cold, frosty, or freezing temperatures has been detailed — see http://cdo.ncdc.noaa.gov/climatenormals/clim20supp1/states/NY.pdf — for locations throughout the country. The closest weather station connected to that site around here is in Poughkeepsie, and in mid-May that site has a 50% chance of experiencing cold weather (36°F.) and a 10% chance of of experiencing frost (32°F.). Cold air, being heavier than warm air, sinks to low-lying spots on clear still nights, such as last night, so my garden in the Wallkill River valley is usually a few degrees colder than surrounding areas, such as Poughkeepsie. Fortunately, temperatures last night here dropped only to 31° F.
———————————–
Not that lower temperatures would have done my vegetables or flowers any harm. I took the advice I’ve been doling out to others for the past couple of (warm) weeks, and held off planting anything that could be harmed by frost. So tomatoes, peppers, melons, and the like are still in pots that I moved into the warmth of the greenhouse last night.
I’d like to plant out all these cold-tender seedlings but chilly temperatures are predicted for the next few night. Even chilly temperatures, let alone freezing temperatures, are not good for tender plants.
Still, anyone looking out over my garden this morning would have seen white blankets over some beds and overturned flowerpots over a few plants. Because my garden is in a cold spot, temperatures well below freezing were not out of the question for last night. Cold enough temperatures could damage cabbage and its

kin, lettuce, onions, and other cold-hardy transplants that have been growing out in the garden for the past couple of weeks. I had some row cover material readily on hand, so why not, methought, throw it over some of the beds anyway? Just in case.

Throwing covers over plants at 7 in the evening is a lot more pleasant than waking up at 3 am with the sinking feeling that temperatures have really plummeted and then, if they in fact did, running outdoors in the cold darkness to cover plants.
——————————-
Fruit trees, shrubs, and vines present another story. A freeze won’t kill the plants, but low enough temperatures could kill flowers or developing fruit, as it did on many fruit plants last year. One frigid night and you have to wait a whole year for the next crop. Unfortunately, not much could be done about this situation. Fruit plants here are too many or too big to cover. My tack is to keep fingers crossed.
Critical temperatures for fruit damage vary with the kind of fruit, the stage of flower or fruit development, the depth of cold, and the duration of cold. Probably other things, too, such as humidity and plant nutrition. 

An excellent table of “Critical Temperatures for Frost Damage on Fruit Trees” can be viewed at http://extension.usu.edu/files/publications/factsheet/pub__5191779.pdf. So, put simply, 25°F would spell death to 90% of my apples, which are in full bloom, and pears, which are post-bloom, and 28% would do in 10% of their fruits. Plums, also post-bloom, tolerate a bit more cold.
In addition to crossing fingers, my tack is also to grow a variety of fruits, and especially native fruits.

Pawpaw blossom, from below.

(Apples, pears, peaches, and most plums are not native.) It’s not a chauvinistic choice; it’s just that these natives — American persimmon, pawpaw, blueberry, grape, and gooseberry, to name a few — are better adapted to our conditions. And not just the weather here. Pests also.

This spring has been the most perfect spring in a long time, with plenty of clear, sunny days and gradually warming temperatures that kept blossoms from jumping the gun. Playing the averages, the critical cold periods should be pretty much be behind us. As with the stock market, though, “Past performance is no guarantee of future returns.”
————————————————–
Update, May 17th: Warm days and nights that are not too chilly are predicted for the next few days, so I planted out tomatoes and peppers today. I’ll still keep an eye on temperatures because there’s still a 10% chance of temperatures dipping to 36° as late as May 28th according to records at the nearby Poughkeepsie weather monitoring station.
Turning compost

Compost and Cucurbits

You’d think, this time of year, that all I’d be doing is sowing seeds and transplanting small and large plants. I am. But I’m also turning compost piles, getting ready to use that “black gold” this autumn. Why now? So the stuff has time to mellow and to make space for new compost piles that will be built from now through autumn.
Here’s my compost routine: All summer and into autumn I fill empty compost bins with hay, wood shavings, horse manure, weeds, kitchen waste, and old garden plants along with some sprinklings of soil, limestone, soybean meal (if extra nitrogen is needed), and sufficient water to moisten the ingredients. When a bin is full, which means loaded up about 5 feet high, it gets covered with a sheet of EPDM rubber roofing material to keep excess moisture out and to seal in whatever moisture is within. A numbered label on each pile gets recorded to remind me when the pile was completed, what went in, and, with the help of a 2-foot-long thermometer, how much heat, if any, was generated.
Fast forward to today. I’m flipping over the contents of two compost bins, one completed last July and the other last August, into empty adjacent bins. Turning over the contents lets me see how the compost

has fared over the past 10 months; some piles might still be a bit raw, others are just about finished and ready for use. No matter, I don’t need any compost yet.

No rule that says compost piles have to be turned at all. I do it because I like to see what’s been going on and so I can make slight adjustments, as needed.  Sometimes a little more water is needed. Turning the pile also gives me the opportunity to break up any clumps of material and render the finished pile more uniform.
One of the piles I turned this spring had so much undecomposed hay in it that I sprinkled on some soybean meal as I turned it. Even that wasn’t one-hundred percent necessary; the high nitrogen soybean meal just speeds decomposition. Leave any organic materials (that is, something that is or was living) piled together long enough, with a bit of moisture, and it will definitely turn to compost. As my bumper sticker reads: “Compost happens.”
————————————————–
One more reason for turning and organizing all of last year’s compost piles is to make space for growing melons and squashes. My vegetable garden is very intensively planted, with 3 foot wide beds packed tight with one or more vegetables growing together or in sequence, perhaps even trained skyward to get more out of the space. The long, sprawling vines of melons and squashes don’t fit into this scheme of things.
The compost bins — 4 foot by four foot by 3 to 4 foot high cubes —  are perfect for these vines. Three or 4 plants poked into the rich compost through holes made in the rubber roofing can sprawl to their hearts’ content, spreading out to cover the tops of the bins and then, if they like, draping down to the ground, even creeping along the ground if that’s their whim. 
Melons and squashes thrive in rich soil, and my plants roots couldn’t find themselves in a richer soil than the pure compost within the bins. Plenty of water is needed to plump up the fruits; the compost clings to enough water so that watering is hardly necessary.
————————————————–
The only melon that does not get planted on a compost bin is watermelon. But even watermelon doesn’t go in the garden. It goes onto a pile of wood chips or leaves I had dumped here last autumn and winter.
In contrast to the muskmelons, honeydews, and cantaloupes, all which bear a few fruits and then give up the ship, watermelon vines just keep bearing and bearing until stopped by frost or short days. I’ll

need to get into the compost bins before frost and short days; muskmelons, honeydews, and cantaloupes will be gone and out of the way but watermelon would not.

Also, watermelons don’t demand a rich soil. “Soil” that’s either partially decomposed leaves or wood chips is poor in nutrients, to say the least. So poor that when I plant in the leaf or wood chip pile, I scoop out a generous hole and fill it with compost to get the plant off to a good start. During the growing season, I’ll occasionally dose the watermelon plants with some soluble fertilizer.
All kinds of melons thrive in heat, in the air and in the ground. Freshly turned compost and old leaves or wood chips aren’t static. They are decomposing and, in doing so, generating some heat. All of which makes for good crops of good-tasting melons.

Deferred Gratification

If there’s one thing I don’t like about gardening, it’s all the deferred gratification, all  the looking to the future. That future might be 3 or 4 weeks hence, when I’m planning to start harvesting the radishes that I’ll be sowing today. Or 8 or 9 weeks hence, when I’ll start harvesting tomatoes from plants I’m nurturing today and that I sowed in early April for planting out towards the end of May.
And it doesn’t end. No sooner will a large portion of the seeds and transplants be snuggled into this season’s garden than I’ll be sowing seeds of cabbage and broccoli for eventual transplanting in midsummer for harvest in autumn. Planning for autumn now! Shudder the thought, but it’s got to be done. I don’t want to even think about autumn’s impending cold weather with this wonderfully warming spring weather.
Okay, let me take a deep breath and resolve this not-living-in-the-present of gardening. It’s not really that bad. I figure out what has to be done — a written schedule updated as necessary from previous seasons’ notes is crucial for this — and and then immerse myself in the all-present of doing it. And it’s not all for end results; there’s the joy and satisfaction of watching plants grow and come into fruition and respond to my ministrations.
—————————————————–
In some cases, the longer the period of deferred gratification, the greater the satisfaction.
I wrote back in February about the excitement of seeing white roots of some yellowhorn tree seeds that were sprouting in potting soil in a plastic bag in my refrigerator. I planted all those in pots. But also, in that plastic bag, were some hackberry seeds I had collected last autumn. They were doing nothing. Nothing obvious, that is.
Seeds of woody plants that ripen in autumn have a dormancy that lasts until they think winter is over. Winter for my hackberry and yellowhorn seeds takes place in my refrigerator, which is ideal because the

temperatures that spur seeds — and plant growth, for that matter — awake are between about 30 and 45°F. That’s why yellowhorn seeds awoke back in February. Outdoors, the requisite number of hours in that temperature range might not have accumulated until around now.

Hackberry seeds evidently need to experience more chilly hours before they’re convinced to wake up, which happened last week. I potted up the delicate little seedlings.
In 20 years or so, those six hackberry seedlings should be large enough to be clothed in a corky bark that, especially in winter, displays crisp, achromatic

shadows reminiscent of the lunar landscape. Perhaps by then the plants will be old enough to bear pea-sized, date-flavored fruits. Not that the fruits offer much more than a nibble; within each pea-sized fruit is an almost pea-sized seed, leaving just a thin covering of sweet flesh.

—————————————————–
Sometimes — usually — it’s best to let Mother Nature do the planting. On a recent drive to West Virginia, where the spring season is about a week ahead of here, the mountainsides were awash in redbud bloom.
Usually, I not a fan of redbud. It’s the color. Pinkish purple. Yuk, and too flamboyant. At least, to me, from isolated trees that blare out their color from front or back yards.
But isolated redbud trees as well as large swathes of them livened up the scene as they nestled in among forests of trees

unfolding soft-colored, pale green blossoms and young leaves.

On a shorter time scale, I see Ms. Nature has also done a nice planting of cilantro. In the couple of beds where cilantro stood last year (from self-sown seeds of the previous year), small plants are now ready for harvest. And I didn’t even have to think ahead to plant them.

Rational in Spring? No.

People are funny, and that includes gardeners. Gardening is basically simple: You put a seed in the ground and, backed by millions of years of evolution, that seed grows. Sure, there are a few more wrinkles, like choosing a sunny spot (for sun loving plants), a well-drained soil (except for bog and water plants), and enriching the ground with organic materials, and, perhaps, fertilizer.
But people love to complicate things. Hence, compost tea, biochar, and now, straw bale culture. A recent article in the New York Times about straw bale culture has everyone — or at least the handful of people who told me of their plans for the season — trying out this new and allegedly wonderful alternative to merely dropping seeds in the ground.
Actually, straw bale culture is not “new.” I wrote, over a decade ago, in my book Weedless Gardening, “Straw bale culture of vegetables originated in Europe from a need to grow plants where diseases had built up in greenhouse soils. The idea is to set a bale of straw on the ground and grow a plant right in the bale. You do this by poking a transplant into a hole gouged in the top of the bale and sprinkling some fertilizer on it. Given adequate water and nutrients, the plant roots grow throughout the bale, hardly realizing that they’re not in real soil. There’s no reason why this method could not be used to start a small garden anywhere. Put some paper down on the ground and create mulched paths between the bales.”
Yes, the method could be used “anywhere,” but there are also good reasons not to. First, straw bale culture is not really organic. With this method, plants are fed mostly by soluble fertilizers sprinkled on the bales. The essence of organic gardening is to feed the soil which, in turn, feeds the plants. Plant foods are released from the soil matrix through microbial action. Microbes respond, as do plants, to warmth and moisture, so nutrients become available to plants in synch with plant needs. In straw bale culture, roots are bathed in readily available nutrients whether they want them or not.
Barring diseased soil or trying to garden on a rock ledge, why use straw bale culture in the first place? What’s wrong with dropping a seed in waiting furrow in the ground? 
—————————————————–
Not that I’m that rational a gardener, especially this time of year.
I’ve admonished many a person to begin with a site that needs a plant, determine what plant would do well with those site conditions, and then — and only then — to go out and get the plant or order it. All that’s

opposed to wandering into a garden center this time of year, when such places are awash with all sorts of desirable plants, picking out a plant you like, and then running around the yard with it trying to decide where to plant.

I, of course, did the latter. A couple of weeks ago, I read about Concorde pear, notable for having “the beautiful shape and crisp texture of the Conference, which gives it an elongated neck and firm, dense flesh. Its flavor is vanilla-sweet, reminiscent of the supple sweetness of Comice pears.” (Supple sweetness?)
The plant is readily available in Britain, but not here. All of which made it all the more desirable. Did I really need a Concorde pear tree? Aren’t the more than 20 varieties I now have sufficient? Evidently not.
As luck would have it, a nursery an hour away had Concorde. The nursery, of course, had  many other desirables also. So I also bought Black Gem, a named variety of black walnut. Not that there aren’t plenty of wild black walnuts around here, but this was a named variety.
So today I will run around the yard with these two plants trying to decide where to plant them.
—————————————————–
The appeal of Black Gem is that it has a name. A “named variety” of plant is one that was either bred or selected from a wild population and found to be superior in one or more ways. Said plant is given an official name and then reproduced by some method of cloning, such as by cuttings or, as is the case with most fruit

and nut trees, grafting. McIntosh is a named variety of apple. Seedling apple trees that pop up randomly along roadsides are not. All plants of the same variety name are genetically identical.

Named varieties are not available for every plant and, for some, pretty much all seedlings are quite good. The hedge of Nanking cherries along my driveway — and now in bloom! — are merely seedlings, but all the plants are beautiful and yield, in a couple of months, great quantities of tasty cherries with virtually no effort on my part. No varieties are available.
Black Gem, according to the tag, yields “huge crops of light-colored, high-quality, delicious nuts that crack in large segments and offer a superior nutmeat-to-shell ratio. Thin husks slip off easily.” How could I resist?
—————————————————–

Loving Locust

With a bit over 2 acres of land to play around with, I could have a woodlot. But I don’t. (I do harvest a lot of sunlight, though.) Still, because this is what I call a farmden (more than a garden, less than a farm), trees, aside from fruit trees, have to fit into the picture. To wit, four sugar maples planted  in 1997 as a sugarbush for tapping in another 20 years and my locust mini-grove.
Locust — black locust, Robinia pseudoacacia, that is — is a tree of many qualities. For starters, the roots can garner nitrogen from the air and put it into a form the tree can use, eventually putting it in the soil. Black locust also laughs off heat, drought, air pollution, and road salt. The tree’s craggy branches and deeply furrowed bark are fondly reminiscent of those trees that hugged Dorothy on the yellow brick road to Oz. Towards the end of next month, chains of pale lavender blossoms will be dangling from the branches. More than just pretty, these flowers fill the air with a sweet aroma that carries far.
————————————————–
What more could one ask from a tree? Wood! Some of which I was harvesting from my locust mini-grove last week. The grove is a stand of locusts of various ages popping up in a swathe about 15 feet wide by about 60 feet long. Forsythia shares that space as understory, new plants developing wherever canes arch to the ground to root. The locust grove formed naturally from a long-gone nearby grove on a neighbor’s property, felled by chainsaws, the new plants arising from dropped seeds as well as from root suckers.

Locust is one of the best woods for burning, but cutting trees from my mini-grove for firewood would hardly be worth it. One week in winter would decimate the small patch.
The locust I cut is destined for posts. Locust is one of the most rot-resistant woods, putting even cedar to shame. It can outlast pressure-treated wood, offering a nice rustic look to boot. Spring, before the leaves come out, is a perfect time for cutting locust for posts because that’s when the bark peels off easily in long strips.
—————————————————
The locust posts are for a new grape trellis. My grapes started out being trained to the traditional 4-arm Kniffen system, on two wires, one at 6 feet and the other at 3 feet from the ground. Two canes, originating near a central trunk, are trained horizontally in either direction along each wire to give a total of 4 canes each shortened to about 10 buds long. (A “cane” is a one-year-old stem.
The 4-arm Kniffen system has its limitations in terms of exposing the vine to maximum light, which translates into better-tasting grapes, and keeping foliage and berries dry, which translates into less disease.
So,a few years ago I morphed the vines to the high wire cordon system. A trunk about 6 feet high branched into two permanent arms (cordons) that travelled in opposite directions along a wire at trunk height. In this case, instead of being left with 4 long canes after pruning, the vine is left with many short canes drooping downwards right off the cordons.
We bag some of grape bunches to foil the birds and the bees, as well as other pests. Bagging also lets fruits hang on the vine longer without damage and so develop sweetness and aromatics that make for finest flavor. The problem with the 4-arm Kniffen and high wire cordon systems of training are that the fruiting shoots droop downwards, which makes bagging difficult and puts the bags at an angle that defies gravity, not a good thing. Which is why my grapes have morphed again, this time to a 5-wire trellis system.
The latest incarnation of grape support consists, then, of sturdy T-trellises spaced 10 feet apart. Running perpendicularly to the cross-arms of the T are 5 wires, the middle one to support 2 cordons growing off horizontally in opposite directions atop each vine’s 7 foot high trunk. The other wires will support the fruiting shoots that grow from short canes along the cordon perpendicularly to the outrigging wires. The more horizontal growth of the fruiting shoots should make bagging easier.
So it’s locust wood from my mini-grove that will deserve some thanks for luscious grapes.
————————————————-
Not everyone is as enamored with black locust as I am. Many classify it as an invasive plant; here in New York, I’ve seen it classified as a native invasive plant. It originated in southeastern U.S. but now ranges far and wide because of its fecundity and it’s tolerance for a wide range of conditions below and above ground. The tree’s beauty and utility have also contributed to its spread, by humans.
My only beef with black locust is with its thorns. Still, I like my black locusts and I like my grapes.
—————————————————-

Garden Extraavaganza

A gardening extravaganza is soon to take place, on May 11th, at the garden of Margaret Roach in Copake Falls, NY. (Margaret is a great gardener and was editor of Martha Stewart Living magazine.) It is a Garden Conservancy Open Day at her garden, I’ll be doing a presentation on “Fruit Growing Simplified” as well as a hands-on “Grafting Workshop,” and Broken Arrow Nursery will be selling plants. For more information and registrations for any of these events, see http://awaytogarden.com/2013-open-days-in-my-garden-and-nationwide.

Nuts for Fruits

What a fool I am; I can’t even follow my own advice! A couple of days ago I planted an apricot tree that I had ordered a few weeks previously. All of which compounds my foolishness because I had plenty of time to ponder the purchase, even cancel it if I came to my senses before it’s arrival mail-order.
Planting an apricot tree may not seem foolish to you. But it is, as I’ve advised many people. The reason is that here in the northeast, perhaps even east of the Rocky Mountains, an apricot is unlikely to bear fruit. The plant hails from regions where winters are steadily cold and spring temperatures creep steadily upward. Over most of continental U.S., winter temperatures fluctuate wildly up and down, predisposing the plants to

My apricot hope for the future.

disease such as ominous-sounding, and truly debilitating, valsa canker. Trees typically die either quickly or slowly.

If only that were all . . . Apricot blossoms open at the first hint of spring warmth. The pinkish buds unfolding against the brownish red stems are a beautiful and welcome sight on the heels of winter, but those early blooms could — usually are — knocked out by subsequent frosty weather. Damaging, late frosts are least likely to occur near large bodies of water, such as the ocean and Great Lakes. Late frosts are most likely to occur in low-lying regions into which cold air sinks on still, spring nights; that would be here on my farmden in the valley of the Wallkill River.
If only that were all . . . Even if the trees stay alive through winters and their blossoms escape spring frosts, the fruits themselves are the target of a number of insects and diseases. Plum curculio, oriental fruit moth, brown rot, black knot . . . the list goes on of afflictions that can reduce the crop to zero. Oh, and did I mention squirrels. My father had a tree that every Father’s Day was stripped of every one of its small, green developing fruits by squirrels.
—————————————————-
Did you ever taste a perfectly ripened apricot, one that’s soft and ready to travel no more than arm’s length from the branch to your mouth? I have (when I worked at the USDA Fruit Laboratory and at a friend’s orchard; he has a good site). Perfectly ripe, the fruit tastes nothing like a lemon, as market apricots usually do, but has just a hint of tartness to offset its rich, sweet flavor. For that, I planted the tree.
My friend Lev with his apricot trees
I wrote that “apricot is unlikely to bear fruit.” “Unlikely” does not mean “never.” A crop of apricots even one year out of — say — every five years will justify, for me, the space and trouble the tree will entail.
I was smart in a couple of ways with my apricot tree. I bought it from a nursery that specializes in fruit trees (www.cumminsnursery.com) and I planted in full sun in well-drained, moderately fertile soil. And the variety is Jerseycot, one of the varieties most resistant to some of the pests and the vagaries of our winter and spring weather.
——————————————————
More foolishness: I just received a confirmation for a nursery order, soon to arrive, that includes a camellia bush. Let me explain. I love living in the northeast but do bemoan the inability to grow certain plants not hardy here, among them southern magnolia, citrus, and camellia. I’ve been tempted to plant the hardiest southern magnolia, Edith Bogue, but

My “citrus” plantation.

restrain myself realizing that the plant might survive but would never become a majestic specimen the tree is meant to be. Citrus? I resign myself to growing some citrus in pots, indoors in winter and outdoors in summer.

The last few years have seen the development of hardier camellias. Long Island Pink is one of the hardiest, with compact stature, glossy evergreen leaves, and single pink flowers in autumn. Still, it’s not really hardy here. I’ll plant it in the partial shade near the northeast corner of my home, protect it through winter its first few years as it develops cold-hardiness, and perhaps my foolishness will pay off.

Tomato Sowing, and More

Sowing tomatoes was the big moment in the garden last week. The sowing was actually indoors and it was on April 1st, which is 6 weeks before the “average date of the last killing frost,” or, to those in the know, ADLKF.
I’m finicky about what varieties to grow because good tomatoes just waste garden space, never getting eaten if great-tasting tomatoes, are also to be had. But look at tomato variety descriptions in seed catalogues and on seed packets, and you’d think that every tomato variety tastes great and is worth growing. 
I read those descriptors carefully to narrow the field. For starters, I avoid any tomato listed as “determinate.” Determinate varieties grow by branching repeatedly because each stem ends in a cluster of fruits. The plants are compact and ripen their fruits over a short season, which appeals to commercial growers. Downsides are that their lower leaf to fruit ratio results in poor flavor and concentrated ripening causes more stress and, hence, susceptibility to diseases.
So I grow only “indeterminate” varieties, whose clusters of fruits hang from along their ever elongating (indeterminate in length) stems. These are the varieties that can be pruned for staking.
Short of tasting a particular variety of tomato, the next descriptor that would guide me is whether or not it’s a “potato leaf” variety. Yes, their leaves look like those of potatoes (a close relative), that is, thicker and with smooth, rather than serrated edges. Still, a lot of great-tasting tomatoes are not potato-leaved.
Pink, heart-shaped tomatoes also have the edge on flavor. Same goes for tomatoes that don’t ripen to a

Two great tomatoes: Cherokee Purple & Amish Paste

uniform red color. Or tomatoes that don’t ripen to perfectly round orbs. I also happen to like dark colored — so-called “black” — varieties. You could almost say that the uglier the tomato (by commercial standards) the better the flavor. Which is not to say that every tomato variety bearing ugly fruits is great-tasting; but it’s a start.

——————————–
A man (or woman, or child) can grow only so many tomatoes. This year I narrowed my lineup to 16 varieties, some old favorites and a few new ones, the new ones chosen on the basis of being indeterminate, perhaps potato-leaved, etc.
The old favorites are Belgian Giant, Anna Russian (good cooked and fresh), San Marzano (good cooked, bad fresh), Cherokee Purple, Blue Beech (good fresh and with unique, good flavor cooked), Amish Paste (good

Some of last year’s tomatoes

cooked and fresh), Rose de Berne, Valencia (orange fruit), and Nepal. Also two cherry tomatoes, Sungold and Gardener’s Delight. The latter was my favorite decades ago and I’m curious now how it compares with the incomparable Sungold.

New varieties for this year are Brandywine Black, Black Prince, Cherokee Chocolate, German Giant, and Black Krim.
—————————————
Whew! That’s a lotta’ tomatoes.
Even with a greenhouse, indoor planting space is at a premium. Besides those 16 varieties of tomatoes, with plans for at least 4 plants of each variety, I have dozens of other vegetable seedlings — broccoli, lettuce, kale, Brussels sprouts, pepper, eggplant, and more — growing or in the works. And multiple varieties of each.
I’m managing all this by starting out sowing seeds in what look like miniature fields. These “fields” are 4 by 6 inch seed flats, filled with potting soil into which I press 4 furrows with my MFT (my “mini-furrowing tool”). MFT is a 4 by 6 piece of plywood with a handle on its upper side and four, spaced out, 1/4 inch diameter dowels glued to its underside. Into the furrows impressed by the dowels I sprinkle the seeds, cover the furrows, and then smooth the “field” with a similar plywood rectangle lacking the dowel underbelly. The seedlings, when they sprout, look like miniature fields of plants.
Once sprouts unfold their second sets of leaves, they’re ready to be “pricked out” and given their own home. That home could be a pot or a cell in a plastic tray of multiple cells. Sliding a small, blunt knife into the potting soil beneath a seedling lets me gingerly grab its leaves and lift it out with roots intact to be dropped

A lot of seedlings in a little space.

into a waiting hole I’ve dibbled with my cone shaped “dibbler.” As each seedling is in place I tuck potting soil in around its roots. Without delay, once a tray of seedlings has been pricked out, I spray a gentle but thorough mist of water to moisten the soil and settle the little sprouts into place without knocking them down.

Seeds and very young sprouts spend one or more weeks — four in the case of slow-germinating and growing celery — in the seed flats, and then another four weeks or so in their cells. That translates to 50 or more seedling in an area 4 by 6 inches for a couple of weeks and then about 20 older seedlings growing up in a space of about a square foot for the next four weeks.
All this not only squeezes oodles of seedlings into relatively small space; it also keeps me intimate with them in their youth. I’ll be planting tomato seedlings out in the garden one week after the ADLKF.
—————————————————-

Tales of Kale

The season’s first peas and potatoes are such a taste treat, radishes are fun, and everyone pines for the first tomatoes. But kale, I think, is the vegetable most worthy of praise. Here I am in the greenhouse, watering kale transplants for the garden even as, right behind me, kale in beds planted last August are still yielding mature leaves for salads and cooking.
Kale is one of the few vegetables that tolerates heat in summer, cold in winter, and every temperature in between. You can just keep picking the lower leaves as new ones keep growing up top. Neither broccoli, cauliflower, cabbage, nor other members of kale’s family can keep up production like that. And other greens, like lettuce, arugula, and mustard, send up seed-stalks and lose their flavor when days get long or hot. The kale in my greenhouse is now sending up seedstalks but the leaves taste as good as ever. Even the flower-heads themselves, which are like small, loose heads of broccoli, taste good.

Although one sowing, in early spring, could keep me in leafy greenery almost all year long, I do three sowings. The first, in early spring, is for planting out in a few weeks for eating from late spring on through summer. Sometimes, usually, I’ll sow again in July for even more greenery well into autumn and, depending on winter temperatures, into winter. The shorter plants of this later sowing are more apt to be covered by snow, which insulates the leaves and keeps them fresh all winter. In August I sow again for planting in the greenhouse, which gives us fresh kale until spring.
If I had to grow only one vegetable, kale might be the one. (I have a friend who does grow only one vegetable, and it is kale.) Besides its ease of growth and its longevity, kale packs a powerhouse of nutrients: vitamin C, vitamin K, calcium and all those other good things found in cabbage kin, and vitamin H (I made that last one up, but kale no doubt contains a lot of not-yet-known goodies also).
————————————————–
Seakale (Cramb maritima) is another “kale” I grow. This one might be good eating; I have yet to taste it even though I had it in the garden for over a decade. Besides being a different plant from kale, it is functionally different in that it has a short season of edibility, in early spring, and it is a true perennial, so potentially never needs replanting. Mine needs replanting this year because, for no apparent reason, it died last year.

Seakale is a salt-tolerant plant native to coastal regions of northern Europe, and it was in those regions that it was first moved into gardens for cultivation as a vegetable. Young shoots need to be blanched (grown in the dark) — by being covered with an upturned clay flowerpot, for example — to make them palatable. The blanched shoots are very tender, so you might never see them in markets. They should make a nice garden or farmden vegetable, though.

I have yet to taste seakale because each spring I’ve never got around to blanching it. Blanching can’t continue too long or the roots will be starved for energy, which comes from sunlight.
Seakale pulled its weight in my garden in other ways than putting food on the table. Its livened up one corner of the perennial flower bed with its silvery green leaves from which arose, in early summer, loose sprays of small, silvery white flowers, almost like the ocean spray in seakale’s native haunts. I never ate the plant because I didn’t want to weaken it and possibly tone down its spring and summer show.
I sowed new seed this week.
—————————————————-
Continuing the “kale” theme brings me to another vegetable, a close contender with kale for ease of

growth, longevity, flavor, hardiness, and nutrition. Seakale beet, as it is known in Britain; known as Swiss chard here. I plant chard just as I do kale, except less of it because it is less nutritious than kale (high oxalate concentration limits its availability of calcium), slightly less cold-hardy, and I happen not to like its flavor as much.

Seakale beet, or chard, is closely related to beet. In fact, both are the same genus and species. Chard is a beet with extra large leaves and an extra small storage root. But beets are another, story, an underground one.
—————————————————-