Viruses Are Good . . . Sometimes
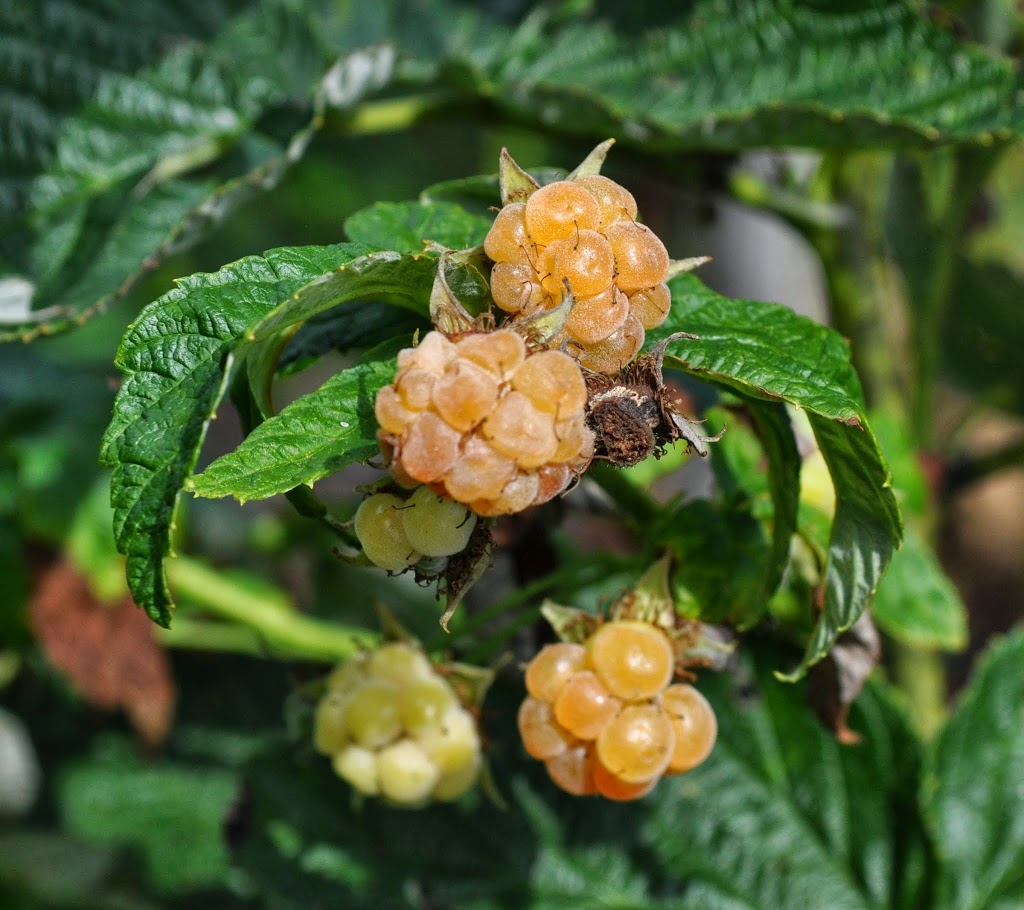
I suspected, and recently confirmed, that my raspberry plants have the “flu.” Okay, not the flu (as in influenza), but a virus, in any case. The plants looked okay but they weren’t bearing their usual abundant crops. And the berries that they were bearing seemed a little crumbly.
The virus culprits were narrowed down to two possibilities, raspberry dwarf bushy virus and tomato ringspot virus. Either of these viruses may also bring on patterned yellowing of leaves, or not, depending on the raspberry variety, time of year, and other variables. (No, raspberry dwarf bushy virus does not make raspberries grow dwarf and bushy.)
Not that viruses are the only things that can make raspberries crumbly. Tarnished plant bug is an insect that feeds on developing flowers and fruits of raspberries and a slew of other plants. If too many druplets of a berry are eaten, the rest of the berry can’t hold together. Boron is another possibility, an
essential micronutrient, the deficiency of which also results in low yield and crumbly fruits. But . . . tarnished plant bugs were not particularly prevalent this year and sandy soils low in humus are where boron is usually lacking. Soil here on the farmden is not sandy and years and years of mulching have maintained very high levels of humus.
Weather — my usual scapegoat for everything this year — can also be responsible for crumbly raspberries, both directly and, by its effect on bees, indirectly. But . . . raspberries flower over a long period so the weather, every type of which we experienced this season, has to be let off the hook this time.
Specific virus infections can be confirmed with a antibody test called enzyme-linked immunosorbent assay, or, for short, ELISA. Back in July, I sent separate samples of leaves from my Cuthbert and Fallgold raspberries to Agdia Labs in Elkhart, Indiana. Bummer, The variety Cuthbert was confirmed to be infected with tomato ringspot virus and Fallgold with dwarf bushy virus.
———————————————–
Once a virus infects a plant, it spreads throughout, and a plant generally cannot be cured. Still, I’m not giving up eating home-grown raspberries, and I’m not settling for crumbly ones either.
The first thing to do is get new plants. No, not plants dug up from my own raspberry patches or from generous neighbors’ or gardening friends’ patches. What’s needed are certified virus-free plants from a nursery that produces such plants.
Ideally, my new plants would go into new ground far from my old planting or wild raspberry or blackberry plants. But where am I going to find a place at the recommended 600 feet(!) “from my old planting or wild raspberry or blackberry plants?” In my neighbor’s yard?
 Tomato ringspot virus is spread by dagger nematodes, and some evidence exists that thorough tillage causes dramatic drops in their numbers. Generally, I rail against tillage for a number of reasons but, hey, gardening and life are about achieving a balance. For my new raspberries, the benefits of tillage might outweigh the negatives.
 Dwarf bushy virus is carried from one plant to the next via infected pollen. Preventing pollination would, of course, prevent fruits from developing. So there’s nothing that can be done to prevent eventual infection if it’s in the vicinity.
Time flies, and I realize now that my raspberry plantings are getting some age to them. Although raspberries are perennial, after about 10 years, any raspberry planting — not just mine — is bound to pick up diseases, some of which result in nothing more dramatic than a decrease in yields. The time clock is up on my plantings. I’m ordering new plants for planting in a new location in soil that will be tilled up and enriched with wood chips, leaves, or other organic material.
I’ll plan on replanting again in by the year 2023.
—————————————————
Virus diseases aren’t always to be cursed, in plants or animals. They can be beneficial.
In dwarf apple trees, for instance. Apple trees are dwarfed by being grafted onto special rootstocks that limit tree size of whatever variety is grafted upon them. (The apple fruits are the same as on full-size trees.) Dwarf trees are more efficient than large trees at converting sunlight into tasty fruits. Malling 9 apple rootstock restricts tree size to no more than about 8 feet high.
Plants can sometimes be cleared of viruses through heat treatment or by cloning whole new plants from a few cells that have not yet become infected. When Malling 9 rootstock was cleared of viruses, it lost some of its desirable dwarfing powers. (The virus-free rootstock of Malling 9 is called EMLA 9.) I’m scared of heights and like to harvest the most apples per square foot of ground, so I made my trees by grafting them on Malling 9, rather than EMLA 9, rootstock.
Looking around my yard, my eyes come to rest on the fantail willow, its branches fused together and
contorting in fanciful directions — more pretty than painful. Such fusion is called fasciation, the result, sometimes, of virus infection.


