A Rose is a Rose is a Rose . . . Not!

Perhaps it was youthful rebelliousness, but for years, for decades, I lambasted my father’s roses. The roses reared up their colorful heads on the other side of the low, clipped privet hedge that bordered our terrace. If youthful rebelliousness was at the root of my rose aversion, that rebelliousness has lasted well beyond my youth, right up to the present day even though those roses are no more.
The plants were hybrid tea roses, in various colors. You’ve got to admit that the shrubs themselves, typically with a few gawky stems topped with disproportionately large blossoms, are not much to look at. The pointiness of the blossoms, a sought-after quality among hybrid tea breeders, is, for me, particularly unattractive. Couple that with the blaring colors and you get the picture, for me, that is.
Hybrid tea roses are not particularly tough plants, succumbing to insects, diseases, and winter cold. Which is why my father grew them practically as annuals, often having to replace dead bushes with new ones. What a waste.
——————————————
Times change, and over the last few years I’ve become a fan of roses. No, not hybrid tea roses! Other types of roses, of which there are many.
Here’s my criteria for a worthy rose (not necessarily in the order of importance): Insect and disease
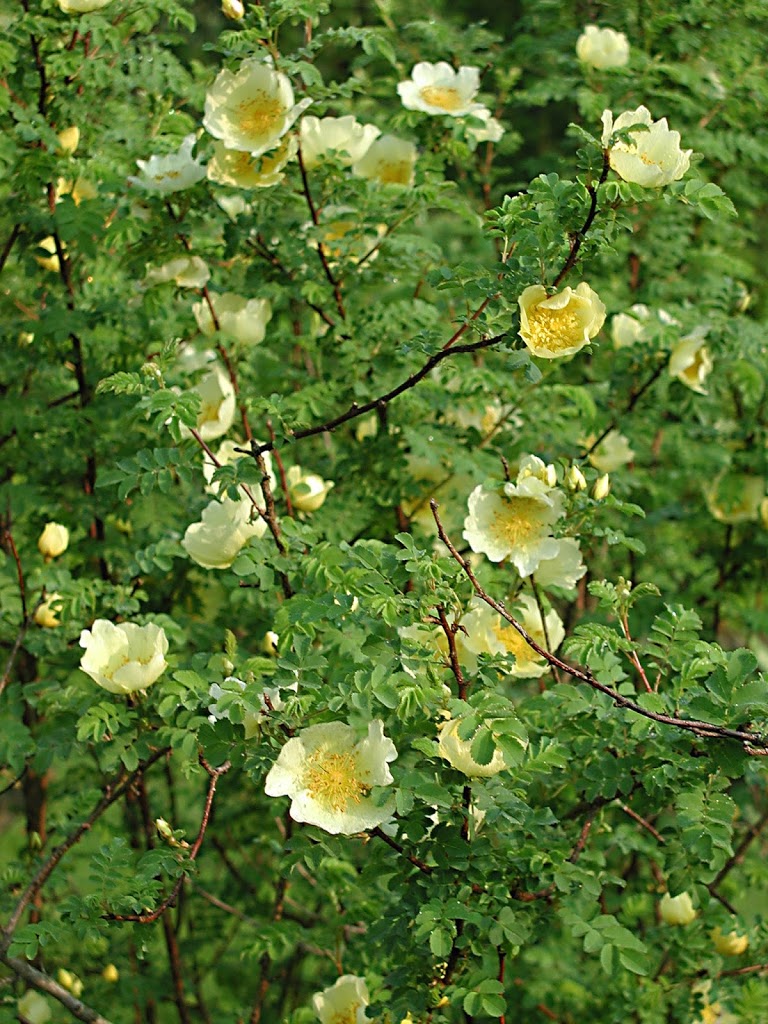
Father Hugo’s rose

resistance; a full-bodied, corpulent shrub; cup-shaped or single flowers; pastel colors; fragrance; and repeat-blooming. Hybrid tea roses generally lack all these qualities, except for repeat-blooming.

Some species and old-fashioned roses tend to have the qualities I seek. Father Hugo’s rose, Rosa hugonis, is one such rose with single, small, soft yellow blossoms and ferny foliage. It’s supposed to be a tough rose, but mine hasn’t yet lived up to that billing. Too much weed competition, perhaps.
Rugose rose (R. rugosa) is another outstanding rose, this one living up to its reputation for being tough. So much so that it’s considered invasive in some places. Still, I like it for its nonstop blooms of single, usually pink-red flowers, its strong fragrance, and its nice hips — fruits that is, very tasty.
If I had to choose just one rose to plant, that rose would

Rose de Rescht

be my old-fashioned Rose de Rescht. Its petals are soft cerise in color, and are crumpled like crêpe paper with just a bit of organization on the ends of flower stalks. The fragrance is heavenly, to my nose the best of any rose.

Some modern roses — but not hybrid teas! — have also

Apricot Knock Out rose

won me over to my father’s camp.

One such group of moderns are the Knock Out® roses. Very unclassical in appearance, with short, wide stature and mostly single-petalled flowers, these roses are tough and carefree, and bloom all season long. The colors would be gaudy except for their being pleasantly  subdued by the small size of the flowers and their lush and abundant backdrop of glossy, green leaves.
David Austin L. D. Braithwaite
The other modern roses that have won me over are the David Austin roses, all bred with the goal of combining the look and fragrance

David Austin Strawberry Hill

of the old-fashions with the repeat blooming and pest resistance of the moderns. Right now, Strawberry Hill and L. D. Braithwaite are growing very well in my garden, partly the result of a very mild winter.

——————————————-
My father eventually came around to my way of thinking and gave me free rein to rip out his hybrid tea roses and replace them with a mix of other perennial and annual flowers. The view from the terrace was transformed into a spring through autumn panoply of colors and forms from the likes of tree peonies, ligularias, lungwort, bleeding heart, and other perennials. The one constant following the transformation was the line of begonias or marigolds that marched along the edge of the bed, just as they did when the bed was home to roses.
——————————————
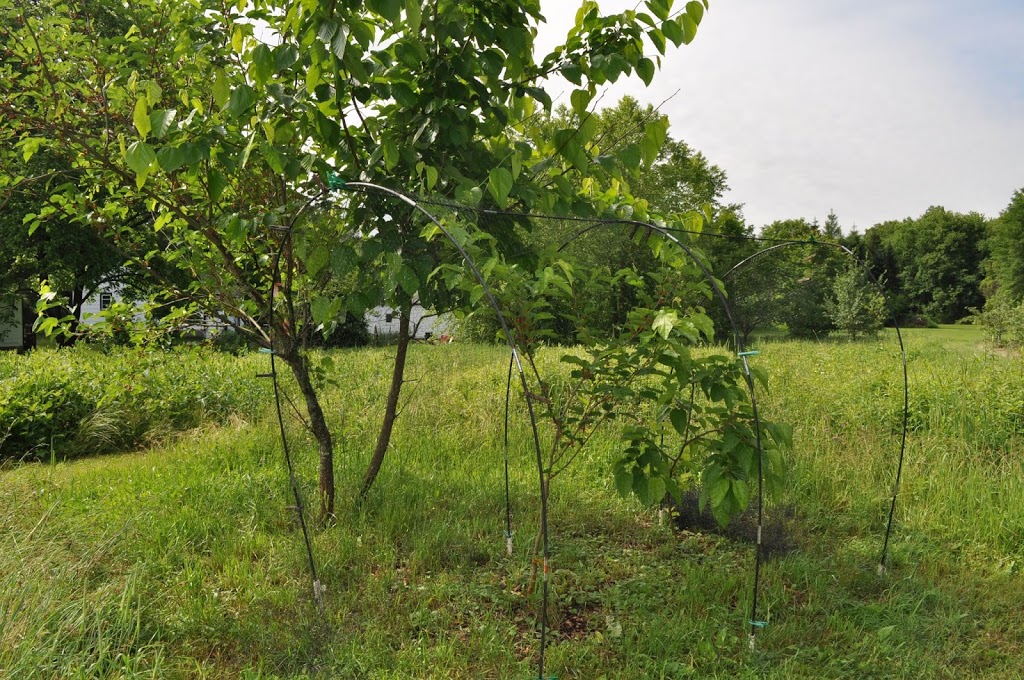
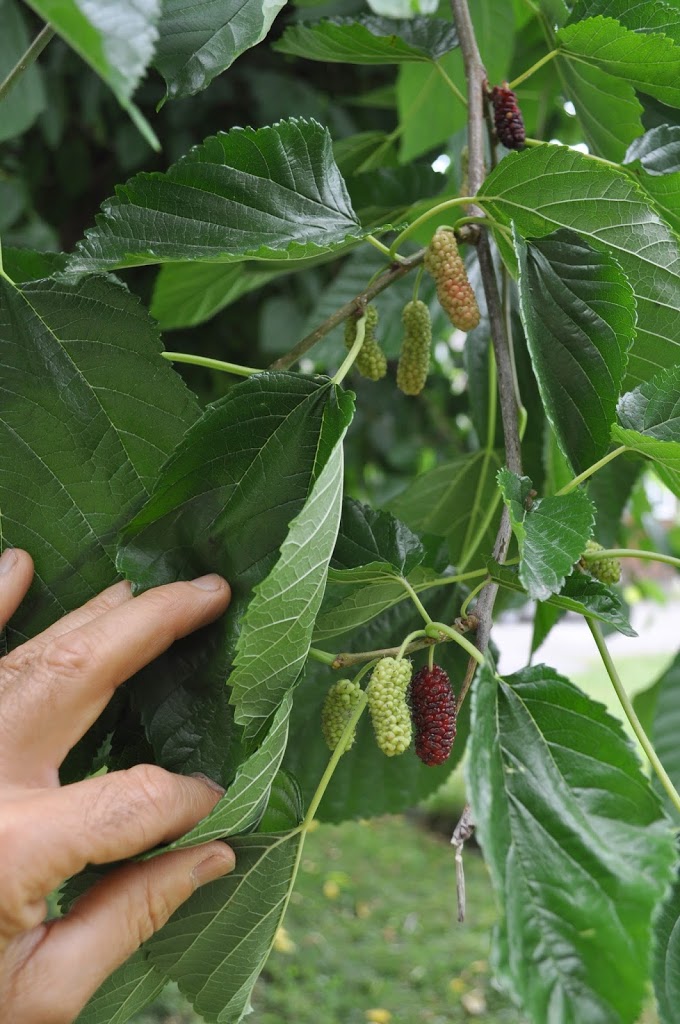
Mulberries have ripened, so a taste test was in order: Illinois Everbearing vs. Oscar vs. Kokuso vs. Gerardi Dwarf vs. random seedling. Oscar was best with Kokuso and the seedling a close second, followed by Illinois Everbearing and then Gerardi Dwarf. These ratings aren’t writ in stone, for me, because confounding everything were big flavor changes that depended on slight changes in ripening — I think.
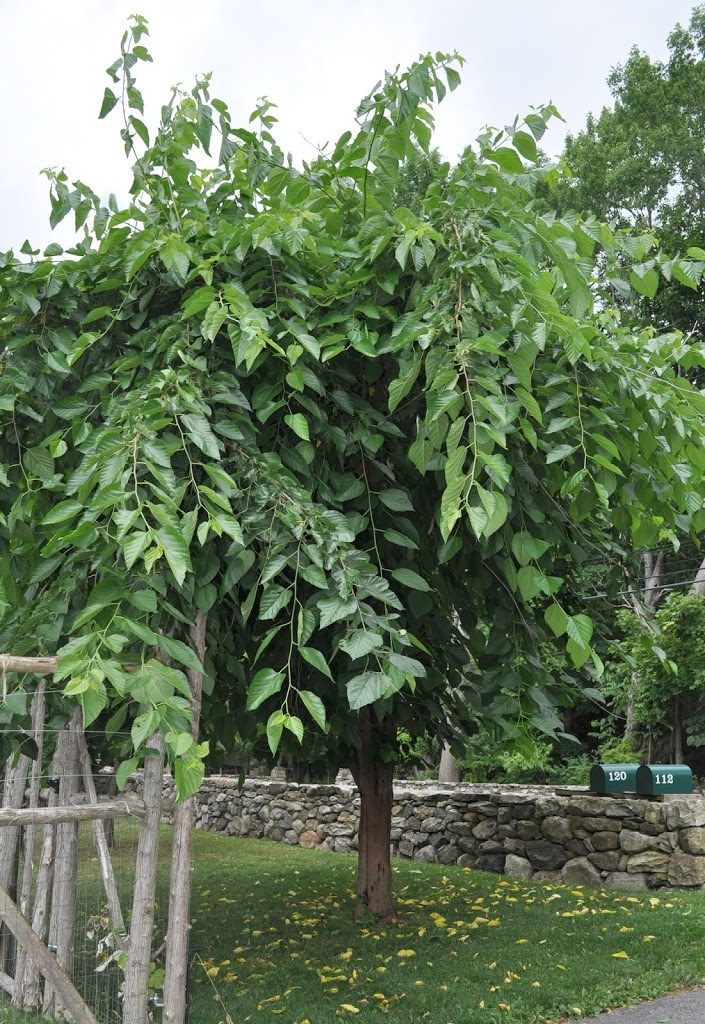
Note that black mulberry — the species Morus nigra — was not in the running. That’s because the fruits won’t be ripe for awhile and because, I know from experience, it’s far and away the best of them all.

Mulberries, And The Winner Is . . .

I’ve been a fruit nut for a long time, and throughout that time have had a particular attraction to uncommon fruits (about which I wrote a book). Evidence of the latter began with  the planting of a mulberry tree in my front yard when I lived in Wisconsin. The plant and fruit seemed intriguing; little did I know, back then, that mulberry trees were growing all over the place. Right now, I could probably bump into a dozen wild trees within a quarter mile of here, or within a quarter mile of my old domicile in Wisconsin. Mulberry is the second most common “weed” tree in New York City.
Commonness is one reason that mulberry doesn’t “get no respect.” Also, fruits from run-of-the-mill trees are too cloying for most tastes. Still, the fruits are abundant, local, organic, and sustainably “grown,”

and some trees have better than run-of-the-mill flavor. The latter are available as named varieties.

Which is why I could be seen today bending flexible poles aver two small trees. Mulberry fruits are a favorite of birds; I needed to protect the fruits. The two trees — the varieties Oscar and Kokusu — allegedly bear delicious fruits. Taste of the fruit from these small trees will confirm whether or not they are worth keeping and growing into larger trees. If worth keeping, the trees, once large, will bear enough for the birds and humans.
My bird protection was easily erected. The ends of the flexible poles, in short sections held together by an inner elastic cord (from www.gardeners.com), like tent poles, went into foot-long pieces of PVC pipe that I pounded into the ground. Clothespins hold bird-netting in place on the poles and metal staples pinned the netting to the ground.
———————————————–
‘Illinois Everbearing’ fruit
Three species of mulberry are commonly eaten: white mulberry, Morus alba; red mulberry, M. rubra; and black mulberry, M. nigra. (Fruit color has nothing to do with species names; many white mulberry trees bear black fruits.) In the eastern part of the U.S., we find our native red mulberry as well as white mulberry, introduced from Asia in the early 19th century, as well as hybrids of the two. Black mulberry thrives best in Mediterranean-type climates.
Right next to my two little trees I have an older mulberry, the variety Illinois Everbearing, a natural hybrid of the white and red mulberry species that does indeed bear over many weeks. My Oscar tree is probably a variety of white mulberry. Kokuso is sometimes listed as its own species, M. latifolia. At any rate, all three varieties are supposed to be hardy and delicious.
‘Illinois Everbearing’tree
I can vouch for Illinois Everbearing because I’ve grown it for a number of years. Although hardy, branches often die back because they don’t realize, towards the end of summer, that it’s time to slow down growth and toughen up for winter. I make it slow down as summer wanes by letting grass and weeds grow high at its feet, sucking up excess moisture and nutrients.
————————————————
The best-tasting of the mulberries, I’d even stick my neck out so far as to say perhaps the best-tasting of all fruits(!), is the black mulberry species. The berries aren’t particularly big but they pack enough flavor that they could be the size of an orange. Their flavor has a nice balance of sweetness and tartness along with some  . . . je ne sais quoi. Mulberryness?
Problem is that black mulberry is not hardy here. I’ve grown it in a pot, but a potted plant has only a limited amount of stems on which to hang fruits so yields are very low. I planted one right in the ground in the greenhouse a few years ago, planning to espalier it as directed in my book, The Pruning Book: “To train a

M. nigra in greenhouse, prior to its demise

mulberry to a tidy form, develop a main set of limbs, then prune branches growing off these limbs to six leaves in July to make short, fruiting spurs.” Not so! I garnered that pruning information from a British book, and it’s evidently is another gardening Britishism that doesn’t work on this side of the pond, probably due to differences in daylength and/or summer temperatures. My tree has done nothing but grow and grow, with little fruit on the abundant, lanky stems.

This week I ripped the black mulberry out of the greenhouse and planted, in its stead, a fig to accompany the three other in-ground figs there. 
A few weeks ago, before the black mulberry awoke from its winter slumber, I cut off a branch and grafted it onto a similarly sized branch of the Illinois

Morus nigra fruits

Everbearing tree. Black mulberry isn’t supposed to be cold-hardy outdoors here, but who knows? It’s a very long shot. As I said, I can’t believe everything I read, even if I wrote it. This time I hope that all of us are wrong.

A Moon Landing?

Anyone visiting my garden a few days ago might have thought they happened upon a moon landing or extraplanetary explorer. A two-legged creature was wandering around in bright blue pants and a bright blue, hooded jacket (actually, rain gear) with goggles and a respirator and 4 gallon tank strapped to its back. Periodically, an engine whine was accompanied by a cloud of mist (a jetpack)?
The creature was me and I was doing what was necessary to put myself on the road to a harvest of delicious apples (especially the variety Hudson’s Golden Gem) and plums (especially the variety Imperial Épineuse). I was dolled up for what looked like a moon landing because I was spraying pesticides on my

trees. In this part of the world, sad to say, that’s generally what’s necessary to get a decent — sometimes any — crop of apples or plums.

Some years I grow these fruits organically; some years I grow them, as some commercial growers say, ecologically or biologically. My organic approach is to spray a special formulation of kaolin clay, called ‘Surround’, and sulfur, a naturally occurring mineral. ‘Surround’ keeps insects at bay; sulfur does the same for some diseases. To be effective, ‘Surround’ must be maintained as a dust-like, white coating on the trees. This laid-back Mediterranean look to the trees necessitates a not very laid-back 3 sprays, before bloom, to build up a base layer, and followup sprays every week or following as little as 1/4 inch of rainfall. Even then, in my experience, control is marginal.
My ecological/biological approach is to spray the horrible sounding material, Imidan, with, again, sulfur. Imidan is a chemical pesticide, but one that has a relatively low toxicity both to humans and to beneficial insects. A perfect year would require only 2 to 3 sprays, the first right after petals drop and the others before mid-June. Re-spraying is usually not needed until after an inch of rainfall. Between rainfall washing off spray, sunlight degrading it, and dilution due to fruit growth,

‘Surround’ on apples

fruits are essentially squeaky clean by harvest time. (After the end of June, approaches other than sprays thwart remaining major pests.)

Back to my moon suit . . . The suit is necessary no matter what I spray. Getting doused with, or breathing, even something as benign as kaolin clay is not good.
And the jetpack? That’s my backpack sprayer. Spraying anything is no fun. Fortunately, except for the apples and the plums, spraying is almost never needed here on the farmden. Also fortunately, my sprayer makes easy work of the job. It’s a Stihl, gasoline-powered backpack sprayer that always starts right up, gives good coverage, and lets me, in less than a half an hour, mix the spray, apply it to about 2 dozen trees, and thoroughly clean it.
———————————————-
Spraying pesticides, organic or otherwise, is not the only approach to keeping plants healthy. Any insect or disease problem can gain a toehold only when there’s a plant susceptible to the problem, an organism that can cause the problem, and a suitable environment in which the problem can develop. So, I beef up my plants’ defenses by paying special attention to the soil, making sure drainage is perfect, and by applying

Good soil, organic matter added from the top down

mulches of compost, wood chips, hay, and other organic materials. The mulches feed the plants as well as worms, fungi, and other “good guys” in the soil. Above ground, pruning lets branches bathe in sunlight and air, both of which make for better fruit and conditions less conducive to insect and disease problems. If my plants are thirsty, they get water.

What I do not do to make my plants healthy is apply compost tea, biochar, or any other potions, or, along the same lines, click my heels together three times and repeat, “There’ll be no pest problems.”
For apples and plums in this part of the world, all three requirements for pest problems — pest presence, susceptible host plant, and environment suitable for the problem to develop — are generally fulfilled. Hence, the necessity of sprays. Still, using a minimum of carefully selected sprays and needing to “ship” my fruit no more than 200 feet from the trees to my mouth (or kitchen) makes for a minimum affront to the environment.
People too often equate “fruit growing” with growing apples. That should not be the case because there are plenty of other fruits, and plenty of them can be grown with hardly a thought to pest control. Pears, for instance. I have about 20 pear trees; none require spraying. The same could be said for blueberries, raspberries, persimmons, cornelian cherries, blackberries, pawpaws, hardy kiwifruits, gooseberries, currants . . . I could go on. In some cases, such as grapes, choosing a disease-resistant variety is the way to avoid having to spray.
As I emphasize in my recent book, Grow Fruit Naturally, choosing plants adapted to your site is a very important part of growing fruit naturally, as is providing optimum growing conditions. 
——————————————-

A Visitation, Clematis, and a Workshop

Last minute notice: Come visit my farmden, in real life. As part of the Garden Conservancy Open Days program, I’ll be hosting visitors between 10am and 4pm. For more information about this visit or other sites, contact the Garden Conservancy (www.gardenconservancy.org).

————————————————————
Letting a few clematis plants grow is the closest I’ve come to playing the lottery. It looks like I’ve won, judging from the first flower that opened last week.
Let me explain. I have a half dozen or so clematis plants of named varieties that I got from nurseries. A few years ago, I started noticing small plants — seedlings of the named varieties, especially from near a Nelly Moser plant — sprouting near the mother plants. I meant to save a couple, I even transplanted some, but these first seedlings succumbed to neglect. More recently, I’ve paid closer attention to the seedlings, especially those that sprouted fortuitously near the fence around the vegetable garden.
The gamble was that some seedlings would be garden-worthy. (Not that big a gamble; if not garden-worthy, I could just dig them out and walk them to the compost pile.) Named varieties of clematis, such as

Seedling of Nelly Moser

my plant named Nelly Moser, are propagated by cloning. That is, every Nelly Moser plant is genetically identical to every other Nelly Moser plant. Clones of any plant are propagated by root, leaf, or stem cuttings, by grafting, or by some other method of asexual propagation.

My seedlings arose from seeds that dropped from a pollinated flower, that is, the seedlings are the result of the sexual union of pollen and egg cells. Whatever jumbling around of genes happened during that union will be reflected in the plants’ growth and flowers.
My first seedling flower spread open clear, blue petals — beautiful. It’s a keeper. If I deem it truly and uniquely spectacular, I could give it a name and multiply it asexually to spread the joy. Then it would become a named variety or, to use the more professionably acceptable term, “cultivar,” from the words “cultivated variety.” The word “cultivar” grates on my ears; I refuse to use it.
——————————————-
That unspeakable “c” word came about because the word “variety”was too general; it could mean two different things, plantwise. One meaning is a garden variety, as in Nelly Moser clematis. The other kind of “variety” is a botanical variety.
In the classification of plants, a botanical variety is a subclassification sometimes occurring within a

Nelly Moser clematis

species. That occurs if there are populations within the same species that are sufficiently similar to distinguish themselves from other populations within a species, and the differences are inheritable. (Both populations are, of course, sufficiently similar to be included within the same species.)

Botanists have not chosen to bastardize the English language with so ugly a word as “botanivar” tomean a “botanical variety.” Likewise, there’s no reason for horticulturalists to bastardize our language with the word “cultivar.” I’ll stick with “cultivated variety” or, if the sense is obvious, just “variety.”
——————————————-
The flowering habit of my clematis seedlings is also of interest. That is, when does it flower? Some clematis flower only on new growth, which means they flower later in the season. Some clematis flower only on old growth, which means they flower early in the season. And still other clematis flower on both new and old growth, which means they flower early and late, over a long season.
As I detail in my book, The Pruning Book, pruning technique varies depending on a clematis plant’s flowering habit. Early bloomers are best pruned right after they finish blooming. Late bloomers are pruned before growth begins for the season. And you do a little of both for plants that bloom early and late. (My book groups cultivars — whoops, I mean varieties — of clematis according to their flowering habits and pruning needs.)
My seedlings have mostly appeared near the “feet” of Nelly Moser, which flowers early in the season, so

Nelly Moser and its baby

presumably will be similarly inclined. That is the case with the seedling that recently unfolded its blossoms. But it could flower again this season.

For now, I’m enjoying the flowers of the first bloomer and looking forward to what unfolds on the stems of other seedlings.
——————————————-
“How to Grow a Lot of Vegetables with Little Space, Time, and Effort” is the topic for an upcoming workshop I’ll be holding here at my farmden in New Paltz on June 23rd, from 9 to 11:30 am. (The growing season is still young: It’s not too late to get more out of your garden; it’s not even too late to start a garden!) The cost is $50 and space is limited so registration is necessary. For questions or registration, contact me at garden[at]lee reich.com.

Back to the Future

Time to jump into the future, again. It’s autumn of this year and tomatoes, peppers, cucumbers and other summer delicacies are on the wane. Does the vegetable garden appear melancholy and forlorn? No! It’s lush with savory greens that thrive in that cool, moist weather to come, vegetables such as kale, broccoli, cabbage, radishes, turnips, lettuce, and endive. (Right now I hunker more for tomatoes and peppers than cabbages and turnips but nippy temperatures and shorter days will, I know from experience, bring on the appeal of autumn vegetables.)
Planning and planting need to take place right now in order to realize my autumnal vision. First on the agenda will be sowing seeds of cabbage and broccoli, in early June, not right out in the garden but in seed flats from which, after about a week they’ll be pricked out into individual cells in plastic trays. A little more

than a month after that, the plants will be ready for their permanent home in the garden. That might be where early bush beans or summer squashes had been sown, harvested, and cleared out of the way. The point is that autumn’s broccoli and cabbage plants, although sown in early June, need not take up space in the garden until late in July.

—————————————-
As I wrote a few weeks ago, information on frost dates, both the last spring frost  and the first autumn frost dates — can be gleaned by choosing a state from the website http://cdo.ncdc.noaa.gov/climatenormals/clim20supp1/states/ and then finding weather data for a nearby location. That nearby location for me is Poughkeepsie, NY, for which there is a 50% chance of the temperature dropping to 32°F on October 9th.
I figure when to plant broccoli and cabbage by counting back the number of days these plants need to reach maturity from the average date for the first killing frost. And then I add more days because I don’t want to necessarily wait until that first frost date before I can start harvest.
Not that 32°F. would spell the death knell for broccoli and company. But growth slows dramatically as weather cools and days grow shorter so I like to have my plants pretty much fully grown and ready for harvest before the first frost date. With cooler temperatures, vegetables can sit out in the garden patiently awaiting harvest in good condition. (In warmer regions of the country, vegetable plants will actually grow through winter, making autumn a fine time to sow peas or set out cabbage transplants.)
——————————————
Other vegetables, with different numbers of days needed to reach maturity, need sowing on various dates through summer. Here’s the planting schedule for my zone 5 autumn garden having an early October first frost date (as well as additional planting dates for vegetables of summer); where frost dates occur earlier, push sowing and planting dates the same amount of time earlier, and vice versa for regions with later frost dates:
•June 1: sow broccoli and cabbage in seed flats; sow small amount of lettuce and cilantro in seed flats or in garden;
•June 7: 3rd sowing of corn and 2nd sowing of bush beans in garden;
•June 14: 2nd sowing of cucumbers in seed flats; sow small amount of lettuce and cilantro in seed flats or in garden;
•June 21: 4th sowing of sweet corn in garden; 2nd sowing of summer squash out in the garden; sow small amount of lettuce and cilantro in seed flats or in garden;
•July 1: sow endive and parsley in seed flats; 3rd sowing of beans in garden;
•July 15: sow beets, chard, turnips, kale, and winter radishes in garden; sow Napa-type Chinese cabbage in seed flats;
•August 1 – September 1: multiple sowings of spinach, small radish varieties, mâche, arugula, mustard greens, and pac choi type Chinese cabbage in garden (early sowing will likely bolt but later sowings will press on late into autumn); keep planting lettuce.
All plants growing in seed flats are transplanted out to the garden as soon as they begin to grow too big for the flats, which is typically four to six weeks after seeds are sown.
——————————————
Multiple plantings of bush beans and cucumbers are ways to keep ahead of bean beetles (yellow, with dark spots) on the beans and striped cucumber beetles (yellow, with dark stripes) on the cukes. It takes awhile for new plantings to get attacked, and that attack is mitigated by whisking the old plants, with potential attackers still feasting, out of the garden to the innards of the compost pile. Multiple plantings also help with summer squashes’ squash vine borers, evident from wilting leaves and a sawdust-like frass that oozes out of stem, although I’m usually glad to be rescued from excess-squash-syndrome by the time the borers take plants down.
The above schedule omits a few vegetables. Carrots: I don’t grow them, but if you do, July 15th is the date to plant them around here. Some people have luck with autumn peas. I don’t because first it’s too hot for them and then it’s too cold for them. Still, if you want to take a chance, sow them August 1st.
And what about rutabaga, parsnip, and kohlrabi? All I can say is, “Yuk!”

It (Could Be) Cold

I see a lot of gardens under wraps this morning, plants covered with upturned buckets or flowerpots, or blanketed under . . . well . . . blankets. Day after day of balmy temperatures have made it hard to hold back finally getting vegetable and flower transplants out of their pots and into the ground.
But temperatures just below freezing were predicted for last night (May 13th) and everyone got a wakeup call: Freezing temperatures, which could kill tomato, marigold, and other tender plants, are still possible. It’s all about averages; around here, there’s about a 10 percent chance of a frost the middle of May.
The likelihood of cold, frosty, or freezing temperatures has been detailed — see http://cdo.ncdc.noaa.gov/climatenormals/clim20supp1/states/NY.pdf — for locations throughout the country. The closest weather station connected to that site around here is in Poughkeepsie, and in mid-May that site has a 50% chance of experiencing cold weather (36°F.) and a 10% chance of of experiencing frost (32°F.). Cold air, being heavier than warm air, sinks to low-lying spots on clear still nights, such as last night, so my garden in the Wallkill River valley is usually a few degrees colder than surrounding areas, such as Poughkeepsie. Fortunately, temperatures last night here dropped only to 31° F.
———————————–
Not that lower temperatures would have done my vegetables or flowers any harm. I took the advice I’ve been doling out to others for the past couple of (warm) weeks, and held off planting anything that could be harmed by frost. So tomatoes, peppers, melons, and the like are still in pots that I moved into the warmth of the greenhouse last night.
I’d like to plant out all these cold-tender seedlings but chilly temperatures are predicted for the next few night. Even chilly temperatures, let alone freezing temperatures, are not good for tender plants.
Still, anyone looking out over my garden this morning would have seen white blankets over some beds and overturned flowerpots over a few plants. Because my garden is in a cold spot, temperatures well below freezing were not out of the question for last night. Cold enough temperatures could damage cabbage and its

kin, lettuce, onions, and other cold-hardy transplants that have been growing out in the garden for the past couple of weeks. I had some row cover material readily on hand, so why not, methought, throw it over some of the beds anyway? Just in case.

Throwing covers over plants at 7 in the evening is a lot more pleasant than waking up at 3 am with the sinking feeling that temperatures have really plummeted and then, if they in fact did, running outdoors in the cold darkness to cover plants.
——————————-
Fruit trees, shrubs, and vines present another story. A freeze won’t kill the plants, but low enough temperatures could kill flowers or developing fruit, as it did on many fruit plants last year. One frigid night and you have to wait a whole year for the next crop. Unfortunately, not much could be done about this situation. Fruit plants here are too many or too big to cover. My tack is to keep fingers crossed.
Critical temperatures for fruit damage vary with the kind of fruit, the stage of flower or fruit development, the depth of cold, and the duration of cold. Probably other things, too, such as humidity and plant nutrition. 

An excellent table of “Critical Temperatures for Frost Damage on Fruit Trees” can be viewed at http://extension.usu.edu/files/publications/factsheet/pub__5191779.pdf. So, put simply, 25°F would spell death to 90% of my apples, which are in full bloom, and pears, which are post-bloom, and 28% would do in 10% of their fruits. Plums, also post-bloom, tolerate a bit more cold.
In addition to crossing fingers, my tack is also to grow a variety of fruits, and especially native fruits.

Pawpaw blossom, from below.

(Apples, pears, peaches, and most plums are not native.) It’s not a chauvinistic choice; it’s just that these natives — American persimmon, pawpaw, blueberry, grape, and gooseberry, to name a few — are better adapted to our conditions. And not just the weather here. Pests also.

This spring has been the most perfect spring in a long time, with plenty of clear, sunny days and gradually warming temperatures that kept blossoms from jumping the gun. Playing the averages, the critical cold periods should be pretty much be behind us. As with the stock market, though, “Past performance is no guarantee of future returns.”
————————————————–
Update, May 17th: Warm days and nights that are not too chilly are predicted for the next few days, so I planted out tomatoes and peppers today. I’ll still keep an eye on temperatures because there’s still a 10% chance of temperatures dipping to 36° as late as May 28th according to records at the nearby Poughkeepsie weather monitoring station.
Turning compost

Compost and Cucurbits

You’d think, this time of year, that all I’d be doing is sowing seeds and transplanting small and large plants. I am. But I’m also turning compost piles, getting ready to use that “black gold” this autumn. Why now? So the stuff has time to mellow and to make space for new compost piles that will be built from now through autumn.
Here’s my compost routine: All summer and into autumn I fill empty compost bins with hay, wood shavings, horse manure, weeds, kitchen waste, and old garden plants along with some sprinklings of soil, limestone, soybean meal (if extra nitrogen is needed), and sufficient water to moisten the ingredients. When a bin is full, which means loaded up about 5 feet high, it gets covered with a sheet of EPDM rubber roofing material to keep excess moisture out and to seal in whatever moisture is within. A numbered label on each pile gets recorded to remind me when the pile was completed, what went in, and, with the help of a 2-foot-long thermometer, how much heat, if any, was generated.
Fast forward to today. I’m flipping over the contents of two compost bins, one completed last July and the other last August, into empty adjacent bins. Turning over the contents lets me see how the compost

has fared over the past 10 months; some piles might still be a bit raw, others are just about finished and ready for use. No matter, I don’t need any compost yet.

No rule that says compost piles have to be turned at all. I do it because I like to see what’s been going on and so I can make slight adjustments, as needed.  Sometimes a little more water is needed. Turning the pile also gives me the opportunity to break up any clumps of material and render the finished pile more uniform.
One of the piles I turned this spring had so much undecomposed hay in it that I sprinkled on some soybean meal as I turned it. Even that wasn’t one-hundred percent necessary; the high nitrogen soybean meal just speeds decomposition. Leave any organic materials (that is, something that is or was living) piled together long enough, with a bit of moisture, and it will definitely turn to compost. As my bumper sticker reads: “Compost happens.”
————————————————–
One more reason for turning and organizing all of last year’s compost piles is to make space for growing melons and squashes. My vegetable garden is very intensively planted, with 3 foot wide beds packed tight with one or more vegetables growing together or in sequence, perhaps even trained skyward to get more out of the space. The long, sprawling vines of melons and squashes don’t fit into this scheme of things.
The compost bins — 4 foot by four foot by 3 to 4 foot high cubes —  are perfect for these vines. Three or 4 plants poked into the rich compost through holes made in the rubber roofing can sprawl to their hearts’ content, spreading out to cover the tops of the bins and then, if they like, draping down to the ground, even creeping along the ground if that’s their whim. 
Melons and squashes thrive in rich soil, and my plants roots couldn’t find themselves in a richer soil than the pure compost within the bins. Plenty of water is needed to plump up the fruits; the compost clings to enough water so that watering is hardly necessary.
————————————————–
The only melon that does not get planted on a compost bin is watermelon. But even watermelon doesn’t go in the garden. It goes onto a pile of wood chips or leaves I had dumped here last autumn and winter.
In contrast to the muskmelons, honeydews, and cantaloupes, all which bear a few fruits and then give up the ship, watermelon vines just keep bearing and bearing until stopped by frost or short days. I’ll

need to get into the compost bins before frost and short days; muskmelons, honeydews, and cantaloupes will be gone and out of the way but watermelon would not.

Also, watermelons don’t demand a rich soil. “Soil” that’s either partially decomposed leaves or wood chips is poor in nutrients, to say the least. So poor that when I plant in the leaf or wood chip pile, I scoop out a generous hole and fill it with compost to get the plant off to a good start. During the growing season, I’ll occasionally dose the watermelon plants with some soluble fertilizer.
All kinds of melons thrive in heat, in the air and in the ground. Freshly turned compost and old leaves or wood chips aren’t static. They are decomposing and, in doing so, generating some heat. All of which makes for good crops of good-tasting melons.

Deferred Gratification

If there’s one thing I don’t like about gardening, it’s all the deferred gratification, all  the looking to the future. That future might be 3 or 4 weeks hence, when I’m planning to start harvesting the radishes that I’ll be sowing today. Or 8 or 9 weeks hence, when I’ll start harvesting tomatoes from plants I’m nurturing today and that I sowed in early April for planting out towards the end of May.
And it doesn’t end. No sooner will a large portion of the seeds and transplants be snuggled into this season’s garden than I’ll be sowing seeds of cabbage and broccoli for eventual transplanting in midsummer for harvest in autumn. Planning for autumn now! Shudder the thought, but it’s got to be done. I don’t want to even think about autumn’s impending cold weather with this wonderfully warming spring weather.
Okay, let me take a deep breath and resolve this not-living-in-the-present of gardening. It’s not really that bad. I figure out what has to be done — a written schedule updated as necessary from previous seasons’ notes is crucial for this — and and then immerse myself in the all-present of doing it. And it’s not all for end results; there’s the joy and satisfaction of watching plants grow and come into fruition and respond to my ministrations.
—————————————————–
In some cases, the longer the period of deferred gratification, the greater the satisfaction.
I wrote back in February about the excitement of seeing white roots of some yellowhorn tree seeds that were sprouting in potting soil in a plastic bag in my refrigerator. I planted all those in pots. But also, in that plastic bag, were some hackberry seeds I had collected last autumn. They were doing nothing. Nothing obvious, that is.
Seeds of woody plants that ripen in autumn have a dormancy that lasts until they think winter is over. Winter for my hackberry and yellowhorn seeds takes place in my refrigerator, which is ideal because the

temperatures that spur seeds — and plant growth, for that matter — awake are between about 30 and 45°F. That’s why yellowhorn seeds awoke back in February. Outdoors, the requisite number of hours in that temperature range might not have accumulated until around now.

Hackberry seeds evidently need to experience more chilly hours before they’re convinced to wake up, which happened last week. I potted up the delicate little seedlings.
In 20 years or so, those six hackberry seedlings should be large enough to be clothed in a corky bark that, especially in winter, displays crisp, achromatic

shadows reminiscent of the lunar landscape. Perhaps by then the plants will be old enough to bear pea-sized, date-flavored fruits. Not that the fruits offer much more than a nibble; within each pea-sized fruit is an almost pea-sized seed, leaving just a thin covering of sweet flesh.

—————————————————–
Sometimes — usually — it’s best to let Mother Nature do the planting. On a recent drive to West Virginia, where the spring season is about a week ahead of here, the mountainsides were awash in redbud bloom.
Usually, I not a fan of redbud. It’s the color. Pinkish purple. Yuk, and too flamboyant. At least, to me, from isolated trees that blare out their color from front or back yards.
But isolated redbud trees as well as large swathes of them livened up the scene as they nestled in among forests of trees

unfolding soft-colored, pale green blossoms and young leaves.

On a shorter time scale, I see Ms. Nature has also done a nice planting of cilantro. In the couple of beds where cilantro stood last year (from self-sown seeds of the previous year), small plants are now ready for harvest. And I didn’t even have to think ahead to plant them.

Rational in Spring? No.

People are funny, and that includes gardeners. Gardening is basically simple: You put a seed in the ground and, backed by millions of years of evolution, that seed grows. Sure, there are a few more wrinkles, like choosing a sunny spot (for sun loving plants), a well-drained soil (except for bog and water plants), and enriching the ground with organic materials, and, perhaps, fertilizer.
But people love to complicate things. Hence, compost tea, biochar, and now, straw bale culture. A recent article in the New York Times about straw bale culture has everyone — or at least the handful of people who told me of their plans for the season — trying out this new and allegedly wonderful alternative to merely dropping seeds in the ground.
Actually, straw bale culture is not “new.” I wrote, over a decade ago, in my book Weedless Gardening, “Straw bale culture of vegetables originated in Europe from a need to grow plants where diseases had built up in greenhouse soils. The idea is to set a bale of straw on the ground and grow a plant right in the bale. You do this by poking a transplant into a hole gouged in the top of the bale and sprinkling some fertilizer on it. Given adequate water and nutrients, the plant roots grow throughout the bale, hardly realizing that they’re not in real soil. There’s no reason why this method could not be used to start a small garden anywhere. Put some paper down on the ground and create mulched paths between the bales.”
Yes, the method could be used “anywhere,” but there are also good reasons not to. First, straw bale culture is not really organic. With this method, plants are fed mostly by soluble fertilizers sprinkled on the bales. The essence of organic gardening is to feed the soil which, in turn, feeds the plants. Plant foods are released from the soil matrix through microbial action. Microbes respond, as do plants, to warmth and moisture, so nutrients become available to plants in synch with plant needs. In straw bale culture, roots are bathed in readily available nutrients whether they want them or not.
Barring diseased soil or trying to garden on a rock ledge, why use straw bale culture in the first place? What’s wrong with dropping a seed in waiting furrow in the ground? 
—————————————————–
Not that I’m that rational a gardener, especially this time of year.
I’ve admonished many a person to begin with a site that needs a plant, determine what plant would do well with those site conditions, and then — and only then — to go out and get the plant or order it. All that’s

opposed to wandering into a garden center this time of year, when such places are awash with all sorts of desirable plants, picking out a plant you like, and then running around the yard with it trying to decide where to plant.

I, of course, did the latter. A couple of weeks ago, I read about Concorde pear, notable for having “the beautiful shape and crisp texture of the Conference, which gives it an elongated neck and firm, dense flesh. Its flavor is vanilla-sweet, reminiscent of the supple sweetness of Comice pears.” (Supple sweetness?)
The plant is readily available in Britain, but not here. All of which made it all the more desirable. Did I really need a Concorde pear tree? Aren’t the more than 20 varieties I now have sufficient? Evidently not.
As luck would have it, a nursery an hour away had Concorde. The nursery, of course, had  many other desirables also. So I also bought Black Gem, a named variety of black walnut. Not that there aren’t plenty of wild black walnuts around here, but this was a named variety.
So today I will run around the yard with these two plants trying to decide where to plant them.
—————————————————–
The appeal of Black Gem is that it has a name. A “named variety” of plant is one that was either bred or selected from a wild population and found to be superior in one or more ways. Said plant is given an official name and then reproduced by some method of cloning, such as by cuttings or, as is the case with most fruit

and nut trees, grafting. McIntosh is a named variety of apple. Seedling apple trees that pop up randomly along roadsides are not. All plants of the same variety name are genetically identical.

Named varieties are not available for every plant and, for some, pretty much all seedlings are quite good. The hedge of Nanking cherries along my driveway — and now in bloom! — are merely seedlings, but all the plants are beautiful and yield, in a couple of months, great quantities of tasty cherries with virtually no effort on my part. No varieties are available.
Black Gem, according to the tag, yields “huge crops of light-colored, high-quality, delicious nuts that crack in large segments and offer a superior nutmeat-to-shell ratio. Thin husks slip off easily.” How could I resist?
—————————————————–

Loving Locust

With a bit over 2 acres of land to play around with, I could have a woodlot. But I don’t. (I do harvest a lot of sunlight, though.) Still, because this is what I call a farmden (more than a garden, less than a farm), trees, aside from fruit trees, have to fit into the picture. To wit, four sugar maples planted  in 1997 as a sugarbush for tapping in another 20 years and my locust mini-grove.
Locust — black locust, Robinia pseudoacacia, that is — is a tree of many qualities. For starters, the roots can garner nitrogen from the air and put it into a form the tree can use, eventually putting it in the soil. Black locust also laughs off heat, drought, air pollution, and road salt. The tree’s craggy branches and deeply furrowed bark are fondly reminiscent of those trees that hugged Dorothy on the yellow brick road to Oz. Towards the end of next month, chains of pale lavender blossoms will be dangling from the branches. More than just pretty, these flowers fill the air with a sweet aroma that carries far.
————————————————–
What more could one ask from a tree? Wood! Some of which I was harvesting from my locust mini-grove last week. The grove is a stand of locusts of various ages popping up in a swathe about 15 feet wide by about 60 feet long. Forsythia shares that space as understory, new plants developing wherever canes arch to the ground to root. The locust grove formed naturally from a long-gone nearby grove on a neighbor’s property, felled by chainsaws, the new plants arising from dropped seeds as well as from root suckers.

Locust is one of the best woods for burning, but cutting trees from my mini-grove for firewood would hardly be worth it. One week in winter would decimate the small patch.
The locust I cut is destined for posts. Locust is one of the most rot-resistant woods, putting even cedar to shame. It can outlast pressure-treated wood, offering a nice rustic look to boot. Spring, before the leaves come out, is a perfect time for cutting locust for posts because that’s when the bark peels off easily in long strips.
—————————————————
The locust posts are for a new grape trellis. My grapes started out being trained to the traditional 4-arm Kniffen system, on two wires, one at 6 feet and the other at 3 feet from the ground. Two canes, originating near a central trunk, are trained horizontally in either direction along each wire to give a total of 4 canes each shortened to about 10 buds long. (A “cane” is a one-year-old stem.
The 4-arm Kniffen system has its limitations in terms of exposing the vine to maximum light, which translates into better-tasting grapes, and keeping foliage and berries dry, which translates into less disease.
So,a few years ago I morphed the vines to the high wire cordon system. A trunk about 6 feet high branched into two permanent arms (cordons) that travelled in opposite directions along a wire at trunk height. In this case, instead of being left with 4 long canes after pruning, the vine is left with many short canes drooping downwards right off the cordons.
We bag some of grape bunches to foil the birds and the bees, as well as other pests. Bagging also lets fruits hang on the vine longer without damage and so develop sweetness and aromatics that make for finest flavor. The problem with the 4-arm Kniffen and high wire cordon systems of training are that the fruiting shoots droop downwards, which makes bagging difficult and puts the bags at an angle that defies gravity, not a good thing. Which is why my grapes have morphed again, this time to a 5-wire trellis system.
The latest incarnation of grape support consists, then, of sturdy T-trellises spaced 10 feet apart. Running perpendicularly to the cross-arms of the T are 5 wires, the middle one to support 2 cordons growing off horizontally in opposite directions atop each vine’s 7 foot high trunk. The other wires will support the fruiting shoots that grow from short canes along the cordon perpendicularly to the outrigging wires. The more horizontal growth of the fruiting shoots should make bagging easier.
So it’s locust wood from my mini-grove that will deserve some thanks for luscious grapes.
————————————————-
Not everyone is as enamored with black locust as I am. Many classify it as an invasive plant; here in New York, I’ve seen it classified as a native invasive plant. It originated in southeastern U.S. but now ranges far and wide because of its fecundity and it’s tolerance for a wide range of conditions below and above ground. The tree’s beauty and utility have also contributed to its spread, by humans.
My only beef with black locust is with its thorns. Still, I like my black locusts and I like my grapes.
—————————————————-