HOW TO FEED THE WORLD
/4 Comments/in Gardening, Planning, Soil, Uncategorized, Vegetables/by Lee ReichPerennial Wheat to Save Our Soil, But What About Compost?
We — that is, almost all of humanity — get all our sustenance from the thin skin that covers out planet, the soil. In appreciation of this, the United Nations has declared 2015 “The Year of Soil.” “Soil is more important than oil,” stated Wes Jackson, founder of the Land Institute, in his keynote at this year’s recent NOFA-NY conference. Like oil, soil is a nonrenewable, or only slowly renewable, resource. Centuries go by before rainfall, freezing, thawing, and microbes and plants eat away at rocks to make new soil; on average, it takes a thousand years for the creation of a mere half-inch of new soil.
The problem is that, as with oil, we humans are using up soil faster than new soil is being created — 10 to 40 times faster! Also, as with oil, that soil, as it is used, releases carbon dioxide and other greenhouse gases. Tillage exposes carbon stored in the ground to air, burning” it up, and annual crops, which are represented by sweeping fields of corn, soybeans, wheat, and other staples of civilization, put little of the carbon that they take in from air below ground. Agriculture is the second highest generator of greenhouse gases.
Whew, what to do? Dr. Jackson’s tack, for the past half century, has been to focus on shifting our staples from annual to perennial crops. Wheat, for instance. Kanza, a hybrid, perennial wheat under development at the Land Institute, would sequester carbon by not requiring annual tillage and by packing carbon compounds into its long-lived root system. Perennial crops also decrease opportunities for soil erosion (another source of soil loss), grow with less added fertilizer and water, and have the potential to increase biodiversity for a healthier ecosystem.
Organic Materials: Wasted Fertilizer
What about vegetables, how are they treating our resources? Up to the podium stepped Tim Crews, director of research at the Land Institute, to give the roomful of organic and aspiring organic vegetable farmers and gardeners bad news: Our soil care is not sustainable. All that manure hauled onto our fields or piled high into compost piles is bedded with hay or comes from animals that have been fed grain. The grain or hay was grown in fields that were fertilized, most of it with commercial fertilizer which is mostly made from atmospheric nitrogen via the Haber-Bosch process which requires — you guessed it — fossil fuel for energy.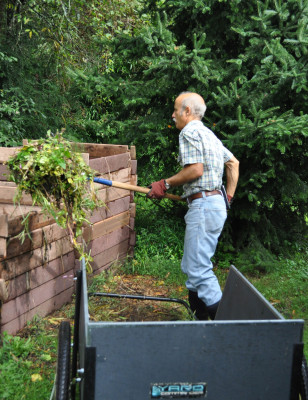
Still, the fact that organic farming and gardening wastes less energy than conventional farming and gardening should assuage some of the guilt that resonated through the room. The soil of a good organic farmer or gardener will, in general, be higher in organic matter (5.4% vs. 3.5%) and, hence, carbon. Said plot will require less water, less pesticide, and less manufactured nitrogen for fertilizer.
Compost, Garden — and Small Farm — “Gold”
Compost, and compost alone, is how I maintain fertility in my vegetable beds. I do haul in some horse manure for that compost, and, as Dr. Crews pointed out, somewhere way back in that manure’s history, fossil fuel needed to be burned.
But civilization, and especially industrialized civilizations, generate many waste products, of which horse manure is one. Picture also all the food waste from restaurants and supermarkets, autumn leaves and grass clippings that are considered “garbage,” even sewage effluent. All these organic materials contain carbon, some of which could be sequestered in the ground, to the benefit of agriculture and the environment, and some of which feed soil organisms and, in turn, plants.
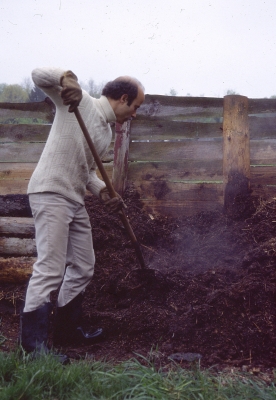 Better to recycle as much of those organic materials as possible into agriculture than let them go to waste or cause pollution. The bottlenecks here are cultural and political rather than agricultural.
Grow Your Own Fertilizer
Another way, as I suggested at the conference, to make vegetable farming more sustainable would be to grow your own carbon and fertilizer. A perennial grain or hay field could be harvested for the grain or hay for the animals or, even more efficiently, just for hay to use either as mulch or for composting. Running hay or grain through animals burns up carbon to grow and fuel the animal to the tune of, on average, about 6 times more needed in terms of calories. That is, for every 6 calories we grow and feed to a cow, we get only one calorie back when we eat the cow.
Left to its own devices, any field will naturally build fertility. Bacteria, free-living bacteria and symbiotic with the roots of legumes, harvest atmospheric nitrogen and put it in the ground, and the combined action of myriad soil organisms slowly chew away at a soil’s rocky matrix to release other nutrients for plant use. Plants grow, their roots oozing substances that further stimulate microbial activity and soil fertility.
The key word in the previous paragraph is “slowly.” In order to be able to harvest fertilizer in the form of hay from a field year after year, sufficient time must be allowed between harvests for fertility to be garnered from the air and rocks. For that you need either more land or less harvest. The big picture, then, is to have more land, to make better choices in how the land is used, to utilize organic practices, and have fewer people.
With the problems of soil improvement, global warming, sustainability, and agricultural production solved, I’m going to sow onion seeds. Planted in flats in potting soil at 7 seeds per inch, I should have plenty of pencil-thick seedlings ready to poke into holes in compost enriched beds in early May.
LECTURES THIS WEEKEND
/2 Comments/in Fruit, Gardening, Planning, Soil, Vegetables/by Lee ReichFeb. 14, 2015
Gardener’s Supply Co.,Burlington, VT
“Espalier Fruits”
“My Weedless Garden”
Feb. 15, 2015
Northeast Organic Farming Association of VT, Winter Conference,
Burlington, VT
“Hardy Kiwifruits”
“Compost Tea: Snake Oil or Plant Elixir?”
LUSTING FOR AVOCADOS, HOME GROWN, OF COURSE
/4 Comments/in Flowers, Fruit, Gardening, Houseplants/by Lee ReichA Long Journey to Avocado-dom
This far north, an avocado plant provides reliable entertainment and, less reliably, the makings of guacamole. The entertainment doesn’t compare with the excitement of a car chase on the silver screen; it’s slower but very engaging.
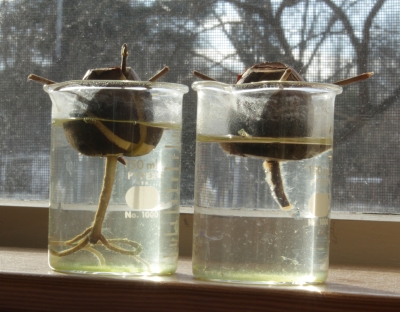
To whit: I’ve been watching roots on two avocado pits elongate and branch. I spend a lot of time with plants; here is my opportunity to spend quality time with their roots. That’s all possible because avocado pits, suspended in water, will sprout roots whose growth can be watched. (Odd, since wet soils are the nemesis of avocado trees planted outdoors in tropical and subtropical climates, and you can’t get much wetter than water.)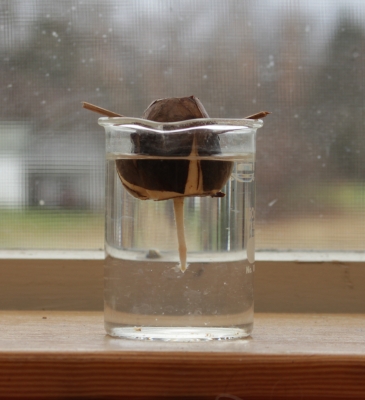
Despite being plants of warm climates, avocados are frequently raised by us northerners, as houseplants. I could have planted the pits in potting soil in a pot, but would have missed out on root entertainment. So I stuck three toothpicks into and spaced evenly around each pit so that the pits could be suspended in a beaker with their bottoms — their fatter ends — sitting in water. Taking a thin slice off the top and bottom of the seed, which I did, reputedly speeds germination.
Roots typically sprout before the tops show any sign of growth.
Whoops, Things Don’t Look So Good
Avocado houseplants are so common that probably none of the above is new information to most readers. I’m embarrassed, then, to admit that my two plants have faltered in their growth.
One of them sent a sprout upwards after its roots were a couple of inches long. That sprout has dried out and, of course, ceased growth.
I noticed a slime surrounding the root of the other pit. This pit was very slow to sprout, and my guess is that there’s some bacteria attacking the weak growth.
I ascribe both failures to growing conditions which, here, indoors, are a far cry from the mostly warm, humid climes avocados call home. Mine sit near a window, experiencing wide swings in temperature in a room heated with a wood stove. Starting new plants in spring should bring better luck.
Entertained by Apical Dominance
I did get to effect and observe apical dominance on one of the plants. More benign than it sounds, apical dominance is the tendency for most vigorous growth from a plant’s uppermost buds, those either at the ends of branches or spatially at the highest points.
 That vigor comes from suppression of buds lower down by auxin, a plant hormone that is produced in the uppermost buds and transported down the stem. Lopping off the top of a stem stops hormone production (temporarily, until the new higher buds start making it) so lower buds grow as they let go of their inhibitions.
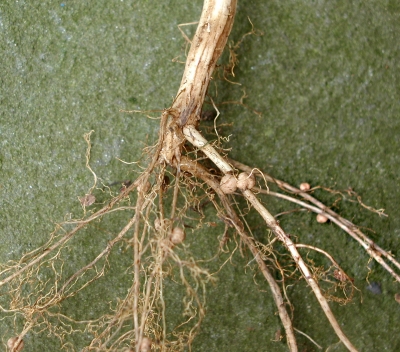
The taproot growing from one of the avocado pits was threatening to bump into the bottom of the beaker so I pinched off a half inch of its tip. The effect was a mirror image to what happens with branches: within a few days, branch roots began to develop. Very entertaining.
An avocado sprout typically shows strong apical dominance, developing into a gawky plant with a single, upright shoot. Cutting the growing top back by a few inches induces branching and makes for a prettier plant.
Flowers, But No Fruit
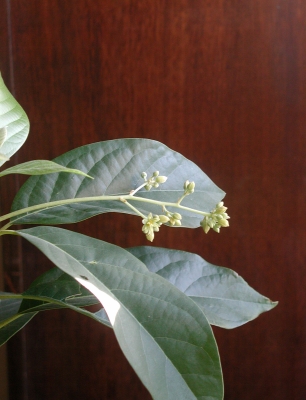
More than beauty, I’d like fruit from my avocado plant. Under good conditions, such as in the ground in Florida, a pit would need 8 years or more before it became old enough to bear fruit. And then, said fruit might not be of best quality because the seedling would reflect whatever jumbling around of chromosomes occurred when the female flower that gave rise to the fruit that begot the seed got dusted with pollen from a male flower.
For quicker bearing and more reliable good taste, cloning is needed, in this case grafting a branch from a tree known to bear good-tasting fruits onto the young seedling. Bearing, then, occurs within 3 or 4 years, and the fruit should be identical to the mother plant from which the stem for grafting was taken.
Not so fast, though. You need two varieties for cross-pollination, and avocado has some pollination quirks. Still, my plan is to get new pits sprouting, and once their stems are large enough to graft, to get scions for grafting. Years ago, I did all this and got flowers but no fruit. I’m hopeful, this time around, to be making guacamole within 6 years.
Outside Now, For More Apical Dominance
The time is drawing near for some real gardening, which could start with pruning. I’ll be putting apical dominance to work on some young fruit trees — each a mere “whip,” single, vertical stem — planted last year. Shortening the main stem will induce side branches that will eventually become the permanent scaffold limbs of these plants. The more severely any stem is shortened, the fewer and the more enthusiastic the sprouts from the buds lower down.

