Upcoming Workshops & Cracking, Red Tomatoes

UPCOMING WORKSHOPS WITH LEE:

NOFA Summer Conference, Amherst, MA, 8/10-12,http://www.nofasummerconference.orgGrow Fruit Naturally, Fruits for Small Spaces, Multidimensional Vegetable Gardening
Philadelphia Orchard Project, 8/22, http://www.phillyorchards.org/volunteer/scheduleFruit Growing Simplified
Hawthorne Valley Farm, Ghent, NY, 9/9, http://hawthornevalleyfarm.org/event/grow-fruit-naturally-workshopGrow Fruit Naturally
Stone Barns, Pocantico Hills, NY, 9/22,  http://www.stonebarnscenter.org/products/backyard-fruit-for-small-gardens.htmlFruits for Small Gardens

————————————————————————————-

Not that I needed explanations, but now I have two more as to why my tomatoes taste so good. A green thumb is not one of them.
Actually, the explanation is not why tomatoes plucked from my vines taste so good but, rather, why the perfect, red orbs — called “tomatoes” — dumped onto supermarket shelves don’t taste so good. For this study, agricultural scientist Harry Klee, at the University of Florida, gathered together a whole lot of heirloom and modern tomato varieties and enlisted a whole lot of people to taste and rate them. 
Followup chemical and statistical analysis pointed the finger at the balance of sugars and acids as one important component of flavor. Modern tomatoes bear so heavily that there’s less sugars to go around, so flavor suffers. For a similar reason, I avoid growing “determinate” tomatoes (listed on the seed packet or in the variety description), which are varieties that make flowers and fruits at the ends of, rather than along, their stems. The determinate growth habit results in fewer leaves per fruit; leaves, along with sunlight, are what puts sweetness and other aromas into tomato fruits.
Dr. Klee also found that, besides sugars and acids, heirloom tomato varieties have certain flavor components lacking in modern tomatoes, some of which enhance any sweetness. Geranial, which has a lemony aroma and is used in perfumery, is just one such component; it’s also present in a wild basil (Ocimum gratissimum), orange, lemongrass, and, of course, lemon. 
——————————————–
The other bit of pertinent tomato research has to do with color. Nice, on those commercial tomatoes, eh? If you eat with your eyes, the color will make your mouth water. If you eat with your mouth, probably not.
In recent decades, tomatoes have been bred to color up uniformly to a nice, red color. Recent research shows that the gene that makes for that uniform coloring was a mutation of a gene that helped make tomatoes flavorful. Before ripening, the uniform ripening tomatoes are pale green rather than the deep green of tomatoes without the mutated gene. Dark green fruits harvest more of the sun’s energy than light green fruits; more green means more photosynthesis and more sugars and other flavor components. That ripening mutation, stumbled upon by breeders about 70 years ago, was widely adopted and has resulted in those beautiful orbs that have lined supermarket shelves and have even been often offered at some farmers’ markets for many years.
Using genetic engineering, researchers confirmed their findings by creating tomatoes that stayed dark green before ripening and then ripened uniformly red. As expected, laboratory analysis showed that the fruits had more sugars and other flavor components than fruits with only the uniform ripening gene mutation. Nobody ate the “Frankentomatoes.”
So beauty is not only skin deep in tomatoes. 
The best heirloom varieties also seem to share some superficial characteristics. Potato-leafed (with smooth leaf edges) tomatoes, such as Brandywine and Prudens Purple, generally make tasty fruits. So-called oxheart varieties (pinkish skins and heart-shaped fruits), such as Oxheart, Orange Russian, and Hungarian Heart, also are rich and flavorful. The same can be said for dark varieties, such as Black Krim, Black Crimson, and Black Prince.
——————————————–
Hybrid tomatoes don’t have to be less flavorful than heirloom varieties. They don’t have to be bred for maximum production at the expense of flavor and/or to ripen uniformly red. But they usually are.
The familiar Sungold and the less familiar Carmello are two flavorful hybrid varieties in my garden. In my opinion, Sungold is far and away the best tasting cherry tomato (and also a beautiful persimmon orange color). Carmello is quite tasty and actually does ripen into perfectly red orbs.
Nonetheless, for unabashed flavor whether sliced with onions and olives in salad, laid in slivers on dark bread with cheese, or cooked into a sauce, heirloom tomatoes are my number one choice. 
Which brings me to Cherokee Purple, the first one of which ripened today. It was very tasty and not at all pretty.

UPDATED WORKSHOP SCHEDULE

Here’s an update of my previously posted workshop schedule:
NOFA Summer Conference, Amherst, MA, 8/10-12, http://www.nofasummerconference.org, Grow Fruit Naturally, Fruits for Small Spaces, Multidimensional Vegetable Gardening
Philadelphia Orchard Project, 8/22, http://www.phillyorchards.org/volunteer/schedule, Fruit Growing Simplified
Hawthorne Valley Farm, Ghent, NY, 9/9, http://hawthornevalleyfarm.org/event/grow-fruit-naturally-workshop, Grow Fruit Naturally
Stone Barns, Pocantico Hills, NY, 9/27,  http://www.stonebarnscenter.org/products/backyard-fruit-for-small-gardens.html, Fruits for Small Gardens

Seedy Visions, Some Hard, Some Eeasy

What a perfect time of year to plant seeds. Yes, seeds! There’s no rush as to timing, with flower seeds, at least; there’s no worry about the soil being warm enough for germination; there’s no need to squeeze seed flats together near sunny windows; and there are plenty of empty seed flats. 
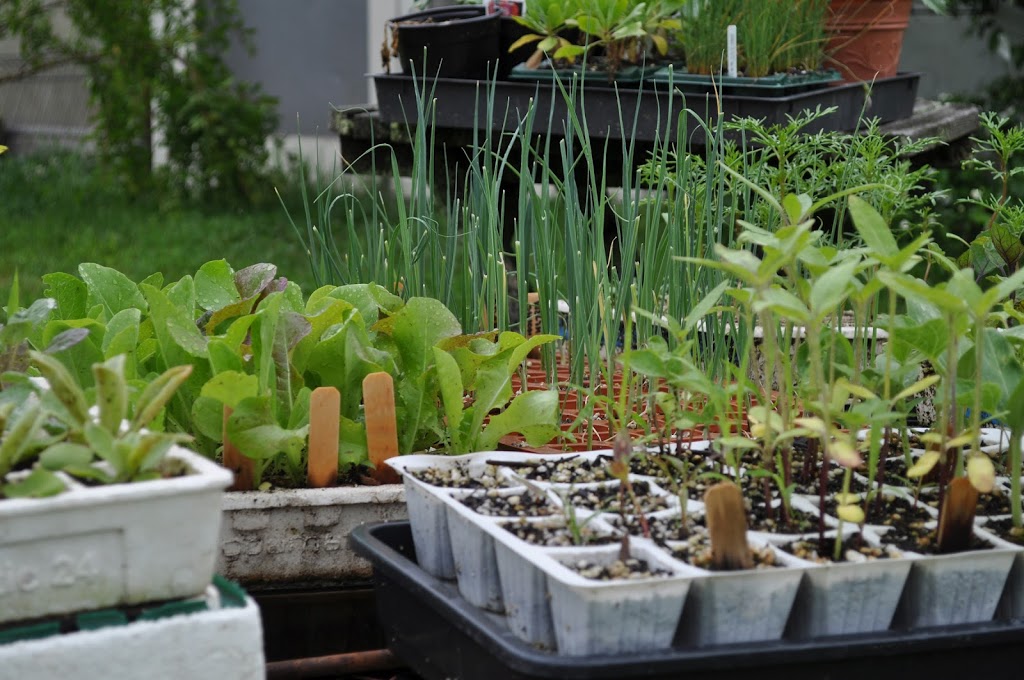
Right now I have seedlings of endive, lettuce, kale, cauliflower, and cabbage growing in seed flats. The seedlings call the flats “home” for a month or more before they’re transplanted into beds now housing early corn, early bush beans, and other vegetables soon to be cleared away. Timing for these plants is critical if they’re going to be ready for harvest during the cool days from late September on into November. Cabbage and cauliflower were sown in early June, endive in early July, and lettuce, for a continued harvest through summer and fall, every two weeks or so all summer.
 
I’ve also sowed seeds with next year in mind. Flower seeds, in this case. Perennial flowers usually don’t flower their first year from seed. Ones that I sow this summer should make enough growth to put on a good show next year.
 
The flower bed undergoing renovation is crying out for black-eyed Susan plants (Rudbeckia hirta ‘Indian Summer), oodles of them. I could buy the plants but almost as easy and a lot cheaper and more satisfying is to buy a packet of seeds. One packet is going to provide many times the number of plants I need. Another bed needs more oriental poppies. Again, a packet of seeds is the more satisfying and economical way to go.
 
I have visions of blue spires of delphiniums rising up in the space between black currant plants and the fence to my south vegetable garden. A packet of ‘Pacific Giant’ delphinium seeds fills the bill, although these seeds are more difficult to germinate and the plants more difficult to grow than the poppies and black-eyed Susans. Delphinium seeds germinate best if fresh and some sources suggest chilling them awhile before or right after sowing. My plan is to plant them in a seed flat and set the covered flat on a bench that sits along the north side of my house — along with all the other seeds I am germinating. Another secret to germinating most seeds is patience.
——————————–
 
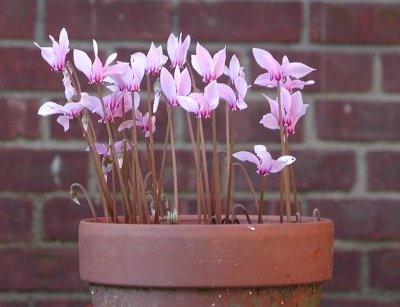
Patience surely has been the secret to my success with cyclamen seeds. Many years ago I purchased seeds of hardy cyclamens. Besides hardiness, these plants offer dainty blossoms that hover above the ground like small, pink butterflies. And when the plants aren’t in bloom, the speckled leaves earn the plants’ keep.
 
With the original batch of seeds came exacting instructions of temperature and time requirements for germination. I ended up with two seedlings from the whole packet of seeds, but those two seedlings have given rise to many more plants. A couple of weeks ago, the seed capsules, which are attached to a squiggly stalk, flared open to offer their ripe seeds, which I collected and sowed. 
 
The flat of cyclamen seeds now sit on that same bench on the north side of my house. My only jobs now are to make sure the flat never dries out, which is unlikely, given the pane of glass that covers it, and to have patience.
———————————–
 
The most challenging seed of those I planned to sow this summer was chamomile, not because it’s at all hard to grow but because it’s hard to figure out just what is “chamomile.” Mostly, what people grow for tea is annual chamomile, but there’s also a perennial chamomile that’s been used medicinally. But just what is “annual” or “perennial” chamomile?
 
Usually, we garden nuts can fall back on botanical names to help out with such confusions. The fallback is not so easy with chamomile. Chamaemelum  would seem an appropriate genus for chamomile and, in fact, C. nobile is a botanical name for perennial chamomile, which has also gone under the monikers of garden chamomile, Russian chamomile, and Roman chamomile. Not to confuse things, but this plant has also paraded under the botanical name Anthemis nobilis. Anthemis plants generally are referred to as dog fennels and, of course, chamomiles. Not to further confuse things, but I must mention A. tinctoria, golden marguerite, a wonderful ornamental in this genus, especially nice trained as a small tree with a head of white, daisy flowers.
 
Getting back to my tea, with annual chamomile . . . that’s Matricaria recutita, which, oddly, has the common name “sweet false chamomile.” It’s also gone under the botanical name of Tripleurospermum maritimum subsp. inordorum. And not to be confused with Matricaria matricarioides, pineapple weed, which grows all over the place and differs from any of the other chamomiles in that the flowers lack prominent, white petals. It has a pineapple-y aroma.
 
Bottom line: For my tea, I need annual chamomile, Matricaria recutita. Because it’s an annual, I’m going to wait until next year to sow it.

Homegrown Rice & Good Gates

Whoops, I don’t know how this post from May jumped up to today. There are some new comments but its otherwise an older post. The newest post is the next one down. Farmdening is easier to figure out than blogging . . .


——————————————————

Here I am swimming in seedlings and small, potted plants sitting on shelves or the ground in the greenhouse, on my picnic table, and on the terrace. Each plant is waiting for the right time to be planted outdoors or to be moved to a bigger pot. So why would I add to the crowd by planting something as absurd as rice? Because rice tastes good and might be fun to grow.

Interest in commercial and home rice cultivation has been on the rise here in the northeast, as attested to by last year’s Second Annual Northeast Rice Conference, held in  — of all places! — Vermont. No paddies in the works here; I’m parting ways with most of my fellow growers in planning to grow rice under dryland conditions. Growing rice in flooded fields is a useful way to snuff out weeds — dryland weeds, at least — and, more importantly, in northern regions, to moderate temperatures. My planting is going to be very small, measured in square feet, so I can weed by hand, and my site is considerably warmer than anywhere in Vermont.
My planting has to be small because I’m starting with very few seeds: the variety Hayayuki, generally recommended for northern conditions and kindly shared with me by Ben Falk (www.wholesystemsdesign.com). Ben has grown rice successfully in paddies he constructed at his homestead in central Vermont.
So today I planted seeds in a seedling tray with inch square cells in each of which I planted one or two seeds. If everything goes as planned, I’ll be transplanting in a few weeks (rice does not tolerate any frost, doesn’t even like cold weather). Recommended spacing is 12 x 8” for groups of 2 to 3 plants. My garden soil is very rich so I’ll plant closer than recommended. Harvest, with a grass shear, should come in September, followed by threshing by smacking pillowcase-filled seed heads against the floor. As for dehulling the rice, that is, removing the hard coat around each kernel . . . I’ll cross that bridge when I get to it. Plans for a small-scale dehuller are available at http://www.savingourseeds.org/pdf/grain_dehuller.pdf
———————————————
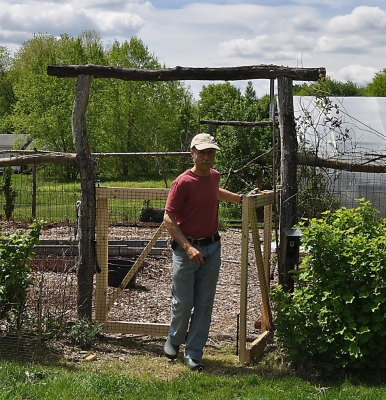
Moving on to more practical matters: gates. If good fences make good neighbors, good gates make good invitations to pass through fences. The gate to my south vegetable garden is not good. It was when I built it, the sturdy frame of natural locust wood swinging either open or closed with the mere touch of a finger.
But locust wood is heavy, and that weight was the gate’s downfall, literally. For the past few years, the bottom scraped along the ground so that lifting the handle was necessary to open and close it. A five-foot span hinged at one end put too much stress on the wood.
I realized recently that the extra trouble of opening the gate and the possibility of it breaking was was limiting trips into the garden. And there’s little worse for a vegetable garden than a disincentive — be it distance, too many weeds, or a gate that’s too hard to open — to enter it.

That full five foot breadth was only necessary to let pass the occasional garden cart full of compost to spread over the beds. So why not, methinks, rebuild the gate with two half gates, one of which would be plenty wide for passing through for the almost daily planting, weeding, and/or harvesting. With less leverage, a half-width gate would experience little stress.
The locust branches of the old gate made it charming but slow to build. I built the new gate — a temporary one — out of 2 by 4s. A pintle sticking up into a hole in the bottom and a bolt sliding down through two parallel eye bolts and then into a hole in the top together make a sturdy, effective, and adjustable hinge, so each gate swings easily and, with a spring closure, shuts automatically.
Already, the garden beckons me. Beds have been layered with compost, weeds have been pulled, and today I’ll sow popcorn seeds. The only problem is that “temporary” building projects too often morph into things more permanent. Two compliments on the new gate have already started it down that road. 
———————————————–

Three Fermentations

Here it is, 9:10 am in the morning, and I already feel very accomplished. Three fermentations are well under way. It’s fun and tasty working with our microbial friends.


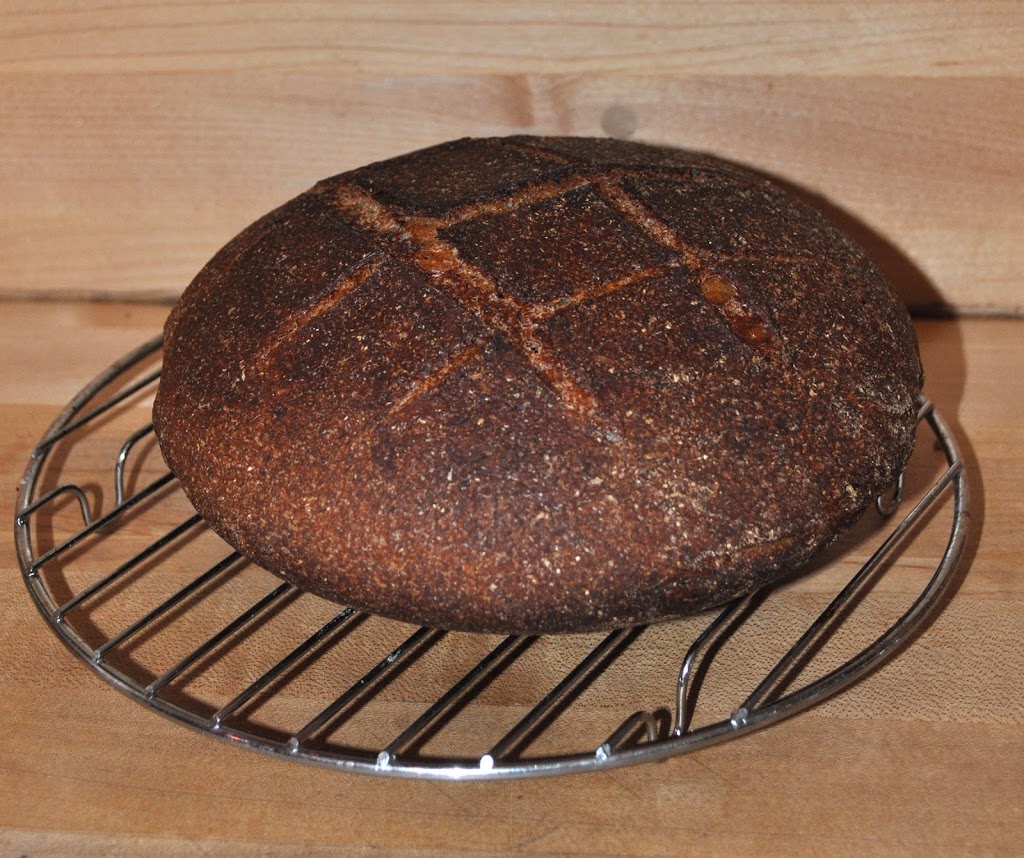
The fun began last night when I scooped out a half a soup spoon’s worth of sourdough starter from a jar in the refrigerator to add to a mix of 3 cups of whole wheat flour, one and a quarter cups of water, and 1/8 cup of maple syrup. That sourdough starter is in its third year — here, at least. I carried it, dried, on a paper towel, back from Alaska, a gift from a friend there who said its caretaker’s ancestry traces back at least 100 years to . . .  was it governor or captain someone? I’ve kept the starter refreshed by stirring a teaspoonful of it every week or two with an eighth cup each of flour and water, and incubating it. The microbial population, a mix of various species of Lactobacillus bacteria and Saccharomyces yeast fungi, has no doubt shifted under my care; whatever the present population, it makes fine loaves of bread.


Back to the bread . . . I mix it in a breadmaker or by hand for a minute or so, incubate it 12 to 18 hours (depending on the temperature), dust it with flour and give it two light folds, let it rise again for a couple of hours, and then throw it (almost literally, and the hardest part) into a pre-heated baking dish from a 450° oven. Into the oven it goes: thirty minutes covered, 15 minutes uncovered, and voilá. Delicious, hearty, fragrant bread.


What’s this got to do with gardening? I wish I could report that I grew the wheat. I tried, last summer. Yields were lower than expected, exacerbated in part by difficulty in threshing it. Kernels were reluctant to part with seedheads despite severe batting of the heads in a pillowcase. I’ll try again, and hope to grow at least enough for one loaf of bread.
————————————————–
One of my sourdough yeasts, Saccharomyces cerevisiae, was invited to my second fermentation, the preparations for which began much earlier this morning. Actually, this second yeast was more probably a relative of the sourdough yeast, a different strain or species, one best suited to fermenting malt syrup into alcohol. The finished product, in this case, will be beer. Saccharomyces cerevisiae came in a sealed packet from a store although beers have been made by mere capture of wild yeasts floating around in the air.


The first step in my brewing was to boil malt extract with hops. I have grown barley, from which malt can be made. Note the “can be;” my barley crop of last year is still hanging, stems and all, from a kitchen rafter. I bought the malt extract rather than go through the threshing, sprouting, toasting, cracking, and sparging steps needed to extract malt from barley. Hops is easier; all you need is the dried seed heads. I grow hops, a decorative and fragrant plant, which is all my young plant is thus far. I also bought hops.


I did go out to the garden after the 45 minute boil to gather black currant leaves and clove currant fruits. These two aromatic plants, steeped along with more hops in the cooling malt-hop mix, will add a subtle and unique flavor to the batch of beer. 


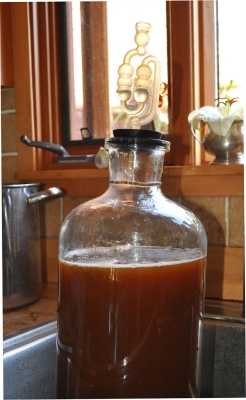
Once diluted to 2 gallons, poured into a glass carboy, and cooled, the mix was spiked with the yeast. An airlock tube with water in it lets carbon dioxide exit without letting air in.


It’s now 1:30 pm in the afternoon, and already bubbling noises from the airlock offer evidence that the Saccharomyces are happily at work. Well, not working, just eating. In two weeks, they will have digested all they can and the brew will be ready for bottling.
———————————————-


Around here, compost-making — the third fermentation du jour, is always in progress. Composting is perhaps the most complicated and the easiest of all the fermentations.


This evening, I plan to get some manure to feed the panoply of microbes that call the compost piles home. Not that manure is necessary for making good compost. Basically, all that’s needed is any organic material, which is anything that is or was living. Microbes in my piles have been eating old lettuce plants, pulled weeds, banana and orange peels from the kitchen, some coarse, weedy hay I cut with my scythe, and occasional sprinklings of ground limestone, kelp, and soil.


Fermentation in the compost differs from that in sourdough bread and beer in that conditions and foodstuffs are always changing. If I add a bunch of material at once, temperatures within the pile rise rapidly, up to about 150° F. Different kinds of fungi, bacteria, and actinomycetes become prominent within different temperature ranges. Also, different microbes become dominant depending on what foods I add to the pile and their stages of decomposition. For instance, old cornstalks are rich in lignin, which only certain fungi can use as food; once the fungi have gone to work on that lignin, certain bacteria might move in to work on byproducts, which include dead fungi.


Compost happens quickest when just the right balance of food, moisture, and air exist within a pile. The nice thing about making compost, though, is that whatever goes into the pile eventually becomes compost no matter what the foodstuffs or conditions. Sooner or later, compost happens


Compost is not, of course, for eating, but spread on the soil makes for some mighty tasty fruits and vegetables.
————————————–


The fun part of working with these microbes is not only the tasty products that result, but the congenial blend of art and science that get you there.
Japanese beetles

JAPANESE & FLEA BEETLES, & LAISSEZ-FAIRE

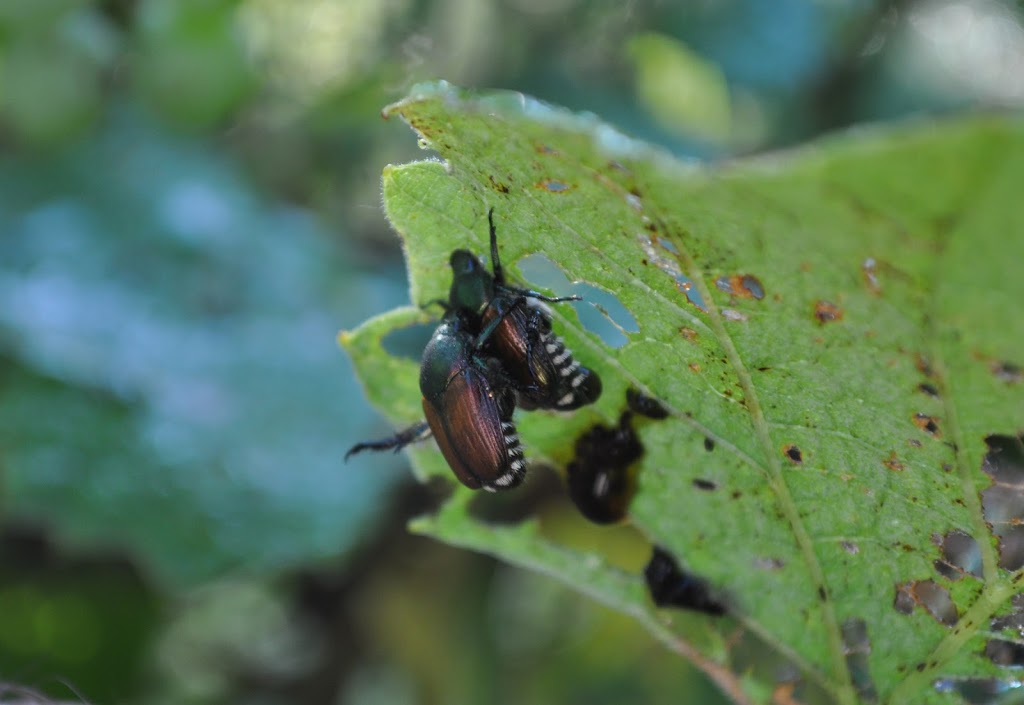
I grabbed the dustbuster as I walked out to the garden this morning, hoping to inaugurate a new era in Japanese beetle control, who began their summer feeding early this month. The dustbuster was ineffective, the beetles passively dropping from any leaf as soon as the nozzle came within a few inches. Even beetles caught in flagrante delicto decoupled and dropped.
This year’s approach to Japanese beetle control will be laissez-faire. Spraying a chemical insecticide like Sevin is too disruptive to the ecosystem. Most organic insecticides, such as neem oil and pyrethrum, are either of limited effectiveness or require too frequent reapplication. And anyway, the beetles attack too many different kinds of plants to make spraying feasible; I’ve got over a dozen varieties of grapes, a half dozen varieties of roses, many varieties of filberts, and a dozen hardy kiwi vines scattered all over the place, and these are just a few of the beetles’ favorites in my garden.
In past years, I’ve put traps a couple of hundred feet apart at either end of the property. Each morning, the catch bags were stuffed full of beetles. But many of those trapped beetles would not have been on-site were it not for the allure (from sexual and feeding attractants) of the traps. The traps seem to work best when only a few Japanese beetles are in the area.
Japanese beetles can get sick from a fungus that attacks them while they spend late summer to late spring in the soil as white, C-shaped grubs. You can purchase the disease, milky spore disease, with which to infect them. Problem is that the disease is of limited effectiveness: Not enough grubs sicken and die and, even if effective, beetles emerging in summer can fly over from neighbors’ untreated yards.
I’ll probably do a little handpicking, knocking or dropping beetles in early morning, while they are still drowsy, into soapy water, from which an escape is too slippery. Hand to hand combat is satisfying and surely effective (for the ones killed, at least). Japanese beetles emit an aroma that attracts more beetles, so hand to hand combat is also intellectually satisfying in the knowledge that each beetle killed means fewer new ones attracted.
The laissez-faire approach has its merits. Plants tolerate a certain amount of defoliation, the remaining greenery ratcheting up photosynthesis to make up for leaf loss.  And if the plants can just hang on for a few weeks, the beetles then begin their exit anyway, their attention turning to laying of eggs in the ground to hatch into grubs for next year’s beetles. Well watered, lush lawns provide ideal conditions for egg laying and grub development; ‘nuff said.
———————————————
Flea beetles, which have peppered the eggplants’ leaves full of holes, will not be emulating Japanese beetles and exiting stage left anytime soon. If you grow eggplants, you have flea beetles, except for perhaps the first year or two in a new garden, before the pests have found your site. Other favorites on flea beetles’ menu are radishes, arugula, and turnips.
Flea beetles, in contrast to Japanese beetles, can be feasibly thwarted. A dustbuster, in this case, can be effective if used frequently enough. A thick mulch might interfere with their emergence from the soil. Fine mesh fabrics, — “floating row covers” — act as barriers although I like to be able to see my plants and the cover has to be removed during bloom to allow for pollination of eggplants.
Mostly, flea beetles are a concern with young seedlings, which can be killed, and for commercial growers, because customers don’t like to buy hole-y vegetables. 
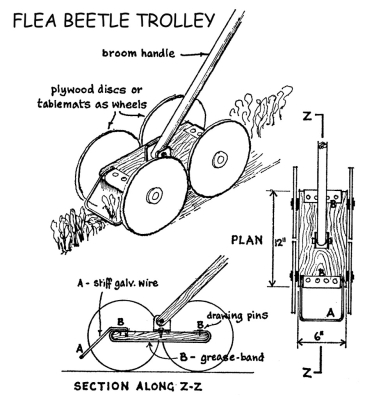
Flea beetles hop away when disturbed and my favorite way to do them in is with the “flea beetle trolley” described on page 144 of Lawrence D. Hill’s Grow Your own Vegetables (Faber and Faber, 1971). Quoting Mr. Hill, “A wire in front disturbs the beetles which jump up and stick to the greaseband [flypaper or paper coated with Tangletrap would also work well]. The large wheels prevent sideways jumping.” The trolley works best on masses of leaves of small plants, such as radishes or arugula, rather than on widely spaced, larger plants with tiers of leaves.
Hot pepper may repel flea beetles. Research suggests that commercial “hot pepper wax” reduced flea beetle damage by about a half, so it may be worth a try.
I might take the laissez-faire approach to flea beetles as well as Japanese beetles. I’ll keep in mind that established plants tolerate 10 to 30% loss of leaf area without ill effect.
——————————–
Sometimes it pays to look closely at your garden plants; sometimes it doesn’t. My general tack with plant pests starts with offering my plants the best possible growing conditions. This means soil that drains adequately and is enriched with plenty of compost and other organic materials to provide nutrients and a friendly microbial environment. It means providing water, as needed. And it means allowing for adequate plant spacing and light. Still, it’s a wide world of insects, fungi, bacteria, and viruses out there, as well as capricious weather, so there’s no reason to expect perfection from each leaf and fruit. Much damage is nothing more than cosmetic and is tolerated by plants. 
One nicety of home-grown fruits and vegetables is that there’s no monetary profit needing to be optimized. So some amount of damage is, and also should be, tolerated by us home gardeners.
——————————–

EASY CHERRIES AND A GREEN ROOF

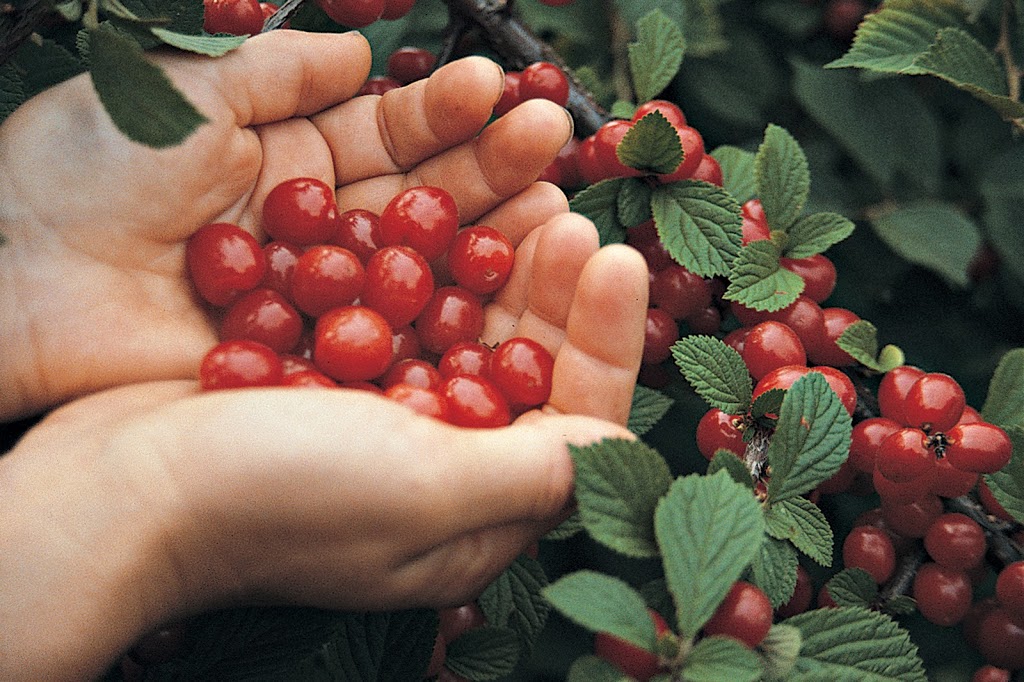
My Nanking cherries (Prunus tomentosa) made a lot of people happy this year. Joy was first spread in early April as thousands of pinkish white flowers burst open along the stems, enough to almost completely hide the stems. Passers-by enjoyed the hedge of plants, which run along the driveway; some people even asked about the name of the plant.
In early June, the blossoms morphed into small, red cherries, oodles and oodles of them. Now, the end of June as I write, just a few cherries still cling to the stems. Throughout the month of June, though, friends, strangers, relatives, birds, chipmunks, and creatures unseen feasted on the abundance.
Nanking cherries are admittedly small and somewhat hard to harvest because they cling closely to the stems on short stalks, but these two deficiencies are far offset by the care the plants need. Almost none! Every few years, I whack back some stems that become decrepit or send the plant high or wide out of bounds.. And I usually spread wood chips or leaves beneath the bushes as mulch to suppress weeds and conserve soil moisture. But neither of these minor tasks is absolutely necessary.
Perhaps the most amazing thing about Nanking cherries is that there are no improved varieties. That is, they are all random seedlings, each a genetic individual. Yet they all taste good, ranging in flavor and texture, depending on the individual, from almost sweet to sour cherry. (Compare this to wild apples, which pretty much all taste bad; the good-tasting apples that we have are the result of hundreds of years of selection and breeding.) Nanking cherry fruits are small, as are the wild cherries from which cultivated cherries are derived.
One of my bushes yields cherries that are slightly larger, slightly firmer and, hence, easier to harvest, and slightly sweeter than my other 10 or so bushes. Seeds from that bush didn’t get spit on the ground; I collected them for planting. Nanking cherry bushes bear fruit within a couple of years and repeated selection of plants bearing the best fruits could result in bigger and better fruits. Improvements might also come from widening the genetic input with pollen from a wider range of Nanking cherry individuals and even some related species, such as sweet cherry. The combination of Nanking cherry’s tolerance to winter cold, late spring frosts, and insect and disease pests and sweet cherry’s fruit size, sweeter flavor, and firmness would make a plant that was easy to grow with even tastier fruits.
I’ll report back in years to come. For now, run-of-the-mill Nanking cherry is well worth growing and another perfect fruit for ambulant consumption on the way to the front door or to the mailbox at the end of the driveway.
—————————————————–
I have a good excuse for the weediness of one of my gardens: It’s on a roof, not an area I frequently walk past with the opportunity to pull a few weeds. I would have to get a ladder and, because this garden is not to be walked on,  reach in as far as possible. I don’t weed it.
This garden is a “green roof” covering a front porch. Green roofs absorb rainfall and the sun’s heat, insulate whatever is below, and look — well — green and alive. The last reason prompted my roof planting about ten years ago.
Original hens-and-chicks laid on roof
But first I had to build the porch roof. Construction was standard — oak posts and crossbeam with 2 by 8 joists covered by 1 by 6 planks — except for the covering of rubber roofing bonded to copper flashing provided with weep holes at the lower end. Planting was begun the year before with hens and chicks (Sempervivum spp.) in seedling flats filled with a mix of equal parts peat moss and calcined montmorillonite clay (the latter also known as “kitty litter). That spring I snuggled the flats next to each other on the roof. Setting flats on the roof intact would, and did, prevent rainfall from washing the planting mix and plants down the slope, the angle of which was determined mostly by aesthetics. I wanted the top of the roof just visible from the driveway.
The goal was for the hens and chicks to make more chicks, and those chicks to make even more chicks, spreading to make a dense, blue-green mat over the surface and draping over the lower eave. They didn’t spread thoroughly or fast enough.
Angelina now filling in the roof
It takes a tough plant to survive and grow on this roof. The soil mix is only a couple of inches deep so plant roots are exposed to the full brunt of winter cold and summer heat, and the roof gets only natural rainfall. Because hens and chicks weren’t fully up to the task, I started planting other succulents to fill in bare areas amongst the hens and chicks.
Over the years, the most successful of these plants has been Sedum rupestre ‘Angelina’. Not only does ‘Angelina’ survive and grow under the austere conditions, but she also looks pretty year ‘round. Right now, the plant is a trailing mat of fleshy, pointed, pale green leaves up through which push foot-high shoots capped with clusters of yellow flowers. In fall and winter, the leaves take on an amber hue. The plants root very easily to furnish new ones to fill in the few remaining bare spots. I pluck off pieces of shoots and toss them back onto the roof to eventually root and spread. Very convenient. 
———————————————
It’s hard to imagine how weeds have gotten onto my green roof, let alone survive. Birds and wind, no doubt, got the plants there. The weeds include fleabanes and some grasses. Some people tell me that these “weeds” look pretty up on the roof, so maybe they’re not weeds. The fleabanes, now in bloom, hold their white, daisy-like flowers high above those of ‘Angelina’. And, if nothing else, both weeds . . . whoops, I mean plants . . . hold the soil in place as ‘Angelina’ continues to spread.
———————————————

SEAKALE, CHUFA, OCA

I’m often questioned, “So what are you growing that’s particularly interesting this year.” It’s a tough question to answer because following the growth of even common plants is interesting year after year, watching how they respond to the vagaries of each year’s weather and pests, changing growing techniques, and other influences. Still, a few plants always elicit a, “You’re growing what?”

Such as, for instance, three edibles: seakale, chufa, and oca. Let’s start with the seakale (Crambe maritima). This plant had been growing at the edge of one of my flower beds for many years but died last year. I never did try eating the plant but had earned a permanent place in the flower bed for its gray-green leaves and attractive sprays of 4-petalled white flowers. Those two characteristics would also rightly land the plant in the cabbage family.

Like cabbage, seakale is edible; unlike cabbage, it needs special treatment before being rendered so. That special treatment is blanching, or shielding the emerging leaves from light to make them more tender and mild-tasting. My plant always seemed too weak to endure such treatment so the plant has been enjoyed only for its good looks. This year, though, I have raised a few seedlings, two of which I planted in the rich soil of the vegetable garden and should be strong enough for a couple of weeks of blanching early next season.

Seakale shoots are too tender for transport so you’ll probably never see them for sale. They were popular in gardens of 200 years ago, though — Thomas Jefferson’s, for one. If flavor turns out to be the reason the plant fell out of favor, I’ll just continue to grow it amongst the flowers.
—————————————————–

Chufa (Cyperus esculentus) is another edible making a return engagement to my garden. This one makes knowledgeable gardener’s raise their eyebrows because it’s very closely related to a pernicious weed, yellow nutsedge. They’re both the same genus and species. I received tubers from J. L. Hudson, Seedsman (http://www.jlhudsonseeds.net/) who claims that the particular selection that they offer does not become weedy; I confirm that claim.

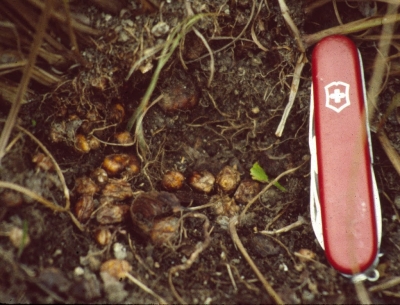
Chufa’s edible portion are the below ground, almond-sized tubers that have a texture an flavor reminiscent of coconut. So you can grow your own “coconut” even where winter temperatures plunge below zero degrees Fahrenheit. Above ground, chufa (and yellow nutsedge) have a grassy appearance except that rolling one of the clumping leaves between your thumb and index finger reveals the triangular cross-section characteristic of sedges. Grass blades are flat.

The main problem in growing chufa is separating the harvested tubers from the soil. Gravel or small stones are about the same size, and a lot harder on your teeth should you accidentally bite into one in a batch of chufa. My plan is to hose down each harvested clump well and then to stir the tubers in water just enough to let anything with the density of stone settle out first. And chew carefully.
—————————————————-

Oca (Oxalis tuberosa) is perhaps the most interesting new plant in my garden, among edibles, at least. It’s related to one of my worst garden weeds, creeping wood-sorrel (O. corniculata). It’s a staple food of the Andean highlands and an iffy crop, around here at least.

The limitations to growing oca are that it needs a long season and it forms tubers only when days grow short (at which time cold weather is likely to kill stems and leaves). On the other hand, the plant has been cultivated for centuries so there are many varieties. New Zealanders have been enjoying and growing oca (which there are called yams) for about 150 years and their varieties are more likely suited here.

I don’t know the provenance of the oca tuber I planted so it could just take up garden space the whole season then die back leaving nothing of value underground. My plan is to keep it warm in autumn beneath a cover of clear plastic, which would be needed even for the most adapted varieties.

And then there’s the flavor. Many varieties, many flavors, from tart to sweet. Oca is used like potatoes and also eaten raw. In the Andes, super-tart varieties are freeze-dried by being left outside on the ground on hot, sunny days and cold, freezing nights. Stamping on defrosting tubers speeds water removal. Interesting, yes?
—————————————————–

Seakale, chufa, and oca are among perennial vegetables that, once planted, come back year after year of their own accord. Others include black salsify, groundnut, Jerusalem artichoke, ramps, skirret, Welsh onion, and, of course, asparagus. For more about perennial vegetables, see Perennial Vegetables: From Artichokes to Zuiki Taro, A Gardener’s Guide to Over 100 Delicious and Easy to Grow Edibles by Eric Toensmeier
—————————————————–

FLOWER BED MAKEOVER

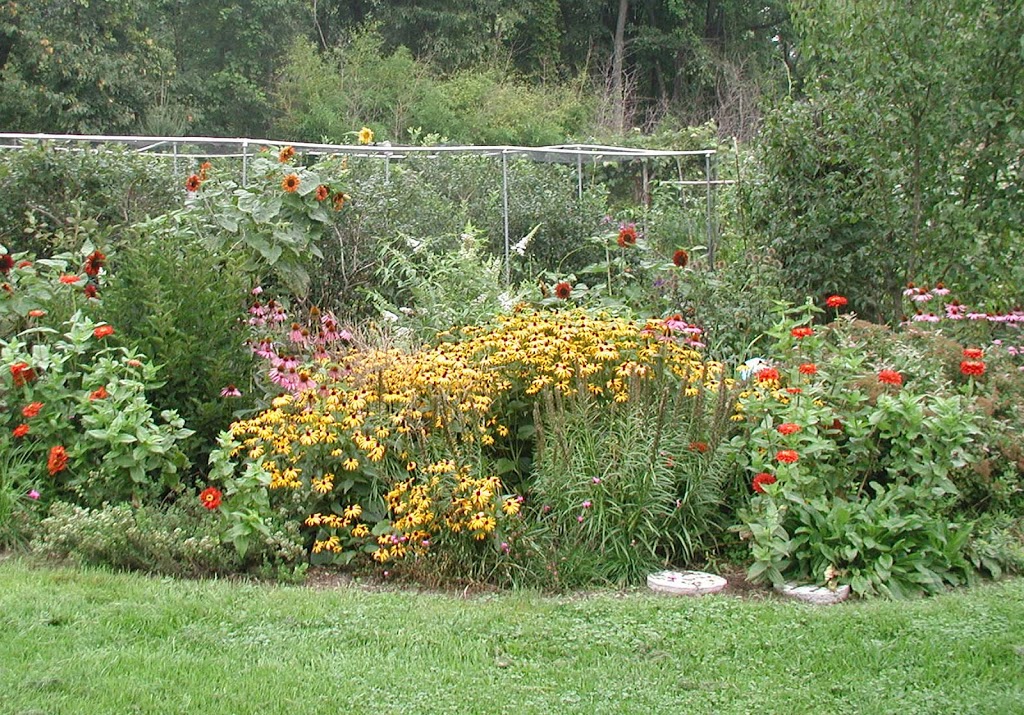
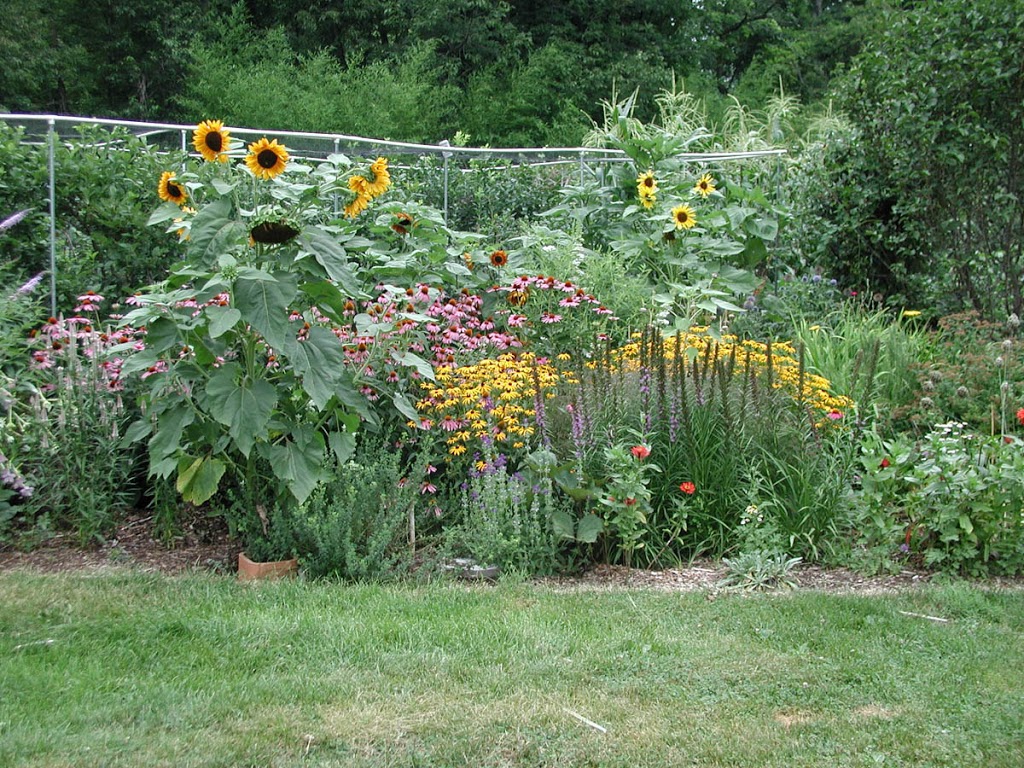
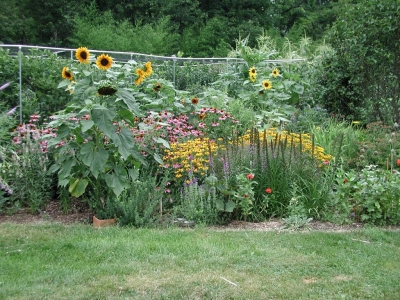
A recent visit to the garden of Margaret Roach (http://awaytogarden.com/) inspired me to makeover a flower bed. Margaret’s garden is all ornamental, a sometimes lively, sometimes subdued interplay of plant shapes with leaf textures and spots of color. My garden is mostly for eating, although I balance that functionality with rustic arbors, shrubbery (some of it edible and ornamental), and interplay of sight lines. And I do have a couple of flower beds.

My flower bed 10 years ago.
Looking at photos of one of my beds from years past highlighted for me just how much in need it was for a makeover.

The attack began on ‘Miss Kim’ lilac. She was supposed to be a dwarf lilac (a different species, Syringa patula, than the common lilac, S. vulgaris), and I suppose she is a dwarf, comparatively speaking. But she’d grown too big and too dense for the flower bed so I did an extensive renovation, cutting to the ground a few of the oldest stems, thinning out some of the youngest ones so that those that remain would have room to develop, and then shortening or removing any other stem that was creating congestion or was in my way. The new ‘Miss Kim’ took some getting used to, like a new haircut, but now I’m pleased and other plants in the bed have more light and space.

I was more brutal with the butterfly bush. Butterfly bush is one of my favorite shrubs but this one takes over the bed each summer. And I’d just received a sample plant of a new series  — the Flutterby series — of butterfly bushes, notable for their small stature and long bloom period. The humongous root system of the old butterfly bush was no match for a chain and the Kubota tractor. Into the waiting hole went a Flutterby.

Next, I took a shovel to the Siberian irises, wonderful plants with pleasant, blue blossoms and spiky, green foliage — until the plants become overcrowded, at which point they become mostly just foliage. The plants need dividing every 3 years or so to prevent overcrowding. Dividing them was actually the hardest job because of the tough root systems. I probably removed about half the plants.

Finally, more herbaceous interlopers — which included a lot of garlic, jewelweed, and errant irises and daffodils — got cleaned up. What’s left is a clean palette, some patches of bare soil ready for some new plants. Thus far: an orange osteospermum off to one side, and deep pink rose campion with purple-pink coneflower on the other side.
—————————————————–

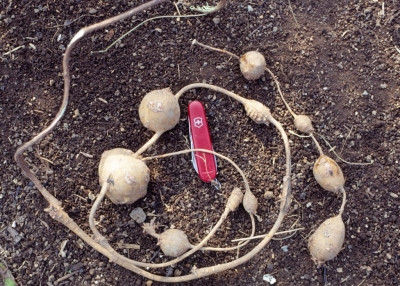
Digging in the flower bed unearthed some golfball-sized tubers connected together like a chain of beads. I immediately recognized them as tubers of Apios americana, sometimes called Indian potato or groundnut (not to be confused with that other groundnut, the peanut). How did I recognize them so quickly? Because I planted groundnuts about 25 years ago!

Groundnuts should be more famous; they are the unsung heroes of Thanksgiving. The Wampanoaga Indians introduced the Pilgrims to this plant, and the Pilgrims’ diet during one of those first winters was supplemented by an Indian cache of groundnuts and corn discovered by Miles Standish. The Pilgrims soon coveted this food for themselves, to the extent of issuing an edict in 1654 ordering that: “if an Indian dug Groundnuts on English land, he was to be set in stocks, and for a second offense, be whipped.”

Native Americans didn’t really cultivate groundnuts, but merely coaxed them along where they grew naturally. Modern Americans became interested in domesticating groundnuts a few decades ago. Hence my groundnuts, sent to me by one of those modern Americans.

Groundnut can be weedy, spreading all over the place via those tuberous chains. I’ve been half-heartedly weeding groundnuts out of my flower bed for 23 years, looking in vain for tubers each time I weeded. Evidently, I didn’t dig deeply enough — until this flower bed makeover.
—————————————————–

Clematis ‘Piilu’
The flower bed is also home to a couple of clematis vines that climb up 5-foot-high wire towers, and beyond. No clematis vines will be touched by a shovel for the makeover, especially since this has been such a spectacular year for those two and other clematis vines I grow. Why this year? Who knows? Clematis are generally winter hardy and not particularly at the beck and call of the weather.

My favorite clematis, named Piilu, arrived here a couple of years ago from Klehm’s Song Sparrow Farm and Nursery (http://www.songsparrow.com/). Piilu grows only about 5 feet high to make a very densely flowering column (with support) of flowers. The flowers have pale lavender petals whose intensity deepens towards their bases, at which also sits a dense bottlebrush of creamy white stamens. The plant blooms all season, with later flowers, borne on new stems, having double rows of petals.
—————————————————–

GROW FRUIT NATURALLY

Every time I go near my apple and plum trees, I feel like my Nanking cherry, mulberry, pawpaw, and persimmon plants are laughing and flaunting their fruits at me. Nanking cherry and company are just a few of the fruits that I grow that require virtually no care.
Apples, on the other hand: If you wanted to come up with the most difficult fruit to grow east of the Rocky Mountains, it would be apple. Or plum, or apricot, peach, nectarine, or sweet cherry. The plants actually grow fine; getting fruit is another story. Organically grown fruit, that is.
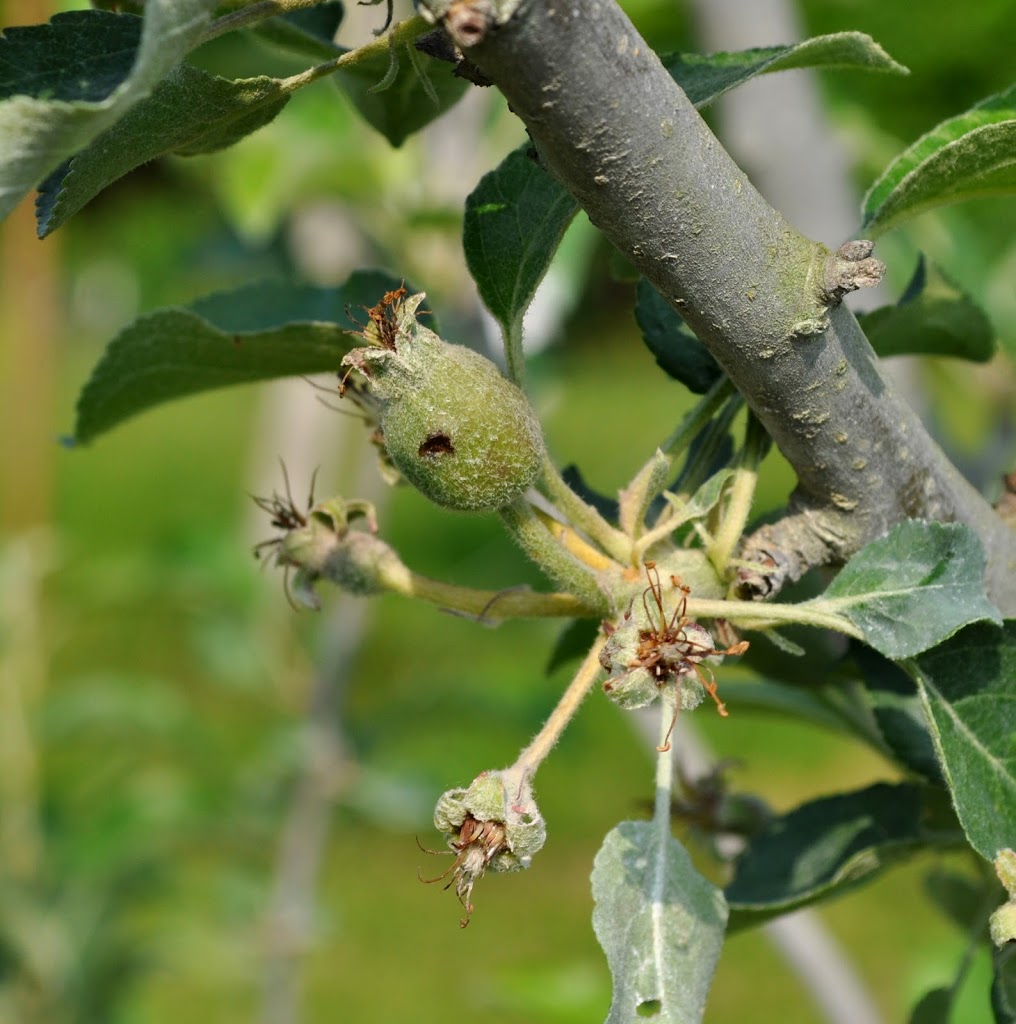
Apple fruit, already damaged by plum curculio
The reason these common tree fruits are so difficult to grow around here is because of insect and disease problems (and, in the case of apricot, peach, and nectarine, winter cold and late spring frosts). For an insect or disease to cause a problem, three conditions need fulfillment: The presence of the insect or disease, a susceptible host plant, and an environment congenial to the insect or disease. I mulch my apples and plums with wood chips, prune away diseased stems, grow nectar-producing flowers to attract beneficial insects, spray organic concoctions such as kaolin clay, let chickens run loose beneath the plants, blah, blah, blah; and for all that effort, still often reap little or nothing. 
Problem is that the northeast is home to some serious insect and disease problems of apples and company and the environment is much to these pests’ liking, as are the plants. Resistant varieties might be resistant to diseases but not insects or to one disease but not another. No variety is resistant to all the insect and disease pests lurking in forest and field.
————————————————
Nanking cherries, no need to spray or even prune!
Still, most people, when they consider growing fruit, think first of apples, and then plums, peaches, and other tree fruits familiar on supermarket shelves. In fact, though, there are a slew of other fruits, many of them, like Nanking cherry and company, very easy to grow. As I point out in my new book, GROW FRUIT NATURALLY (Taunton Press, 2011), the first step in growing fruits naturally/organically/holistically is to select those that are naturally well-adapted to the local climate and insect and disease pressures.
This all-important planning step does not preclude growing many common fruits. Pears, for example, both European and Asian varieties, are relatively easy to grow around here. The trees do need pruning but usually can be grown without the need for any sprays, organic or otherwise. With thousands of varieties, pears alone could round out your larder. I grow about 20 varieties.
Berries are also relatively easy to grow. Pruning is important both for good production and to help keep diseases and insects in check. My berry plantings include raspberries, blackberries, black raspberries, gooseberries (more than a dozen varieties!), red currants, black currants, clove currants, elderberries gumis, seaberries, lingonberries, lowbush blueberries, and, my favorite, highbush blueberries. Pest control? I spray insecticidal soap on my gooseberries once, just as the leaves unfold to kill any imported currantworms that may be starting their leafy feast. I mulch my blueberries late each fall to bury any infected berries that could spread mummy berry disease the following spring. And that’s about it for pest control on all my berries.
Still not enough fruit? Well, there are the mulberries. Not run-of-the-mill mulberries, such as grow wild all over the place. But named varieties — Illinois Everbearing, Oscar, and Geraldi Dwarf — selected for their high quality fruits. And cornelian cherries, an excellent stand-in for tart cherries, except much, much easier to grow. They bloom around the first day of spring yet never fail to set a good crop of fruit. The same can be said for Nanking cherries, a hedge of which lines my driveway and is now yielding many more sweet-tart cherries than I, birds, squirrels, and chipmunks could possibly eat. Total effort involved for all these fruits? None.
And the list goes on: pawpaws, persimmons, hardy kiwifruits, juneberries, grapes . . . so many fruits, so little space. The grapes get bagged to keep insects, diseases, and birds and bay.
(Actually, in my microenvironment, juneberries do not bear well because of various insect and disease problems. The solution? I don’t grow them. But as I wrote, that still leaves plenty of fruits that can be grown easily and without any significant pest problems.)
—————————————————-
So why do I grow apples and plums? I grow them because I frequently write about fruit growing. I grow them to supplement my “book learning” with what I observe “in the field” (in other people’s “fields” also). I grow them because when I apply all the right sprays at just the right time and the weather cooperates and insect and disease pressures aren’t too, too bad and all the stars align just right, I harvest some very tasty apples.
——————————————————–
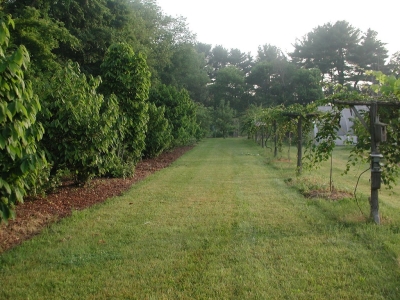
My pawpaws and hardy kiwifruits
Would I suggest others to plant apples, plums, or possibly peaches, apricots, nectarines, or sweet cherries? Probably not, unless said person was interested in learning a lot about fruit pests, spending a lot of time and no small amount of money dealing with them, and then was willing to accept the fact, as Charles Dudley Warner wrote, tongue-in-cheek and over a hundred years ago in MY SUMMER IN THE GARDEN, that “the principle value of the garden . . . is to teach . . . patience and philosophy, and the higher virtue – hope deferred, and expectations blighted, leading directly to resignation, and sometimes to alienation. The garden thus becomes a moral agent, a test of character, as it was in the beginning.” All well and good if that’s what you want from planting fruit.
—————————————————–